Customizing the search page is one of the biggest concerns for web designers. When it comes to WordPress, you need to modify your search page template in order to customize your search results. But what if you had the ability to customize your search results in a blink of an eye with a set of premade options?
Jupiter X uses a default search results page which mimics post archives. This is controlled in the theme by the jupiterx/lib/templates/fragments/search.php template file. There’s no option to create a custom template for a search results page, but you have the capability to customize the page with some settings.
By default, when users search for something on your website, it displays the results from all of the post types such as posts, pages, portfolios, and products. But, you may want to filter the search results in your website and show the results from just a specific post type like posts or pages.
It’s especially useful in e-commerce websites when you want to show particular products in the search result page. You can even specify how many posts should be shown per page. Let’s see how easy it is to create a custom search results page via Jupiter X.
Create Custom Search Results Page via Jupiter X
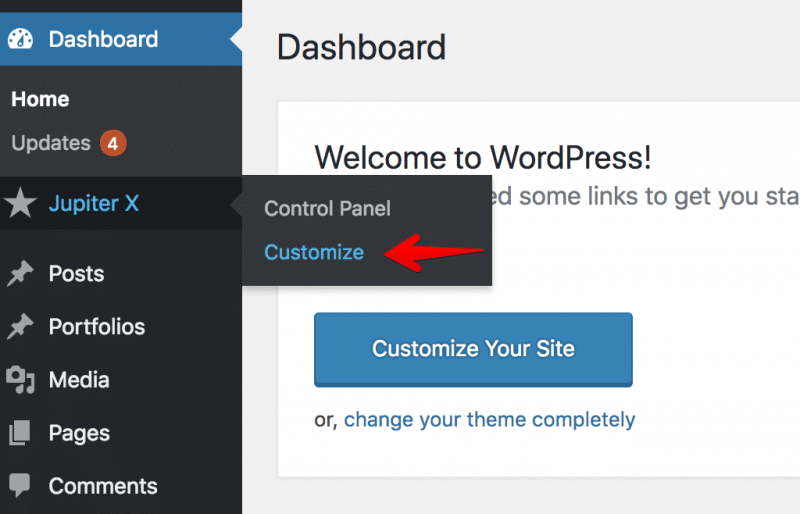
1. From your WordPress left menu, go to Jupiter X > Customize.
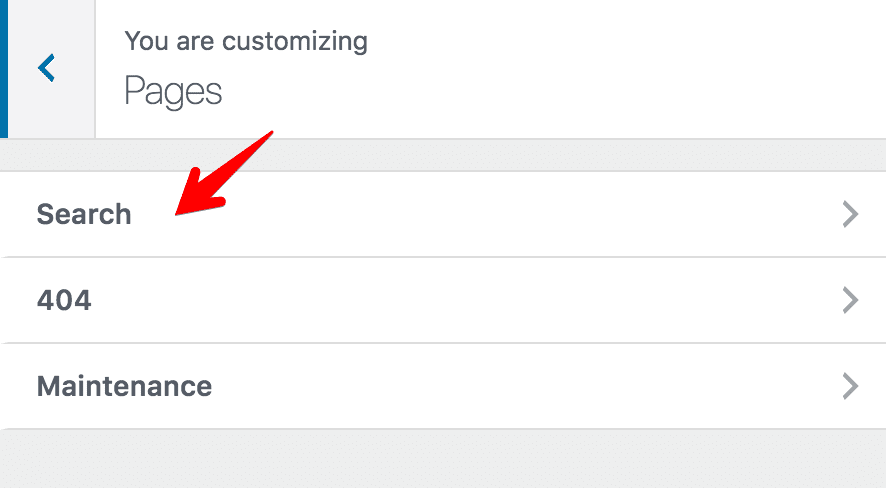
2. Select the Pages option.

3. Choose Search, then a new window will show up with the Search settings.
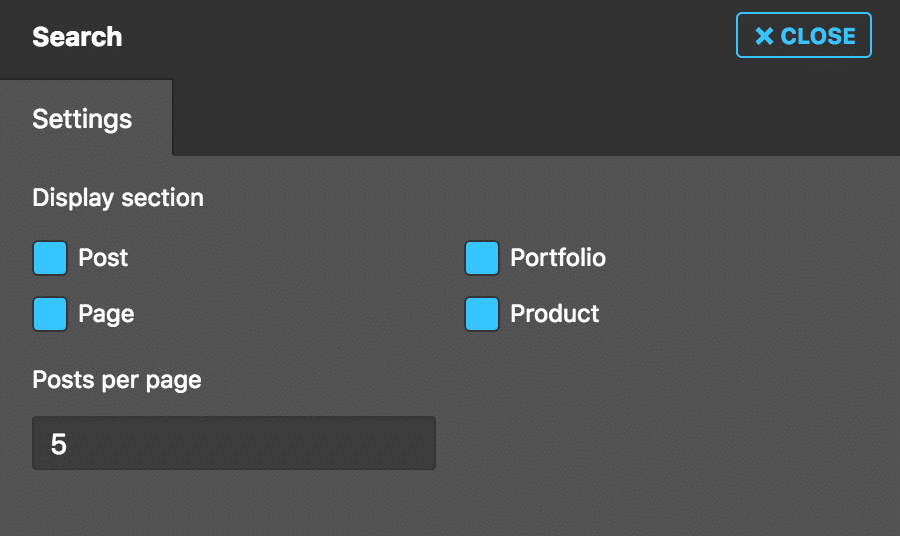
By Disabling/Enabling the post types from the Display section, you can customize the search results. You can change the number of posts per page as well.
4. Close the Search settings panel and then Publish the changes.
Editing Search Result Text
- Using Poedit software
When you check the search results page, you may want to edit or translate some titles like “Search Results for:”, “New Search”, etc.

It can be done with the Poedit software, which is used for translation. You can read more about Poedit in the article “Translating the theme”.
Just create a .po file as described in the linked article above and name it with your language prefix. If you want just to edit the text in English, you need to name the file en_US.po. This way, you’ll be able to edit any Jupiter X text in the English language.
- Using the child theme
Another way to override default text is to make changes in the child theme. You’ll need to override the functions of the necessary titles.
You can edit the files through your WordPress dashboard in Appearance > Editor.
1. Look for the file search.php in the parent theme jupiterx/lib/templates/fragments directory.
2. Copy the function name, for example, jupiterx_new_search_title_text if you want to change the text “New search” on a search results page.
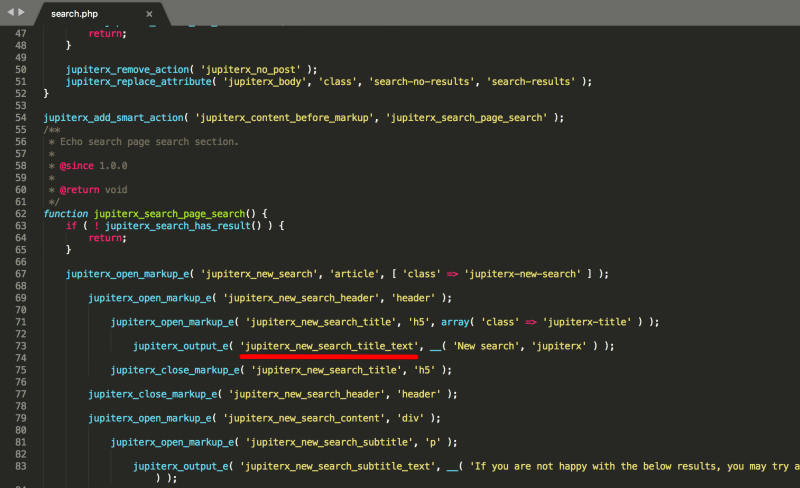
3. Go to the child theme folder and open the file functions.php and add this code:
add_filter( 'jupiterx_new_search_title_text_output', function() {

   return 'Some new text of yours';

} );
4. Save the file, and you’re done. The changes will be visible on the frontend.
You can do the same with other functions you find in the file. For example, to change the subtitle text, you can use the same code. Just edit the function name to the one you need, e.g. jupiterx_new_search_subtitle_text for the subtitle, and the code will be:
add_filter( 'jupiterx_new_search_subtitle_text_output', function() {

   return 'If you are not happy with the below results, you may try another keyword.';

} );
Adding a Sidebar on a Search Results page
You can also add or remove the sidebar when you create custom search results page via Jupiter X. To do this, you’ll need to edit Sidebar section in Jupiter X > Customize. You can get comprehensive instructions about how to add a sidebar in this article. It will be applied to all pages, but if you want to add or remove it only for the search result page, do the following:
- From the WordPress left dashboard, go to Jupiter > Customize.
- From the Customizer left dashboard, go to the Sidebar menu.
In the Sidebar popup, there’s an Exceptions setting which allows you to edit the sidebar for different post types, such as Page, Blog, Search, Shop, Archive, and Portfolio. In our case, we’ll select Search as an exception and configure the sidebar settings to the ones you need.
For how to add widgets to sidebar areas, refer to the article “Adding widgets to a sidebar”.
Customizing Your Search Results Page is Quick and Easy with Jupiter X!
In this article, we learned how we to create custom search results page via Jupiter X. To reiterate, you can customize the search to include/exclude different post types and also change the number of items in the result page. We also explained how to change the text using translation plugins and in the end, we overviewed how we can modify the search page using the powerful Jupiter X API.
In general, with the Jupiter X API, there is nothing you can’t customize. In future posts, we will go through some approaches on how you can easily add or edit some sections using Jupiter X API.


No comment yet, add your voice below!