In the first part of this series, we dove into creating a dynamic room listing with room attributes and a nice template that includes those custom attributes, both of which will be filled out by the receptionist. In the second part of the series, we saw how you can create archive lists and add filtering capabilities to them. Picking up from where we left off, we will now build a dynamic hotel website by creating booking forms along with pricing calculators and we’ll see where the entry data goes if someone books a hotel on our website.
As you’ll recall, we created a custom post type for our room called Rooms and then created a listing for it. A listing is an embodiment of the meta fields in a custom post type with a particular design. In the first part, we built a custom post for our rooms and a listing and beautiful design for a single page. What we are going to do now is work on building a dynamic hotel website by modifying the single page template for our Room post type and using Jet Engine forms to add a booking form to each room page.
Enabling Jet Engine Forms
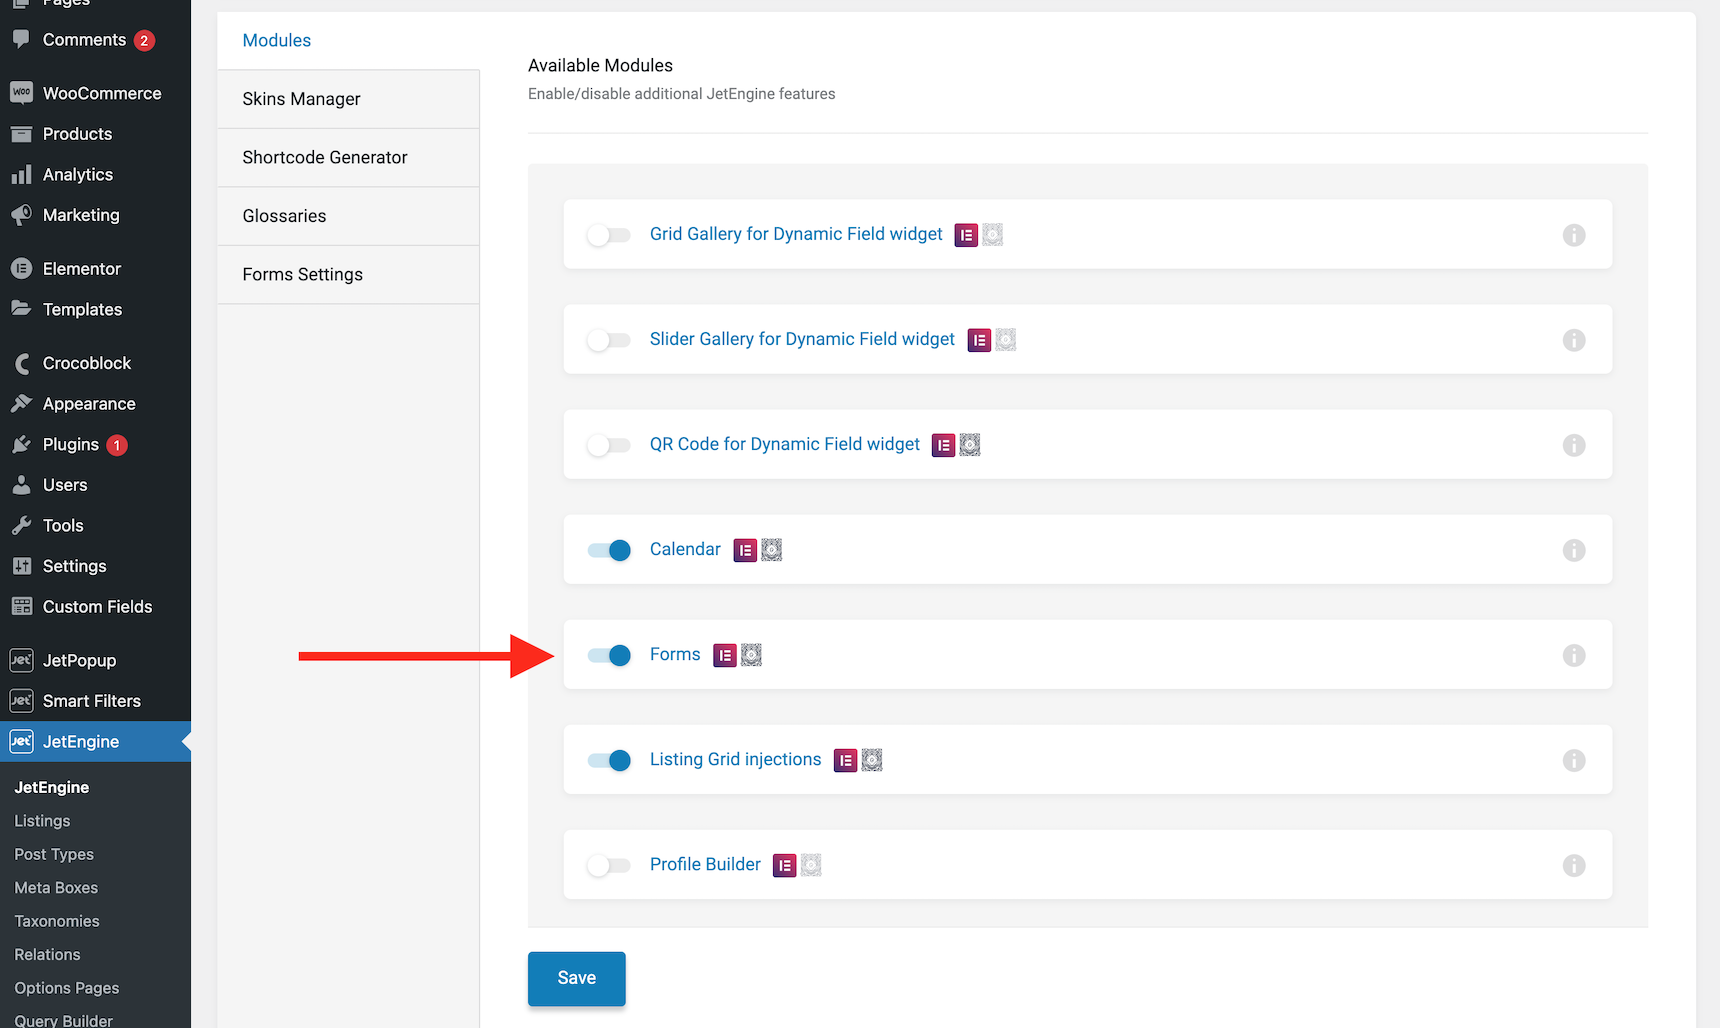
Jet Engine Forms are disabled by default. If you want to make booking forms using this feature, you first need to enable it via Jet Engine settings. Open the Jet Engine -> Jet Engine and make sure the Forms module is enabled.
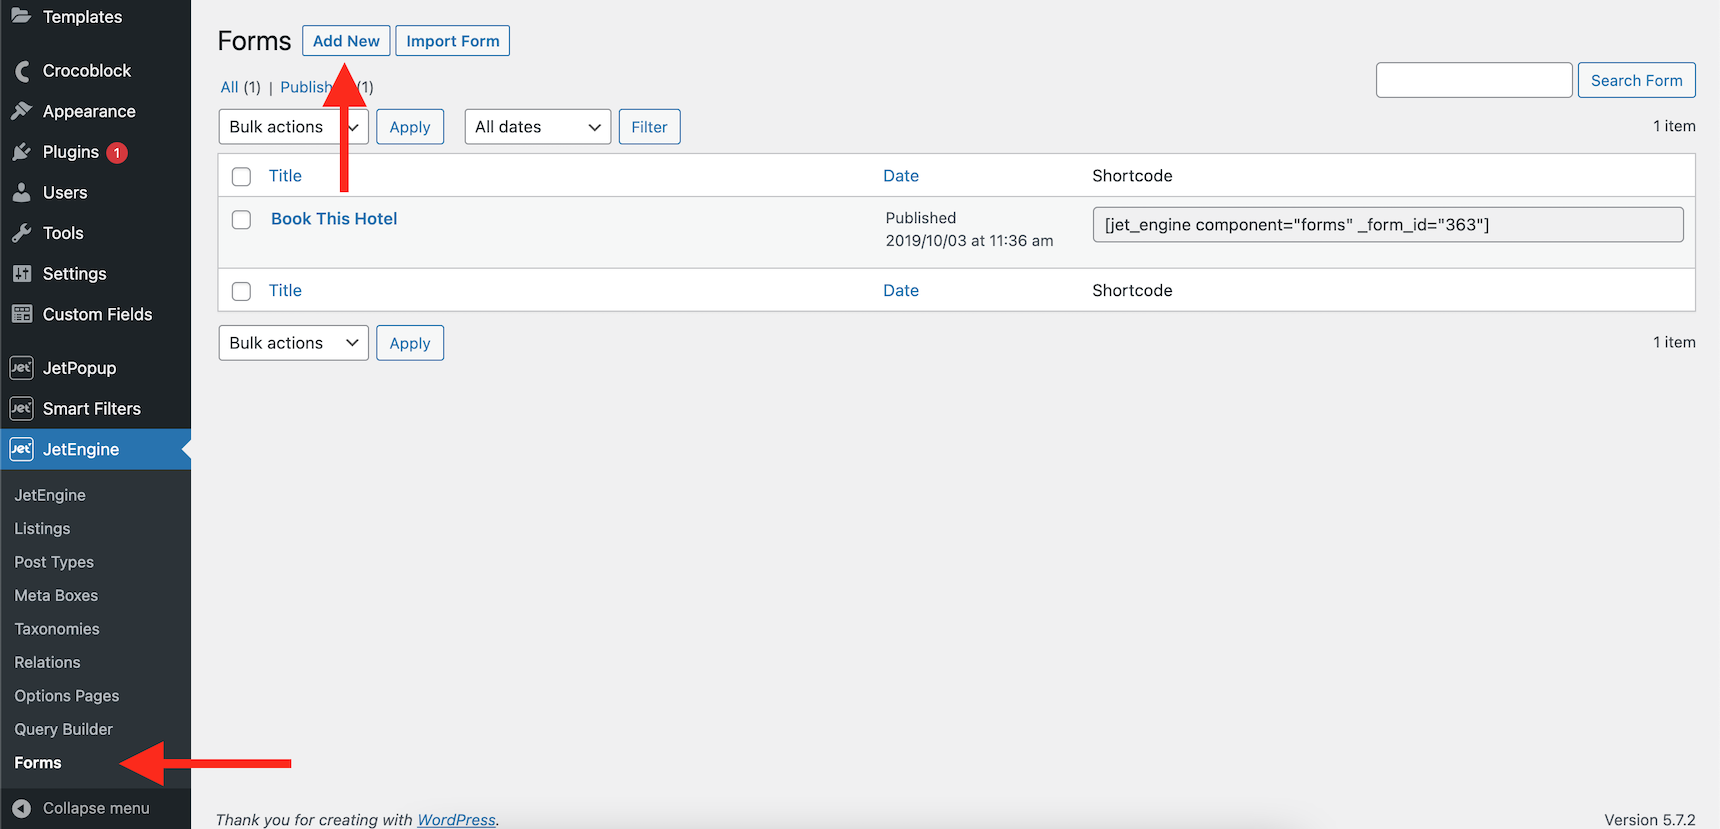
After that, the Forms menu will be available under the Jet Engine menu. Open the Forms panel and click on Add New to create a new booking form.
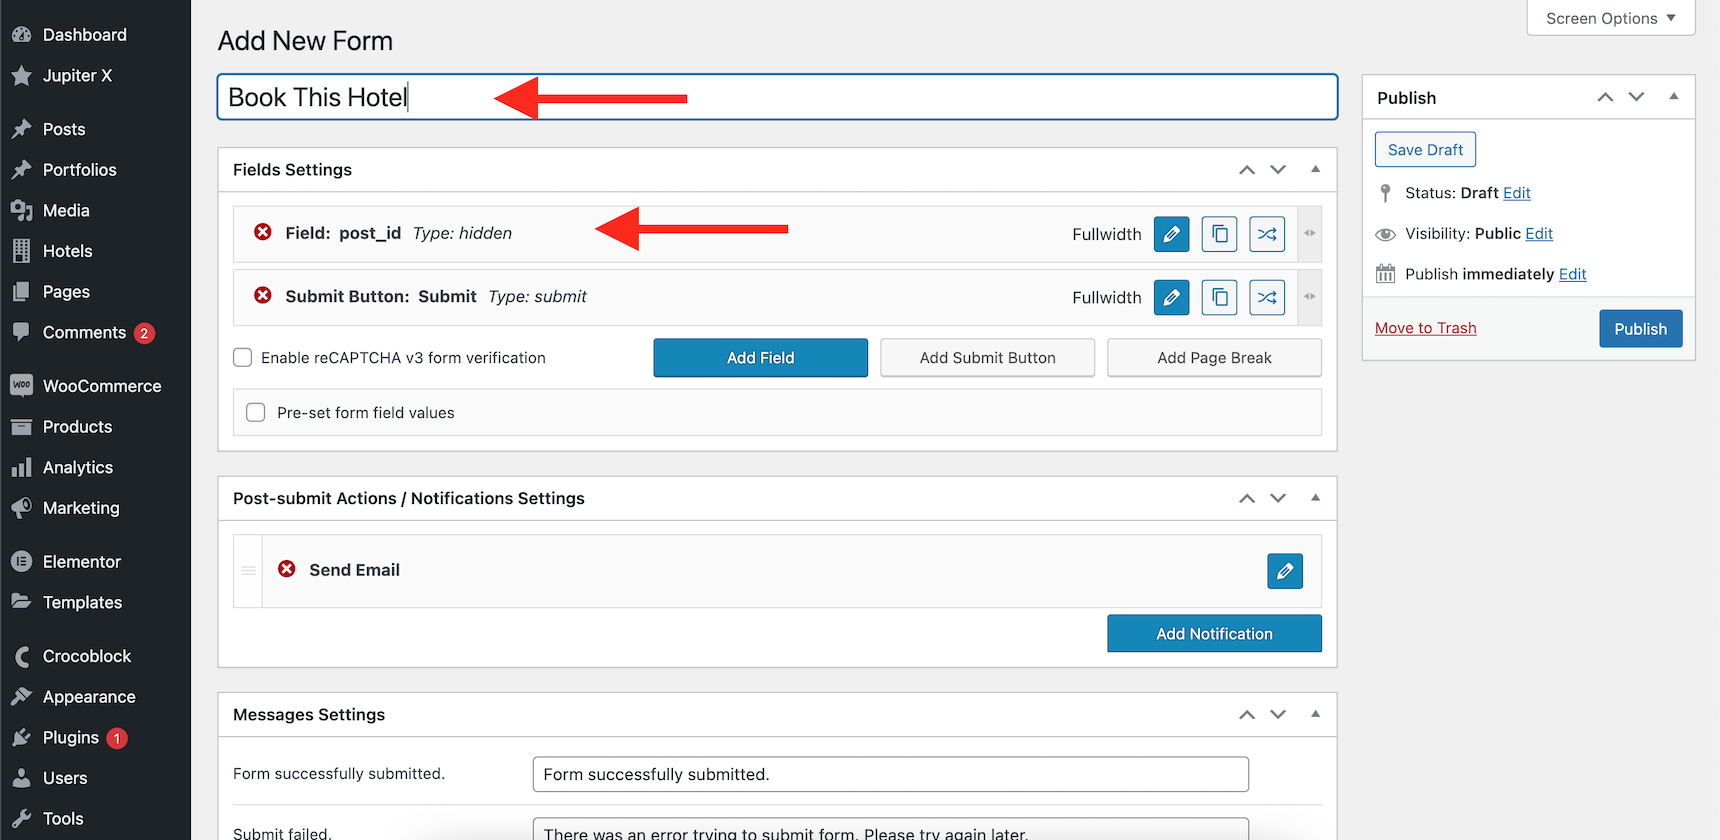
The first step is to define a name for your form. Then, add the post ID as a hidden value in order to be able to use the form in dynamic pages. This will give you the option to see on what post the user submitted the form.
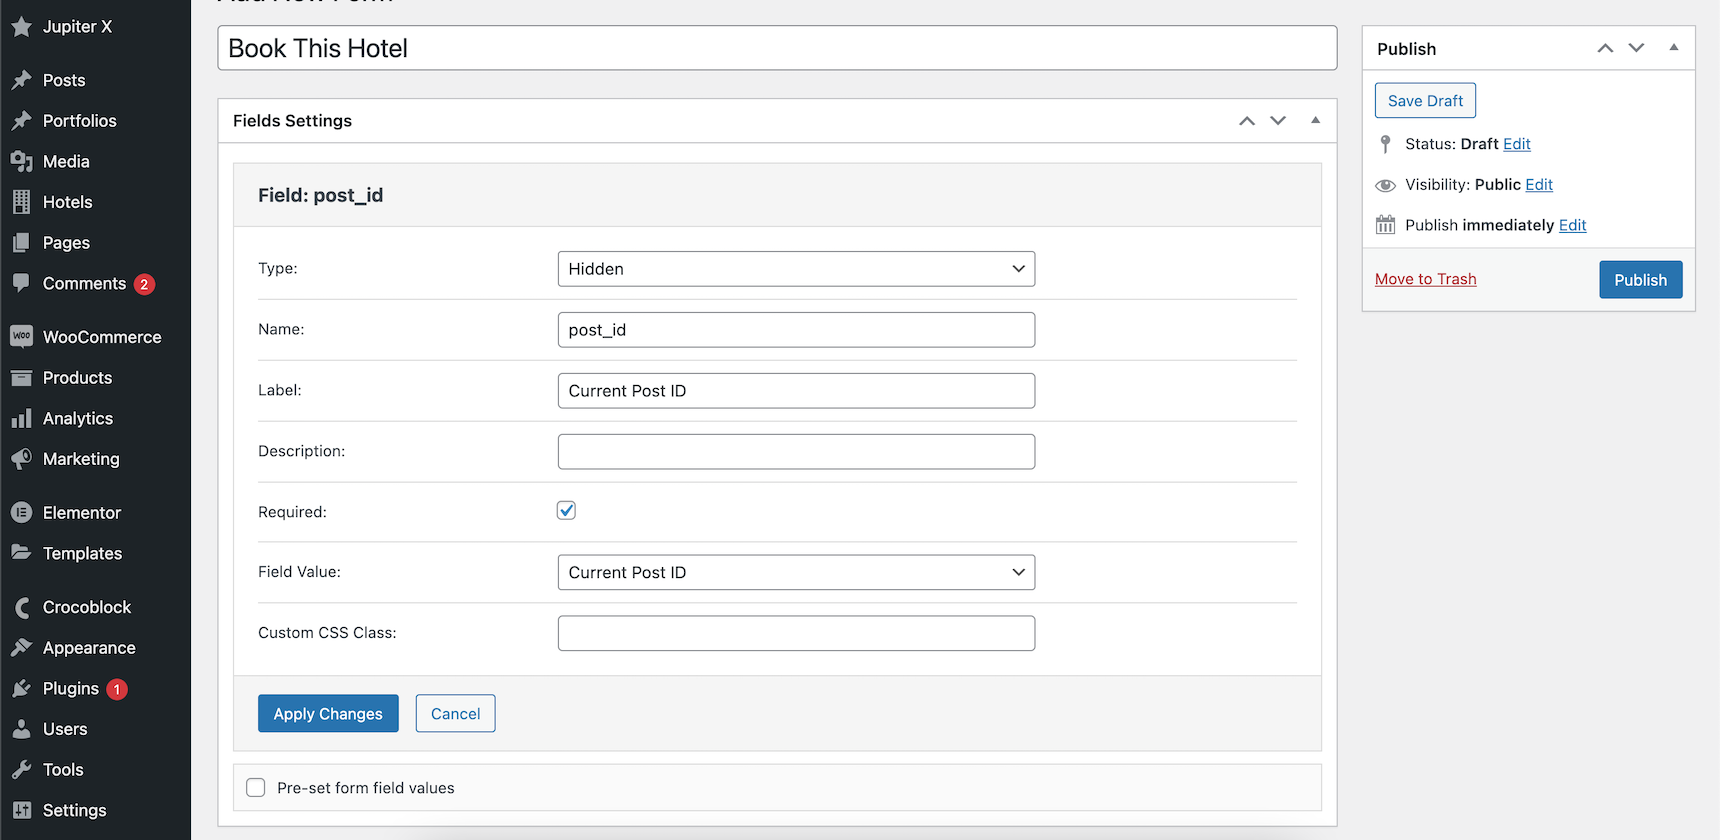
Make sure the post_id field has these settings:
Type: Hidden
Required: checked
Field Value: Current Post ID
Now we need to add other essential fields to our form to get the user booking information. I will add the check in date, number of nights of stay and number of guests in three separate fields.
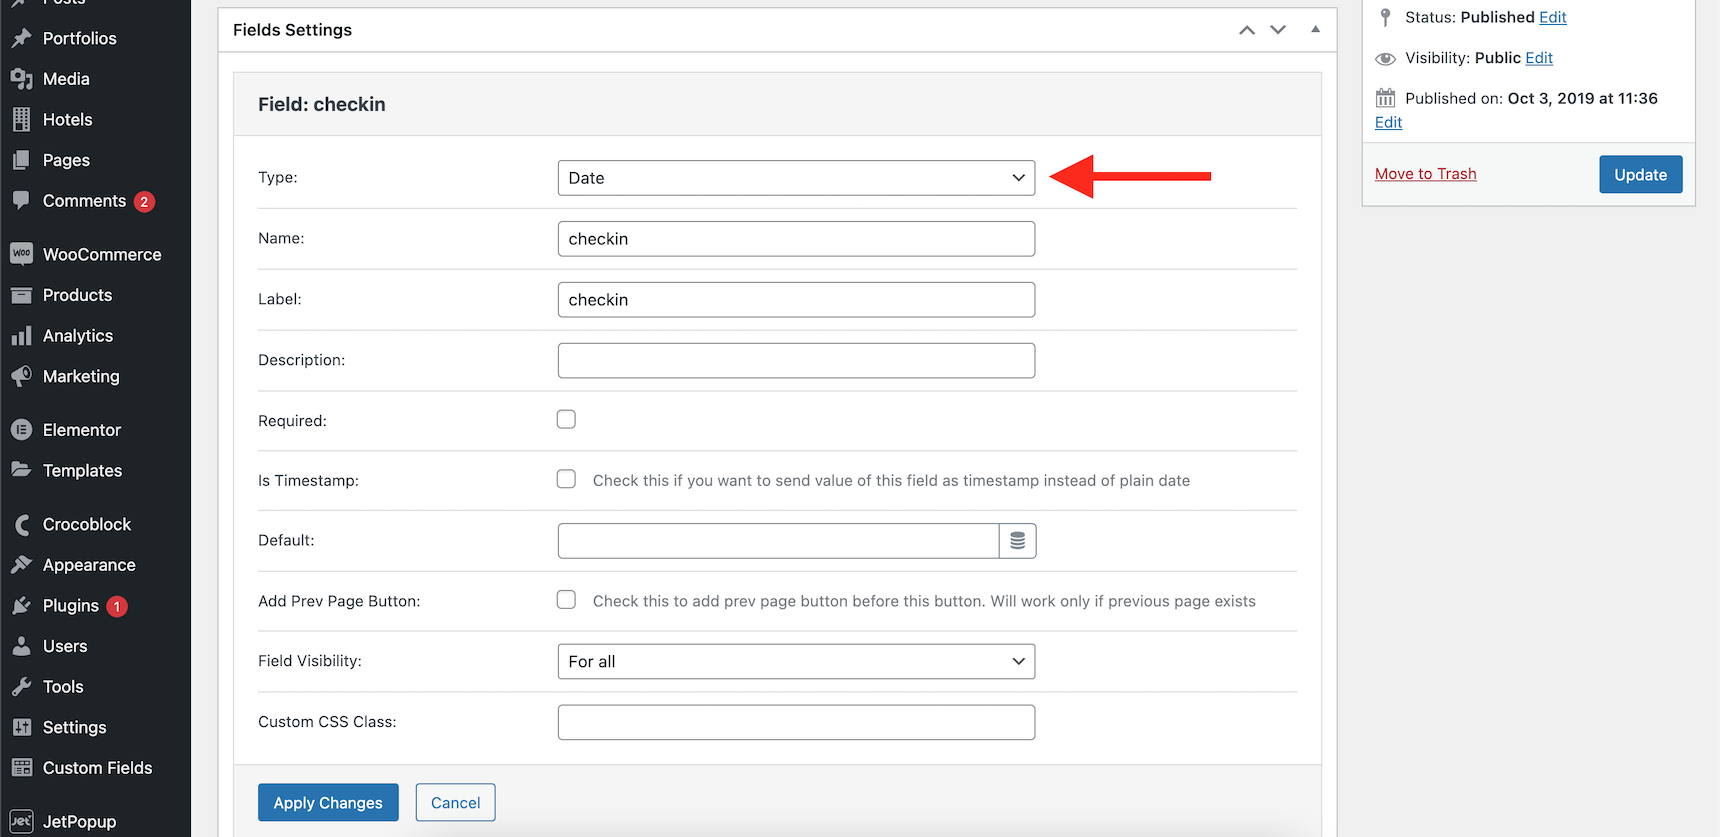
The Check In Date should be a datepicker field, so I will set its type as Date.
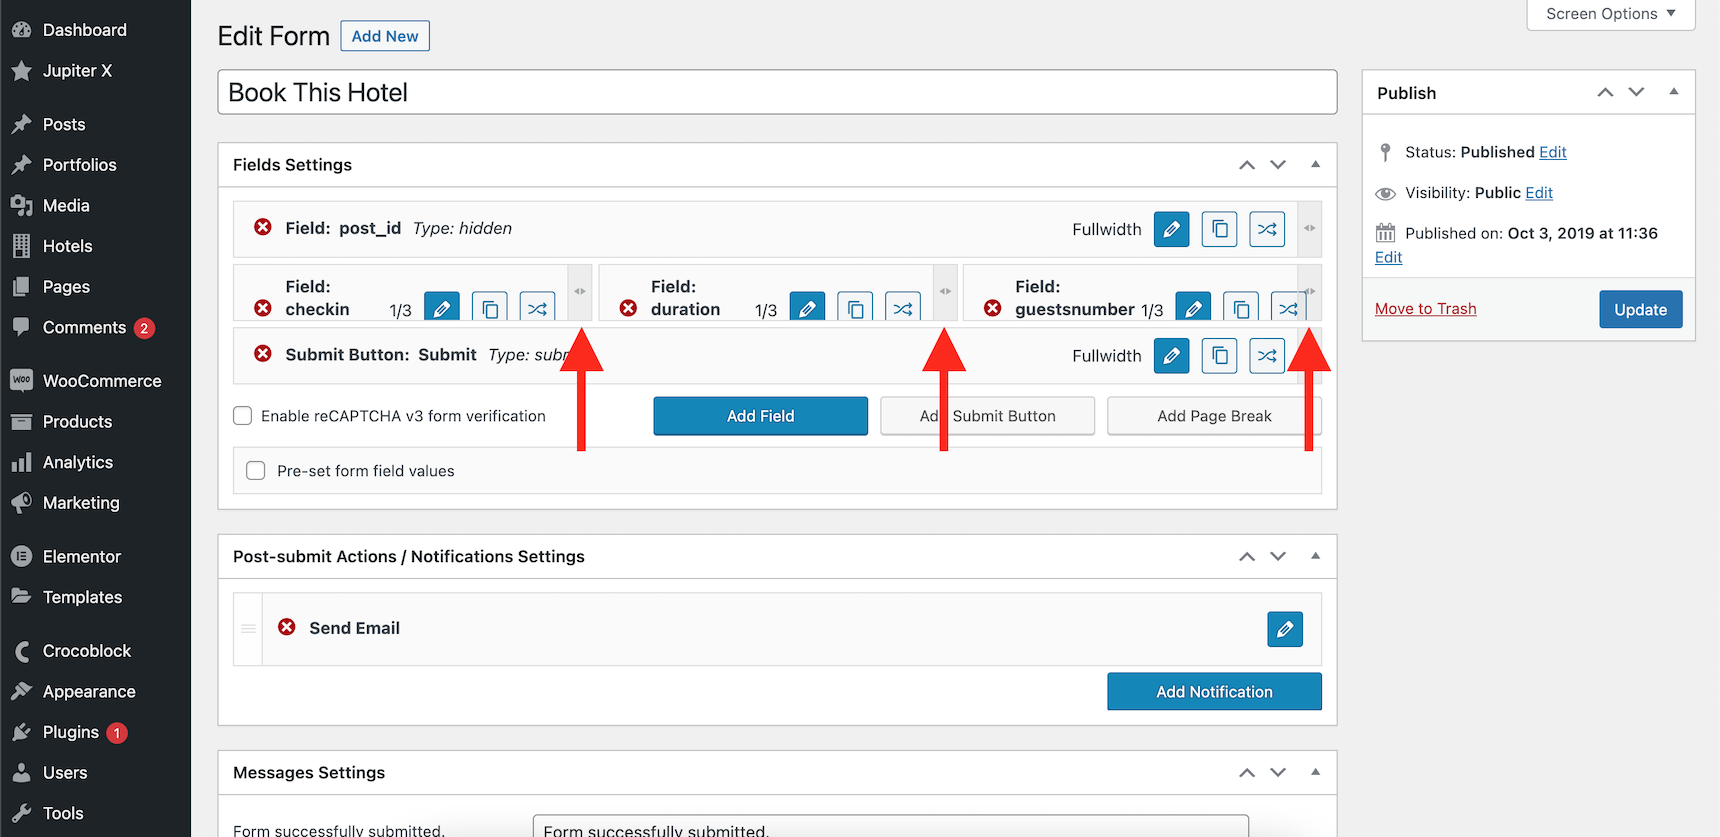
The good thing about these fields is that you can change the width of the fields and change their alignment by simply dragging and dropping them into position. I want my fields to be placed in one line, so I will change the width of each field to approximately 33%.
I want to show the price of that room as soon as the viewer changes the numbers on the form. If I didn’t know that Jet Engine provides a “Calculated” field type, I would have to write this part via Javascript. Fortunately, I can do this easily if I just define my formula in a “Calculated” field type. In order to do that, I will add a new field named “cost” and then define a formula for how to calculate the cost. However, I need to get the price of the room from the meta fields first and then we can use it in our formula. So, let’s add a hidden field named “price”.
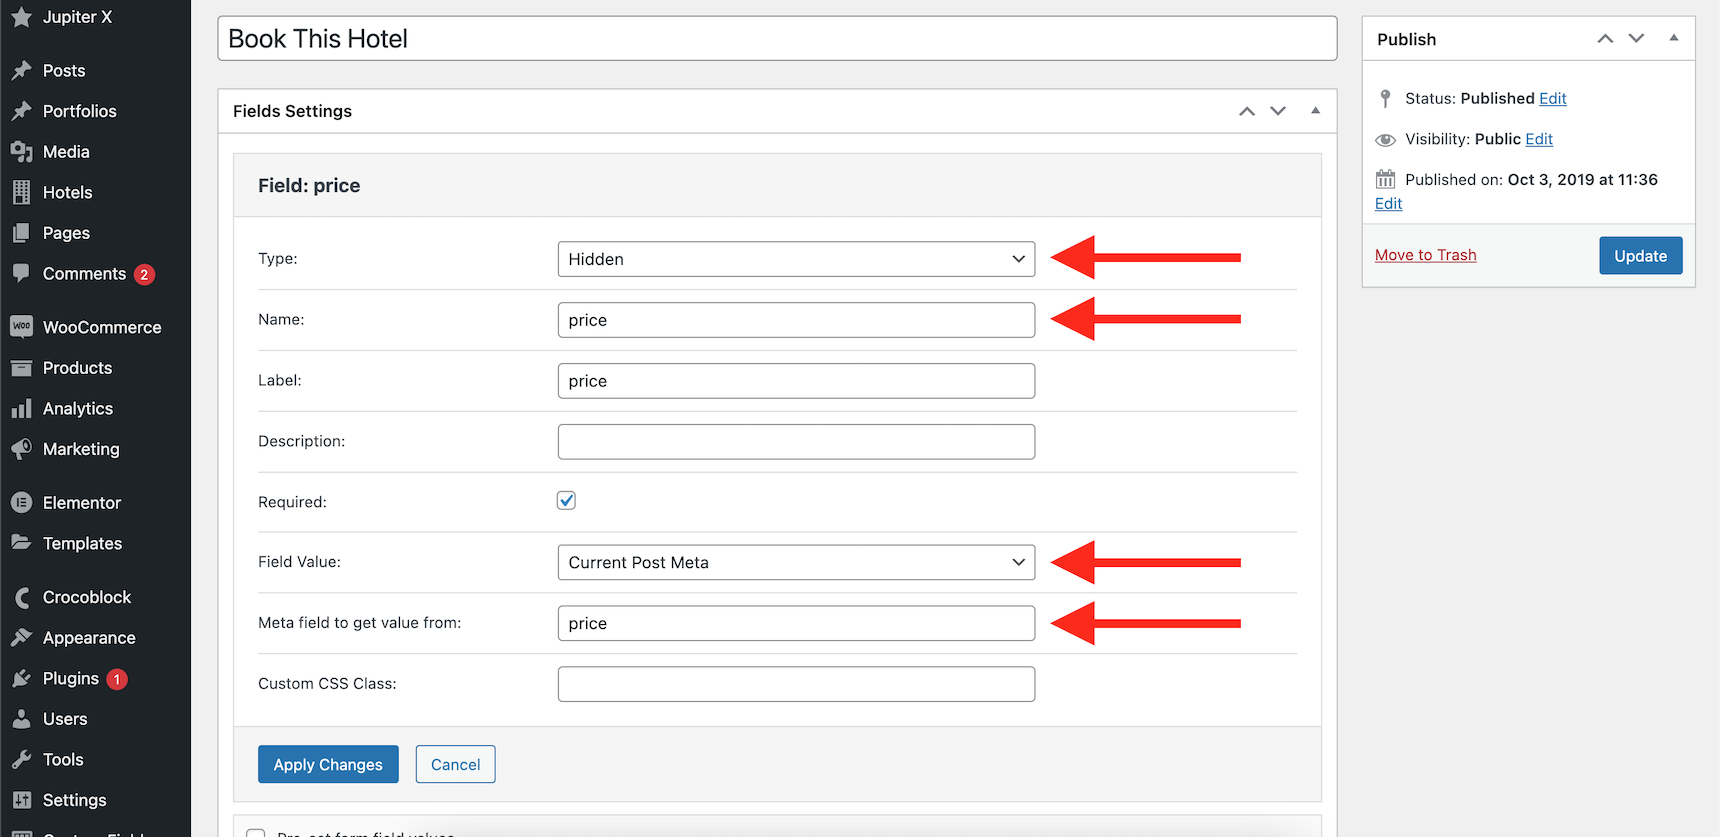
Now set the Field Value to be “Current Post Meta” and put the meta key “price” inside the “Meta Field to get value from” section.
Now It is time to add a calculated field into the form. Add a new field and set it to be “Calculated”. Then define the formula as follows:
%FIELD::guestsnumber%*%FIELD::price%*%FIELD::duration%By using this formula, we are saying that we need to multiply the guest number by price of the room multiplied by duration in terms of nights.
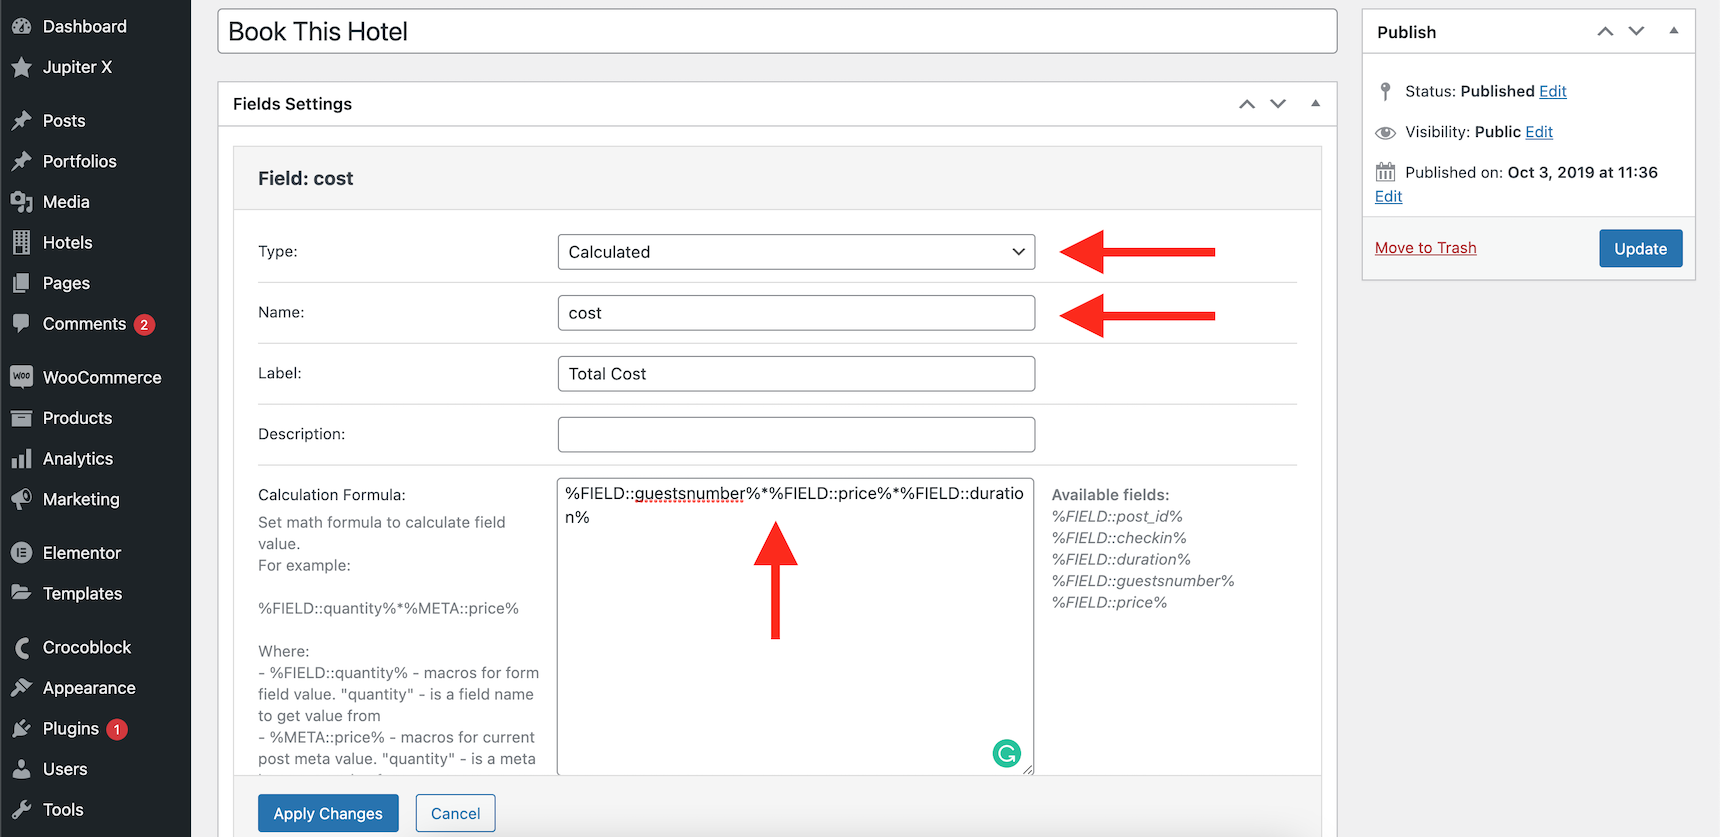
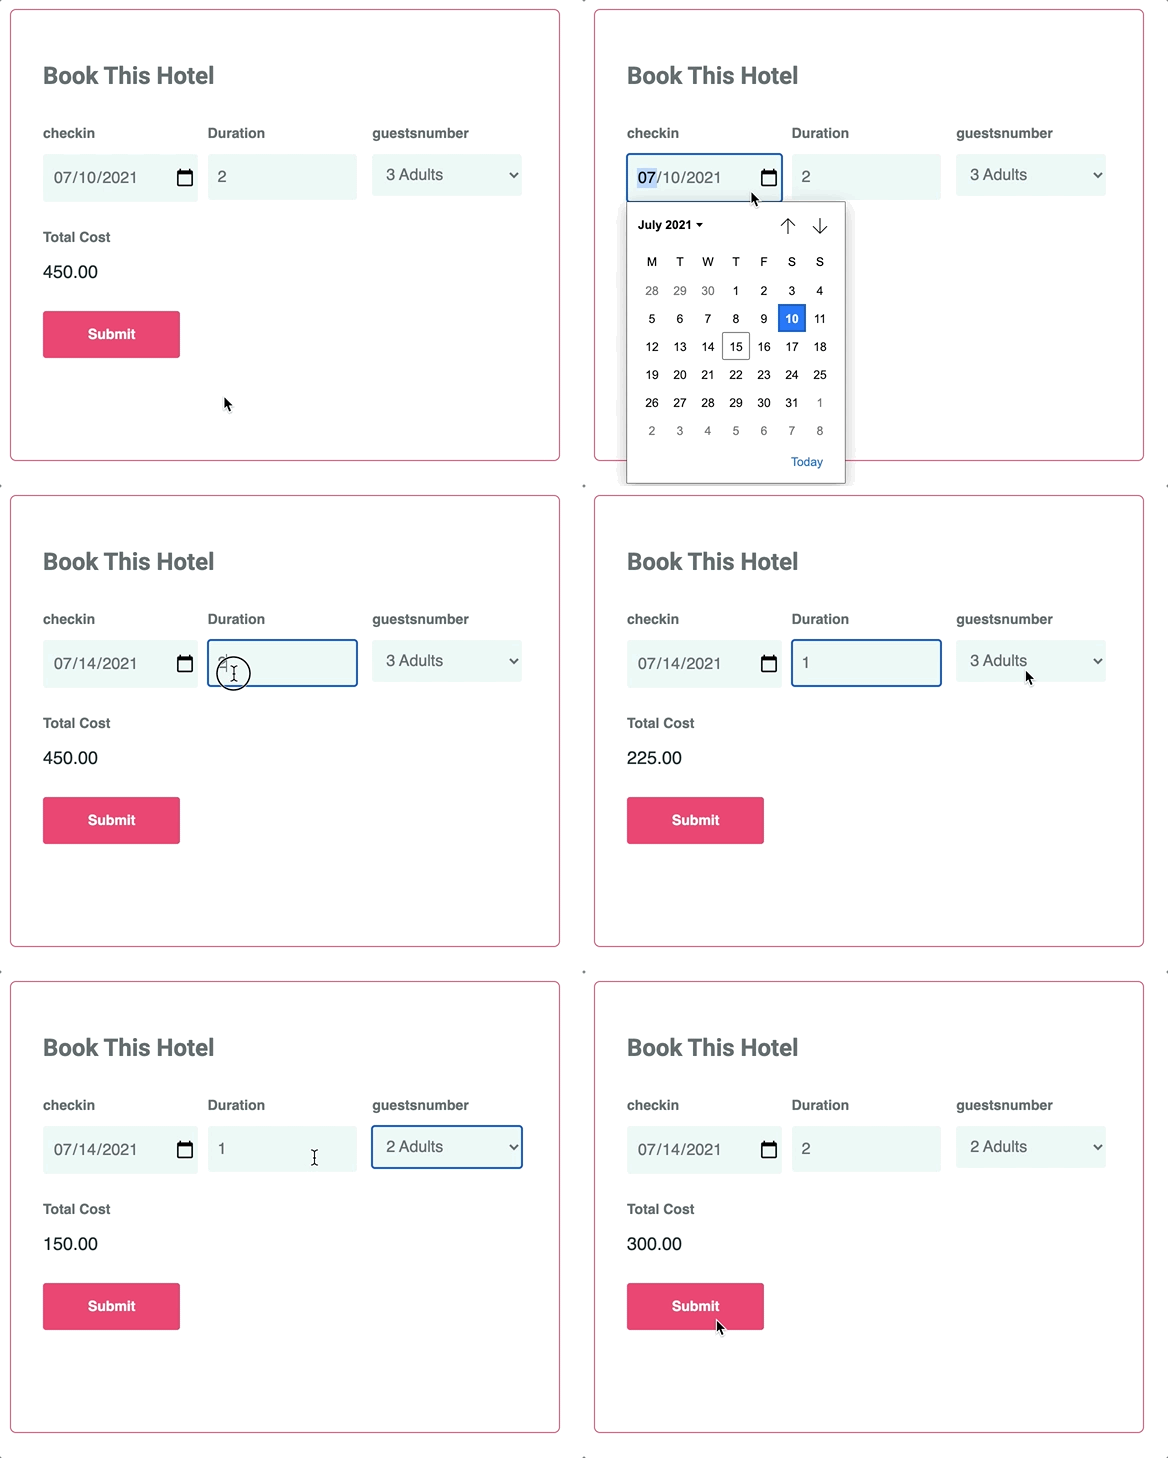
So, if a room costs 50$ per night and a person, it would cost 50x2x3 = 300$ if there are two guests and they want to stay 3 nights in that room.
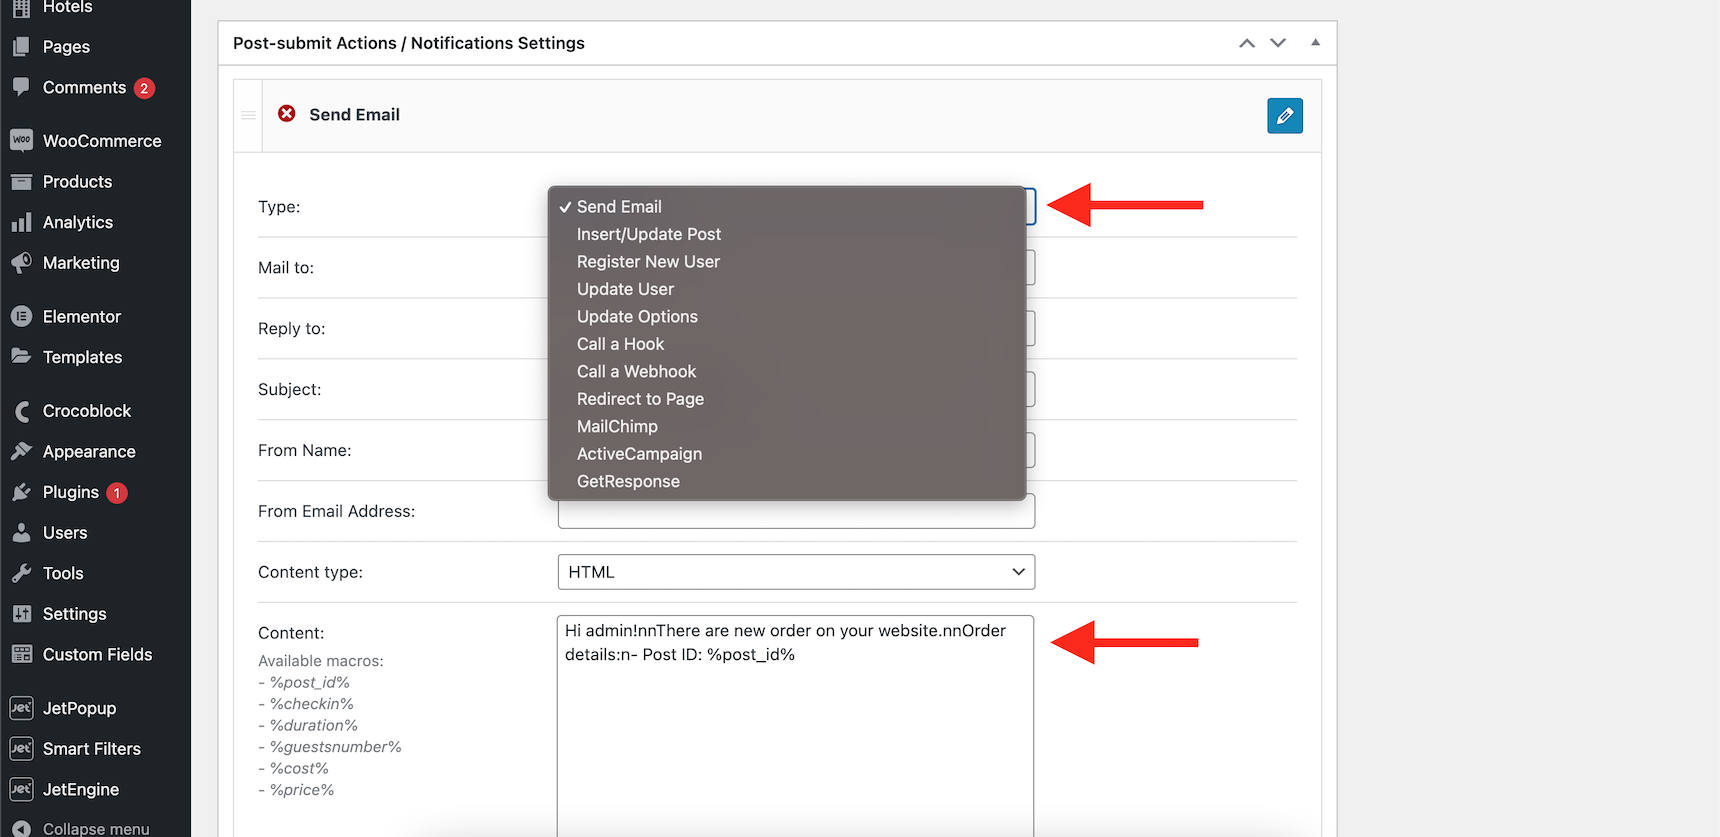
After that, apply the changes and define how the form should act when the user submits it. Scroll down to the “Post-submit Actions / Notification Settings” and add as much as you want. Here I just want to get notified via email but you can use MailChimp, Active Campaign, create a user or even call a webhook to connect your website to your hotel booking software (with a little bit of coding).
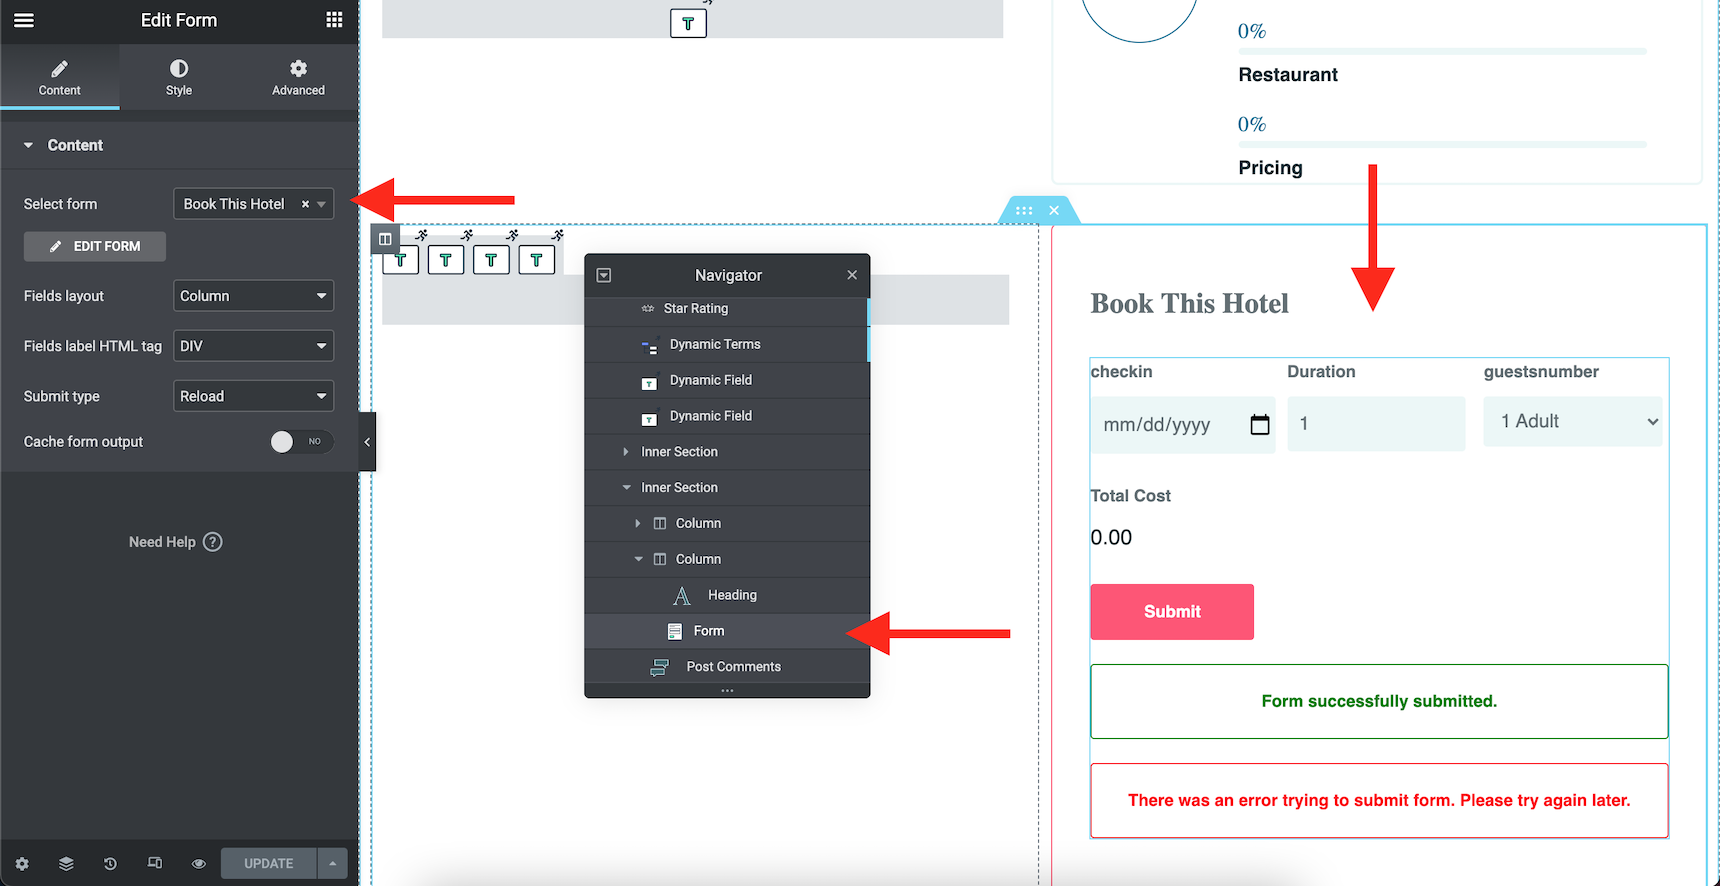
Now save your form and open the room’s single page template and edit that via Elementor. Then drop a “Form” widget from the jet engine widgets and then select the form you created.
That’s all. Now save the page template and visit one of the hotel’s pages.
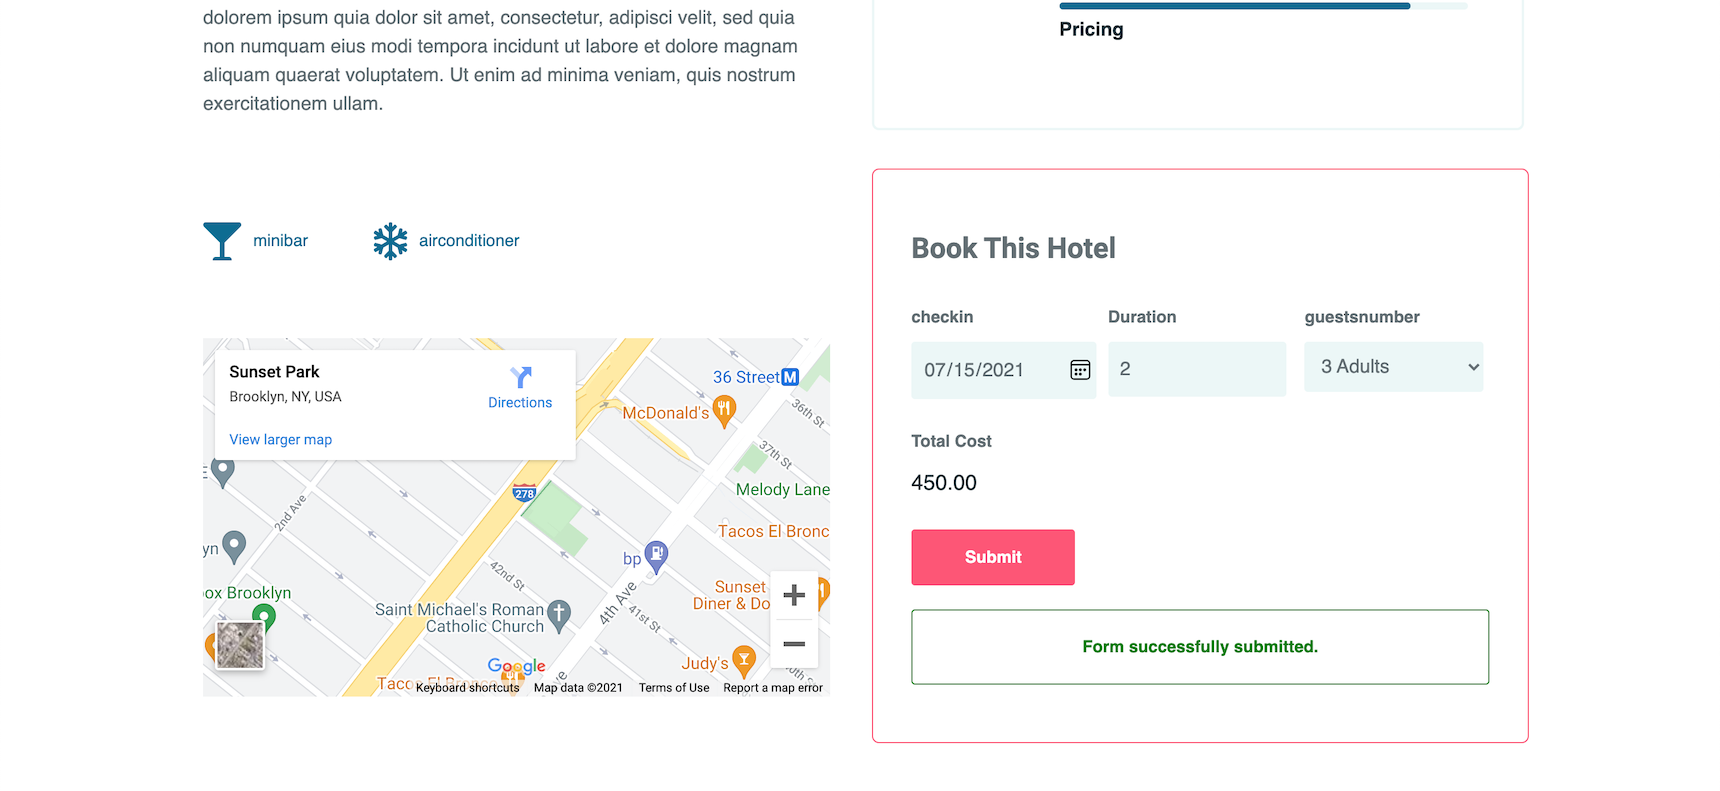
By submitting this form, since I set the notification email to be sent to my website admin, she will receive an email as soon as someone books a room.
Building a dynamic hotel website series ends here and we hope that it shed some light on the possibilities and features offered by the Jupiter X theme and its bundled plugins. Some users may need advanced booking forms. The booking forms here can get really advanced and complex. However, advanced features such as integration with WooCommerce or storing the data in custom tables are possible via the Jet Bookings plugin, which is not bundled with Jupiter X.
If you have any questions or feedback on building a dynamic hotel website and this series in general, feel free to post it in the comments below. We love getting feedback and would like to hear from you.



No comment yet, add your voice below!