While the WordPress login page is its most recognizable page – keeping its default design is not ideal. You might be thinking “why not”? We’ve gone ahead and detailed why you should create a custom login page with Jupiter X.
Why would you need a custom WordPress login page in the first place?
- Traffic. The more traffic you get on your site, the more problematic it becomes to manage spammers, malicious scripts and bots. A custom login page can filter all suspicious activities and make your site more secure.
- Branding. There’s nothing wrong with the default styling of the WordPress login page in and of itself. But if you’re an established brand, you’ll definitely want to brand every inch of your website, including the login page. Displaying your logo to users or clients is surely something they will appreciate.
- Multi-user site. This is fine if you have a small blog and you are the only one who uses the login page. But if you have a membership website where users can register and login, a custom login page offers a better user experience.
Choosing the right plugin to create a custom login page
There are 2 ways to create a custom login page:
- Using third-party plugins
- The manual way
Both have their pros and cons. For instance, it’s easier to use third-party plugins to create a custom login page as it can be done in a matter of minutes without writing a single line of code. However, going the manual route will give you more control of the appearance and features. It also requires good coding skills.
In this example, we’ll choose the easy way: a third-party plugin to create a fabulous custom login page for our project.
There are several plugins that can be used to create custom login pages in Jupiter X. From drag and drop to custom-made templates, from simple to complex, you can find plugins for all tastes and purposes these days.
For our example, we’ll use Clean Login, which is a plugin that offers shortcodes allowing you to embed your form anywhere on your site, including posts, pages, sidebar widgets or widgetized footer areas.
A few other benefits of this plugin include the following:
- Add your login form in the frontend easily (page or post), as well as the registration and the lost password form.
- If the user is logged in, they will see a custom profile and will be able to edit his/her data in another frontend form.
- Only one shortcode per form, which means that you’ll only need to create a page or post and apply this shortcode to create each form you want.
Designing this page for the custom login page with Jupiter X
This is the most interesting part of the post as designing a page is always challenging. But if you have a good design taste, you won’t ever fail. For our login page, we’ll use a simple, clean design. This is how it’ll appear:

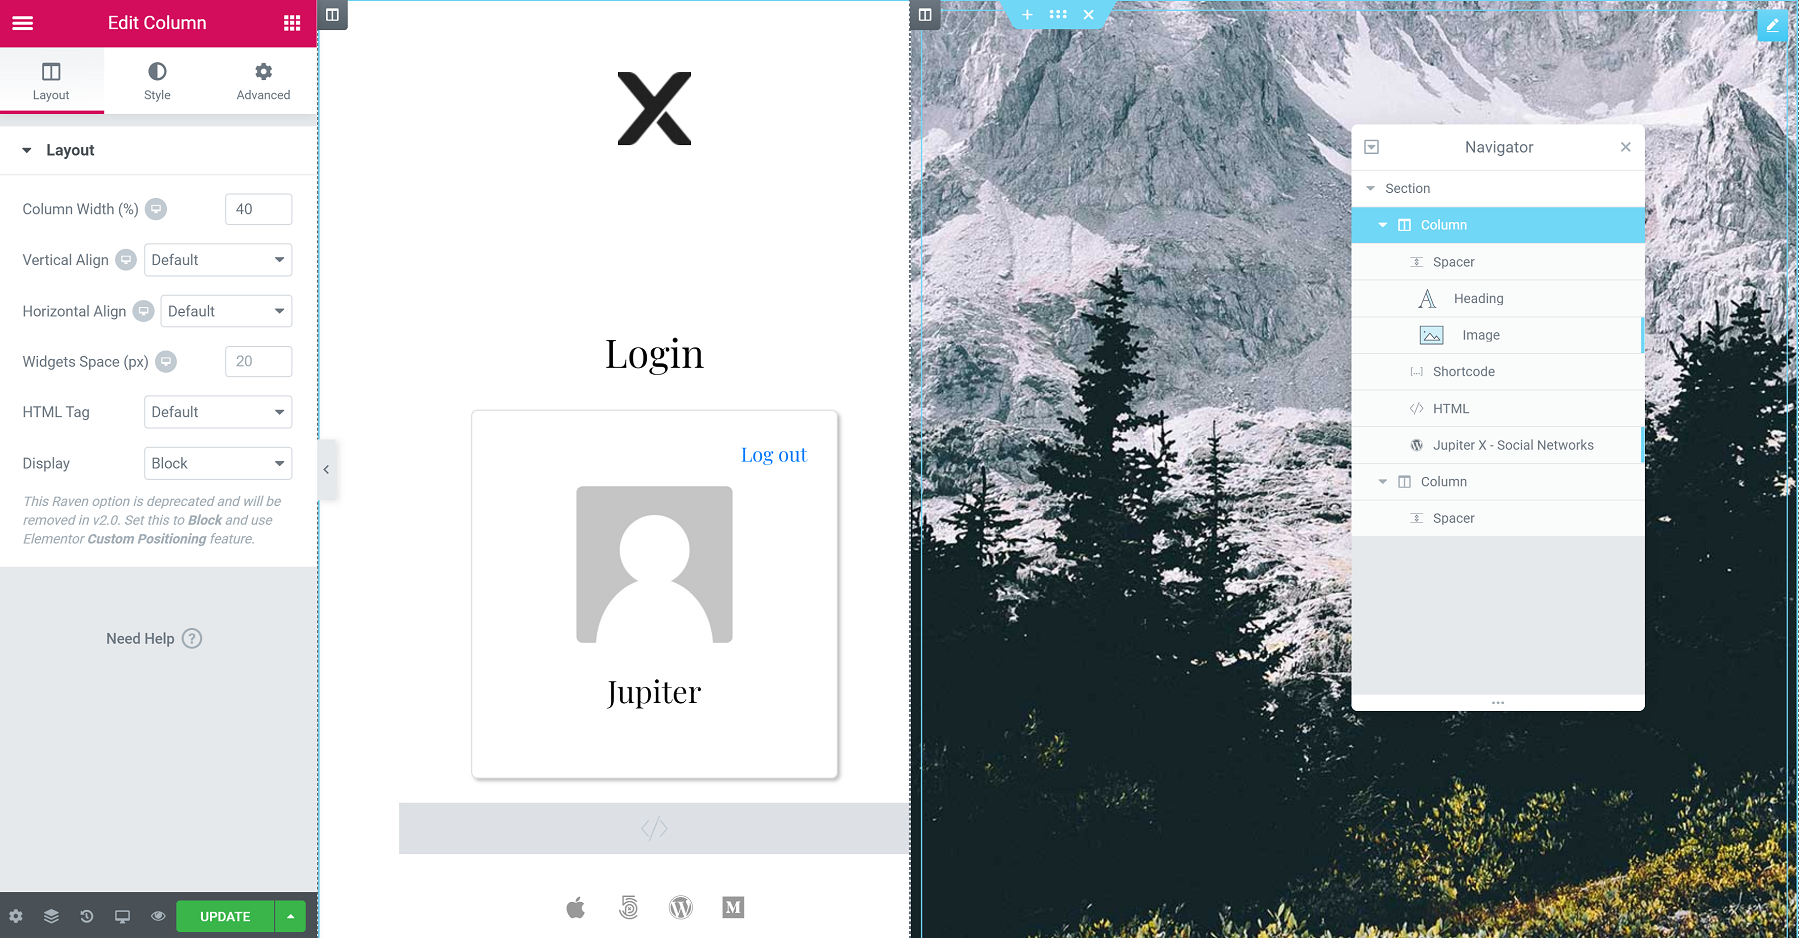
We are using 2 columns: one with 40% width and second with 60% width. In the first column we have:
- Image widget – Logo with an absolute position at the top
- Spacer widget – Adds space between the logo and login form
- Shortcode widget – Clean login shortcode: [clean-login]
- Jupiter X social network widget – Social networks at the bottom
- HTML widget – We use this widget for custom CSS, and this CSS code to fix the styling of the form and page:
<style>
.cleanlogin-container * {font-family: "Playfair Display", Sans-serif;}
.cleanlogin-field-remember {float: left;text-align: left;}
</style>
While in the second column, we have only a spacer element and column that has a beautiful background image.
This is how the page looks from the backend:

There is a simpler way to speed up the page creation process. For example, instead of designing a page from scratch, you can use page templates or predesigned blocks from Elementor. This feature will speed up your design process, and all you’ll need to do is to place a login shortcode in the predesigned page:

Wrapping up
There are many ways to build a fantastic login page with Jupiter X using different tools and scenarios. However, the Clean Plugin is the simplest and does not require adding a heavy plugin to your project. Another benefit of this plugin and Jupiter X is that you can use a shortcode in the header builder in the popup window attached to the header or footer menu (The plugin offers the option to redirect the user after a successful login).
Another benefit of Jupiter X is that you can display various menus for different user roles. For example, after successfully logging in, you have access to different menus and options, while a user who has not logged in will see something else.
Please do let us know about your experiences and comment in the section below! 😉


No comment yet, add your voice below!