This is a guest post contributed to Artbees Themes blog by Thuy Nguyen from Ninja Team.
By offering subscription products such as news, summaries, courses, or even food, you can generate recurring stable revenue with WooCommerce subscription email templates.
Subscription-based products have a special business model that requires a strong digital presence. Brand print via email communications is a must.
Therefore, visual continuity is essential at all subscriber touchpoints, including your website, social media channels, and transactional emails. In today’s article, we’ll be showing you how to do that by customizing WooCommerce subscription email templates without coding using YayMail.
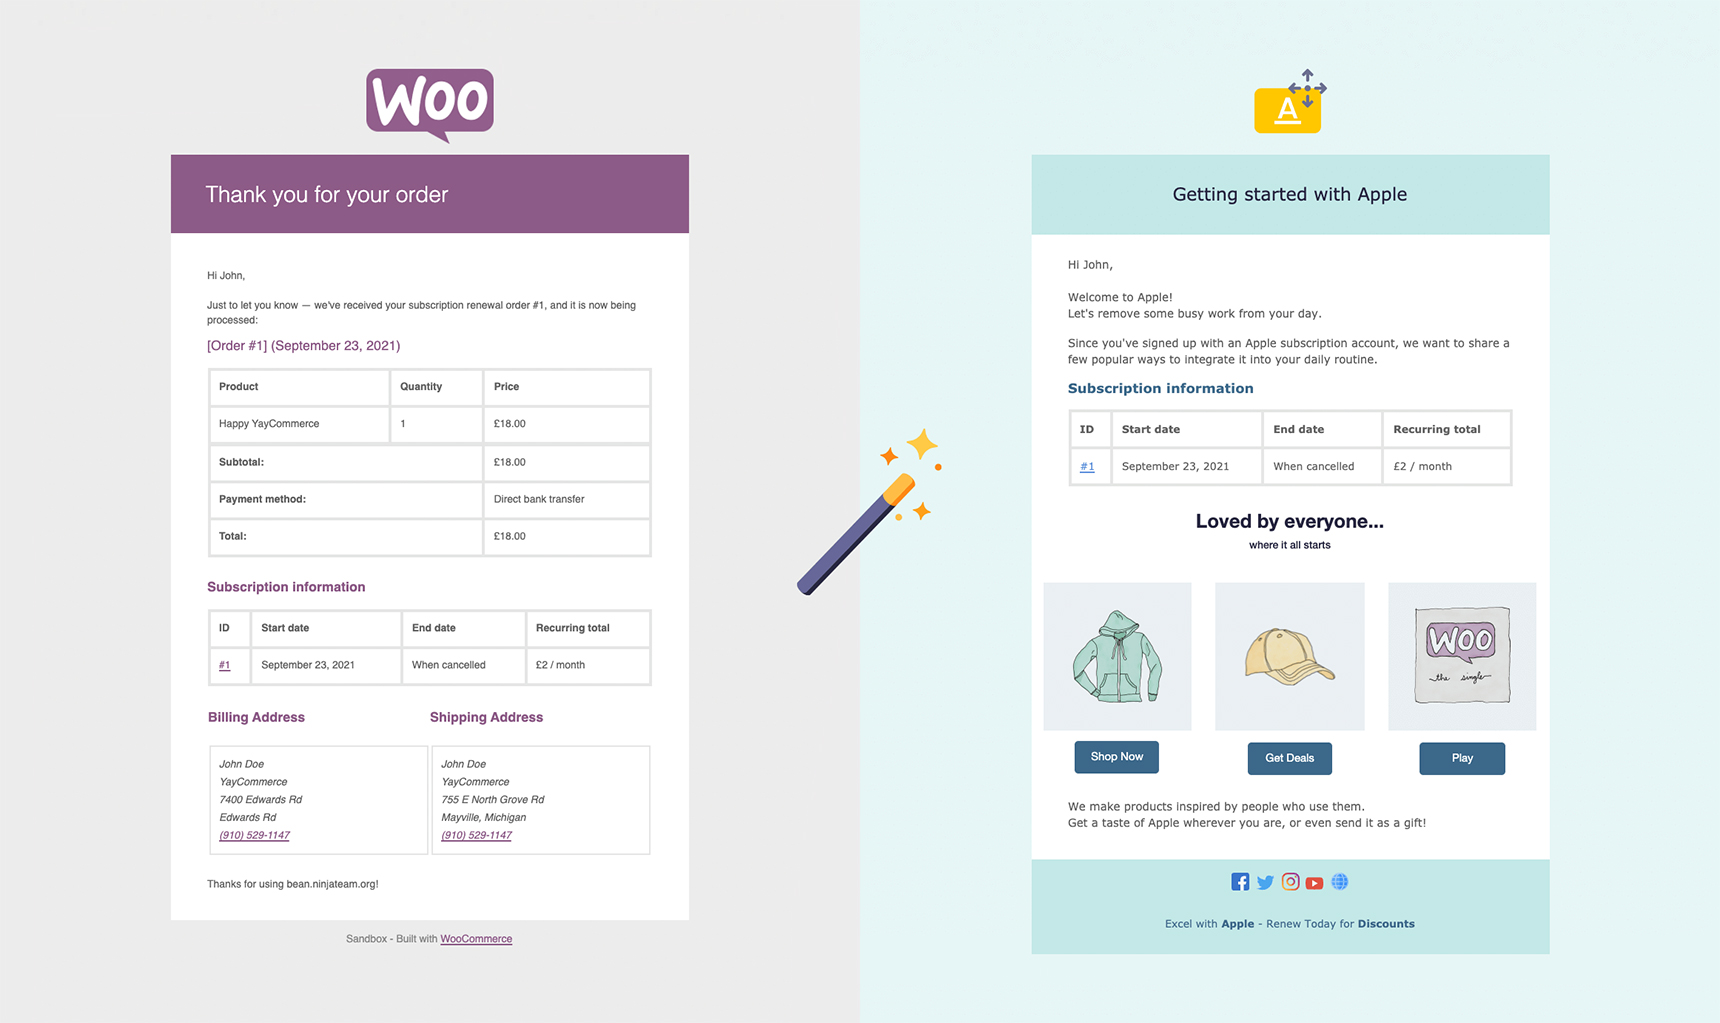
Install required plugins
In this tutorial, I’m using these plugins:
- WooCommerce Subscriptions: to create subscriptions via WooCommerce and sell subscription-based products or services
- WooCommerce Stripe Gateway: to handle recurring payments with Stripe
- YayMail: the free email template builder that support 50+ third-party extensions in its addons
- YayMail Addon for WooCommerce Subscriptions: integration of email customizer for subscription emails
- YayMail Addon for WooCommerce Stripe Gateway: integration of email customizer for Stripe’s payment reminder email templates
If you haven’t decided on which Woo subscription plugin to use, please check out our blog post on how to Create a Subscription Store with WooCommerce. In this article, you will learn the pros and cons of each plugin in order to make an informed purchase. No matter which one you choose, the customization workflow will be the same as presented in this walk-through.
Let’s get started!
Design the general template layout
By default, the WooCommerce plugin alone comes with 11 transactional email templates. The WooCommerce Subscriptions extension comes with another 10 email templates and WooCommerce Stripe Gateway adds even more templates for payment status reminders.
That’s quite a lot, right? But don’t fret, all of these subscription email templates are located in one place under WooCommerce > Settings > Emails.
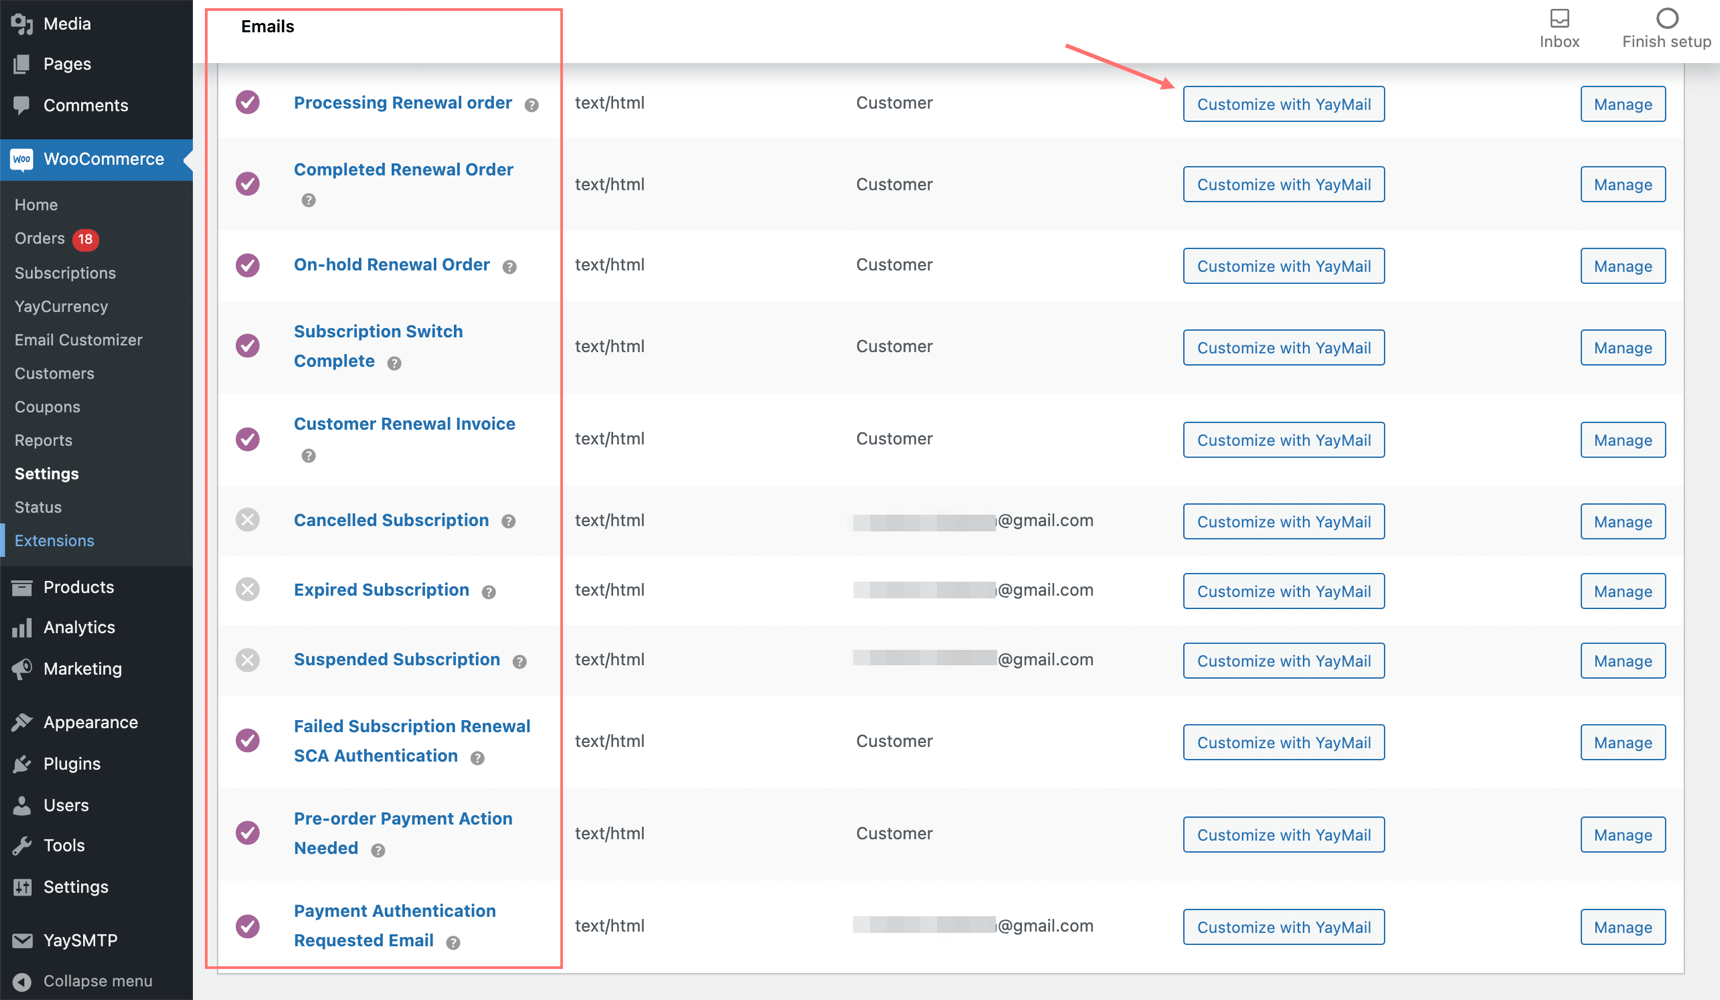
Alternatively, you can also find the email templates by navigating to WooCommerce > Email Customizer.
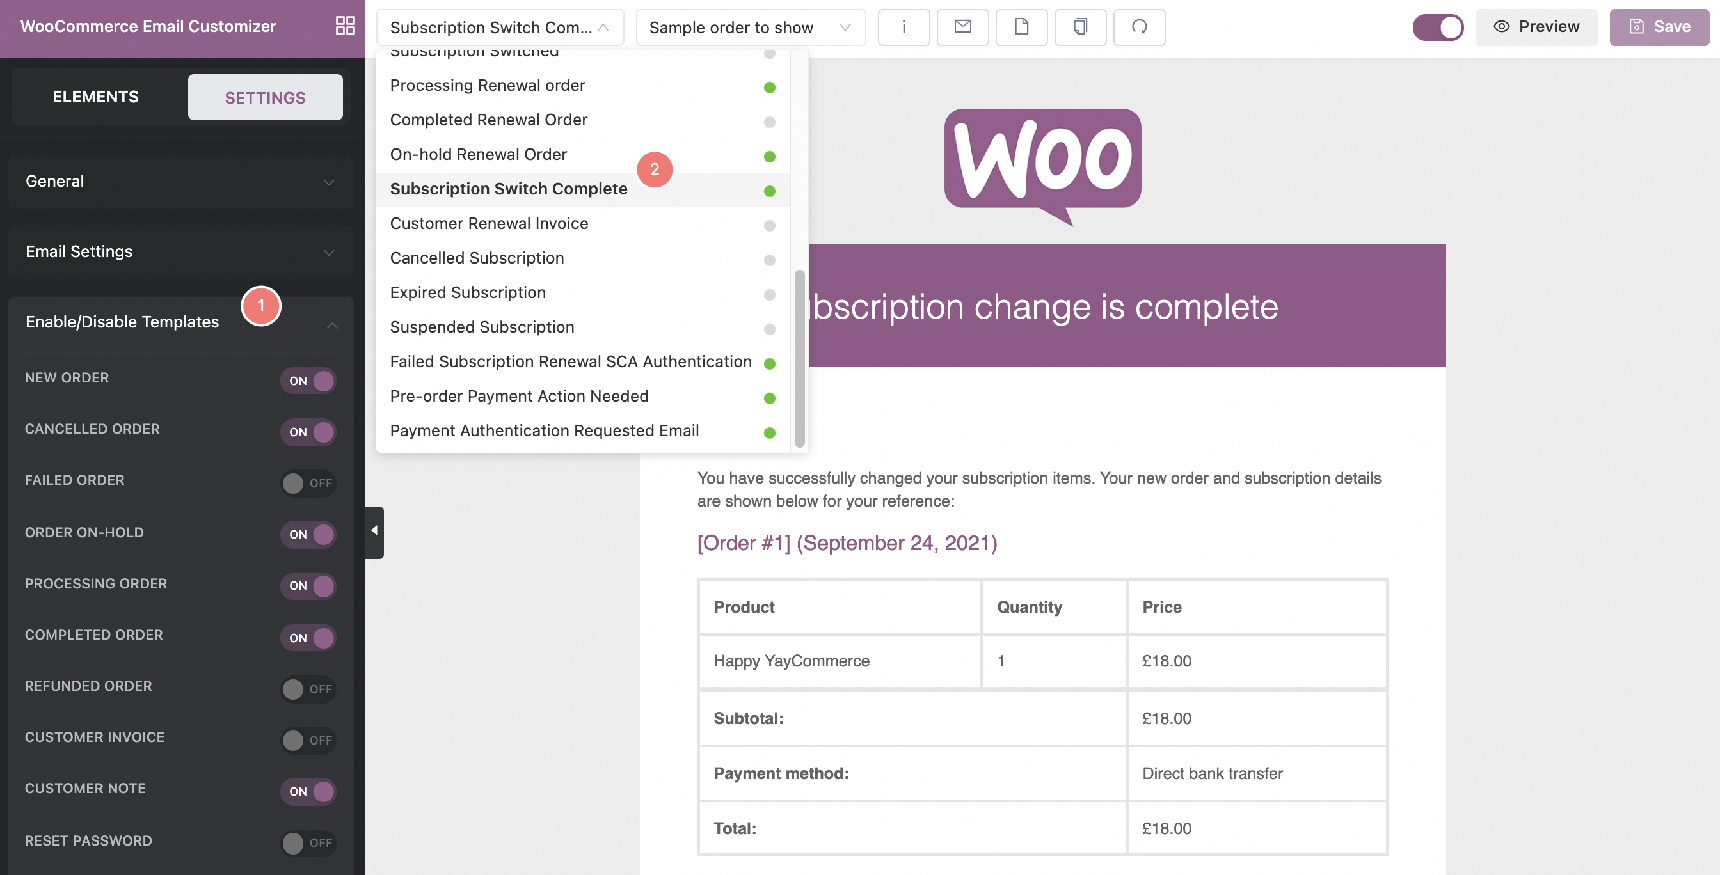
In the email builder interface, please go to Settings > Enable/Disable Templates to find all the available email templates. There, you can choose to activate all the templates you want to put in use.
For each enabled template, you will see a green light indicating that it is now being used in the automation workflow of WooCommerce.
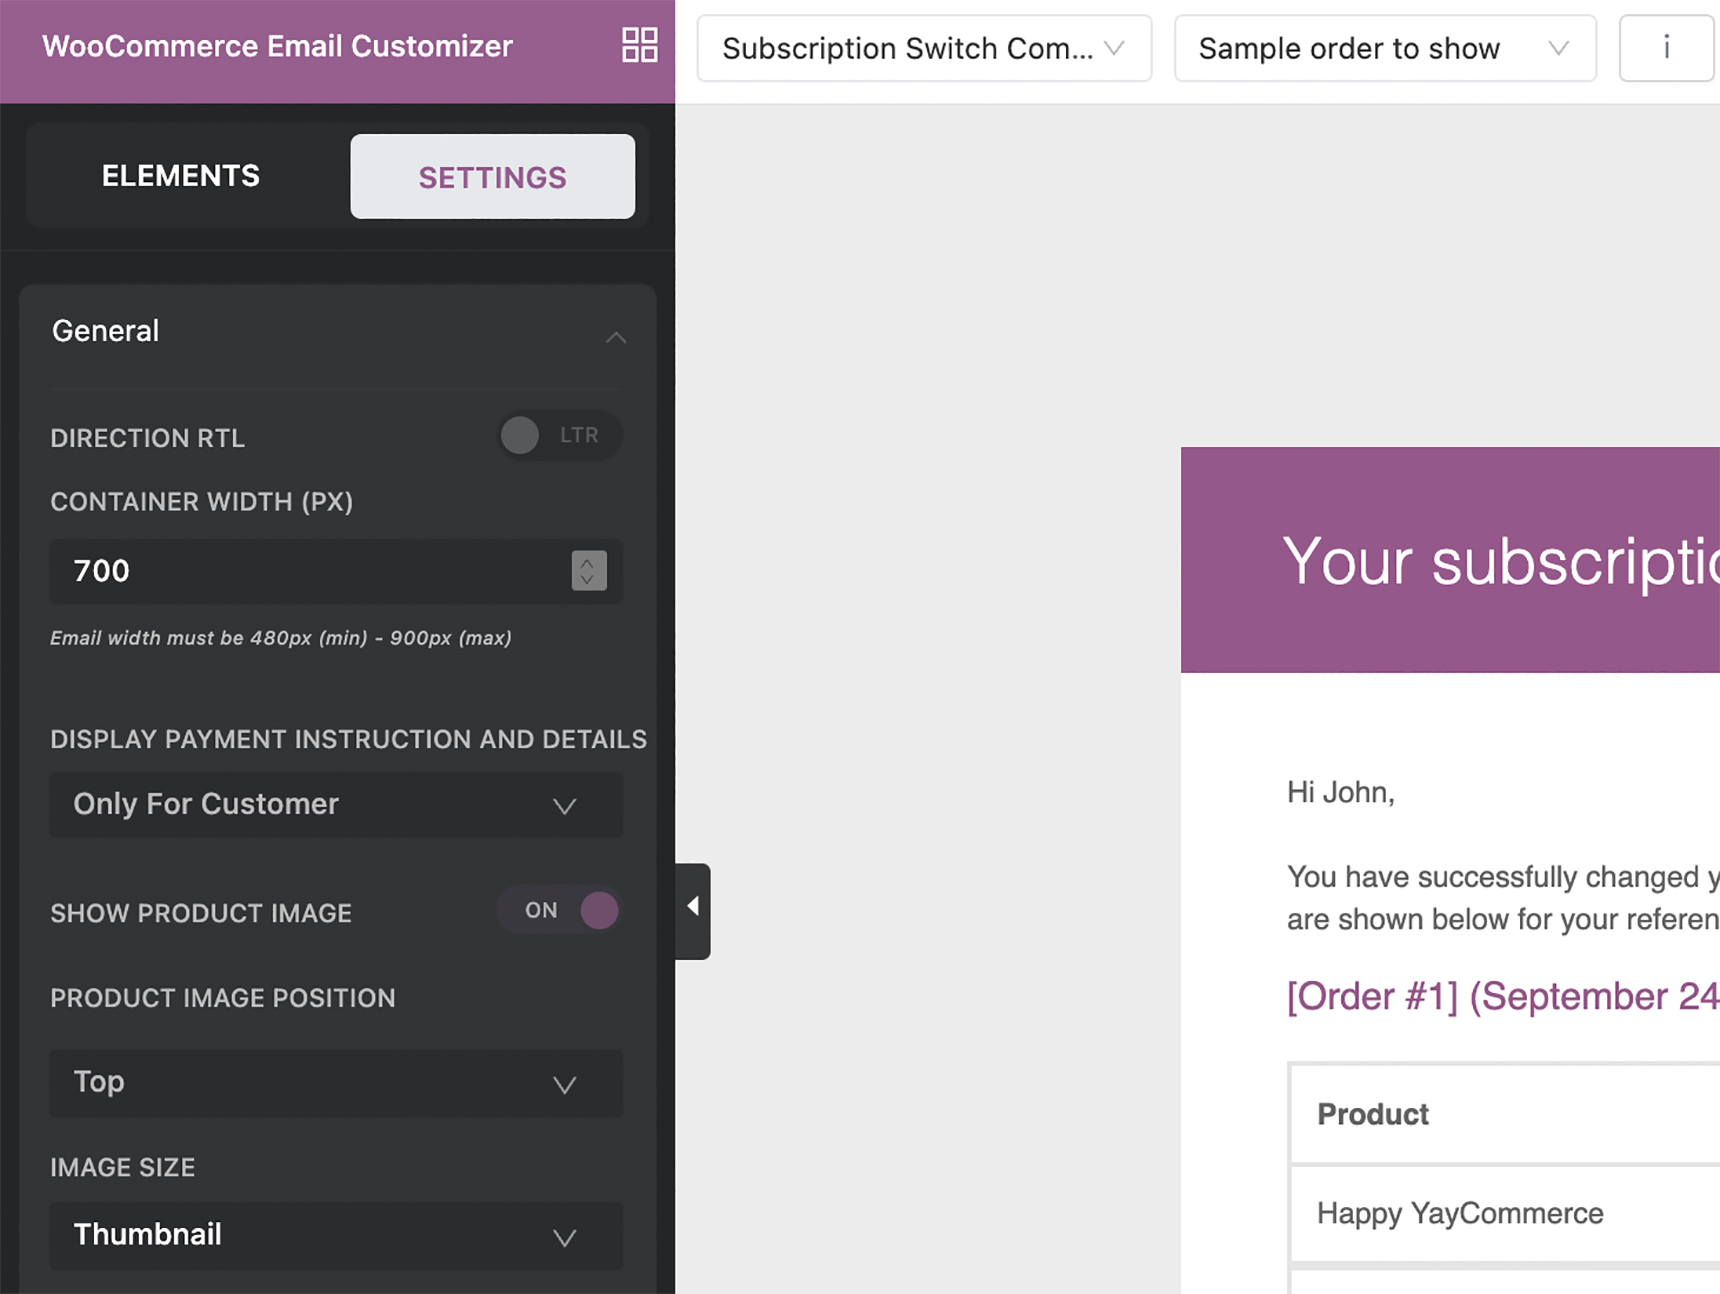
Also in the same Settings tab, you’ll be able to design the general layout of email templates. These options include universal display components like:
- Language direction: it is left to right by default.
- Container width: the width of the whole email body. It is 900px by default but 700px in the sample image.
- Product image: automatically insert any product image with a custom position and image size.
- Custom CSS: add your own creative adjustments.
- Export and import email templates: keep a full template backup or use your customized email templates on different sites.
In the sample image I’ve changed the email background color to light mint and the text link color to dodger blue. Feel free to play around with colors before we move on to the next steps.
Customizing welcome email template for new subscribers
After finishing the general options, you can now move along to a specific subscription email template such as New customer welcome email template for onboarding subscribers.
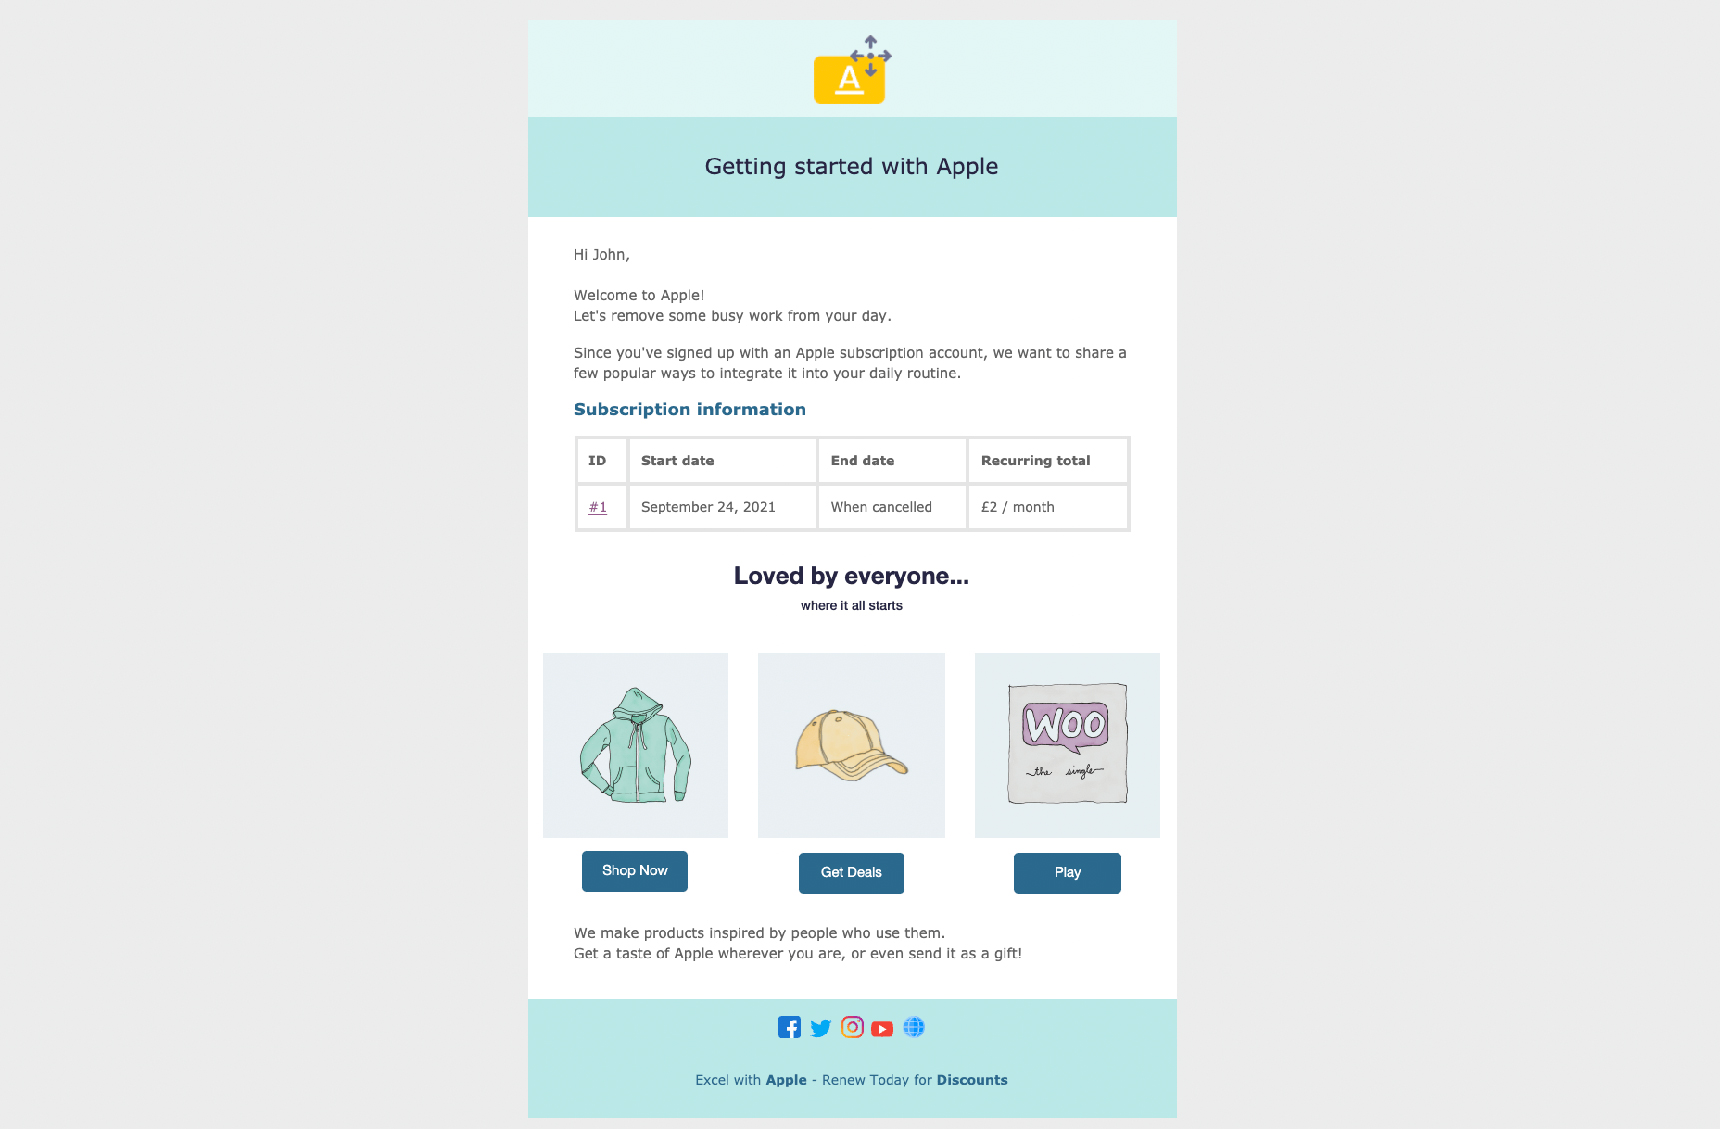
In the WooCommerce subscription flow, the first email your subscriber receives after signing up is called Processing order. Choose it from the dropdown list and then we can start to transform it into a more appealing welcome email template.
Logo and email header
Similar to Gutenberg blocks, you can upload and insert your logo very quickly. For this logo block, I set its background color with the same light mint color as the email background.
Alternatively, you can use a full width banner or an animated GIF in your email to emphasize your brand and its personality.
Then, with the email heading block, I pick a darker mint color for its background. After that, I just add some custom text and tweak it:
- Change text color: use the built-in color picker or paste your own HEX color
- Change font family: choose one of the email-safe fonts listed under “Font Family” option
- Align and format the text further if necessary
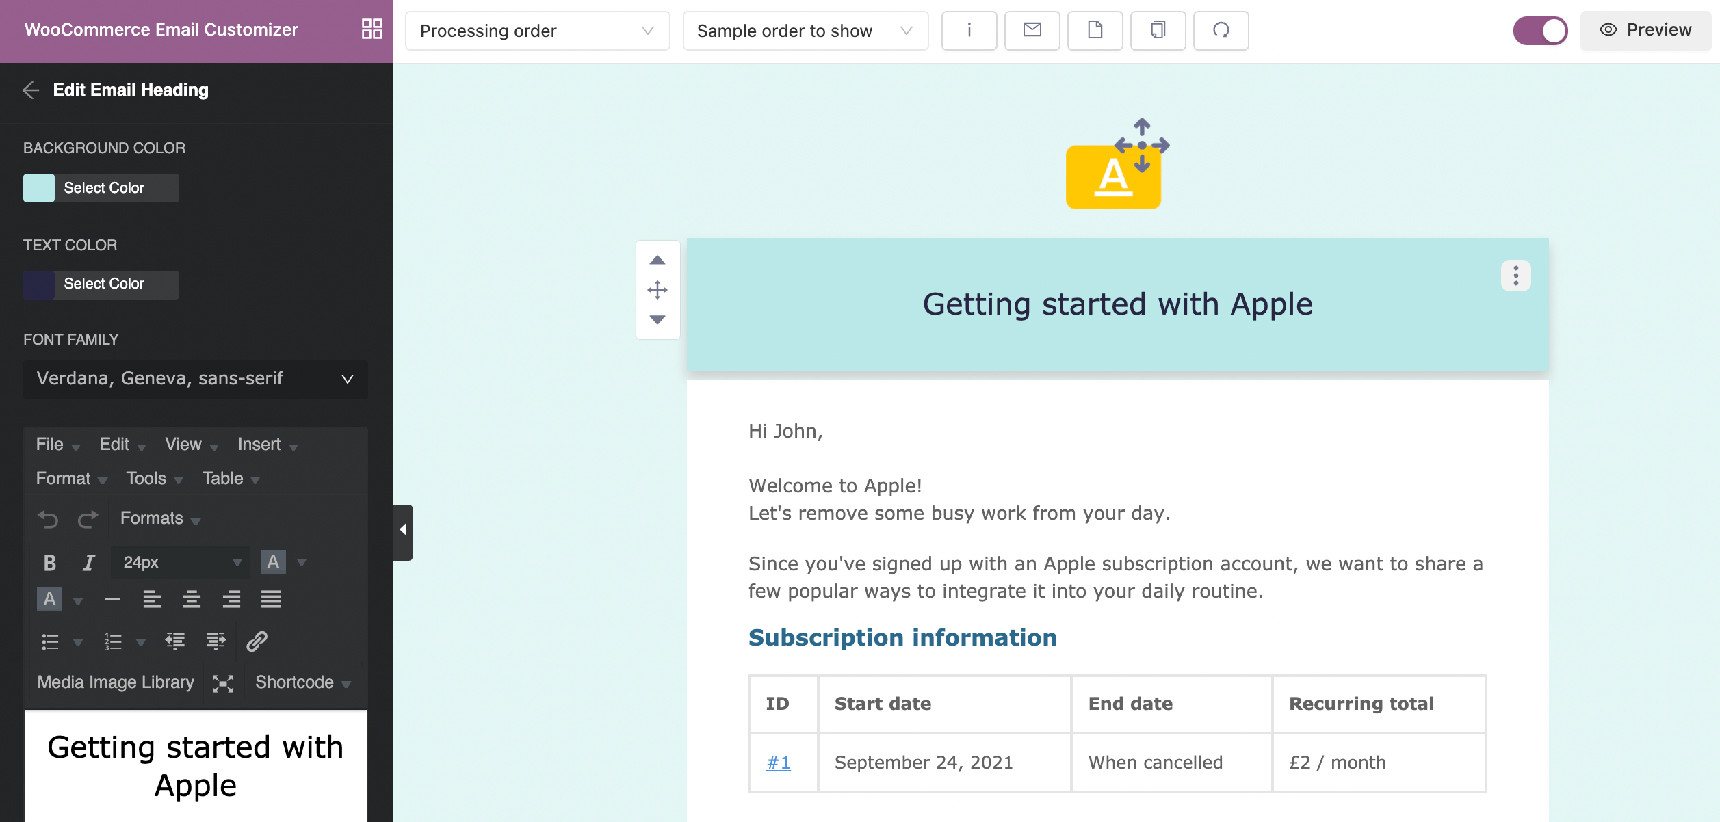
After I am satisfied with my email header, I can continue with the main email content using text blocks such as:
- Welcome greetings
- Announcement of the subscription registration, and a bit more of what you have to offer
- WooCommerce subscription detail table
Multiple column email section
Now it’s time to add some fancy media sections to the onboarding subscription email template. Here you can unleash your designer vision with an advanced multiple column block.
Here are some ideas to help you out with what to put in new subscriber email templates:
- Setup instructions
- Upcoming events and webinars
- Merchandise and badges
- Other useful links and resources
It’s easy to implement this media section by following these steps:
- Add a three column block: set portion width, padding, background color or add an image
- Drag and drop content blocks into each column
- Insert buttons into columns: edit button color and text font/text color
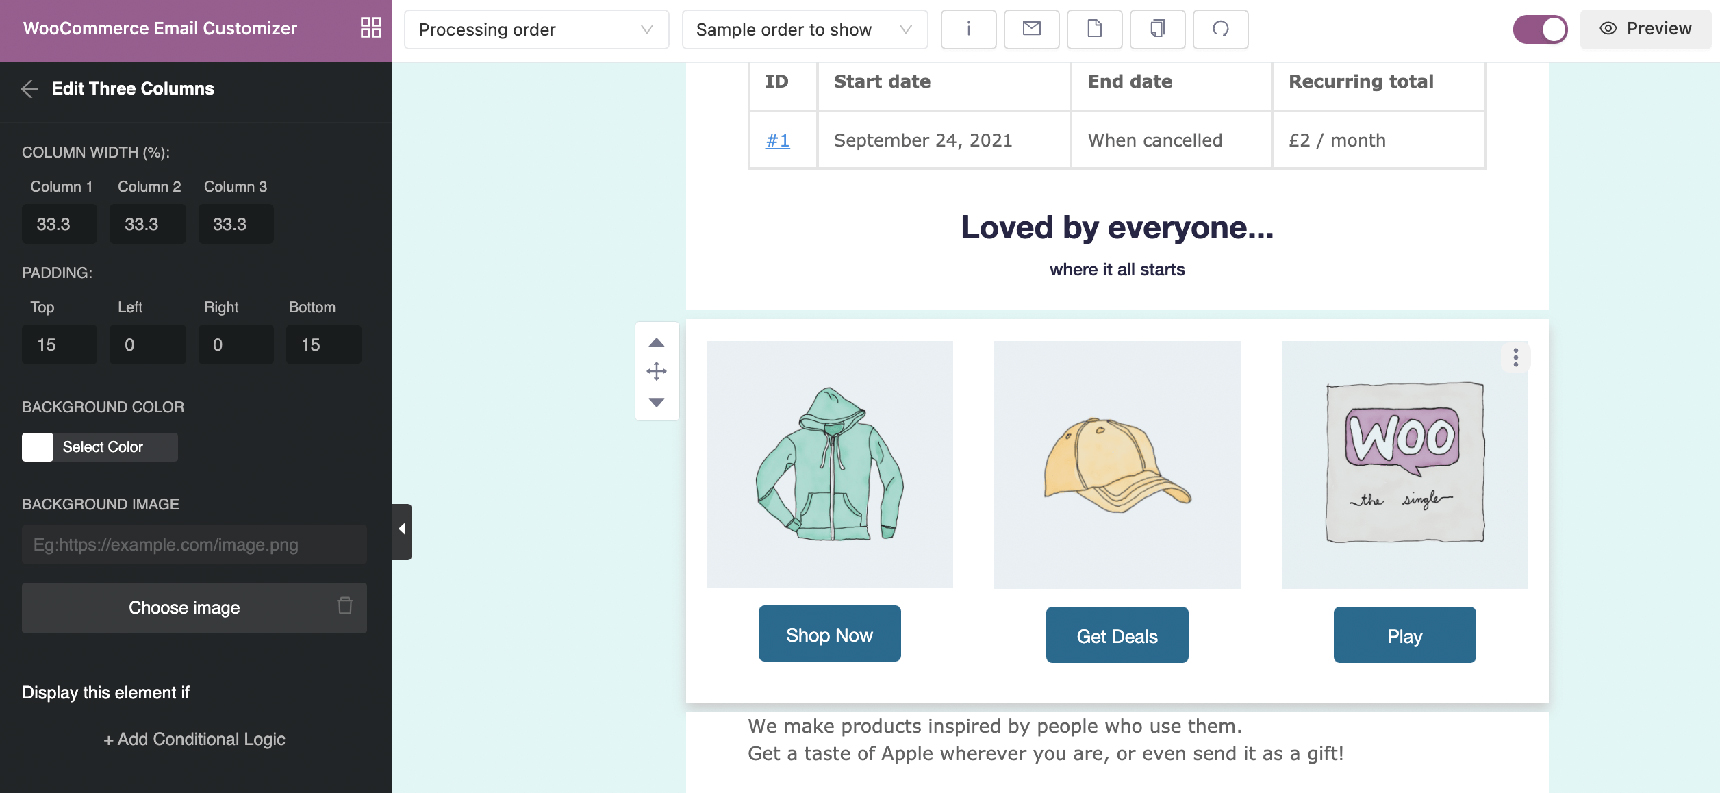
Feel free to add more images or videos to build excitement for your products with new subscribers and include gentle CTAs for further actions.
Email footer and signature
As for the email footer, this is where you can include post-purchase details such as customer service number, return or refund policy, company signature, QR code, etc.
Here I want to minimize those details so I only include social media profiles and the website tagline/company slogan.
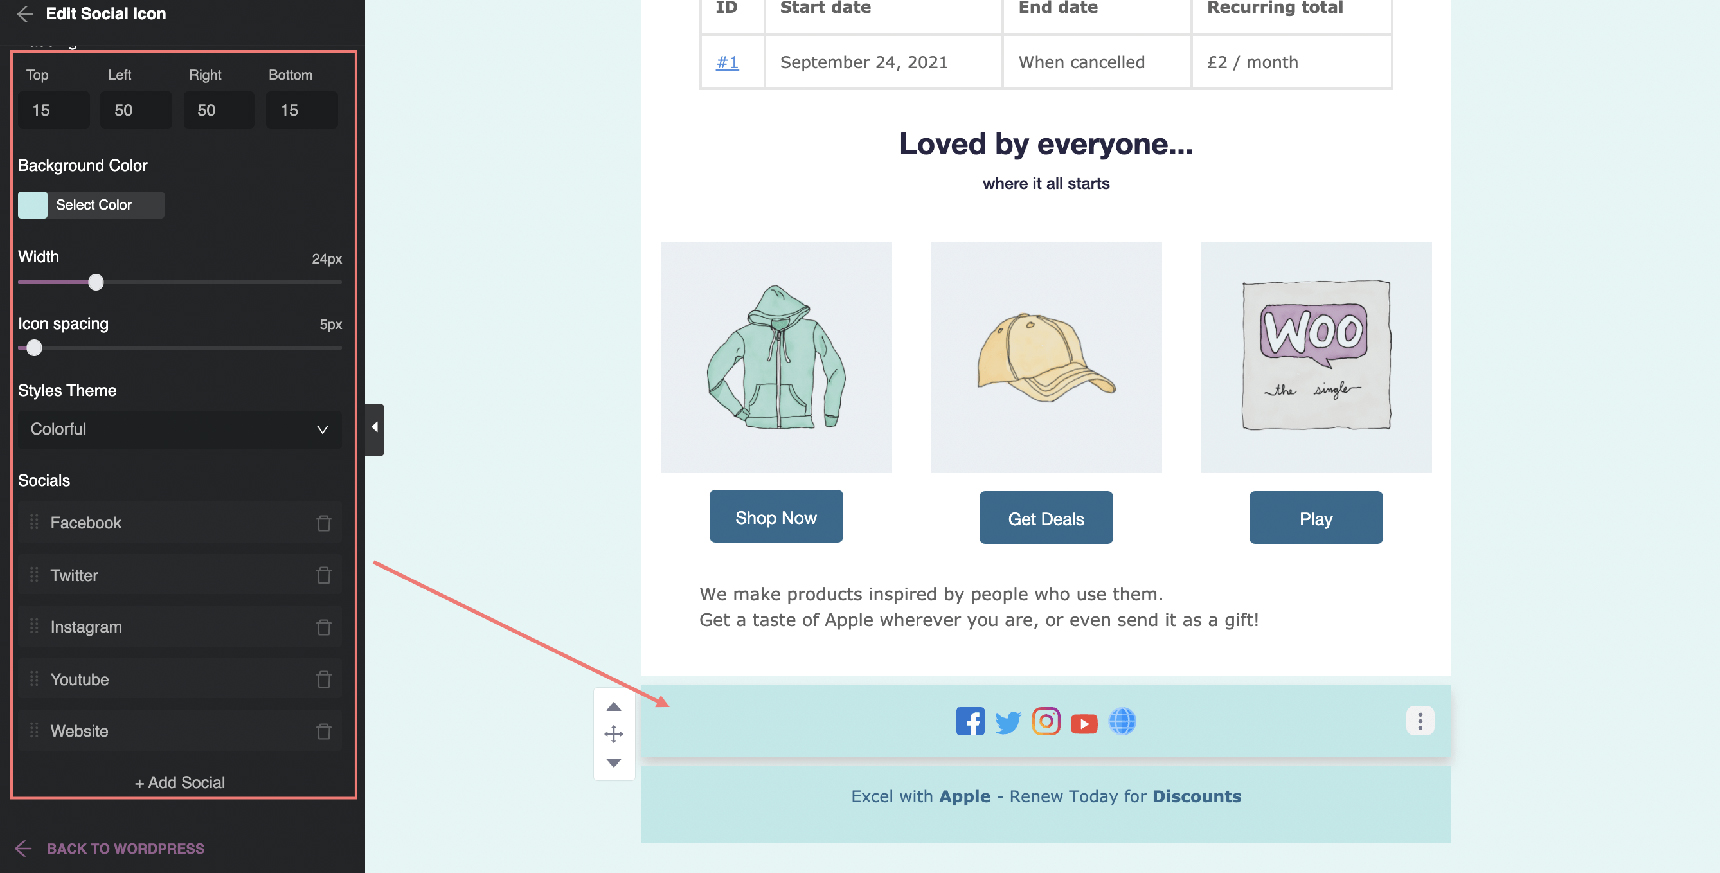
Within YayMail’s email builder, you can find a dedicated Social Icon block for showcasing your online presence. This enhancement provides customizable options including:
- Social icon row paddings
- Icon width and spacing
- Various pre-set styles
- Links to social media networks and home page
- Optionally add or remove social media icons
After all of the customization work, our email template looks like this:
Customizing payment reminder email templates
When it comes to processing renewal payments, there are many scenarios that cause failed authentication. When this happens, Stripe Payment Gateway automatically sends payment reminder emails to the subscribers.
The WooCommerce email template Failed Subscription Renewal SCA Authentication gives a heads up to your customers:
- To inform that an attempt to automatically process a subscription renewal payment has failed,
- To explain that the transaction requires an SCA verification,
- To request the customer to authenticate the payment, and a retry rule has been applied to notify the customer again within a certain time period.
That said, please prepare a reminder copy that helps clarify the issue and what actions you want your subscriber to take.
Here’s what my copy looks like:
“The automatic payment to renew your subscription with [yaymail_site_name] has failed. To reactivate your subscription, please login and authorize the renewal from your account page: Authorize the payment »”
After that, you can go to the email builder and reuse the newly customized email template to develop a consistent brand experience.
To save valuable time, it’s wise to duplicate an email template so that you don’t have to design it over again. To do this, simply follow these steps:
- Select the current email template, eg: Payment Authentication Failed
- Click on the button “Copy template” from the upper toolbar
- Choose a particular template from which you want to copy all designed blocks, eg: Processing order
- Click Copy template to have the new draft right on your current email template
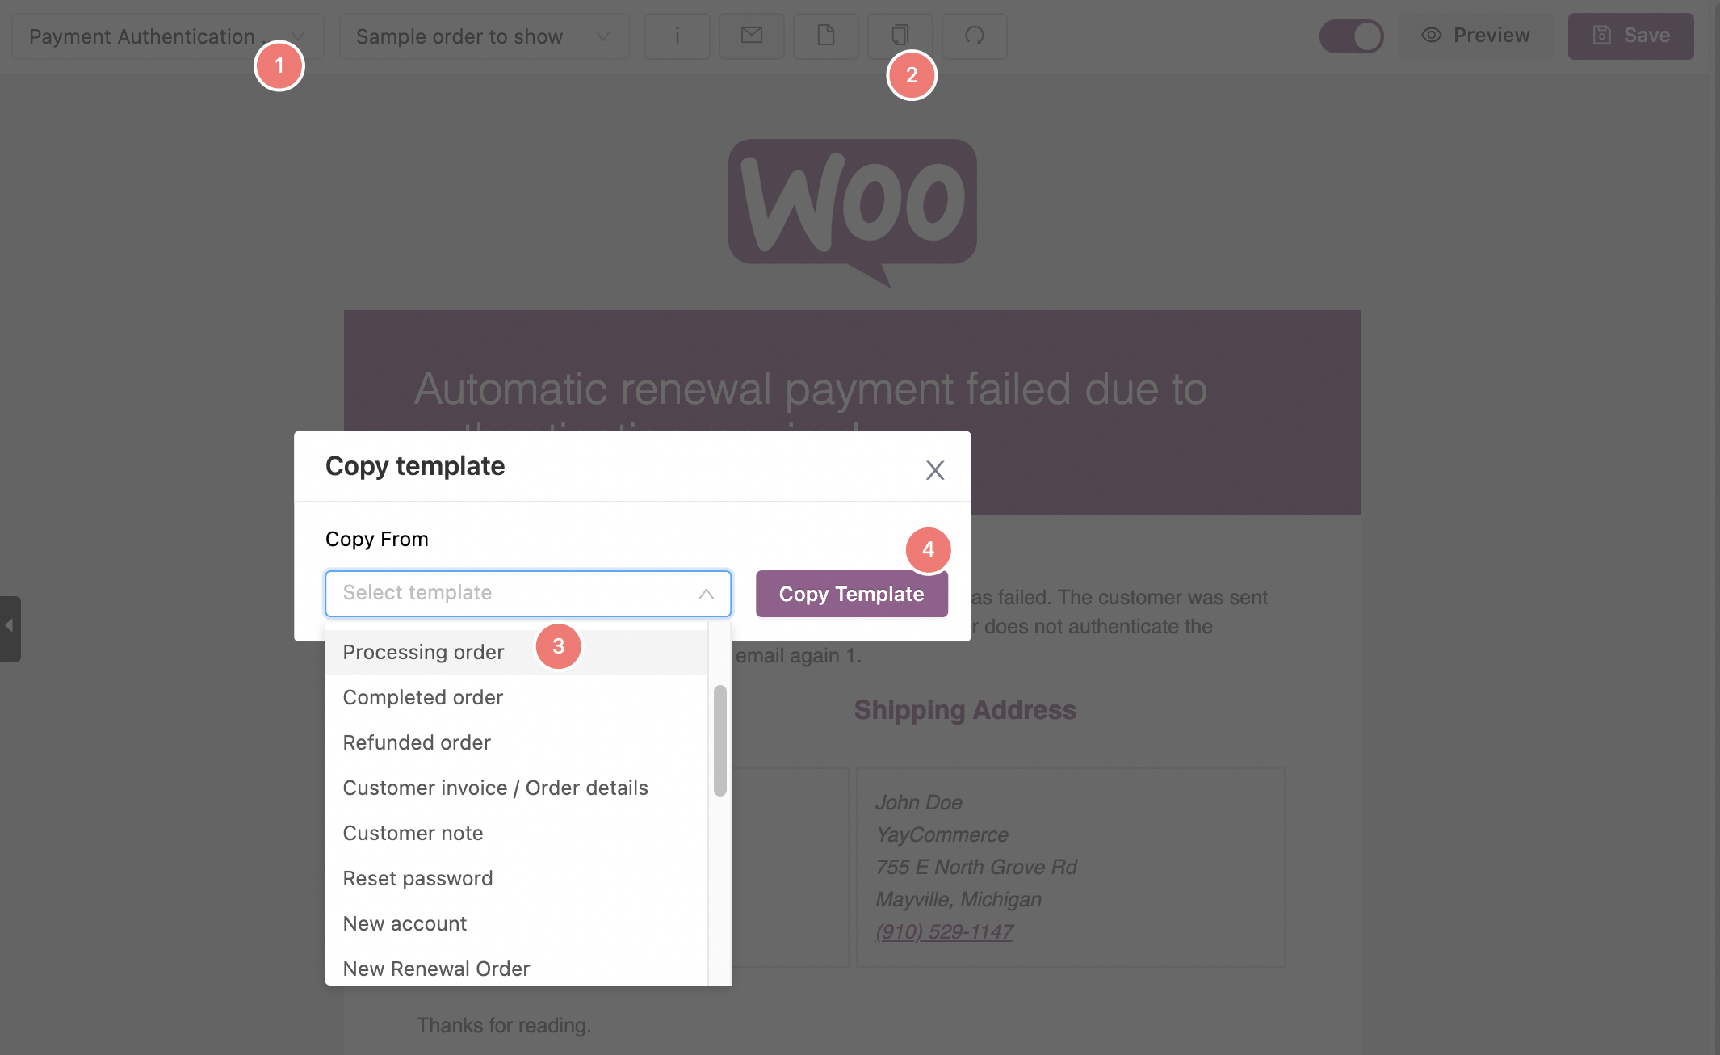
Then you’ll have a full template cloned from the Processing order’s template. Now go ahead and omit the blocks that you find unsuitable or unnecessary.
For situational guides, you can even add an extra text box to the email body with additional information.
It is as easy as pie! When the email templates look just as you wish, click Save to finish.
Subscription email best practices
So we have guided you through the very basic steps of customizing subscription welcome and reminder emails.
While it is intuitive to design with this drag and drop email builder, here are the best practices to save you more time:
- When you add external links to the email templates, they could appear as insecure links and the template won’t be able to be saved. You can troubleshoot this problem by trying to reset the template.
- There are many shortcodes and variables to insert personalized information into the subscription email templates. You can find them in any textbox element or from the (i) Shortcode button.
- At any point in time, you can save and preview the current template on desktop or mobile interface.
- Before enabling the email templates, you can send a test email anytime to make sure it looks good on different email clients and devices.
- You can try sending different email templates in real life to find out which layout brings the highest WooCommerce conversion rate.
Wrapping Up
WooCommerce subscription email templates are expected and contain important information. These emails have a high open-rate. While you don’t want to promote hard via these emails, you do have the chance to give incentives for sharing your products, or simply ask for a review.
With the help of YayMail – WooCommerce Email Customizer, you have a simple way to build a successful relationship with your subscribers.
Have any templates that you want to share? Don’t hesitate to let us know in the comment section below.


No comment yet, add your voice below!