WooCommerce is the world’s number one ecommerce solution based on the popular WordPress CMS. Flexible and open source, WooCommerce is used to build virtually any type of online ecommerce website. In this article, we are going to review WooCommerce blocks, which are a flexible way to display your products in different pages through the new WordPress Block Editor.
What are WooCommerce blocks?
Blocks are the essential building functionality of the block editor. By using WooCommerce blocks you are able to benefit from creating custom shop, cart, checkout pages and more.
If you are interested in building a custom WooCommerce website using Elementor, you can try the Jupiter X theme and SellKit plugin, which offer many features to optimize WooCommerce websites.
Available Blocks
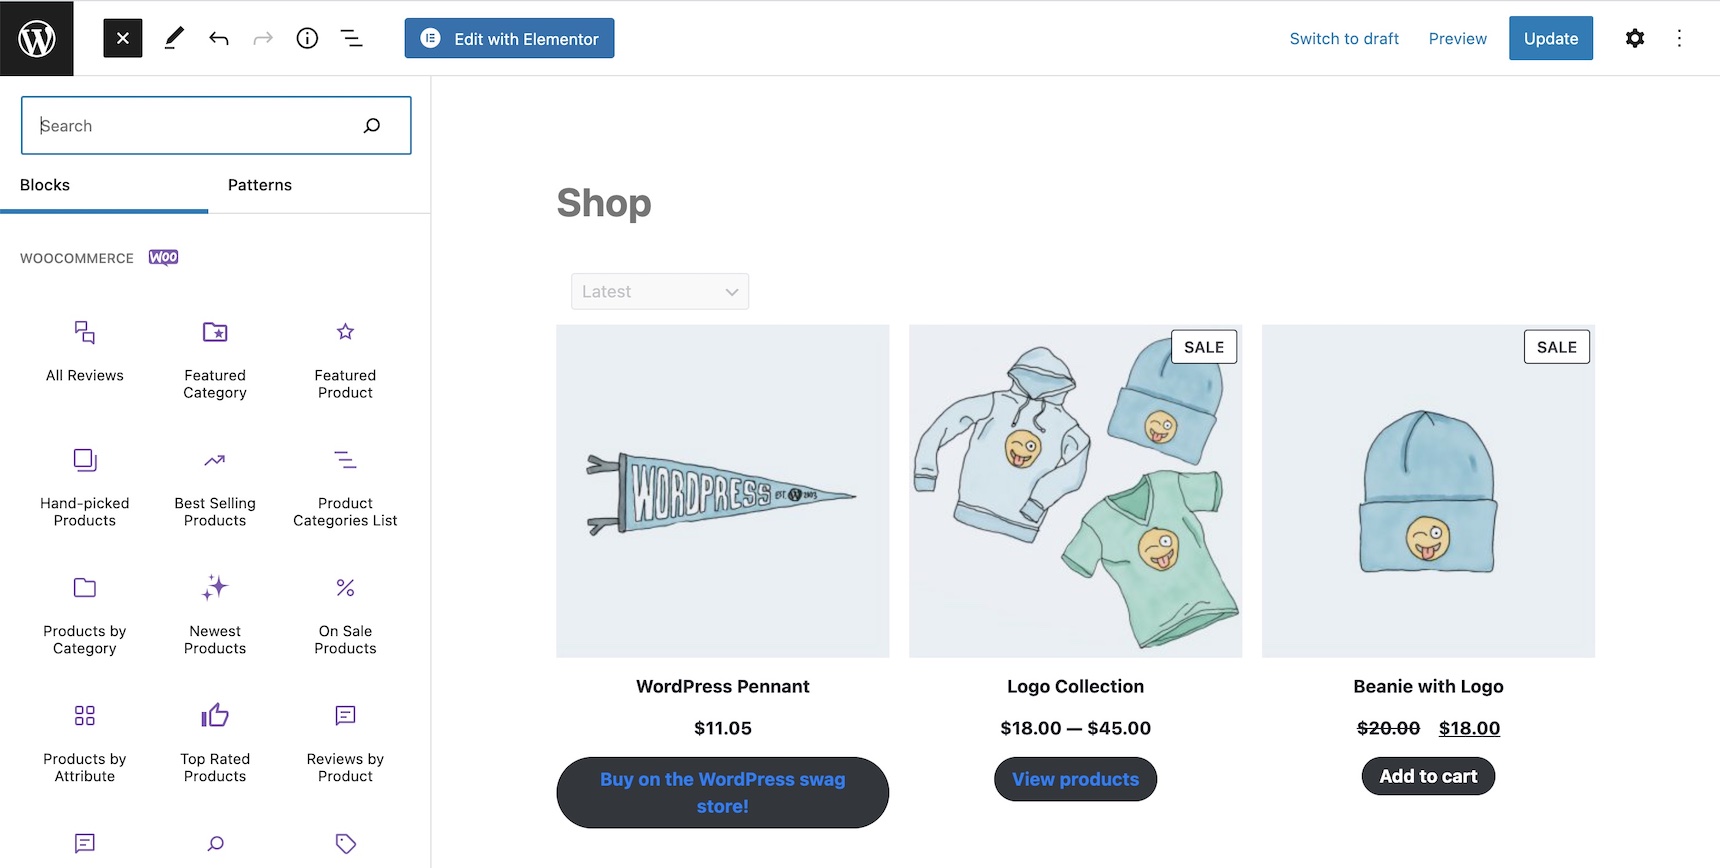
There are around 22 WooCommerce blocks to help you build an online store using the new WordPress editor. Let’s briefly review them. Stable blocks are available in the WooCommerce plugin but some of them are available in the WooCommerce Blocks plugin.
- Featured Product
Shows a single product in any part of the page. This is helpful for highlighting an important product. - Featured Category
Shows a product category. It can be used to draw visitors’ attention to a specific product category in your shop. - Hand-picked Products
Shows a grid of hand picked products. - Best Selling Products
Shows a grid of your best selling product. - Top Rated Products
Shows a grid of your top rated products. - Newest Products
Shows a grid of your newest products. - On Sale Products
Shows a grid of on sale products. - Products by Category
Shows a grid of products from shop categories. - Products by Tag
Shows a grid of products based on specific tags. - Products by Attribute
Shows a grid of products by selected attributes. - Product Categories List
Shows all product categories as a list or dropdown. It makes navigation easier. - Reviews by Product
Shows reviews of a specific product. This helps gain visitors’ trust. - Reviews by Category
Shows reviews from specific categories. - All Reviews
Shows a list of all product reviews. - Product Search
Shows a search box to help users find any product by searching its name. - All Products
Shows all products of the store as a grid with pagination and sorting options. - Filter Products by Price
Shows a slider to filter products in your store by price. - Filter Products by Attribute
Shows a list of filters of selected product attributes. - Filter Products by Stock
Shows an item in the list to filter products based on stock status. - Active Product Filters
Shows a list of active product filters. - Cart
Displays the current cart items. - Checkout
Shows the checkout page, with customer details, shipping options and payment method with a new UI. - Mini Cart
Allows visitors to see the items of their cart. It can be added to any page or sidebar.
Build a Custom Shop and Checkout Page Using WooCommerce Blocks
There are two ways at the moment to test blocks.
- Replacing the existing shortcodes (if available) in the default shop pages with the appropriate block in the block editor.
- Creating new pages and adding blocks. You just need to make sure to change the settings in WooCommerce > Settings > Advanced.
In this article, we will use the first method.
Shop Page
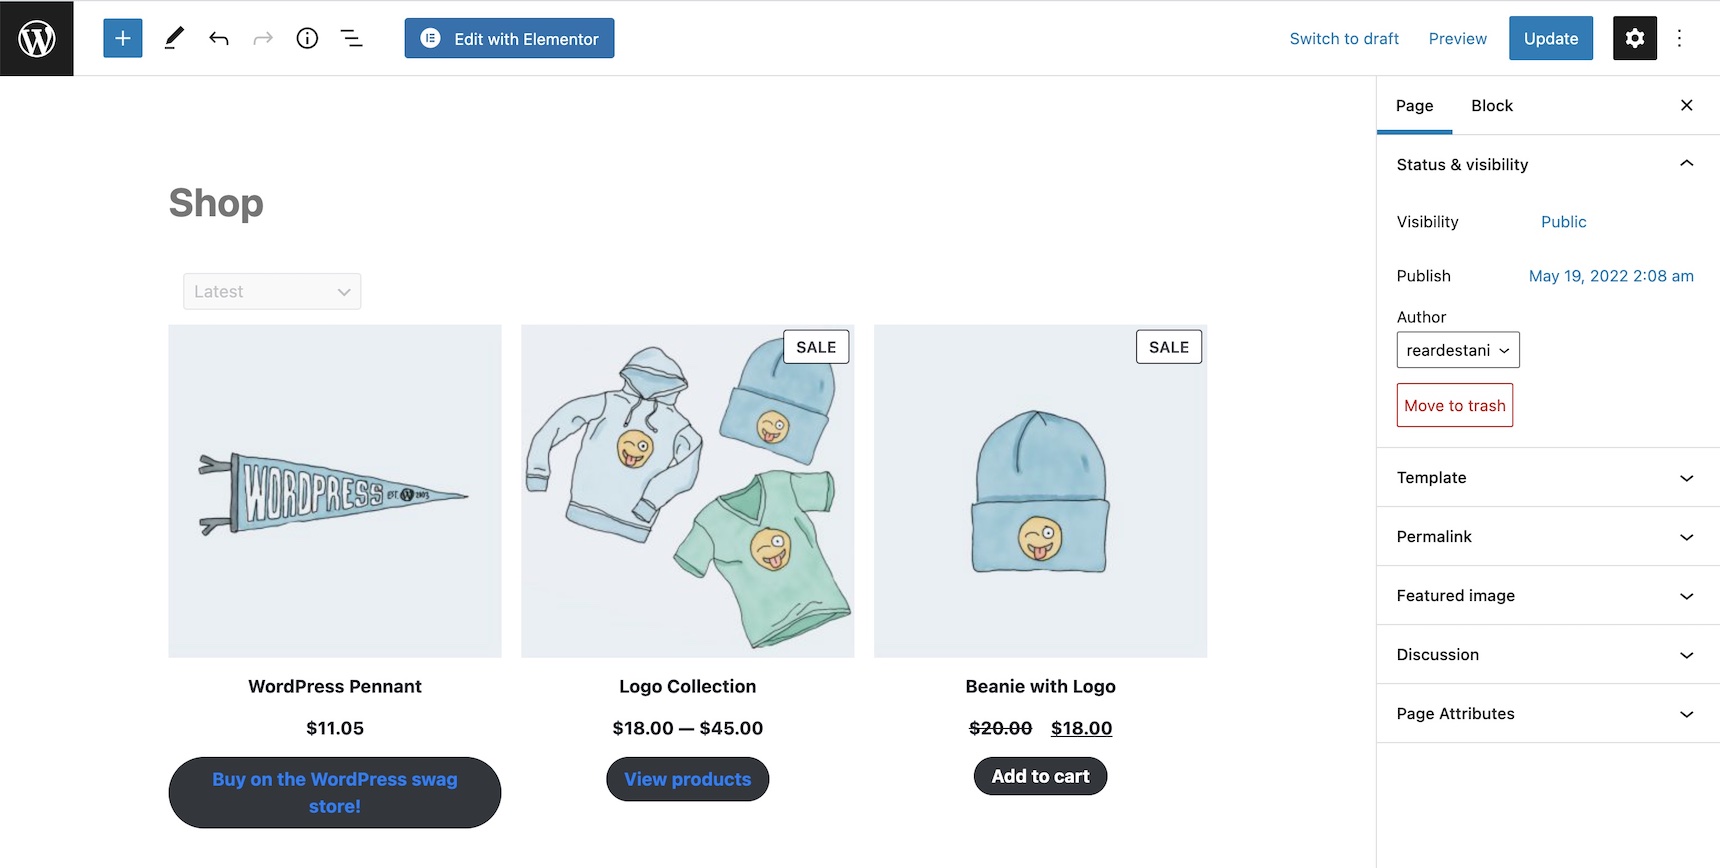
The Shop page is the most important page in the store. It normally shows all the products. Edit the Shop page in your pages and add All Products in blocks in the editor.
Features
- Display demo products for preview purposes
- Customize columns, rows and order of products
- Show or hide sorting dropdown
- Employ paged-based pagination
Settings
- Columns
- Rows
- Align Last Block
- Show Sorting Dropdown
- Order Products By
Checkout Page
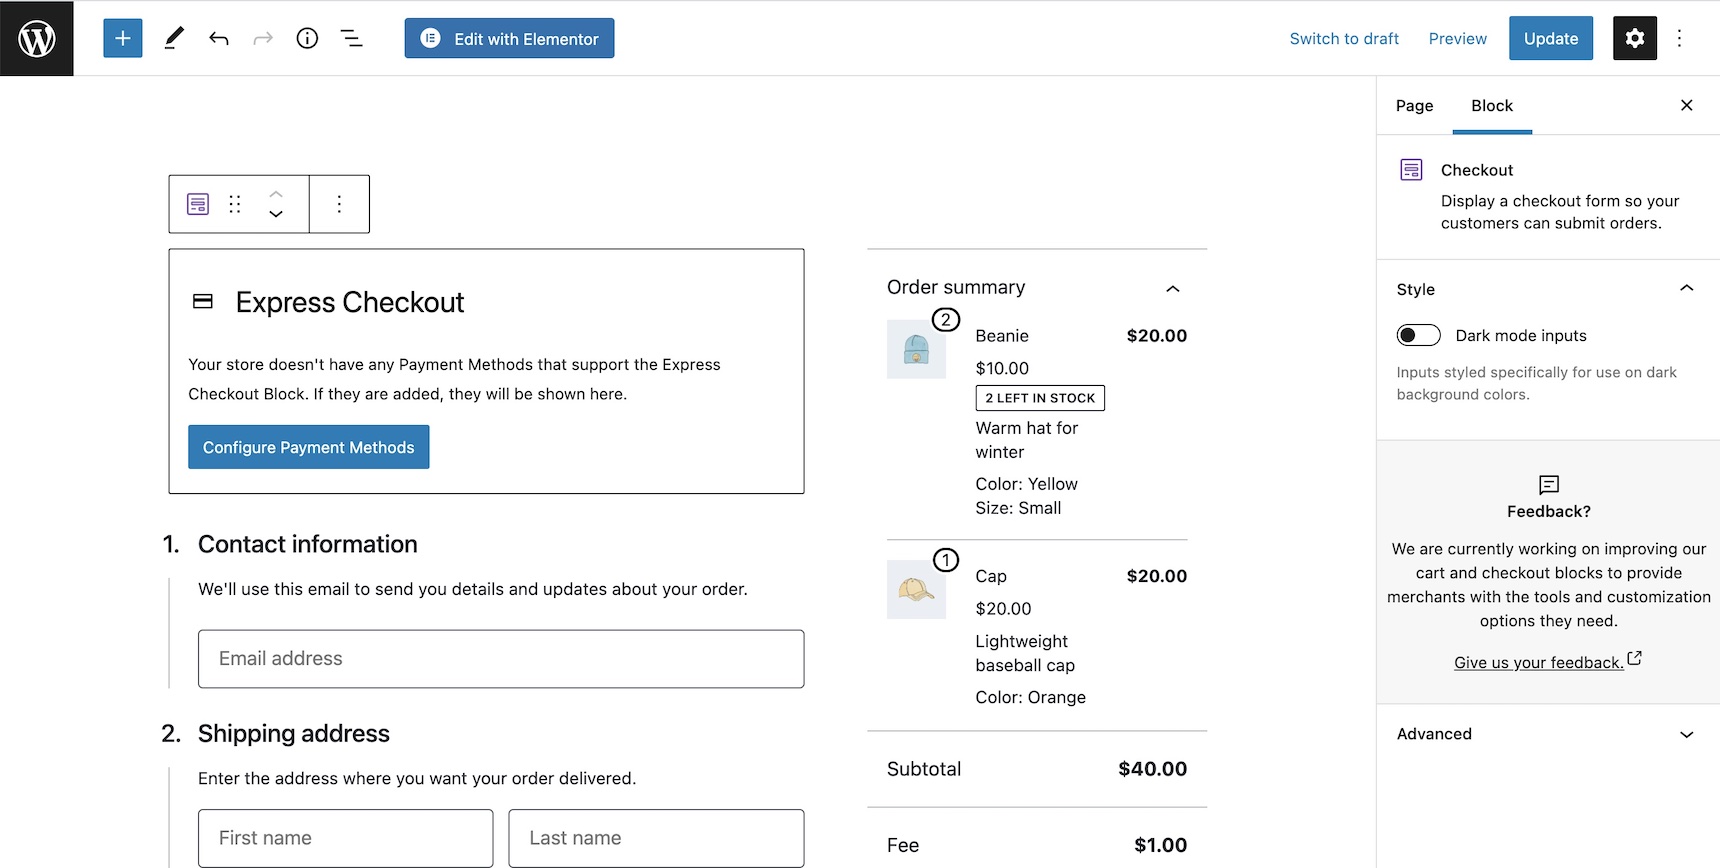
The checkout page has received a new appealing look in comparison with the traditional checkout page. Edit the default checkout page then add the Checkout block. This block does not have many settings at the moment as it is still under active development.
To be able to see this block, you need to install the WooCommerce Blocks plugin.
Features
- Display demo products for preview purposes
Settings
- Dark Mode Inputs
Wrapping Up
This post provided a general introduction of what WooCommerce Blocks are and how we can create a custom shop and checkout page using blocks in the Block Editor. Some of the features are still under active development. Hopefully in the near future, we will be able to customize any part of our shops using blocks.
We’d love it if you would share your thoughts with us in the comments section below!

3 Comments
If you want to create a unique WooCommerce storefront with Elementor, you can do it with the help of the Jupiter X theme and the SellKit plugin.
Thank you very much for the very interesting information.
With Elementor, the Jupiter X theme, and the SellKit plugin, you can build a one-of-a-kind WooCommerce storefront.