
A hotel website consists of different parts such as the homepage, about and contact pages – but the most important part of a hotel website is filtering, room listing, and booking. In this November Crash Course, I’ll show you how to create a dynamic room listing with the custom post type and custom attributes. In the upcoming parts of this course, I’ll show you how to add booking compatibility as well as other filtering and listing features required to build a dynamic hotel website.
A hotel website is, in fact, a room listing website where each room type has a profile for itself and all the features and attributes for that page are included in that profile. Also, we need it to work like a template where a hotel receptionist or a Guest Relations Officer can easily fill in those attributes and the room profile is created.
When creating a regular blog post in WordPress, we’ll fill in some related information such as the title, category, tags, excerpt, author, featured image and body of the blog post so we need a custom post where custom attributes about the room is definable.
In technical terms, we should create a custom post type for hotel rooms with custom meta attributes about the room’s title, description, price, rating, amenities and so forth. We call this custom post type the “Hotel Room.”
Here is what we need to create a “Hotel Room” in action:
- Define a custom post type with custom meta fields (as room attributes)
- Create a listing for our custom post type single page (room profile page) and a template for it
- Create a design template for your post type single page
It’s important to note that a custom post type has two sides:
- Backend where the custom meta fields (room custom attributes) is filled
- Frontend which is how the custom post type and its attributes appear visually. We call this a “listing”. A listing is a visual presentation of a custom post type.
1- Define a custom post type with custom meta fields:
After installing Jupiter X, you need to install the JetEngine plugin v2.1.4. JetEngine is a tool used to create custom post types in Jupiter X. Additionally the following plugins should be installed and activated:
- Jet Elements v2.1.2
- Elementor v2.7.5
- Raven v1.8
In the WordPress dashboard sidebar, go to:
- Plugin > Find JetEngine and click on Activate.
From the dashboard sidebar, go to:
- JetEngine > Post Types > Add New
- In the General Information section, give your custom post type a name and slug like Rooms
- In the advanced settings section, define an icon for your post type in Menu Icon and for support, set the following:
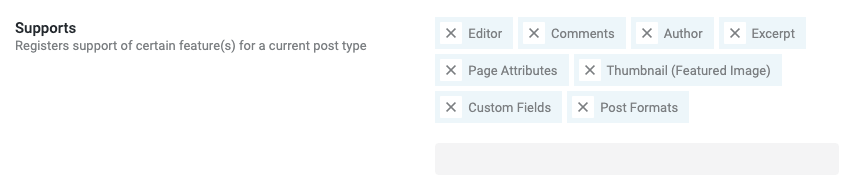
- The most important section here is Meta Fields where we define the room’s custom attributes so the receptionist can fill them in accordingly. We can set various options about meta fields but those that we need most in this tutorial is:
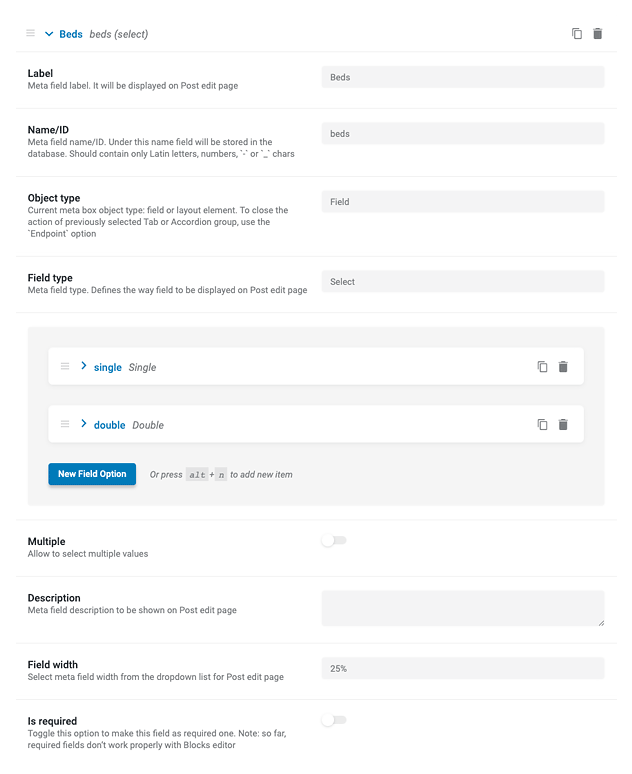
- Field Label (name)
- Field Type defines the type of field which can be text (for attributes such as the city), text area (for large text amount like description), gallery (for attributes that require the receptionist to upload images), checkbox (for amenities that differ from room to room) and more.
- Field Width defines the width you want the meta field to occupy in the backend. You can change this as you like to make it simple for the receptionist. In this tutorial, we’ll set it as 25% for all meta fields.
Let’s say our room has the following custom attributes. We need to create a custom field for each of them. You can use the suggested values you see on the table.
| Meta Field | Field Type |
|---|---|
| Beds | select |
| Rating | text |
| Price | text |
| Price Rate | text |
| Cleaning Rate | text |
| Restaurant Rate | text |
| About Hotel | textarea |
| Address | textarea |
| Room Images | gallery |
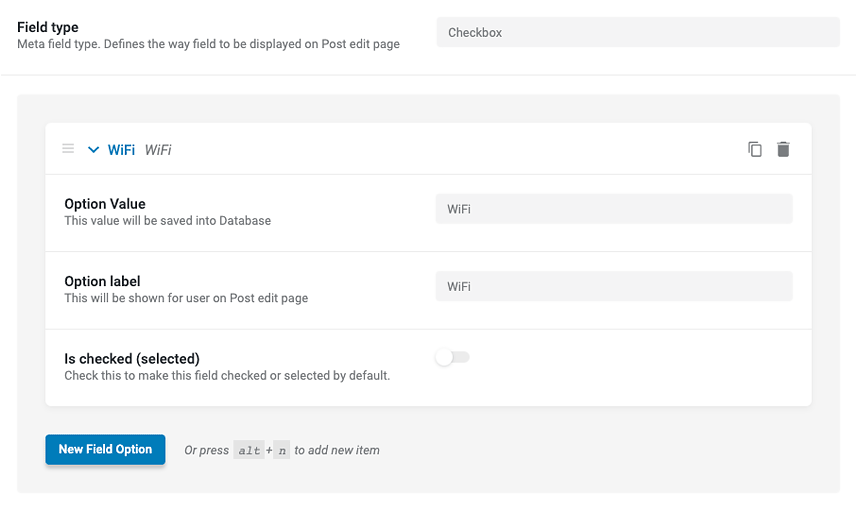
| WiFi | checkbox |
| Minibar | checkbox |
| Car Park | checkbox |
| Air Con | checkbox |
| Airport Shuttle | checkbox |
| Night Club | checkbox |
| Breakfast | checkbox |
Note that for select and checkbox field types, we should define the options that the receptionist can choose from.
Now that we have defined what custom attributes we want available for our receptionist, let’s find it in the dashboard sidebar and create an actual post from our Rooms post type. The new post page should look something like this:

As you can see, all the room custom attributes we wanted are located in the meta fields section lower on the page. Let’s imagine that our receptionist filled out these fields but could he or she just go ahead and publish the page? No! We should first make this data presentable or – in technical terms – assign it to a listing.
2- Create a listing for our custom post type single page
In the WordPress dashboard, go to:
- JetEngine > Listings > Add New
- Fill the upcoming dialogue as follows and proceed.
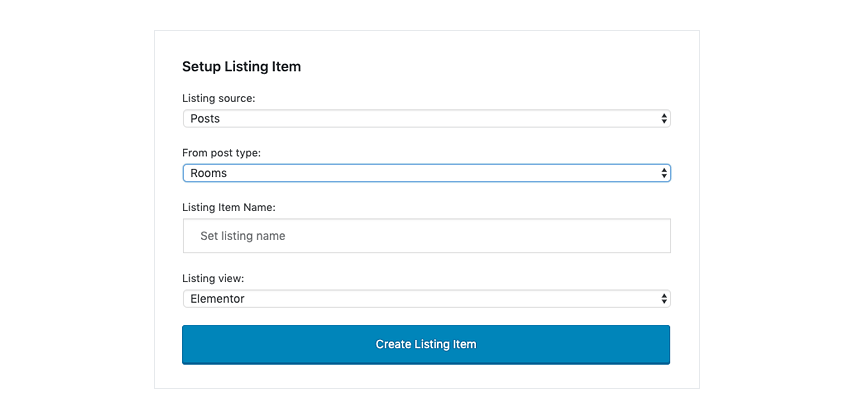
- Clicking on the button will create a new listing for your custom post type. In the next step, you’ll be taken to the Elementor environment so you can create a design template for your room profile page or, in technical form, a template for the single page of your new Rooms custom post type.
3- Create a design template for your post type single page
Just before we start, please note the resulting design of this tutorial so far should be similar to this template. This template is part of the Jupiter X Hotel Listing and is available for Jupiter X users to download from its control panel.
Alright, now we are going to design the template how we want and arrange the custom attributes based on their importance to the receptionist accordingly.
First, add a bit of top margin to your page to separate the page content from the header. Right-click on the main container section:
- Edit Section > Advanced > Set Top Margin to 40px
Intro & Image Slider
For the title of our room, we’ll use a Dynamic Field:
- Drag the Dynamic Field to your page from the element library.
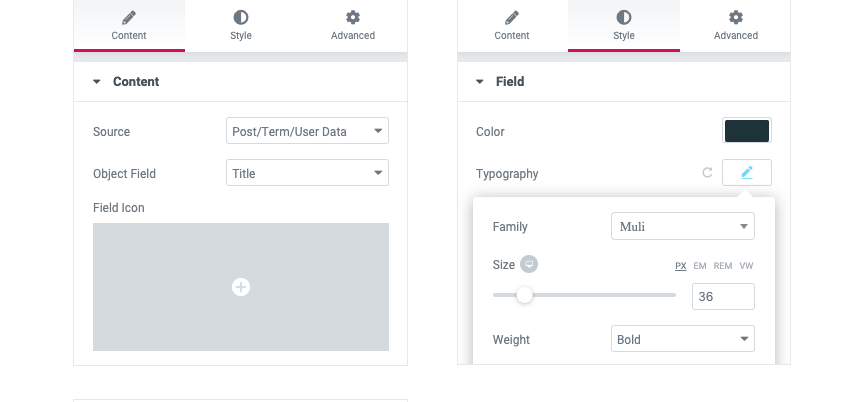
- Style your title as you like. We used Muli Bold 36px.
- Set Source as Post/Term/User Data and Object Field as Title. This is where we specified the value for this field should be filled by the name of the post created by the receptionist.
Next up is the room image gallery:
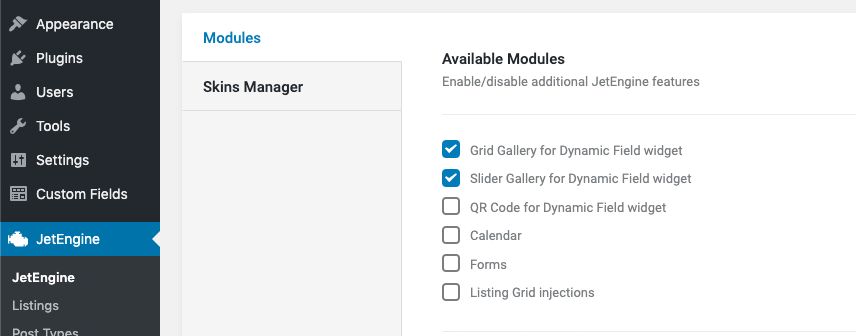
- We need to first activate the slider and grid capabilities for dynamic fields in JetEngine. Save your work and go to the backend. Click on JetEngine in the sidebar and check the following two options:
- Go back to your single page template and drag the Dynamic Field to your page from your element library.
- Set Source at Meta Data
- Set Meta Fields as Room Images. We just set our dynamic element to load the images uploaded by the receptionist when creating the post in the Room Images section.
- Turn on the Filter Field Output and set the callback as Image Gallery Slider. Also, turn on the Use Lightbox option.
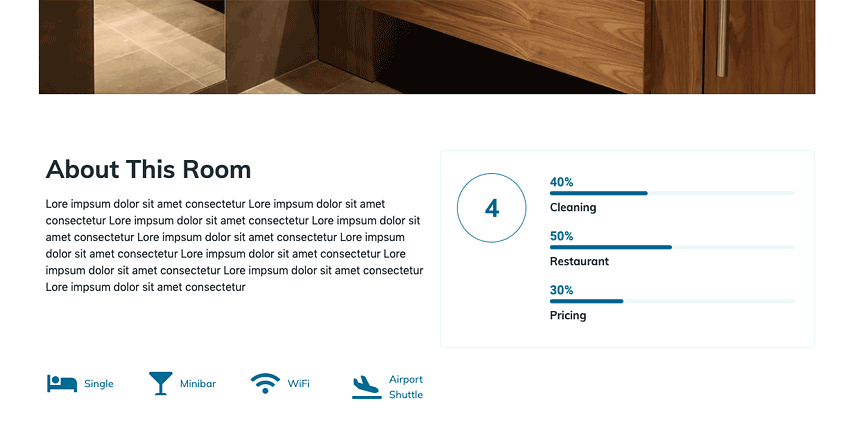
Description and Ratings
Now we need to define the location for the other info about the room including its description and specifications.
- Create an Inner Section inside your main section, set its Top Padding as 60px and divide it by three columns with these ratios: 50%, 15%, 35%
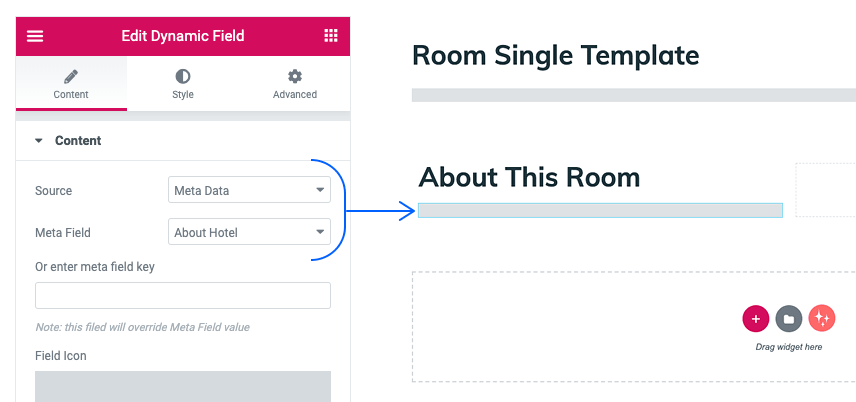
- Unlike the main title, we don’t need a dynamic title for “About This Room.” Simply use a Heading element and style it however you want.
- For the room description, we’ll use a Dynamic Field and set its Source as Meta Data and the Meta Field as About Hotel.
Right next to the description column is the room rating. For the rating, we’ll need a circle including the rating inside it. So here’s how we do it:
- For the middle column (15% width), set a 10px left margin and 32 px Top Padding.
- Drag a Button element inside the middle column.
- In the content tab, set its Text as Dynamic > Custom Field > Rating. This will load the value added by the receptionist in the rating section in the backend.
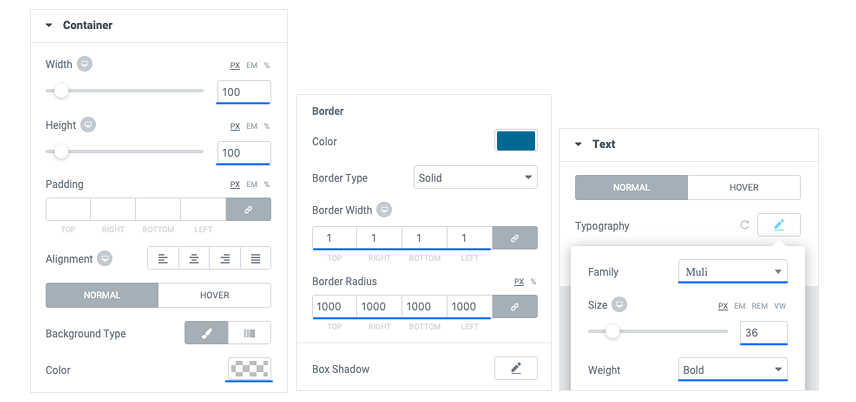
But that’s not all. We need to make the button container circular now.
In the Style tab, apply the following settings:
Now Let’s add the skill meters to right column:
- For the right column (35%), set a 35px Top Padding and 10 px Left Padding.
- For the dynamic skill meters, we’ll actually add 3 Progress Bar elements (from the JetElements library), and we’ll set the percentages to:
- Dynamic > Custom Field > Cleaning rate
- Dynamic > Custom Field > Restaurant
- Dynamic > Custom Field > Pricing
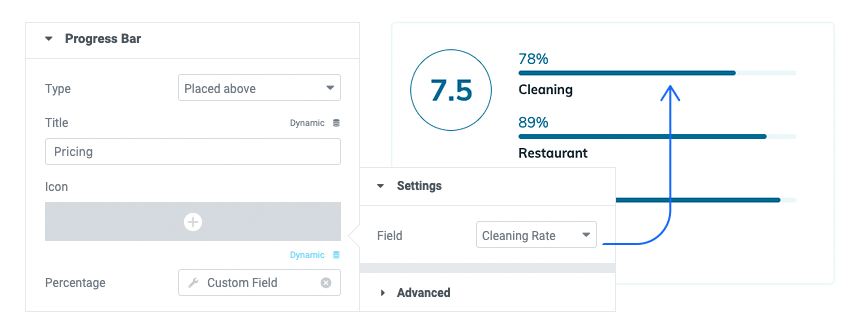
The respective value for these parameters will be dynamically replaced by what the receptionist has entered in the backend.
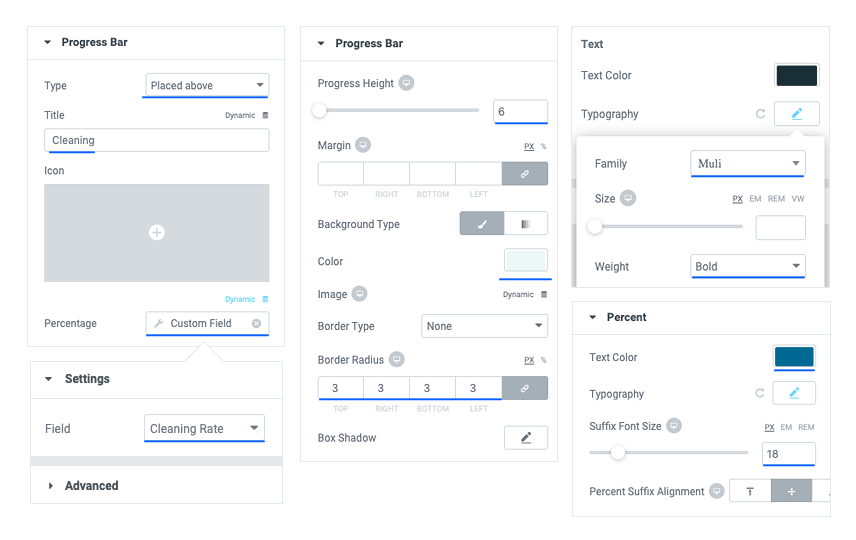
You can style the meters as you wish. Below is the recommended styling:
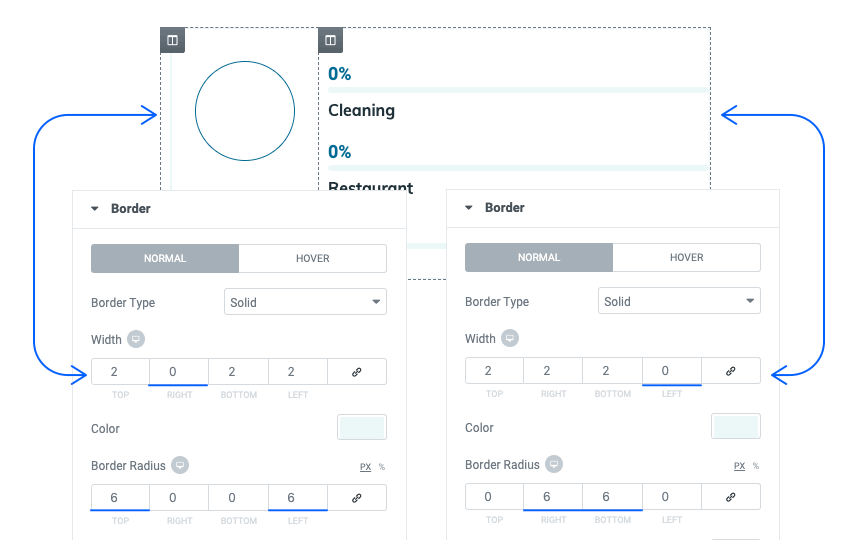
What’s left of this section of the template is putting the circular and bar rating in a box. For this, we’ll add a three-side border without the right side to the left box (15%) and a three-side border without the left side to the right box (35%):
Amenities, Location & Booking
Ok, what’s left is the last section of the template, which includes room amenities, hotel location, and the pricing calculator. We’ll cover the pricing calculator in the following episodes together with the booking feature. If you remember in the first step, we created 7 meta fields for our Rooms post type that will appear as checkboxes in the post single backend. Those that are checked by the receptionist will appear in the front end.
So what we need to do is to put all of the amenities as Dynamic Fields in the page but set to display only to those that have a value (which means checked in the backend by the receptionist). So let’s do this.
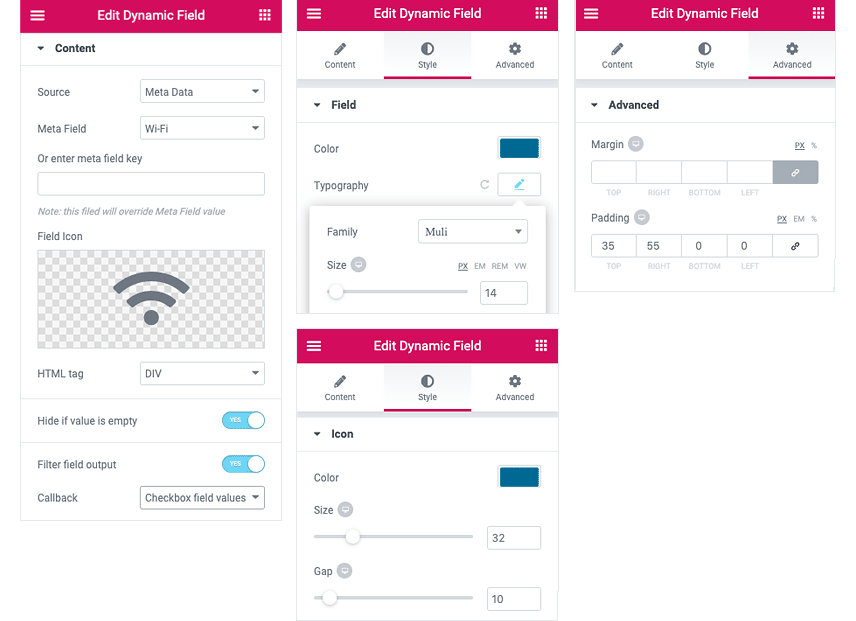
- Drag a Dynamic Field to your page. Set the Source to Meta Field and the Meta Field to one of your amenities like WiFi
- Define an icon for your amenity
- Enable the Hide if the value is empty (with this, the amenity will be displayed only if checked in the backend by the receptionist)
- Activate the Filter field output and set the callback to Checkbox field values
- Complete some further styling to your amenity item
Repeat the same process for the other 7 amenities that we have. You can divide your column by 4 columns to better organize the list of amenities. Ok so far this is what we have:
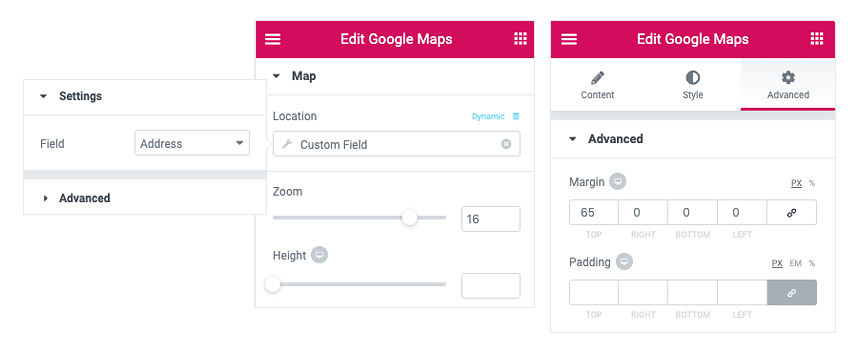
So we have one more item to add: The location map.
- Drag a Google Map element to your page and set its Location to fetch from the dynamic custom field address:
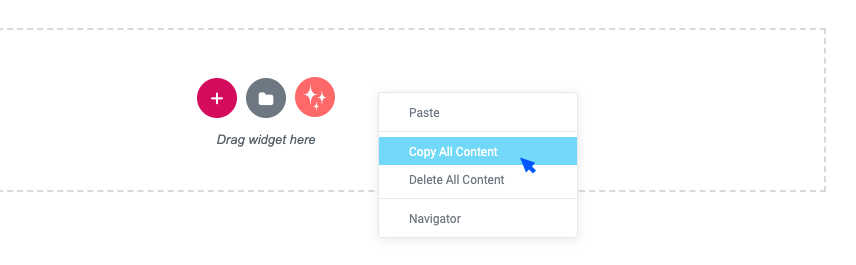
Ok, we are done with creating the template. Now we need to tell Jupiter X that the template we created should be the template we want to use as the custom single template for the Rooms post type.
- Save the content of the template by right-clicking on the bottom of the page and choosing Copy all content or using Elementor Save As Template option in the lower-left corner.
- Publish/Save the template
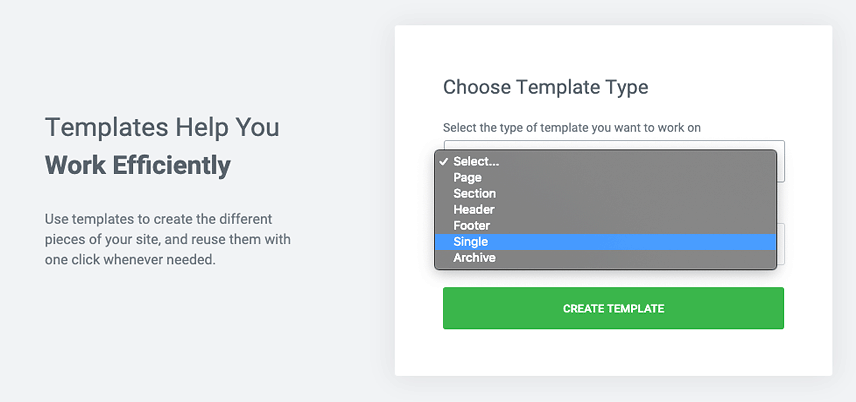
- In WordPress dashboard try Dashboard > Templates > Add new > Single. Give your template a title such as Room Single Template.
- In the upcoming Elementor environment, either paste the content you copied in the last step or import the template you saved.
- Publish/Save the template
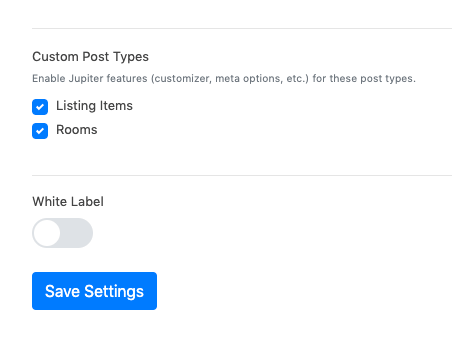
- Open a new browser tab and go to Dashboard > Jupiter X > Control Panel > Settings > lower on the page, check the Listing Items and Rooms (the name of your newly created custom post type). This will allow us to use Customizer for these two items.
- Then go to Dashboard > Jupiter X > Customize
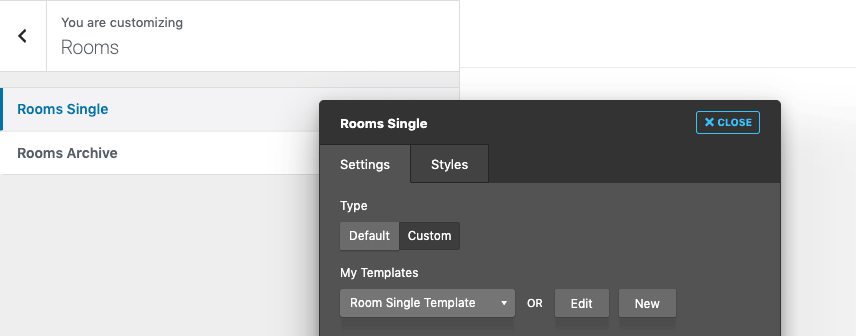
- In Customizer > Post Type > Rooms > Room Single
- Click on Custom and select the Room Single Template as the custom template for the single page:
- Publish the changes.
And that’s it. We just built our custom post type Rooms a nice single page design template with dynamic components that will be fetched from what our receptionist will enter in the backend.

In the following episodes of this Crash Course, we’ll cover how to add a price calculator and booking module to the lower right corner of this template as well as other listings derived from our Rooms post type, such as the main rooms listing and archive listing.
Do make sure to watch the tutorial video along this post to better understand the process and ask any questions below in the comment section. And keep an eye out for the upcoming episodes on how to build a dynamic hotel website for our Wolf of Wall Street!

2 Comments
great theme. thank you
can I just edit the template directly without using listing