
Review websites are very popular nowadays as many people search for reviews before making a purchase online. Furthermore, reviews are the most effective type of content for driving traffic, because many users trust online reviews as much as they would trust advice from a friend.
Creating a review website is a simple process – just find a niche that is perfect for you, and write reviews for the products belonging to that niche.
I’ll use this Movie Review demo as an example of building a review website in WordPress.
Required plugins for review website
Elementor isn’t enough to build a review website Here is the list of the required plugins for the Jupiter X theme (they are already bundled with the theme):
- Elementor
- ACF (Advanced Custom Fields)
- JetEngine
- Jupiter X Core
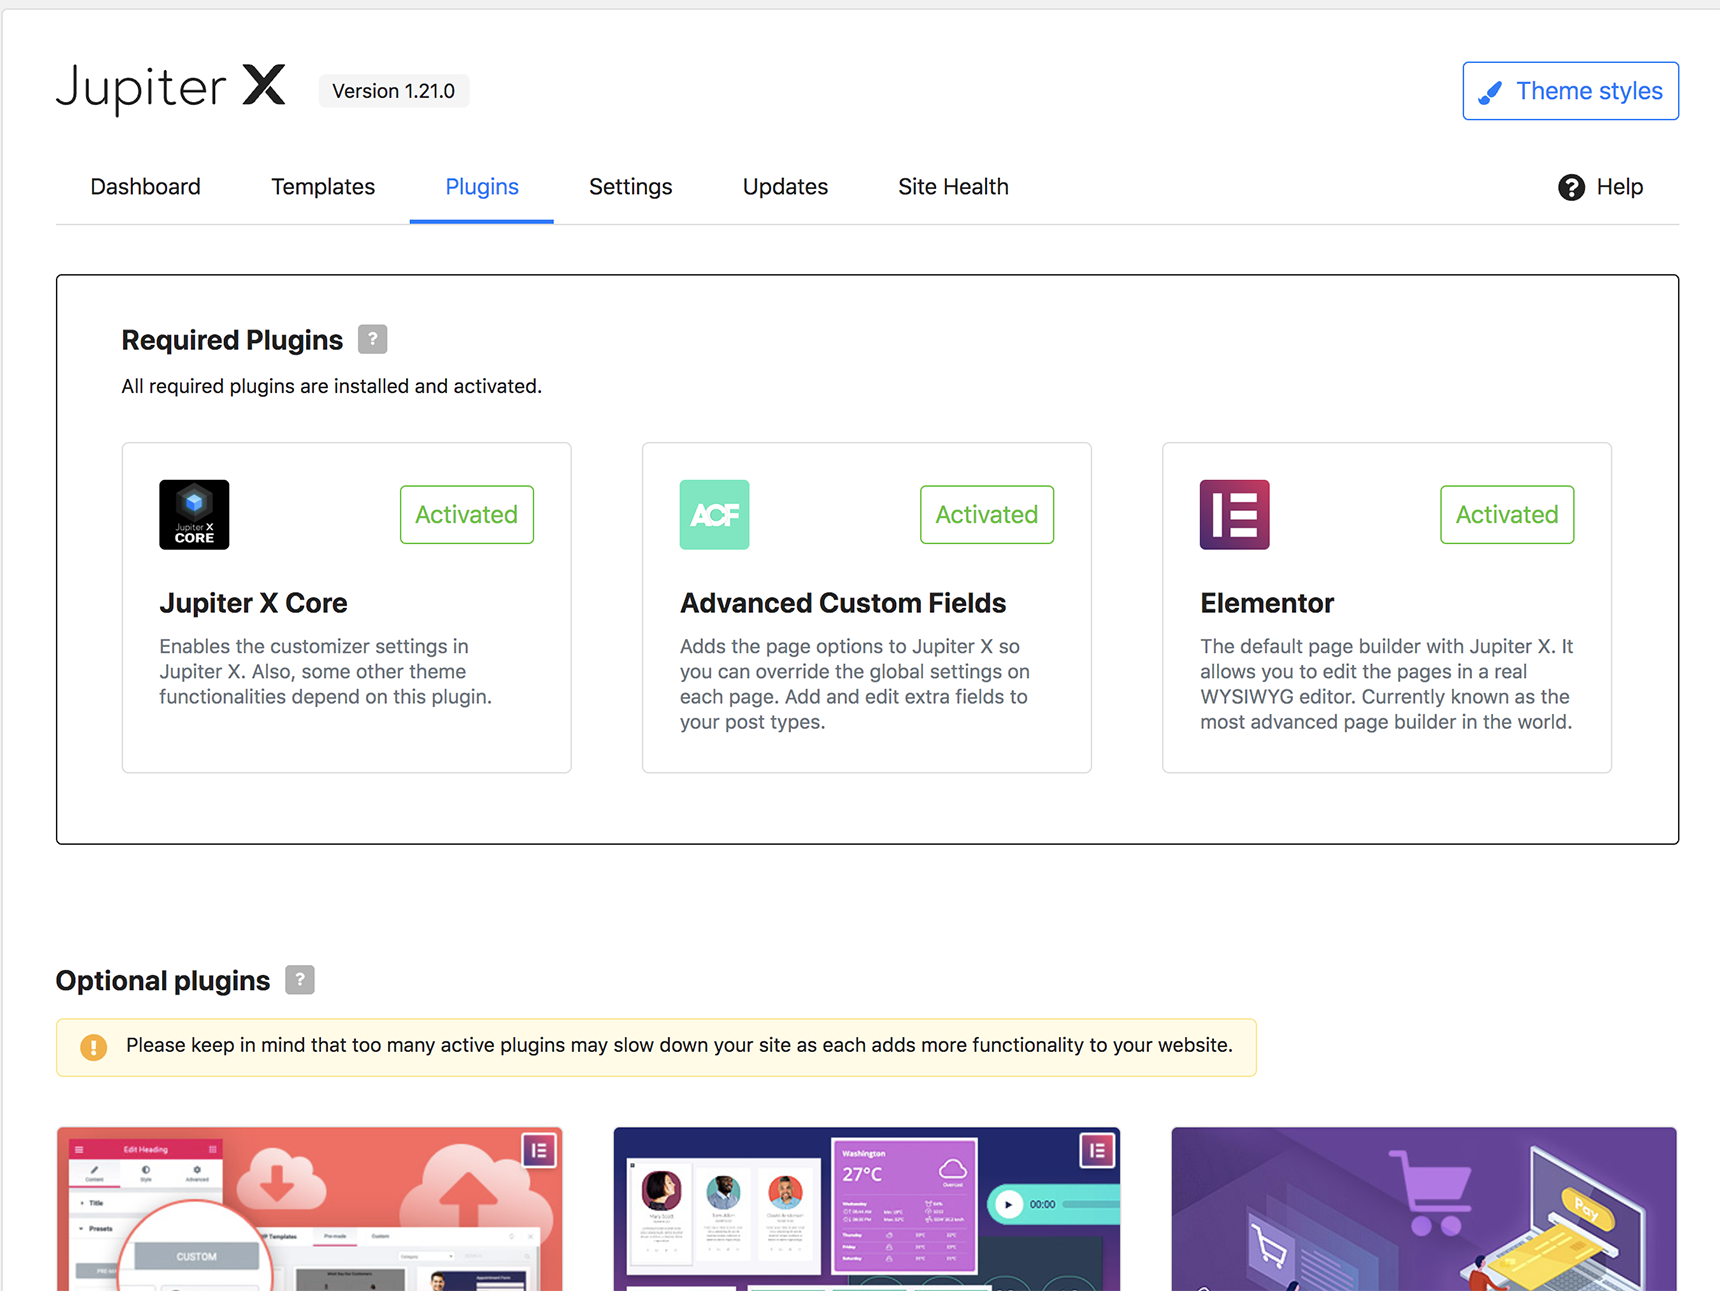
To learn how to install the bundled plugins, you can read this Artbees Documentation.
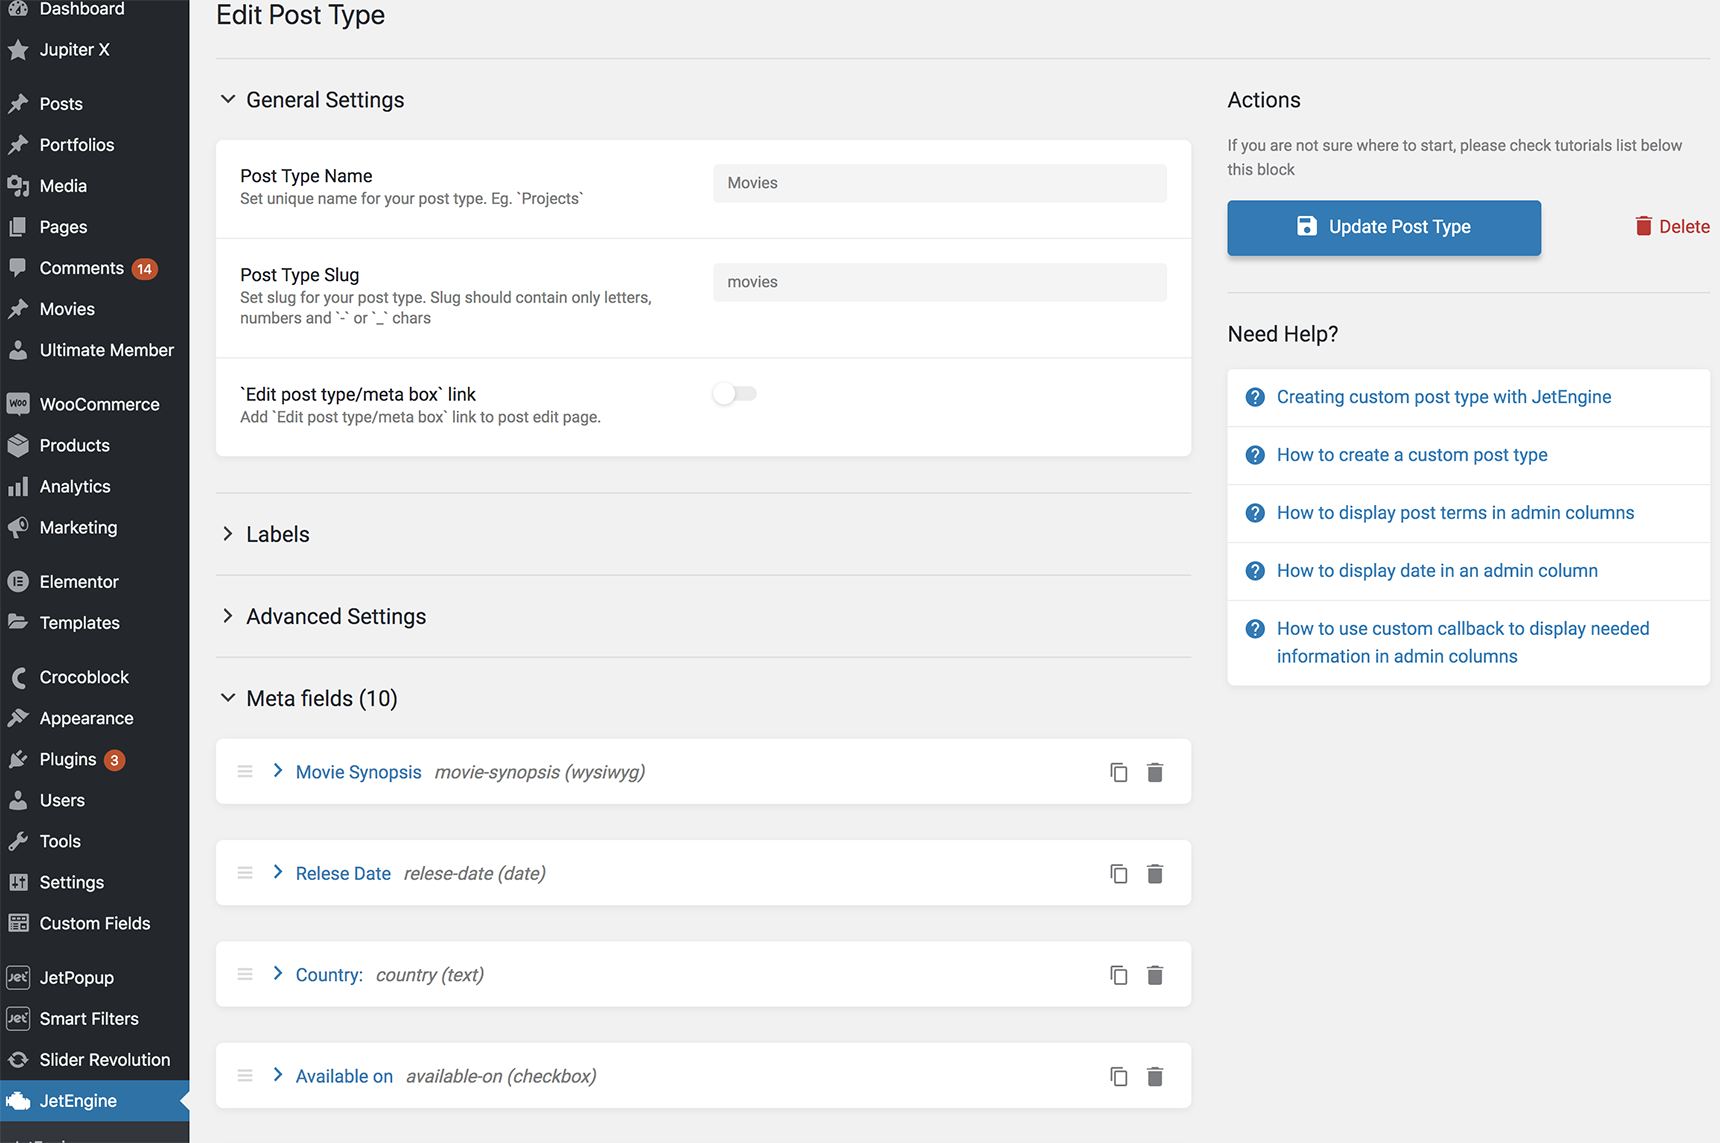
Creating a custom post type
By default, Jupiter X provides posts and portfolios post types. You may need to create a custom post type for your reviews product. In our example, we’ll create a Movies post type to provide reviews for different films. The JetEngine plugin is excellent for this purpose.The detailed tutorial on how to create a custom post type can be found in the JetEngine knowledge base.
Creating a custom taxonomy
In our example, we’ll divide movies posts into custom taxonomies: director, actor, genre. They can be also created with the JetEngine plugin via JetEngine > Taxonomies.
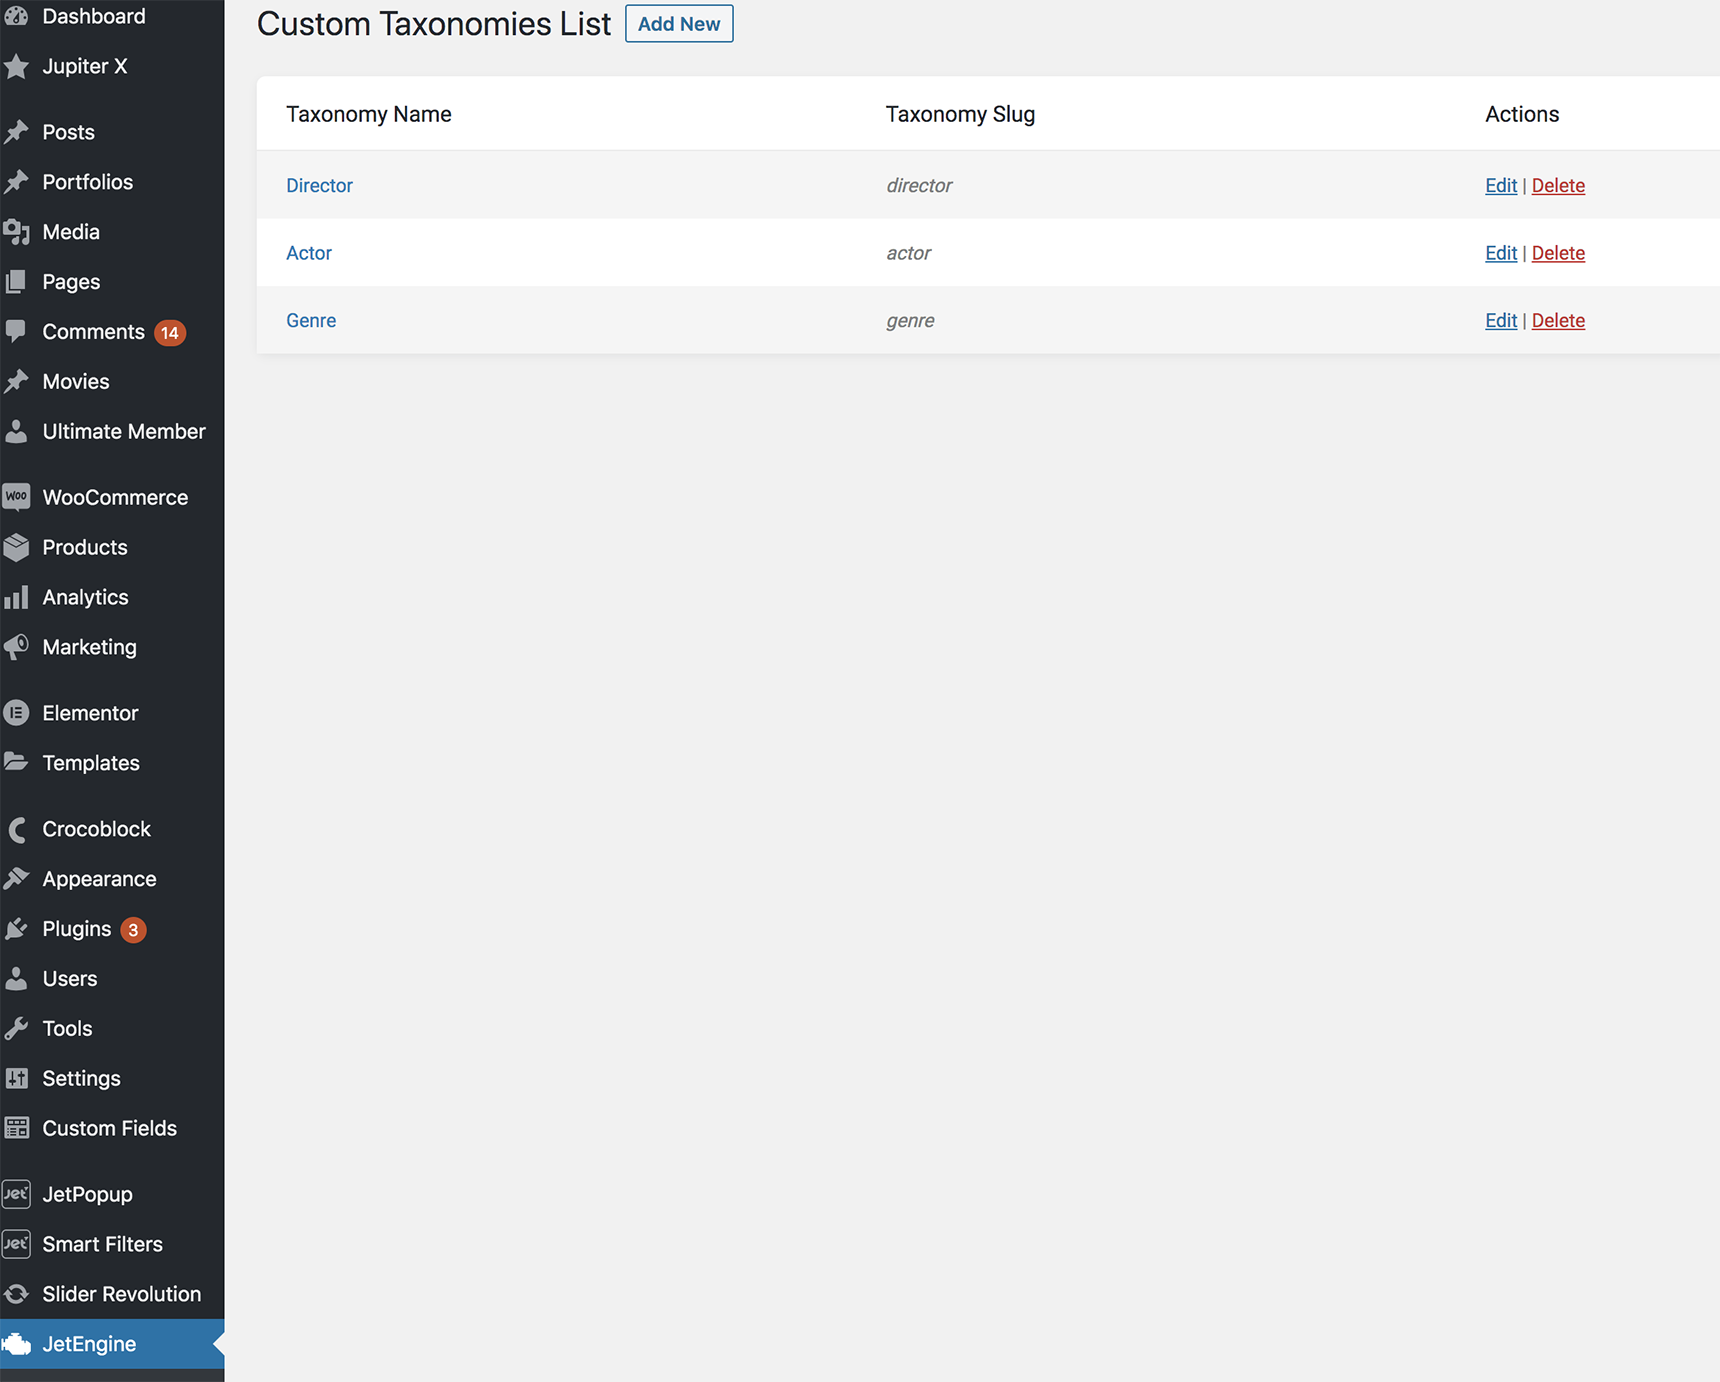
You can read more detailed instructions on how to create taxonomies for custom post types with JetEngine in this article.
Creating movie posts
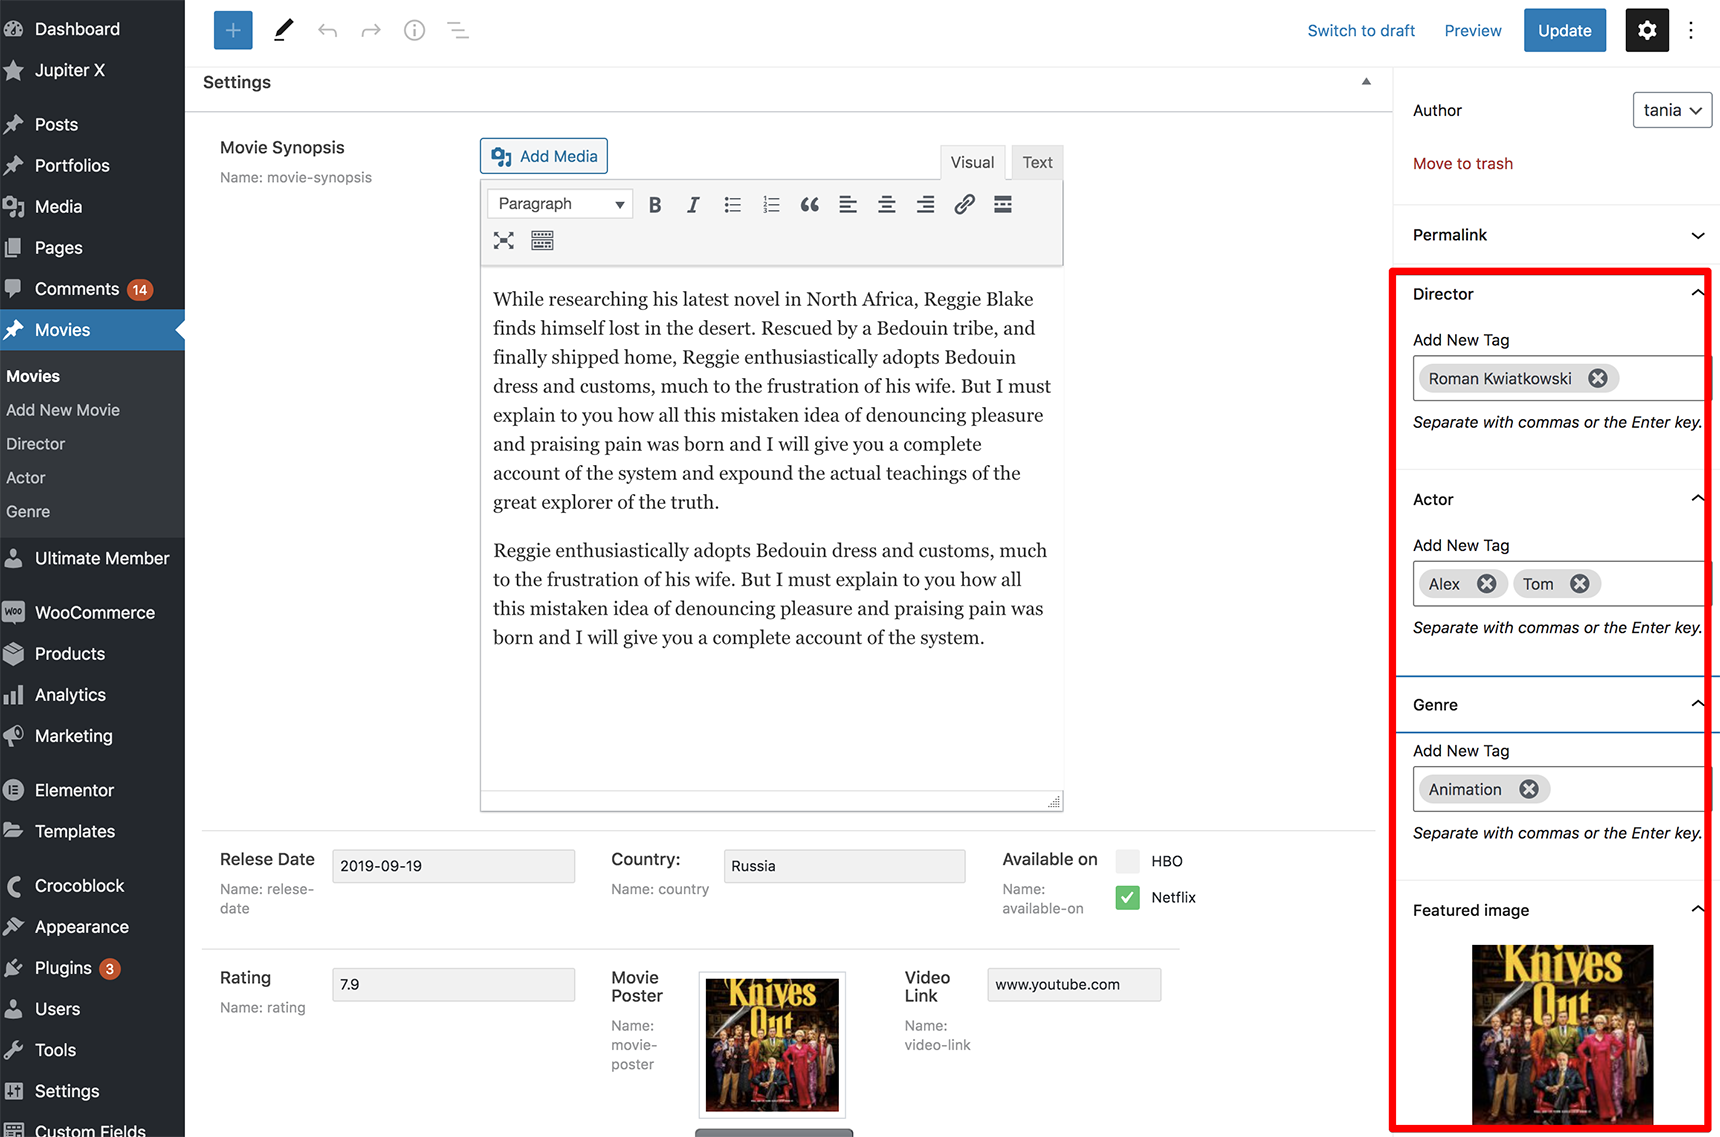
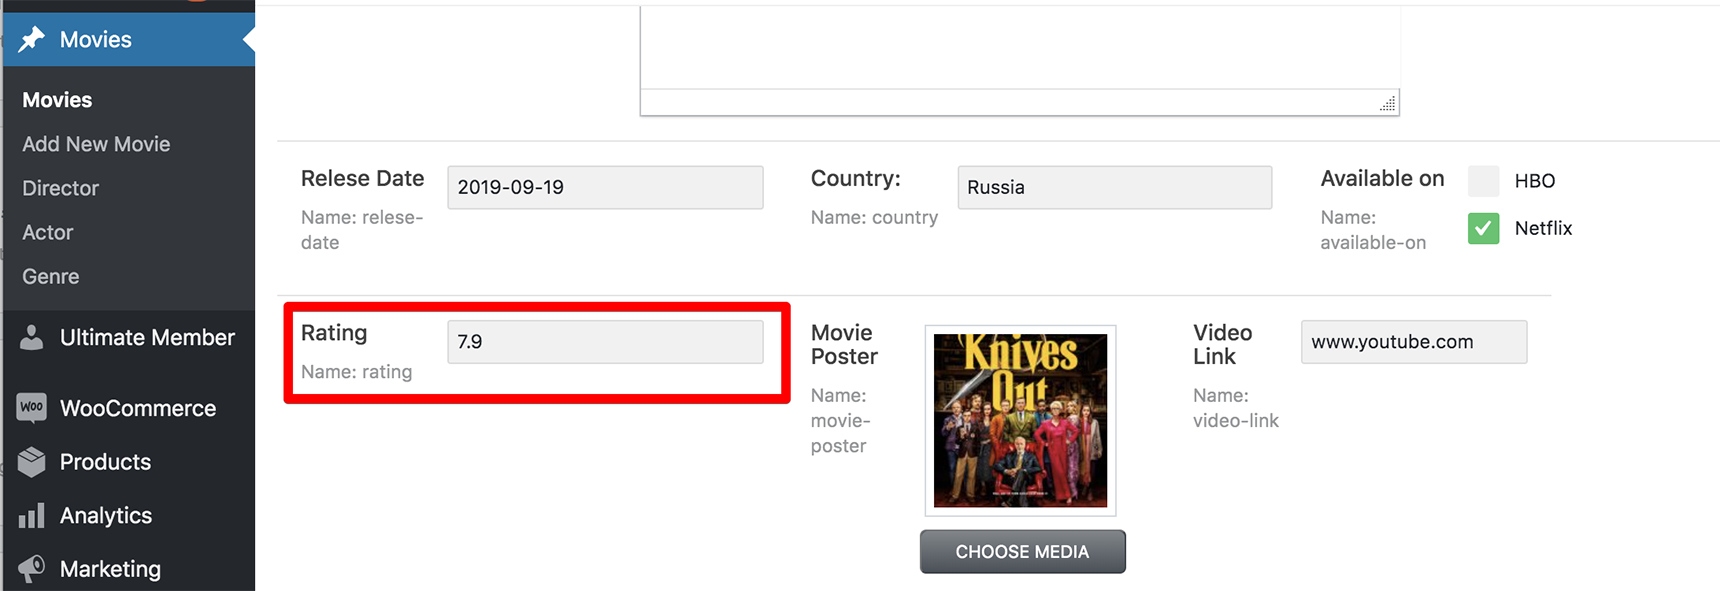
Now let’s start adding posts to our custom post type. Under the Movies menu, click on “Add New Movie,” write the title (for our purposes, we named it “Knives Out”) and add the rest of the fields that were added as meta fields when you created a custom post type in JetEngine.
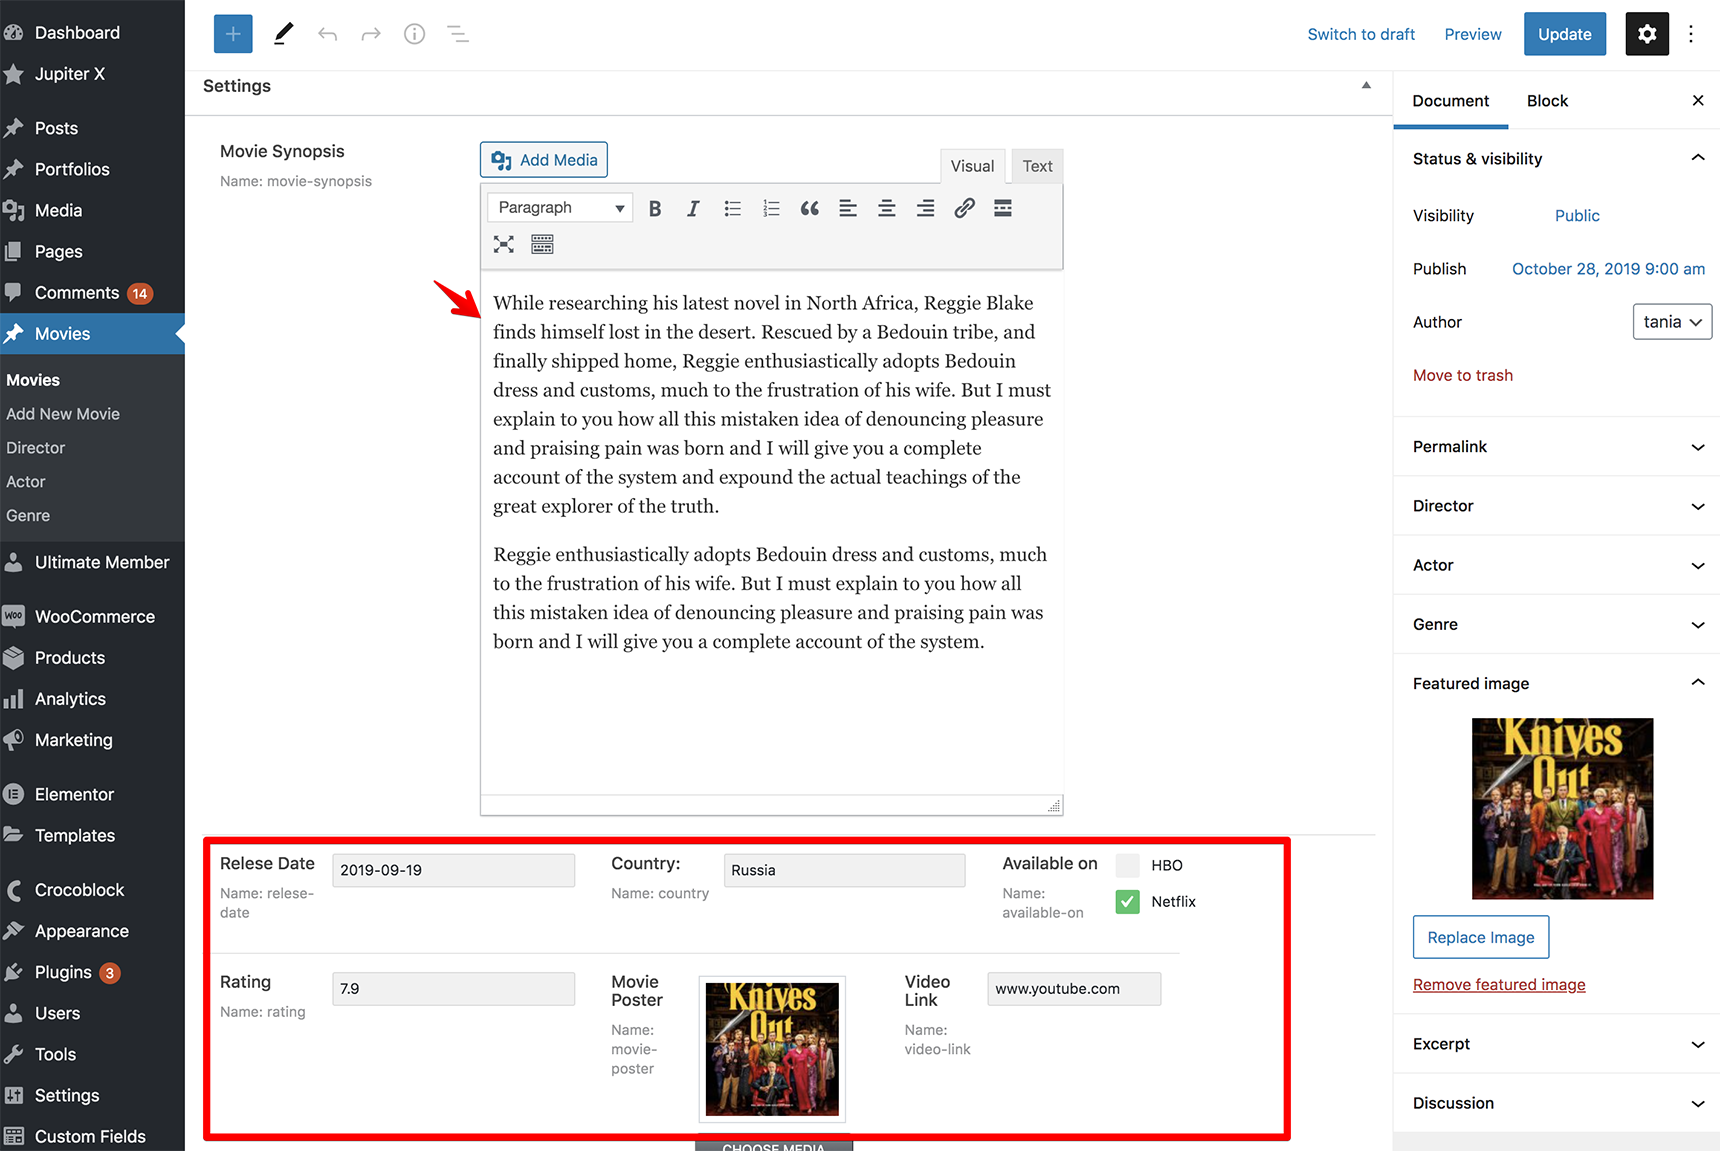
Don’t forget to select director, actor, genre and add a featured image. Then, click on Publish.
Now if you visit this movie post, you’ll see that the page was created but that the custom fields are not displayed. This is where Jupiter X Core and its single post template come into play, allowing us to create a template for single posts and to display custom fields.
Go ahead and create several other movie posts so you have something to work with.
Creating a single template for a custom post type
If you click on one of the movie posts, you’ll see a page with the default theme structure. You need to build a single template to display the content correctly.
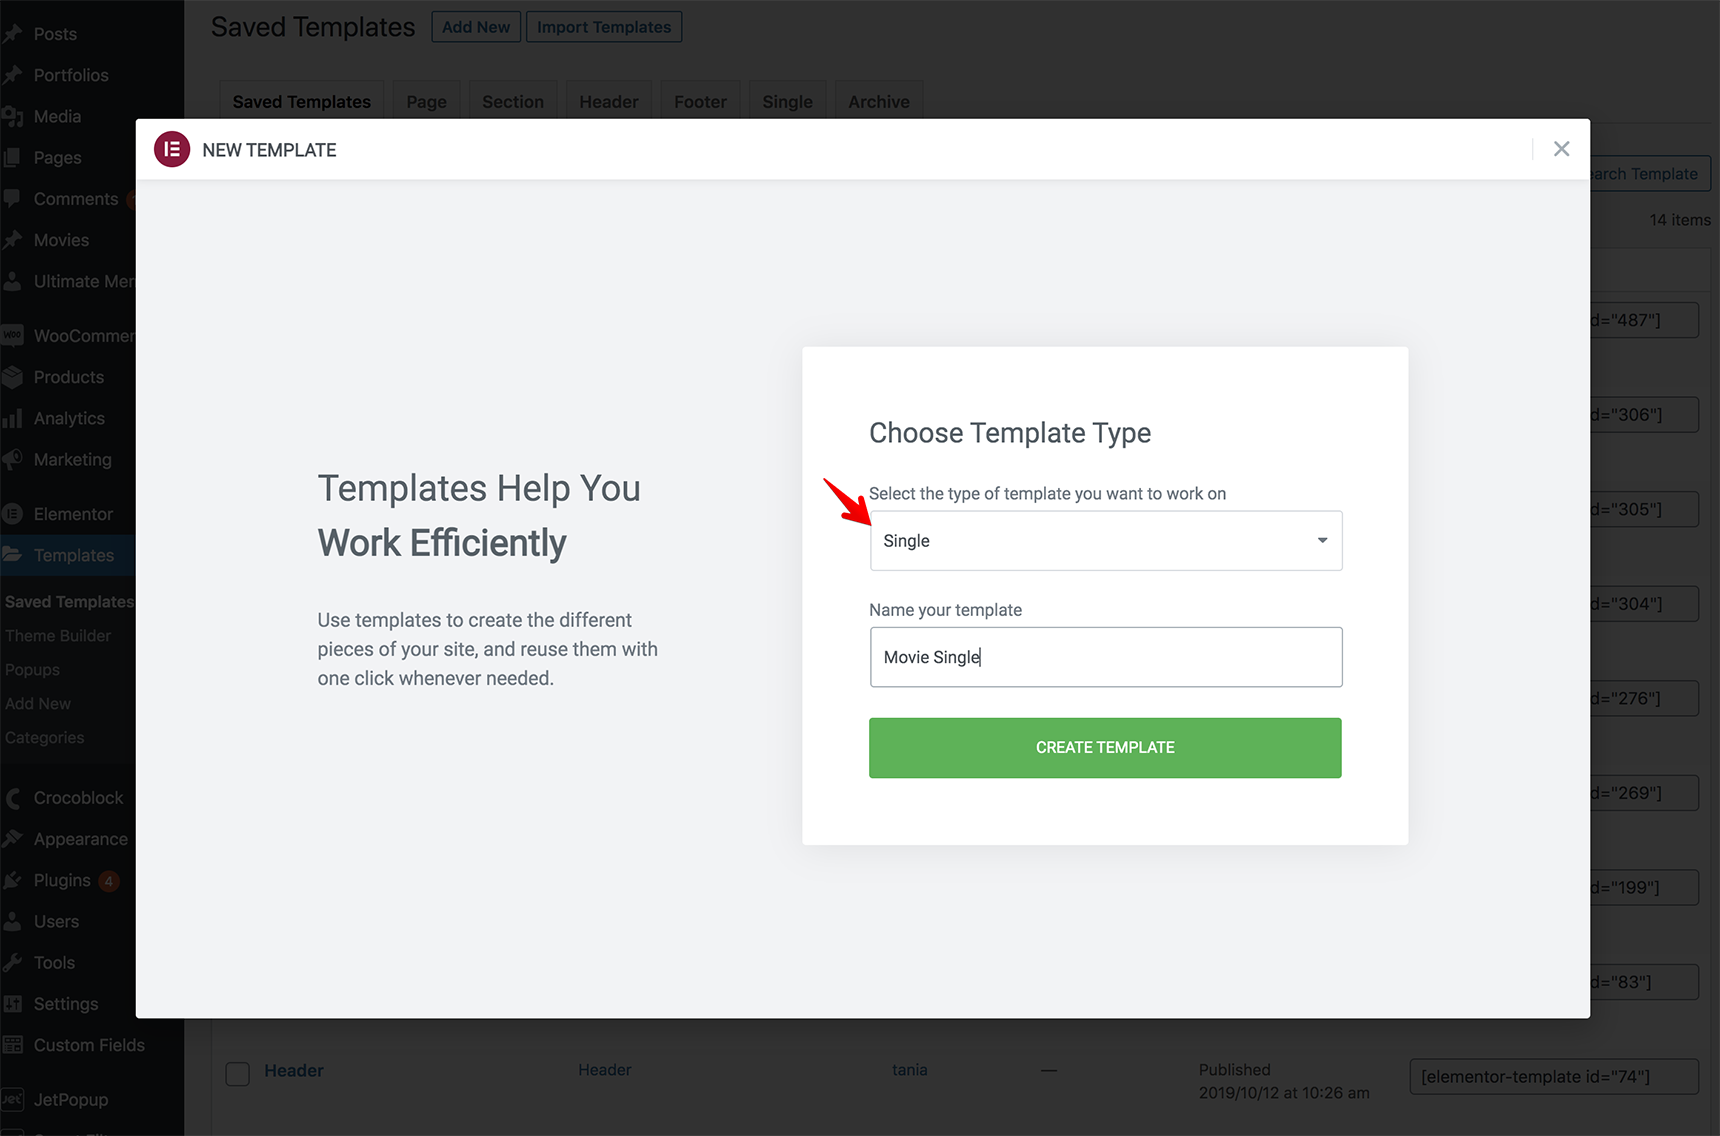
Under Templates > Saved Templates, click on “Add New”, select the single type and name your template (for example, “Movie Single Template” in our case).
Now let’s add dynamic content to the template so that it loads the appropriate data for each movie post.
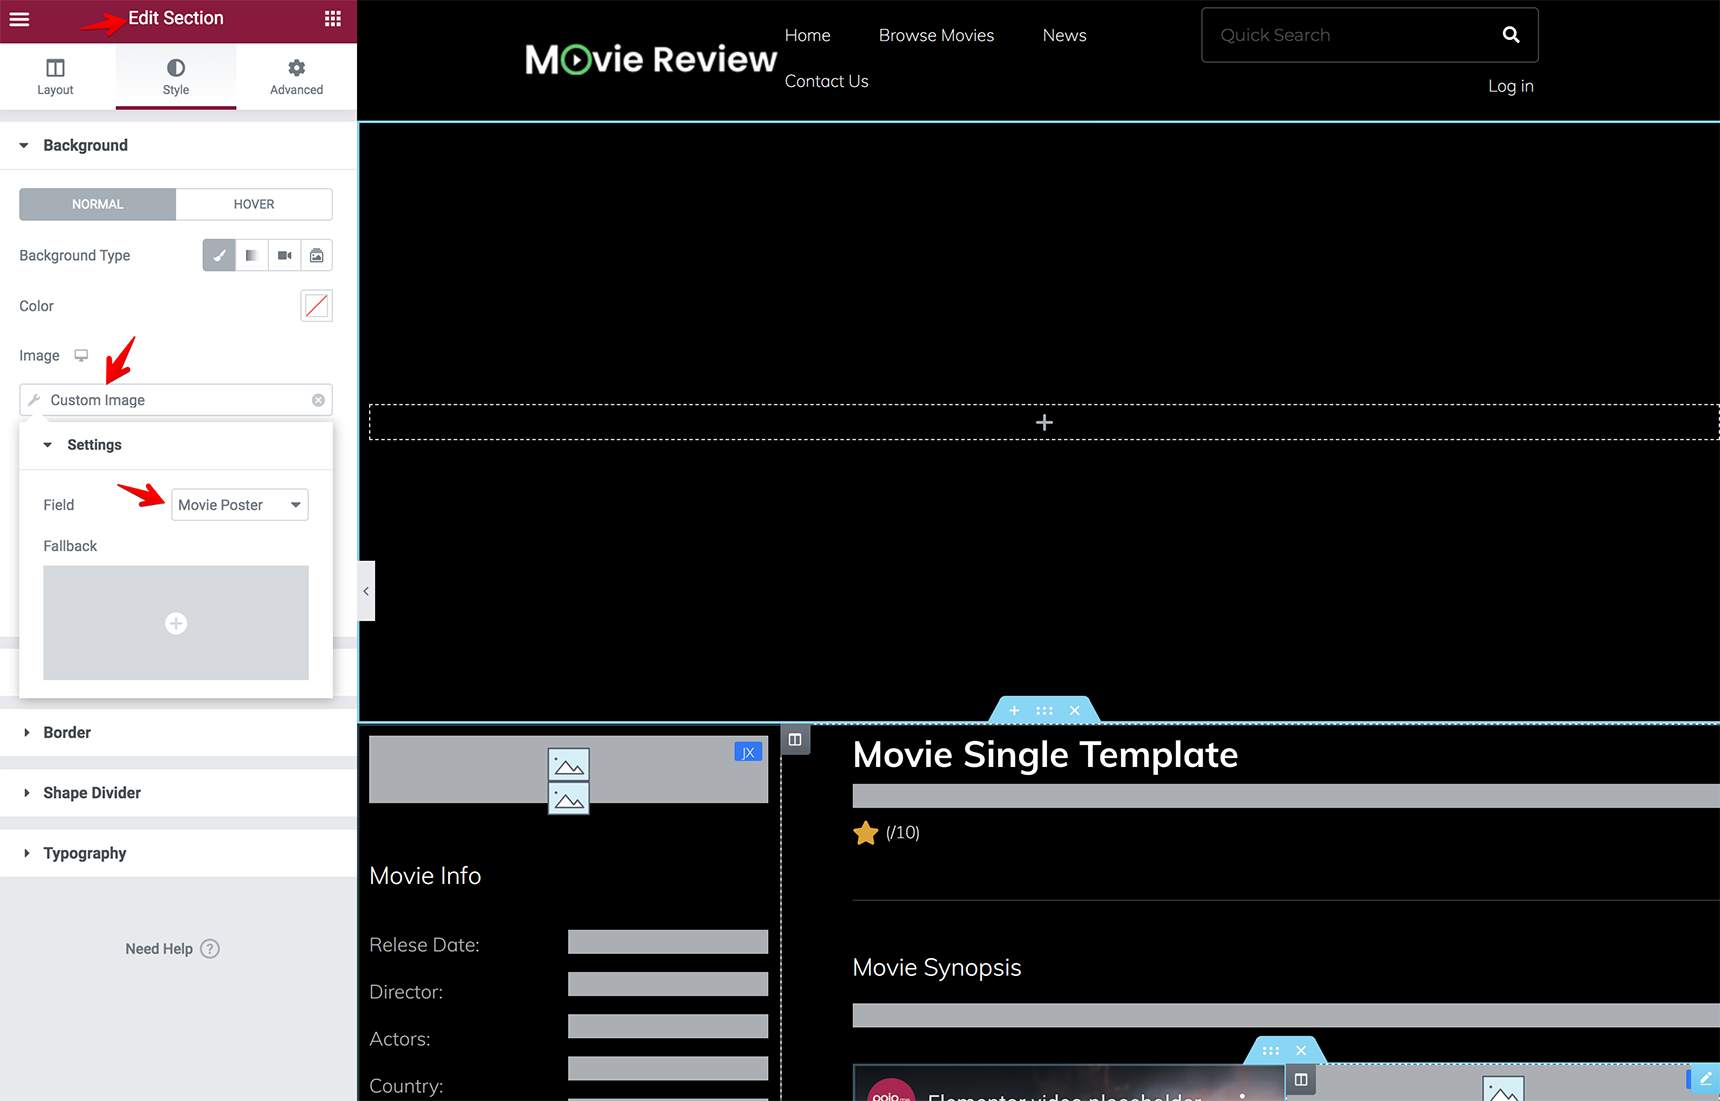
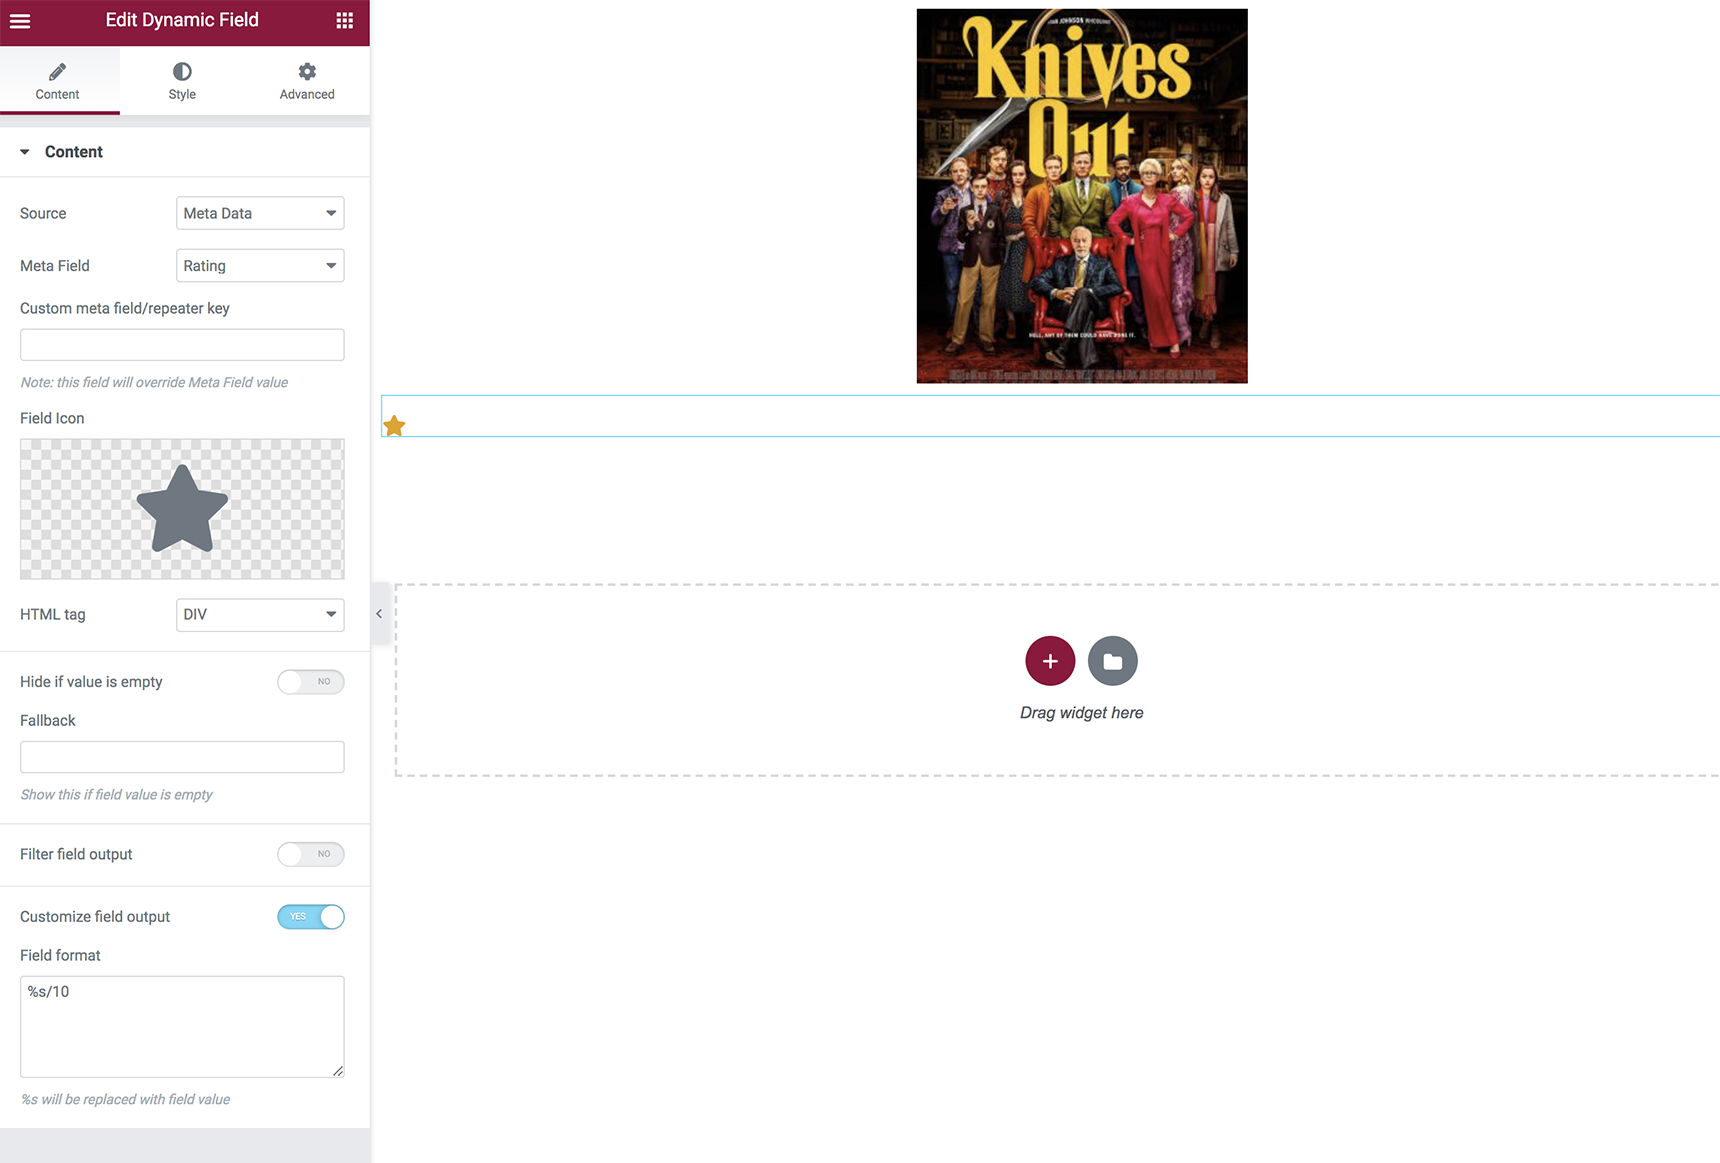
We created the meta fields in the JetEngine settings for the movie post type. To be able to show a “Movie Poster” field, you can add the section in the Elementor editor and select “Custom Image” in the background settings under Style tab and select the “Movie Poster” field.
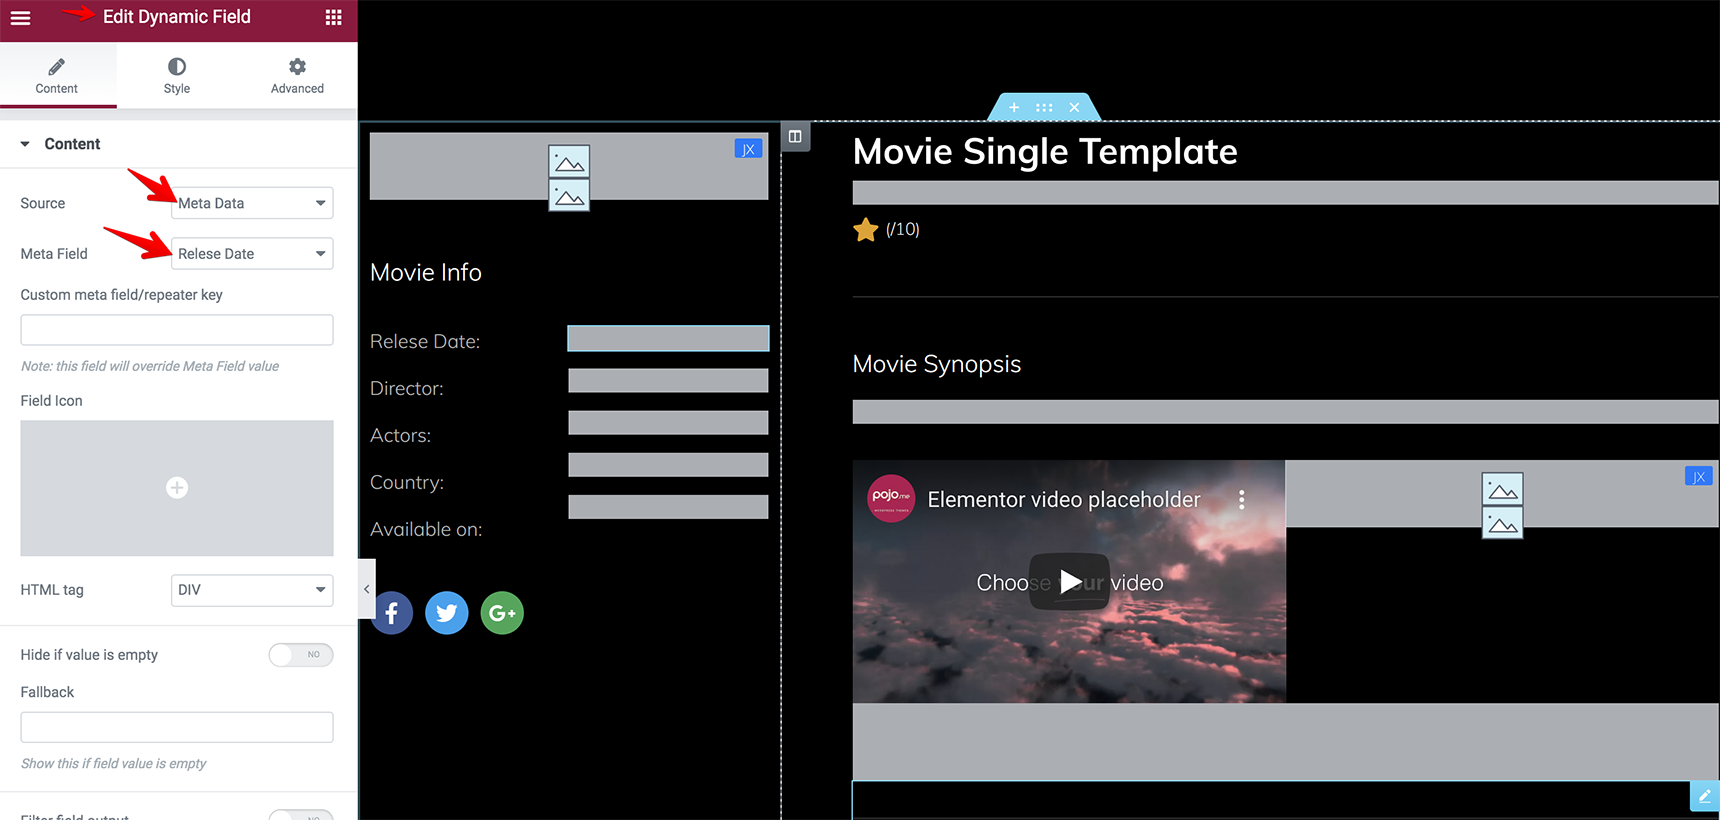
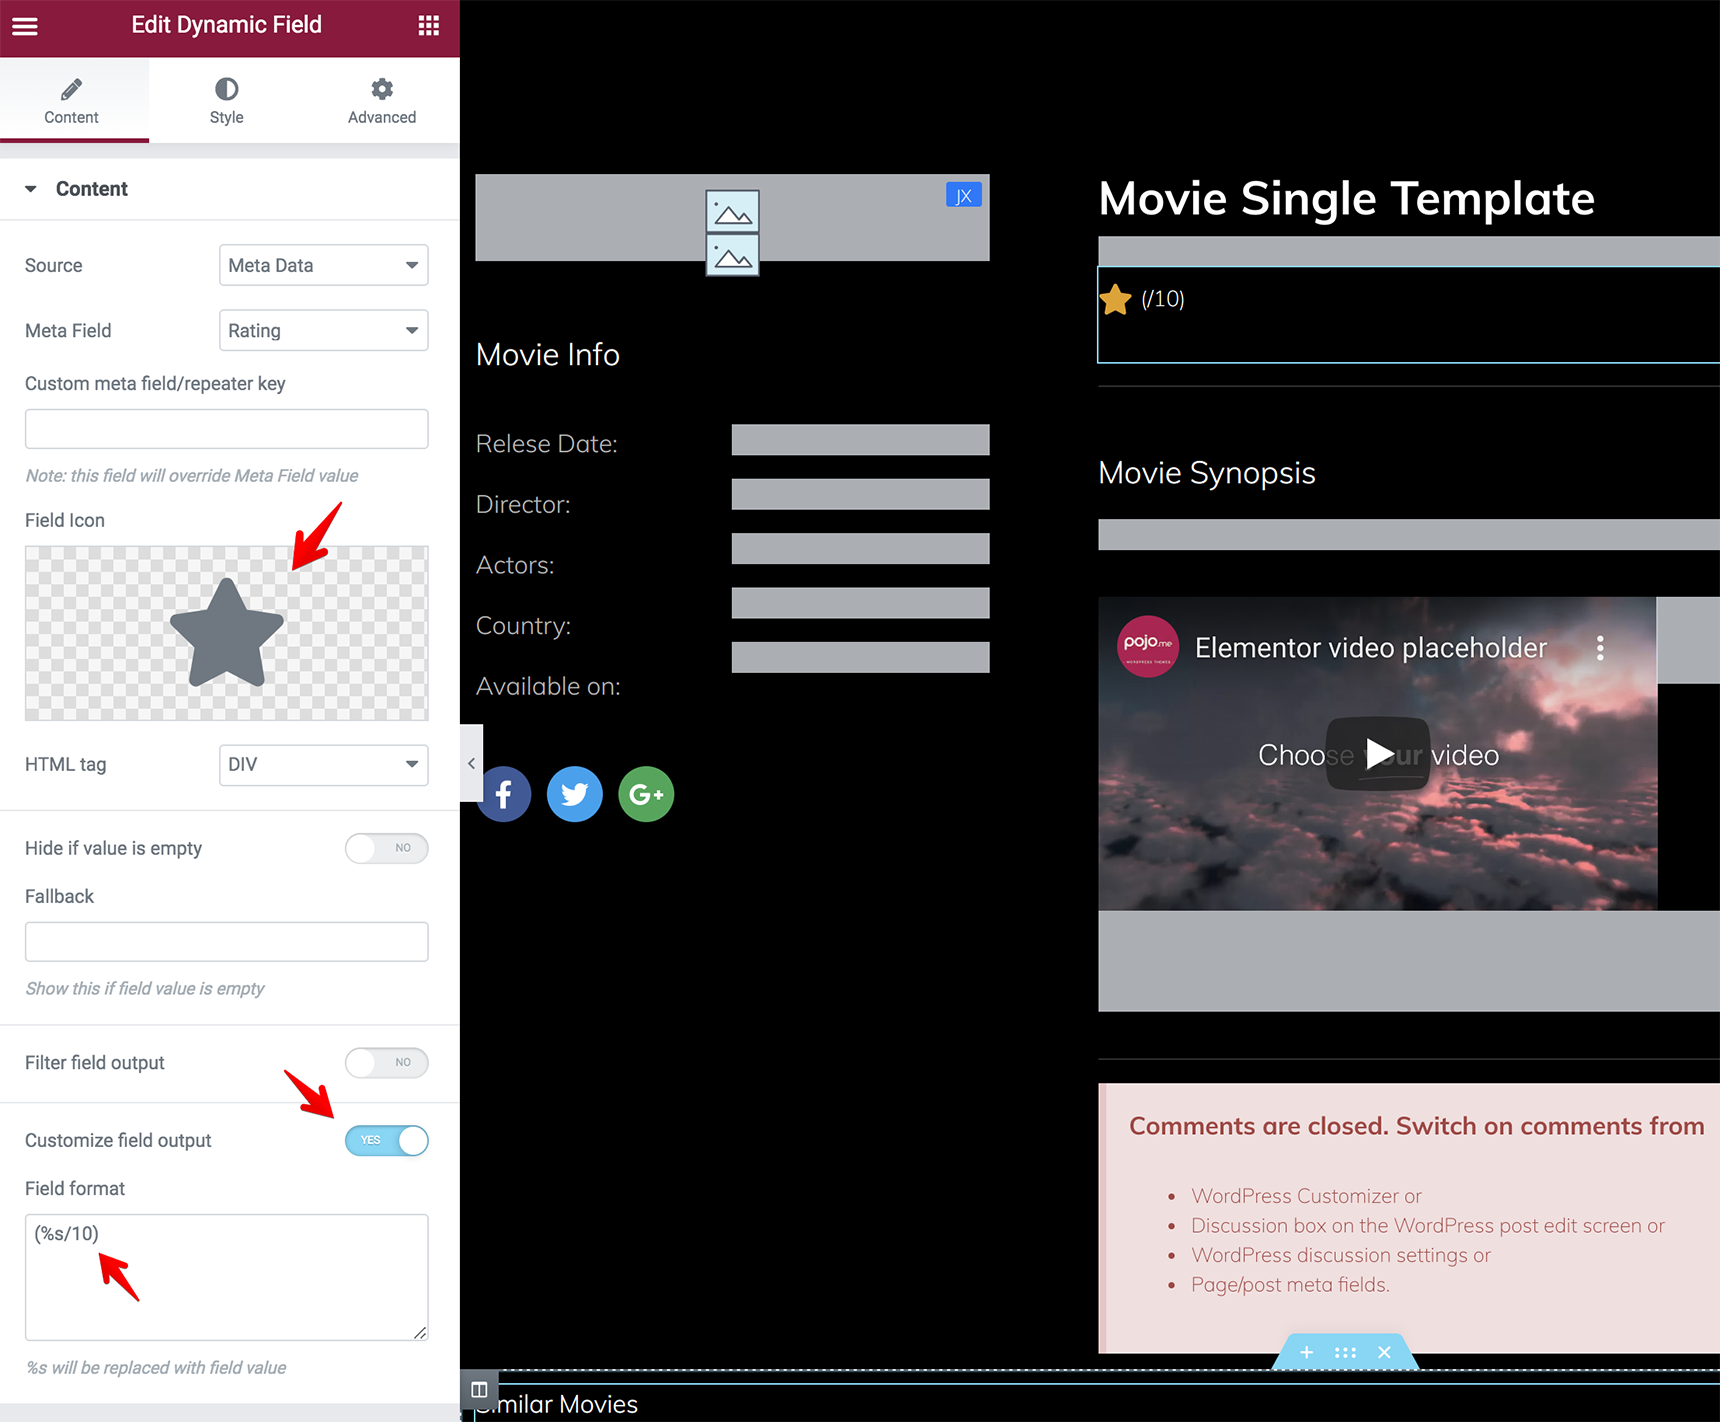
Other meta fields can be added with a Dynamic Field element, just select the “Source” as “Meta Data” and select the field you want to display.
You can find our more detailed information about the Dynamic Field element in this article.
As for the ratings, it can be a meta field too that you created in the JetEngine settings for the movie post type, and you can show it in the post with Dynamic Field element as well as other meta fields.
You can add a star icon for the rating field and customize the output like this (%s/10), in which 10 is the highest rating.
You’ll see this on the frontend:

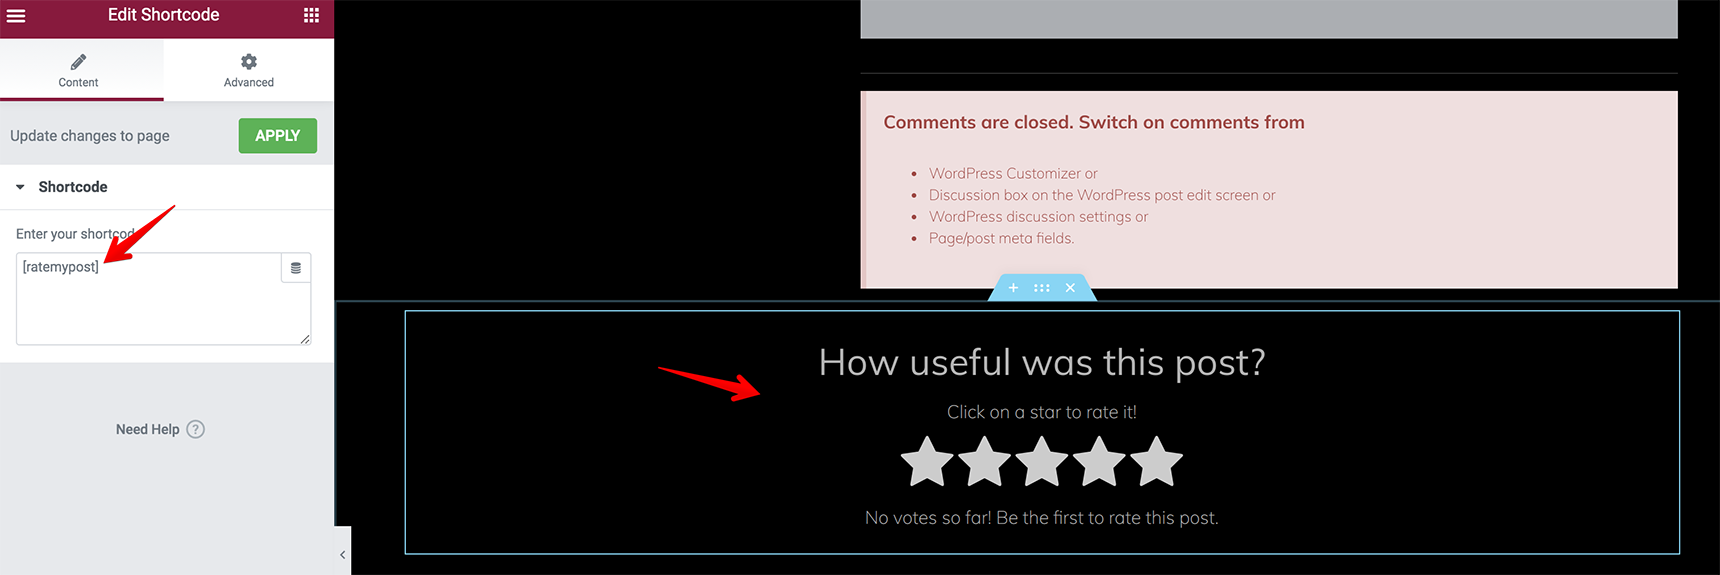
Another way to show ratings is by using the plugin Rate My Post. You can add a shortcode [ratemypost] into the Shortcode element on the single template so that the users are able to leave their ratings.
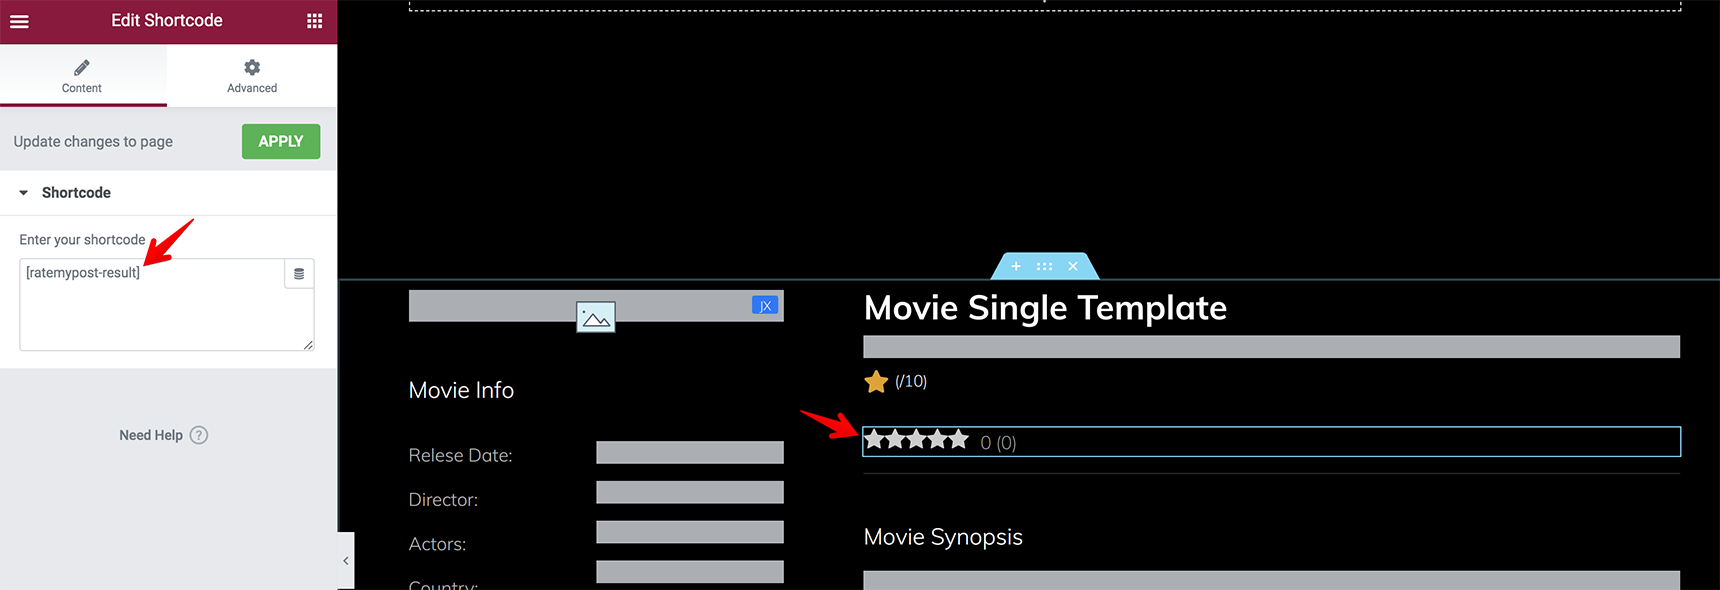
To show rating results, use the shortcode [ratemypost-result]
The texts can be changed to your needs in the plugin Settings.
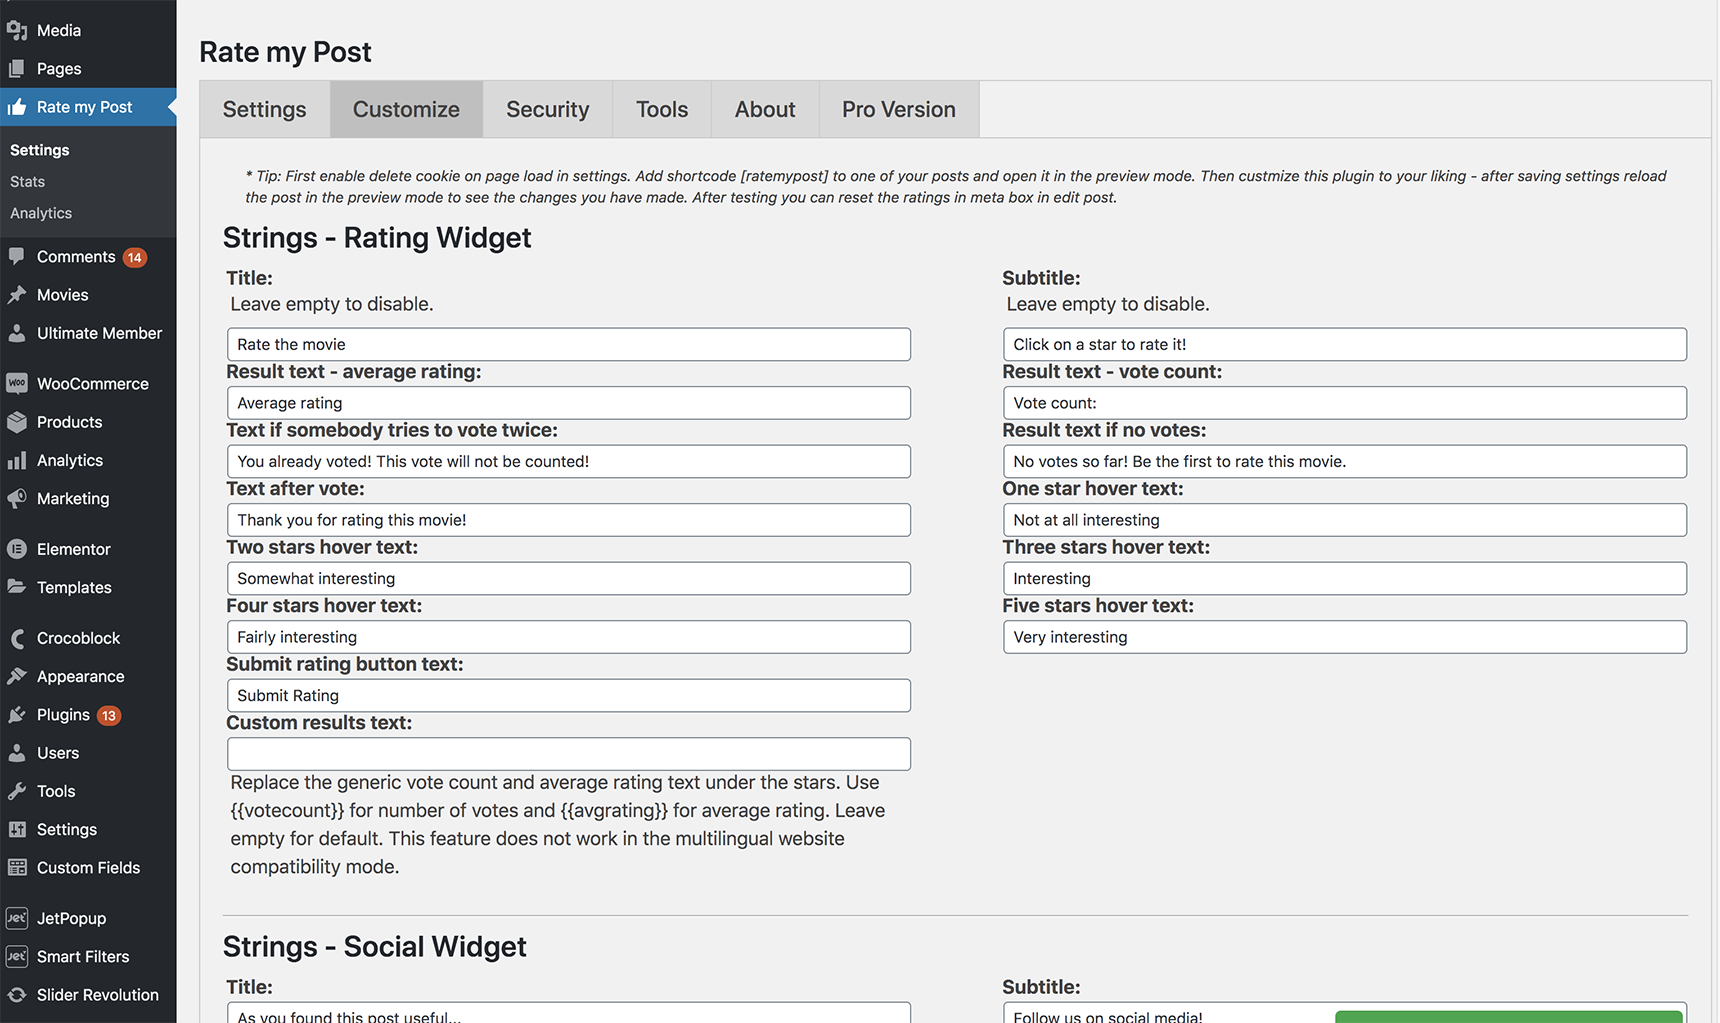
Read the full documentation for the Rate My Post plugin to study it in more detail.
Once you’ve added all needed content, click on Publish and your template is live.
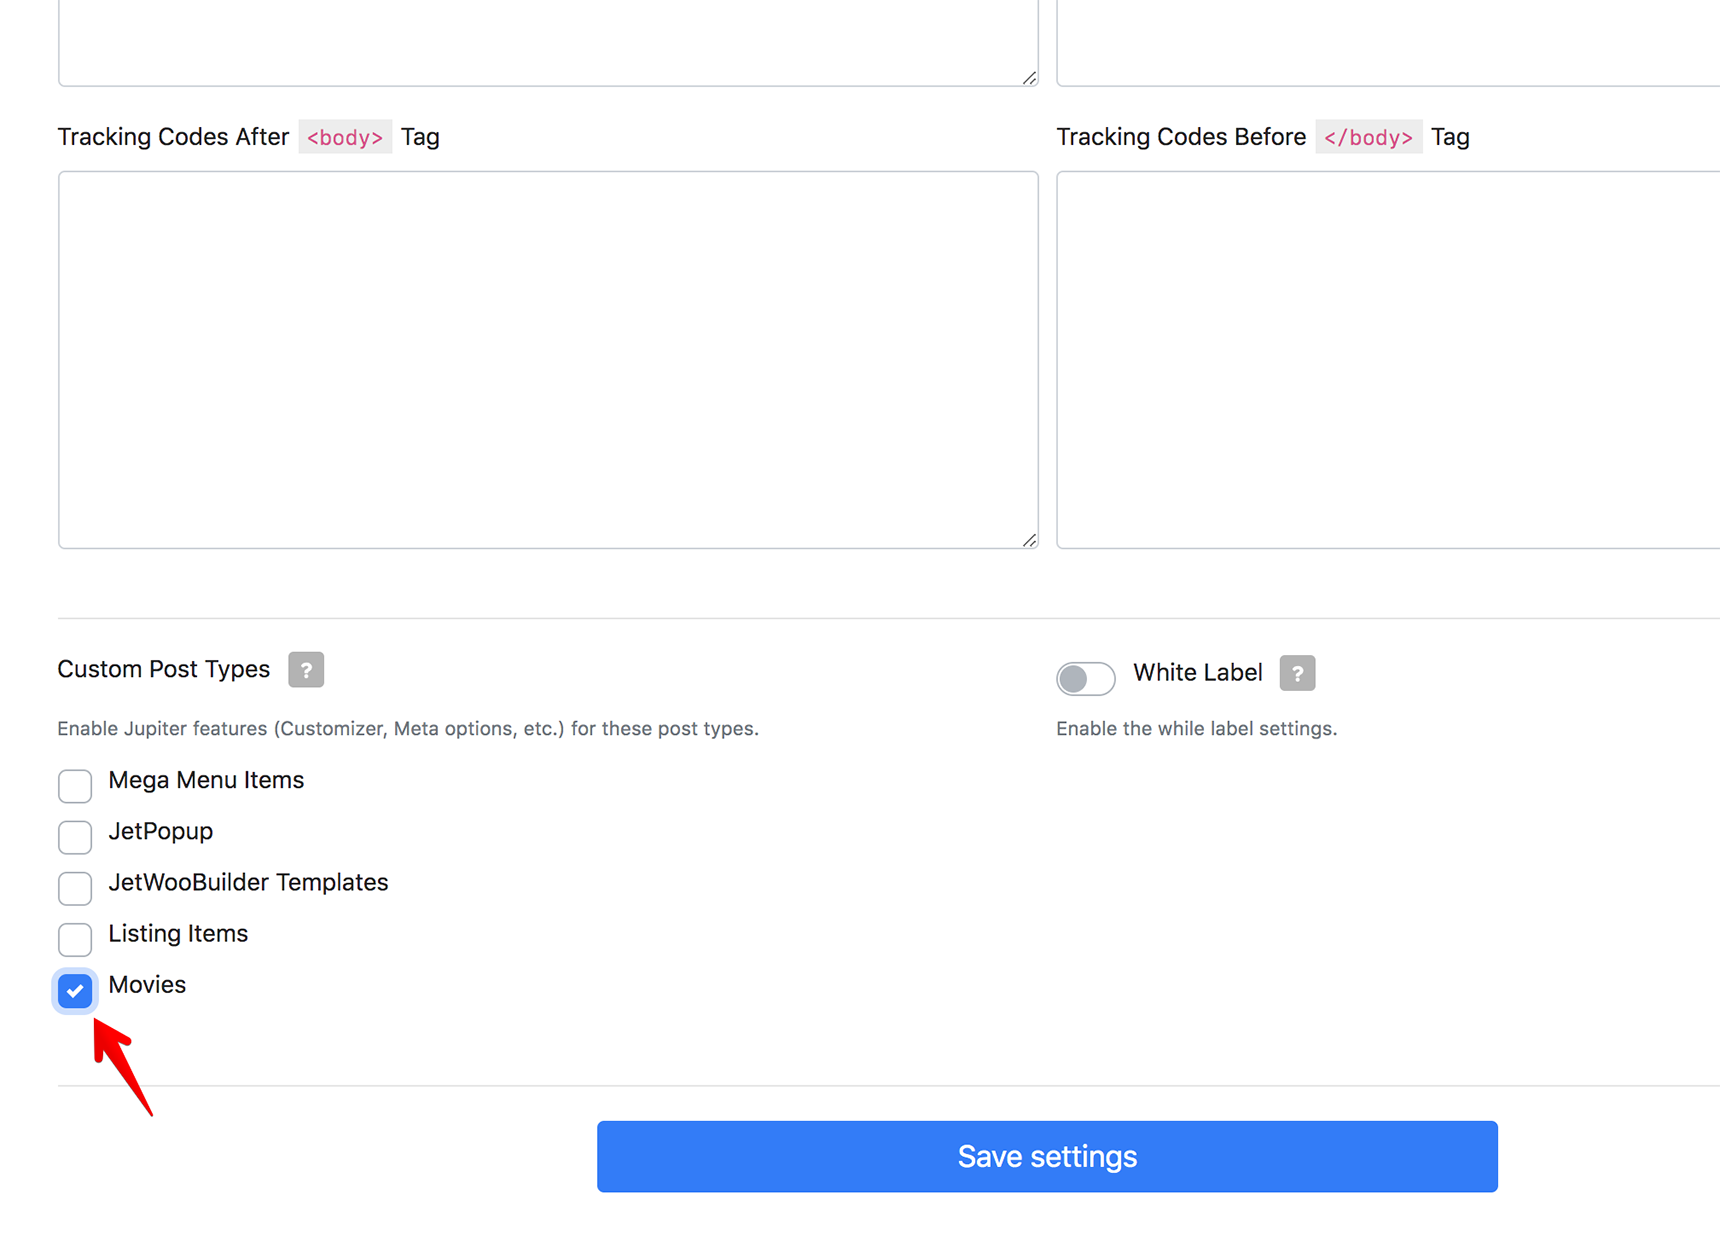
Now, it needs to be assigned to the movie post type. Go to Jupiter X > Control Panel > Settings and enable your custom post type (in our case “Movies”).
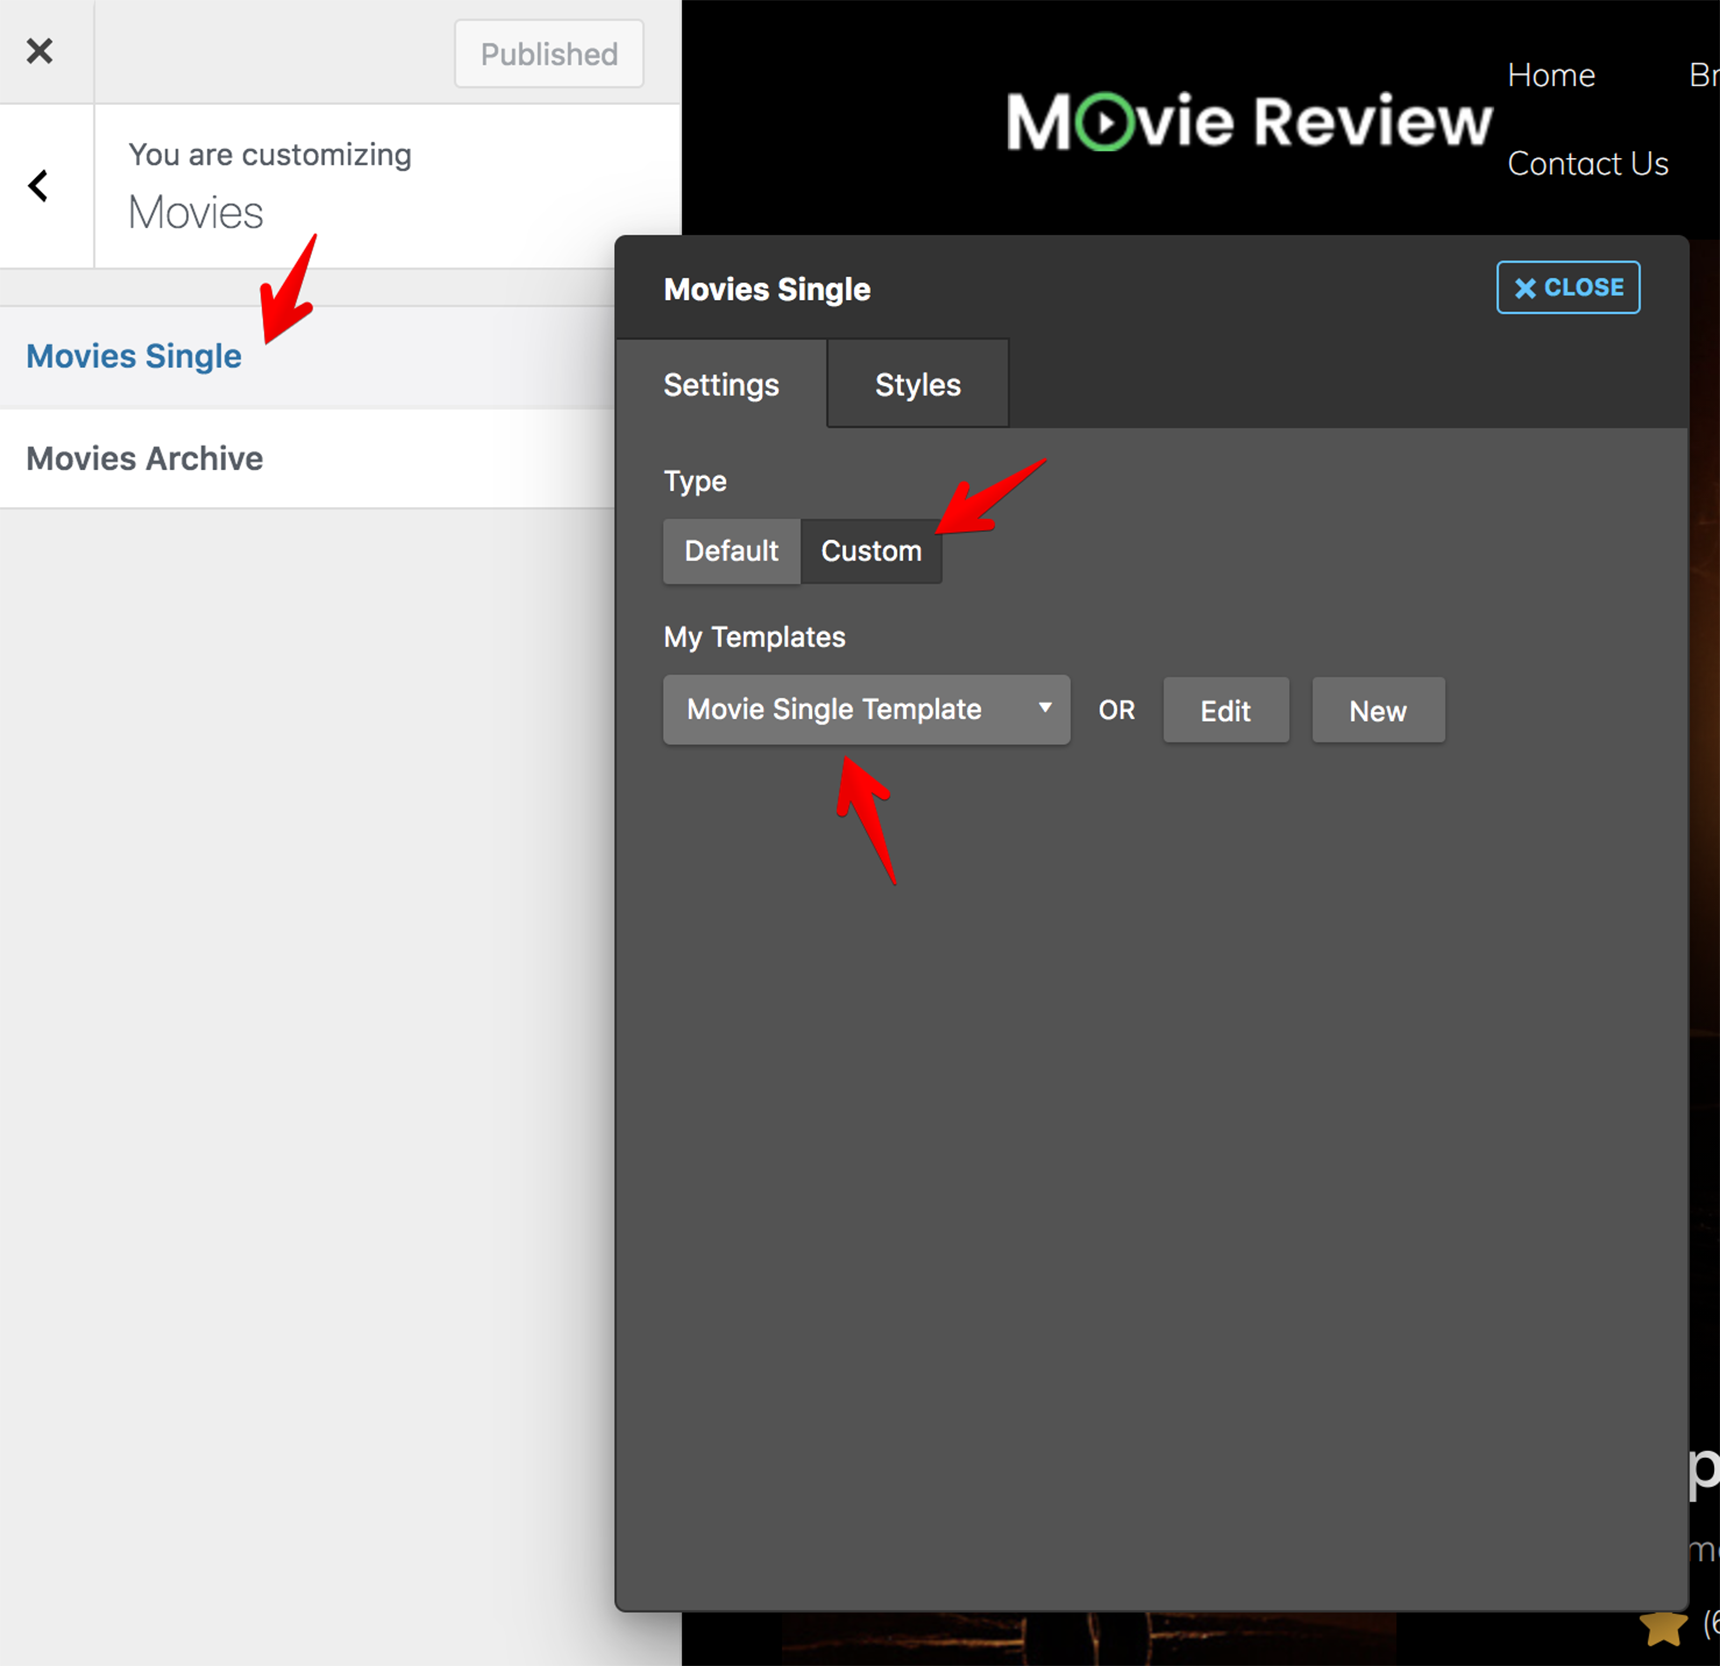
Then go to Jupiter X > Customize > Post Types > Movies > Movies Single and select the custom template.
When visiting one of the movie posts, you can see that your template will appear exactly as you designed it.
Creating an archive template for a custom post type
Creating an archive template is a similar process to the single template – you just need to select the Archive type.

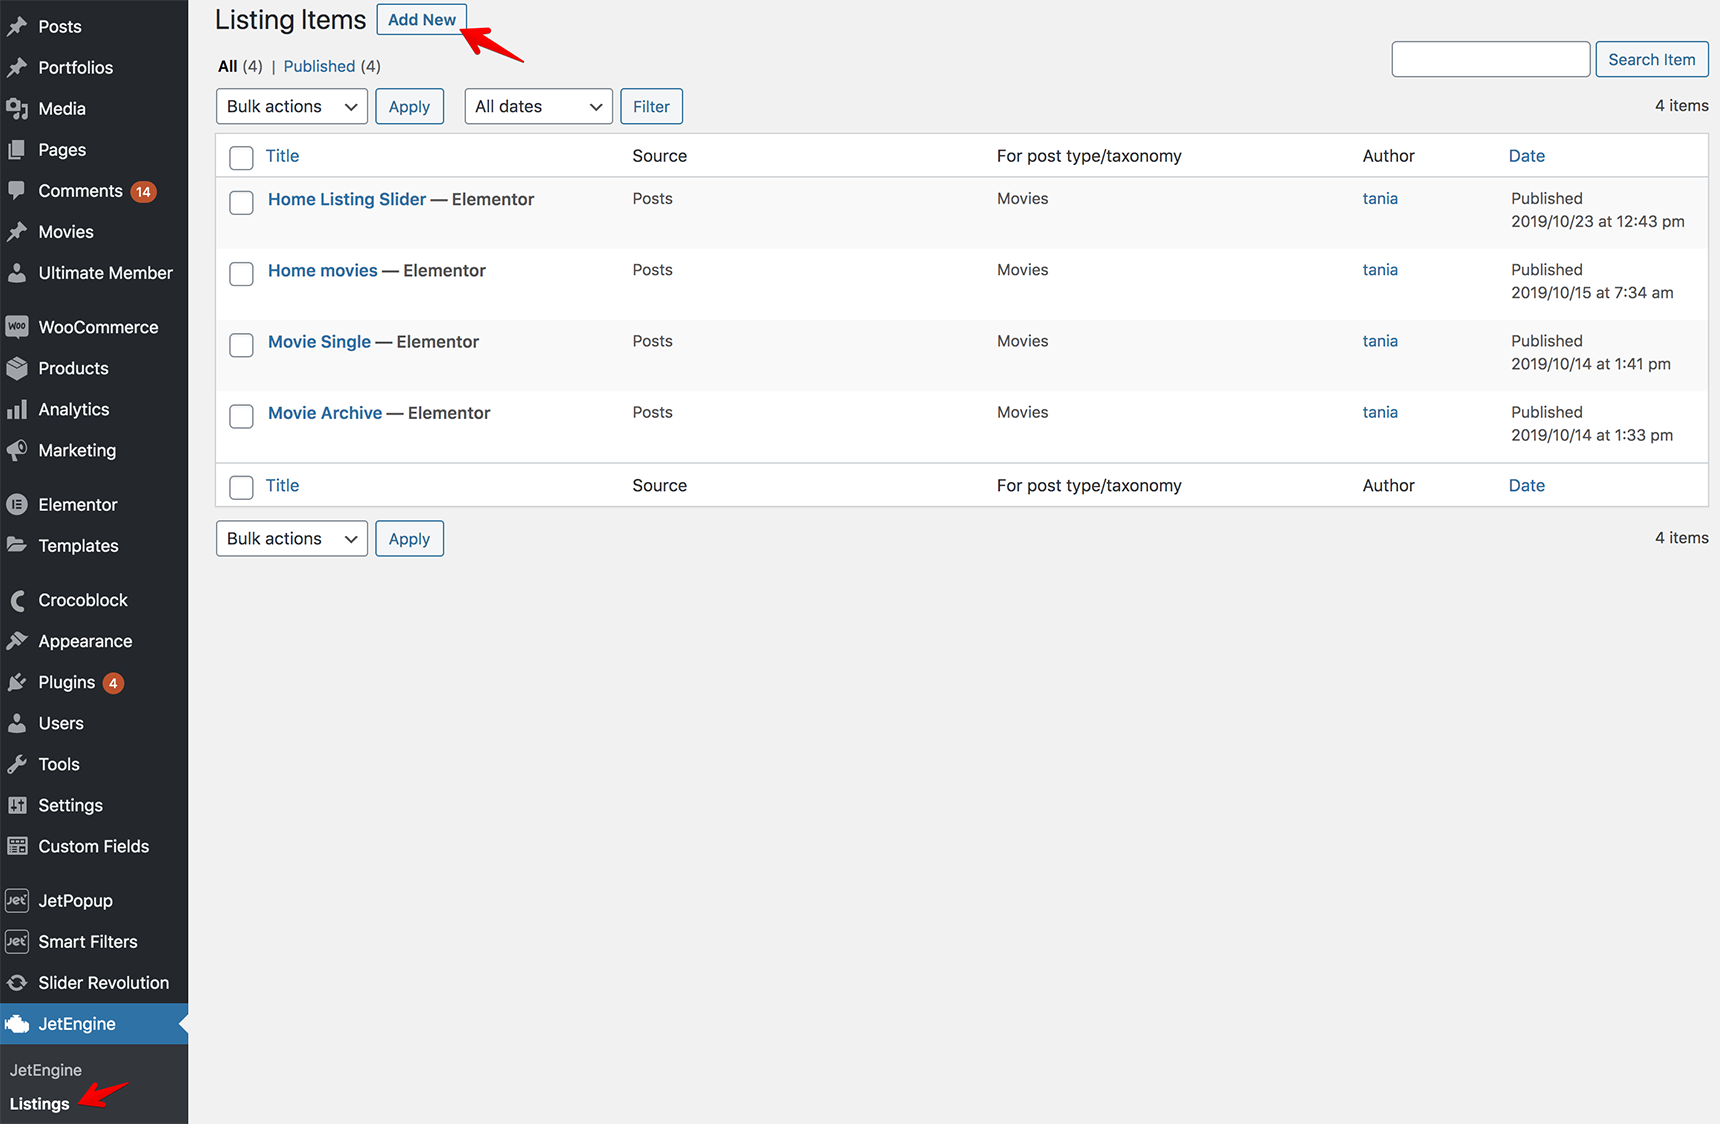
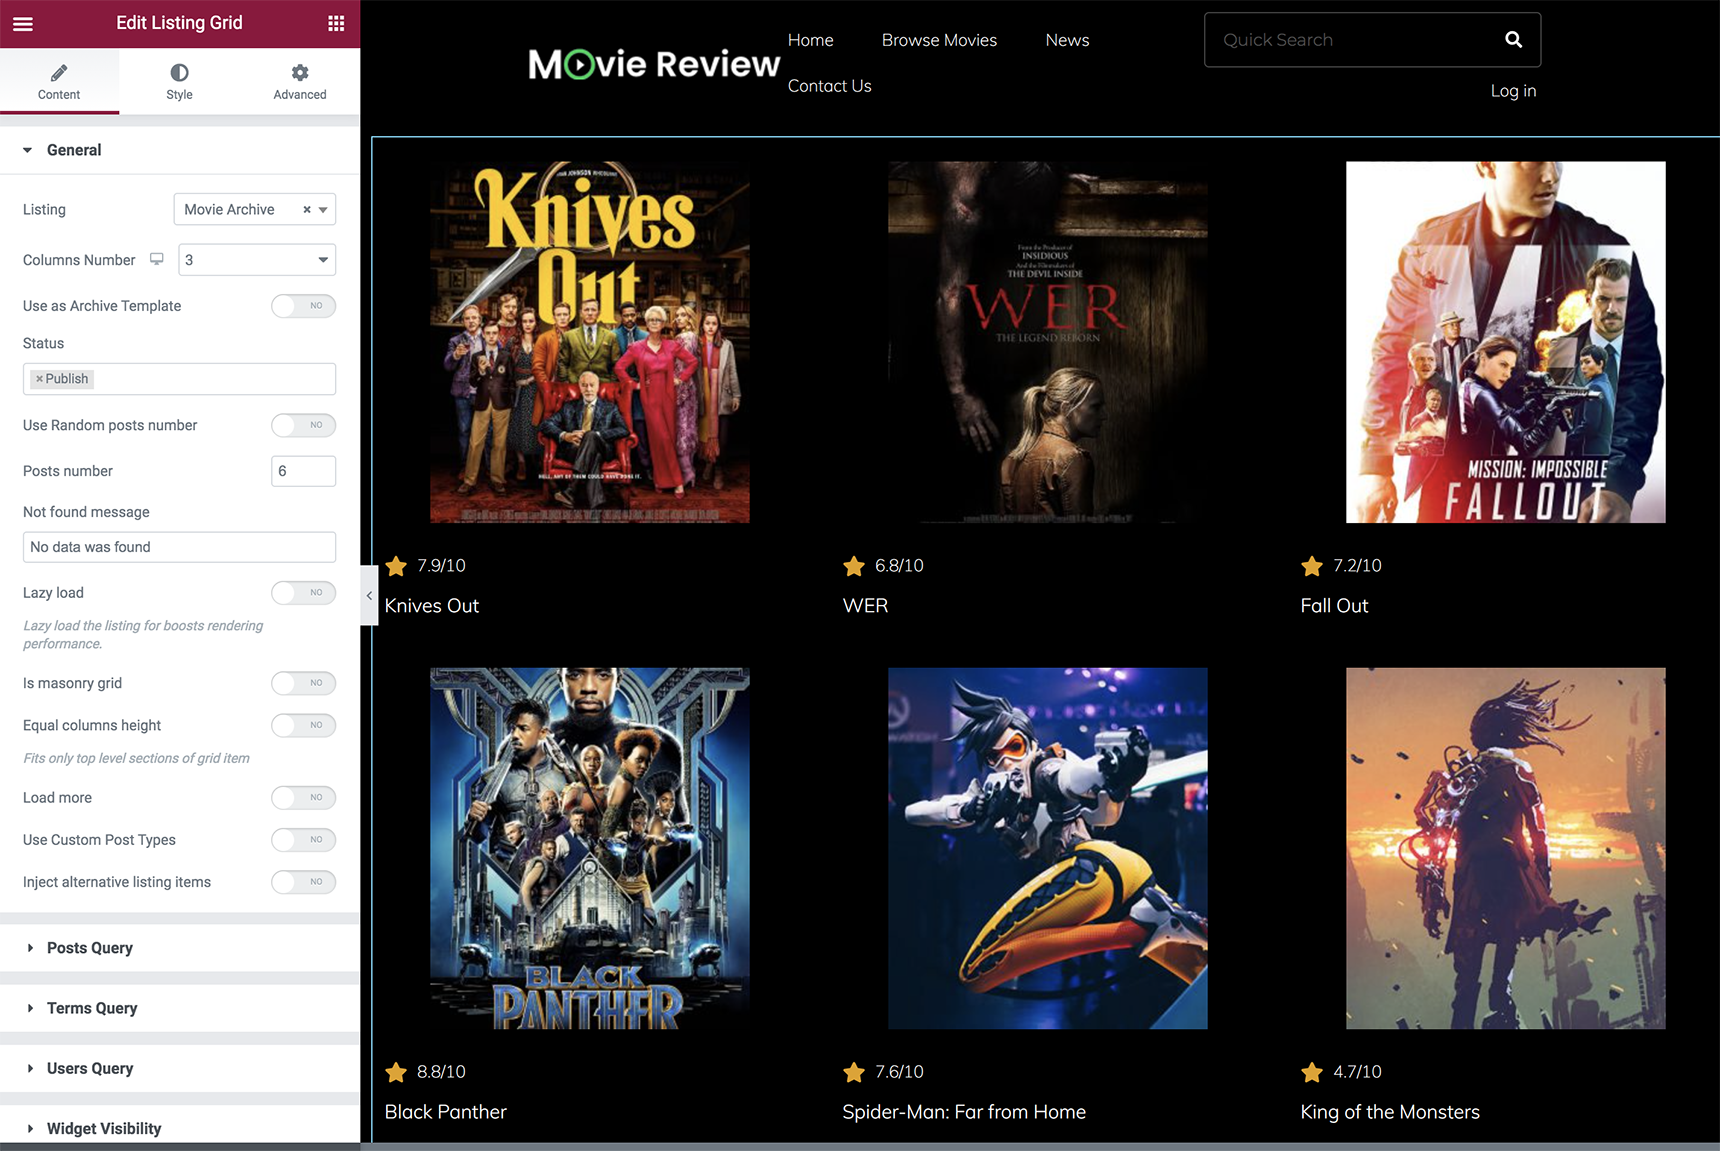
Before creating the archive template, we need to first create a Listing Grid to set up the content of the custom fields.
Go to JetEngine > Listings > Add New and create a new listing. Here, you can see that I’ve already created the “Movie Archive” listing.
The Elementor editor will open, and you can add dynamic fields to show the data of your meta fields, just like we did for the single template.
More details about Listings can be found in the JetEngine article.
When the listing is finalized, go back to the Archive template under the Templates menu and add the Listing Grid element to show your listing on Archive pages and customize the settings.
When it’s ready, you need to assign the template to the Movie post type. Go to Jupiter X > Customize > Post types > Movies > Movies Archive and select a custom template.
Your archive is live! You can visit any category page in the Movie post type and see the list of movies.
Wrapping Up
As you can see, building a review website in WordPress is easy with the Jupiter X theme and with its bundled plugins like Elementor and JetEngine. You can also import a demo to save more time and simply edit the content to fit your needs.
And the great thing? You can view many other demos offered by Jupiter X in case there are others that align more closely with your goals.
If you have any questions, feel free to write to us in the comment section below.

1 Comment
I loved your blog post on how to build a review website in WordPress with Jupiter X. I think your step-by-step guide is very clear and easy to follow and i think that i will create a great web using this guide !