If you’re the owner of several WordPress websites that share common aspects such as themes and plugins, then you might wonder if there’s a more efficient way of managing them as a single install. WordPress Multisite might just be the exact thing you’re searching for. Since version 3.0 came out, WordPress has offered the multisite feature. Multisite allows users to create a network of sites on a single WordPress installation – which ultimately means that you can run as many sites as you like. Read this article in its entirety to find out how to build a WordPress Multisite with Jupiter X.
Advantages of WordPress Multisite
- Ability to use the same plugins on your project (e.g. performance, security, SEO).
- Flexibility to use one theme as a parent theme on multiple sites.
- Ability to share similar media files for your organization’s branch sites.
- Saves time on updates to your sites.
- Freedom to experiment with new ideas while developing client sites on a temporary domain.
- Community networks
Let’s take a look at these benefits in more detail.
Disadvantages of WordPress Multisite
The things that make Multisite a great sharer also contribute to its flaws.
- Migrations. Because the network uses one database and stores data from each site in a single database, migration is a bit difficult and complex.
- Users. You can’t separate users, meaning that each one will continue having access to the entire network. Also, you cannot create separate users for FTP uploads because only one folder is used for all the sites.
- Plugins. You aren’t able to install one plugin for only one site, once the network administrator installs the plugin, it will immediately be available for all the sites in the network. Also, if you delete a plugin, all sites using that plugin will be affected.
So then, this begs the question: Who needs a WordPress multisite network?
Enable a Multisite Network in WordPress
By default, the Multisite Network feature is built-in with each WordPress installation. All you need to do is set up and activate it.
To do this, you’ll need access to the files in your WordPress installation. Use the FTP browser or file browser in your hosting to edit files. This process requires access to two files .htaccess and wp-config.php – both of which are in the base folder of your WordPress installation. Make a backup of both of those before you start. (It’s also a good idea to backup your entire site too.)
To start, open the wp-config.php file in your code editor and add the following code just before the
/* That’s all, stop editing! Happy blogging. */

/* Enable Multisite */
 define( 'WP_ALLOW_MULTISITE', true );
Once you’ve done that, save your changes to the server. This code simply enables the multisite feature and once enabled, you will still need to set up the multisite network
P.s. don’t forget to create a complete backup of your WordPress site.
Setting Up WordPress Multisite Network
Now that we have successfully enabled multisite, it’s time to configure the Network settings. Head over to the Tools » Network Setup page to configure your multisite network.
You’ll then see a screen that asks how you want your network to be set up and whether or not you want to use subdomains or subdirectories.
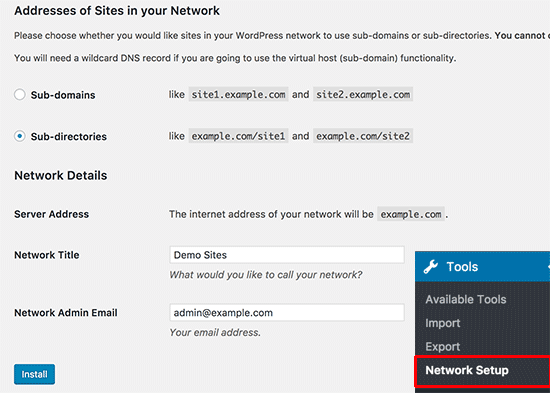
Select which one you want to use, enter the title and admin email address for your network in the Network Title and Network Admin Email fields, and click the Install button.
After this, you’ll be taken to the Network Setup screen. Here, you’ll find some codes with instructions where to paste them. One is for the wp-config.php file and one for the .htaccess file.
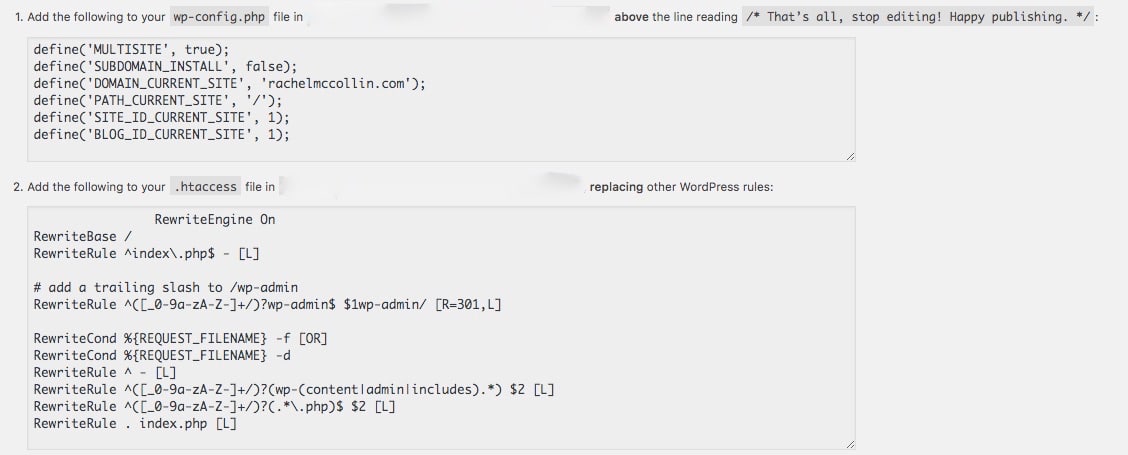
Please note: you’ll get different code from this site because we have different sites 🙂
Once you make changes to the files, go back to your site admin. Click the link on the Network Setup screen, and log into your network. Use your default login credentials you used before.
Now, you’ll find that your admin changed a little bit, and you’ll see new items in the toolbar at the top called My Sites and the second one called Network.
My sites – used to manage your sites. Among these settings, not only can you add or delete but you can also deactivate and archive sites.
Network – used for configuration and overall network setup, user roles, plugins and theme management, and their updates.
And that’s it! You’ve successfully activated the WordPress network, and you’re now ready to add your new sites in the network.
Building a WordPress Multisite in Jupiter X
As we now know all the advantages and disadvantages of this feature, we should think about how to use WordPress Multisite with Jupiter X. There might be several use cases, but let’s take a look at the most interesting one.
Let’s say you are a freelancer who travels a lot and loves mountain biking. You want to create a site or sites where all these interests will be published according to their styles.
This is what our task looks like:
Freelance site. This site will have a solid looking design, complete with your portfolios and the services you provide. You’ll also want to list all your clients and their testimonials.
Travel site. Since you’re traveling quite a bit and have accumulated good experiences that you want to share with the world, the site must contain a gallery, trips, places you’ve, as well as your future plans.
Mountain Bike. Since you’re really into mountain biking, you’ll want this website to have a very sporty style. If you’re participating in various races, then you’ll also want to have race events and stylish blog posts where you will publish your previous and future adventures.
Having these sites under one hood where you’ll be able to manage everything from one dashboard sounds like a great plan. Now, let’s take a look at what Jupiter X can offer us and how it can help us achieve our goal.
Currently, Jupiter X offers 250 premade templates that are sorted into 16 categories. You’ll find at least one type of business in this extensive list of premade templates. Now, let’s check what we got for our situation.
The freelance-style website under the creative/portfolio category has 33 premade demos:
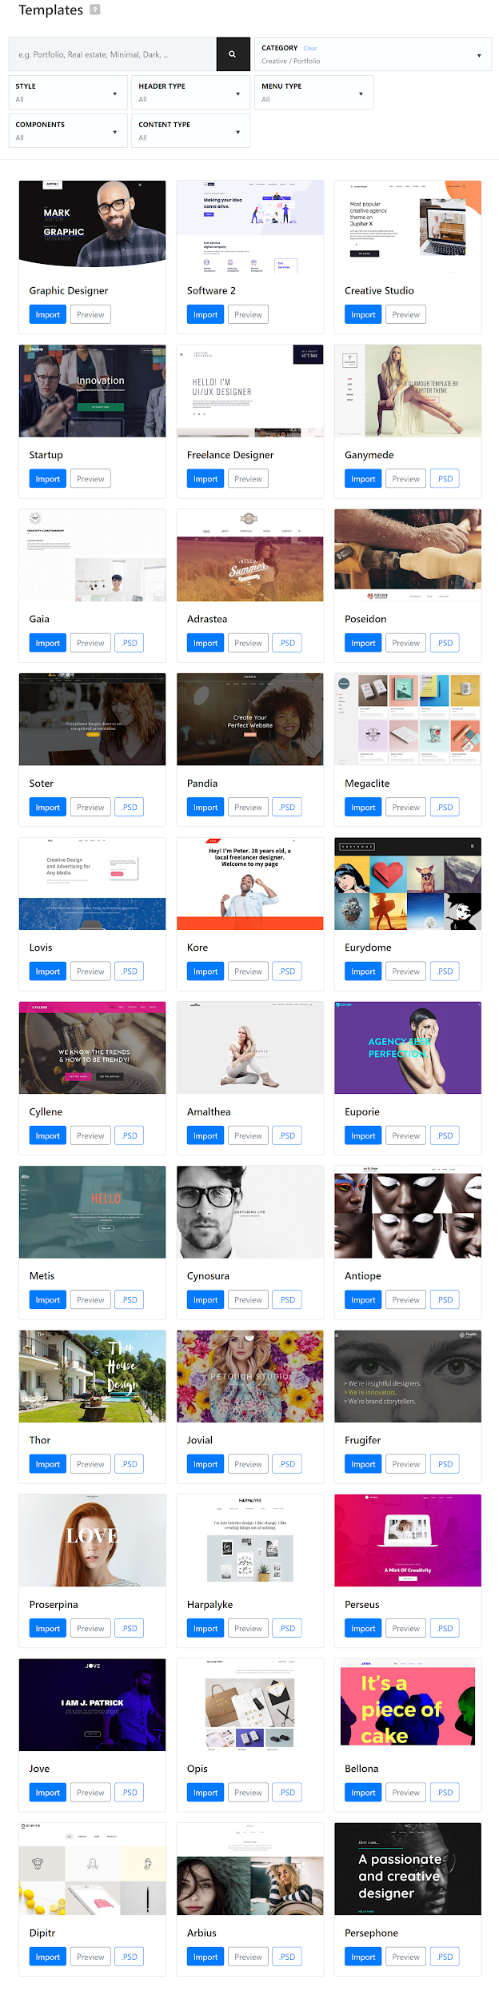
I will choose Creative Studio, which has a clear design, pleasant typography and colors match – all of which I’d like to incorporate into my website:

Travel site – There are 9 templates in this category:
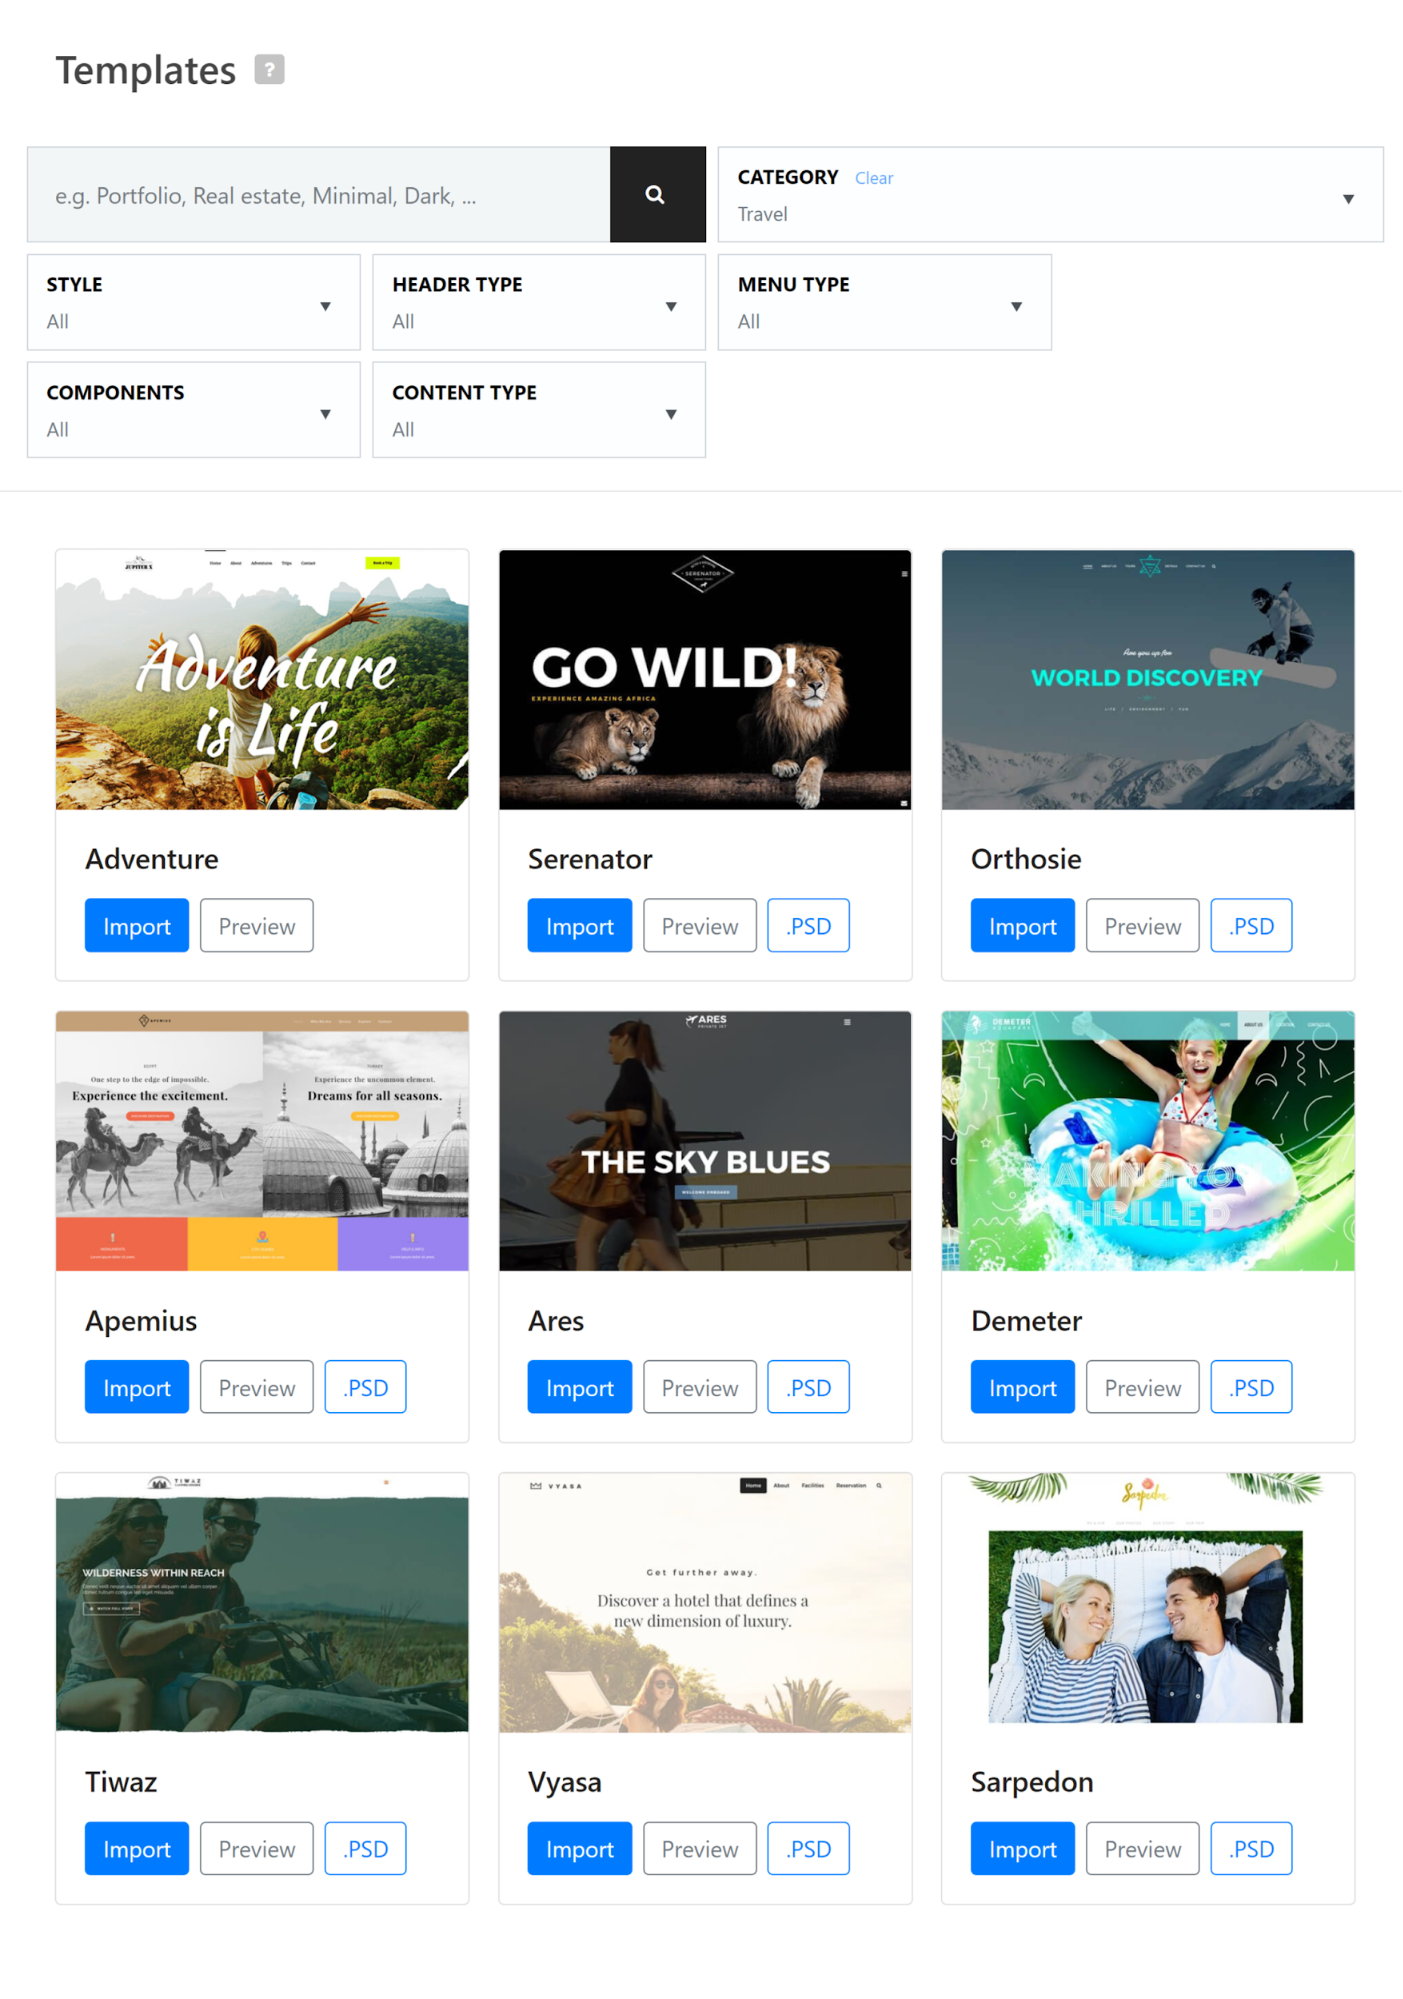
And my favorite is Adventure since it closely resembles my personality and active lifestyle:

Lastly, for my mountain bike hobby, I’ll go ahead and choose the Mountain Bike template from the 10 available demos. It has everything needed on a hobby site and the design exactly what I want.

Now, as we already know what we want, it’s time to roll up our sleeves and get our hands dirty. This is what our task looks like for now:
- Install WordPress.
- Setup a WordPress network site.
- Create three domains and name them based on our goal (For example Freelancer, Traveler, Biker).
- Install Jupiter X and all the necessary plugins.
- Install templates for each domain.
- That’s it – now it’s your turn to make the final changes to them. The Jupiter X templates are almost ready. All you’ll need to change are the text and images. Everything else has already been taken care of (Thanks to the design team behind Jupiter X).
Wrapping Up
WordPress Multisite is a great feature when used correctly. While it has it up and downsides, you can use it for your personal or business sites, to host client or community sites or to run a WordPress.com-like system of blogs that people create themselves.
In this blog post, we took a deep dive into how you can set up, enable and build WordPress Multisite with Jupiter X quickly and efficiently so you can begin managing several sites at once. We’d love to hear more about your thoughts and experiences in the comment section below!

No comment yet, add your voice below!