
Creating custom forms in WordPress has always been a hassle. Jupiter X has begun a new era in the form building experience. Now, you can create custom forms visually. Typically, site visitors come across forms such as signup, sign in, register, subscription, contact or any other custom forms.
Forms allow site visitors the ability to send information such as usernames, passwords, comments, emails, among other things to the server.
Forms contain fields such as dropdowns, checkboxes, text boxes, input, as well as submit and radio buttons. Nowadays forms play an integral role, particularly in digital marketing and social networks.
Form Builder in Depth
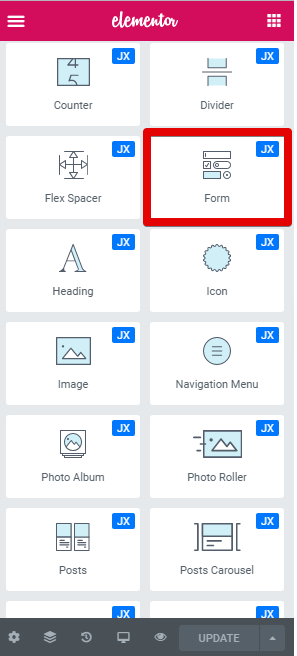
If you want to build a beautiful and secure form with Jupiter X, then you can use the Form Builder, which allows you to create custom forms in a few minutes with minimum effort.
Content Tab
This tab contains four sections such as Form Fields, Submit Button, Settings and Feedback Messages. Let’s go through each of them one by one.
Form Fields
In this section, we can create fields for our forms. Form Fields have two options:
- Form: for setting the name of the form.
- Items: each field in the form.
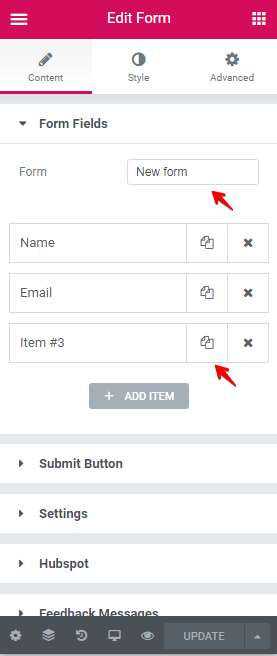
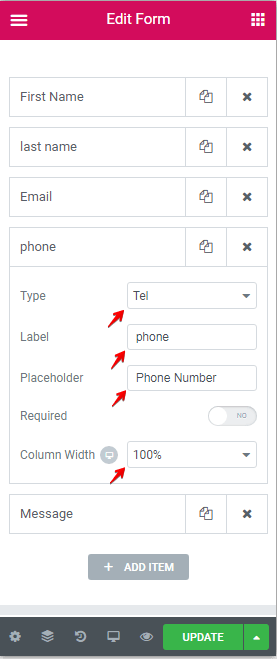
Furthermore, each item has its options like:
- Type
- Label
- Placeholder
- Required
- Column Width
- And more.
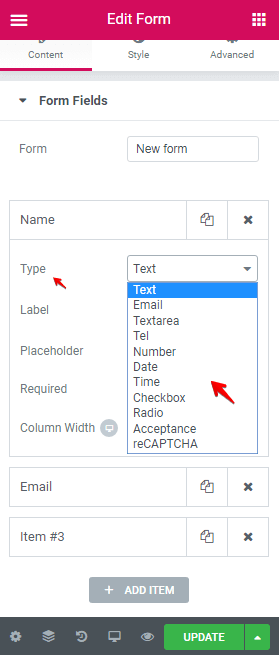
One of the important options of each field is the Type option, which defines the role of the field. The Jupiter X Form Builder has eleven types for fields:
- Text: for creating the text input.
- Email: for creating the email input.
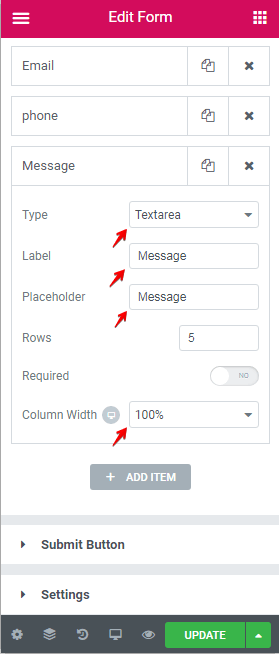
- Textarea: for creating the textarea input.
- Tel: for creating only the phone number input.
- Number: for creating only the number input.
- Date: for creating the date picker.
- Time: for creating the time picker.
- Checkbox: for creating a checkbox element.
- Radio: for creating a radio button element.
- Acceptance: for creating an agreement for conditions or a term of use button.
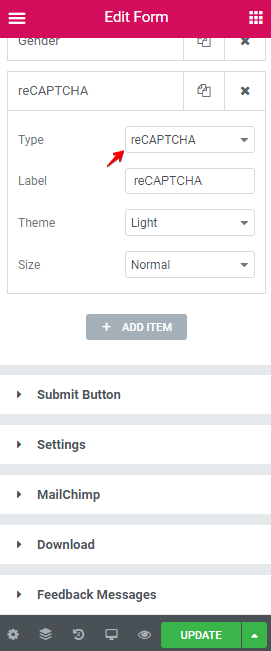
- reCAPTCHA: for creating the human testing Google service.
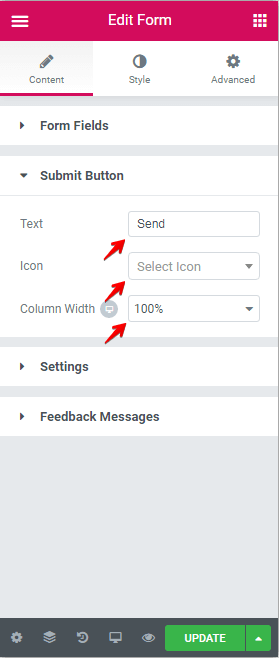
Submit Button
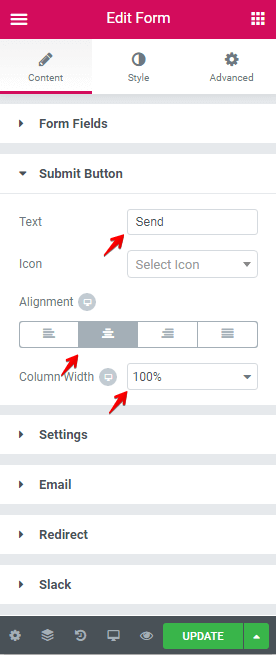
After clicking on the Submit Button, the information contained in the form is sent to the server. The Submit Button section has three options:
- Text: for changing the bottom text.
- Icon: for setting an icon for the Submit Button.
- Column Width: for changing the Submit Button container.
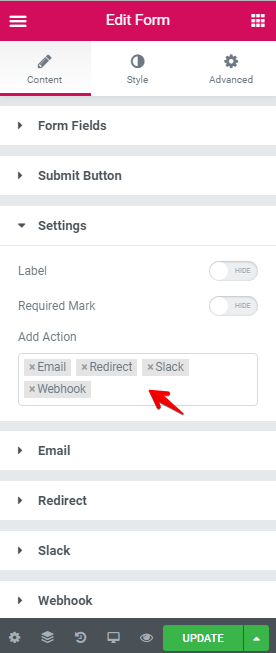
Settings
The Settings section has three options:
- Label: Show/Hide status for fields label.
- Required Mark: Show/Hide * after fields label for required fields.
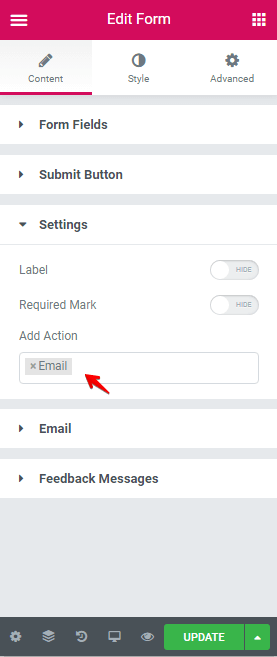
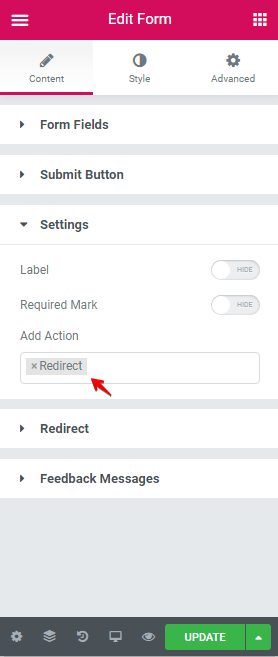
- Add Action: Set the action in the form.
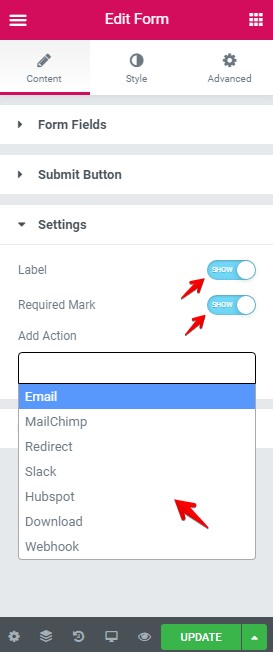
The Jupiter X Form Builder allows the user to choose from seven action fields. If you choose one of them, the options section of each action appears at the bottom of the setting section to where you can modify it.
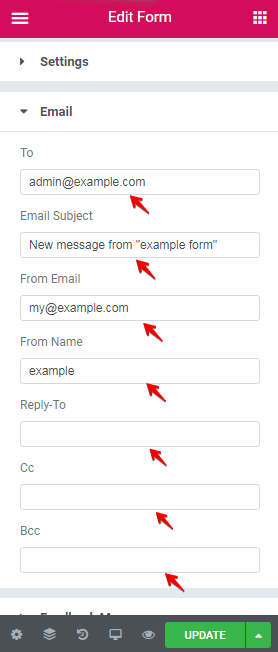
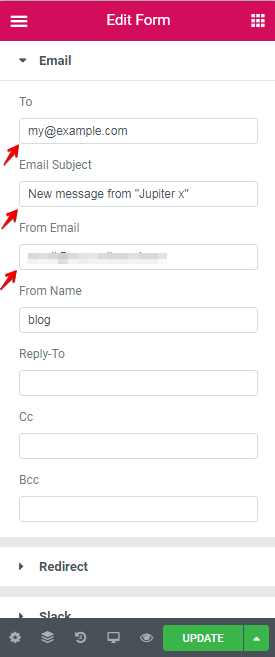
1. Email: This action email form allows users to fill in their email address such as admin. We can set To, Email Subject, From Email, From Name, Reply-To, Cc, Bcc.
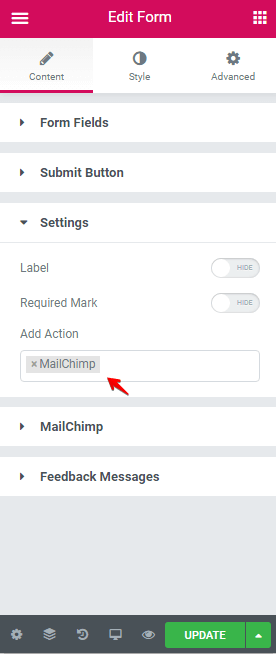
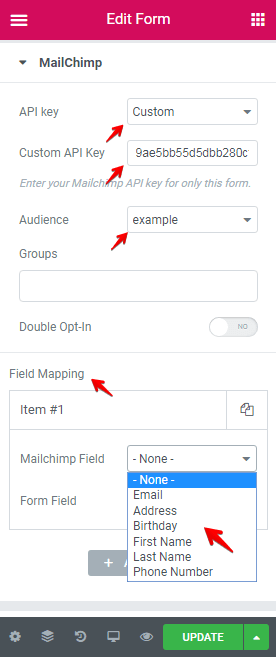
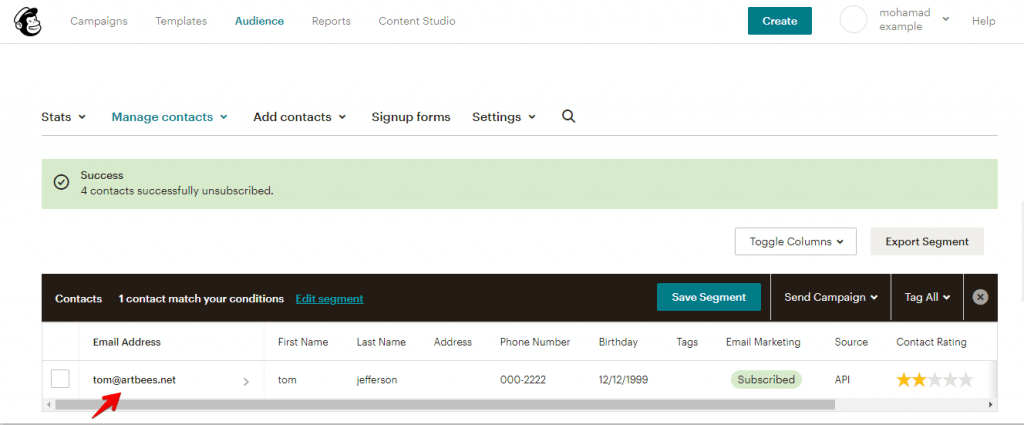
2. MailChimp: This is used for a subscription form. In order to use this, we must first have an API Key from MailChimp to manage our subscriber list. You can learn more about how to get a MailChimp API by clicking on this link.
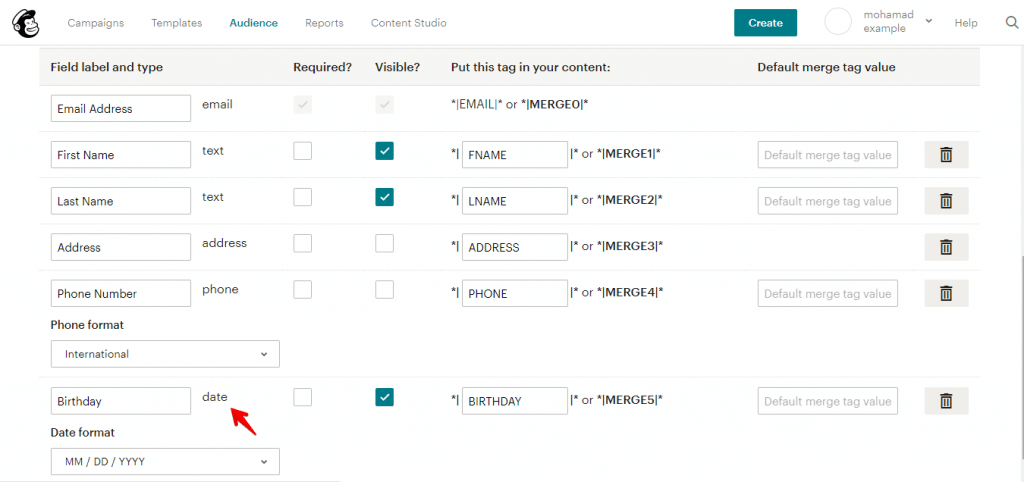
In the MailChimp section, set the API Key, choose the Audience, and finally set the field mapping. In default, MailChimp has six fields including Email, Address, Birthday, First Name, Last Name, and Phone Number.
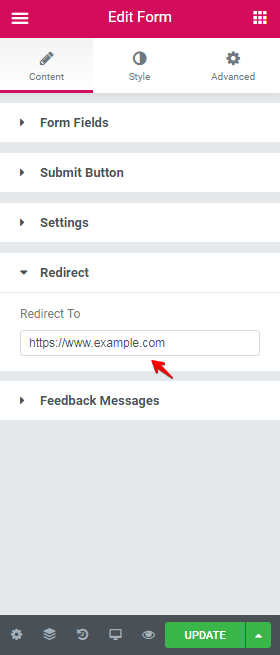
3. Redirect: With this, we can redirect our page to another URL.
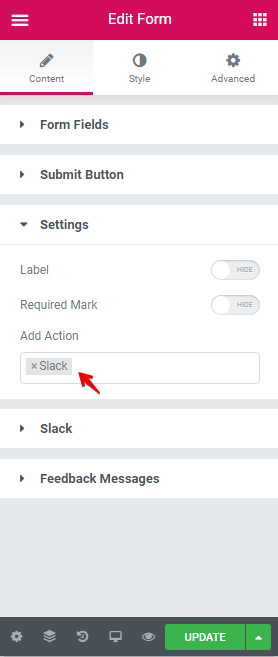
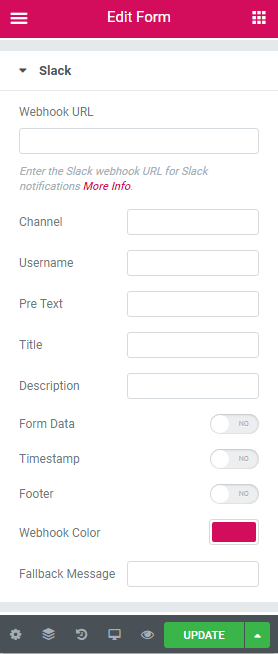
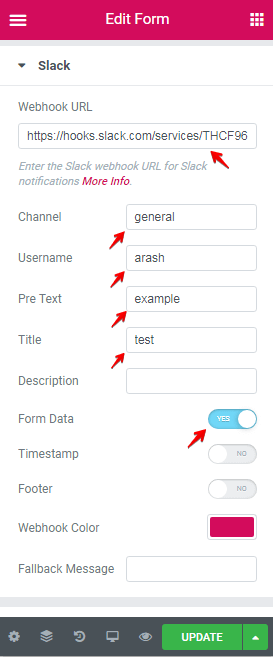
4. Slack: this action allows us to send information from our form to Slack. In order to do this, we must first sign up for Slack, enable the incoming webhook, then set our information in the Slack setting section. For more info on how to do this, you can head over to this link.
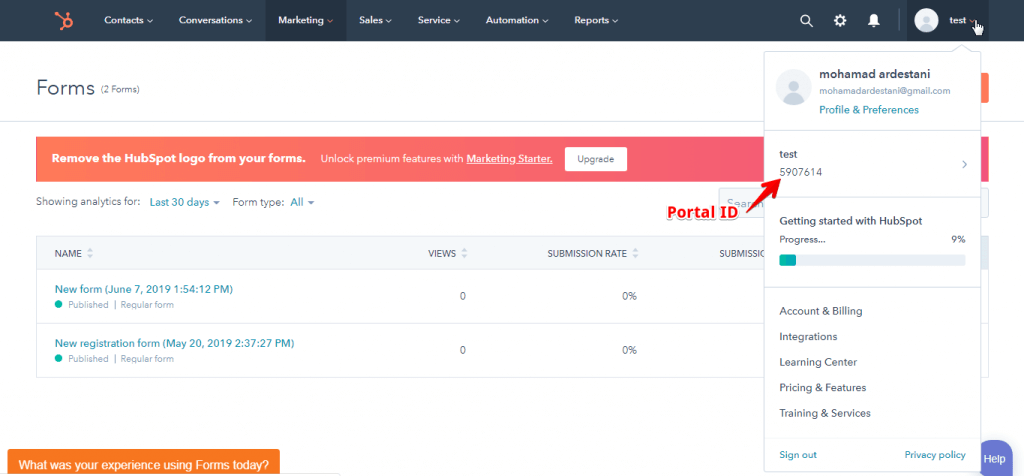
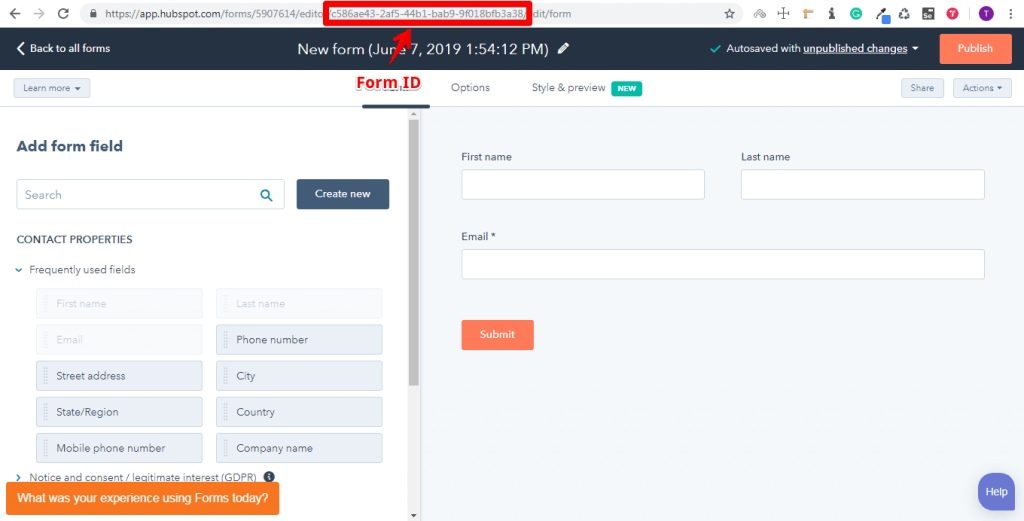
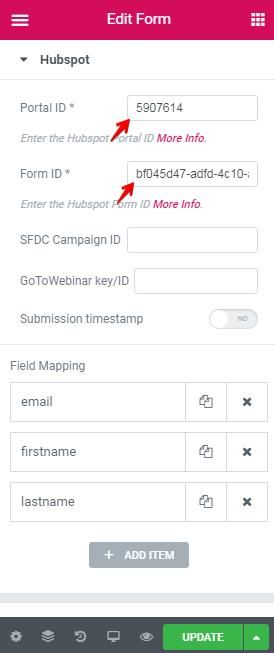
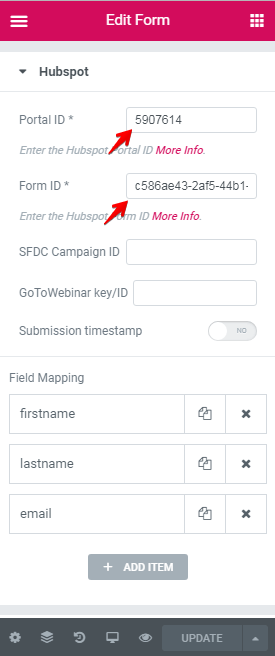
5. HubSpot: One feature that Hubspot provides is allowing users to create a contact form and then to publish these forms on the internet. This allows us to directly submit our form data to the Hubspot form.
First, signup to HubSpot then go to Marketing > Forms and create a new form. After that, design a form and get a Portal ID and Form ID to enter in the HubSpot action settings in the form.
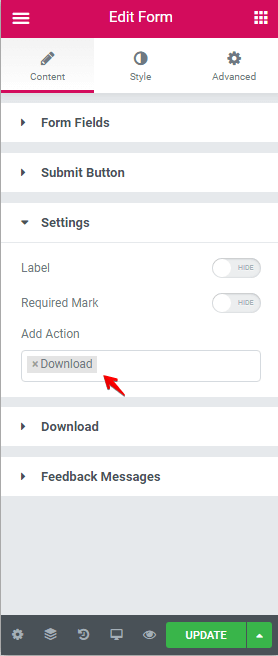
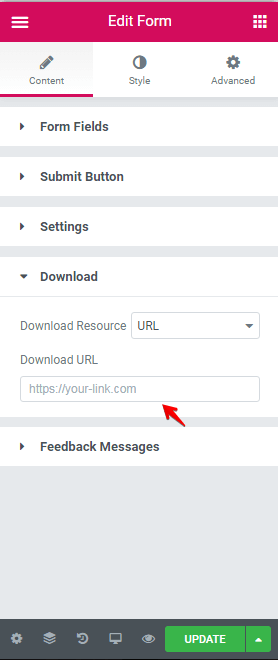
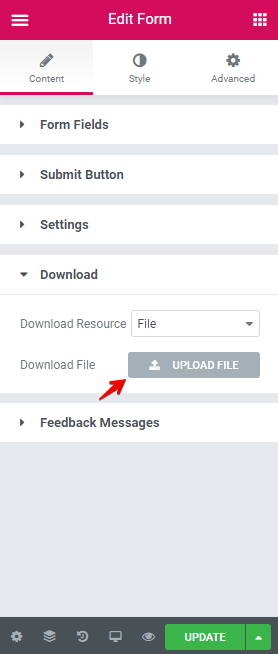
6. Download: This allows site visitors to download a file from your website.
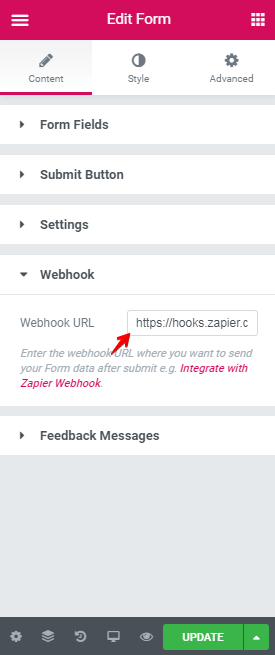
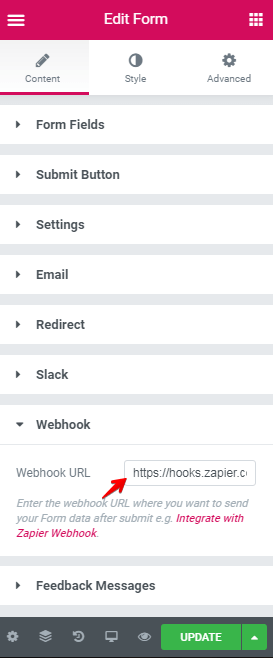
7. Webhook: this enables us to integrate our form with Zapier webhooks. Zapier webhooks allows us to complete several tasks such as sending an email, connecting to Facebook, Twitter, and Slack, as well as accessing more than 1,500 apps.
To activate this action, go to Zapier, generate a zap, and copy the Webhook URL and paste it into the Webhook action setting. To find out more about how to do this, visit this link.
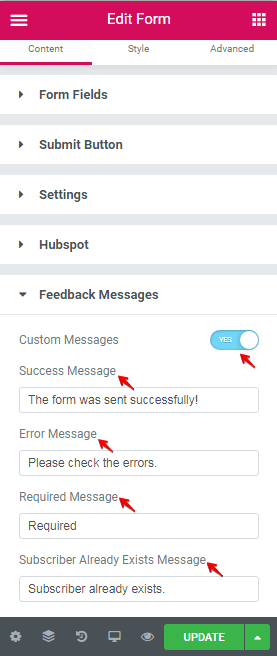
Feedback Messages
After a page visitor submits a form, they will be able to see a message on their screen. The Jupiter X Form Builder has four types of messages, including Successful Message, Error Message, Required Message and Subscriber Already Exists Message. In the Feedback Messages section, you can alter the messages tailored to fit your needs.
Style Tab
This tab contains six settings including General, Label, Field, Checkbox, Radio, Button. Let’s walk through each setting one by one.
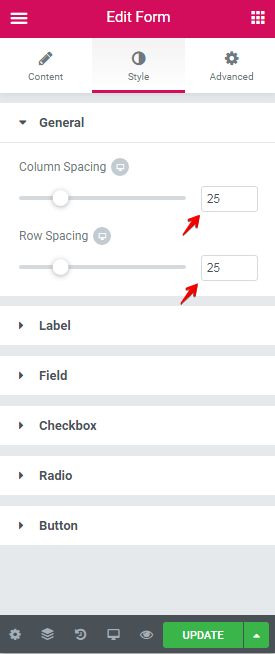
General
In the general section, we have two options:
- Column Spacing: this allows you to change the space between fields that are arranged horizontally.
- Row Spacing: this enables you to adjust the space between fields that are arranged vertically.
Label
In the label section, we can set the below style for the label:
- Color
- Font family
- Font size
- Font weight
- Transform
- Style
- Decoration
- Line-height
- Letter spacing
- Space between the label and field.
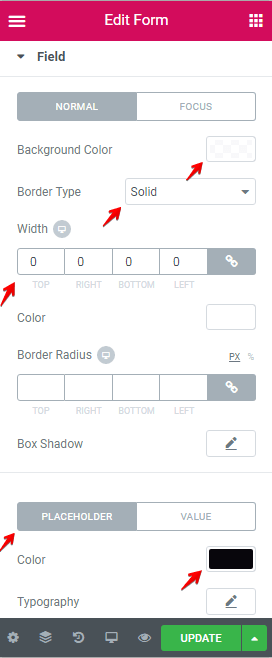
Field
In the field section, we can set the below style in the normal and focused situation.
- Background color
- Border Type
- Border Radius
- Box Shadow
Also, we can set Color, Typography, and Padding of the placeholder and value.
Checkbox
In the section, we can set below style in the normal and checked situation.
- Size
- Color
- Typography
- Spacing between
- Spacing
- Background color
- Border style
- Box-shadow
Radio
In the section, we can set below style in the normal and checked situation.
- Size
- Color
- Typography
- Spacing between
- Spacing
- Background color
- Border style
- Box-shadow
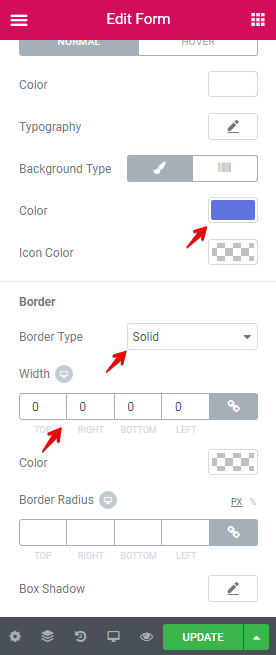
Button
In this section, we can adjust the style for a button with the following settings:
- Height
- Color
- Typography
- Spacing
- Alignment
- Background Type
- Icon color
- Border style
- Box-shadow
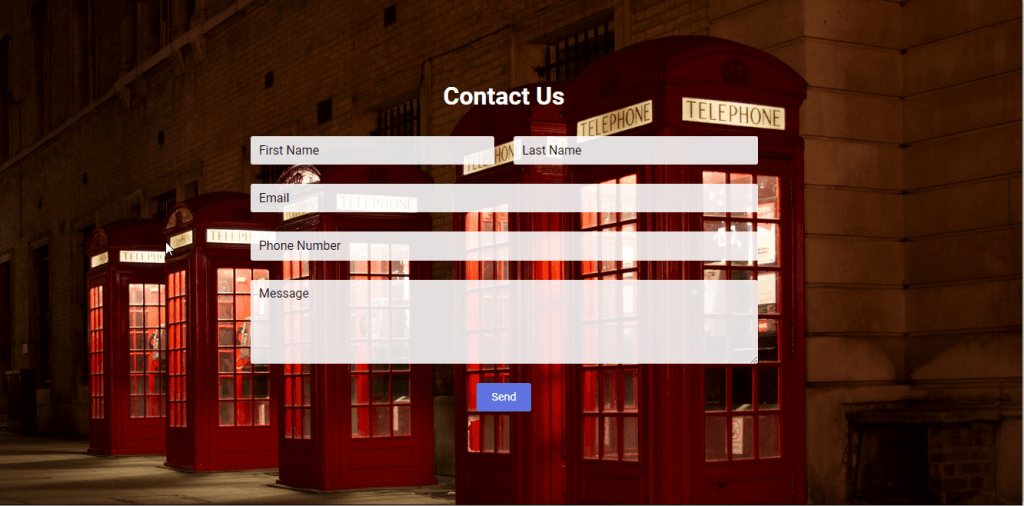
Creating a Custom Contact Form
Contact forms are a useful type of form commonly used on websites. Visitors to your page can fill out contact forms to send messages, ideas, questions or any other information to the site owner.
In creating this form, you have the option to include Email, Redirect, Slack and Webhook actions. At the end of this section, we will create a Contact Us form like in the image below:
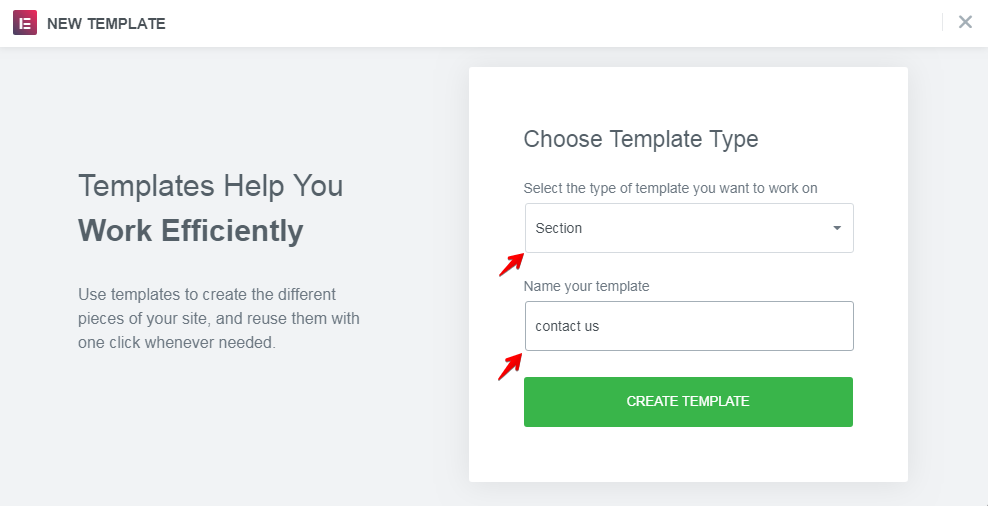
1. Go to Elementor > Add New.
2. Create a Section that is named Contact Us.
3. Add a new section with one column and set the following:
- This image as a background image.
- In the Content tab, Content Width: 680px
- In the Advanced tab, Padding top and Padding bottom: 100px
4. Add a Heading.
- In the Content tab, set Title to Contact Us and Alignment to Center.
- In the Style tab, set Color to #FFFFFF
- In the Advanced tab, set Padding Bottom to 16px.
5. Add a Form element from Raven Elements, then set the name to contact.
6. Create a First Name Field.

7. Create a Last Name field.
8. Create an Email Field.

9. Create a Phone Number field.
10. Create a Message field.
11. In the Style tab, set:
- Background Color to rgba(255,255,255,0.91)
- Placeholder Color to #000000
Also, set the other settings as shown in the images below.
12. Go to Content tab > Submit Button section.
13. Go to Style Tab > Button Section. Set Background Color to #6073e0
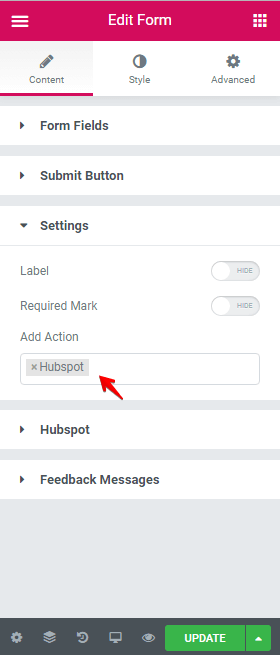
14. Go to Content tab > Setting section. Set your preferred actions.
15. Change the settings like in the images below in the sections of each action.
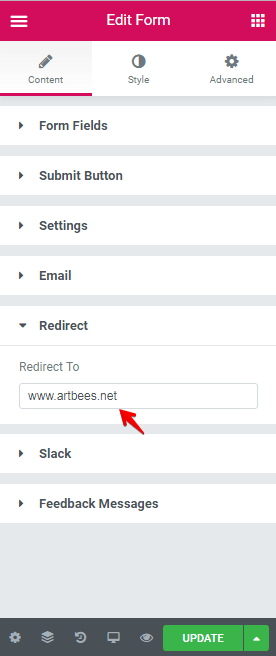
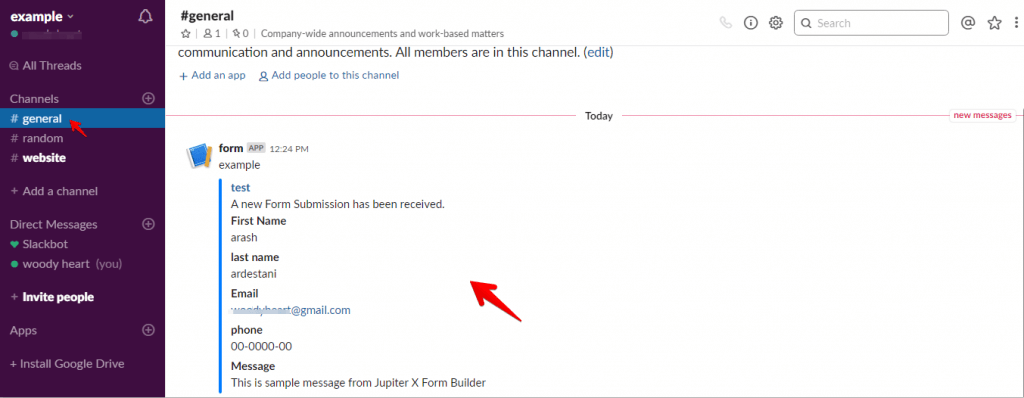
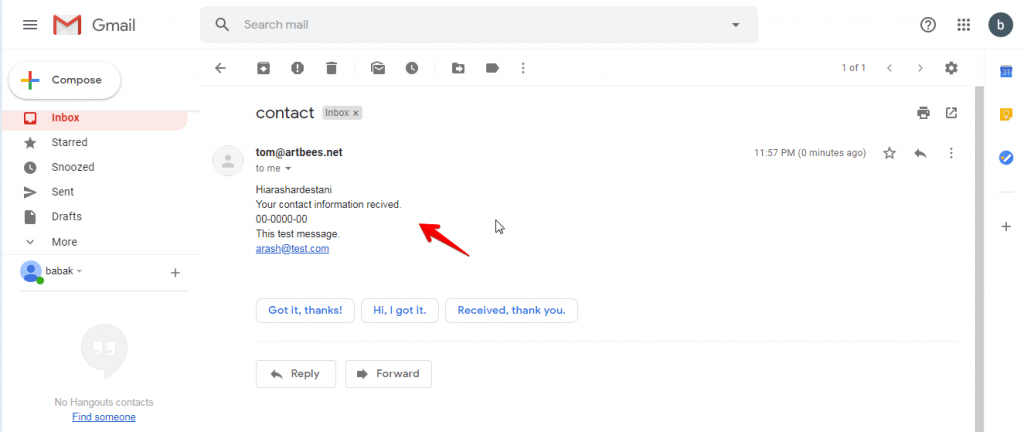
In the end, when submitting the form, the data will be sent to [email protected], the page will be redirected to www.artbees.net, the form data will be sent to our Slack channel and a new email will be sent to the Gmail account that we set up in our zap in Zapier.
Creating a Subscription Form
Subscription forms are popular on websites as it enables the site owner to send news and deals to their subscriber list.
In this section, we’ll go through and explain the MailChimp, Download and Hubspot actions in detail. Also at the end, we’ll create the subscription form shown in the following image.

1. Go to Elementor > Add New. Create a new section and call it “subscribe.”
2. Add a New Section with two columns then set:
- Background Image to this image.
- In the Layout tab, set content width to 800.
- In the Advanced tab, set Padding to 100px.
3. Edit the left column. In the Advanced tab, set:
- Padding-top to 19 %.
- Padding-Right to 30%.
4. Add a Heading element in the left column the set following settings.
- Title: Subscribe to our Feeds
- Alignment: center
- Text color : #FFFFFF
- Size: 26
5. Add a Spacer element in the left column.
6. Add a Social Icons element in the left column with the following settings.
- Shape : Circle
- Alignment : Center
- In style tab: Primary Color to rgba(255,255,255,0.54), Secondary Color to rgba(0,0,0,0.68), Size to 17, Spacing to 18.
7. Edit the Right column:
- In the Style tab, set background color to rgba(255,255,255,0.8).
- In the Advanced tab, set the following:
- Padding-top to 10%.
- Padding-Right to 5%.
- Padding-left to 5%.
- Padding-bottom to 4%.
8. Edit the Right column:
Add a Form Element. In the Content tab set Form to Subscribe.
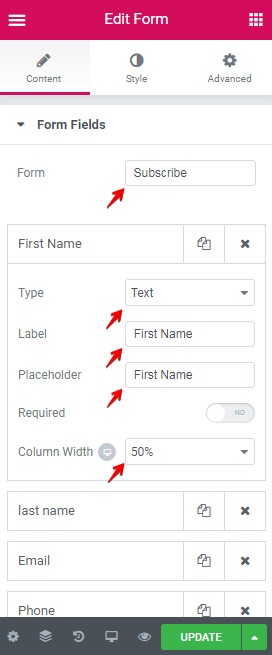
9. Create the First Name and Last Name fields like in the images below:

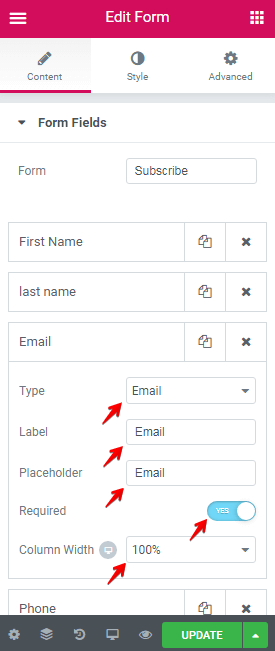
10. Create the Email and Phone fields as seen in the following images:
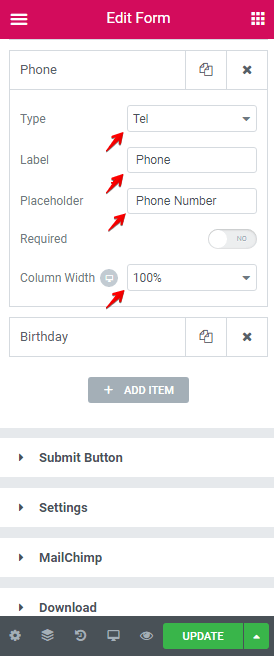
11. Create a Birthday field like the images below:
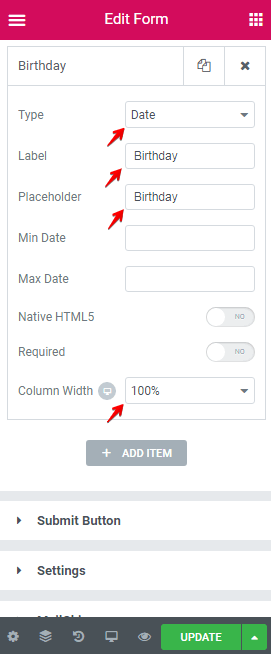
Important Note: In your MailChimp account, the type of birthday field must be Date.
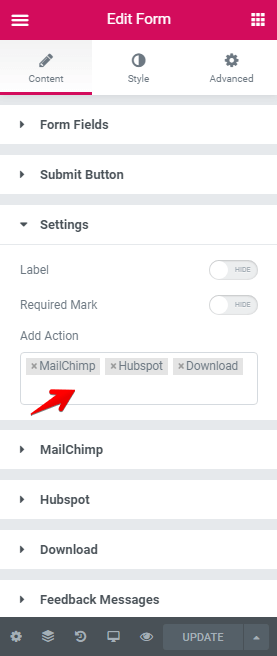
12. Change the Submit button and Settings sections like in the image below:
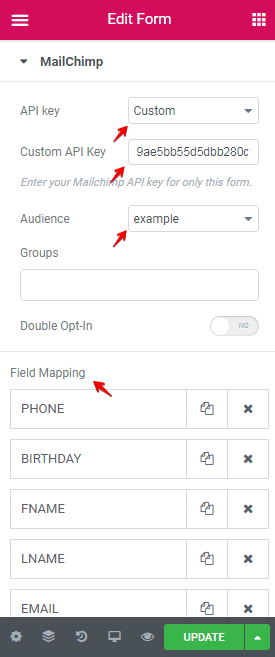
13. In the MailChimp section, set our API Key and create five fields in Field Mapping with the following values:
Field Mapping
| MailChimp Field | Form Field |
| Phone Number | Phone |
| Birthday | Birthday |
| First Name | First Name |
| Last Name | Last Name |
14. In the Download section, set your URL for download.
15. In the Hubspot section, set the settings as seen in the following image:
Field Mapping
| Hubspot | Form Field |
| firstname | First Name |
| lastname | Last Name |
16. Edit the Form > Style Tab, set the following:
- Column Spacing: 15
- Row Spacing: 25
Finally, after submitting a form the download will begin, the data in the form will be sent to Hubspot, and users will be subscribed to MailChimp.

Securing the Form
There’s no doubt that security is one of the most vital factors when it comes to forms. The Jupiter X Form Builder has been built on top of standard security practices.
Frontend Validation
Frontend validation (HTML5 validation) is used on the client-side to ensure that the data is correct before sending. The data entered into a form needs to be in the right format and certain fields need to be filled in order to effectively send the submitted form. For example, if we enter a number in the email field, an error occurs and the data is not sent.
Backend validation
Backend validation runs on the server after the data from the form is sent to the server. Backend is more important than frontend validation because hackers can disable frontend validation and send malicious data to the server.
reCAPTCHA
reCAPTCHA is a free Google service that protects websites from spam and abuse. With this service, we can ensure that the data is sent by a human, not a robot.
To add this to our form, we must go to reCAPTCHA and get the Site Key and Secret Key, and then insert them into Elementor > Setting > Raven.
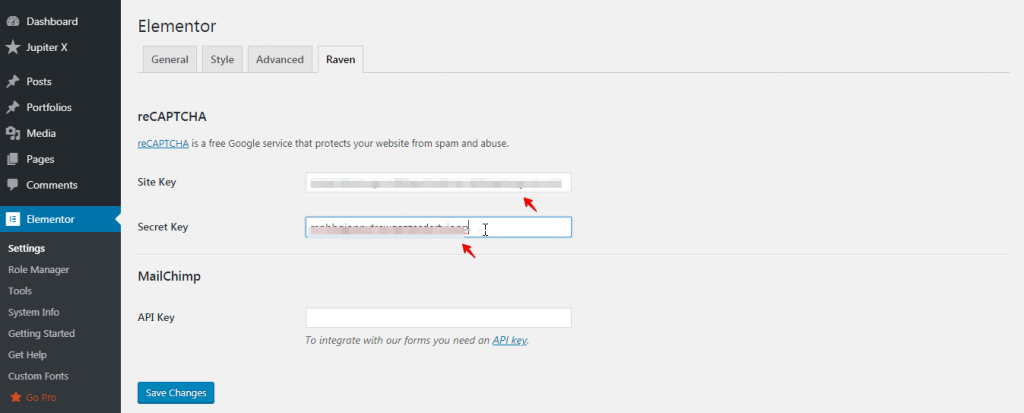
Then, create a field with reCAPTCHA type to use it.
Logging the Sent Emails
Being able to log and view the sent emails in WordPress admin is very helpful both for development purposes and in tracking the emails.
There are some plugins that allow us to log the emails.
1. Email Log

Email Log is a WordPress plugin that allows you to easily log and view all emails sent from WordPress.
The features of Email Log include the following:
- See all sent emails.
- Filtered or sorted based on the date, email, subject, etc.
- Delete selected emails or bulk emails.
- Resend emails.
- Forward emails.
- Export email logs.
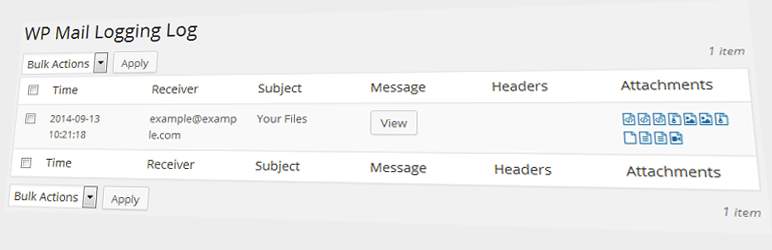
WP Mail Logging logs each email sent by WordPress. This can be useful if you don’t want to lose such mail content. It can also be useful for debugging purposes while developing.
Features
- A complete list of sent emails.
- Error status from mail implementation is logged.
- Zero-configuration – just install and enjoy.
- Log rotation – decide which emails you want to keep.
- DevOP: IP of server sent the mail.
Conclusion
In this article, we took a deep dive into how you can create custom forms with the Jupiter X Form Builder. This post provided step-by-step instructions on how to create two types of forms: a contact form and a subscription form. Through looking at both of these examples, we also covered the Email, Redirect, Slack, MailChimp and Download actions that are found in them.
We took this post a step further and explained the significance of security and addressed frontend and backend validations, as well as reCAPTCHA. This post further examined two plugins that will allow you to log the emails that have been sent to your server from your site’s forms.
Feel free to share your ideas and experiences with us in the comments!

1 Comment
Just finished going through your article and I have to say, it was an outright hoot. Your writing practice is so engaging, I felt like I was on a wild goose chase with you. The picture you included were also a hoot, and I’m persuadedconvinced that you must have a photographic memory because they were so vivid. Keep it up, it’s a real trip!”