
A popup is a small window that appears from different sides or with different effects as a customer browses a website. It can have different shapes, forms, locations and functioning behavior, it can be used to show important information, make an agreement with the user, collect leads or gather other information from the end user.
Let’s be honest, you probably hate to see popups when you’re browsing a website. It’s usually unwanted and distracts from whatever process you were engaged in. However, as a site owner, you can’t afford to ignore making popups because they have the potential to greatly increase lead generation. In this article we will discuss the function of popups and present several methods on how to create popups in Elementor websites.
Popups in Elementor Pro
Elementor has a built-in feature for popups, but in order to utilize this feature you need to upgrade your account to the Pro version.
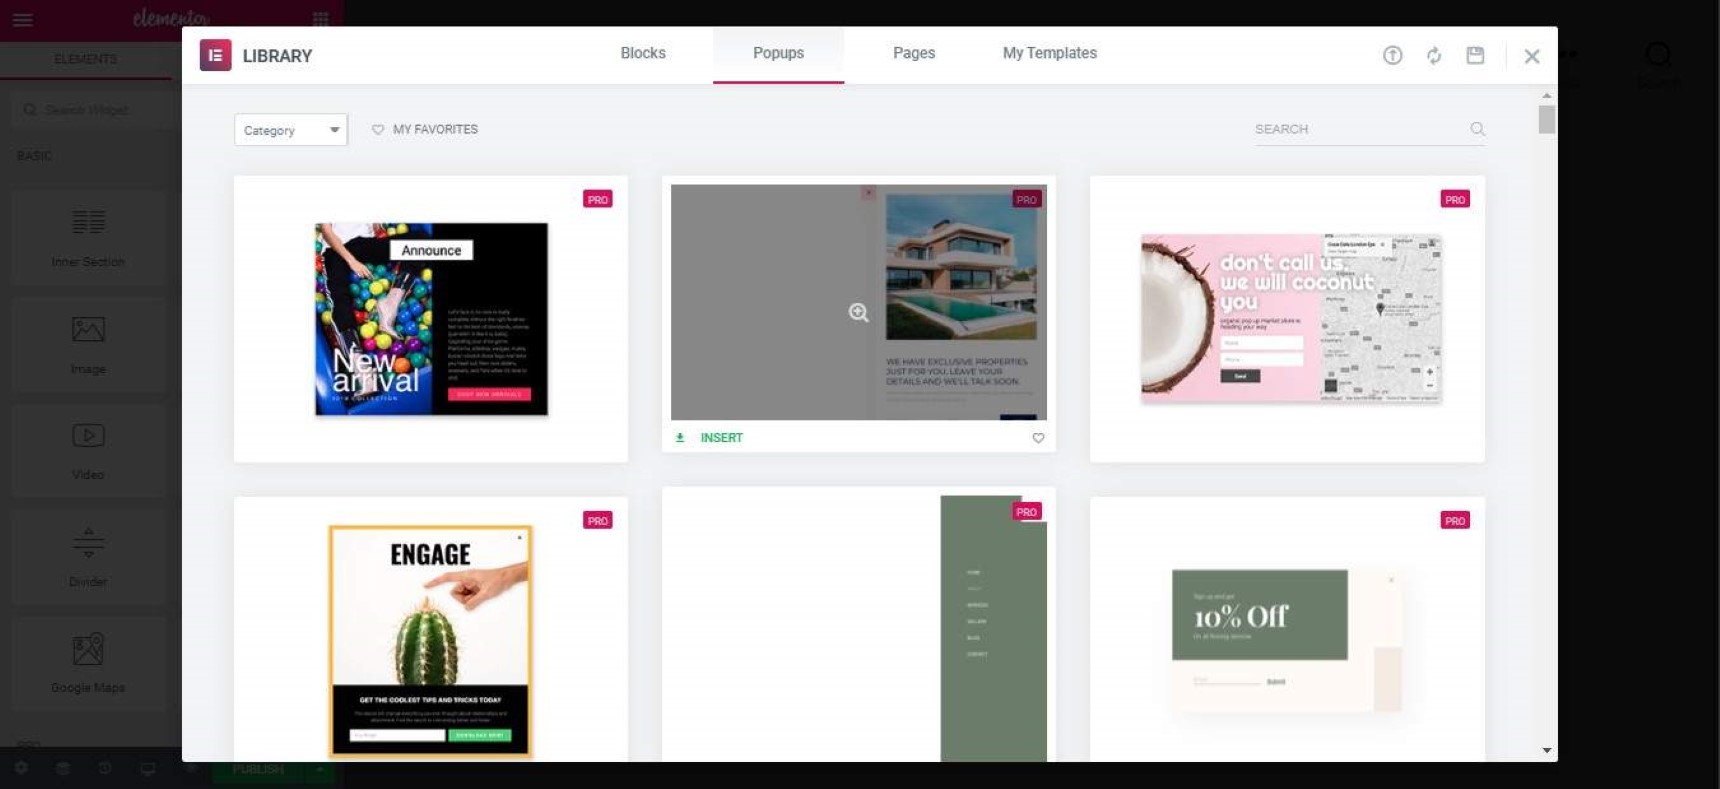
If you are familiar with Elementor, then you probably know how to create and manage templates. Building popups in Elementor is very similar to working with templates; you create them, define rules and set where they will appear. Let’s shortly review how this works in Elementor Pro:First you need to create a new popup via Elementor > Popups > Add new popup. Once you add the name you will have the chance to choose from a pre-designed template or start from scratch.
No matter which way you use it, working with page elements is absolutely the same. Besides, this post is not about how to use the Elementor page builder. Rather, the most interesting part of the popup is in the template setting (marked by the gear icon at the bottom left). Here in the settings tab you can define width and height, animations for entry and exit, the horizontal and vertical position of the popup window and close button style and appearance.
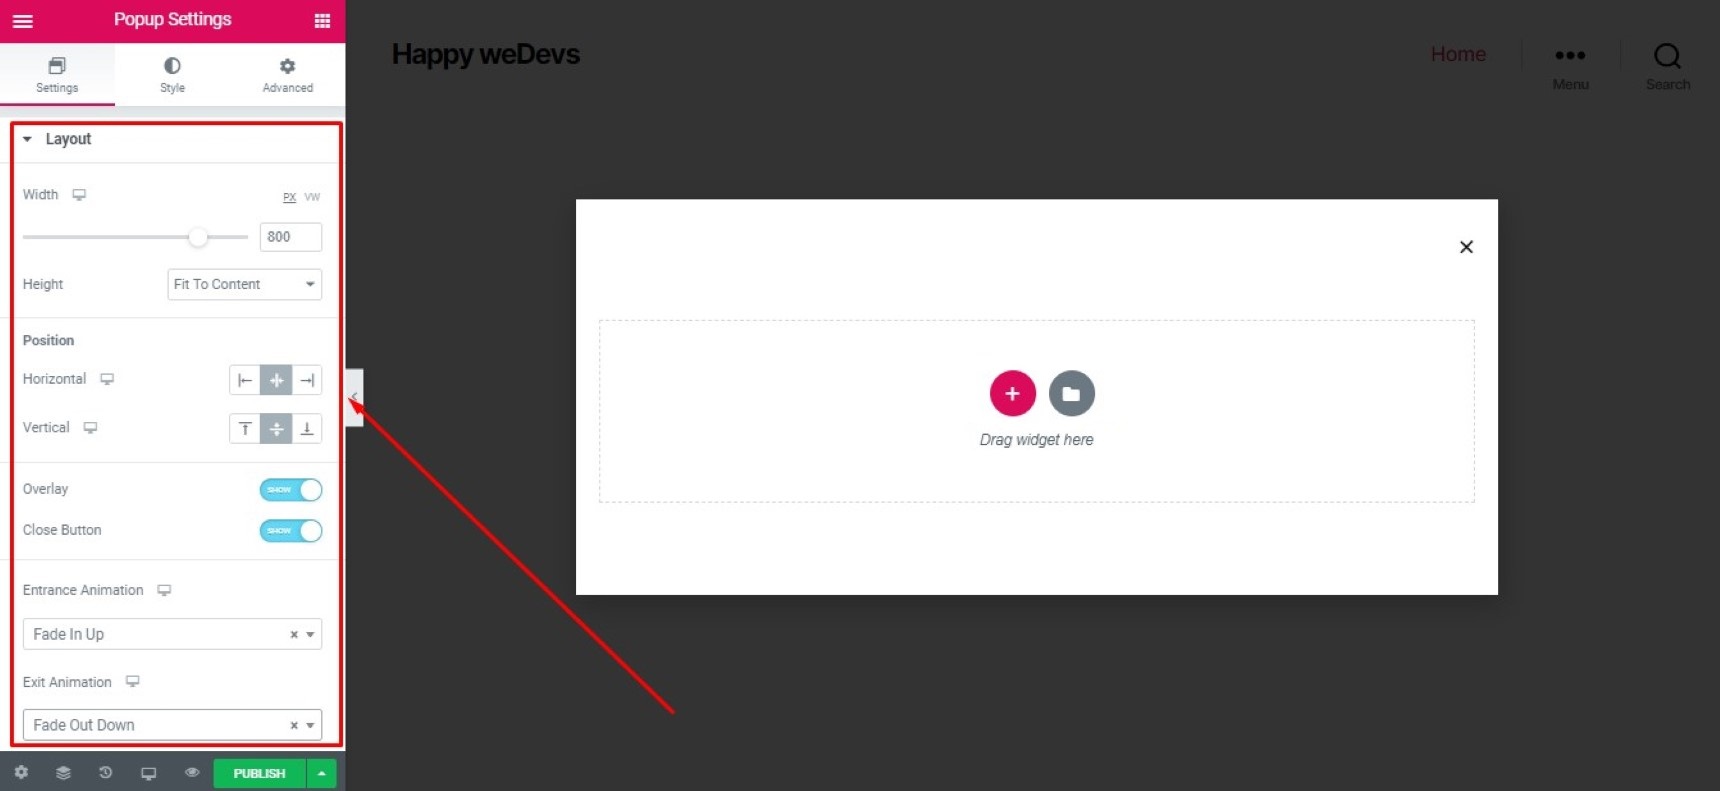
On the style tab (on the right side), you can define the style of the elements used in the popup, close button style and some other style-related settings.
If you finished setting up the popup window it’s time to define how and when to show your popup. To do this you need to define the Publish Settings of this popup.
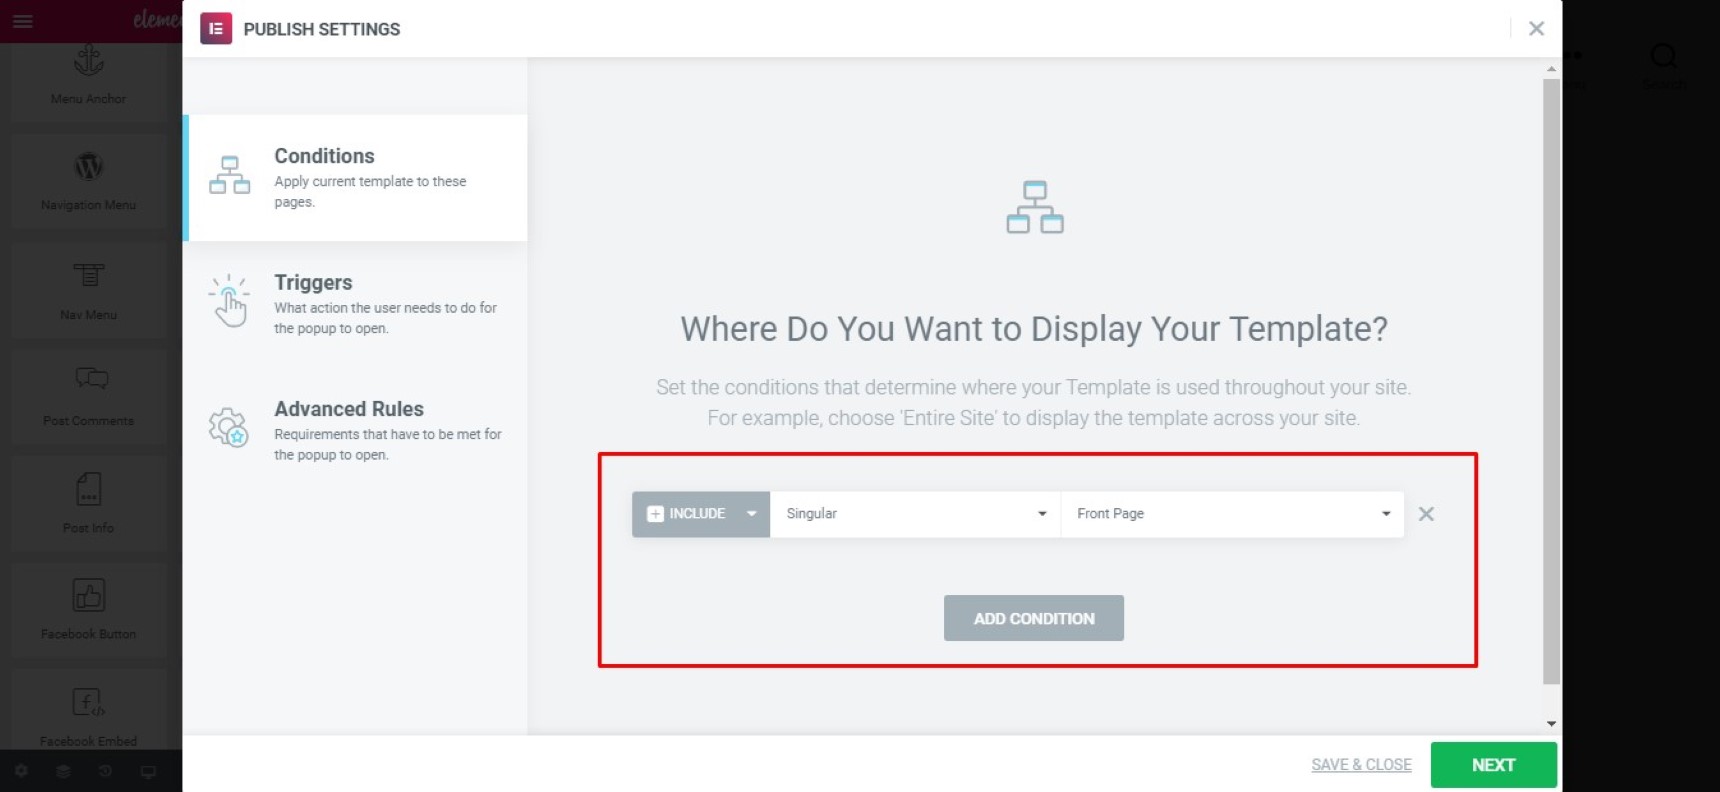
The Conditions tab defines the location of the popup. You can choose different locations like pages, posts, only frontpage, only Shop page or anything else you can imagine. You can also combine rules together.
The Trigger tab defines exactly when you want a popup to appear. There are several triggers and they are enough to setup advanced processes including:
- On-Page Load
- On Scroll
- On Scroll to Element
- On Click
- After Inactivity
- On-Page Exit Intent
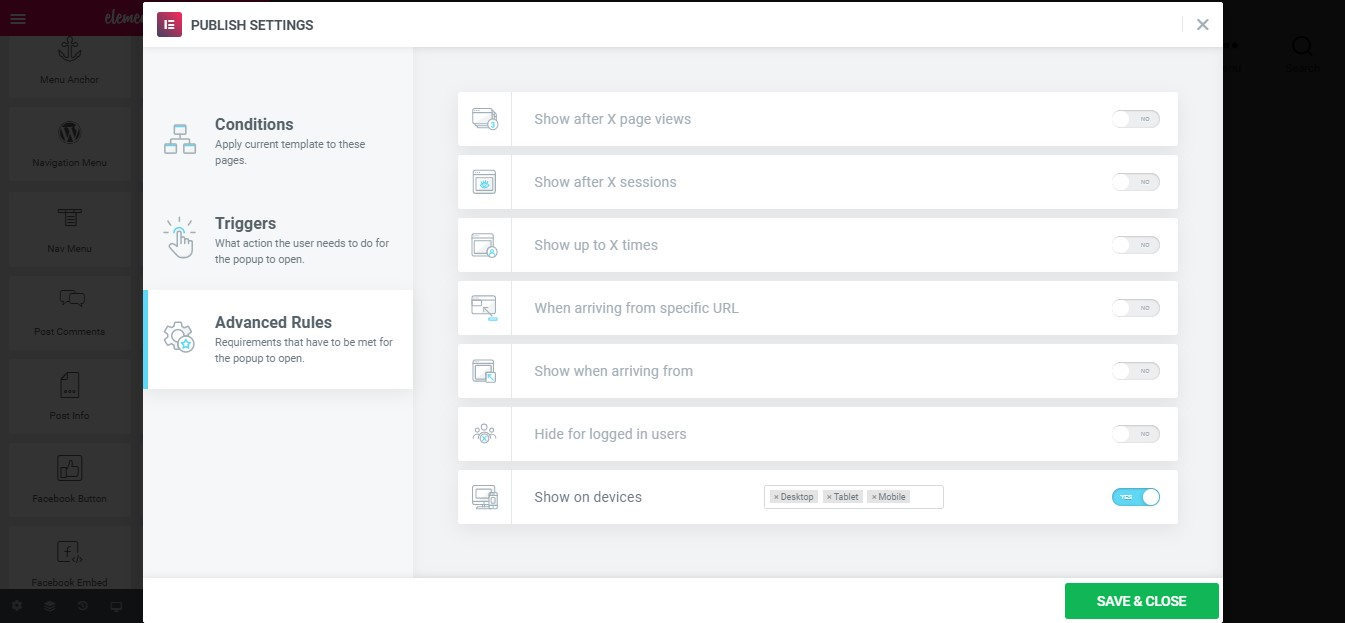
The Advanced Rules tab allows you to define the advanced conditions of your popup such as where or to whom you want to display the popup. These include different user roles as well. There are many different rules available and they can also be combined with each other.
Once you set all your rules and click Save & Close, your popup will be ready and will show up for end users according to the rules you set.
Popups in Jupiter X
Popups in Jupiter X can be used even if you don’t have Elementor Pro! They are organized by famous JetPopup plugins, which is a premium plugin and included for free in Jupiter X.
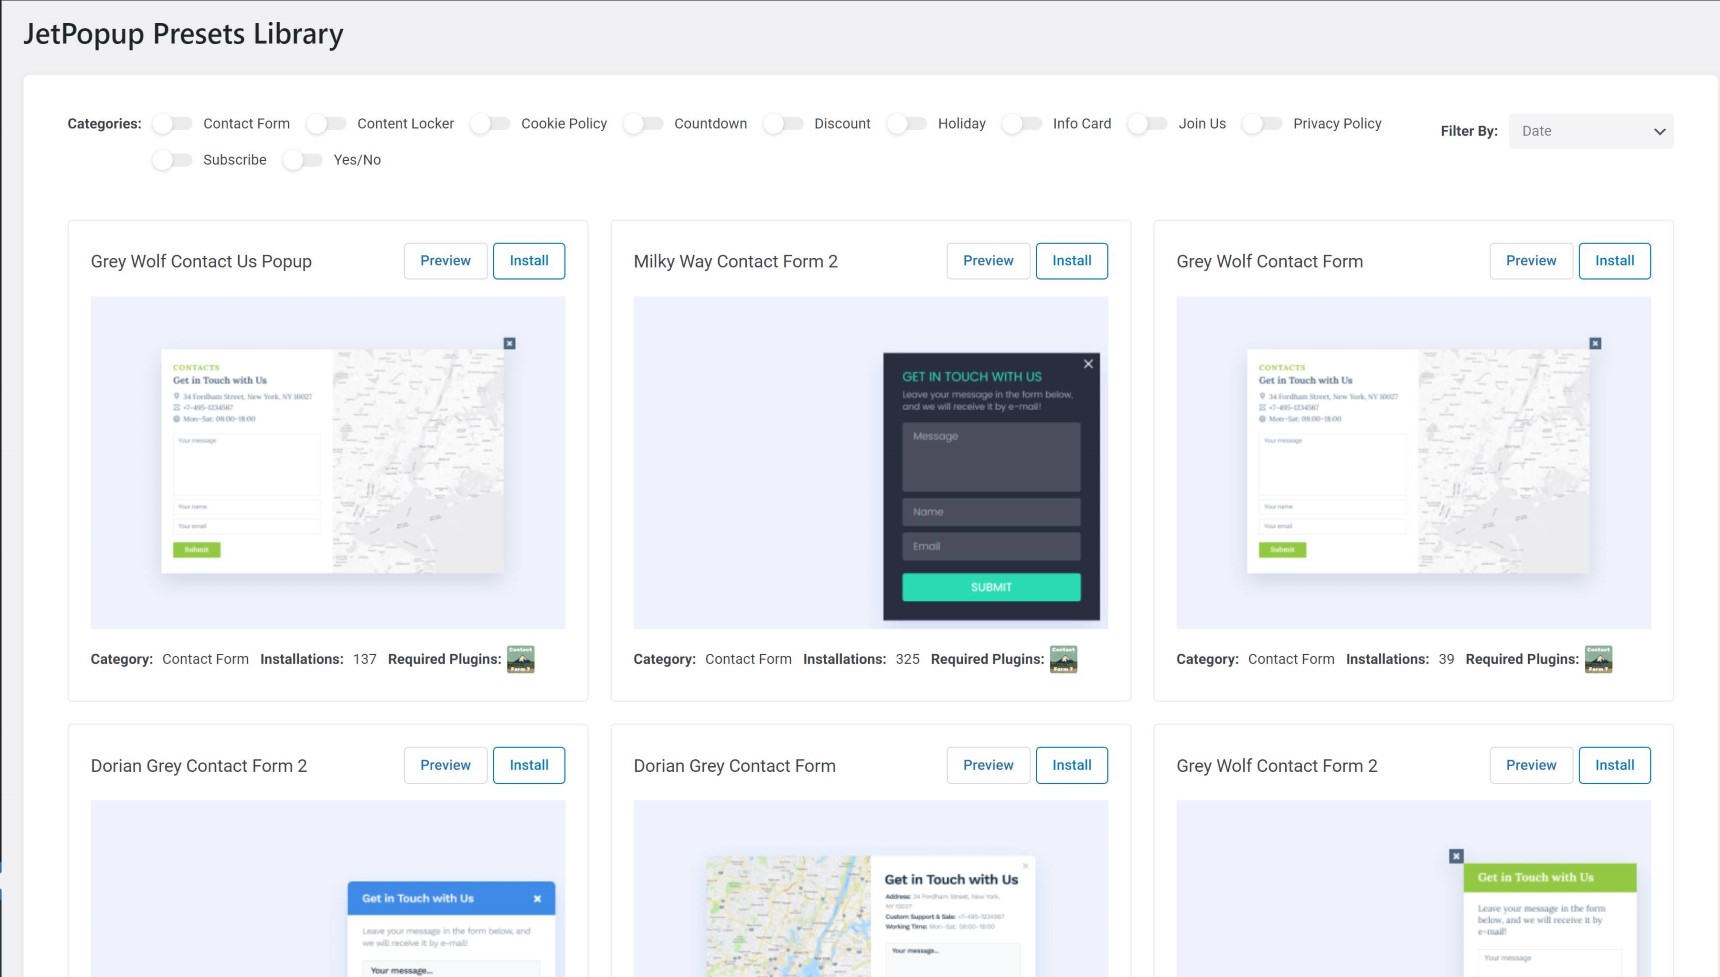
In JetPopup, as in Elementor pro, you also have pre-built templates, but here you have a better selection of templates and they can be filtered by different categories.
The process is almost the same as in Elementor Pro: you start with a blank template or with a premade template. Designing the page with the Elementor widget is the same, you just need to add and configure the Elementor widget. The difference is in the settings of the popup. In this case you don’t have a Publish Settings tab, but instead you can configure all the settings from the same window.

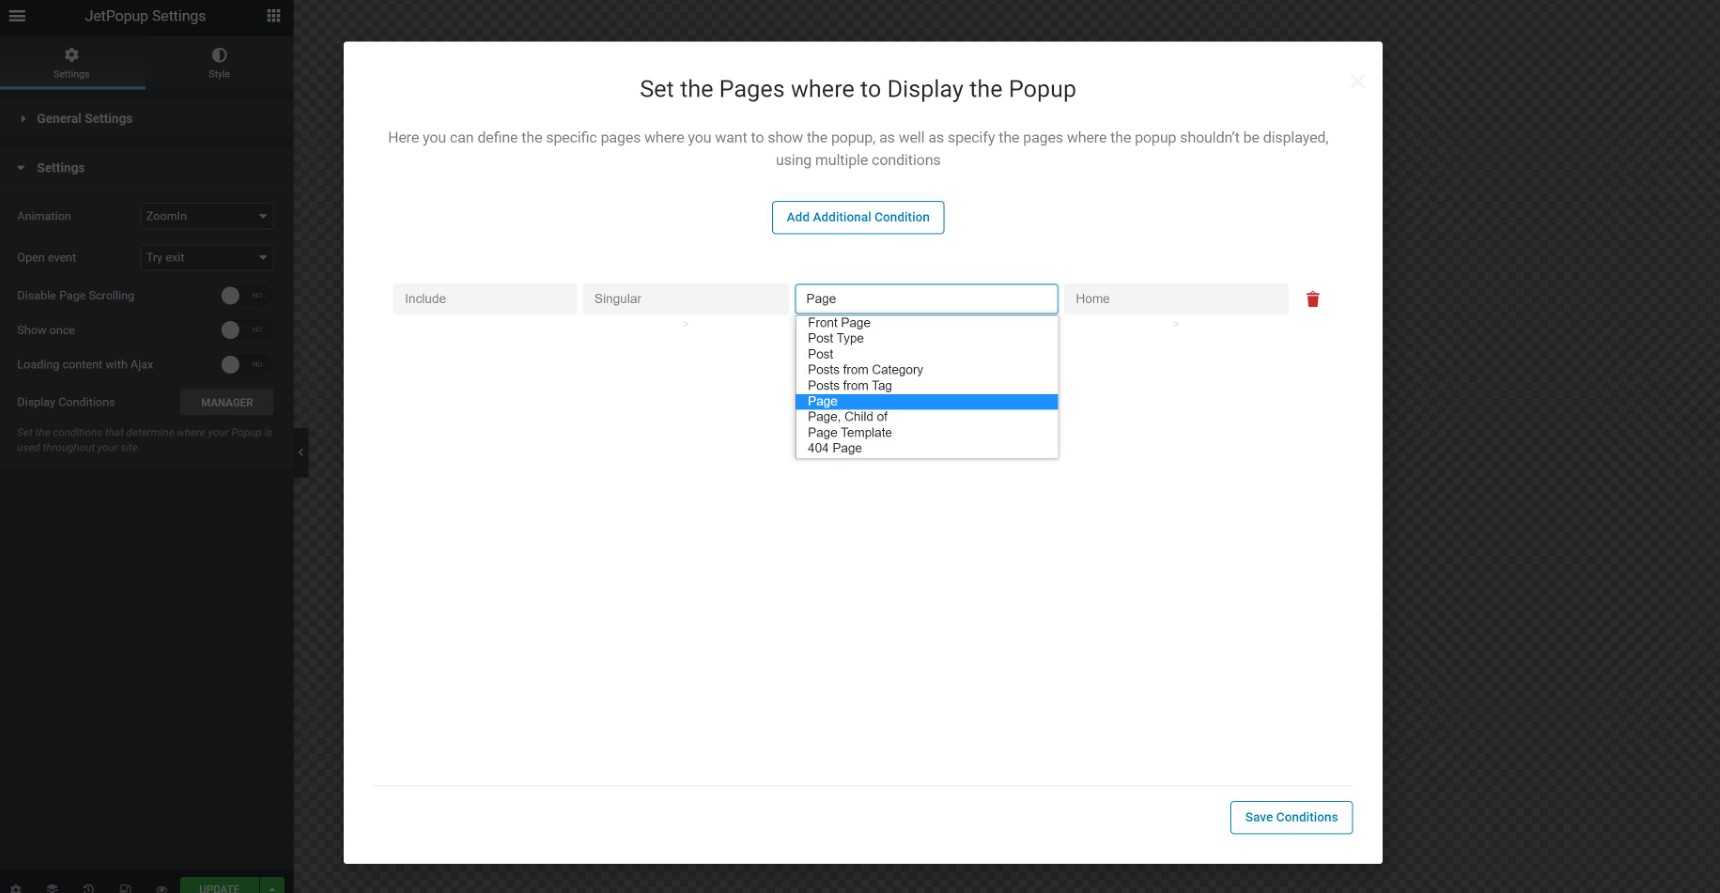
Here in the settings tab you can define animation, popup events, amount of popups and many other settings. The most important part here is Display Condition, which defines rules of where exactly you want to show your popup. Here you can choose to include or exclude pages, posts, categories or many other post types. They can also be combined with each other.
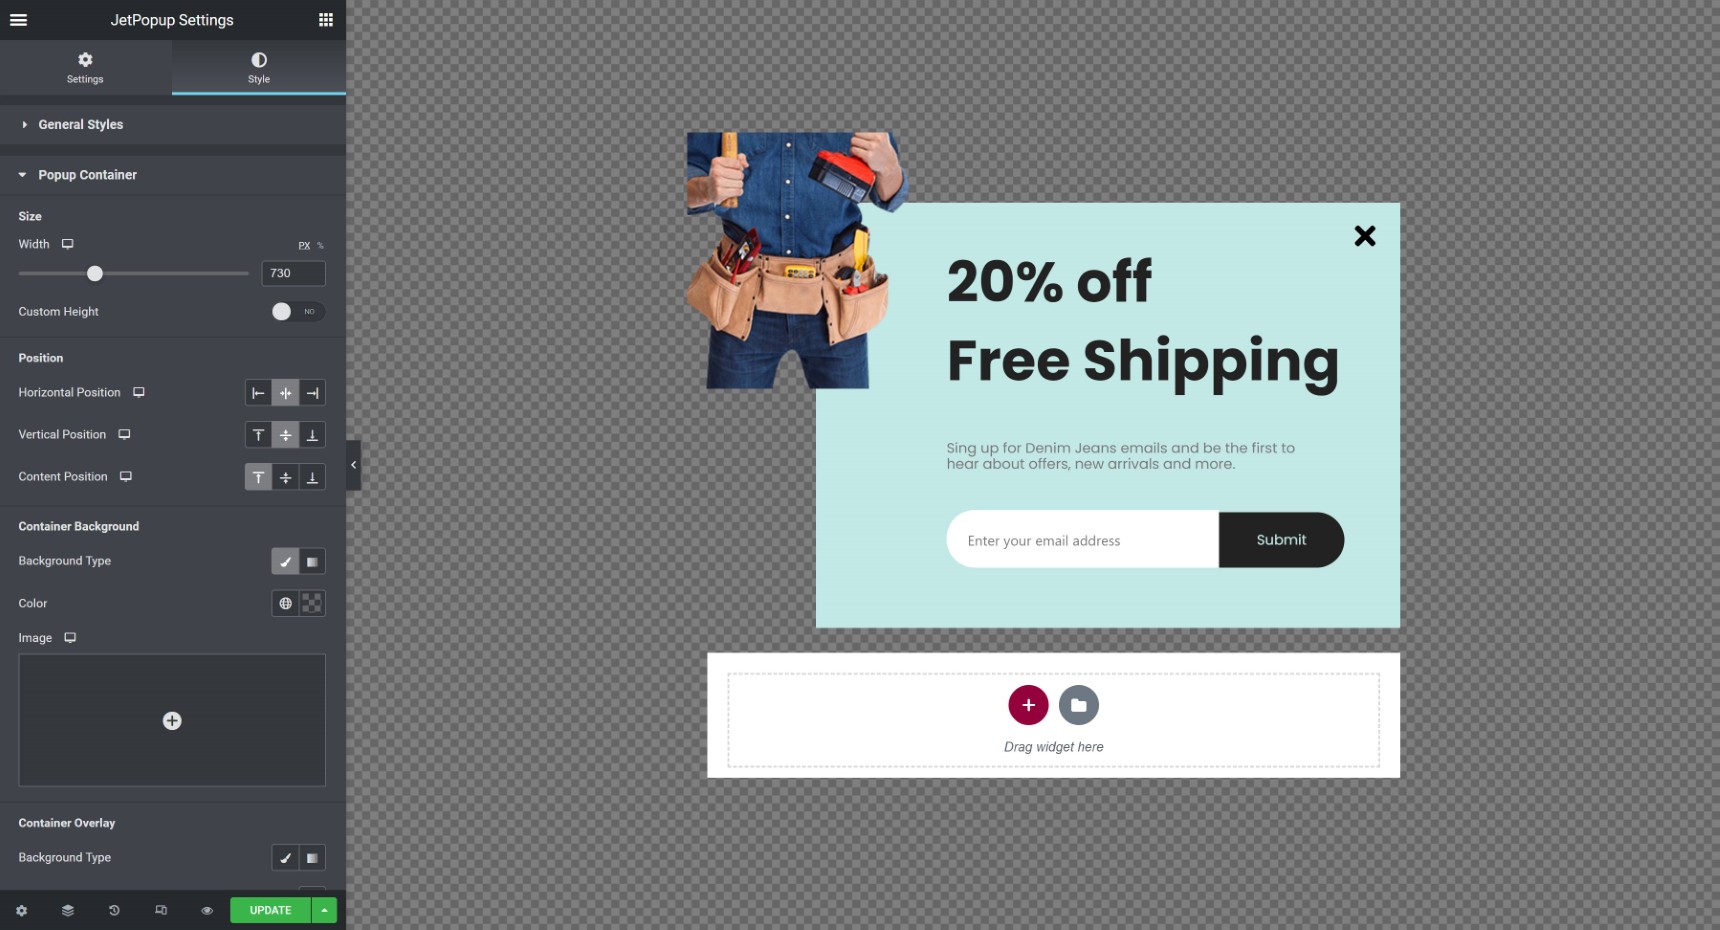
The Style tab in the settings is responsible for the style of the popup. Here you can define width and height, position, background type and many other settings such as close button style and overlay of the popup, which can be defined as a color or image.
The good thing about the JetPopup plugin combination with Jupiter X is that when you install one of many demos of Jupiter X it comes with a pre-designed popup template optimized for that particular demo. Most of the demos are packed with nice looking popups, especially shop templates.
Popups by Growmatik
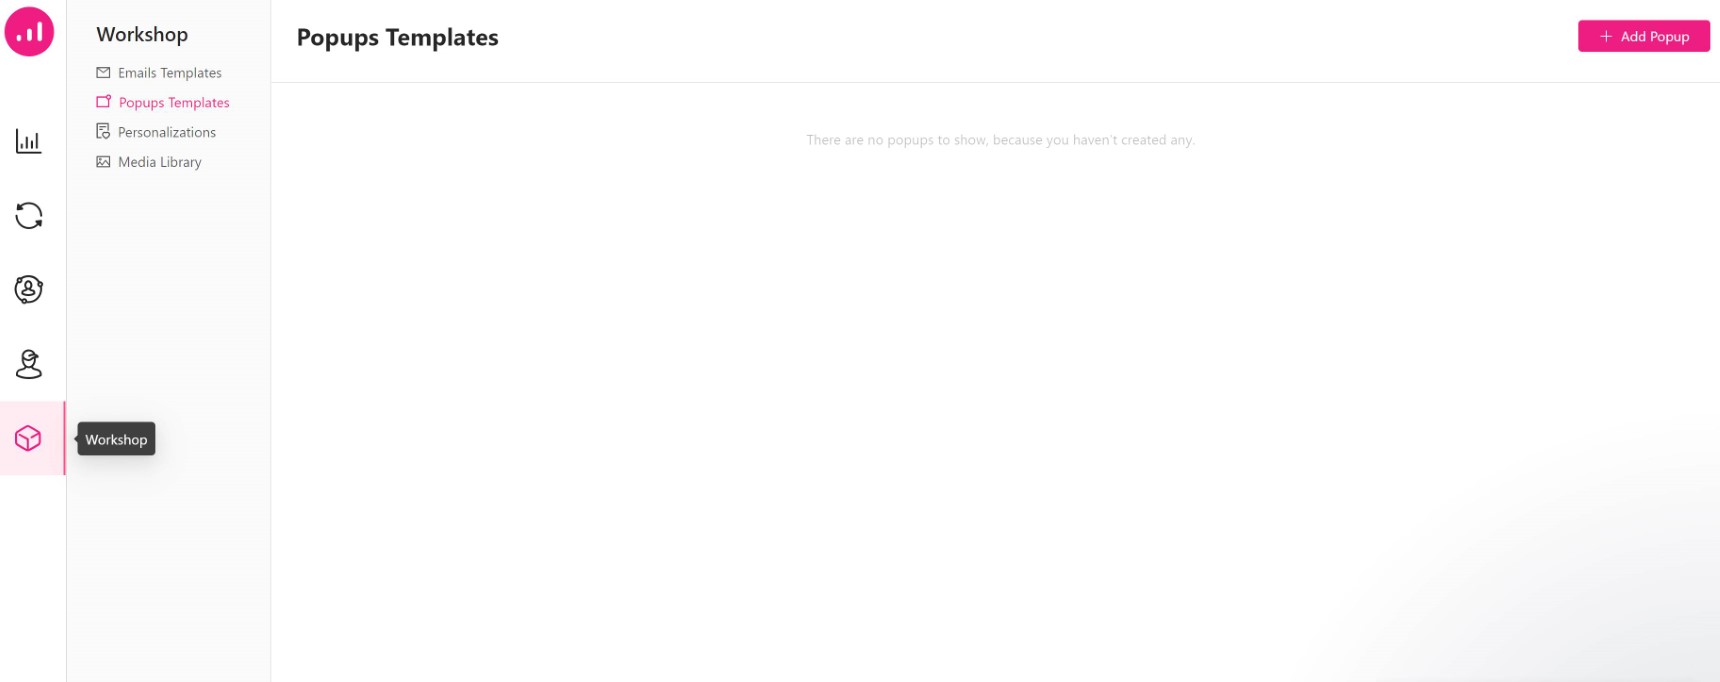
It’s likely you already know about Growmatik, our product that automates your entire marketing arsenal and drives more sales via personalized web pages, emails and popups, all from within one tool. However, if you have not tried it before I highly recommend checking it out. Popups in Growmatik can be displayed for specific events or to certain users from certain locations. In order to create such popups, first of all you need to make sure you first integrate your website with Growmatik. Once this process is done, you can start creating popups from the Workshop page:
Now, click on the button on the upper right side to add the popup. Basically, you have 2 options, to start from scratch or use readymade popups. These pre-made popups were created to fit the most common marketing scenarios like subscription, discount offer, content giveaway, new collection and many others.
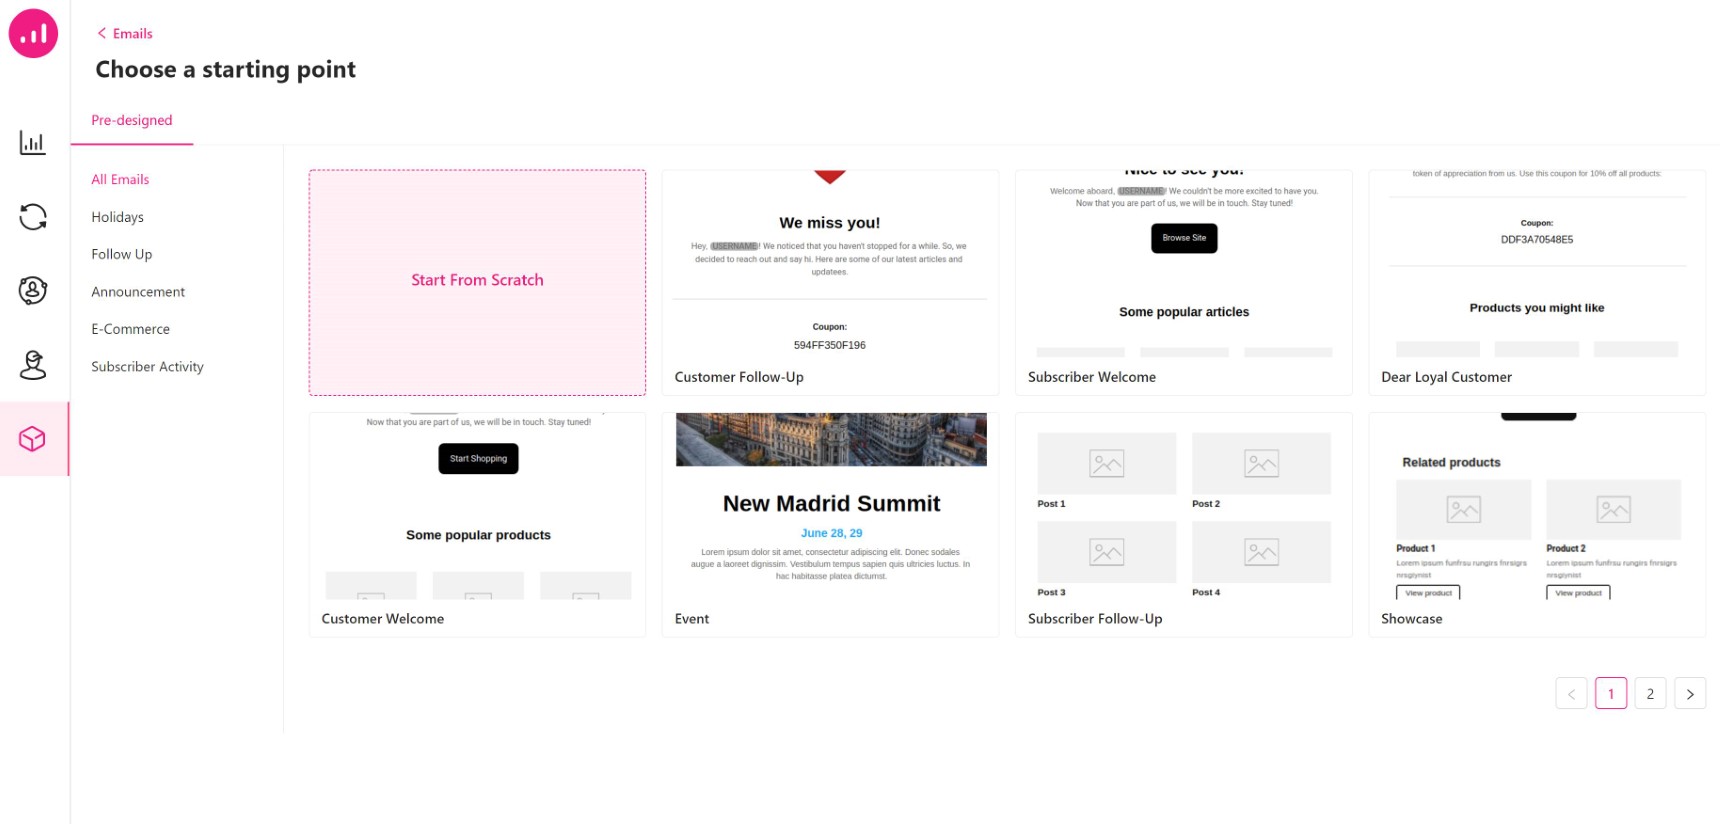
Starting with pre-built templates is the easiest option, of course, and will save you plenty of time. You’ll just need to change some text, images and the appearance settings of the popup window as everything else is already created and configured.
If you decide to start from scratch, it will take more time but your template will be fully customized. It’s all about your creativity! I love prebuilt templates but they do not always fit my needs, which is the main reason why you might want to start from scratch.
The best thing about Gromatik popups is that you are not distracted with other elements in the editing window. The sleek design helps you focus on your work, such as the important elements and settings window of the popup. Take a look at this screenshot to get an idea what the Growmatik interface looks like.
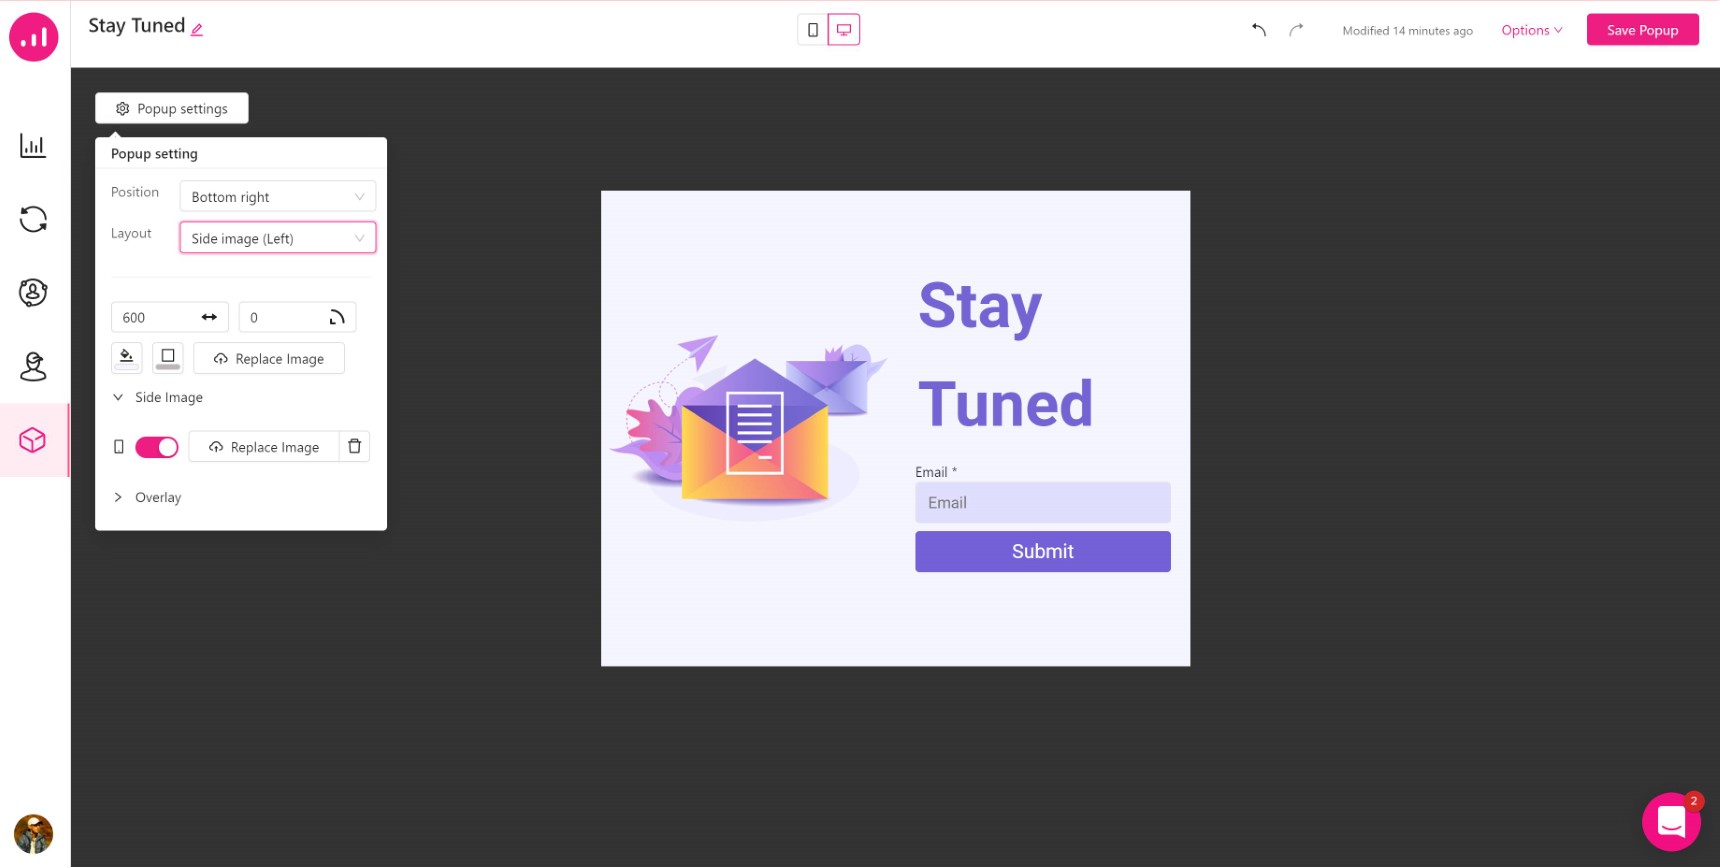
Everything you may want from the popup, you have in your window. Growmatik boasts a responsive view, real time preview, the setup of the popup layout, overlay style and many other related settings that can be configured from a single window. That’s how easy it is!
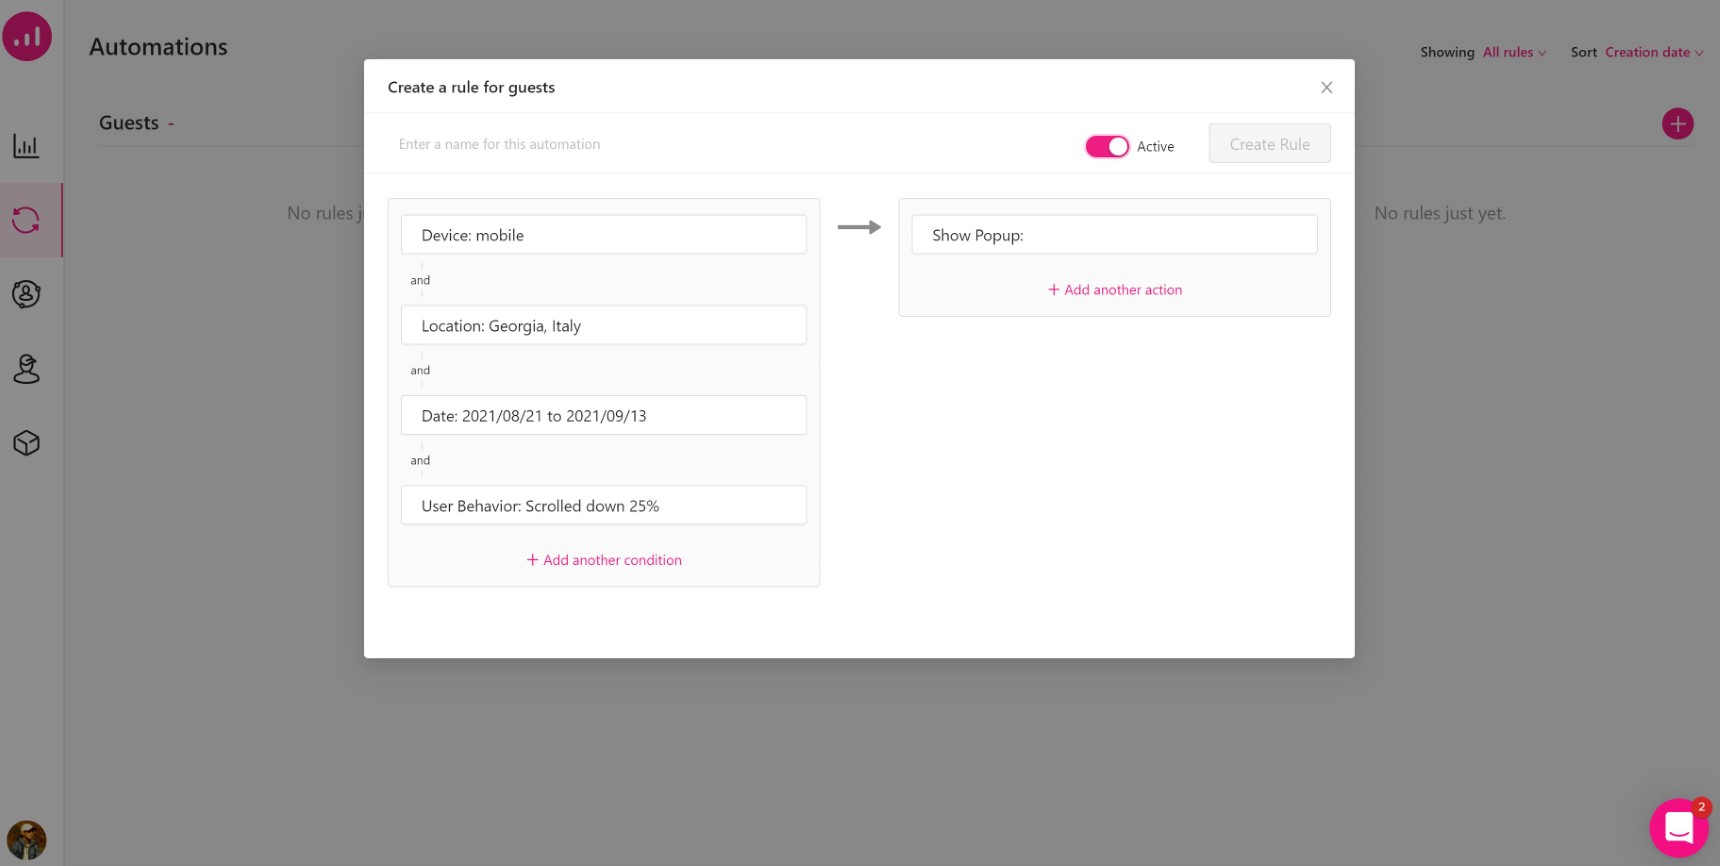
Once your popup window is finished it’s time to create some automation. In other words, this popup now needs smart rules of appearance since we don’t want to show it for every user who opens our site. In this case, Growmatik has automation rules. To access these, you don’t even have to leave the popup builder. From the same window, on the top left you’ll see the Options button. Choose “Use in automation” and then, depending on your marketing goal, choose who you want to show your popup: guests, leads or customers. In the window that appears next you will have the option to show your popup window to filtered users by parameters such as location, device used, period of the time and many others.
We will not review all the details of the creation process but let’s check this screenshot, where we decided to show popups to users from Georgia and Italy who are using mobile devices. We want our popup to appear after they scroll our page by 25% and this campaign should run from 8 August to 13 September. On the right side we chose which popup to show for this campaign:
As we can see, creating this process is very easy, even for beginners, but be aware that we covered only the basics of the process. Actually, Growmatik is a versatile tool and it can be used for advanced marketing scenarios.
Conclusion
Thank you for reading this article! I hope you now have more information on creating popups in Elementor and other key marketing programs. As you can see, making a great looking popup is not a big deal and it is super easy. Nowadays, you don’t need to design popups from the ground up, since many ready-made templates are available. You just need to change some settings and set up appearance rules. As a site owner, you always need to imagine yourself as a viewer of the site. Don’t create too many popups and don’t distract users, since only good looking and well-functioning popups can really increase leads
If you have any questions or tips to add, please feel free to comment below!

No comment yet, add your voice below!