
Well, there are a lot of plugins for WordPress that allow you to add contact form to a page. In this article, we’ll talk about two of them – Gravity Forms and Contact Form 7 which are the most popular and easy to use.
Here I’m going to introduce some of the most useful and widely used contact form plugins and walk you through, step by step, on how to maximize your use of them. For Jupiter users, I’ll also give you some insight into how you each of these plugins work best with Jupiter. Let’s get started!
An Intro to Contact Form 7
As I mentioned, there are several widely used contact form plugins, including Contact Form 7. Contact Form 7 is a free and simple contact form plugin. For some users it can be one of the best form plugins for their websites. The plugin can handle multiple contact forms and supports AJAX submitting, CAPTCHA, Akismet spam filtering and file uploading.
You can find access this plugin by visiting the official website: ContactForm7.com. To download the plugin archive for installation, you can refer to the WordPress Plugin Directory. For future reference, detailed documentation can be reached in the official docs.

Okay, so now that you’re ready to start, after installing and activating you will find a dedicated menu item called “Contact” in the admin interface.
Your contact form can be easily deployed by placing its shortcode wherever you’d like the form to appear whether it’s in page, post, or widget area. Then messages submitted via the forms are sent to the email address you’ll have provided in the plugin settings.
Some Basic Options for Creating Your Contact Form
Simple forms can be created using a list with the tags described below:
- text fields (text, text*, email, email*, textarea and textarea*),
- checkboxes, radio buttons and menus (checkbox, checkbox*, radio, select and select*),
- file uploading and attachment (file and file*),
- captcha (captchac and captchar),
- quiz (quiz),
- acceptance checkbox (acceptance),
- submit button (submit).
Though that’s not all! There are actually even more alternative options you can use. To find more detailed information and options, I’d recommend you to refer to the Contact Form 7 documentation. To see an example of simple contact form you can visit Contact page of the plugin official website https://contactform7.com/contact/.
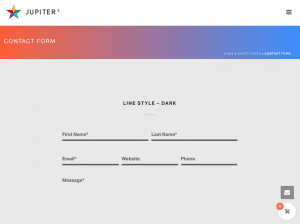
Adding a Contact Form to Jupiter WordPress Theme
Okay Jupiter users, listen up! It’s a safe bet you’ll be including a contact form on your site and if you’re using Contact Form 7, the plugin installation will be very simple:
- Once you logged in to your dashboard, go to Plugins -> Add New and search for the plugin “Contact Form 7”;
- Click “Install” and then click on “Activate” to install and activate the plugin so you can use it;
- Click on “Contact” in your WordPress Dashboard left side menu panel. Inside this menu you can create new contact forms for different parts of your website and edit the existing ones via the Edit option. The most important settings you need to define are located in the Mail tab. To set them properly you need read the documentation carefully (refer to the link mentioned above).
- To add a form to any page or post you need copy the form shortcode and paste it in the editor of your page/post.
As you can see nothing complicated is here. This plugin has a lot of potential. Try it, use it!
An Intro to Gravity Forms
Another plugin we’ll talk about here is Gravity Forms. Gravity Forms is also a WordPress plugin you can use to create contact forms. It’s also used for WordPress post creation, calculators, employment applications and more, but for today we’ll just talk about contact forms.
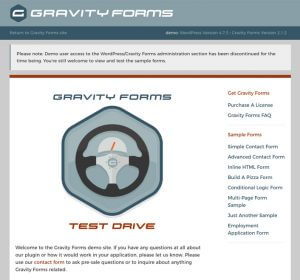
The official website you can refer to is gravityforms.com. Unlike with Contact Form 7, this plugin is paid and requires you to buy a license to be able to download it. To do this, go to this page. If you’re not ready to purchase the plugin, you can try its demo version and check out how it looks on the demo page.
Gravity Forms includes a wide variety of form field inputs available right at your fingertips. Choose which fields you want to add using the easy to use form editor. The standard field toolbox consists of: Single Line Text, Paragraph Text, Drop Down, Number, Checkboxes, Multiple Choice (Radio Button), Hidden Field, HTML, Section Break and Page Break fields.
If while using the form, some questions appeared, you can always visit the plugin documentation and FAQ, and search for the answers. Another way is to contact support department to get a reply directly from a tech person.
Adding a Form to Jupiter WordPress Theme
Once you’ve bought the plugin and are ready for installation, you’ll need log in to your WordPress Dashboard. Once you’re there, go to Plugins > Add new and click on Upload plugin button. Upload the archive that you downloaded. Here’s an additional reference on how to install any plugin.
Once you’ve activated the license key which was emailed to you along with your download link when you initially purchased your license, do the following:
Choose Plugins > Installed Plugins. Then click Gravity Forms > Settings and provide your license key. Once validated, you are eligible for automatic upgrades and support.
Once the plugin is installed and activated, you can start creating a form by going to the Forms menu in your WordPress Dashboard left side menu panel. Then click on “Add New Form”, give the form a title e.g. Contact Us Form, and click “Create form”. For how to add fields to the contact form or set up email notifications, I recommend reading Gravity Forms Documentation to be aware of all available features.
Once your contact form has been set up you need to add it to a page. Create a new page or edit an existing page, choose where you wish your form to display, then:
- Click on the Add Form button.
- Choose your form from the drop down.
- You can use the options of adding the form title or the description if you wish.
- Then click Insert.
- You will see a shortcode on the page once you can see this you can click preview and your form will be on the page.
- Click Update to save your changes.
Useful Tips for Gravity Forms and Contact Form 7
Once you’ve created a contact form and used it on your site for a good period of time, you’ll want to improve it and probably add some new features. We’ll share some tips with you that can be very useful.
How to Prevent Spam
It’s really important to add measures to prevent spam from getting through your form submissions. Gravity Forms gives you two options to avoid spam:
The first option is to add CAPTCHA to your form, but it can be a bit difficult to set up.
Instead, you can use the second option and enable the anti-spam honeypot.
This option adds an invisible field to your form. Bots get tricked into filling in the hidden field, which alerts the form processor that it’s spam. Since the anti-spam honeypot is not enabled by default, you’ll need to go into the Form Options on the Form Settings page. Simply click the check box for “Enable anti-spam honeypot”.
As for Contact Form 7, it provides several ways to prevent spam, and cooperation with the Akismet spam filtering plugin is an important part of the prevention strategy. In this article, you’ll find how to implement Akismet on your contact form with Contact Form 7 plugin.
Adding Line Breaks in Notification Emails to User for Gravity Forms
Whenever a user filled out the form, he would get an email notification with all the text on one line without paragraph breaks. Turns out you just need to tick a little checkbox that will make the difference. All you need to do is disable the auto-formatting and then the notification will save the paragraph breaks you created in the visual editor.
Redirecting to another URL after submissions in Contact Form 7
By default, Contact Form 7 redirects to the same URL as the form’s URL after form submissions. In some cases, you’d like to change this and set redirection to another URL after submissions. Contact Form 7 has already a post in their documentation how to do this.
Gravity Forms vs. Contact Form 7
When looking at the two plugins, you may suppose that Gravity Forms is the more powerful form builder plugin for WordPress. However, not everybody needs such a high level of functionality — especially when it comes at a price.
When it comes to how quickly you can create a standard contact form to your website, Contact Form 7 can be the winner, because the plugin is free to use, you can install it in just a few clicks from within your WordPress dashboard. As for Gravity Forms, it requires you to purchase the plugin, download the archive file, upload it to your website, and then create a form. Only after this step is complete can you publish it.
[call_to_action title=”Discover 26,000+ code scripts & plugins from our partner CodeCanyon starting from $2″ target=”_blank” url=”https://codecanyon.net/?irgwc=1&clickid=Q3XVRp27-Vd-W5SUr%3AxaIR5HUkjQ1q2JFRdWRY0&iradid=275988&irpid=1239055&iradtype=ONLINE_TRACKING_LINK&irmptype=mediapartner&mp_value1=&utm_campaign=af_impact_radius_1239055&utm_medium=affiliate&utm_source=impact_radius” type=”link”]
When you need to add more fields to the standard form of Contact Form 7, the process can be a bit complicated, it includes a few extra steps that you could overlook, and, if you don’t get them right, you may not receive all the details your users submit.
With Gravity Forms you simply add the fields to the form. If you need to change the order, you can drag and drop the fields into place you need.
What about translations? The Contact Form 7 plugin has already been translated into many languages, as well as Gravity Forms (its PO files are available for download by plugin license holders).
Gravity Forms has its own add-on for leading multilingual WordPress plugin WPML — which means you can build one form on your website, and then create the translations of it using WPML. Contact Form 7 also works with WPML, but multiple versions of the same form needs to be created, which means you’ll take more effort.
It’s up to you what plugin to use for contact form creation, but if you’re financially able to purchase a plugin, I recommend using a premium one. With a premium plugin you’ll get more additional features and access to plugin support should you experience any difficulties or have any questions.

1 Comment
This peculiarity is generally clearly fundamental and certainly economical with surprising facts, plus my business is looking for a place in advance for these exact useful items. https://totoilmi.com/