There are dozens of platforms out there to help you build your eCommerce store. If you’re looking for a free and powerful tool, WooCommerce is the most popular one among the shop builders using WordPress. WooCommerce offers some common shopping processes and features including product overviews, add to cart, checkout, shipping and payment and taxes, among others.
However, when it comes to customizing your pages and user experience, you would need to either develop it using a child theme/plugin or through another tool that allows you to customize your shop pages as desired. But wait – there are still ways to build and tailor your WooCommerce store without a single line of code. Read the article in its entirety to learn exactly how to build an eCommerce store in Jupiter X.
The Jupiter X theme offers a great Shop Customizer tool by default. It allows you to customize every part of the default shop pages or choose between the predefined shop page templates. But what if you want to create your own design and layout and use it to build an eCommerce store in Jupiter X? Fortunately, this is possible with the JetWooBuilder plugin which is bundled in with the Jupiter X theme.
What does the JetWooBuilder offer?
Simply put, the JetWooBuilder allows you to override the default shop pages in WooCommerce from single pages to the archive and category pages. It still doesn’t offer any customization on checkout and cart pages, but that part can still be made using Jupiter X or other plugins. So, if you aim to build a completely custom shop page layout, you can make use of the JetWooBuilder plugin. Here is the JetWooBuilder’s official website.
After adding the JetWooBuilder, there will be four global widgets that you’ll be able to use among your templates and even on your own pages:
It also adds a various number of widgets that you can use on your single page templates such as an add to cart button, attributes, content, excerpts, image, price and etc. You can find out how to create a single page template for your eCommerce here. However, we’ll go ahead and go through the steps of creating a shop while using Jupiter X and Jet Woo Builder.
Setting up an eCommerce store with Jupiter X
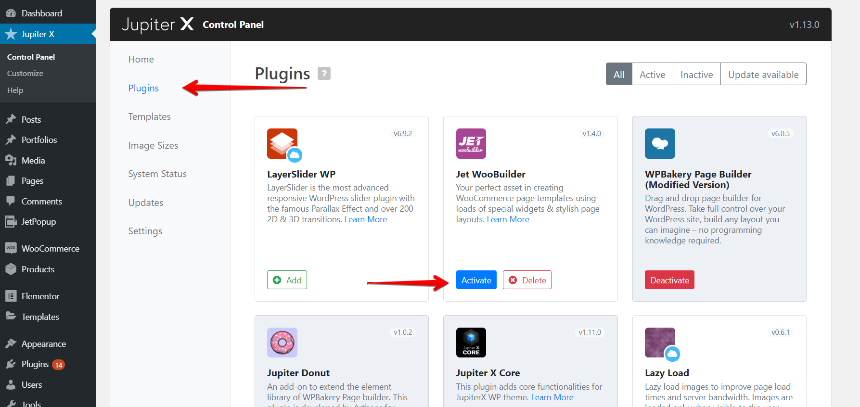
Let’s set everything up quickly. We already installed the Jupiter X theme and activated it like this. Now we just need to activate the JetWooBuilder plugin and start using it. So, simply go to Jupiter X -> Control Panel -> Plugins, then install and activate the JetWooBuilder plugin. It’s one of the bundled plugins in the Jupiter X theme.
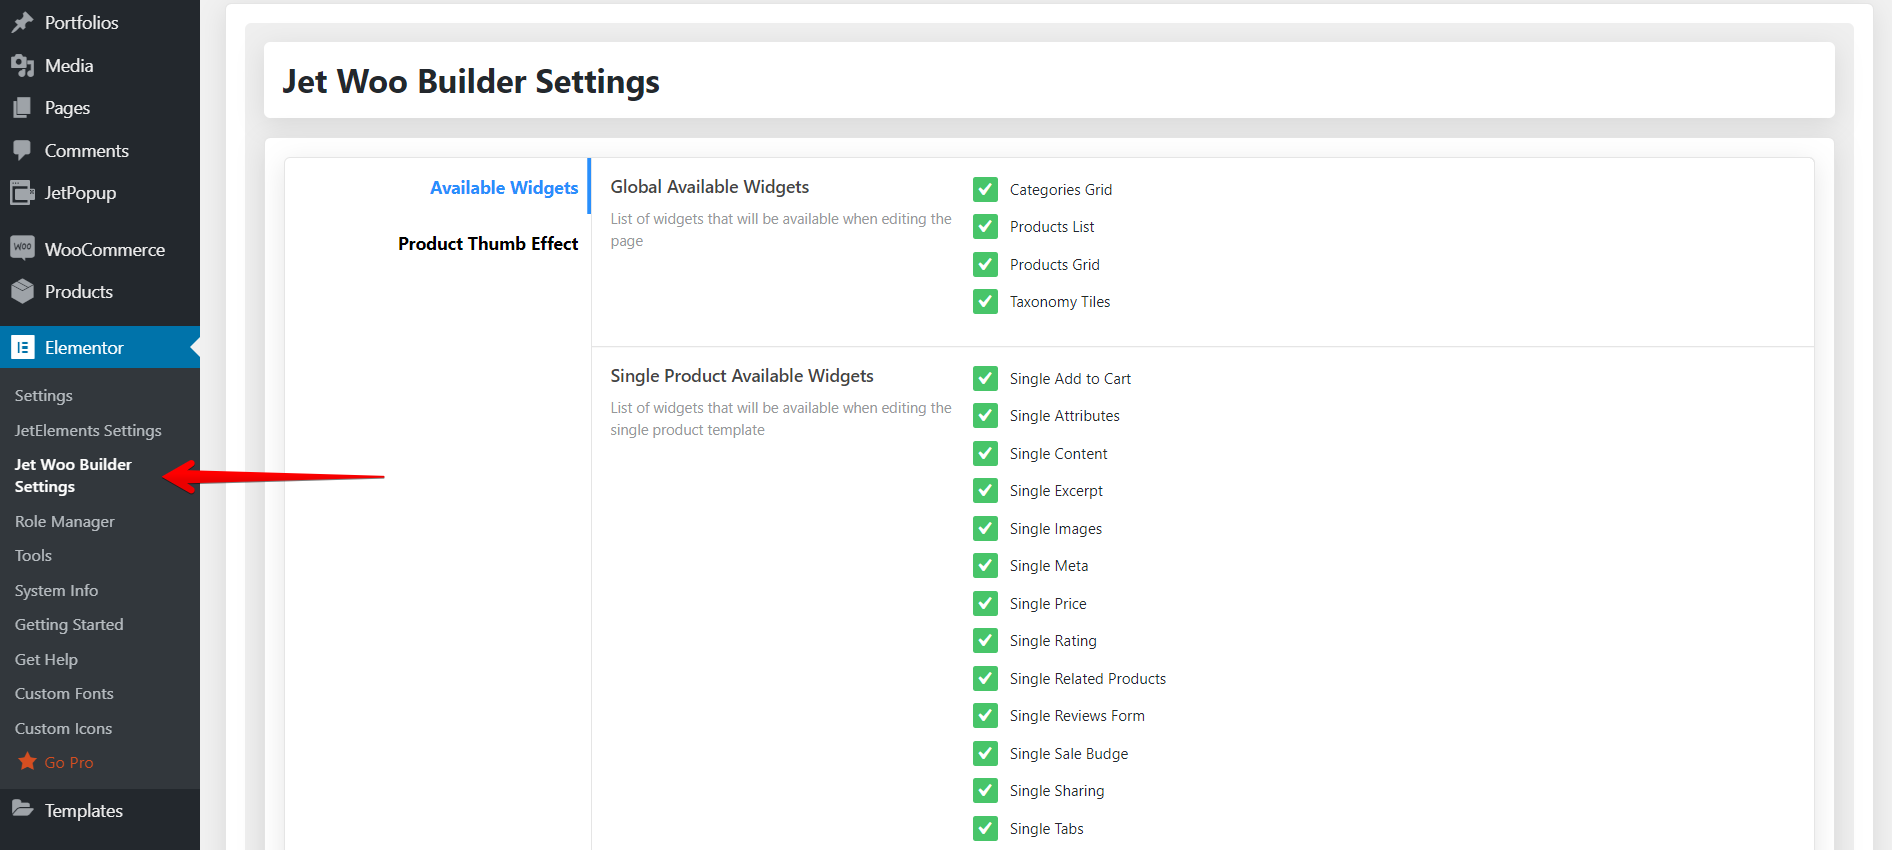
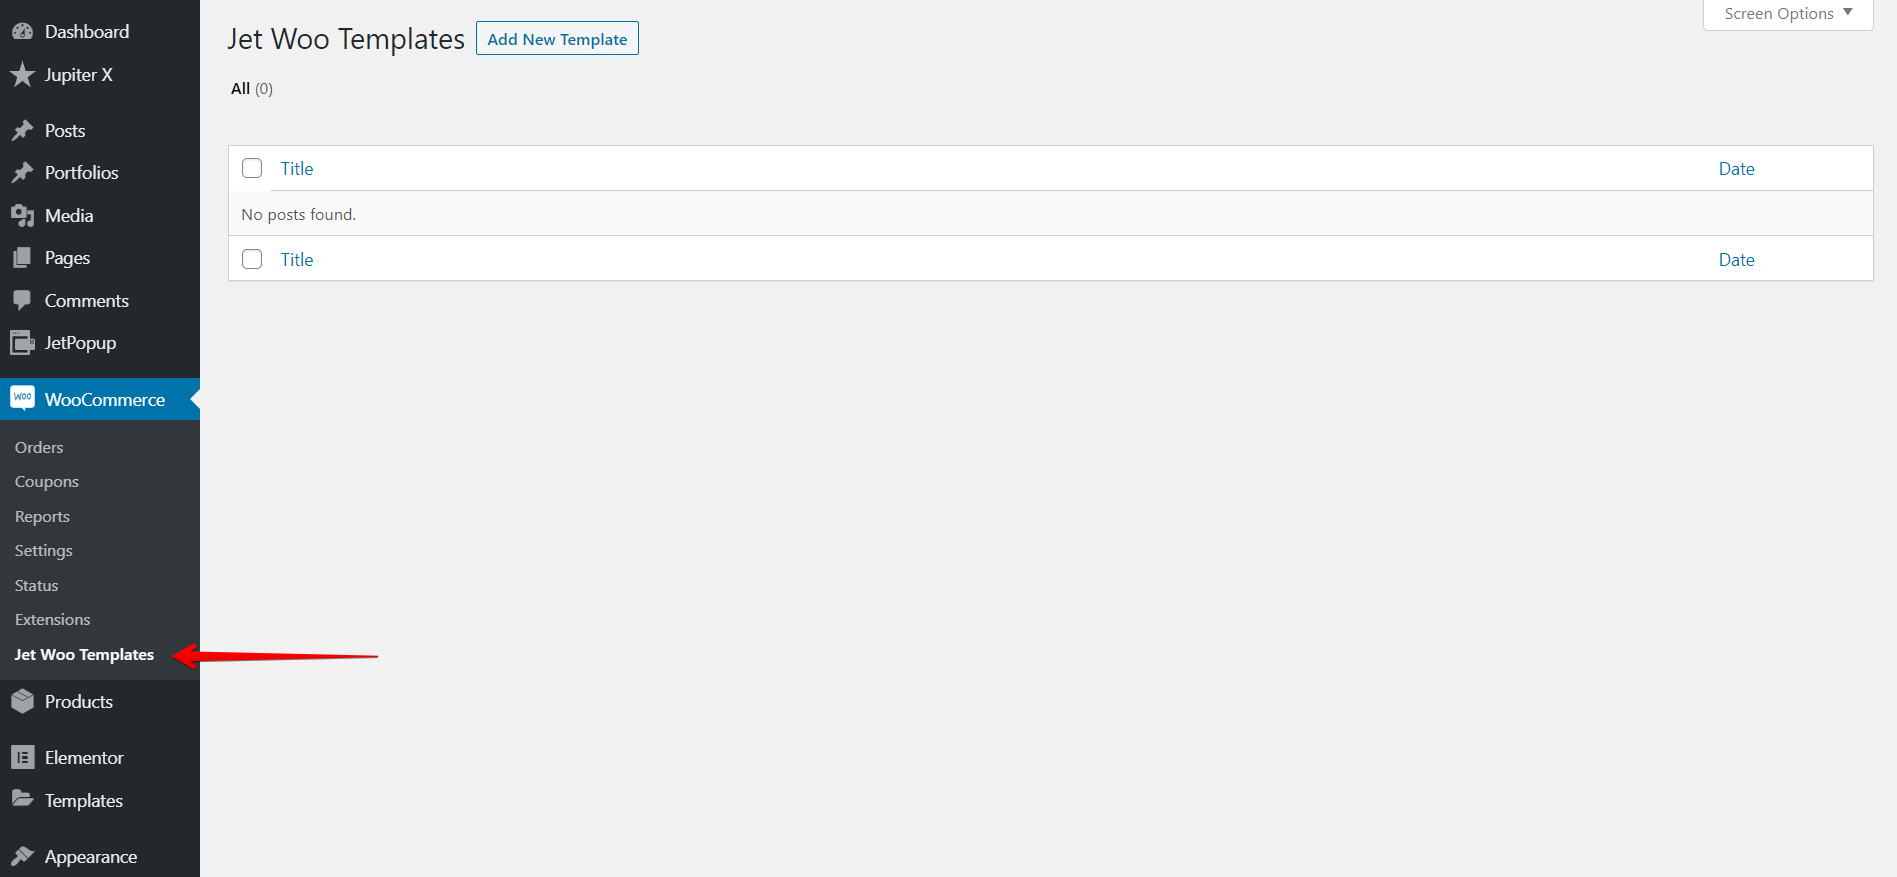
After activating JetWooBuilder, you will notice that two menus are added onto the WordPress Dashboard:
- Elementor -> JetWooBuilder settings which allow you to set the available widgets.
- WooCommerce -> JetWoo Templates which lets you add and manage your templates.
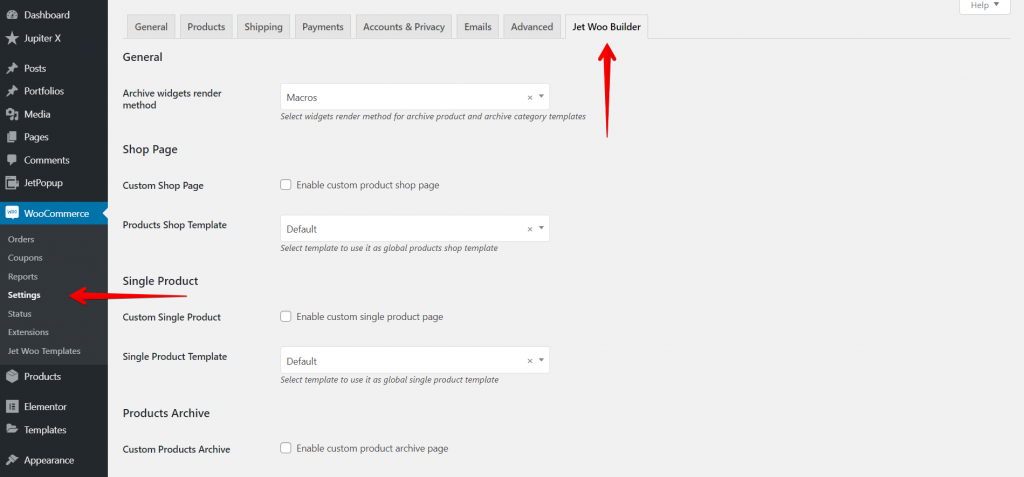
There is also another place where you can assign your templates to WooCommerce pages. It’s located on WooCommerce -> Settings -> JetWooBuilder.
Now let’s create our first shop page template and then assign it to our website.
Creating your first shop page template
In order to override your default shop page (usually it would be /shop/ after you finish the WooCommerce wizard), you would need a Shop Page Template and to set the default shop page template in WooCommerce settings.
Let’s do this together step-by-step.
1 – From WooCommerce -> Jet-Woo-Builder Templates, add a new template.
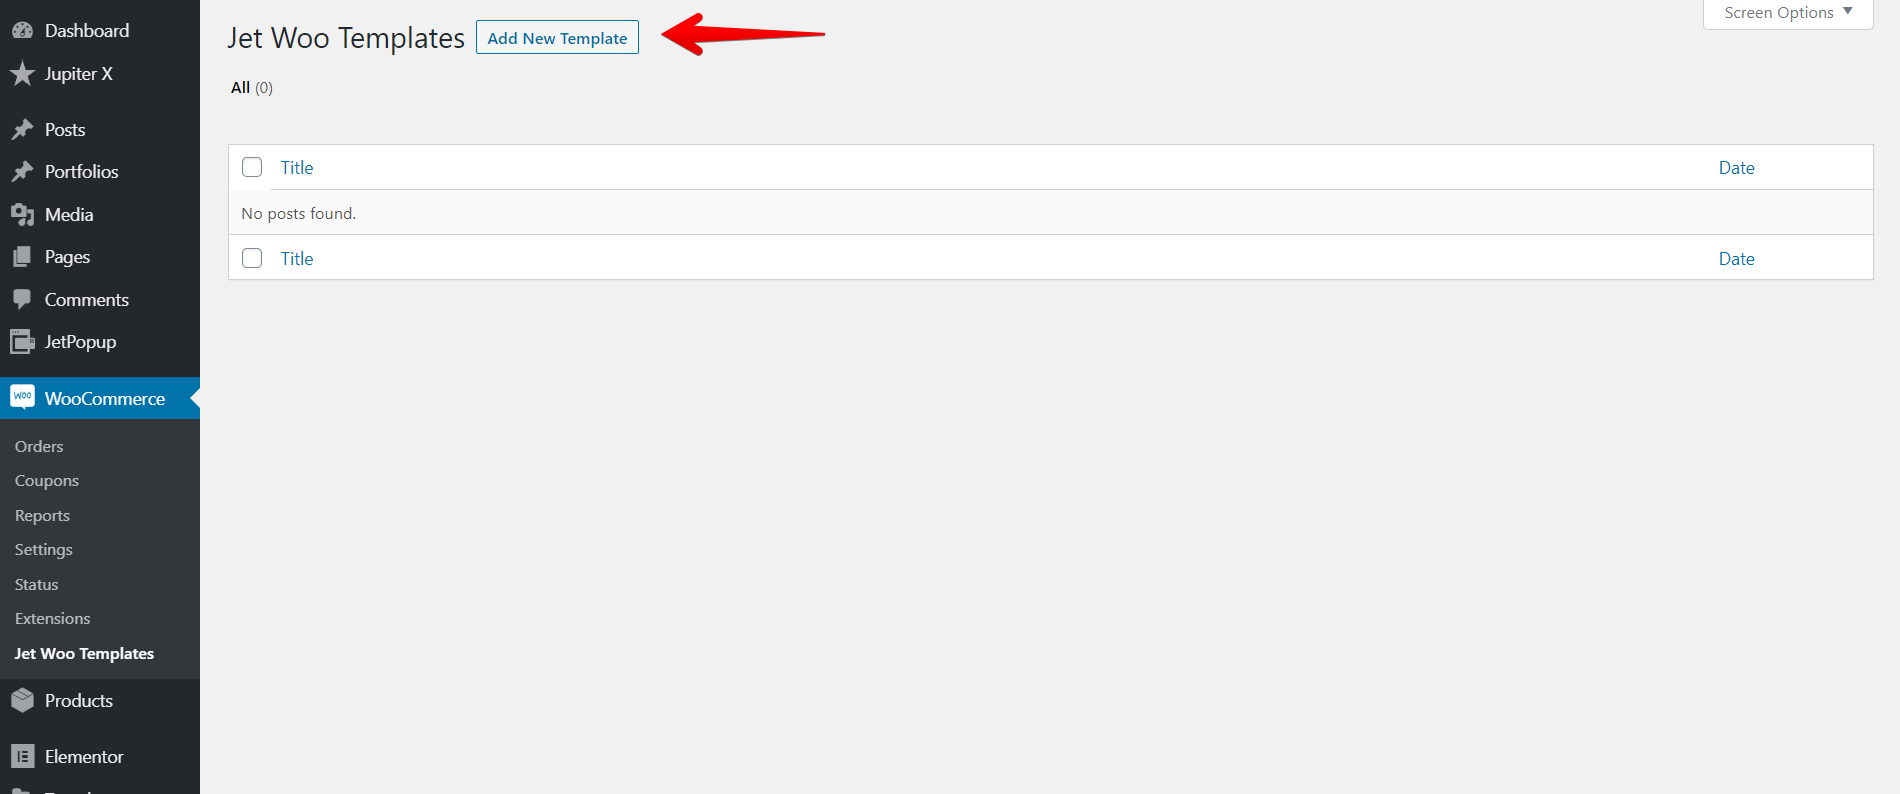
2 – Select Shop as the “This template for”, then fill in the name of the template and choose your desired layout and click on Create Template.

3 – Done. Now let’s take a look at the page template that has been created.
The first thing you’ll notice is that this page does not have a style. It may even look like it’s broken.
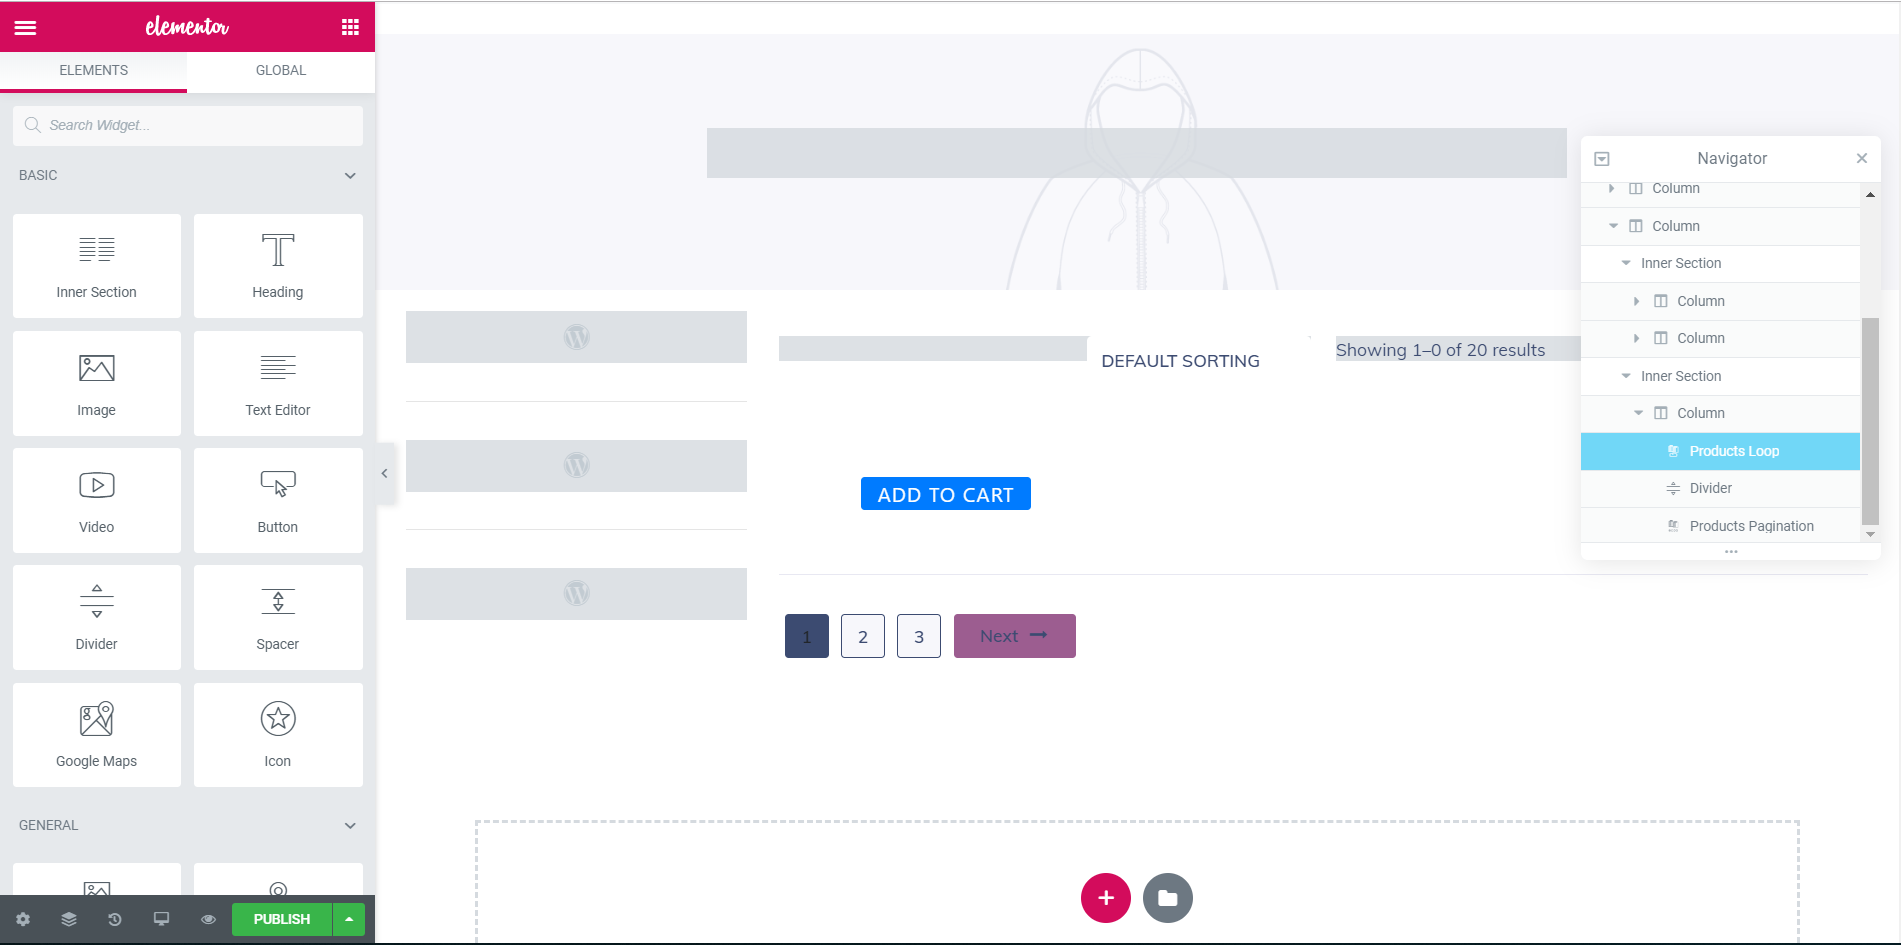
Don’t worry – everything is completely ok. It’s just that the widgets used inside the template require dynamic content and since we don’t have any dynamic content at the moment, it looks like this.
On the created page, you’ll see some elements such as filtering widgets among others. Feel free to add or remove the widgets as you wish. Just consider one point: the JetWooBuilder uses the Products Loop element inside the default shop page template. We need the Product Loop widget here. It’s not possible or recommended to change it to Products Grid or any other product loop as it will ruin the mechanism and won’t look good.
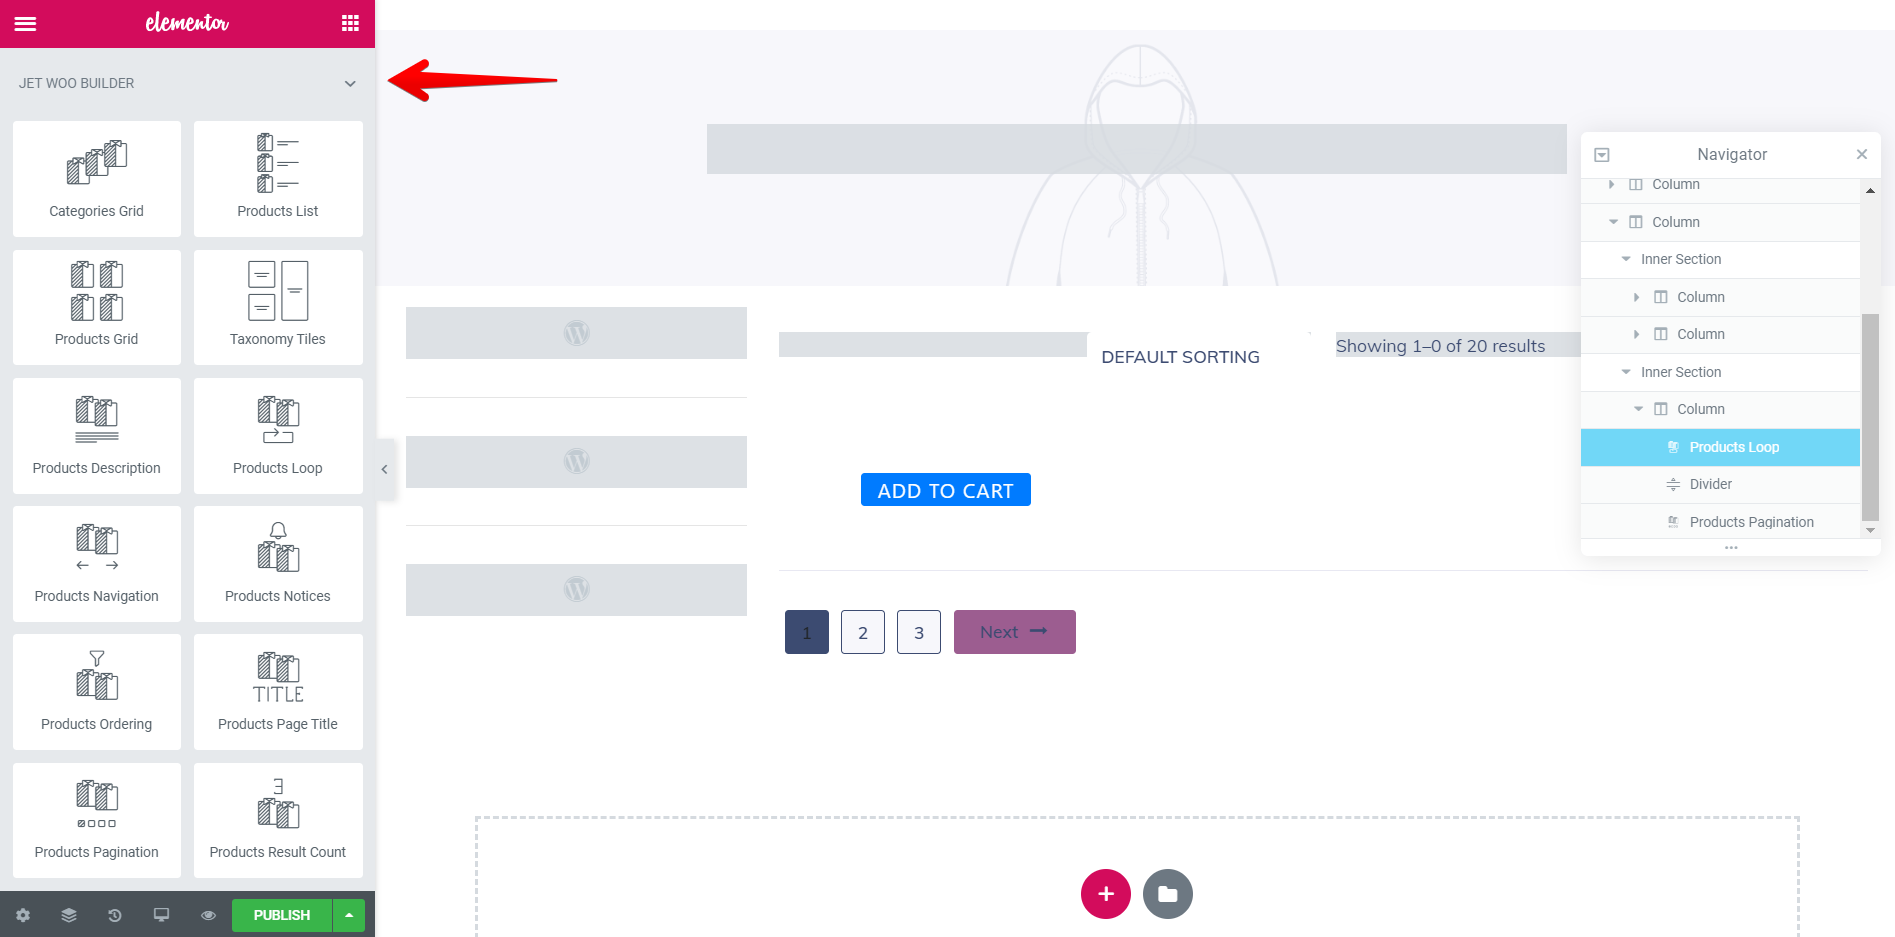
Scroll down the left sidebar to see the available widgets under the JetWooBuilder. You can also use other widgets if you like. As you can see, the default shop page utilizes some native WordPress widgets to filter the shopping items in the front end.
There is one point we should address about the template settings in the JetWooBuilder: The default shop page can be unique, but the rest of the templates such as archive and category pages will be wrapped up inside the default shop page template, as a Product Loop item template if you have it enabled.
This means that you can only design the whole shop page template once, and after that, if you want to use it for category and archive pages, simply create one of the item templates instead of the whole page. In other words, you won’t need to repeat the whole design of your shop page for your category and archive pages.
If you do so, it’ll ruin your pages, and you’ll wonder why the pages aren’t working. The logic behind this is a little bit confusing, but if you know how to use it correctly, then you’ll have as much flexibility as you’ll need to build up all of your custom designs without a single line of code.
Now let’s save this template then add some products to our shop and check out our shop page. Before that, it’s better to set our template as the default shop page in the WooCommerce Settings.
Setting the Shop Default template
1 – From the WooCommerce Settings page, choose JetWooBuilder.
2 – Check the Custom Shop Page checkbox.
3 – Choose the Product Shop Template that you created in the previous step.
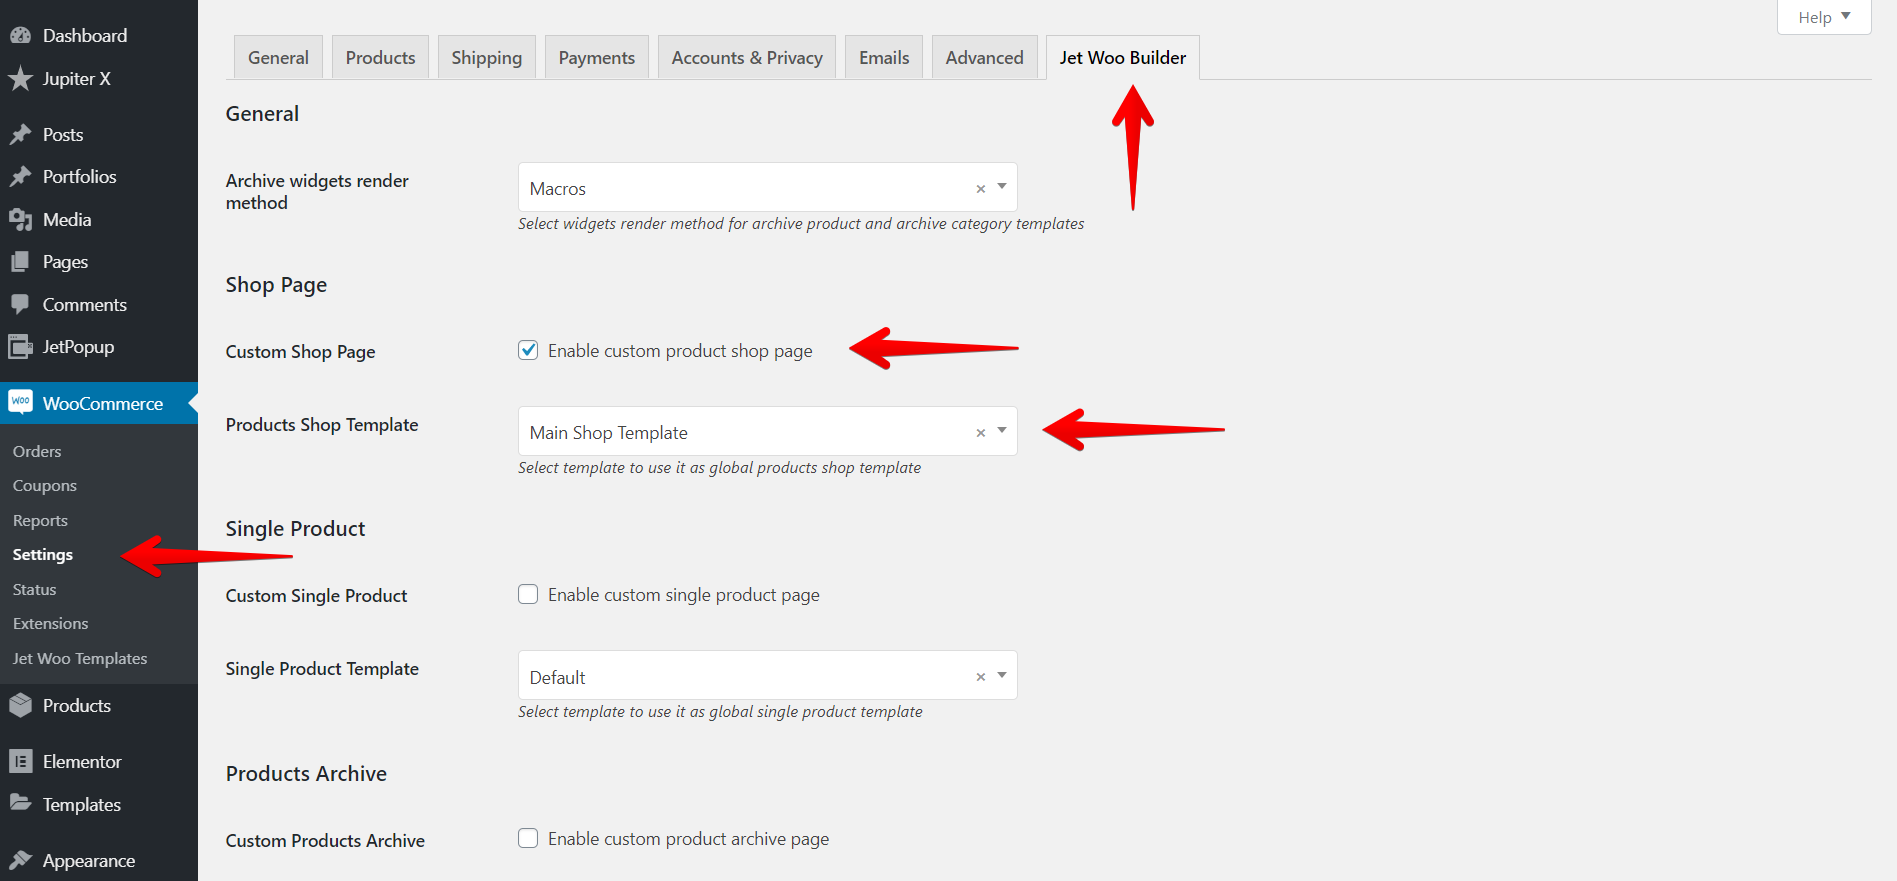
4 – Save the settings.
5 – Make sure you already selected the default shop page in the WooCommerce settings.

After adding some products (you can find a dummy product file here), the final results on the shop page will be like the following:

Creating the archive and category pages using JetWooBuilder
The overall process was easy, right? Now let’s practice the steps above with a new goal in mind – which is adding the archive and category pages. The JetWooBuilder website explains this topic thoroughly.
However, a question that will probably pop into your mind is: what will happen if you don’t use an archive or category page? Well, the answer is nothing. It will still wrap up the products on the default shop page and show the default loop item layout. If you want to have a different layout on the loop items, you can use the archive and category page templates. Here is the complete tutorial for this: How to create and set a Product’s Archive template
Here’s the video that demonstrates how this template feature works with the JetWooBuilder.
Final Thoughts
The JetWooBuilder is a tool that can help you create highly customizable shop pages. From the default shop page to archive and single pages, there are widgets and options that allow you to create stunning shop pages that fit your needs.
In this article, we briefly explained how to build an eCommerce store in Jupiter X by working with the JetWooBuilder. The most common issue with JetWooBuilder occurs when you change the Product Loop widget on the shop page or use the product grid on the archive pages.
Let us know your experiences and thoughts in the comment section below! 😉

No comment yet, add your voice below!