
Not so long ago, I completed a project that involved running an affiliate marketing program on a Jupiter X website. I learned a lot about affiliates and how to integrate them into a WordPress website. I thought it would be useful to share what I learned with the readers of this article. If you want to run an affiliate marketing in WordPress and don’t know where to start, read on!
Before we get into the details, let me explain what affiliate marketing is: it involves selling a product or a service and paying a commission to those who introduce your product or service to new buyers. This is a win-win situation for everyone involved: the product owner will sell their product or service, the affiliate will get rewards for sending real buyers to the seller and the buyer will get what they want. Many companies use affiliate marketing as their main marketing strategy with excellent results.
I’m not going to talk about why affiliate marketing is important or introduce ways to get the most out of it. Instead, I just want to guide you through what I did to set up an affiliate marketing program in WordPress.
The basics of affiliate marketing
The goal of affiliate marketing is to reward those who connect buyers to your brand. Based on this, to have an effective affiliate marketing program you need:
- A place where you register affiliates and store their data.
- A way to recognize and track affiliate income traffic and affiliate sales.
- A method to pay affiliates upon request.
In this case, we’re choosing to store the data via a WordPress website, complete with a Jupiter X shopping templates theme. In order to run the affiliate marketing program, I will use the WP Affiliate plugin. This plugin has the basic features required to run an affiliate website and also include great addons that can add to the site’s overall functionality. In order to see the complete list of addons, check out this page.
The best way to recognize and track affiliates would be to generate a specific link for each of them. The affiliate would then use the link wherever they advertise your brand. The link would look something like:
https://shoppingwebsite.com/?ref=3
Here the “ref” query parameter is the referrer’s ID on the website. When a user visits via that link, a cookie value will be stored on the visitor’s browser containing the referrer’s ID. From then on, until the cookie expires or gets deleted, every activity that user completes on the site will be linked to that referral ID. If the user buys something, the website knows that this sale was made via a referral and therefore involves a commission fee. Based on the product or service, you may want to decide on how many days a referral link should remain valid. In my experience, more expensive services or products require more time for visitors to decide if they want to buy it. For such items, you’ll need to increase the cookie expiration interval in the plugin settings. By default, browsers will store cookies for 7 days, so if a user clicks on the affiliate link, leaves the website and returns at any time over the next 7 days, the commission still goes to that referral. Check out this page for the answers to some common questions about how this process works.
Installing and activating the plugin
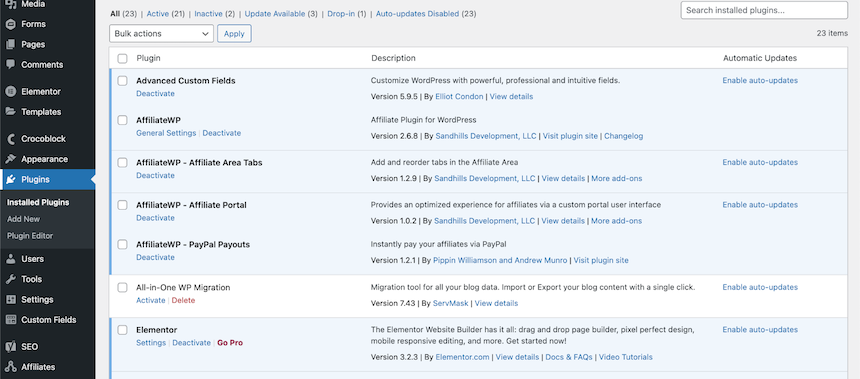
In order to use the Affiliate WP plugin, you need to purchase it from its developer’s website. Check the prices here and choose your plan, then proceed with the process and download the plugin package from the website. Next, go to your WordPress website admin area -> Plugins -> Add New, hit the Upload button and upload the AffiliateWP-x.x.x.zip package. After installing the plugin, simply activate it via the plugins list. I also recommend that you install the Affiliate Portal addon because it will give your affiliate page an excellent makeover.
The next step involves activating the plugin by adding the license key to it. Do this via the Affiliate settings page.
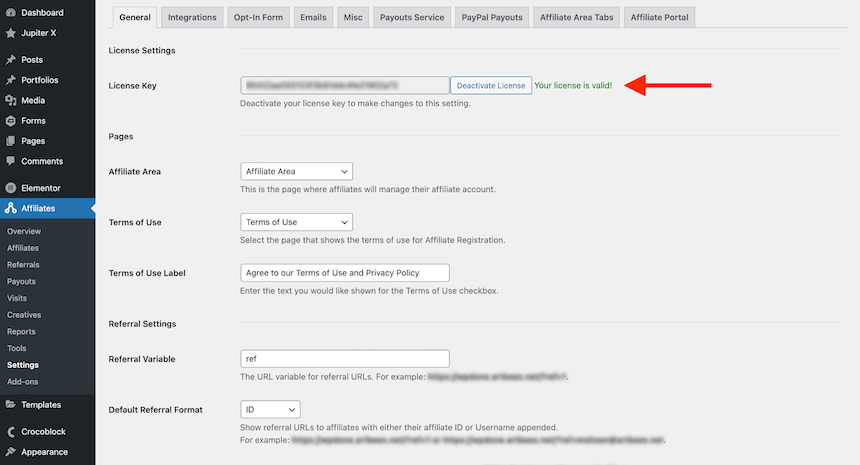
Configuring the AffiliateWP plugin
The next thing you’ll need is a page to act as your affiliate area. Create a page and put this shortcode into it:
[affiliate_area]
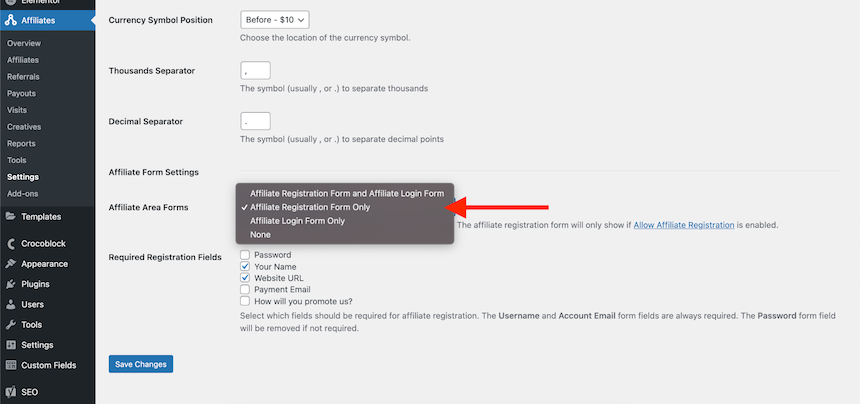
Then, come back to the Affiliate Settings page and set that page as your affiliate area. Some other configurations may still be required to make it work as you want it to. In my case, I wanted users who were already registered on the website to have the option to register for the affiliate program as well. Below the settings page there is an option that allows you to choose whether you want to show only the registration form or login page or both. For my site, I chose the option to display only the registration form.
Now if I check the affiliate area, the page would appear as follows:
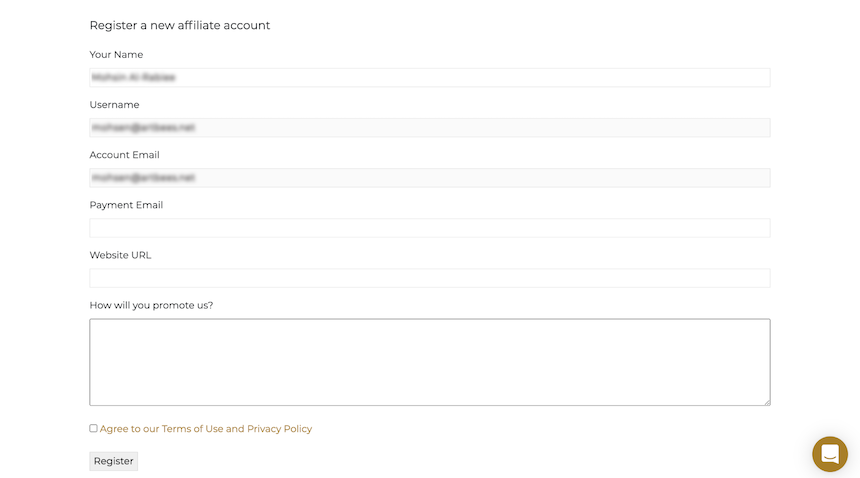
You can set the required form fields in the settings page. You can also modify the form fields using the hooks available on this github repository. (Snippet available here as of the date of writing this article)
After registering as an affiliate, the user will need to wait for the website administrator’s approval. While the affiliate is pending approval, they will see this notice on the affiliate area page:

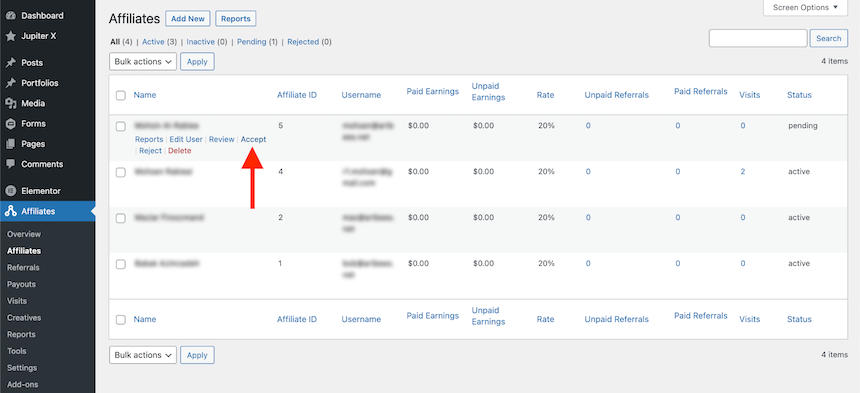
Once an affiliate has registered, the administrator can approve them via the WordPress admin area -> Affiliates -> Affiliates.
Once approved, the new affiliate will receive an email notification. In order to change the email content, you can override the email template on your child theme. For more information, please read this article. You can modify the current email template and settings via Affiliates -> Settings -> Emails.
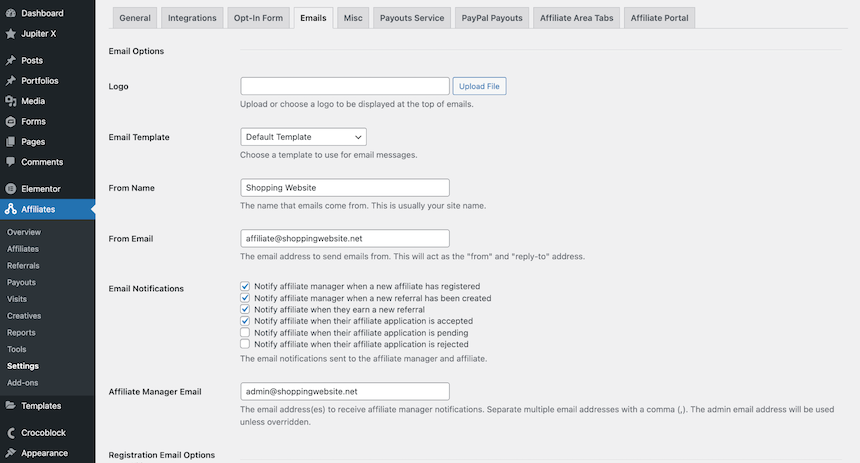
Each action has a corresponding email notification here that you can manage and customize.
Once you’ve approved the affiliate, if you have not installed the Affiliate Portal Addon yet, your affiliate page will look like this:
However, if you have installed the Affiliate Portal Addon, your affiliates will see this page:

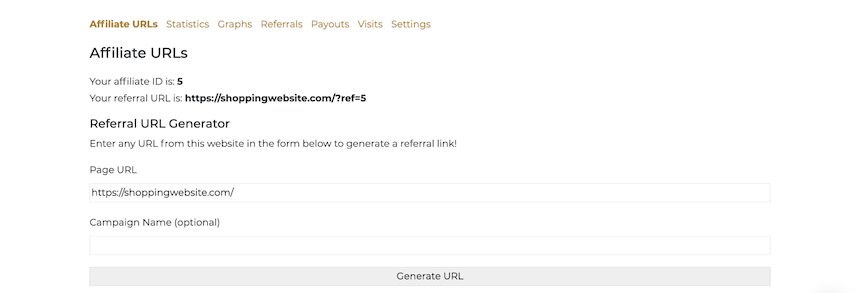
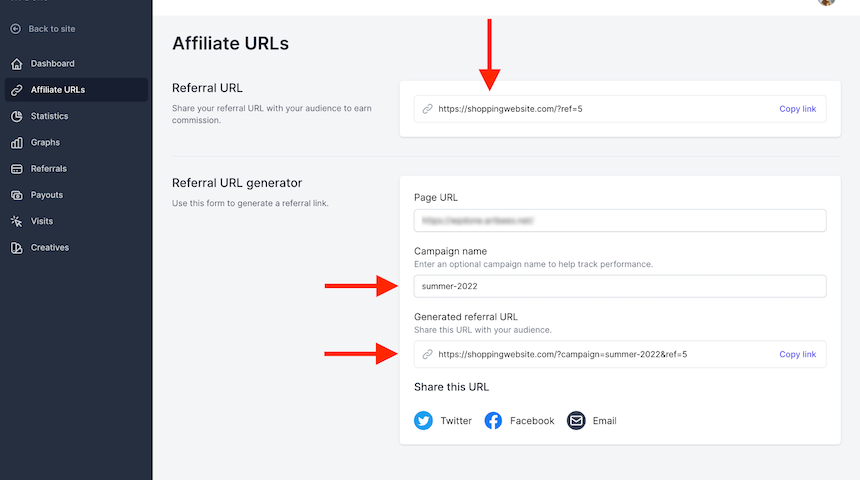
On the affiliate area page you can see your affiliate statistics, including visits, number of referrals and other handy figures. The affiliate can generate a link to the website and use it when promoting your brand. The links generated on the Affiliate URLs tab will all end with the “ref” query parameter. You can also add a specific campaign name so that the links look something like this:
https://shoppingwebsite.com/?campaign=summer-2022&ref=5
Adding a campaign name can help track visitors and will show which campaign was the most beneficial for affiliates.
So far, so good. Now it’s time to integrate it all with your shop. You may use the affiliate model for all kinds of e-commerce. It doesn’t matter if you sell goods, run a learning website, a membership-based website or even a donation service. The biggest benefit of AffiliateWP is the long list of available plugins that you can simply integrate it with. In order to see the available integrations, navigate to AffiliatWP’s settings page and open the Integrations page.
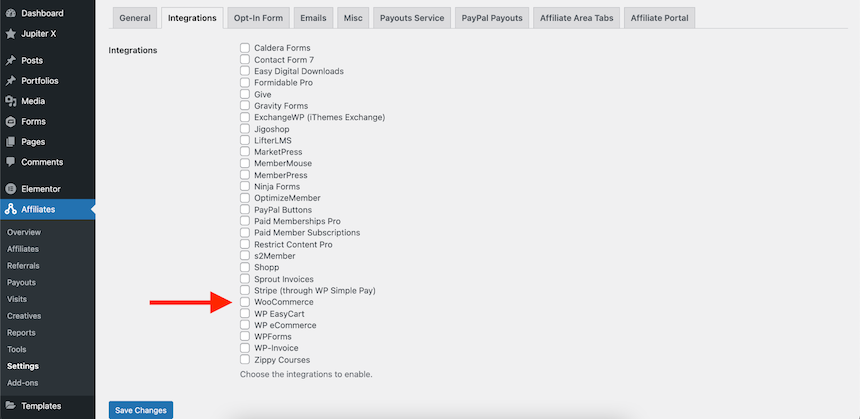
As you can see above, I’ve just enabled the WooCommerce integration. You don’t need to do anything else to integrate the plugin with WooCommerce. As soon as you check that box and save the settings, the integration will be complete. The rest of the process is as follows:
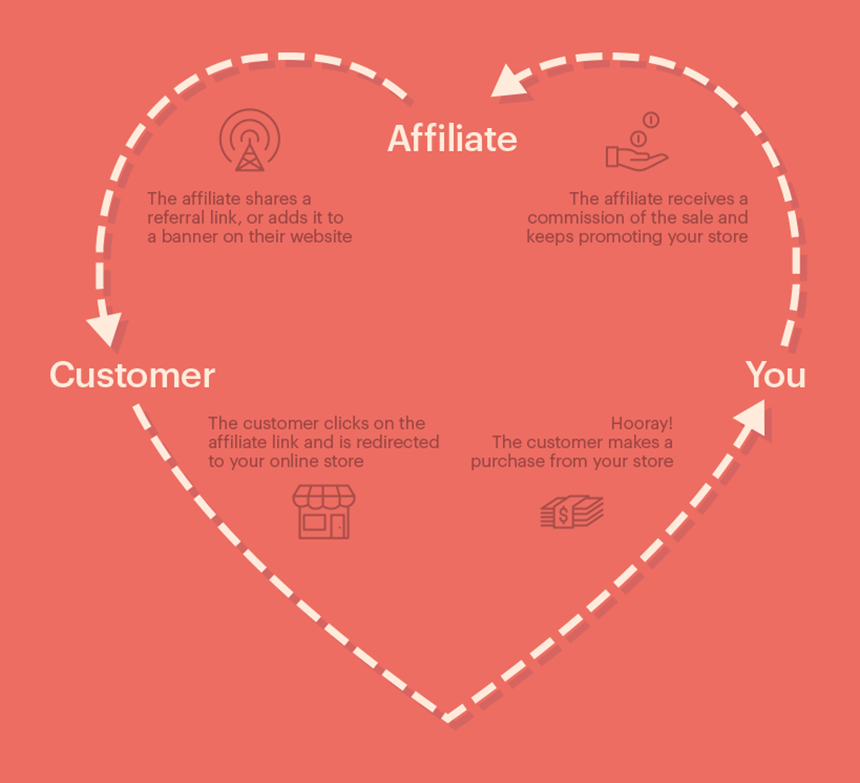
- The affiliate will register and generate a link to your website containing a unique referral ID.
- Visitors will click on that link included in affiliate ads.
- The visitor will then browse your website and consider buying something.
- The visitor then buys something via the same device they originally entered your website with over the course of the next 7 days (or whatever time interval you set for cookie expiration in the AffiliateWP plugin)
- The commission will be added to the affiliate account and wait for the affiliate to request a payout.
There is another step before the commission goes to the affiliate. The visitors may add something to their cart, but pay for it later. Before the payment is complete, the visitor still counts as unpaid. As a result, there are 4 statuses for an affiliate transaction with the AffiliateWP plugin:
- Pending – This is a referral that has been generated but has not yet been confirmed
- Unpaid – This is a confirmed referral that is waiting to be paid out to the affiliate
- Rejected – This is a referral that has been rejected
- Paid – This is a referral that has been paid to the affiliate
“All referrals begin with a status of Pending and are then updated to one of the other three statuses when particular events occur. A pending referral means that it is waiting to be confirmed as valid. Referrals are confirmed when orders in the eCommerce platform are completed.
A referral is marked as rejected when the corresponding order in the eCommerce platform is refunded or deleted. In Affiliates → Settings → Misc, there is an option to automatically mark referrals as Rejected when orders are refunded or deleted. If enabled, AffiliateWP will mark referrals as Rejected for you. If disabled, or your eCommerce platform is not fully supported, referrals will need to be rejected manually.
Referrals are marked as Unpaid when the corresponding order or signup is completed in your e-Commerce or membership platform. Once marked as Unpaid, the referral is considered earned and should be paid out to the affiliate.
Referrals receive a status of Paid as soon as they have been paid to the affiliate. Once marked as Paid, a referral is considered closed and no further status changes are applied to it.”
Full documentation on the referral status is provided here.
Payouts
Your affiliates will get paid as soon as you generate a payout for them or pay them and then add the payment info as a bank transfer invoice to their payout list. There is currently no automatic paying out system. You can generate a form to get in touch with your affiliates and allow them to request payment.
You can integrate your website with a payout service as described in this article. Using payout services allows you to pay affiliates in more than 30 different countries directly to their bank accounts in as little as 3 days. Learn more about using Payouts Service here.
There are other methods that allow you to pay your affiliates with PayPal, for example. Check the above article for more info.
The payout workflow involves you, as your website administrator or affiliate manager, generating a payout. This payout then goes out to all users for referrals that are paid to you within a certain date range and for a minimum withdrawal amount.
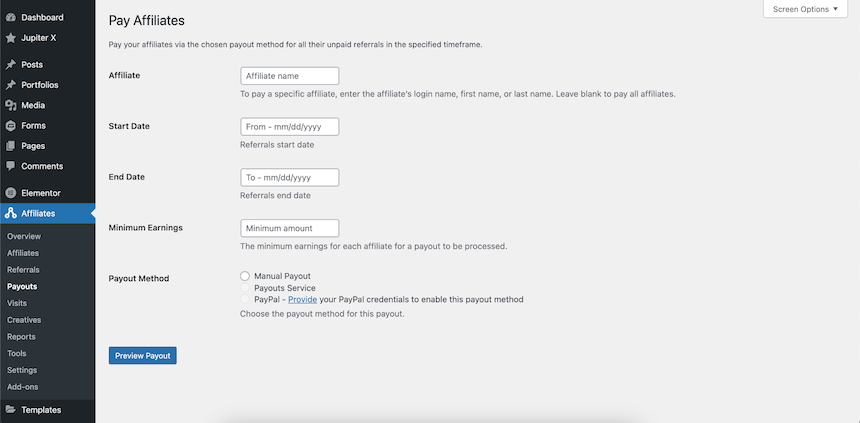
After the payout is complete, the status for each referral within that date range will change to Paid and will not be considered for upcoming payouts.
Creative Banners
It’s possible to provide banners and visuals for your affiliate marketing program, complete with embed codes that let your affiliates use them for whatever promotions they run on their websites.
In order to add banners, you should navigate to Affiliates -> Creatives and add a new Creative. Here you need to add the title, description and, most importantly, an image that will serve as your affiliate advertising. Here you can find some marketing advice on how to get the most out of your banner images.
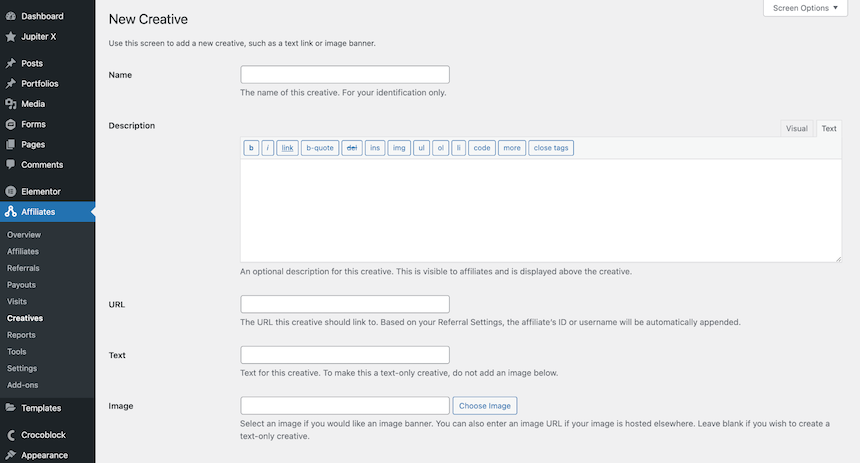
After adding the creative material, your affiliates are able to see and copy the code through their affiliate area page and simply paste it to their website.

Wrapping up
In this article we reviewed how to run an affiliate marketing program in WordPress with the AffiliateWP plugin. To be honest, when I accepted the project to integrate a WordPress website with this plugin, I had no idea what I’d gotten myself into. The website that I was going to integrate it to wasn’t using any premade integration services. I had to find out for myself how affiliate marketing programs work and then try to implement one using actions and hooks. The key point I want to share with you here is that you need to know the status of each visit. What happens to a user that decides to buy a product after 10 days? What happens if they open the website using another device? What if the service you are selling requires two payment steps? These are the sorts of questions you should consider. Fortunately, the documentation of this plugin is great. The codebase is standard and you can find some samples in the github repository. This all adds up to make a great experience for both users and the developers who work with this program.
Please share your comments and questions below in the comments and don’t forget to subscribe to our newsletter.

No comment yet, add your voice below!