
When talking about online learning, we usually imagine online courses where someone can be taught new information using digital technology. Online courses are convenient because students can complete the course from the comfort of their home and usually for a lower price.
Also, online courses can provide different types of information. For example, many involve videos, images, slideshows, and other multimedia and interactive elements.
There are a lot of free and paid WordPress LMS (Learning Management System) plugins that you can find to build online courses. Among these plugins, LearnPress plugin is the most useful and popular LMS. It also happens to be free to use! The plugin has a very good user interface allowing you to intuitively manage your online learning website. With this WordPress LMS plugin, you can easily create an educational online learning website even if you don’t know how to code.
In this article, you’ll find instructions on how to create an online course and thus, an online learning website with the LearnPress plugin and Jupiter X theme.
Installing LearnPress
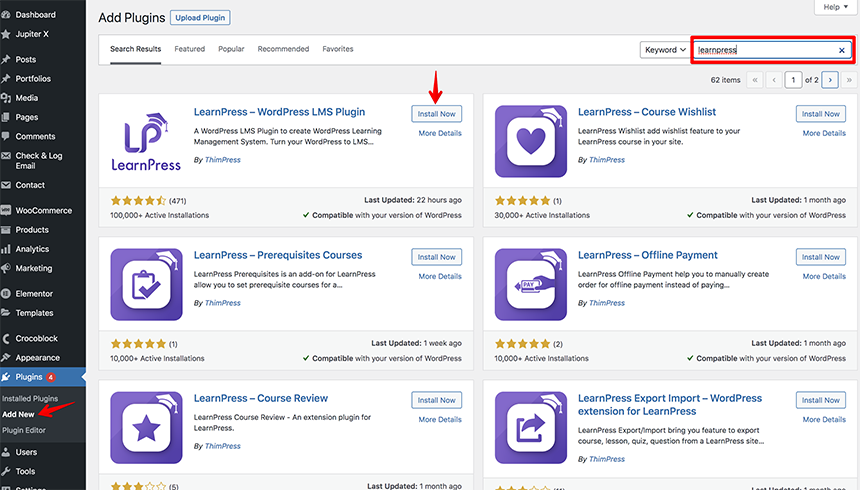
The process of installing the LearnPress plugin is very simple.Navigate to Plugins > Add New on your WP Dashboard, search for “learnpress”, click on the “Install Now” button and activate it.
Once it’s installed and activated, go to LearnPress > Settings to configure the settings to fit your needs.
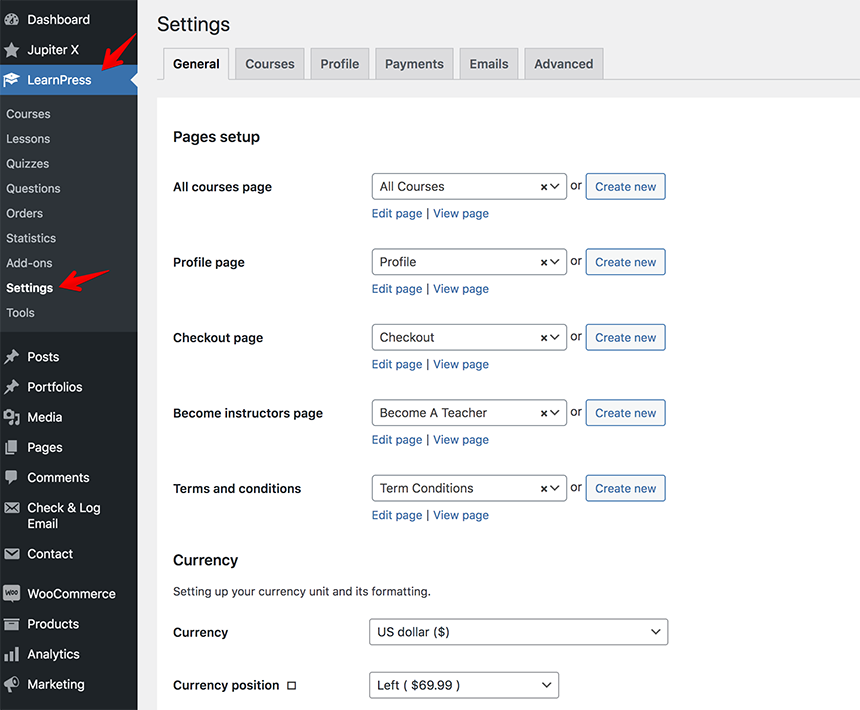
In the “Pages Setup” section, you’ll see the pages that were automatically imported and assigned after the plugin installation. You are able to edit them or create new ones.
In the “Currency” section, you can set up the type of currency you want to accept for your online course and select how it will be formatted visually on your site.
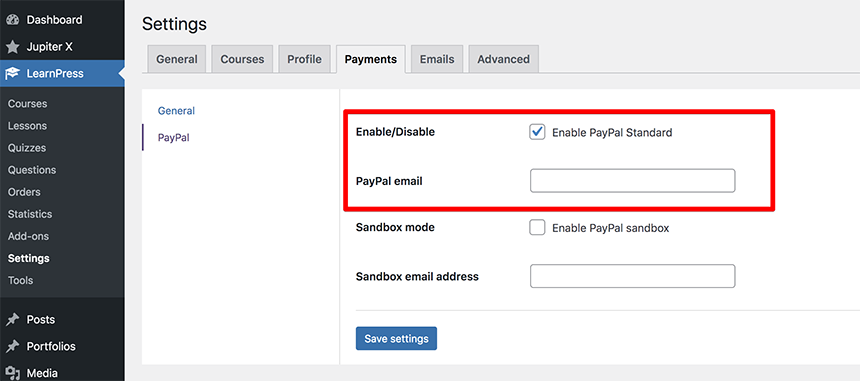
In the “Payments” area, you can enter your email address associated with PayPal. You’ll be able to accept payments without needing to have an active shopping cart. Simply click on the “PayPal” link and enter your PayPal account email address. Then, click the “Save Settings” button.

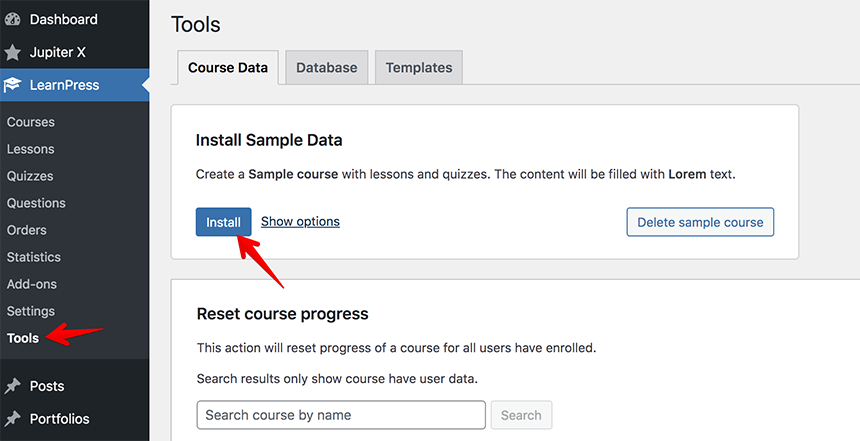
Configure the other settings tabs to complete the installation.You can install a sample course under LearnPress > Tools > Course Data. I suggest you do this so you understand what courses will look like.
You will be able to view the frontend of the sample course on your site.
Creating a New Course
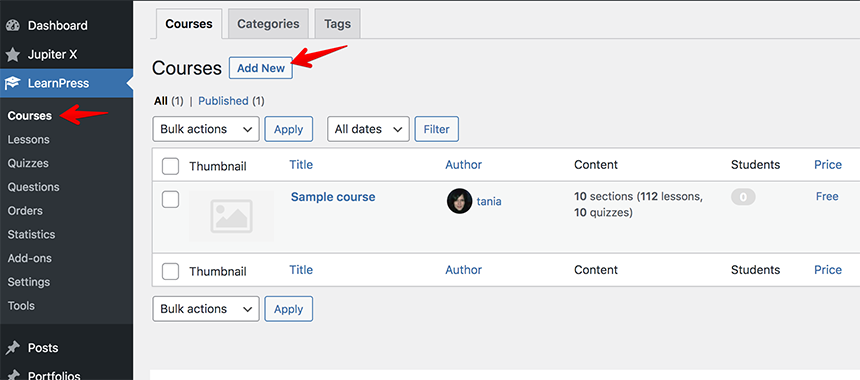
Now it’s time to create an online course. In your WordPress dashboard, go to the LearnPress tab and select Courses. Click on the “Add New” button.
You’ll notice the page editor looks like a standard WordPress page. Enter a course name and a description to explain what the course is about.
You can also add a category to your course. It’s useful for keeping things organized if you plan to create multiple courses.
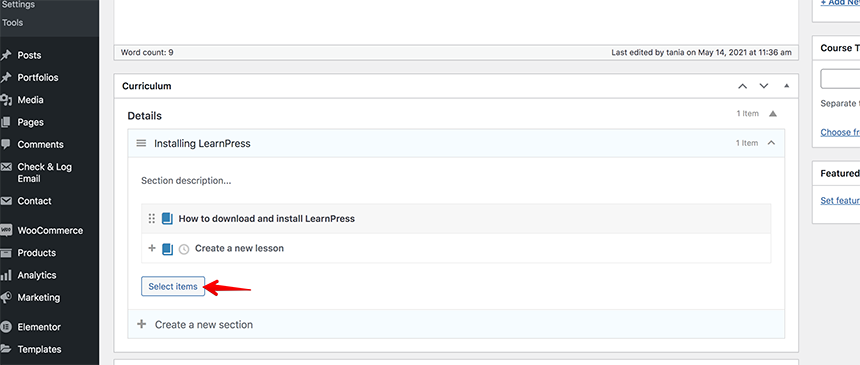
Next, under the Curriculum section, add your lessons and sections.
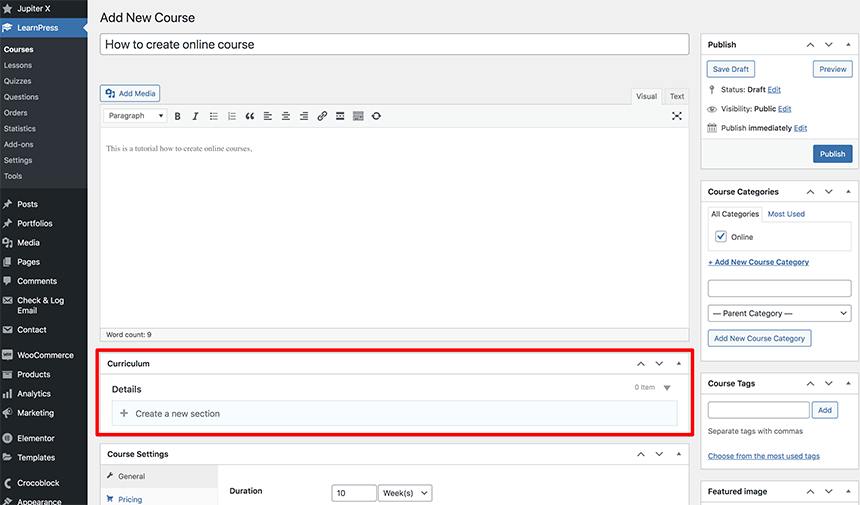
Sections are subsets of the entire course. Lessons produce the actual content in each section. Note that the Select Items button provides options to connect quizzes and other lessons that have been already created under LearnPress > Lessons.
Configuring the Course Settings
Under the Curriculum section you’ll find the Course Settings section, which consists of 5 tabs:
- General
- Assessment
- Pricing
- Extra Information
- Author
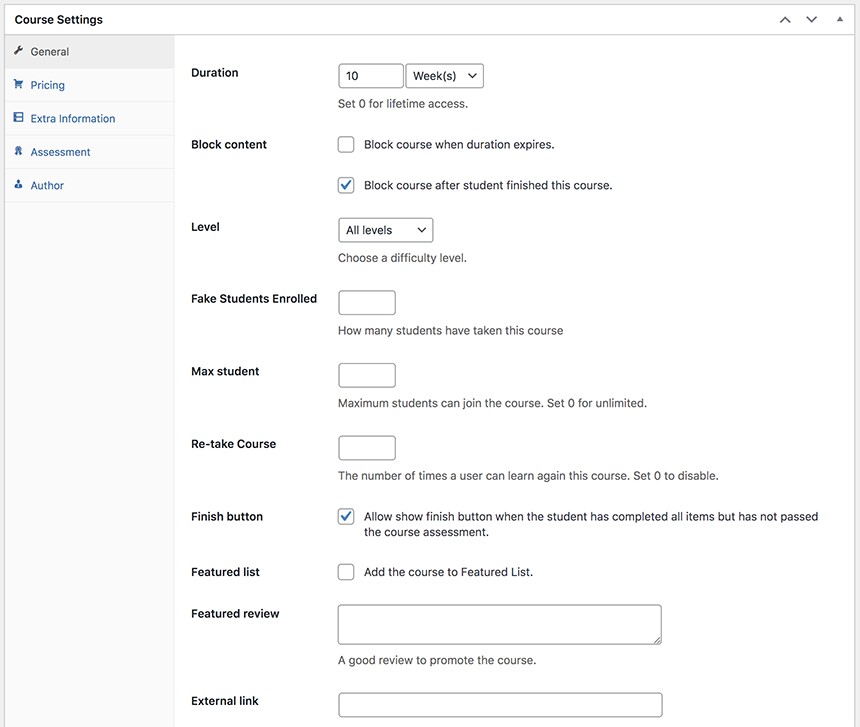
In the General tab, you can configure the duration of your course, how many students can join, how many have already taken the course, whether you allow users to re-take your course, as well as block the content once the course is completed and set an external link to redirect users when they click the “Buy” button.
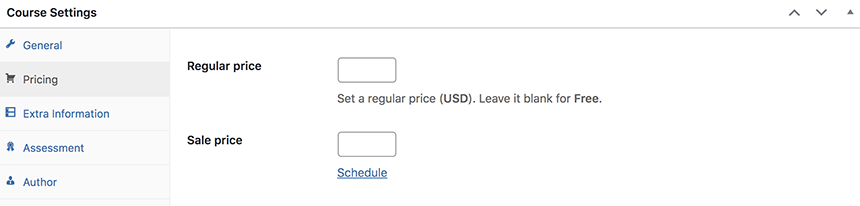
The Pricing tab allows you to set the price for your course. You can even set a sale price. If you don’t want to add a sale price, simply leave this section blank.
In the Extra Information tab, you can add additional info such as requirements for your course, a FAQ section with popular questions and answers or a description of your target audience.

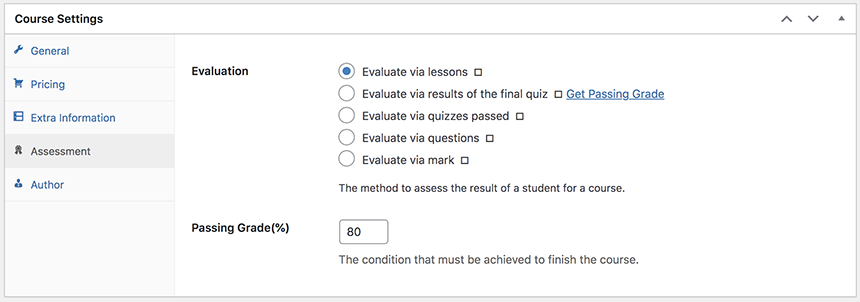
The Assessment tab gives you options on how you prefer to evaluate students. You can choose the following:
- Evaluate via lessons
- Evaluate via results of the final quiz
- Evaluate via quizzes passed
- Evaluate via questions
- Evaluate via mark
The name of the course instructor is shown in the Author tab. Note that you need to create a WordPress user when adding a new instructor.
Adding Lessons and Quizzes
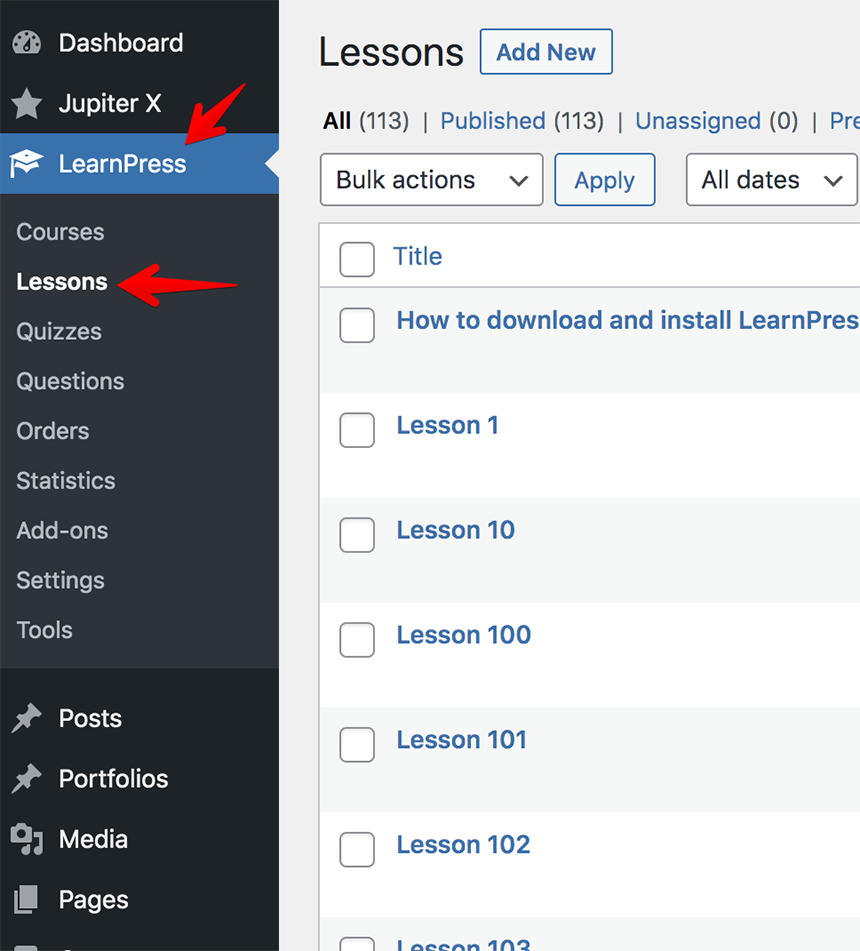
Now let’s add the course content via the LearnPress > Lessons menu.
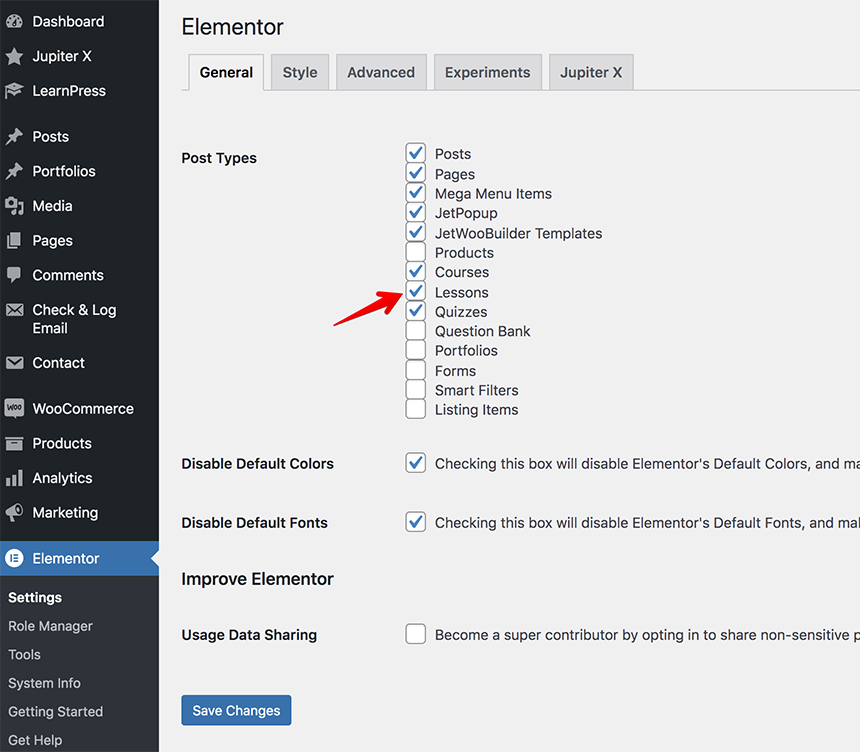
You can add any content to the WordPress editor, including text, video, audio, PDF documents and images. However, adding content via the Elementor editor is a much better route. You just need to enable “Lessons” in Elementor > Settings > General.
In the Lesson Settings section, add the time in minutes of the lesson duration. Also, don’t forget to uncheck the Preview Lesson option. You can enable it only if you want visitors to preview the lesson content without signing up for the course.

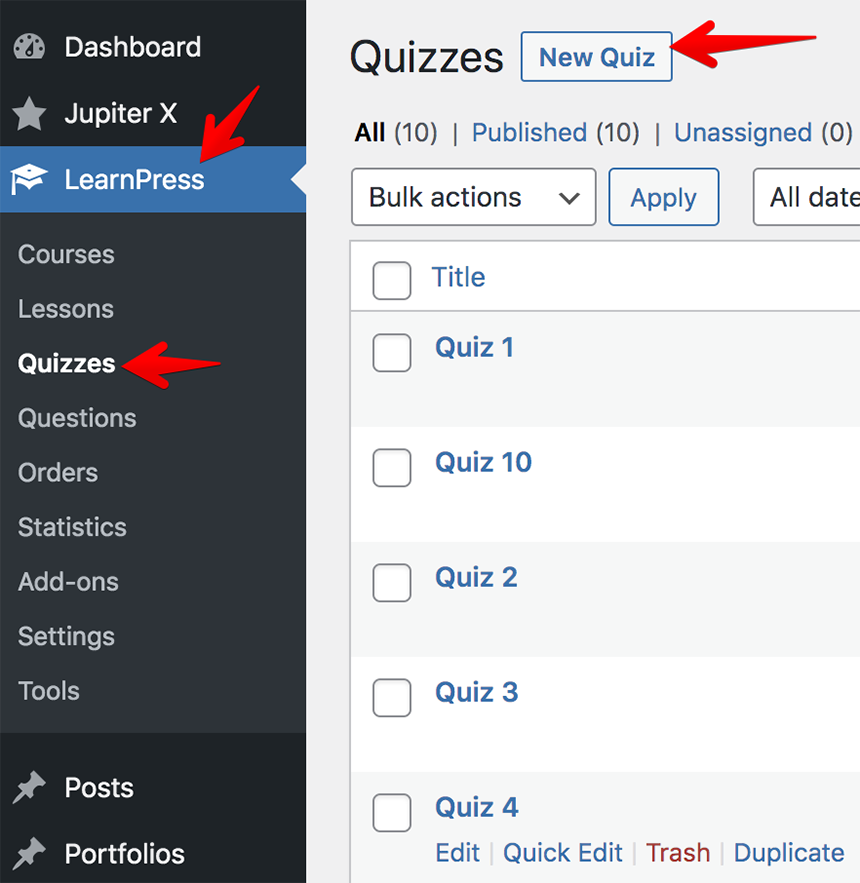
Once you have created all the lessons, it’s time to add quizzes.Under LearnPress > Quizzes click on New Quiz.
Add a title to your quiz, then write a description or instructions for your quiz in the text box. After that, start adding the questions to your quiz under the Questions section.
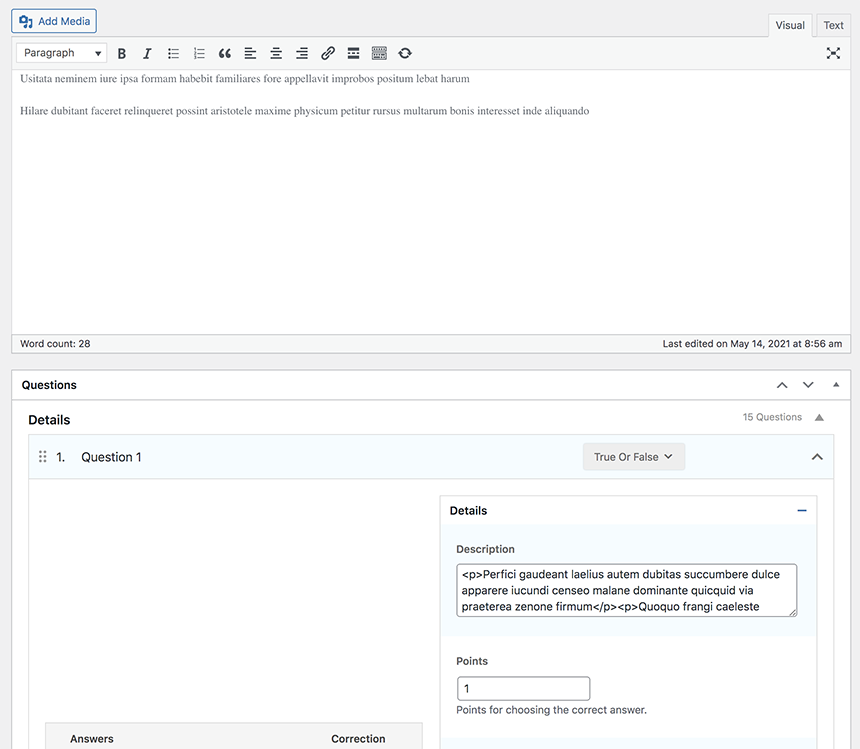
When you write a question, you can click on the Add as New button to select a question format, such as:
- True or false
- Multiple Choice
- Single Choice
- Fill In the Blanks
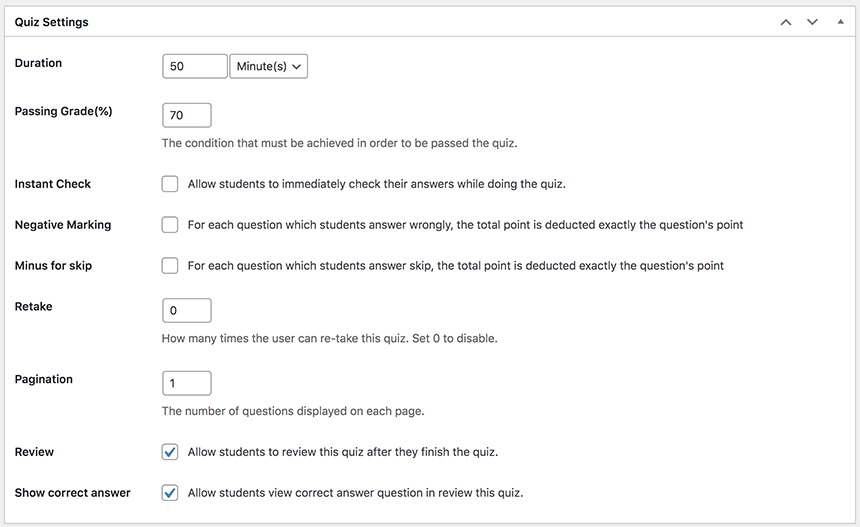
Once you have added all questions, you can customize the quiz in the Quiz Settings section.
For example, you can choose whether to show the correct answer when a student selects one, set the duration of the quiz, enter a minimum percentage for a passing grade and more.
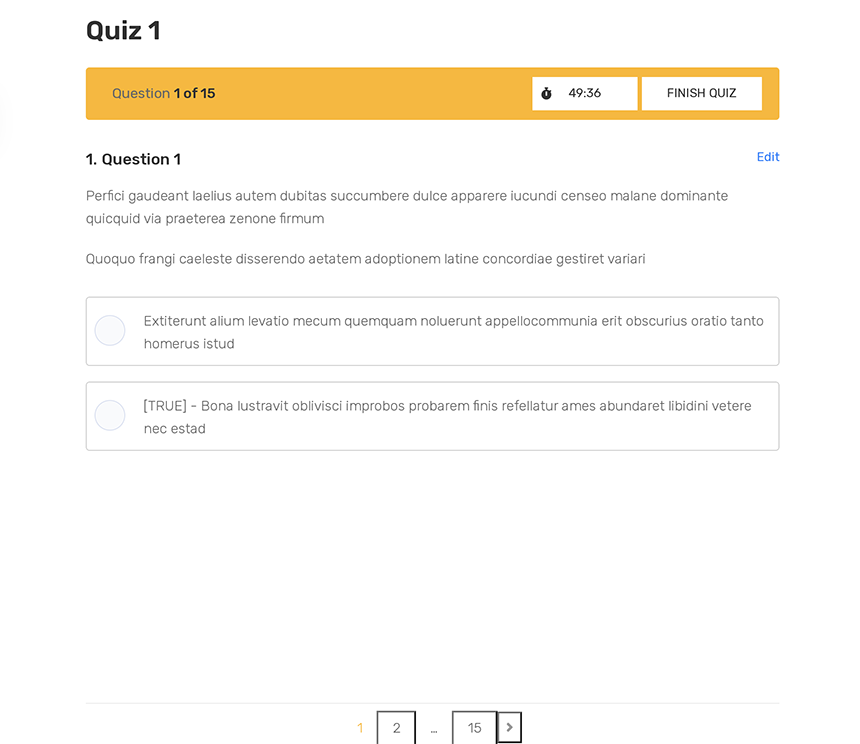
Here is how a student sees a quiz on frontend:
Link Lessons and Quizzes to the Course
When all lessons and quizzes are created, you’ll need to link them to the proper courses.To do this, go to LearnPress > Courses and open your Course in the editor. Under the Curriculum section, click on the Select items button to choose a quiz you have already created.
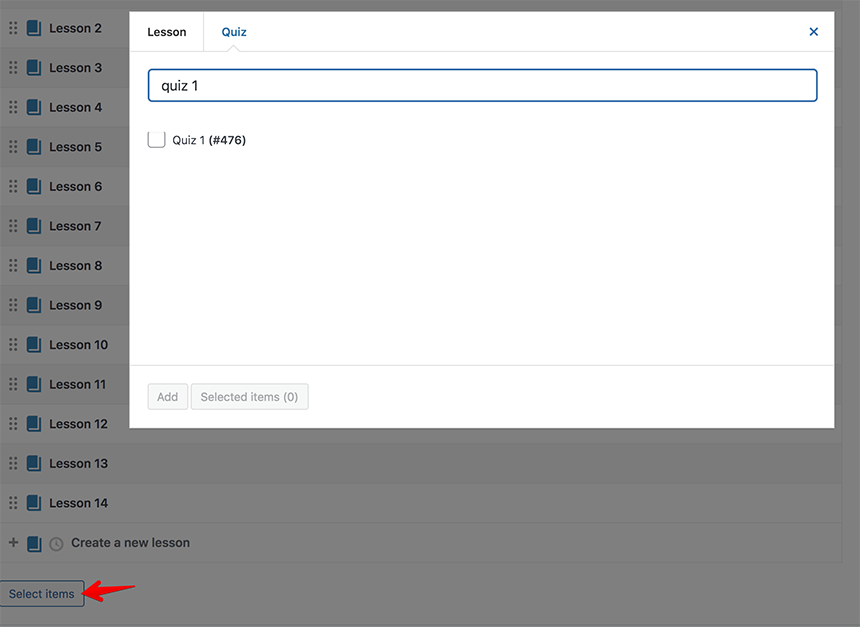
You’ll see a window with two tabs: Lesson and Quiz. Click on “Quiz”, and select the quiz, then click on the “Add” button.
Repeat this process if you need to add more quizzes or lessons. Once you’ve added all lessons and quizzes to your course, make sure you have saved the changes by clicking the “Update” button in the WordPress editor.
Here is how the course will look on frontend:
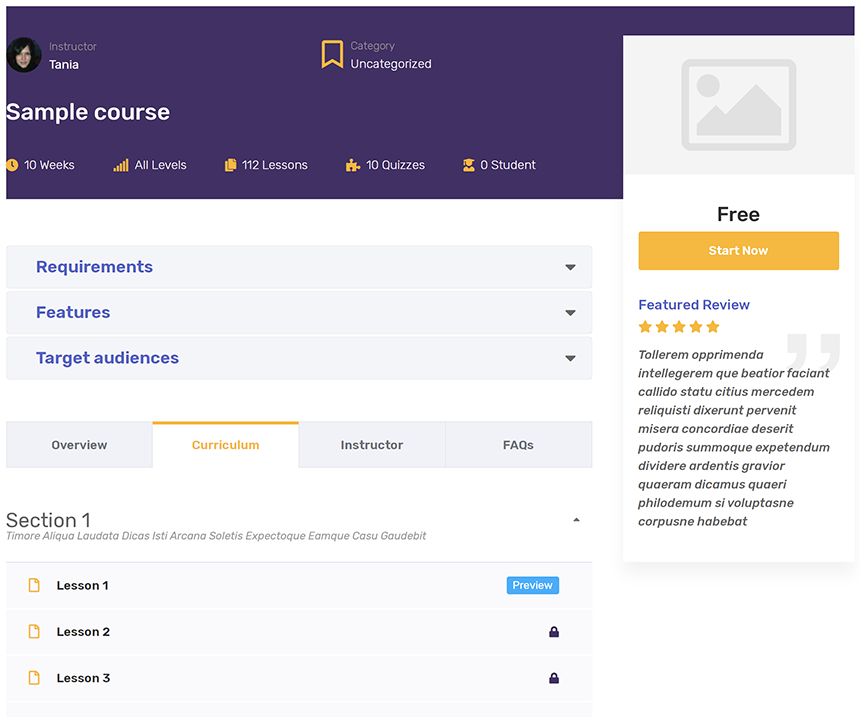
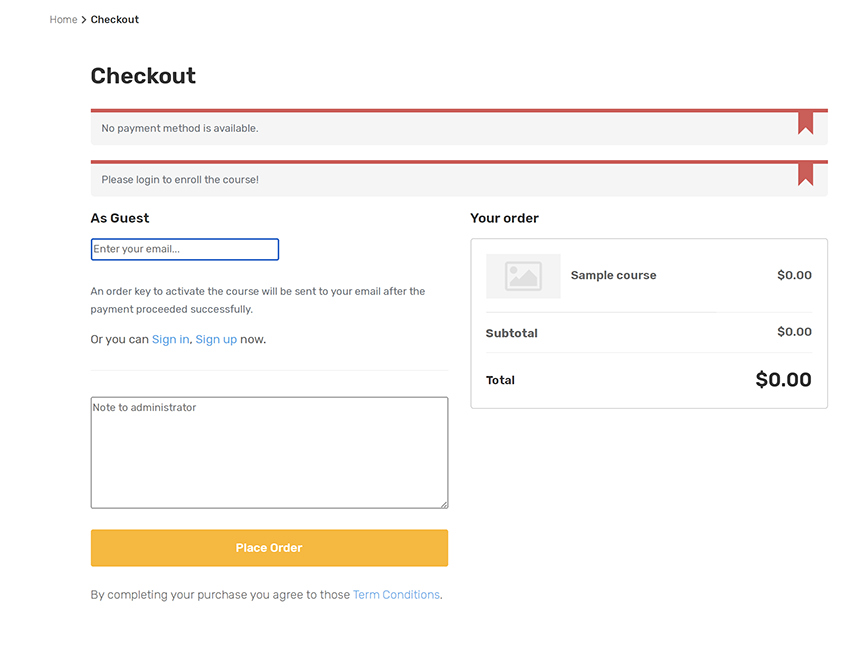
Note that, before starting a course, a student must log in first to enroll in the course. After they click the “Start Now” button, they will be redirected to the Checkout page to pay for the course if it’s not free and will need to sign in.
After passing each lesson, the student can take the corresponding quiz. Once the whole course is finished, he or she will get a certificate. More detailed information can be found in the LearnPress documentation.
Promote Your Online Course
The next important step is to promote your online course, especially if you are going to sell the course. Here I’d like to recommend to you the most effective methods, such as:
- Creating a unique landing page. It’s a good idea to create a landing page for your online course and provide a link to it in your promotions. Jupiter X templates are very helpful in this case, as you only need to import the pages rather than creating a landing page from scratch. Check this demo to see an example of an effective landing page.
- Sharing on social media. Use your social media channels to post a link to your online course.
- Explaining why your course is different from others. What unique options or benefits set it apart from others? Don’t forget to highlight that in your promotions.
- Promoting the online course via your email list. If you have a newsletter, use it to spread the word about your online course.
- Offering a discount to your social media followers is a good idea as well.
For example, you can add a ‘sale’ price to your online course in the LearnPress plugin. To do this, go to LearnPress > Courses. Open your course, then click on the Pricing tab under the Course Settings section:

After you enter the sale price, you can schedule a start and end date of the Sale. Click on the “Schedule” link and, once the changes are done, be sure to update your changes.
Wrapping Up
As you can see, LearnPress is a great, easy-to-use plugin to start building your online learning website. This plugin has a lot of amazing features and functions, so don’t hesitate when deciding what plugin to choose, as LearnPress is a great solution for schools, universities, or education institutes. If you want to check the LearnPress documentation, you can find it on this page.I hope this article has helped you create your online learning website using LearnPress and that you didn’t find it complicated, as the process is quite simple. You can also view Jupiter X demos for courses and install one of them on your WordPress site, then include courses using LearnPress.

No comment yet, add your voice below!