In WordPress, to access the login page of your website, you can use the default WordPress URL yourdomain.com/wp-login.php. But what if you have a large website with different authors? Then, you might need to create a custom login/register page – this is necessary for shop sites that require users to log in before making a purchase. You can build these pages with the help of Elementor and Ultimate Member plugins, both of which are already bunded with the Jupiter X theme.
In this article, I’ll show you how to build and customize login/register pages with Jupiter X by adding login/register buttons in the header and link them to custom pages with the appropriate forms or to enable the forms as a popup window.
Steps before creating a form
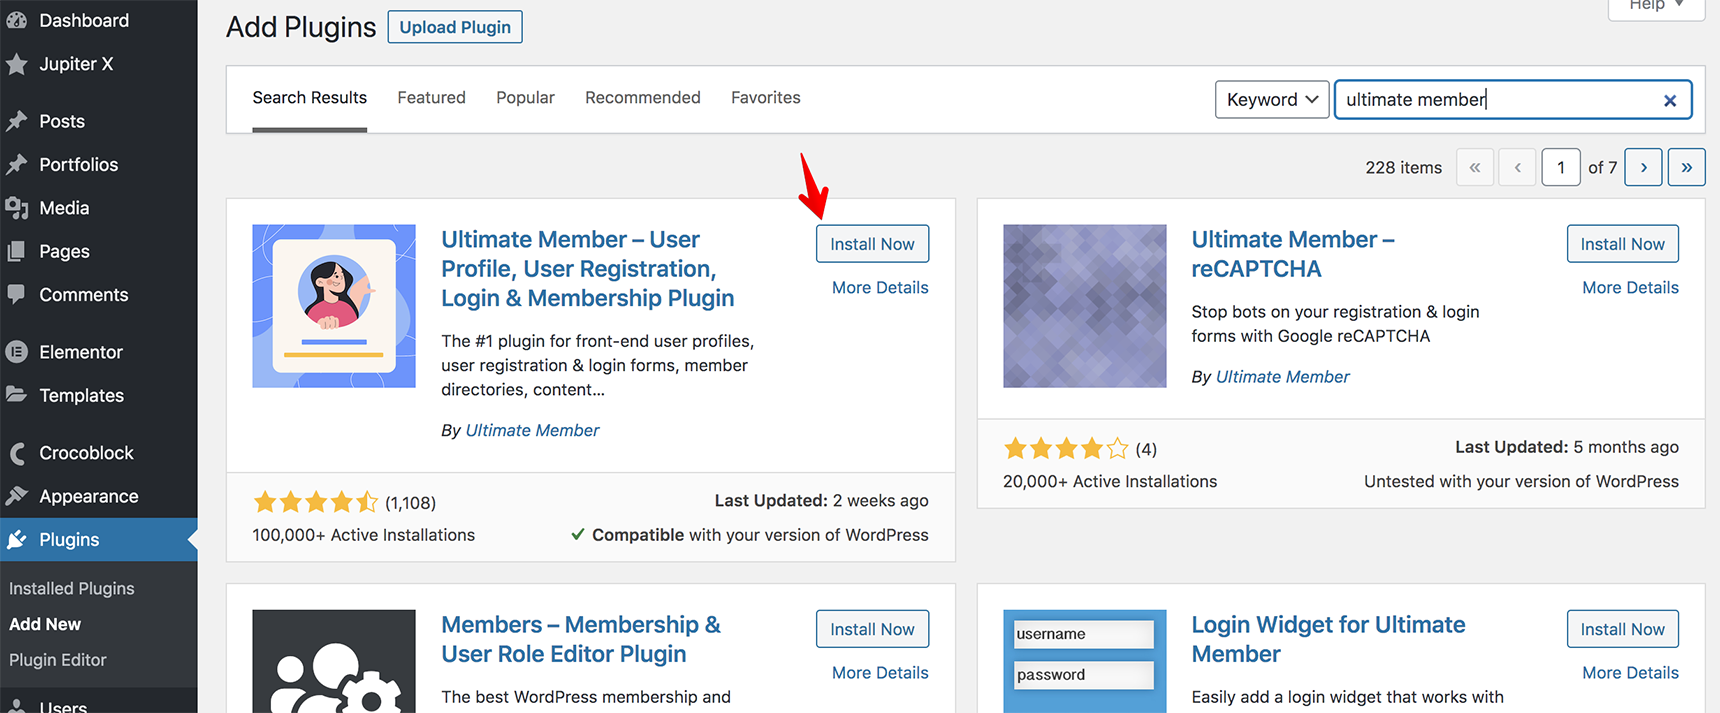
Before getting started on creating a login/register page with Jupiter X, you need to first install the Ultimate Member plugin on your WordPress site. Add this plugin as any 3rd-party plugin of WordPress: go to Plugins > Add New in the dashboard as described in this article.
Once the plugin is installed and activated, you need to create the Login and Registration forms. You can also create a default Profile page if you want to redirect a user to it after they’ve successfully logged in.
After the installation, you’ll see Pages in the Ultimate Member Settings:
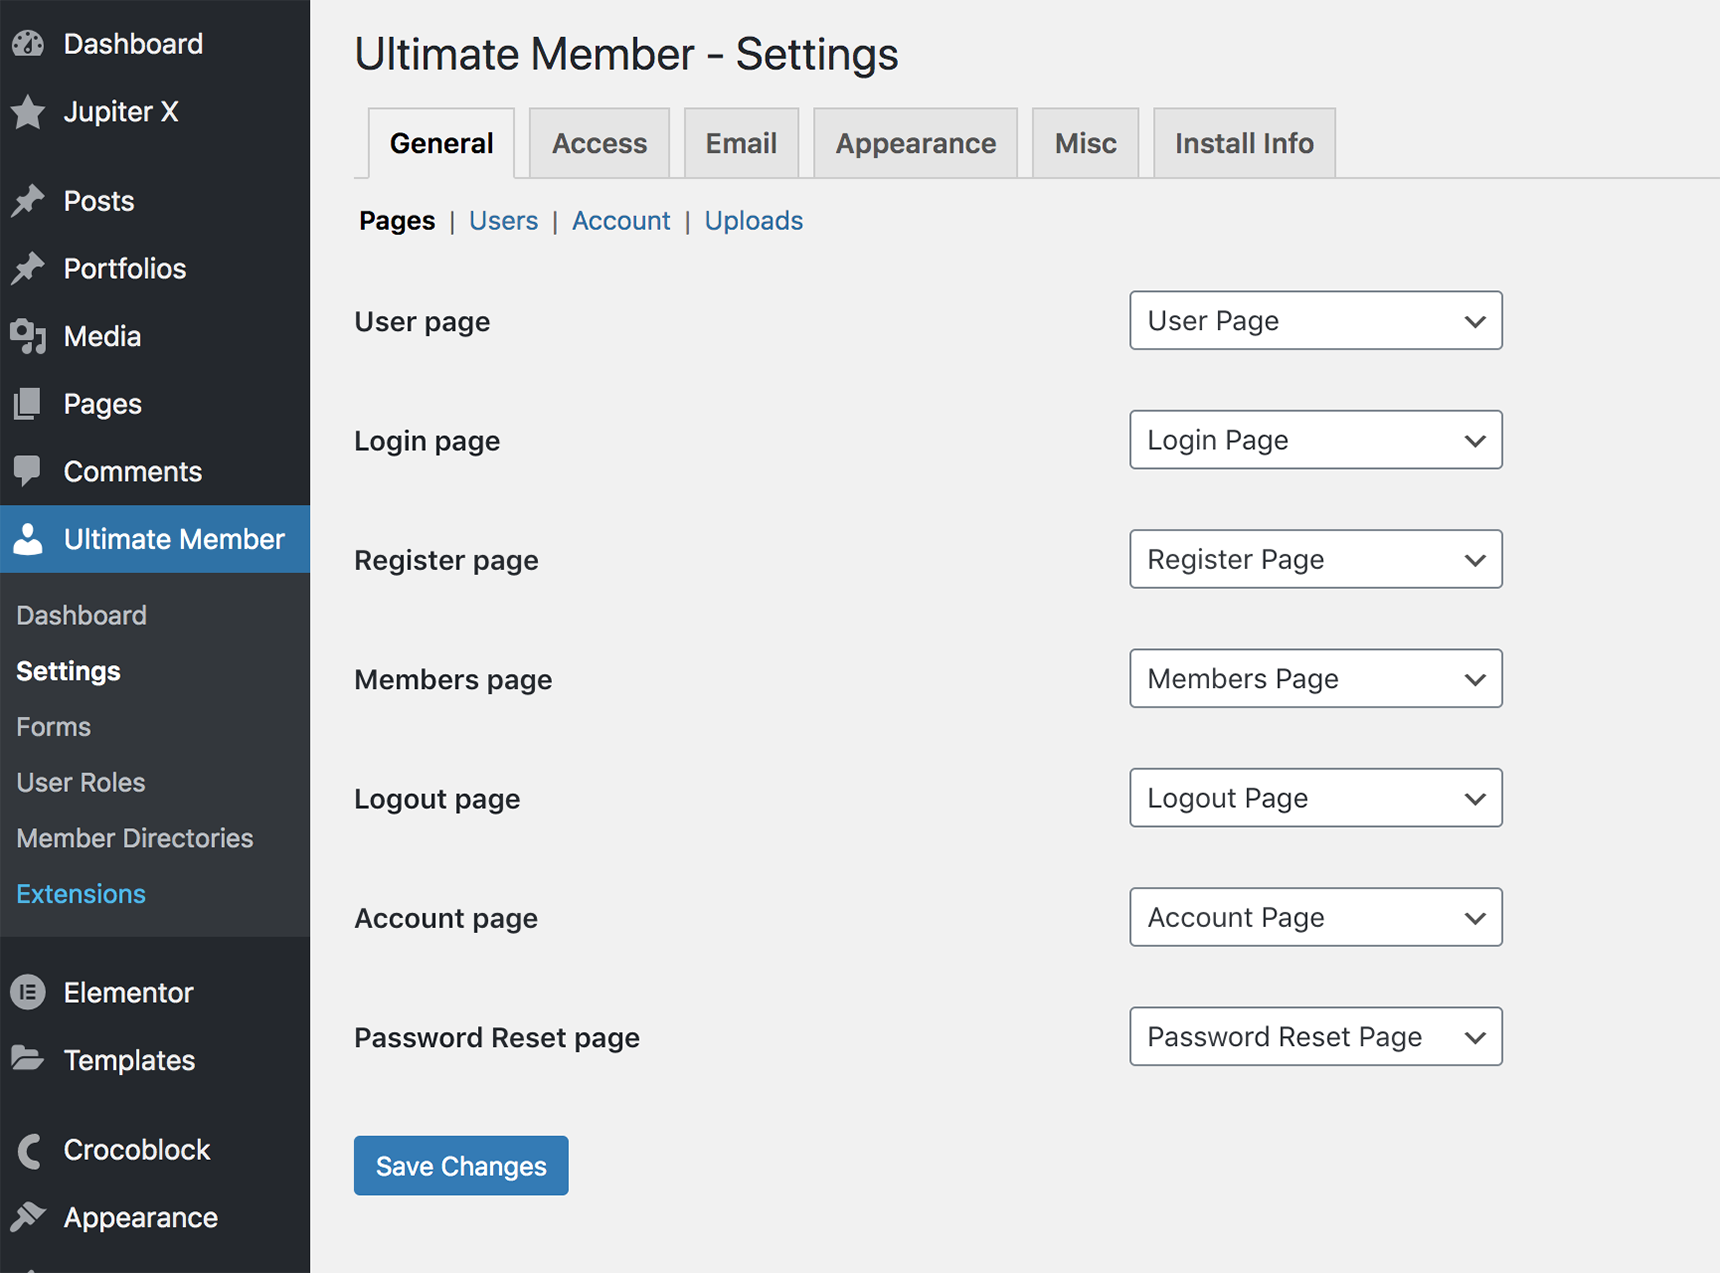
They are required for the plugin to work properly. Find more information about the pages in the Ultimate Member documentation. If the pages have been deleted for some reason, you’ll need to create them, add the form shortcode and assign the appropriate page in the settings.
Creating the registration form
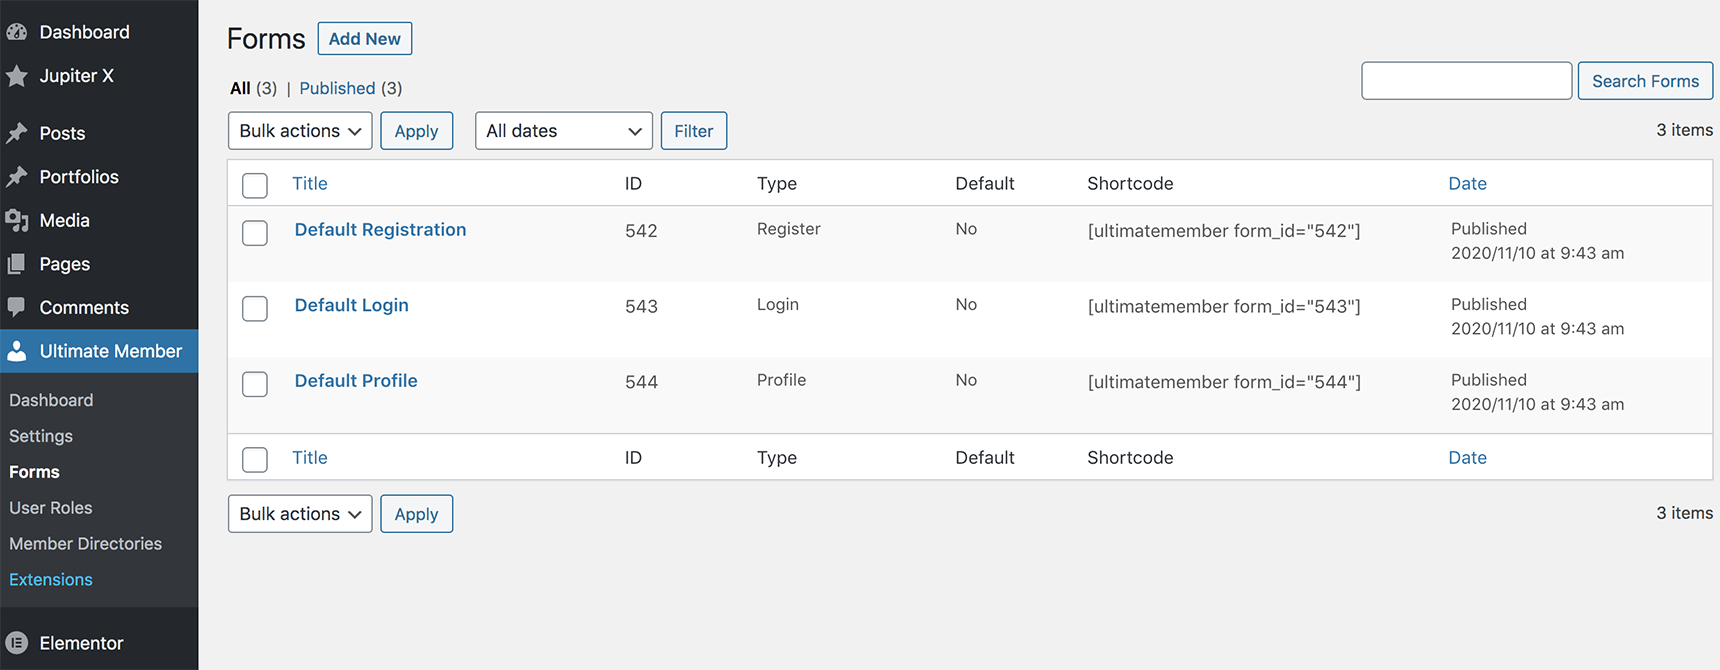
To start creating the registration form, go to Ultimate Member menu > Forms. There you’ll be able to edit a default form or create a new one.
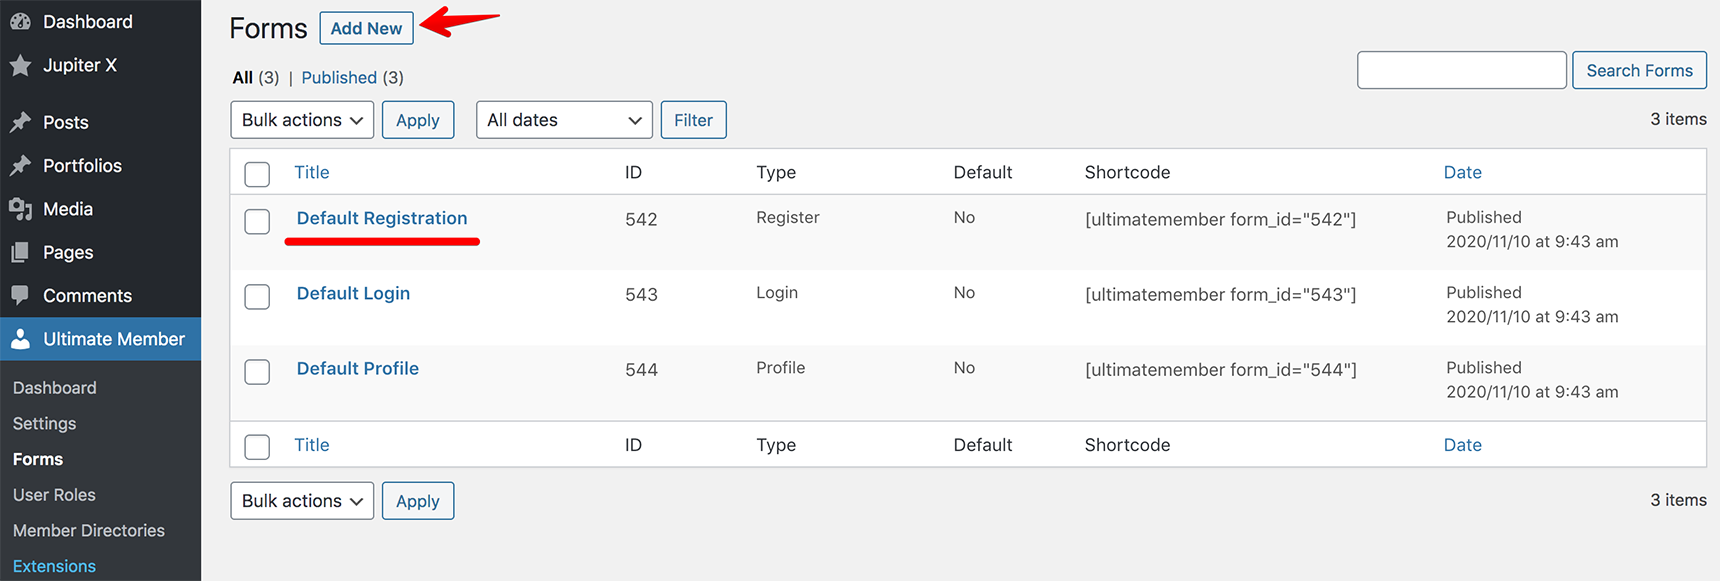
Let’s add a new form: click on the Add New button, you’ll be shown a New Form page where you’ll need to write the title of the form and select the type – Registration Form.
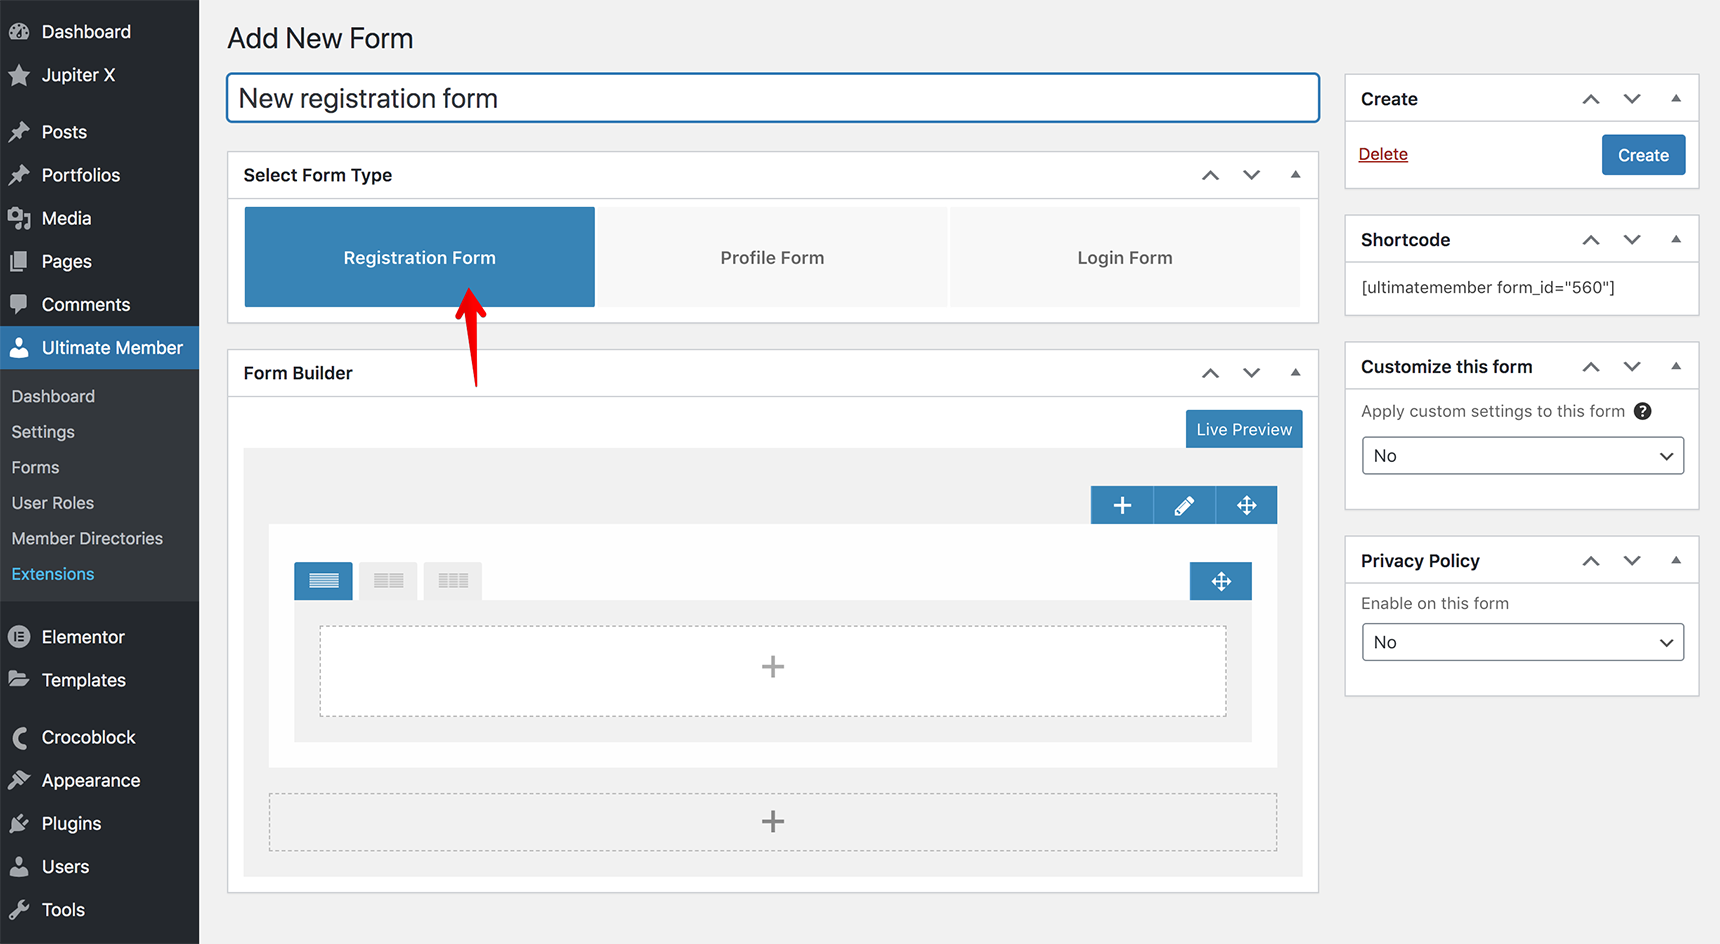
Below, there is a Form Builder where you can add the fields to the form. Let’s add the fields Username, Email Address and Password. Click on the plus icon to add the new fields.
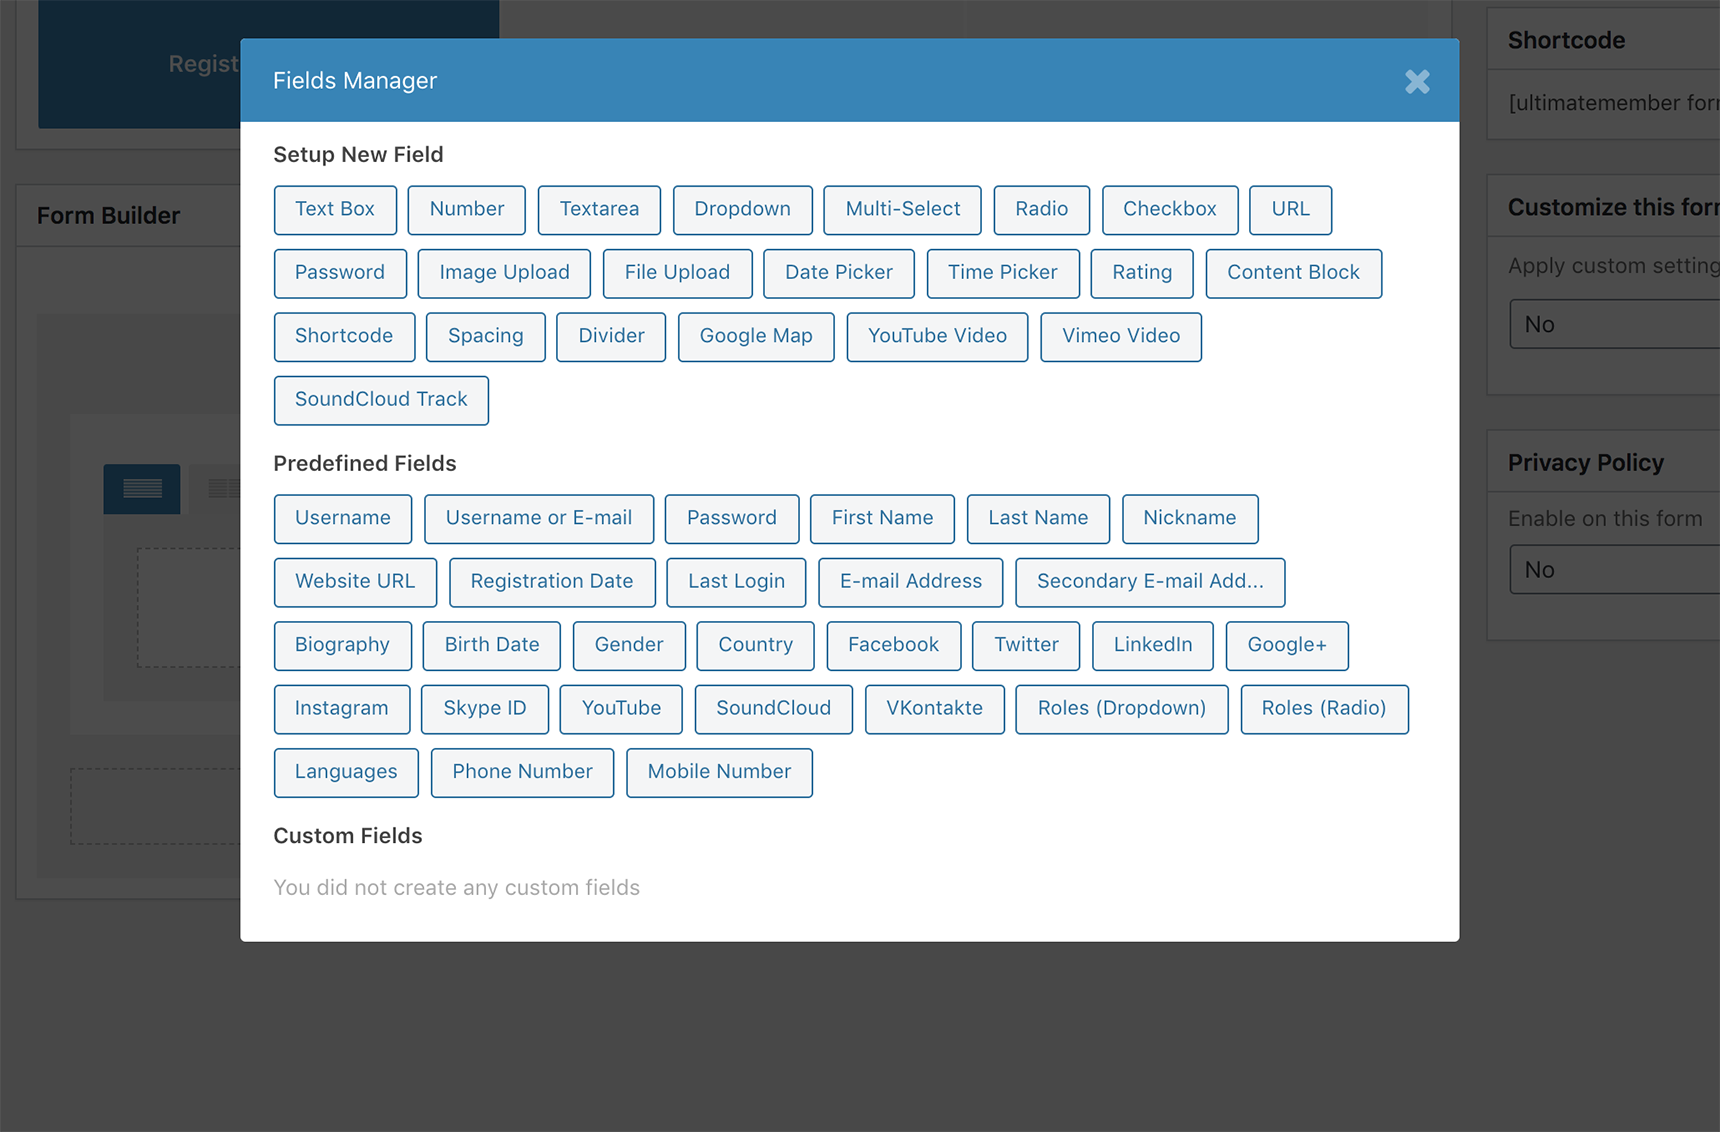
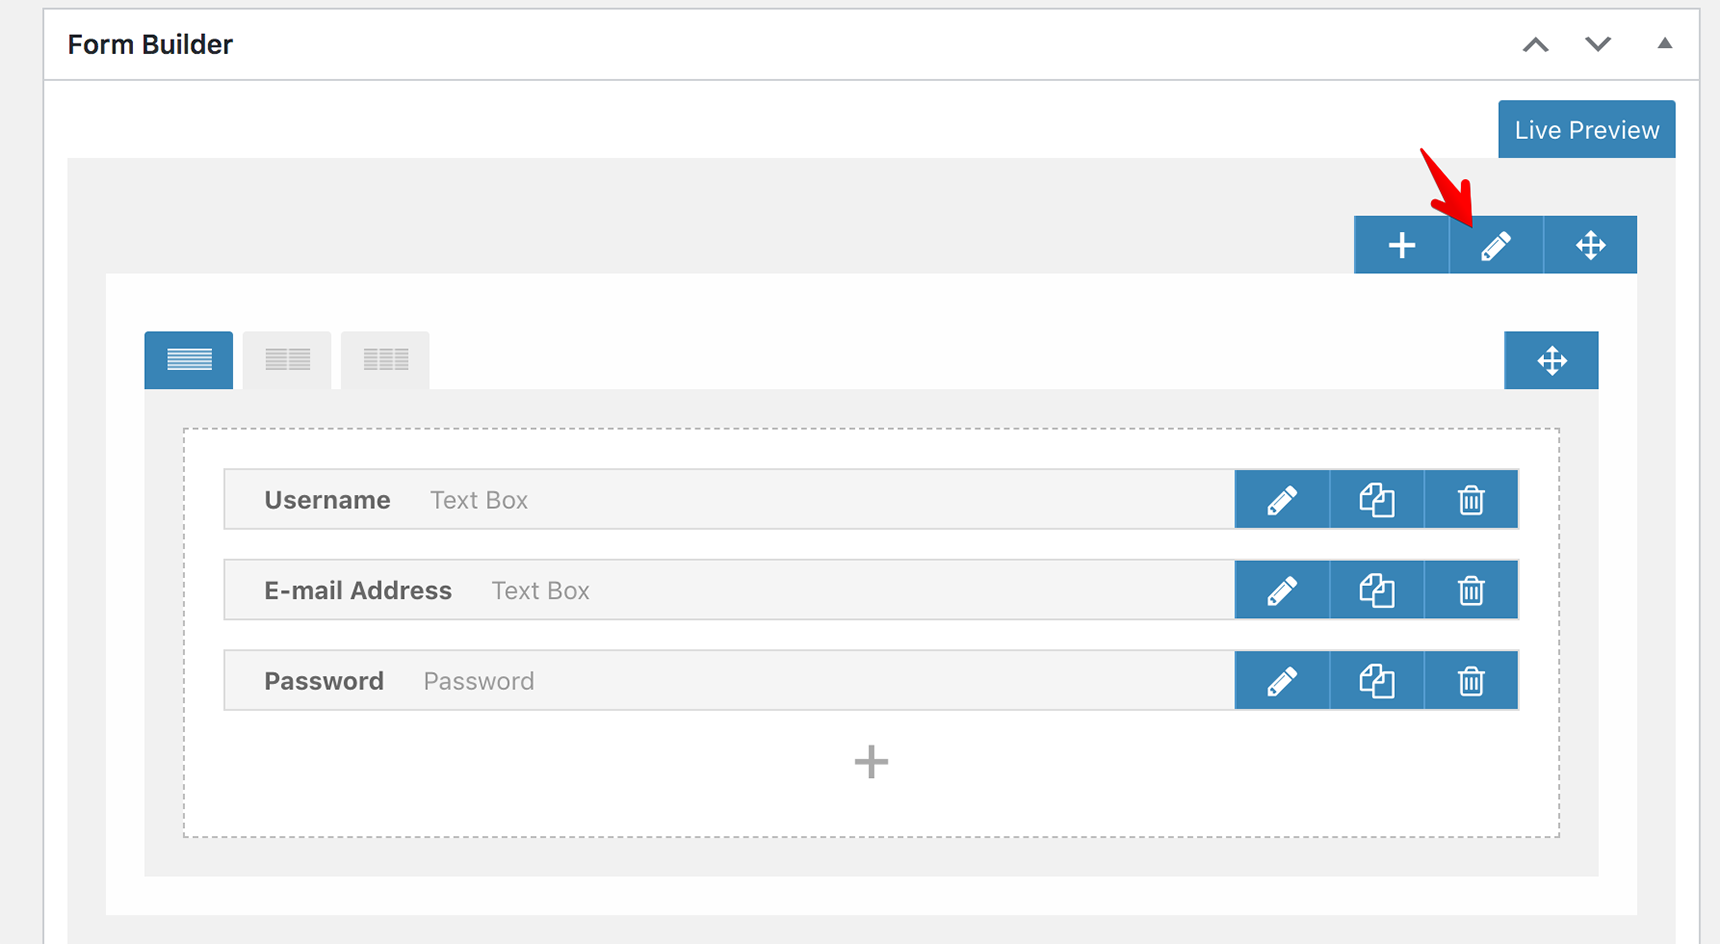
From the Predefined Fields section, select Username. This field will be added to the form, and you’ll just need to click the plus icon again to add another field. Once all fields are imported, click on the Create button on the top right side.
There is a possibility to style the fields – you can set the background and text colors, edit padding values, borders, etc. To do this, click on the pencil icon, and a modal window will pop up with the styling settings.
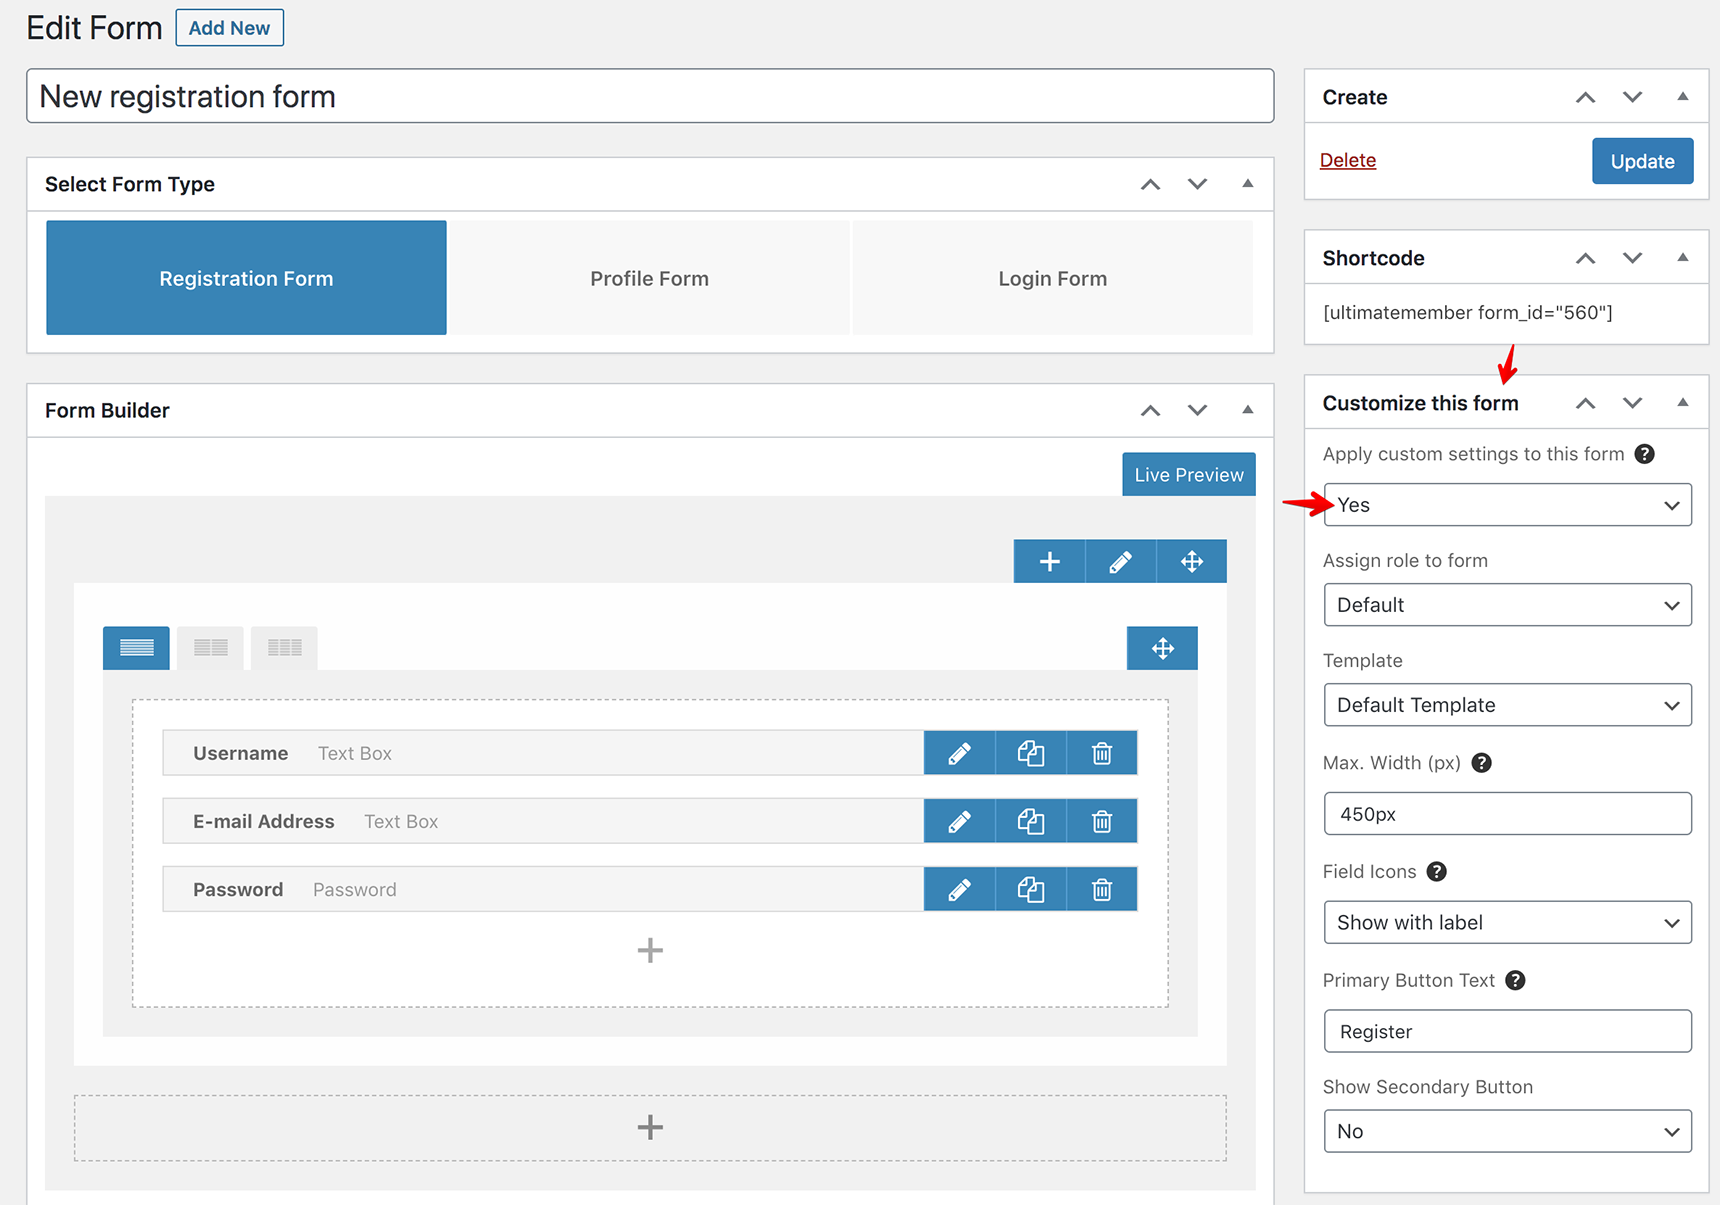
Other customization options can be found on the right side of the form editor under Customize This Form section, select Yes for the Apply custom settings to this form setting.
Here you’ll be able to assign a user role to the form, change the form width and rename the button from Register to whatever you’d like to name it.
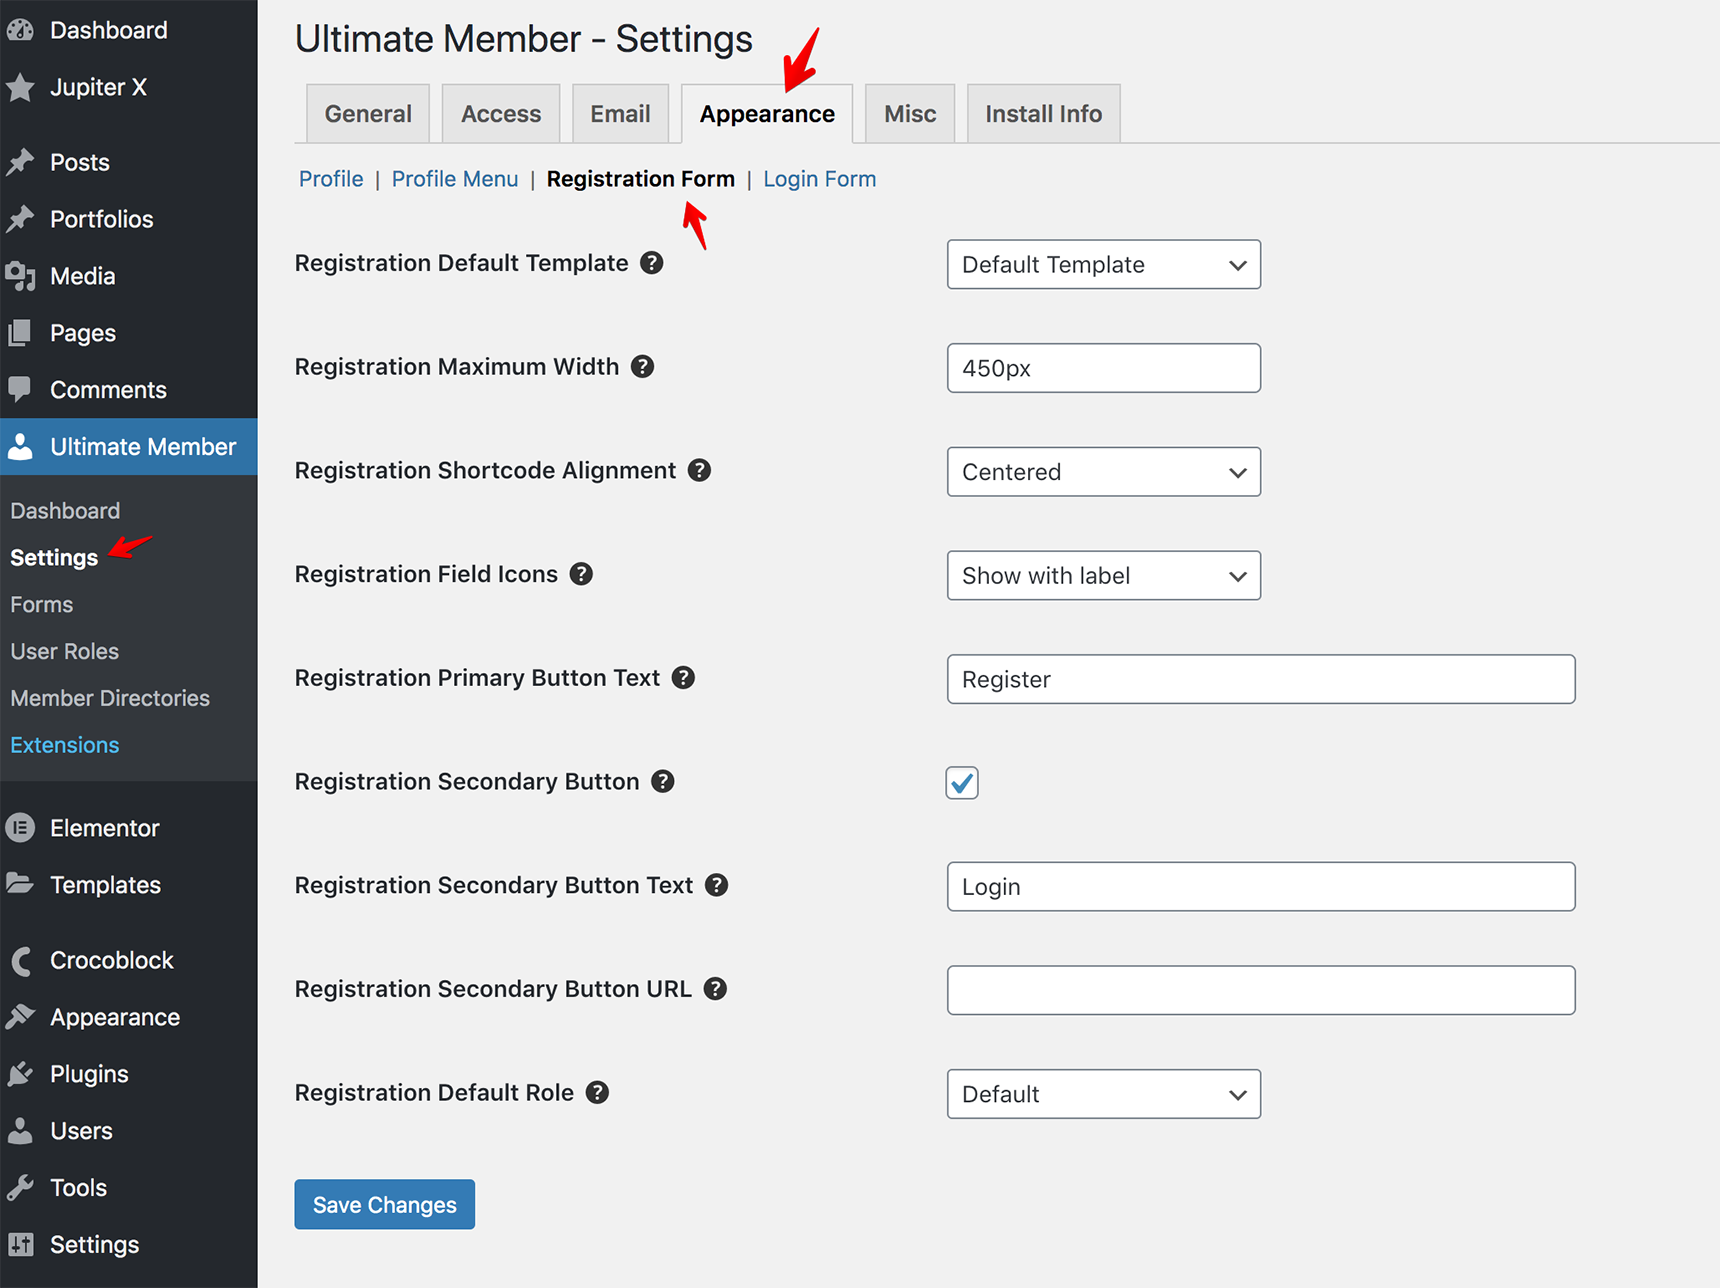
Or you can edit the global settings in Ultimate Member > Settings > Appearance > Registration Form.
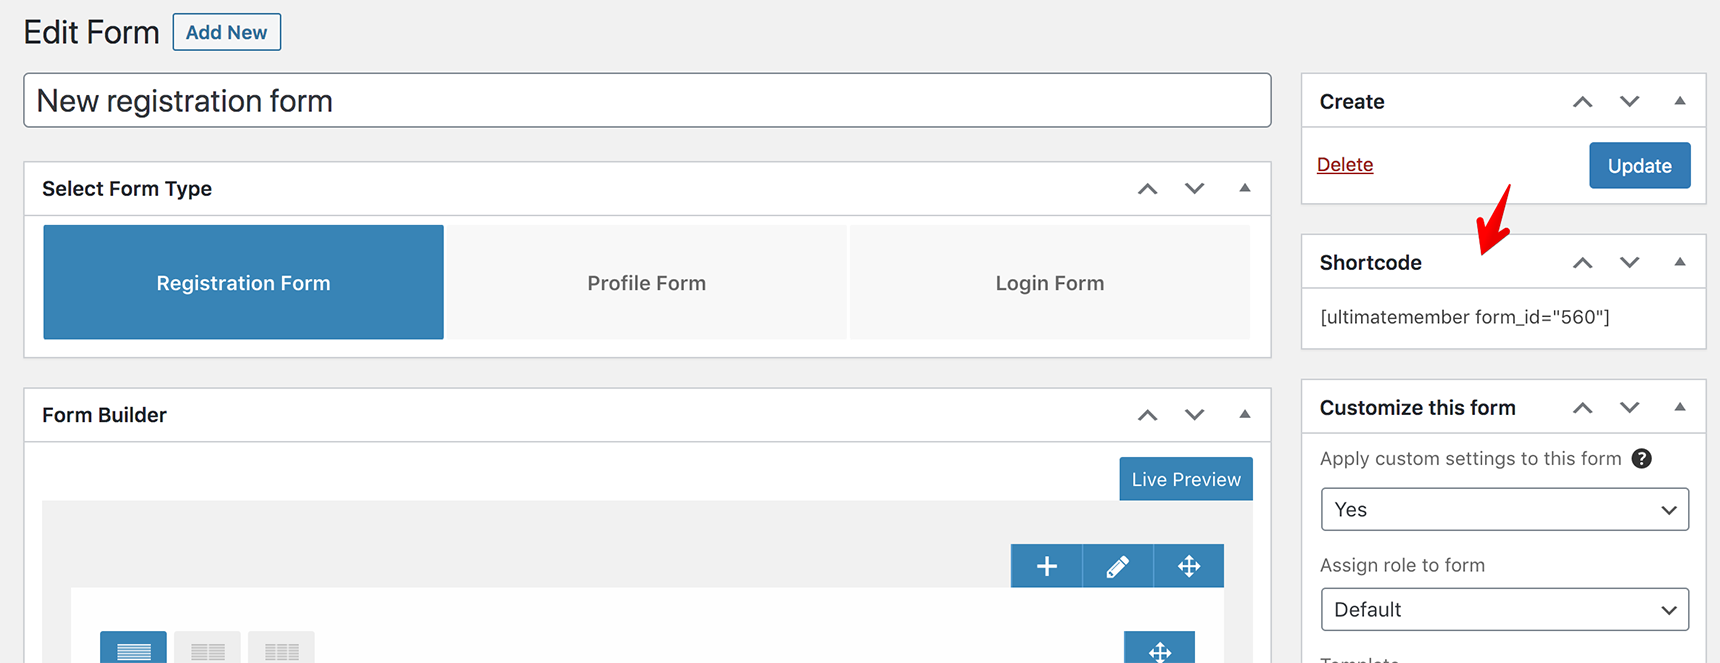
When you’re ready with the form, you need to copy its shortcode from the Shortcode section and paste it into the text editor of the Register page in the Pages menu.
More detailed information regarding the registration form can be found in the plugin documentation.
Creating the login form
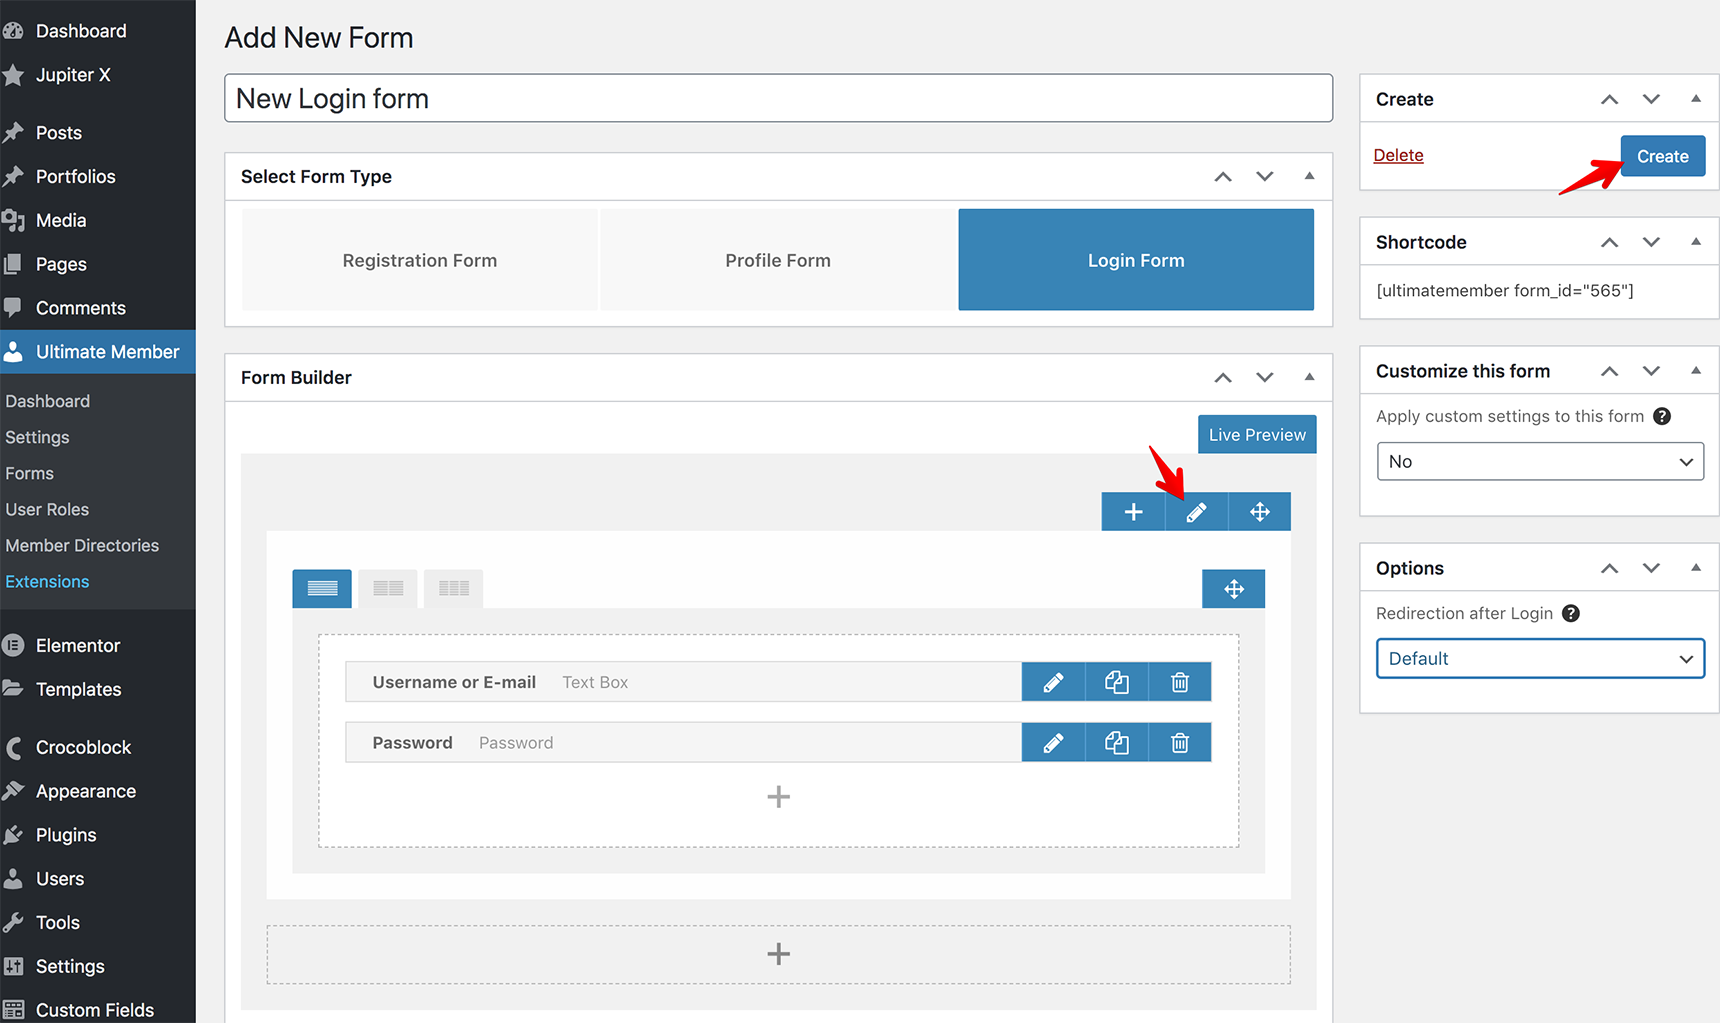
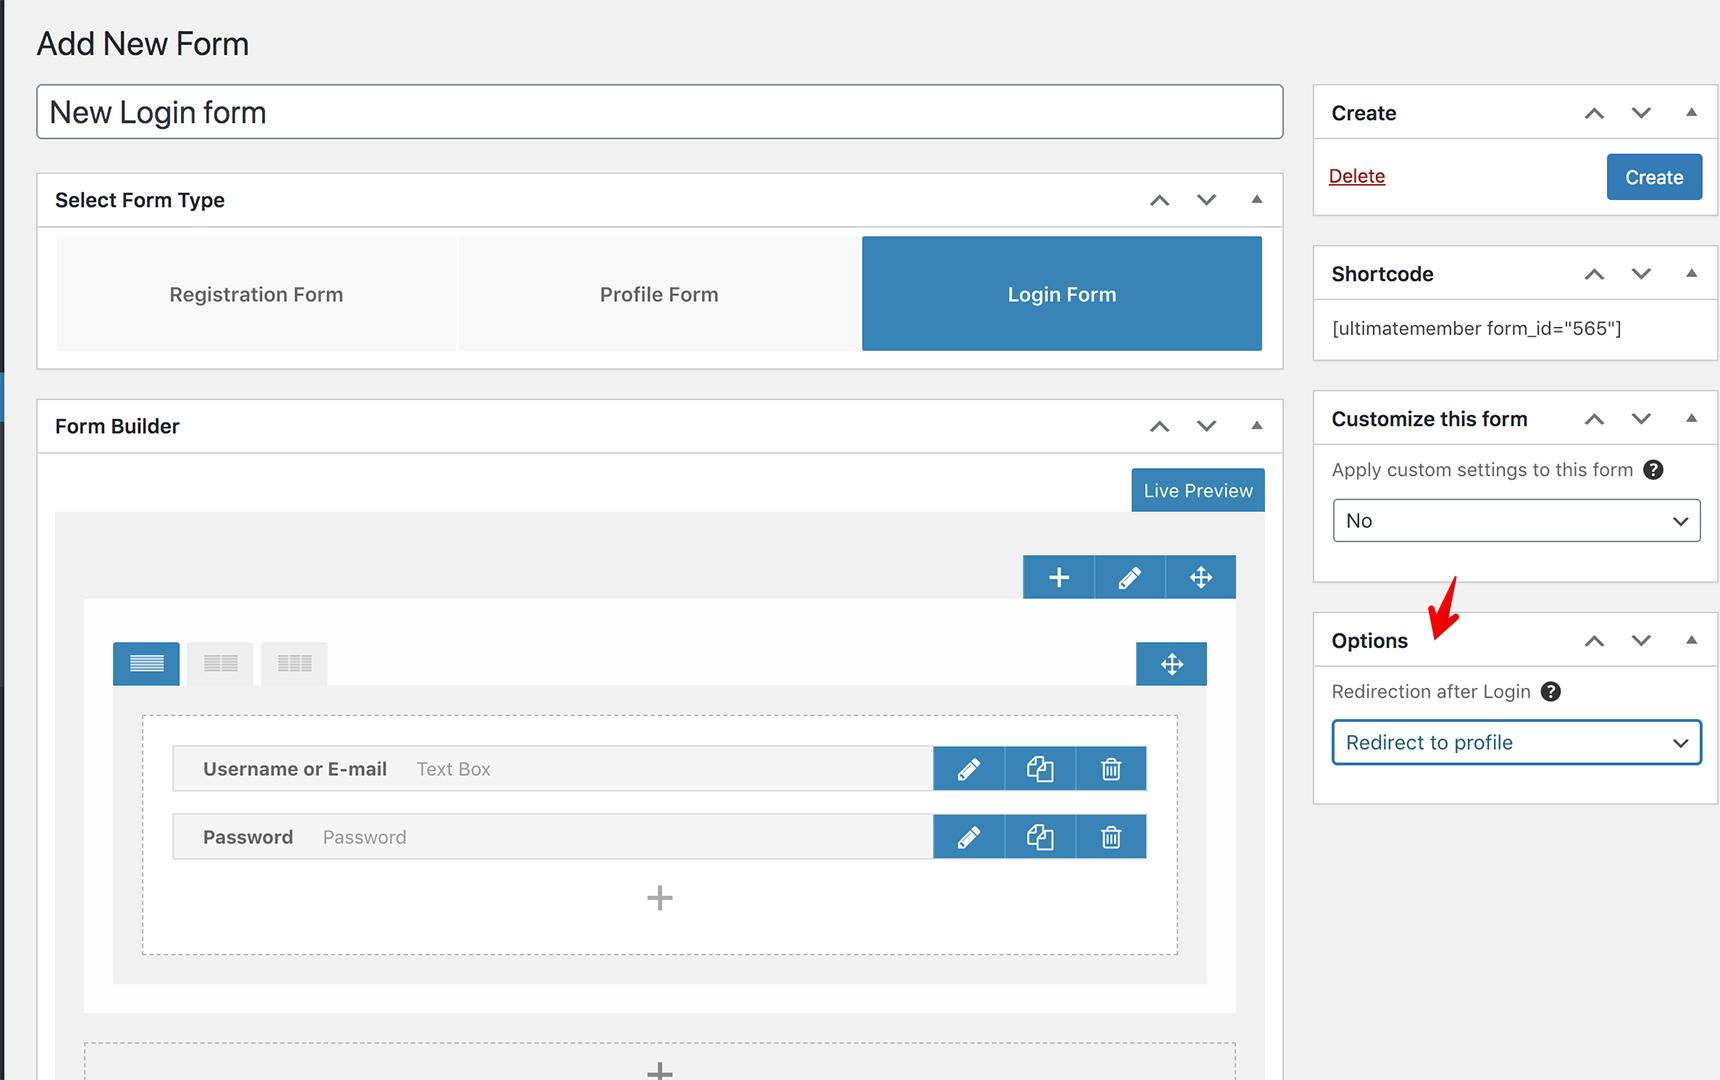
When new users are registered, they should be able to log in to make purchases or manage the site according to the user role assigned. Creating the login form is similar to the registration form creation. Click Add New under Ultimate Member > Forms, write a title of the form and choose the type Login Form.

As we did for the registration form, click on the plus icon to add some fields to the form. For example, we’ll choose Username or Email Address and Password. Style the fields by modifying the colors, borders, etc. Simply click on the pencil icon to do this, and once you’re done with this form, click on the Create button.
The customization options are the same as for the registration form: you can modify the settings in the form editor directly in the Customize this form section on the right side of the editor (it’s convenient if you have multiple login forms and want to customize them differently) or modify the global settings under Ultimate Member > Settings > Appearance > Login Form.
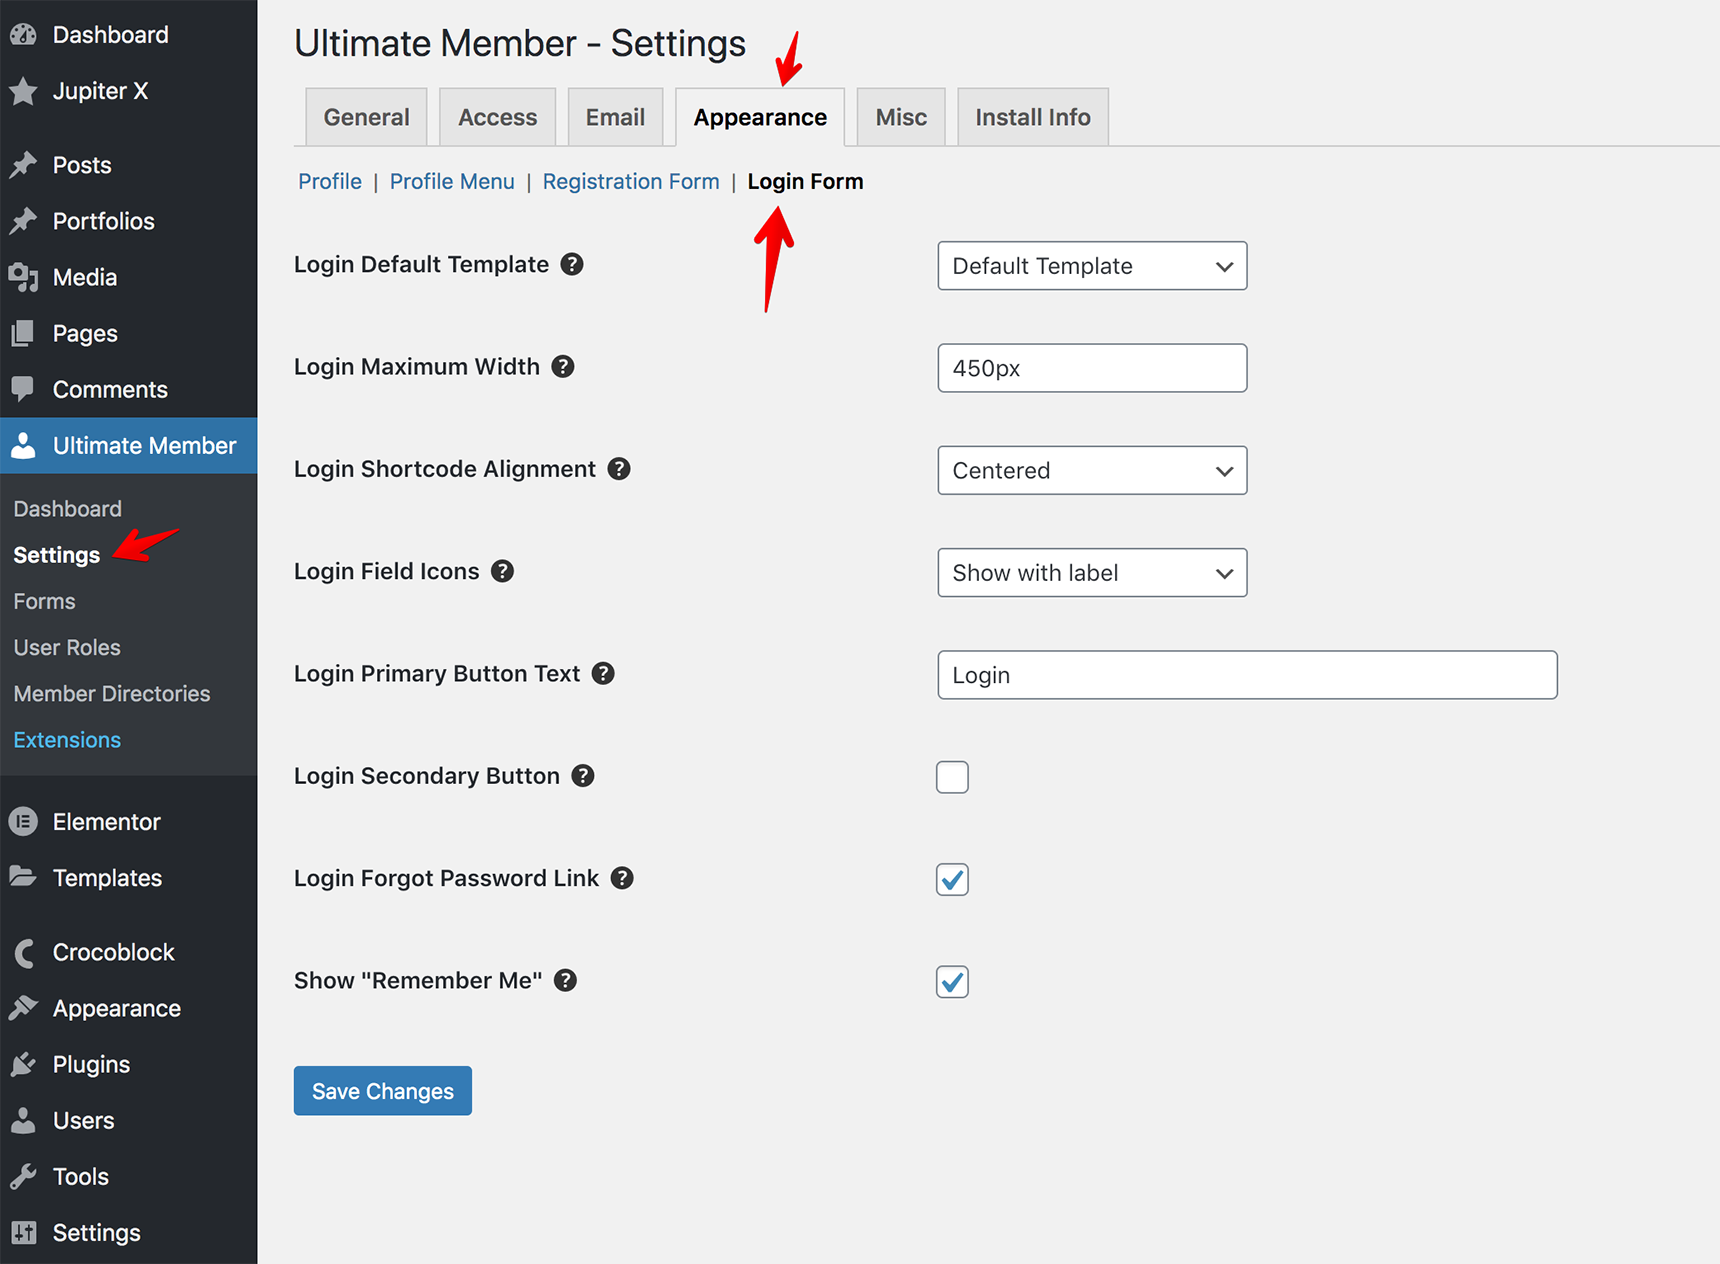
Another useful setting here is Redirection after Login, which can be found in the form editor on the right side under the Options section.
There are four options you can choose from to redirect a user after a successful login:
- Redirect to Profile
- Redirect to URL
- Refresh Active Page
- Redirect to WordPress Admin
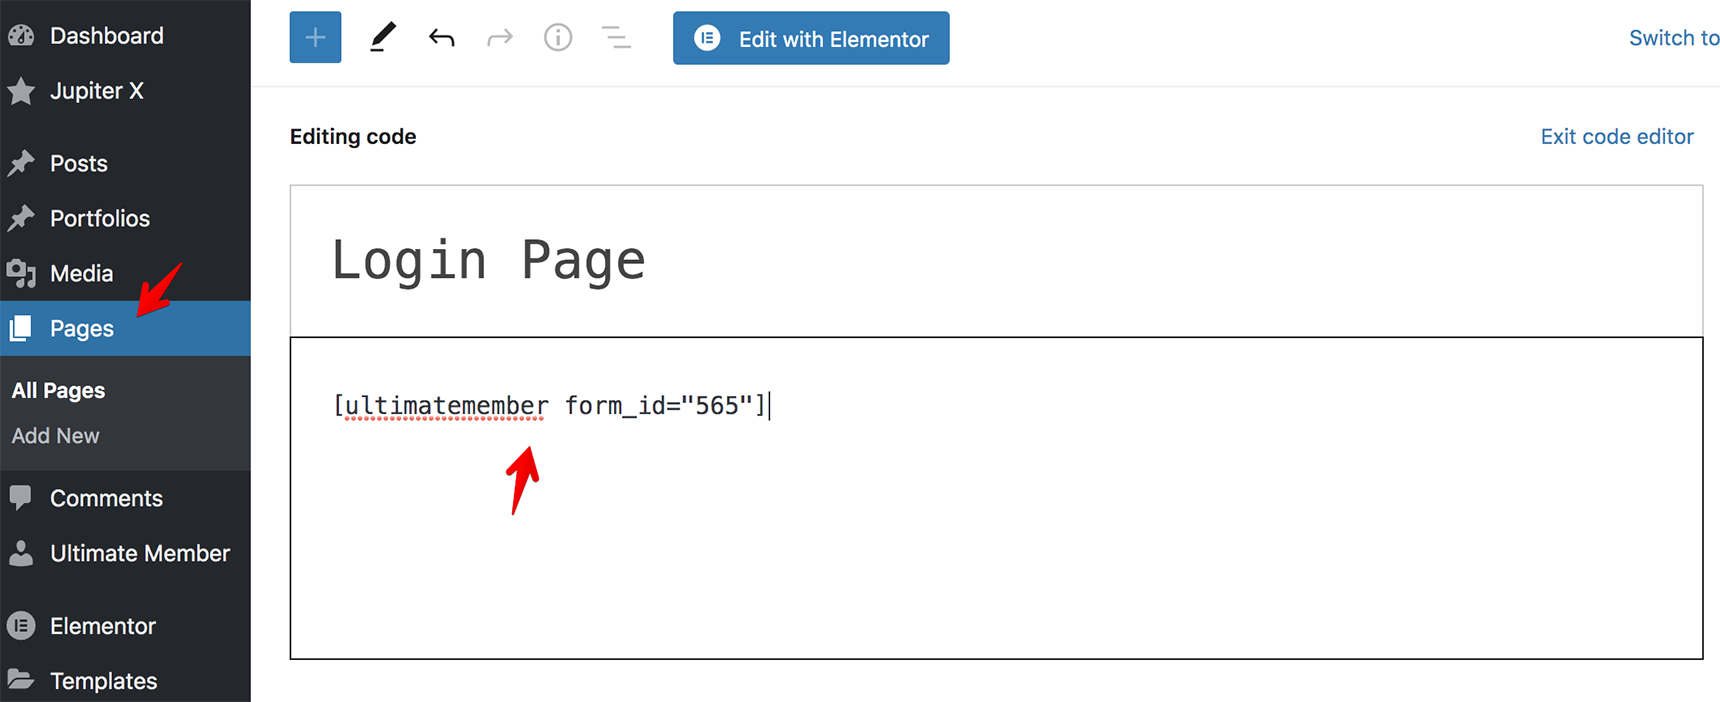
When the form is ready, copy the shortcode from the Shortcode section on the right side and paste it to your Login page in the Pages menu.
Once you’ve customized the forms, let’s then assign them to the buttons in the header.
Assigning login/register pages to the buttons in the header
To add login/register links to the header, you need to create a custom header with Elementor at first. If you don’t have it yet, read this article on how to create a custom header.
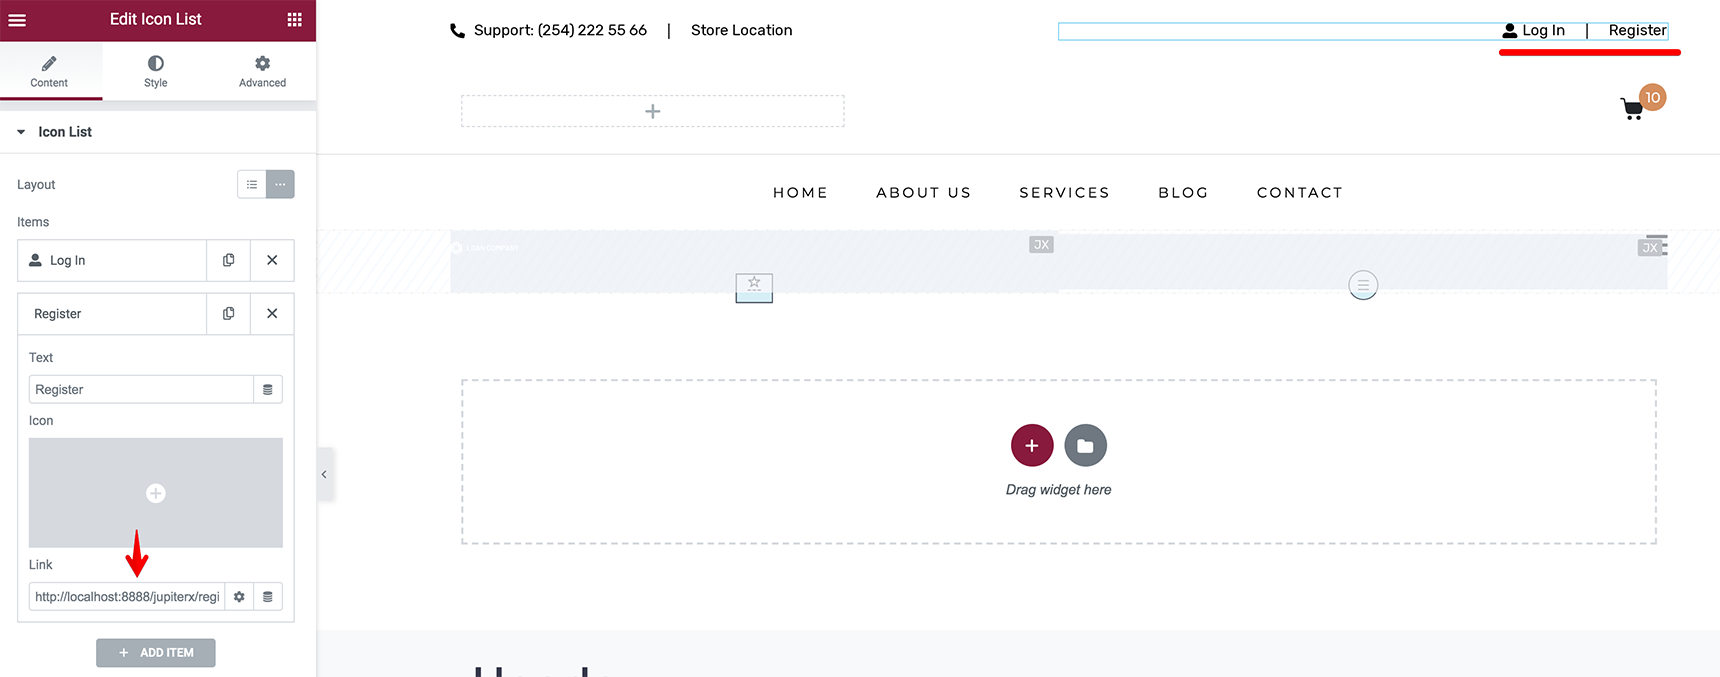
To show the login/register links, you can use the Icon List element and add the links of your pages in the settings.
It’s supposed to change the login link to log out once the user is logged in. To achieve this, we’ll use custom code.
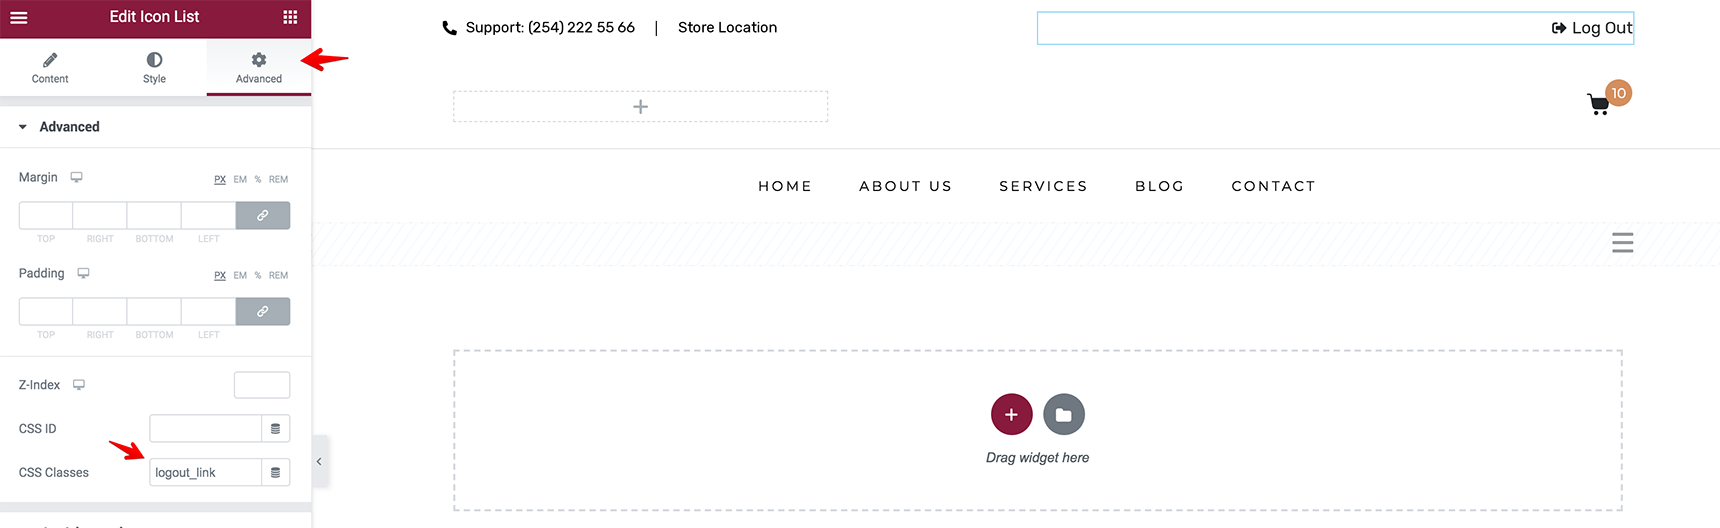
First, add the Icon List element with the log out link and assign custom classes in Advanced > CSS Classes of the Icon List settings. For example, let’s assign the login_link class for Login/Register Icon List and the logout_link class for the Log Out Icon List.
Then add custom css code to Jupiter X > Customize > Additional CSS:
.logged-in .login_link, .logout_link {
    display: none;
}

.logged-in .logout_link {
	display: block;
}
If you want to add Login/Register links inside the menu, it can also be done. The instructions are described in the Ultimate Member article.
How to open login/register forms in the popup window
If you prefer to show login/register forms in a modal popup instead of redirecting visitors to a new page, read the instructions below.
I’ll use the JetPopUp plugin to create popup windows. The plugin is bundled with the Jupiter X theme and can be installed via Jupiter X > Control Panel > Plugins.
Once you’ve installed the plugin, let’s create a popup for the login link.
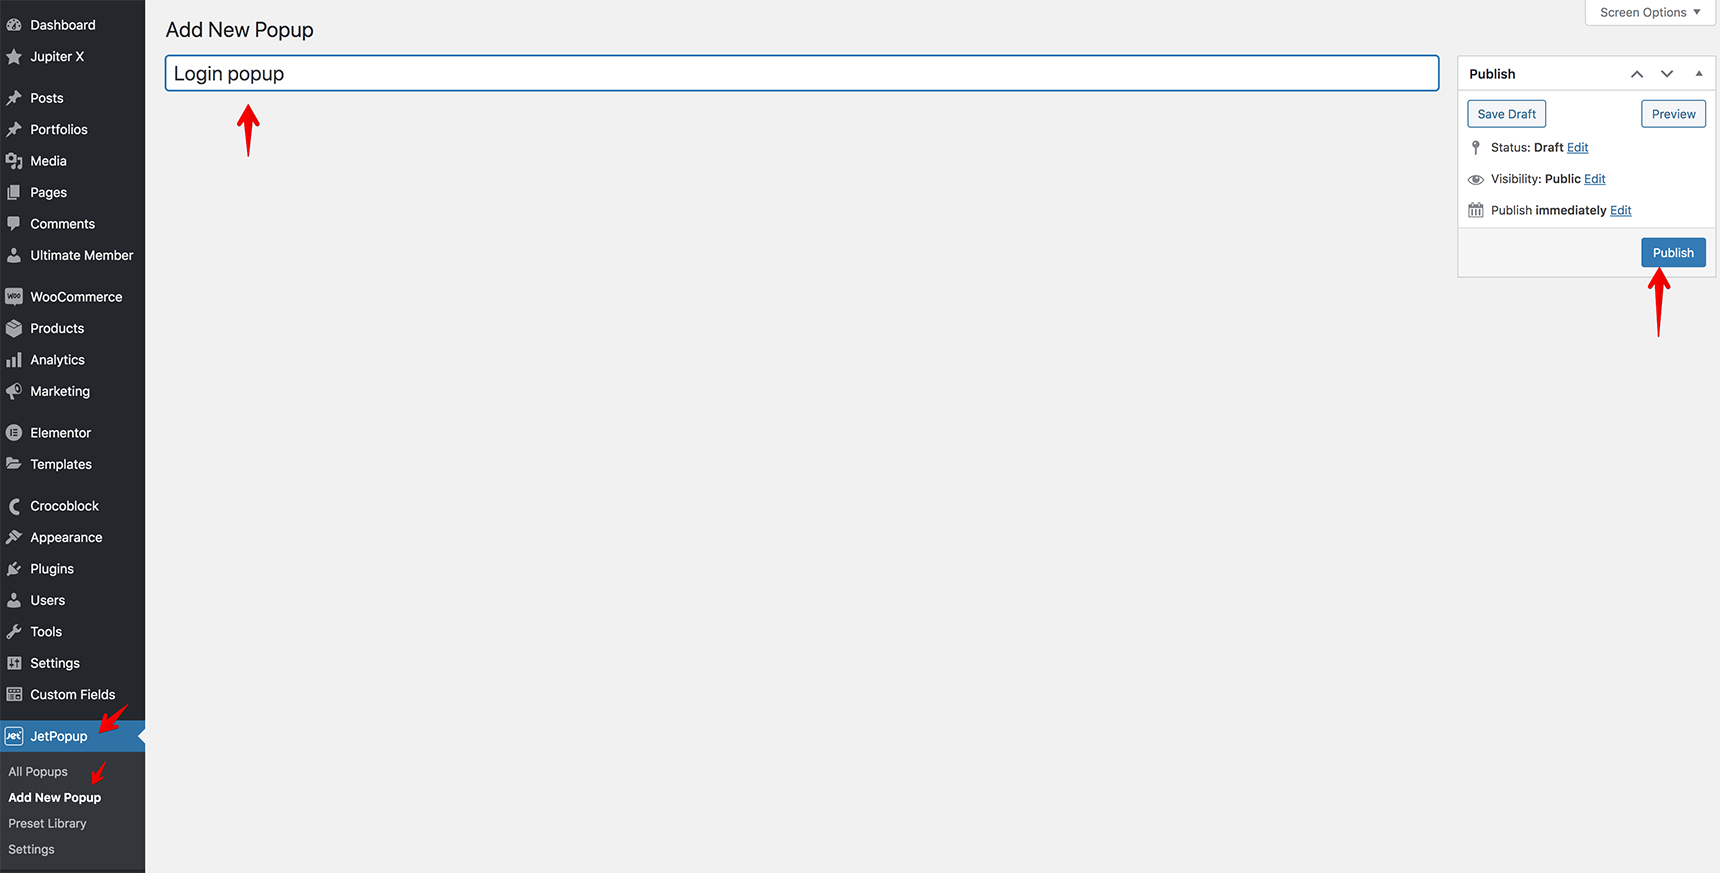
Go to the JetPopup menu in your dashboard and click on Add New Popup, write the title for it and publish.
The page will be updated, and you’ll see the button Edit with Elementor. Click on it to open the Elementor editor. The process of adding the form is very simple: look for the Shortcode element, drag and drop it into the editor, insert the shortcode of the login form that you created in Ultimate Member > Forms.
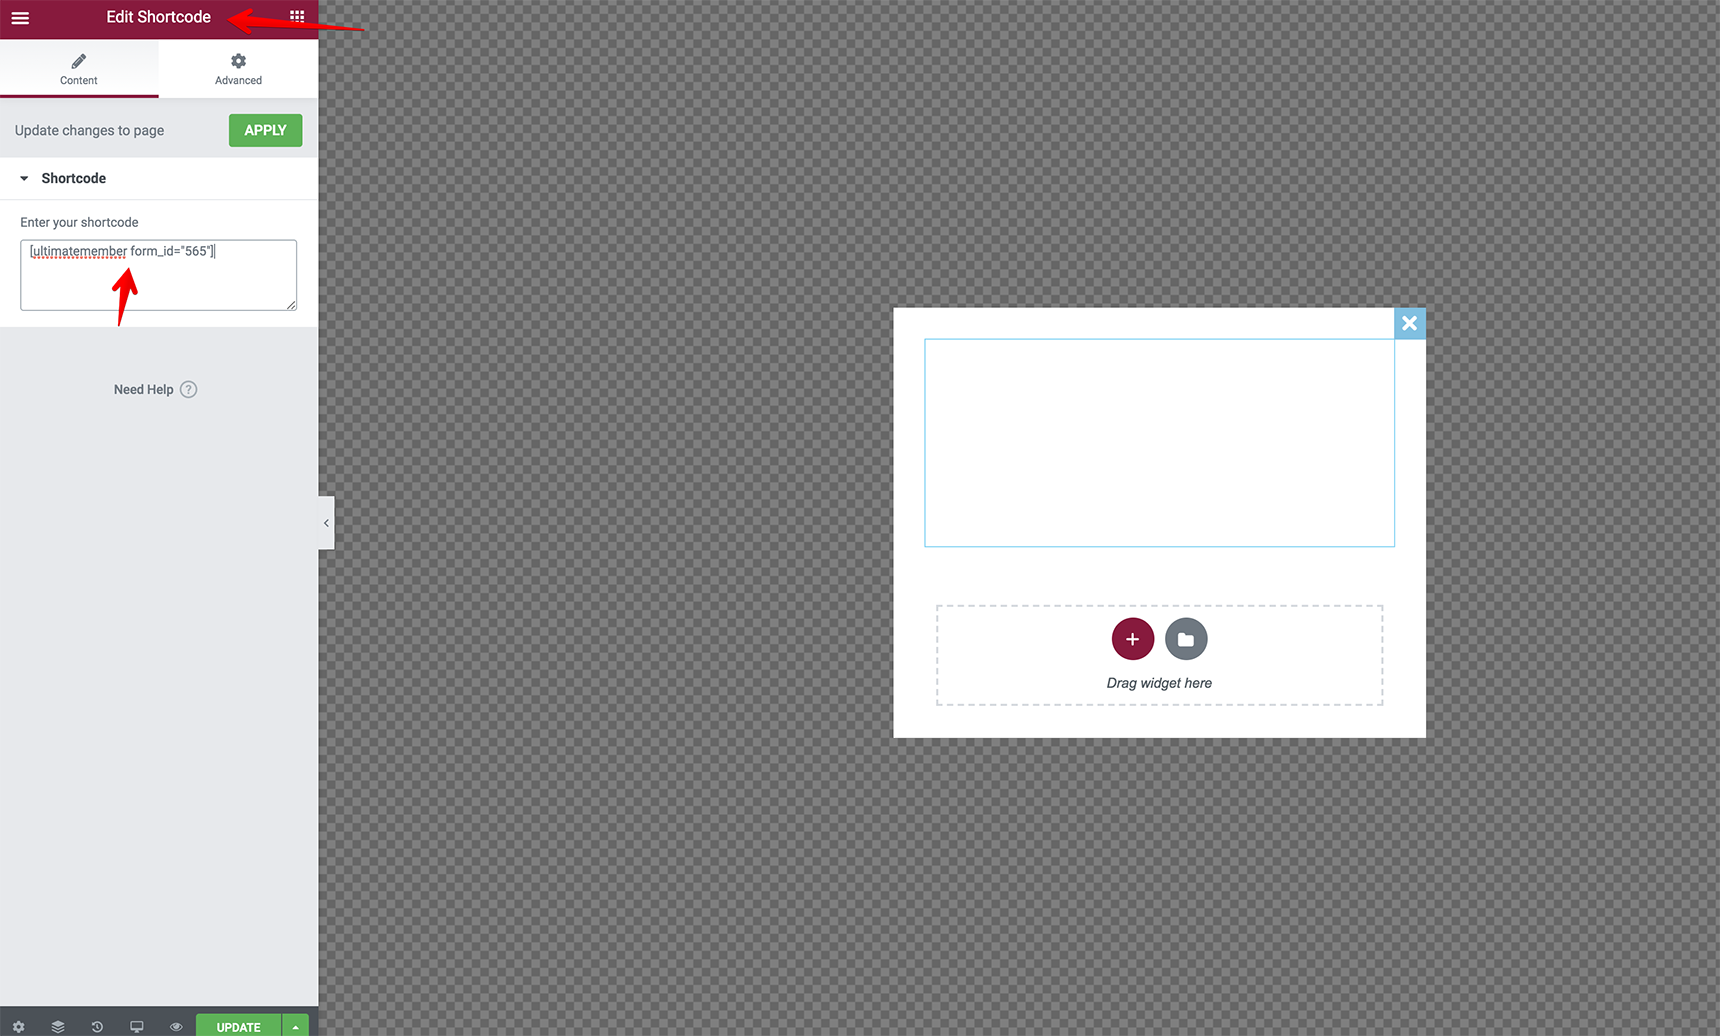
Don’t worry if you can’t see the form in the editor, that’s normal when using shortcodes as it will be visible fine in frontend.
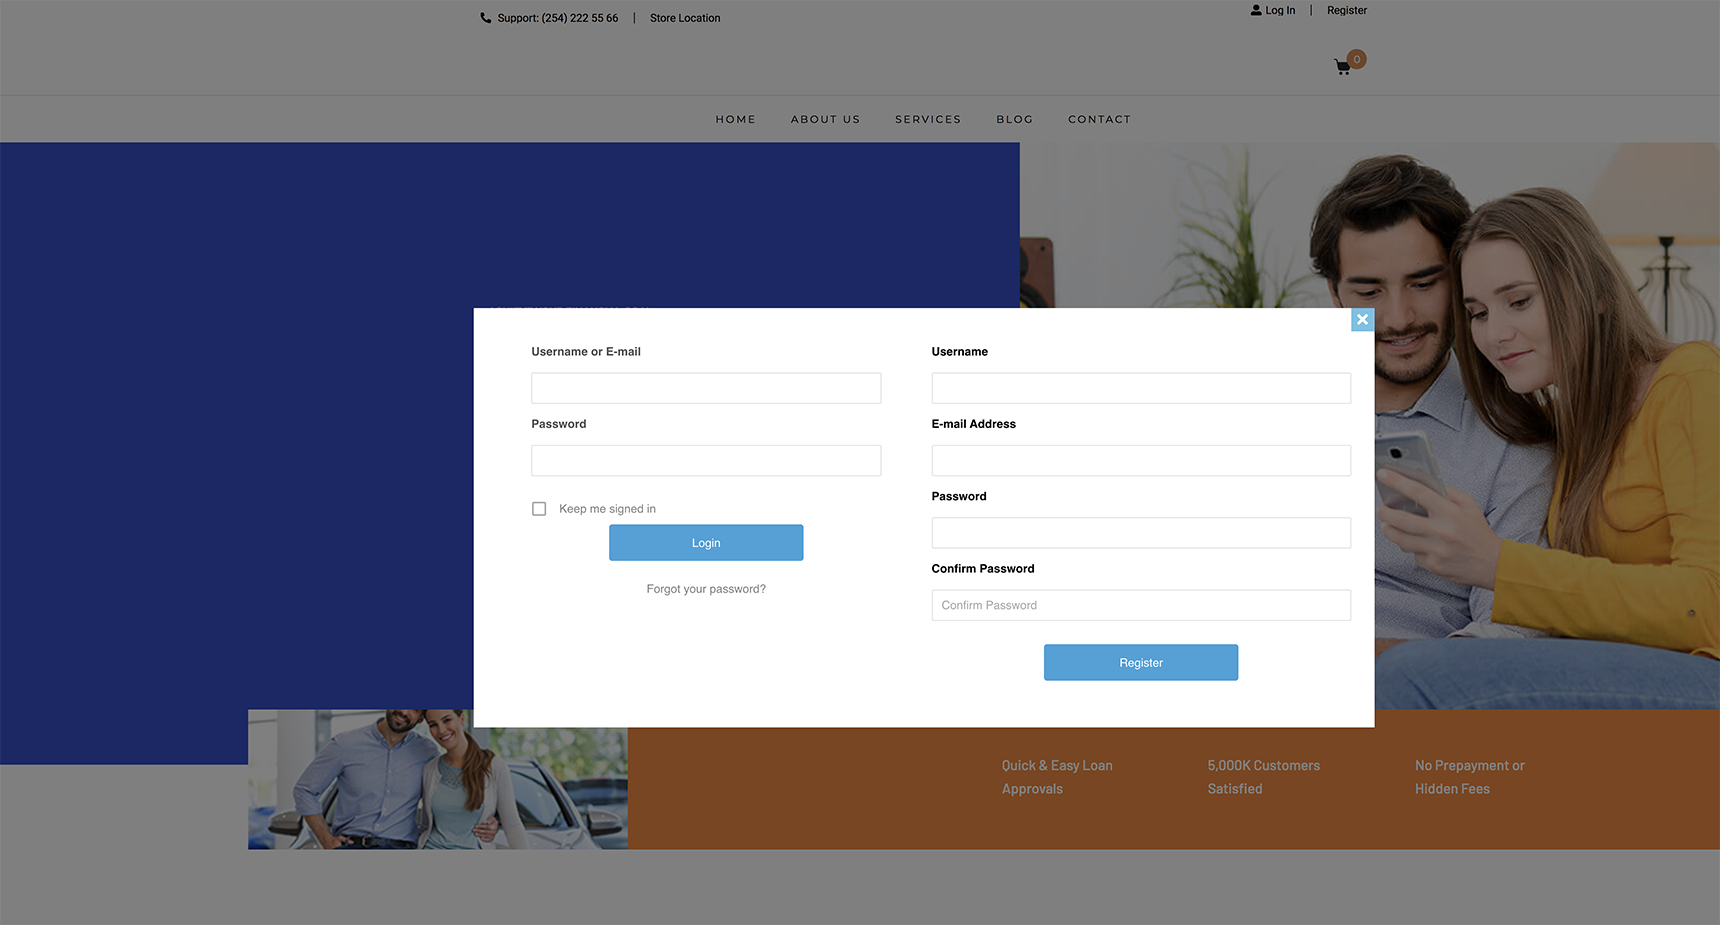
I’ll add two forms – login and register – in one popup window dividing a section into two columns.

To style the popup container, just open the JetPopup Settings as described in the plugin documentation.
Now it’s time to assign the popup to login/register links in the header template. Go to the Templates menu and open the Header template in the Elementor editor. Find the Icon List element that was added for the login/register links (you may not see it when logged in as we hid it with custom CSS code, so it’s better to use Navigator), open Advanced tab > JetPopup > select the popup in the Attached Popup field and Click on Widget from the Trigger Type field. Update the template with the new modifications.

Check the popup on the frontend, open your site as a guest and click on Login/Register in the header. The popup will then appear.
Wrapping Up
As you might have been able to tell, the process of creating and adding login/register pages with Jupiter X can be a bit tricky. Hopefully, this article helps you to make this process smoother. If you’ve followed all the steps laid out in this post, then you’ll have registered users on your site with the Ultimate Member registration form. This plugin will allow you to create beautiful user profiles, and your users will be able to join and become members with absolute ease.
If you can recommend other plugins to create login/register forms, feel free to share them in the comments.

No comment yet, add your voice below!