Knowing how to customize a blog in WordPress has always been a big challenge, particularly for those who don’t want to deal with coding. Want to do something like creating a custom single post simply to remove a page title? Or something more complicated like changing the entire layout of single blog posts? Of course, the latter is much more involved.
The Blog Customizer is one of Jupiter X’s best features as it allows users to create custom single blog pages quickly and easily. It’s highly customizable, and you can change the layout of your blog pages without a single line of code.
By using the single Blog Customizer, you can:
- Change the whole template of single blog posts.
- Display/hide every element of the blog posts such as featured image, title, author box, etc.
- Customize and change the styles of the blog post elements.
In this article, by using a practical example, we’re going to show you how easily you can customize your blog single page using the Jupiter X Blog Customizer feature. Let’s first create the single blog page before customizing it.
Adding a New Post
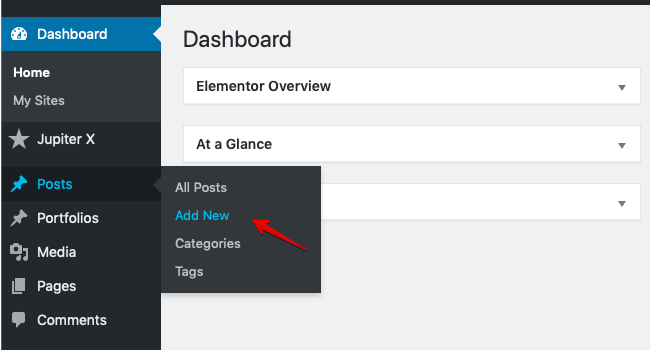
1. You are probably familiar with creating blog posts in WordPress. All you have to do is click on Posts > Add New from the WordPress sidebar menu.
2. Now you’re in the post editor. You can add a title and content to your post. Also from the right sidebar in the editor, you can add categories, tags and a featured image to your post. These things are optional but as we want to show how we can customize them, let’s add categories, some tags and a featured image to our post.
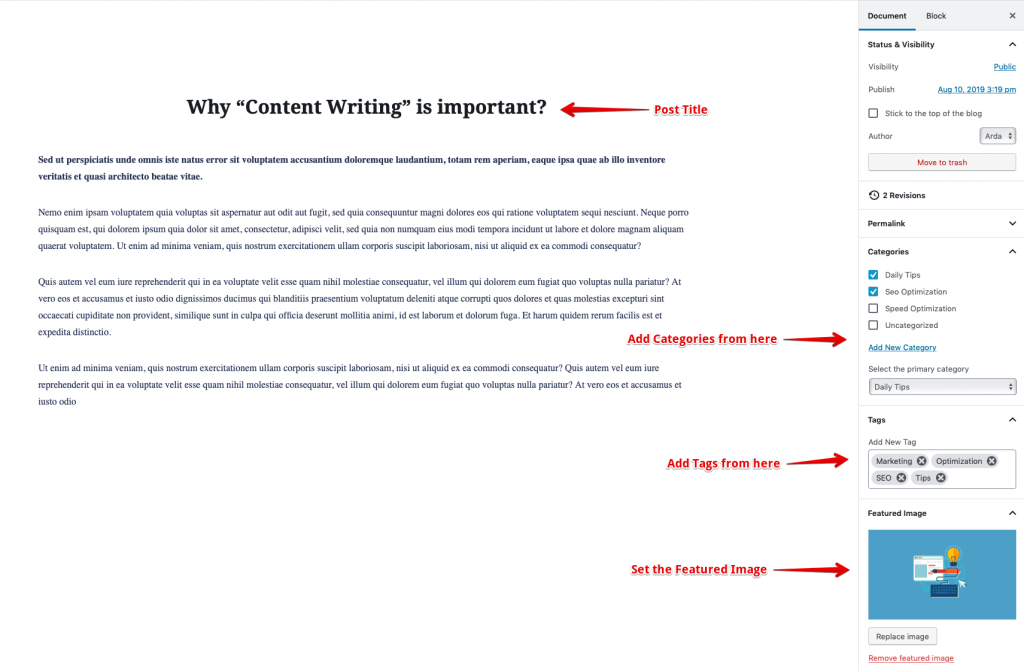
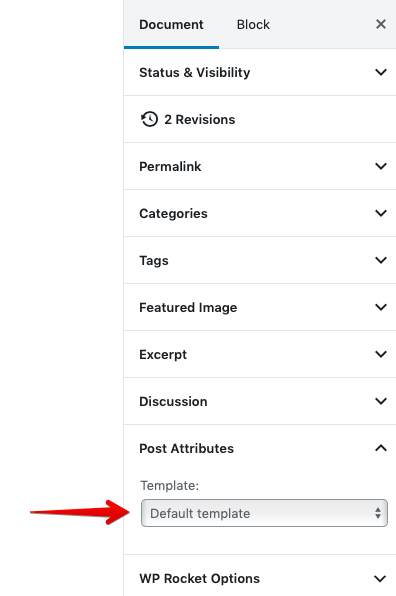
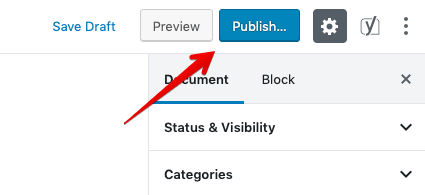
3. To be able to customize your posts with the Jupiter X Blog Customizer, your posts must have a Default Template. So from the right sidebar menu, find Post Attribute and select the Default Template.
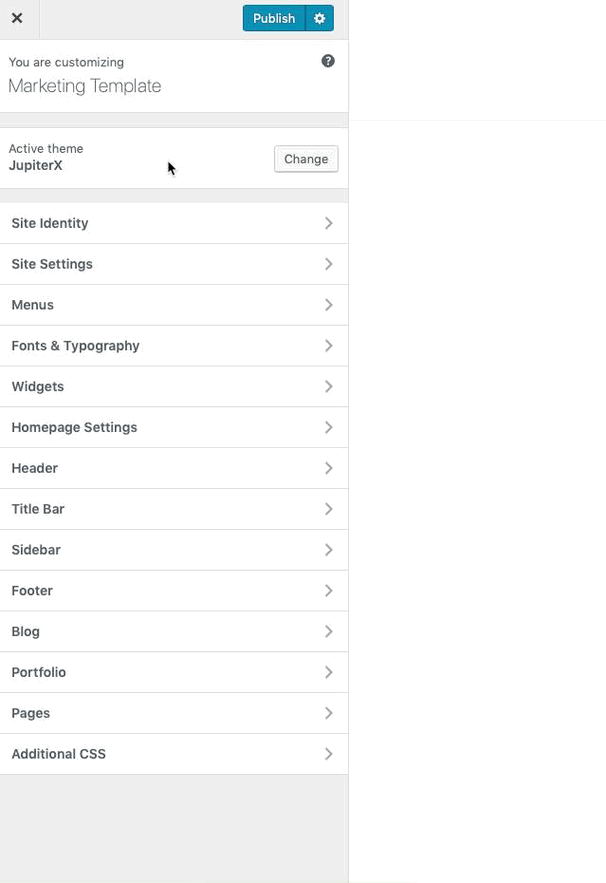
4. Publish (Update) the page.
Important: To customize your posts with Jupiter X Blog Customizer, you must create at least one post and set its Post Attribute to the Default Template.
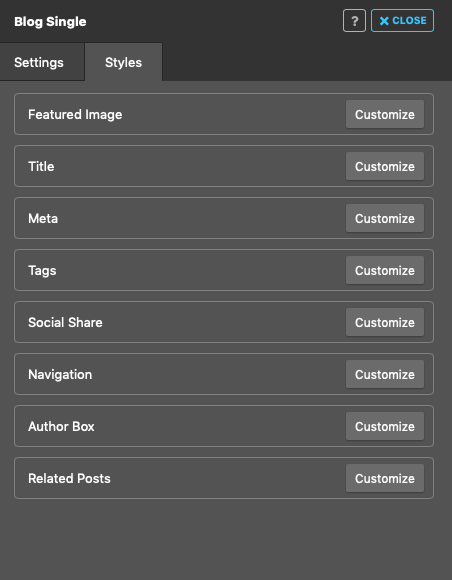
How to Customize your Blog Posts via Blog Customizer
To customize your posts:
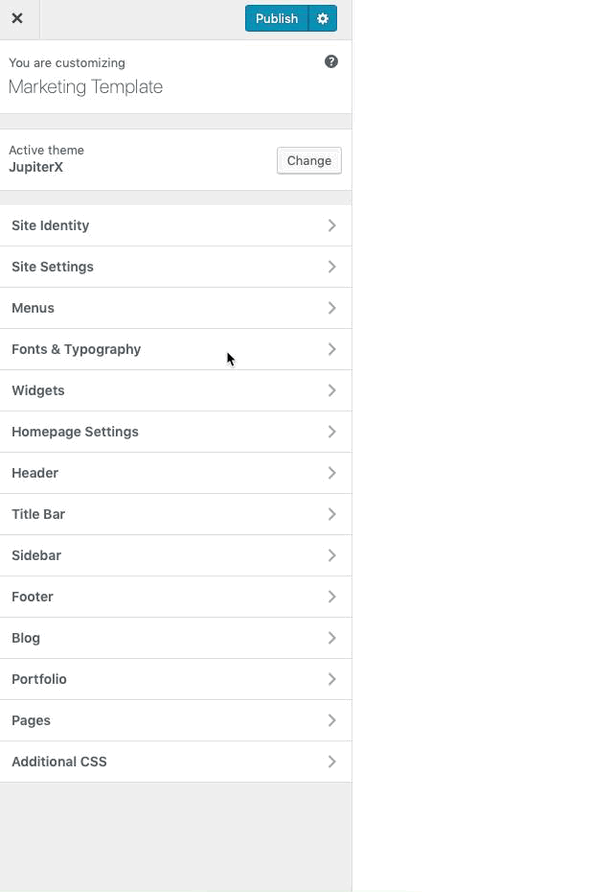
1. From the left menu in WordPress, go to JupiterX > Customize > Blog > Single Blog
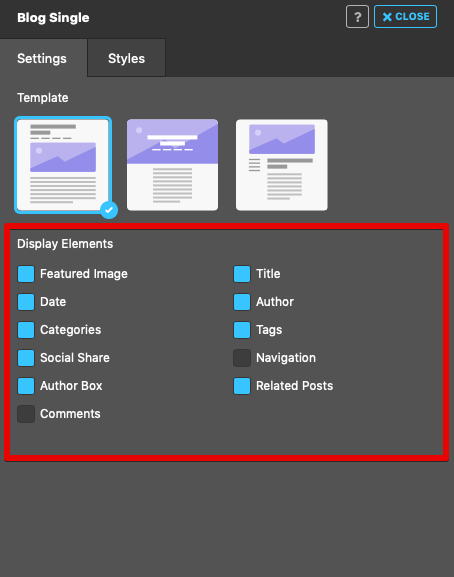
2. A new window will open with all the available options to customize and style the blog post. The Single Blog Customizer has two tabs: Settings and Styles. The first tab (Settings) allows you to choose a default template for your blog posts and enable or disable the feature image, title, date, author, categories, etc for them. In the second tab (Styles), you can change the styles of each element of the blog post.
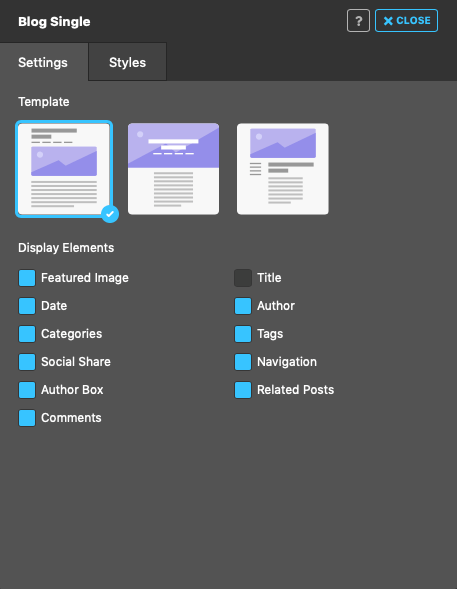
Settings
Here are the available options for customizing the blog posts that you can find in the Settings tab.
Template
Choose a default template from the sample templates.
Display Elements
Enable/disable the below elements in the blog posts. The available elements include the following:
- Featured Image: Displaying a representative image for our posts
- Title: Displaying the title of the post
- Date: Showing the publish date for each post
- Author: Displaying the author of the post
- Categories: Showing the post categories
- Tags: Showing the post tags
- Social Share: Adding a social share button for our blog posts
- Navigation: Navigating through the next and previously published posts
- Author Box: Displaying all the author’s information, such as the author’s name, bio, avatar, etc.
- Related Posts: Displaying the related posts at the bottom of each blog post.
- Comments: Enabling/disabling the comment feature for blog posts.
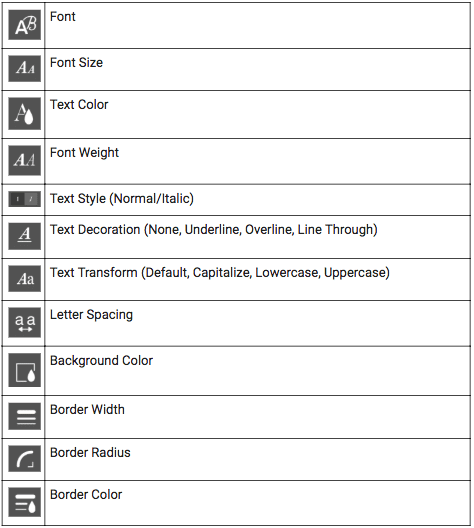
Styles
Here, you can change the styles of every enabled element in the blog post. All the available options for styling elements can be accessed by clicking on Customize for each element.
Here are some sample options for element customization:
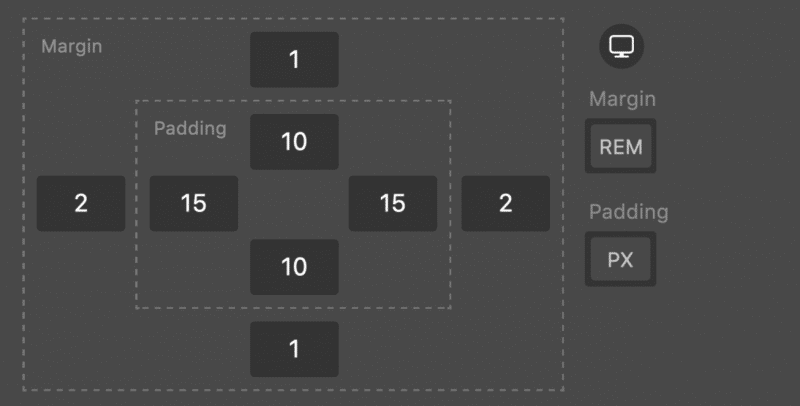
Margins and Paddings
You can set margin and padding for every available element for the blog post.
Units
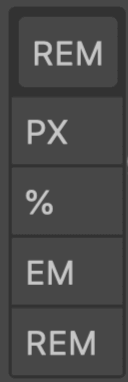
Units are crucial to set font sizes, measuring spaces, setting the width, etc. Because of that, you can set different units for all the properties that have units. There are four types of units in the Jupiter X Customizer: PX, REM, EM, and %. By clicking on the chosen unit, other possible units will be shown, and you can choose another unit for the property.
Responsive Option
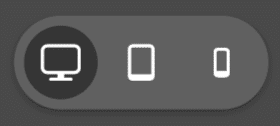
An important and useful feature in Jupiter X Customizer is the responsive option. This option allows you to set different values for different screen sizes for some of the properties of a particular element. For example, you can choose different font sizes for tablet and mobile screen sizes. For every property that has the responsive option, you will see the Monitor icon next to it. By hovering over the monitor icon, three devices will be displayed, and you can choose another value for them.
Case Study
Let’s assume that we want to customize a single blog page by using the Jupiter X Blog Customizer.
Here is what we do:
- Create blog posts.
- Customize global options.
- Enable/disable elements in your blog posts.
- Change the styles of existing elements.
Creating blog posts
We’ve described this section earlier. To customize your blog posts, you must create at least one blog post, but we recommend that you have multiple blog posts as we want to show the related posts below each blog post. Also, we suggest you add some tags and set a featured image to your posts to be able to display them for all single pages.
To emphasize what was mentioned before, the Page Attribute option for all of your posts must be set to the Default template.
Customizing global options
Before customizing blog posts, you might want to change the style of the body text or remove/add a sidebar from/to your pages. Also, you can decide whether the Title Bar must be visible for your pages or not. These options can be set globally and not only for the blog posts.
To change the style of body content:
Go to WordPress left menu > Jupiter X > Customize > Fonts and Typography to customize it.
Let’s add the popping font named popping. From Typography, click on Customize for Body. Set the font family to Poppins and the font size to 16px.
To remove the sidebar from your pages:
Go to WordPress left menu > Jupiter X > Customize > Sidebar and set its layout to No Sidebar.
And finally, let’s remove the title bar from our pages by going to Jupiter X > Customize > Title Bar and disable the Title, Subtitle, and Breadcrumb from it.
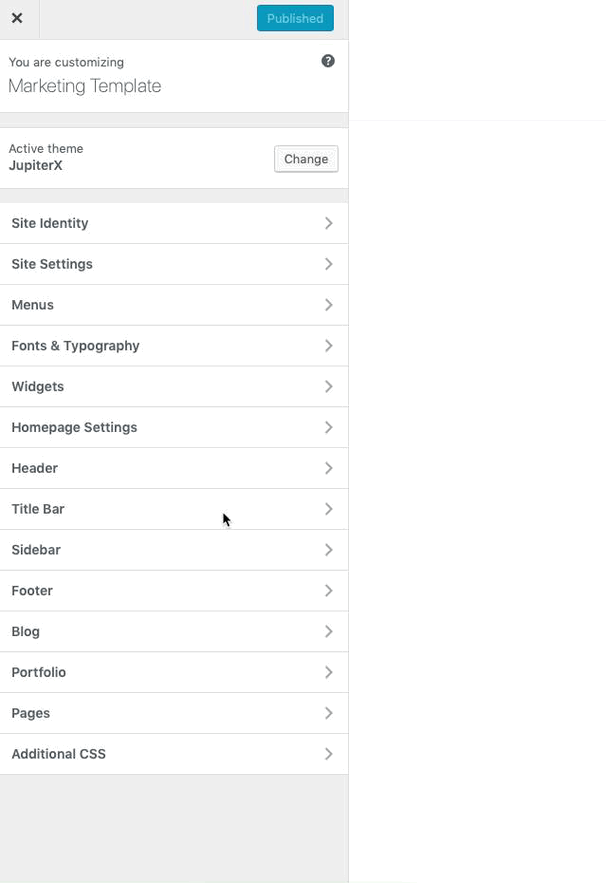
Finally, Publish the changes.
Enabling/disabling elements in your posts
You must decide which elements that must exist and which elements must be removed from your blog posts.
We have multiple pre-made templates for our blog posts that we can select and then customize to our preferences. Let’s choose the first template.

Also, we want to remove Comments and Navigation elements from our blog posts and keep all the other options enabled:
All the changes happen instantly.
Change the styles of existing elements
So now that you’ve decided which elements should remain on your blog posts, it’s time to change the styles of enabled elements. Keep the Blog Customizer’s panel open, and go to the Styles tab.
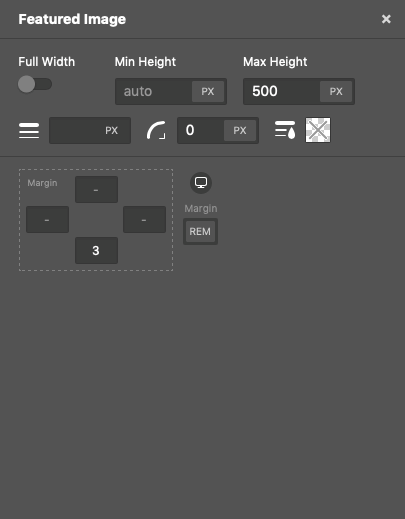
Featured Image
Let’s start from the first element. Click on Customize for Featured Image. Set the max-height to 500px, border-radius to 0 and margin-bottom to 3rem. Here is our final customization for the Featured Image:
Title
Let’s go for the second element, which is Title. We won’t touch any settings for color and the font family so it inherits these styles from its parent which is body, But we will center align it, and change its font size to 2rem. 2rem means it’s two times bigger than its parent’s font size (body: 16px), so it equals 2x16px = 32px. Here is the result:

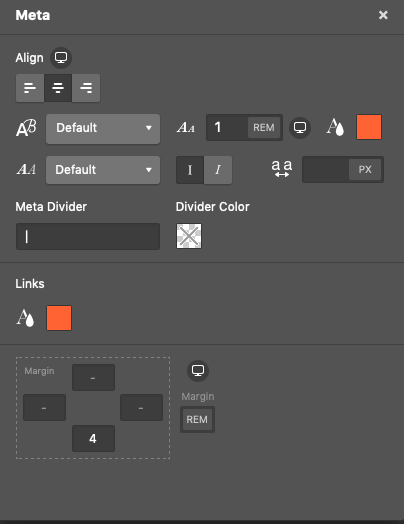
Meta
Let’s change the color for Meta, and the available links to #ff6334. We will center align it as well.
Social Links
You can add your desired social links icon to the bottom of your blog posts. They could either have names or simply keep the icons visible.

Author Box
We have plenty of options for customizing the author box. Let’s add a border-radius: 50% to our avatar to have a circular profile image in the author box. And change the font-size for the name, description and the social icons. Note that WordPress collects this information from your profile. To modify it, from the left menu in WordPress, go to Users > Your Profile and add the required information there. Here is the result:

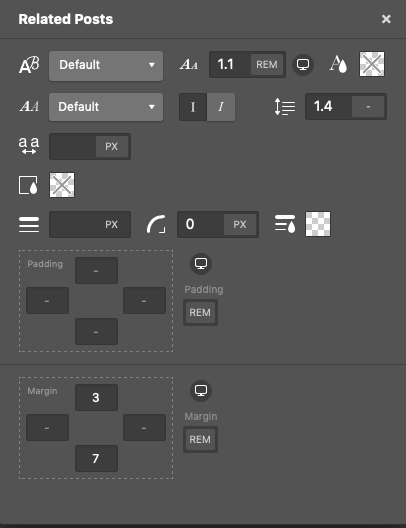
Related Posts
Finally, let’s customize the Related Posts element. Changing the font size and adding a little bit of margin to the top and bottom of this element is enough.
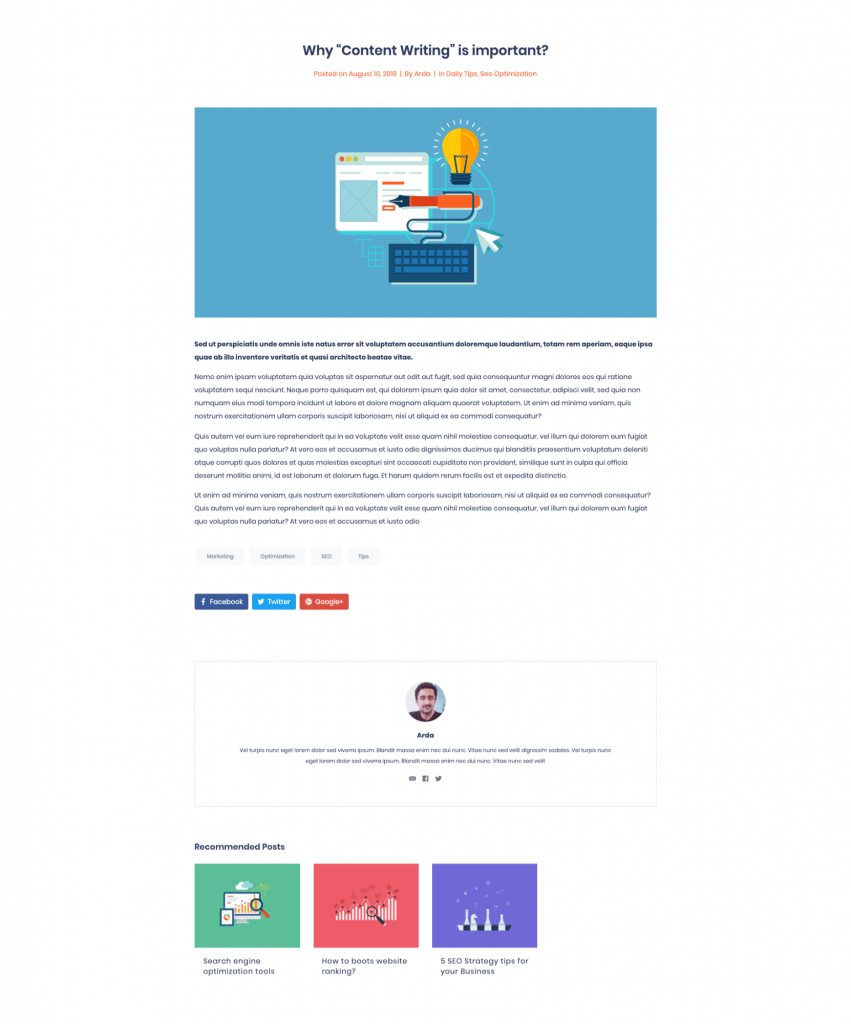
This is the result after customizing single blog posts with the Blog Customizer:
After you’re done with all the customizations, simply close the Single Blog settings panel and Publish the changes.
Summary
In this article, we’ve explained how to customize your blog posts with the Jupiter X Blog Customizer. We showed how you can add your desired elements to blog posts, remove any unwanted ones and easily and quickly change the styles of all the available elements.
We’d love to hear from you. Let us know your experiences with Jupiter X Blog Customizer in the comment section below!

3 Comments
Hi Jupiter X-perts,
Is there a way to change both the words and the style of the “Read More” text that is included with every post? What if I wanted it to say “next article?” or if I wanted it to say “See Recipe” and also be BOLD? How/where is that controlled?
or changing pieces of text, I recommend using translation plugins, However It is not very convenient nor straightforward.
As for changing the appearance of elements nested withing widgets, I recommend custom CSS.
Customizing your blog with the Blog Customizer in Jupiter X is a breeze!