
This is a guest post contributed to Artbees Themes blog by Qode Interactive.
Whatever your line of business is, if you have a service or a product to offer to your customers, you can benefit from a pricing calculator.
A pricing calculator is a dynamic online tool that displays the value or the cost of a service or product based on a set of factors that make up the value.
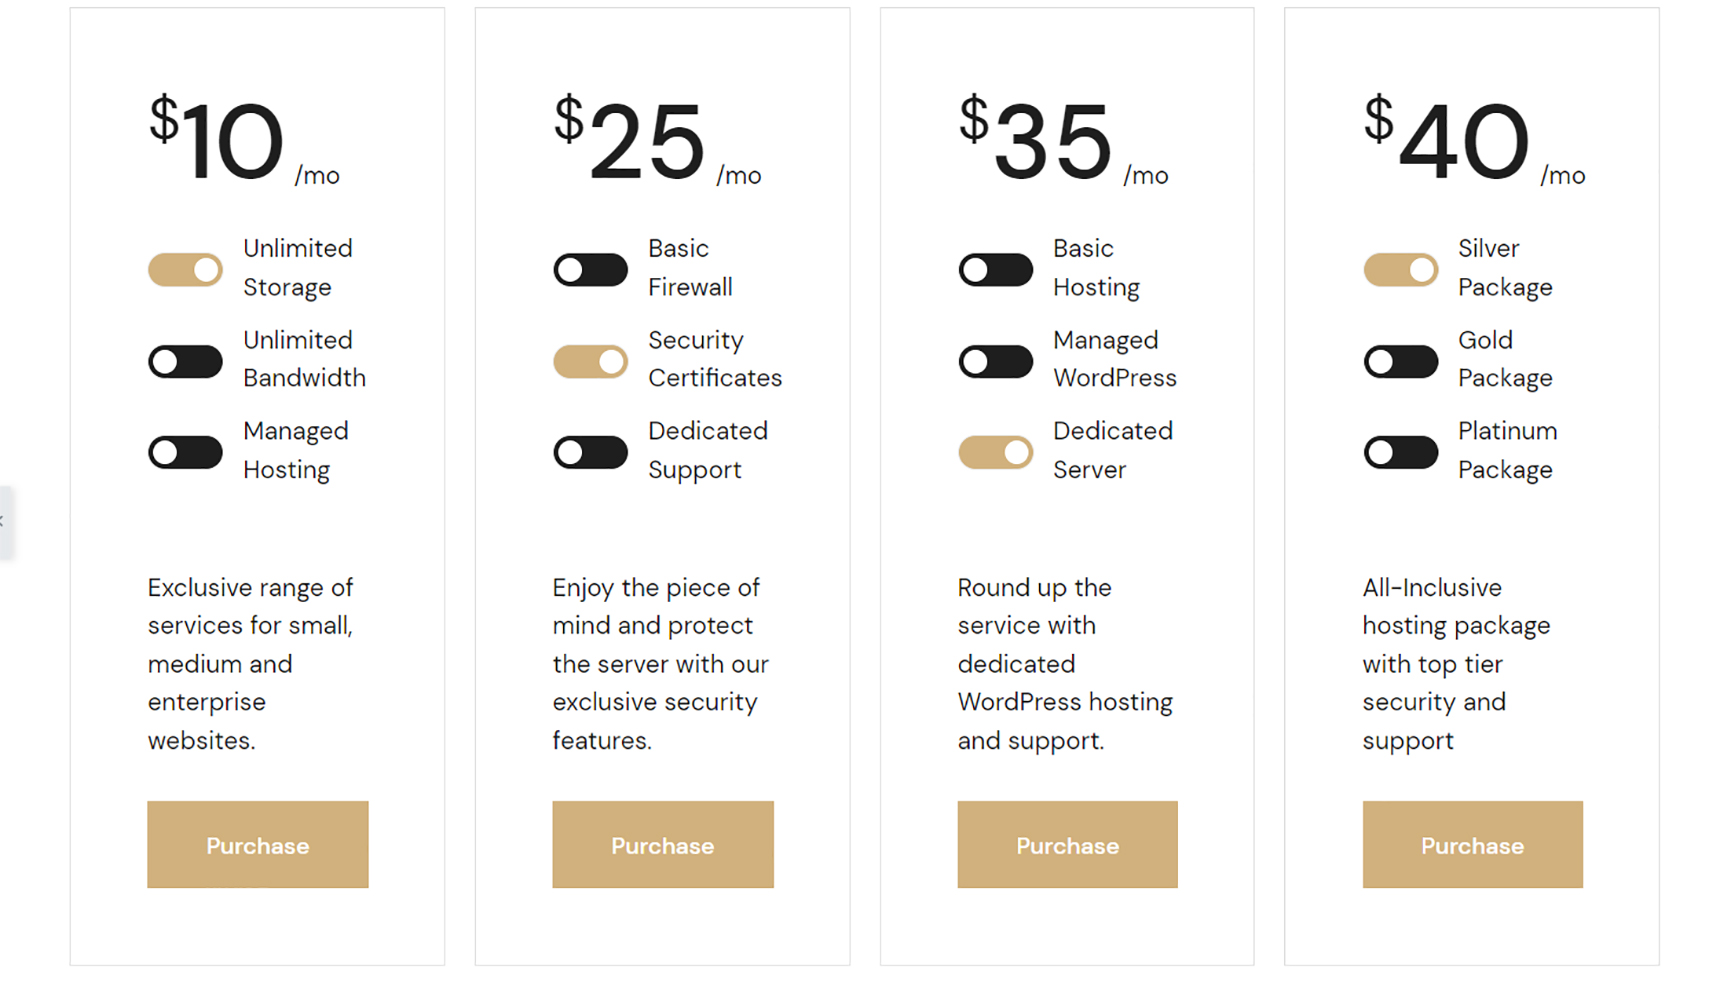
For instance, if you’re selling hosting packages, a pricing calculator can show your prospects how much they need to pay for a basic package and how much for basic plus special features, such as firewalls or managed hosting.
Or, if you’re running a beauty salon, you can use a pricing calculator to display prices for a facial, a facial plus massage or a facial plus massage plus exfoliation.
You get the idea. The best thing is, if you have a WordPress-powered website, you can set a pricing calculator up in no time and with utmost ease – and that’s what we set out to show you today: how to create a pricing calculator in WordPress to better offer your services or product.
How Does a Pricing Calculator Help with Conversion?
The simple truth is, when it comes to spending money, people like to make informed decisions. The more they know about a product or a service, the more likely they are to pay for it. And value is the most important factor here.
Your clients need to understand the value they’re paying for. If the value is unclear, it raises suspicions and hurts your reputation, too. Transparent pricing is an excellent way to let your customers know just what they’re paying for. And if your product or service comes in price tiers, if it’s layered and contains components that can be purchased individually or as a bundle, then a pricing calculator can help make things clearer.
In the consideration phase, when a prospect is thinking “Okay, I pay this much for this, and this much for that” it helps them feel in control over the process. This feeling is a major factor in purchase intent and one of the factors that gently push the prospect towards conversion.
How to Set Up a Pricing Calculator in WordPress?
Now, WordPress obviously does not come with the pricing calculator as a default feature. This is the sort of functionality that needs to be developed and designed separately, and for most users, using a plugin is the easiest and the most obvious solution. And that’s precisely what we’ll be doing today, using a custom Elementor widget from the Qi Addons for Elementor collection.
This collection brings 100+ highly customizable widgets for adding advanced functionalities to your website, from creative and showcase to business and eCommerce ones. And one of them is the Pricing Calculator widget. Note that you can’t get just this one widget alone – you get the entire plugin and with it the entire collection, so you won’t be limited to just the calculator. You will also be able to use the other useful and fully flexible addons in the collection.
Getting Started
After purchasing and installing the plugin, you will notice that the selection of available Elementor widgets in your WordPress backend has grown significantly, with the addition of Qi Addons. You can now add any widget you want, anywhere you want.
You first need to decide where you want to display your pricing calculator. Ideally, it should be somewhere on your homepage, along with the other essential information about your brand, your products and services.
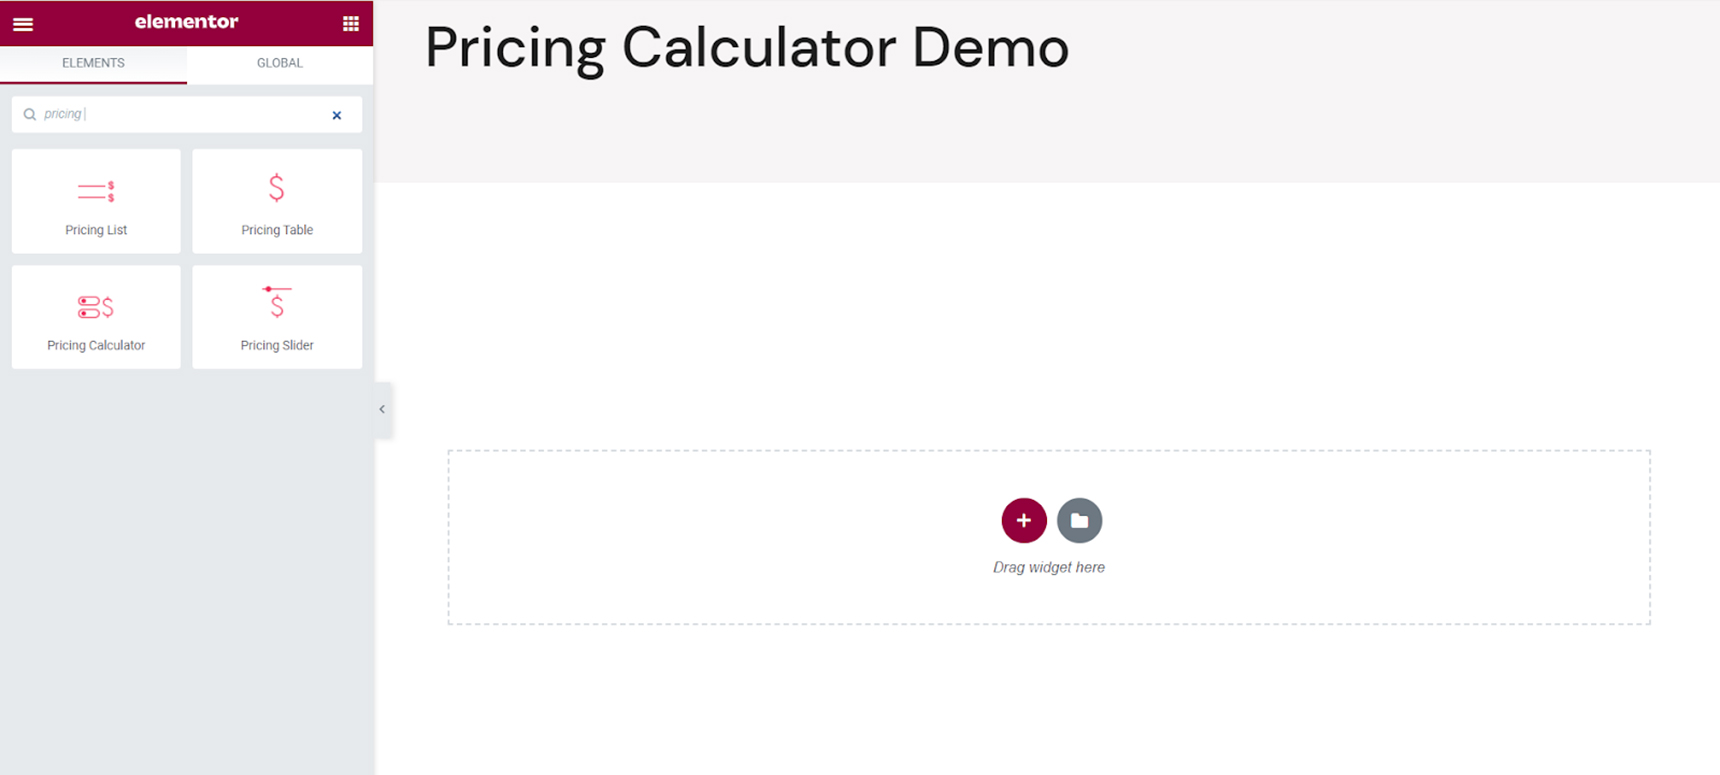
Once you’ve identified the section where you want to display the calculator, simply find the widget in the left-hand side menu. You can do so by scrolling but it’s much easier to just type in “Pricing Calculator” and then drag the widget to where you want it to be.
You will want to make sure your calculator fits your style and your branding. Fortunately, with Qi Addons, that’s easy to do since each widget comes with highly flexible customization options.
You can create transparent, solid color or gradient calculators, or calculators with a special image background. You can set the typography just the way you like it, too, and you can set the calculator behavior – whether its elements will change when hovered upon, for instance.
We won’t be going through all the details as that would make this article way too long, but we’ll walk you through the options and show you what can be done with the Pricing Calculator widget.

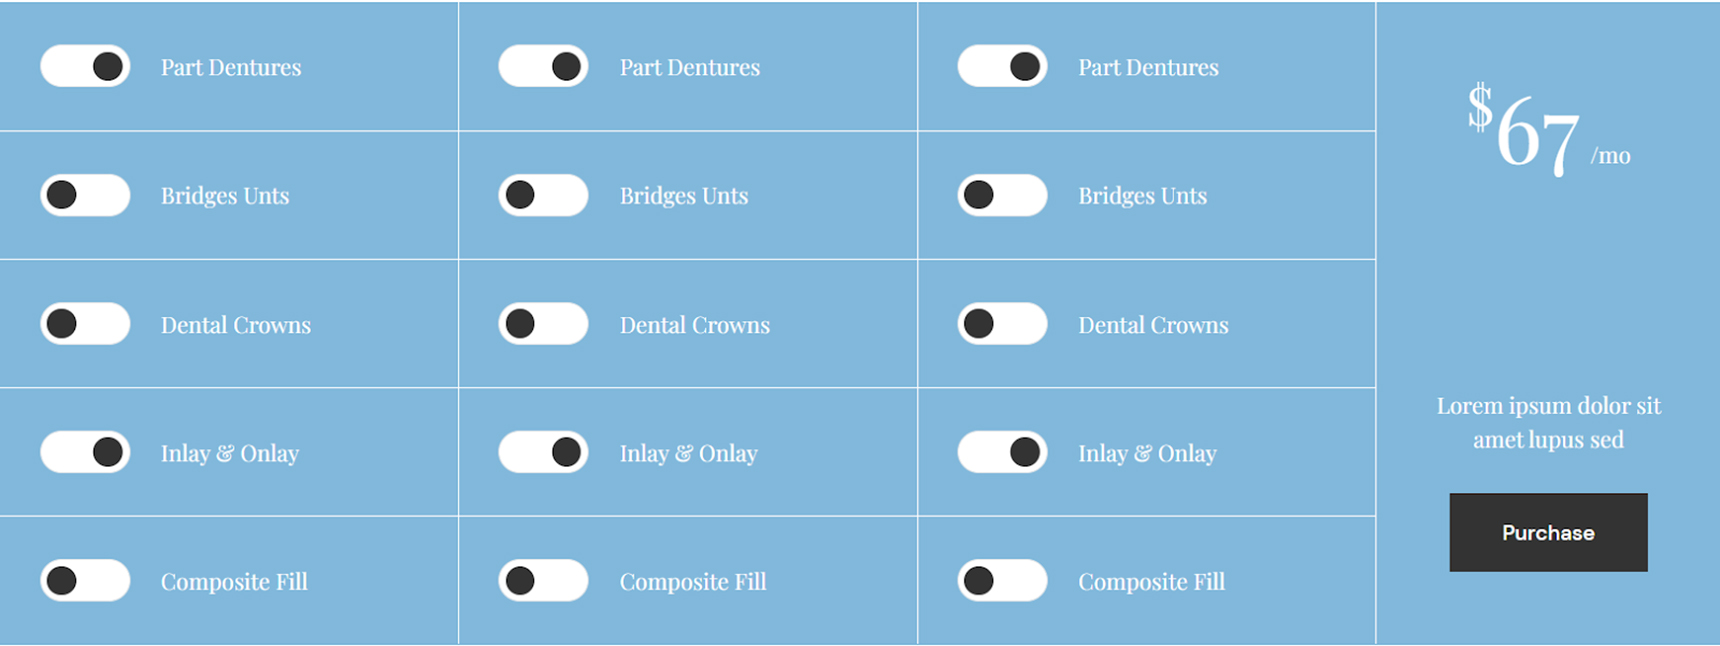
This is what the widget looks like by default – it has placeholder content in it to get you an idea of what goes where, and you can now start customizing it.
Pricing Calculator Options
Now, you can set a single calculator, or several ones. For instance, you can add columns to your section and then add as many calculators as you have columns. Note that, for a uniform look, you can create and customize one calculator and then duplicate it to the other columns.
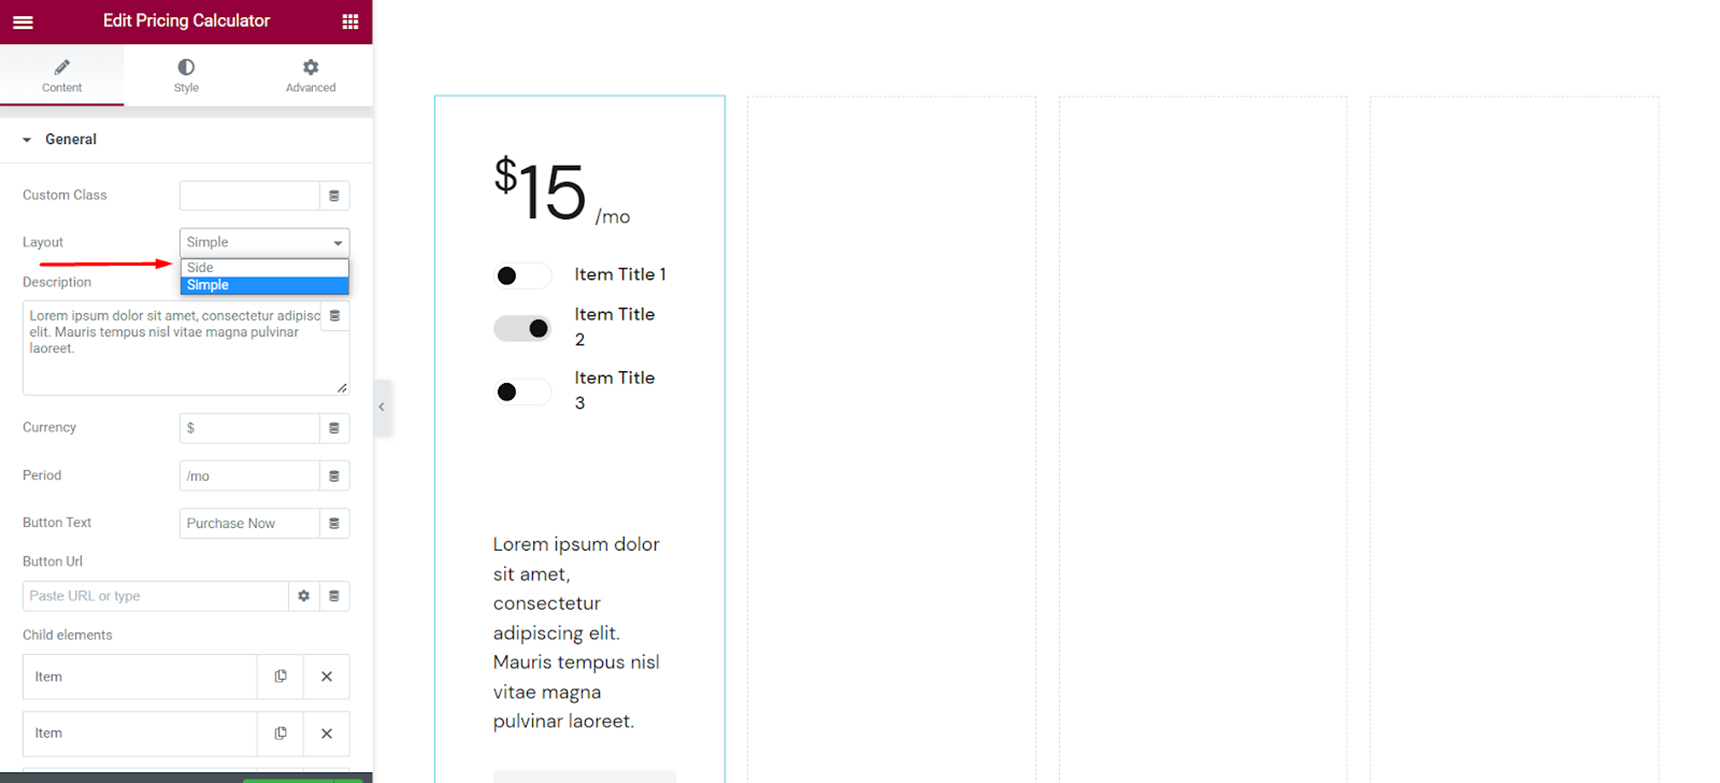
One of the first columns you can set is the Layout, where you get to choose between Side and Simple. If you’re going to have several columns, you should set the Simple layout, otherwise it won’t fit.
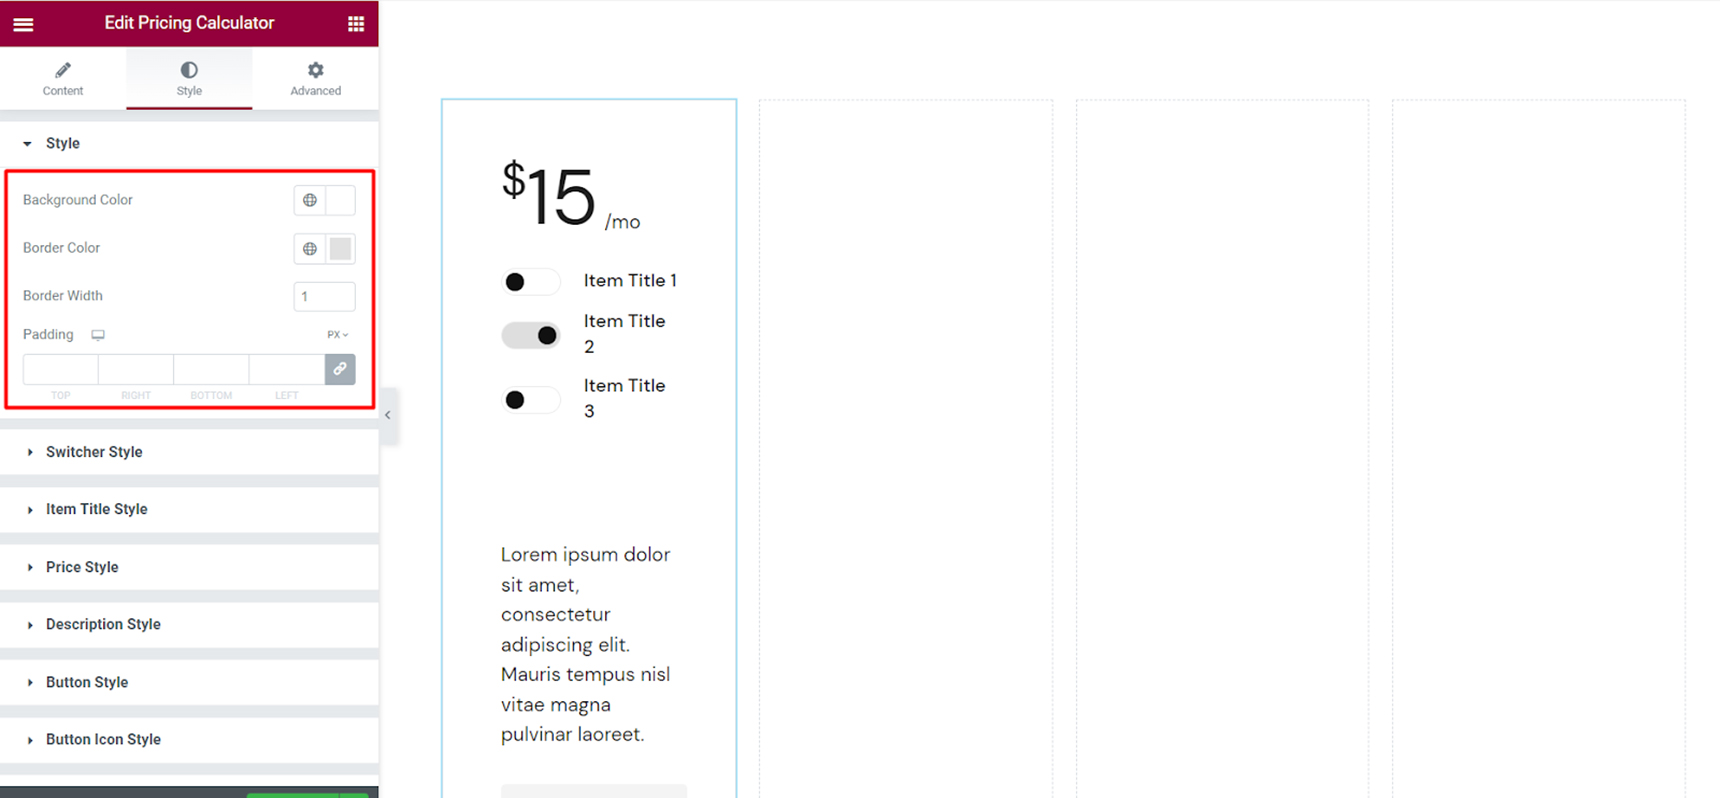
At this point, you may want to set the background color and the border for your element, as it will make it easier to work with the widget. These options are set in the Style tab.
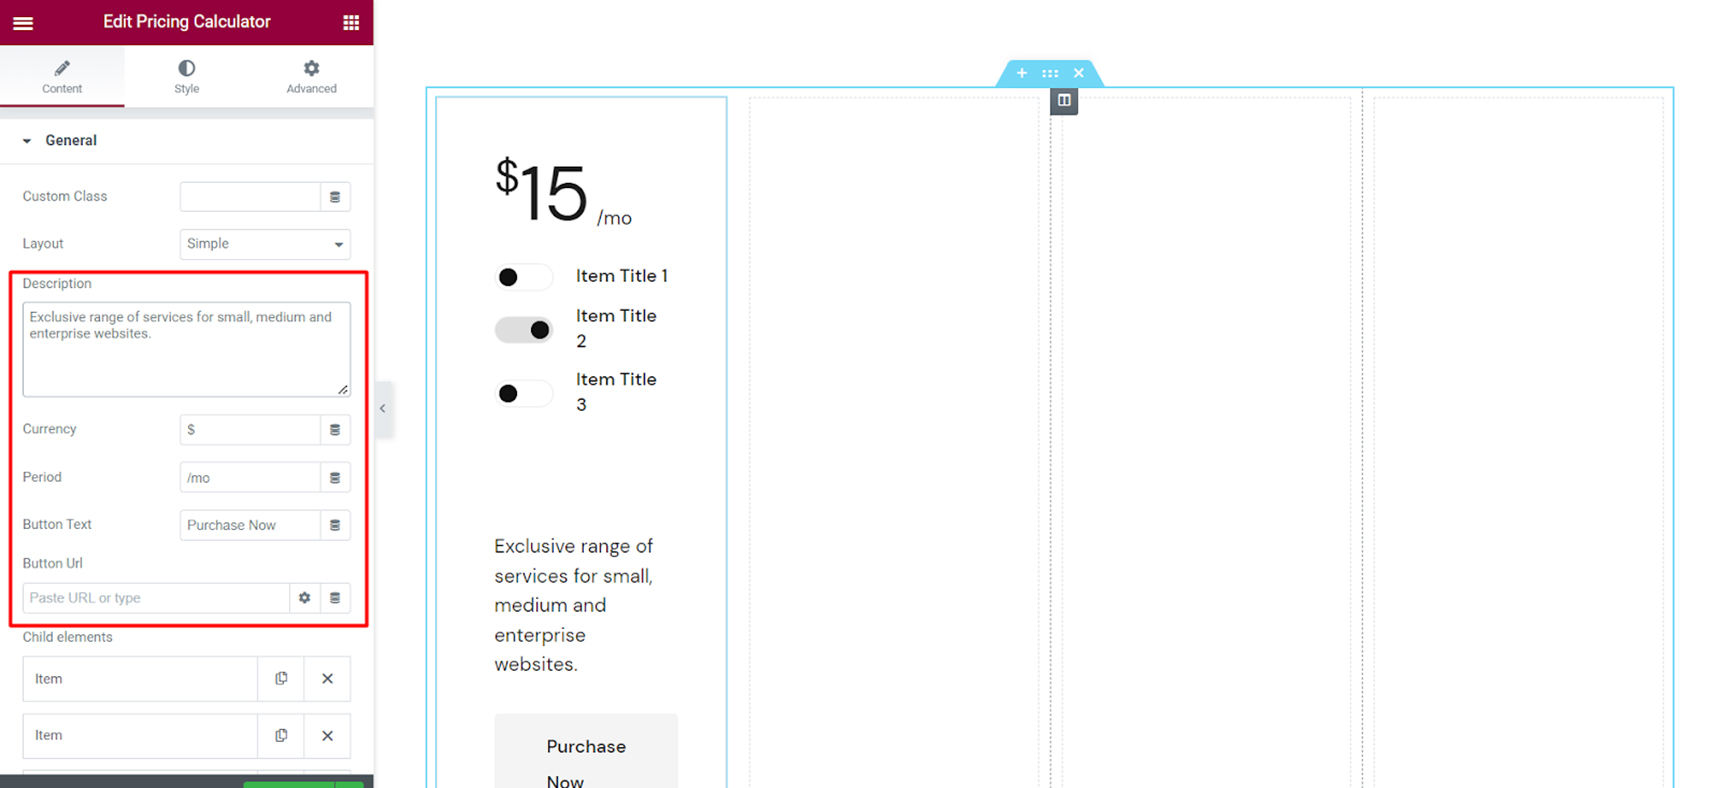
Head back to the Content tab now. Here you will set the description, if you want to have one, which will replace the lorem ipsum text. Here you also set the currency you want to display with your price, and the period it applies to (month, year, etc). Here you can also change the button text, if you like, and, most importantly, set the link for the button.
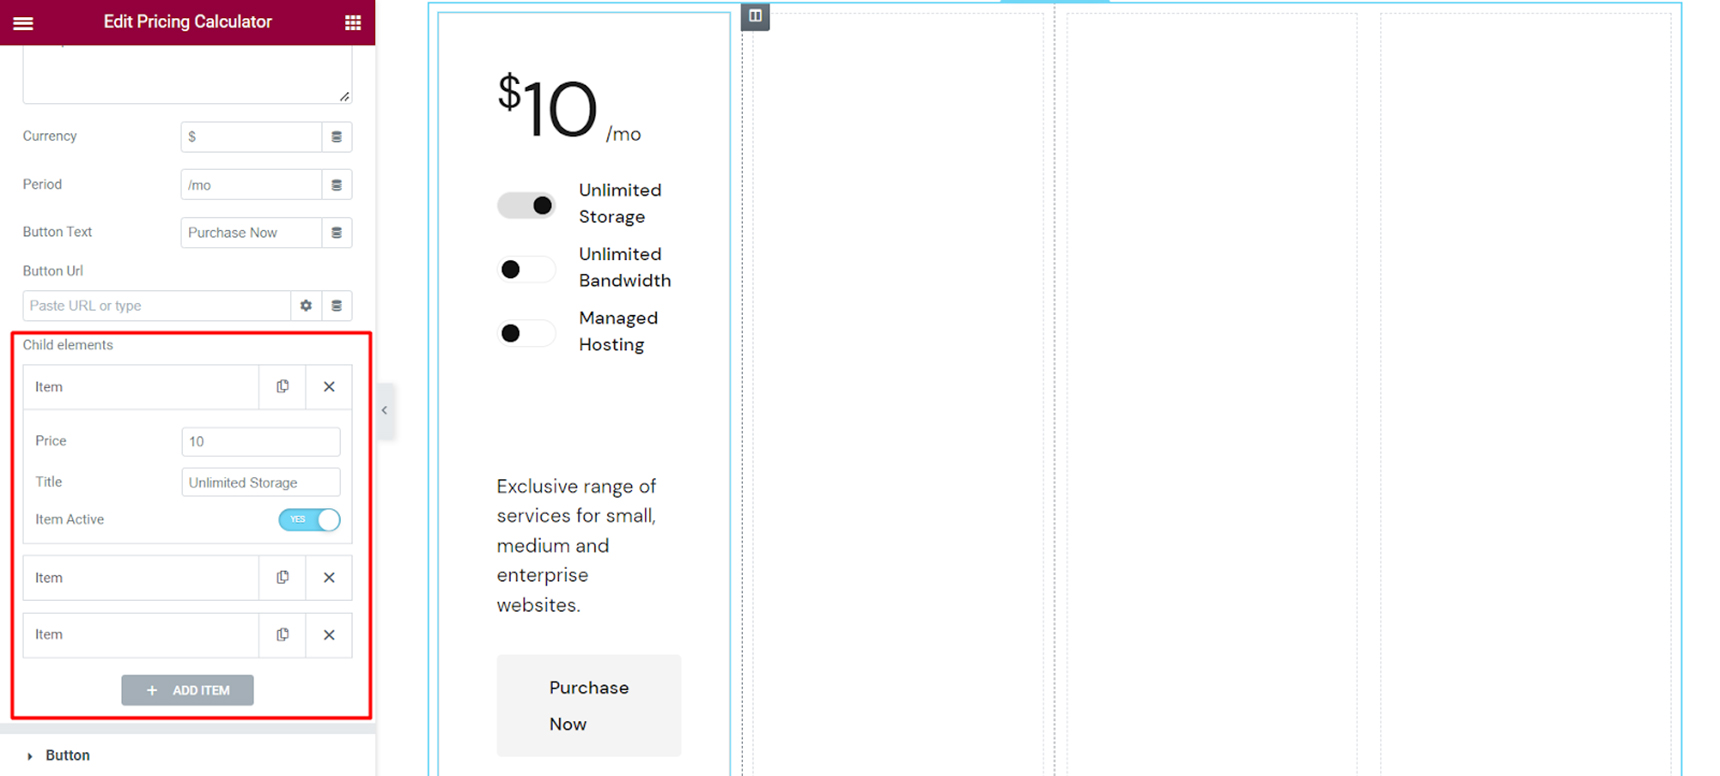
The Child Elements section refers to the items in your calculator. By default, the widget contains three of them but you can add or remove the items as you wish, by clicking on the X next to the item, or clicking on Add Item.
Here you will also be naming your items, setting the value (price) of the item and whether it will display as an active or inactive item. Basically, if the item is active, its value will be included in the displayed price. Of course, the visitors will switch the toggle as they like, and the price will change dynamically. The settings here are just for how you want to display the items by default.
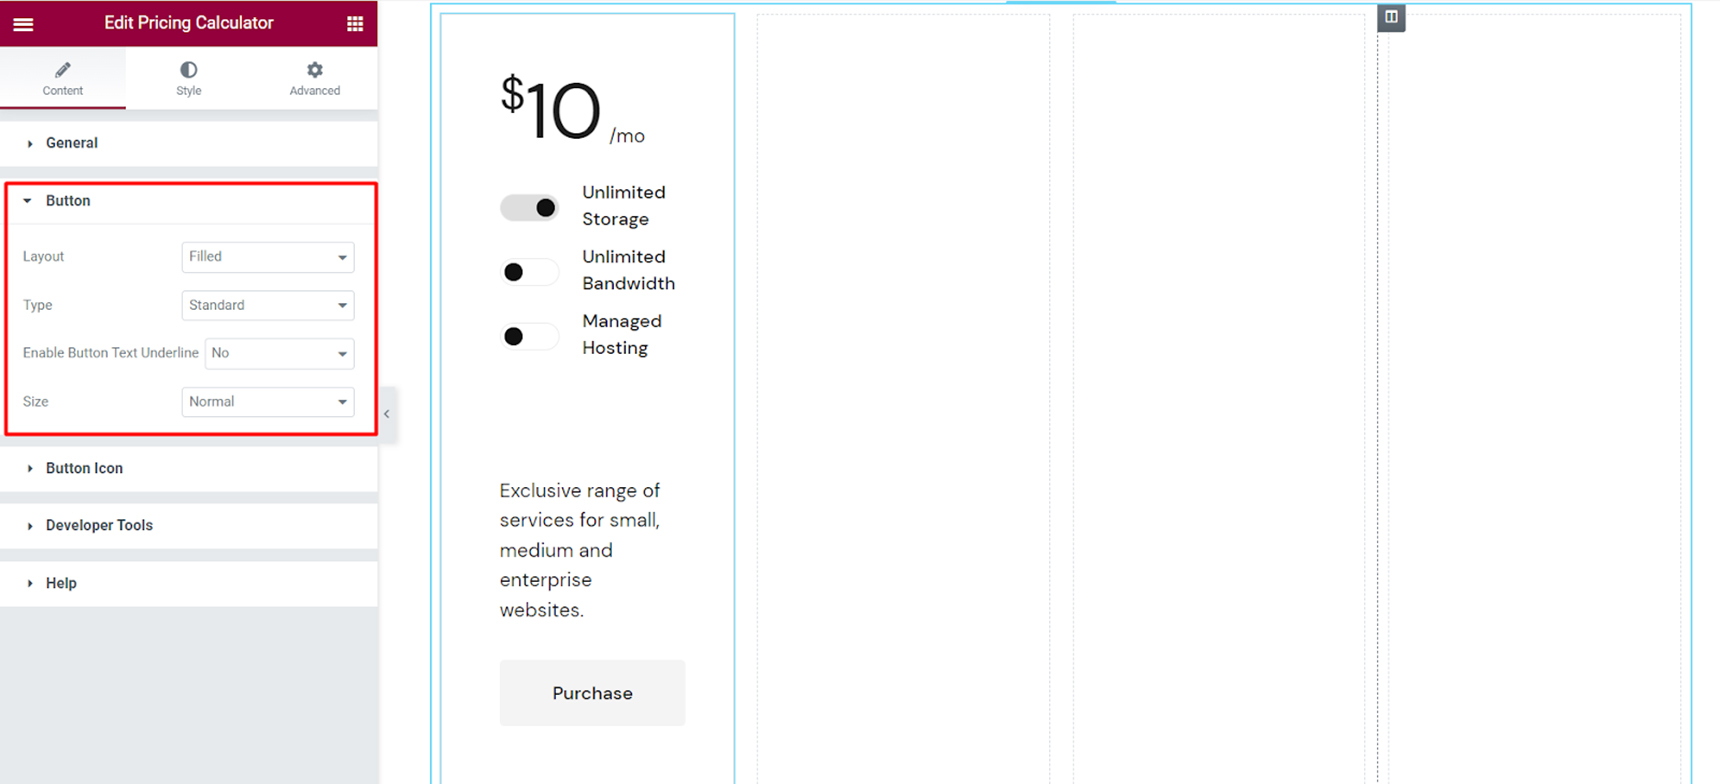
Next up are the Button and Button Icon options, where you can set the button layout (Filled, Outlined or Textual), set the type, underline and size. You can also upload the button icon of your own, if you don’t like the default one. Remember, to change the text, head over a few sections up to General Settings.
Styling the Pricing Calculator
That’s pretty much all there is to the Content tab, you can now move on to the Style tab to style your calculator to your liking. We’ve already set the first option (Style), except if you change your mind now (or at any other point) you can also set the padding around your content.
Next, you can customize the look of your Switcher, which is basically your toggle button.
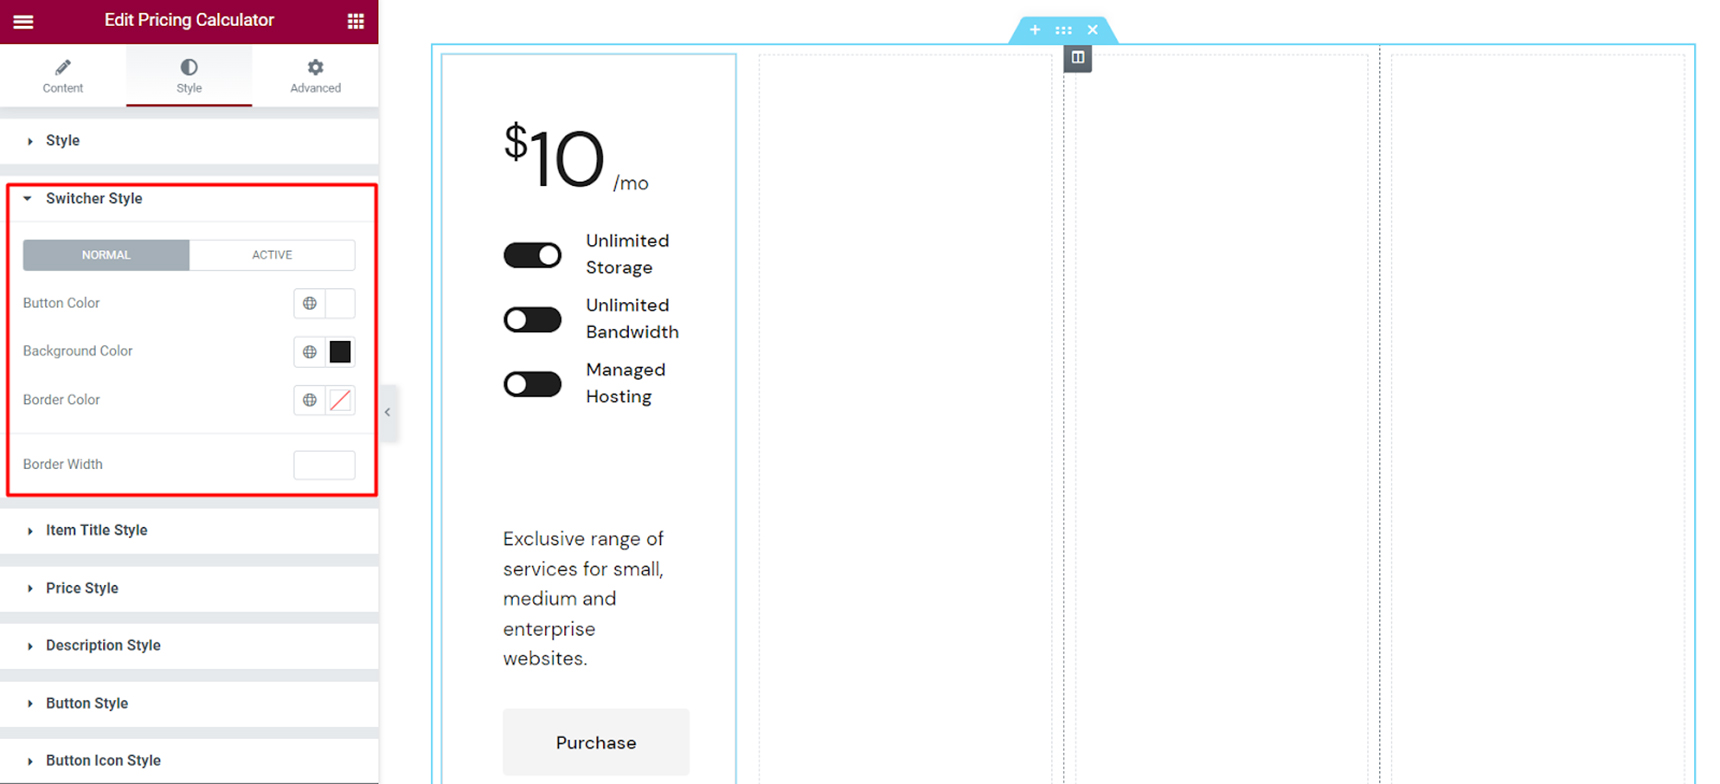
Note that here you have two sets of settings – one for the normal (inactive) and one for the active status of the switcher. It’s a good idea to give them different colors, so there’s a noticeable difference between two statuses.

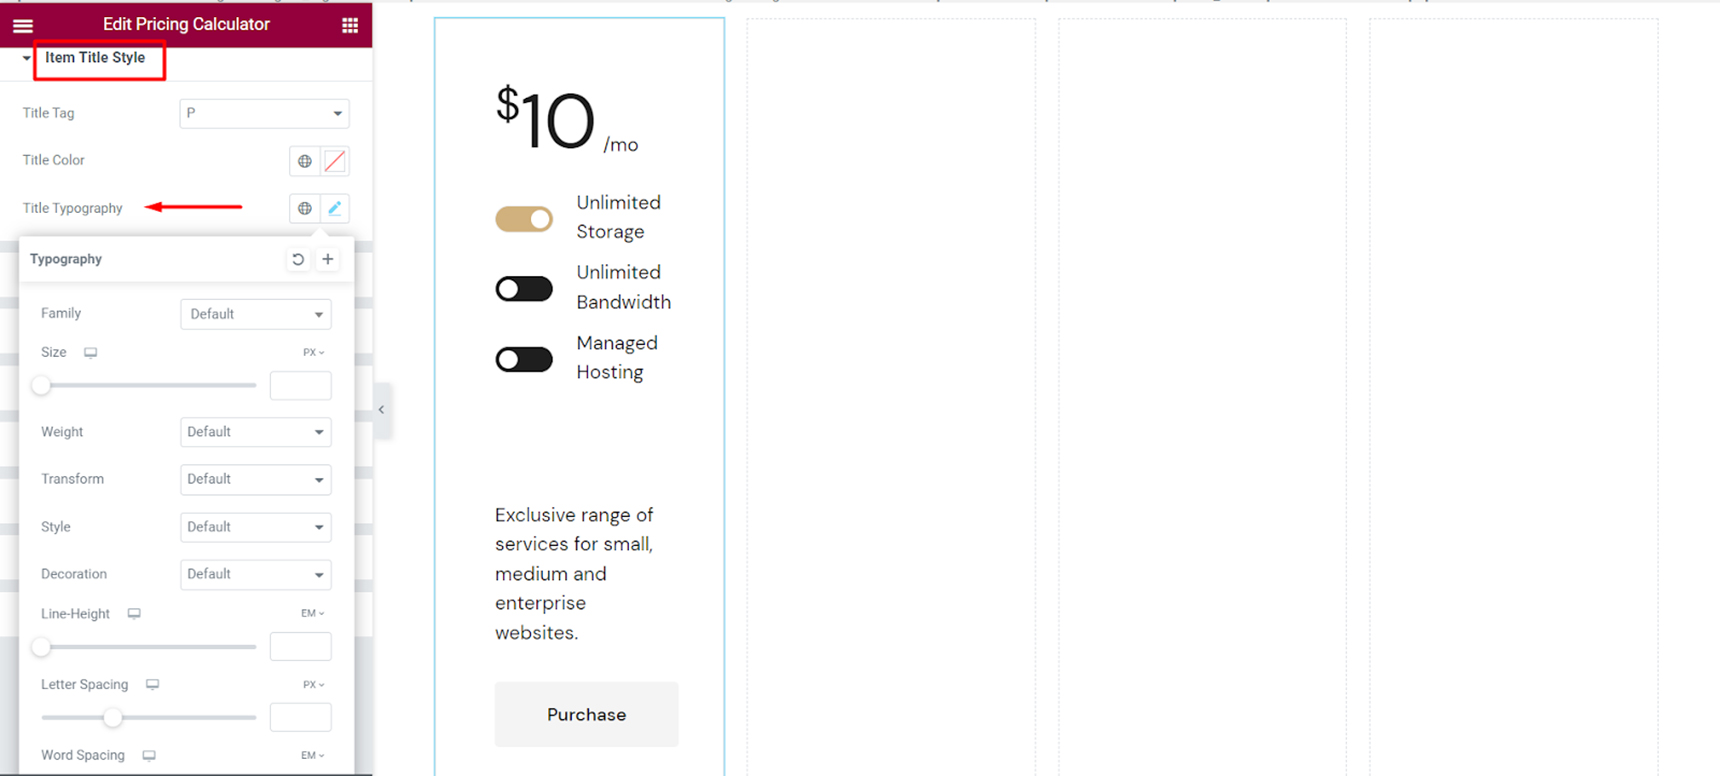
Next up is the Item Title Style section, where you can set the tag for the item title (which is basically what the item says), the color, as well as various typography options.
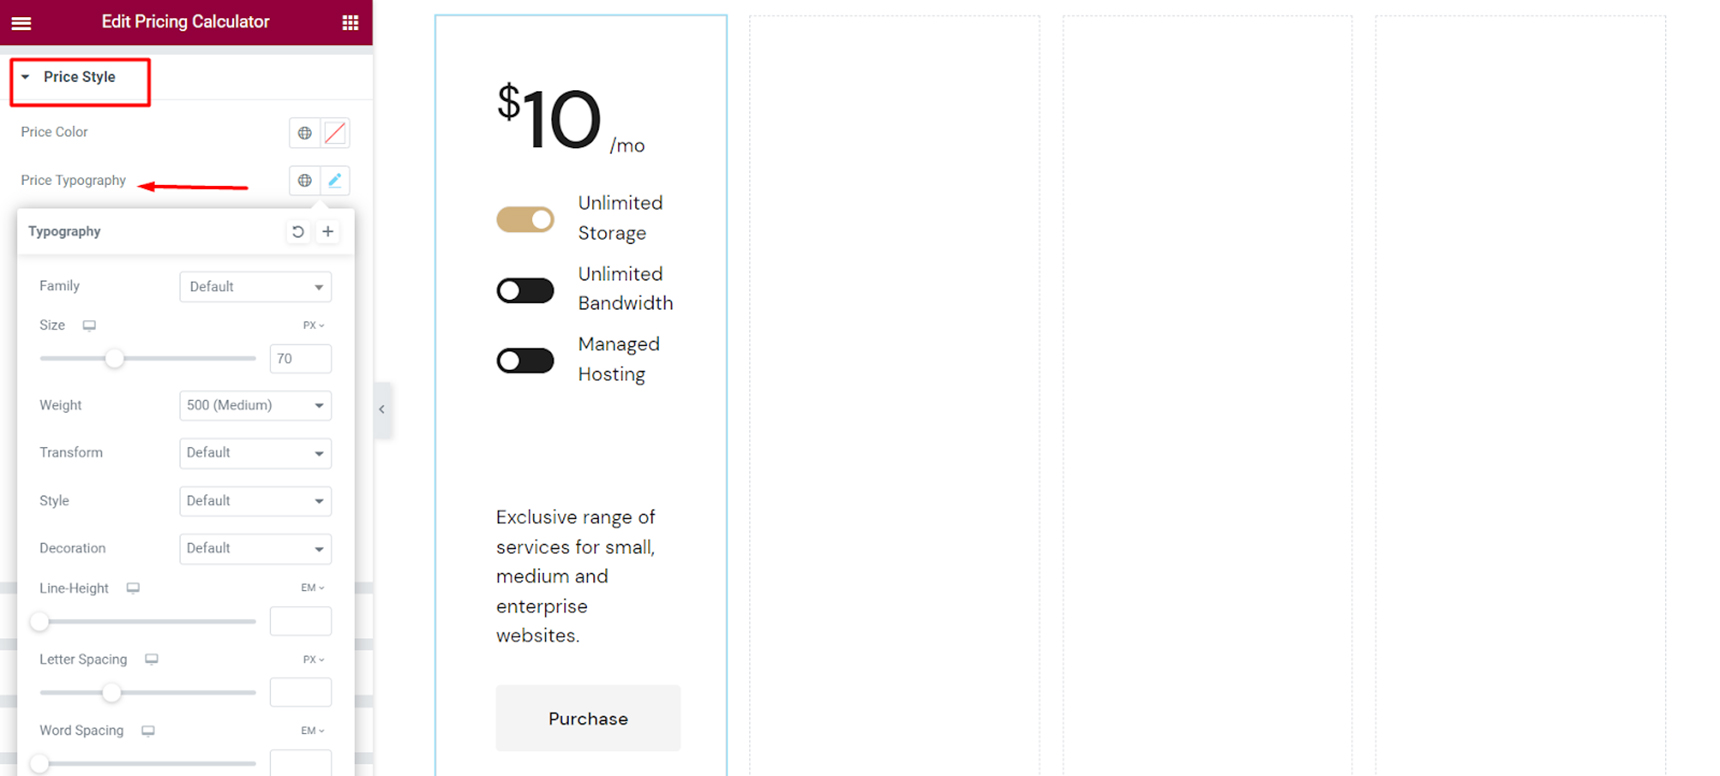
After that, we have the Price Style options, with price typography, which are rather self-explanatory.
The Description Style section includes options for changing the color and the typography of your description.
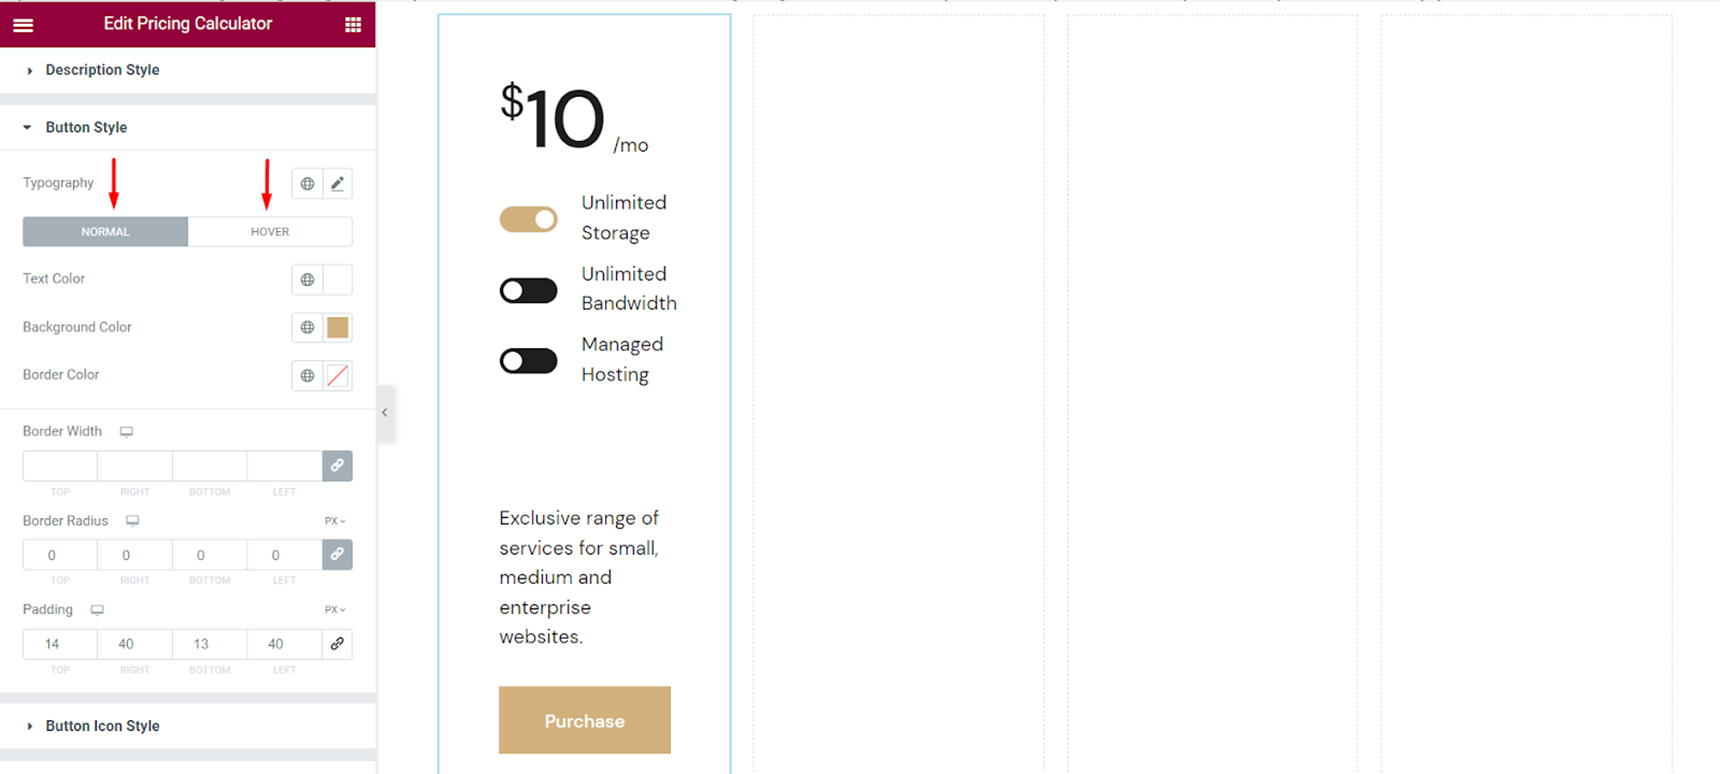
After that, we have the Button Style options, where you can set what you want your button to look like normally, and when hovered upon.
The next section is for customizing the button icon, in case you’ve added one, and then you also have the options for Button Inner Border Style and Button Underline Style.
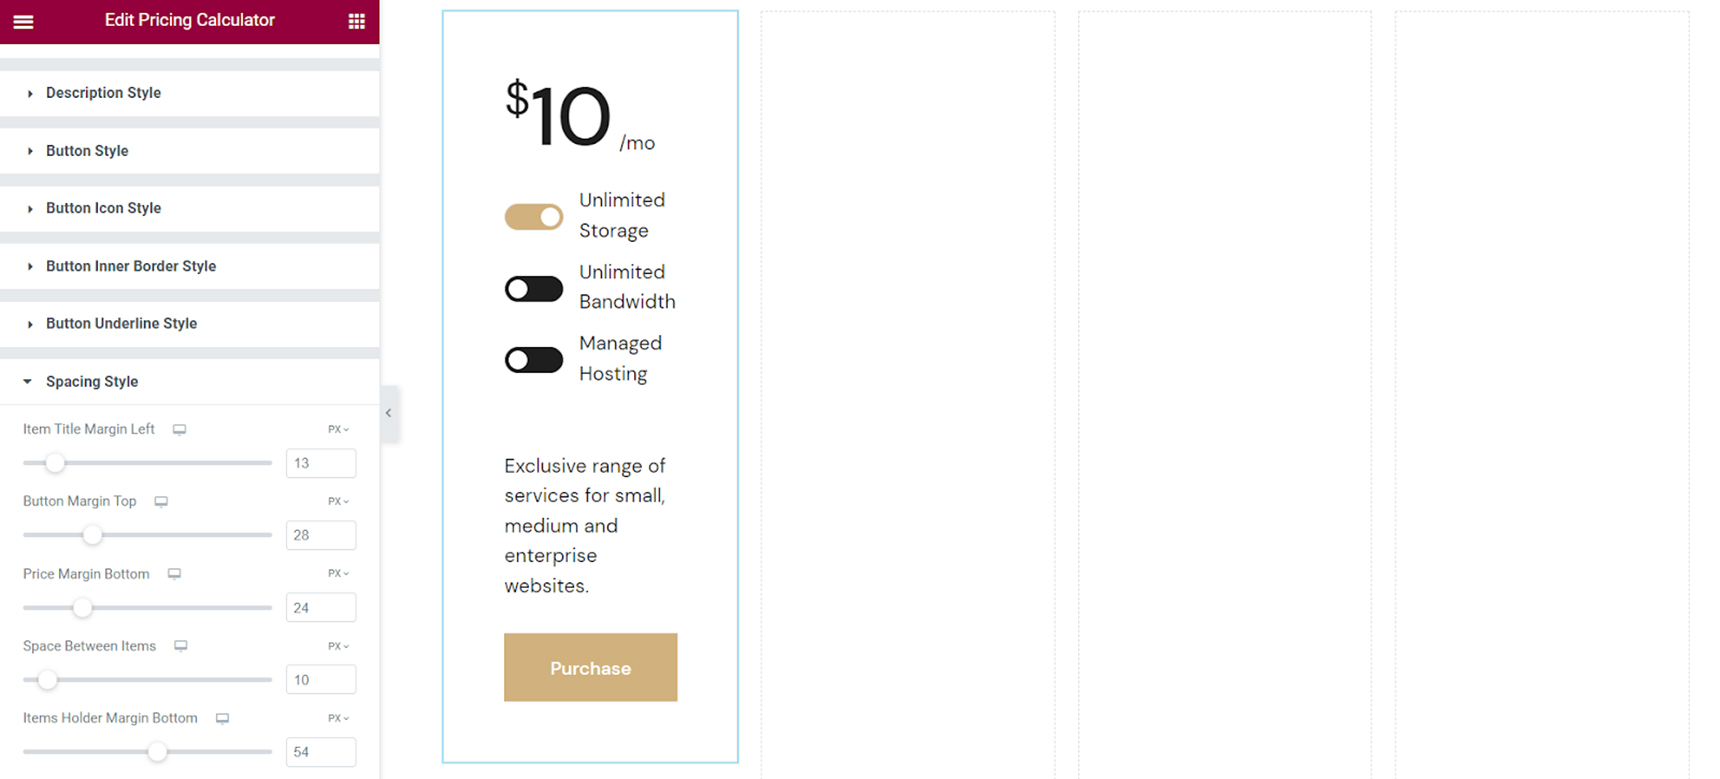
Finally, you can add finishing touches to your calculator by tweaking various margins under Spacing Style.
And that’s it for the customization options. Feel free to play around with the options until you reach the effect that works just right for your pages. We did a pretty basic design here but you can really go crazy – for instance, you set a background to your section and then make your calculator transparent, or add bolder colors to it, or anything else that works for you.
Adding the Other Calculators
Since we have four columns for four calculators, we will have to make three more calculators from scratch, right? Wrong! If you want all your calculator elements to match, you can simply duplicate the first one you’ve fully customized and then adjust the content in each subsequent calculator.
Right-click anywhere in your section and open the Navigator.
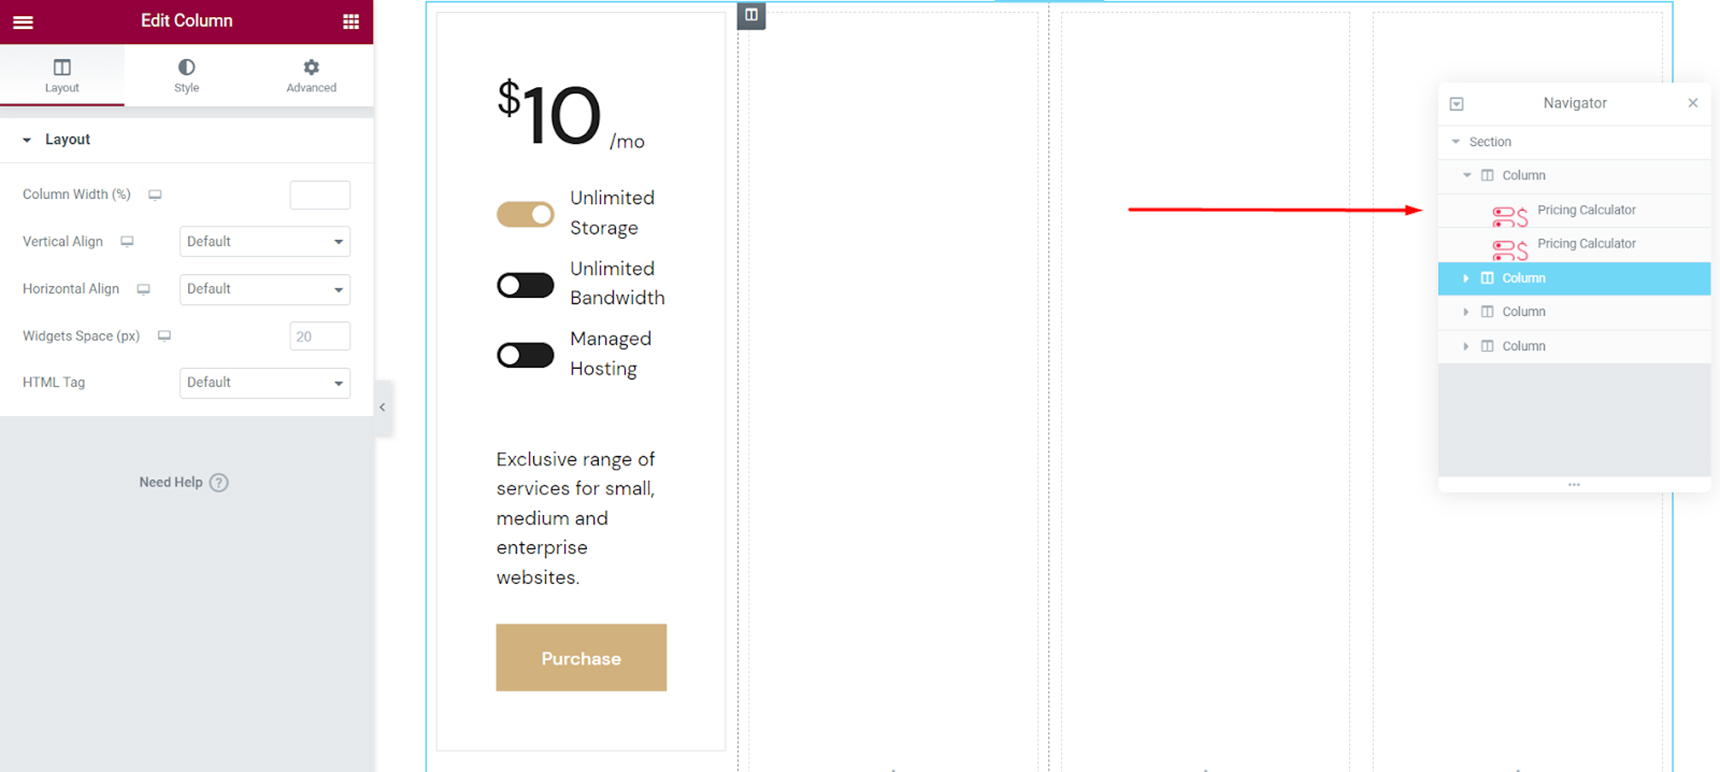
Now, right-click on the first calculator and click on Duplicate. The duplicated calculator will appear below, and you can simply drag and drop it in the desired position. Do this for all the columns you’ve created and then customize the content with different item titles, description and prices.
Wrapping It Up
There you have it – a pricing calculator with your preferred design, your brand colors and typography, and with your own content can be set up in Jupiter X or any other WordPress theme in no time. By allowing the visitors to switch the toggles and learn about the prices, you greatly increase the chances of making a conversion. Like we said, people need to be sure they’re making an informed decision, and with a pricing calculator, you’re allowing them to do just that. It makes a very positive contribution to the overall UX of your website and leaves a great impression about your service or brand.

No comment yet, add your voice below!