
Braintree is a payment processor that allows businesses to accept payment via websites and apps. Paypal owns Braintree, which means that to use Braintree gateways you need to have a PayPal business account. Braintree lets your customers pay using popular methods such as credit cards, debit cards, Paypal, Paypal credits, Apple and Google Pay and more. You can find a complete list of available methods here.
In this tutorial we are going to walk you through how to set up Braintree gateways for WooCommerce and SellKit checkout step by step.
Installing the Braintree gateway plugin for WordPress
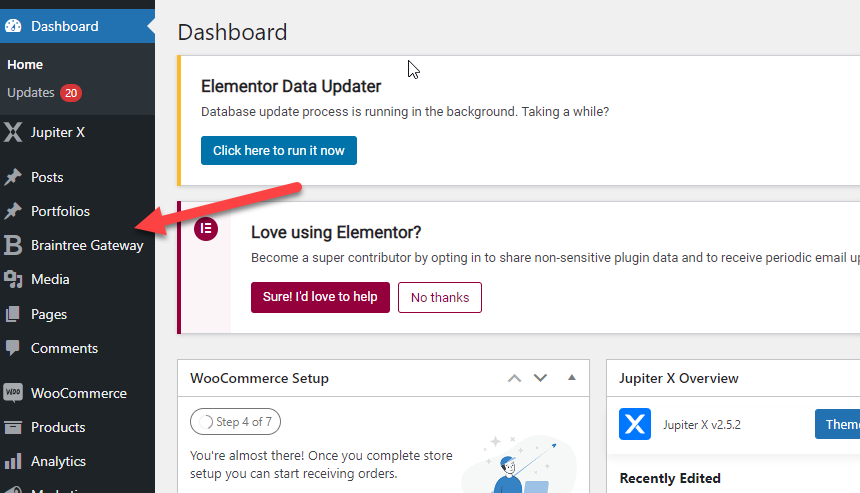
You may install the Braintree gateway plugin from its WordPress plugins page. After installing you may see a newly added menu on your admin dashboard page:
Configure the plugin to connect with Braintree gateways
In your WordPress admin dashboard navigate to Braintree Gateways > Settings page.
There are two environments for the plugin:
- Sandbox or test environment
- Production or live environment
Everything in the sandbox environment is the same as the production environment, the only difference being the payment process. In this example we will continue with the sandbox environment and when you are ready you can attempt the same process in the production environment as well.
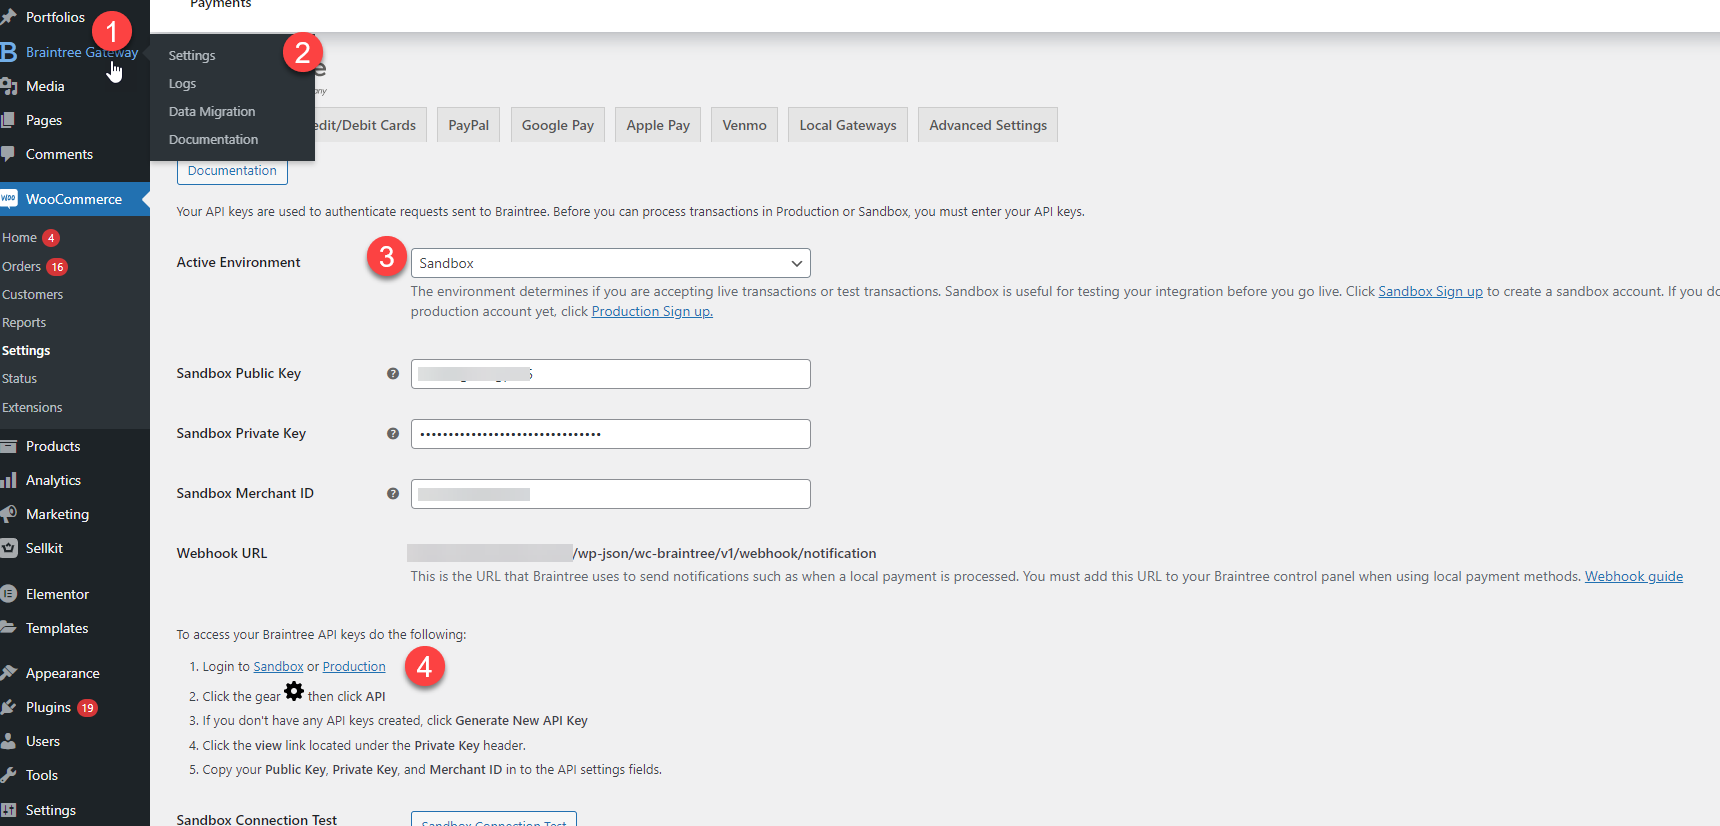
Set the environment to sandbox mode, then click the sandbox link near the number 4 in the image.
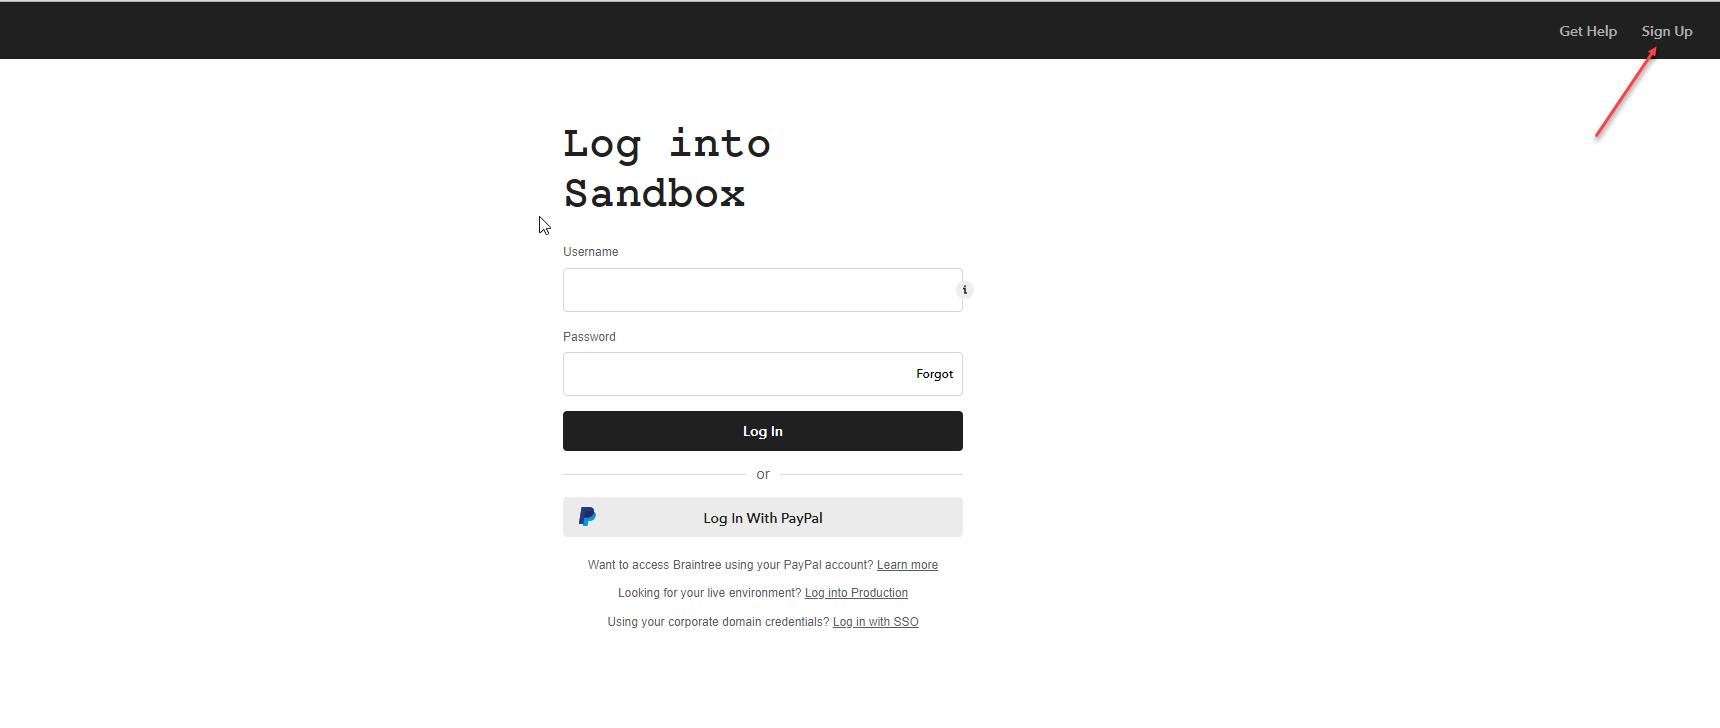
Once you are redirected to the sandbox site, log in using your credentials. Click the sign up link at the top right corner to create an account if you don’t have one.
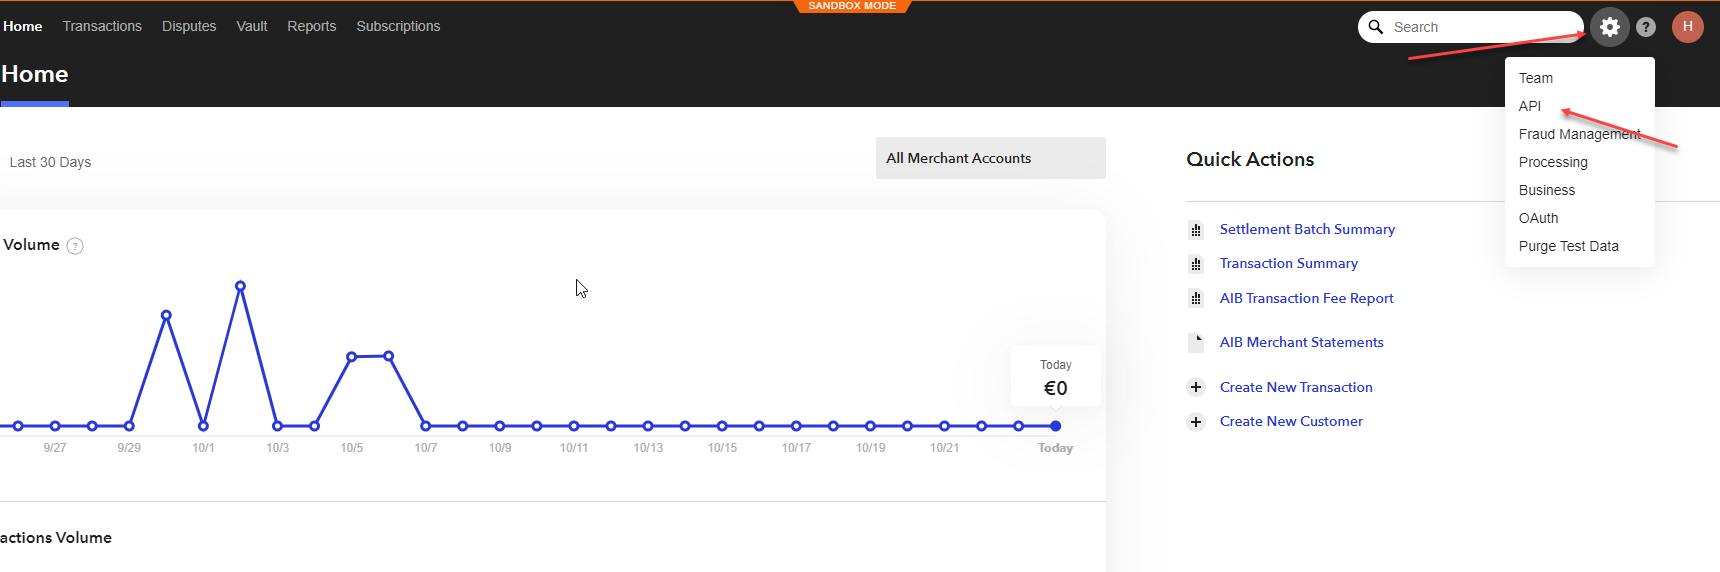
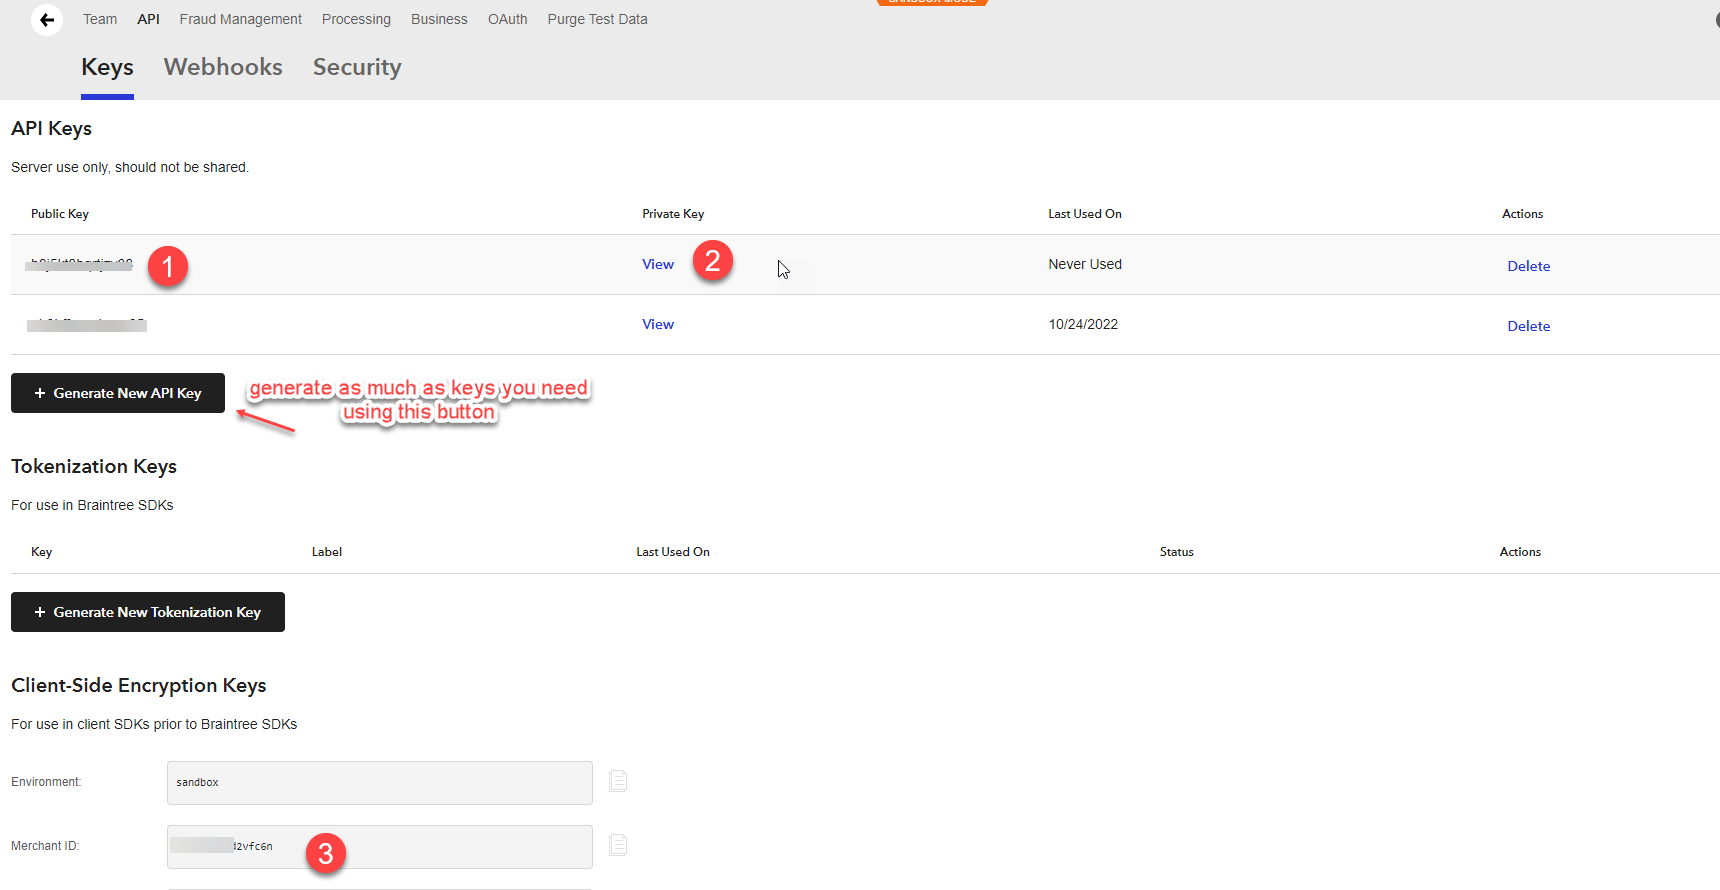
When you are logged in to the sandbox environment (remember that everything in the production environment is the same as in sandbox mode), click on the Settings icon at the top right corner and then click the API from the menu. You will be redirected to the page where you can claim required credentials for your gateways:
Once you are on the API page, we need to claim the three keys identified in the following image:
- Public key
- Private key
- Merchant ID
And as you see, we can generate as many keys as we need using the “generate new API key” button:
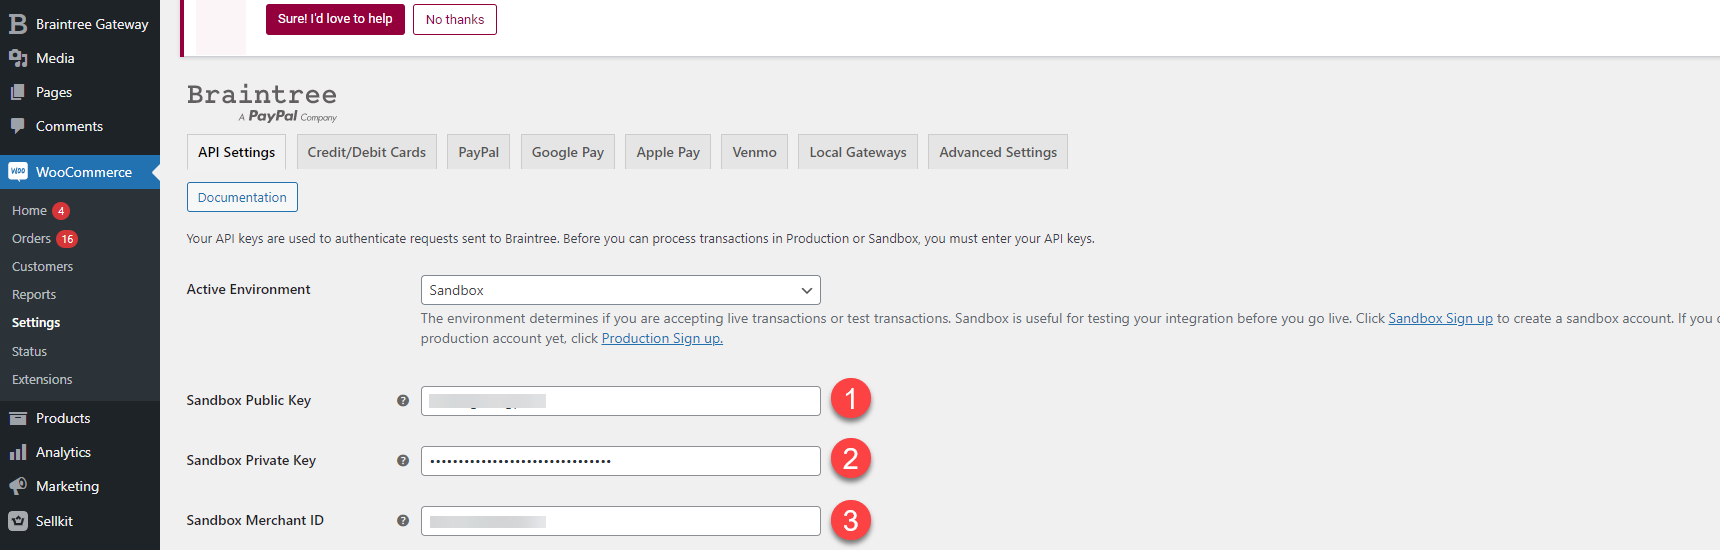
Copy these credentials and add them to the fields in the plugin settings page on the WordPress dashboard:
Now that the basic configuration is complete, we need to make sure everything is correct. Press the Sandbox Connection Test button at the bottom of the same page and you should see an alert that says “Sandbox connection test was successful”, as seen in the following image:
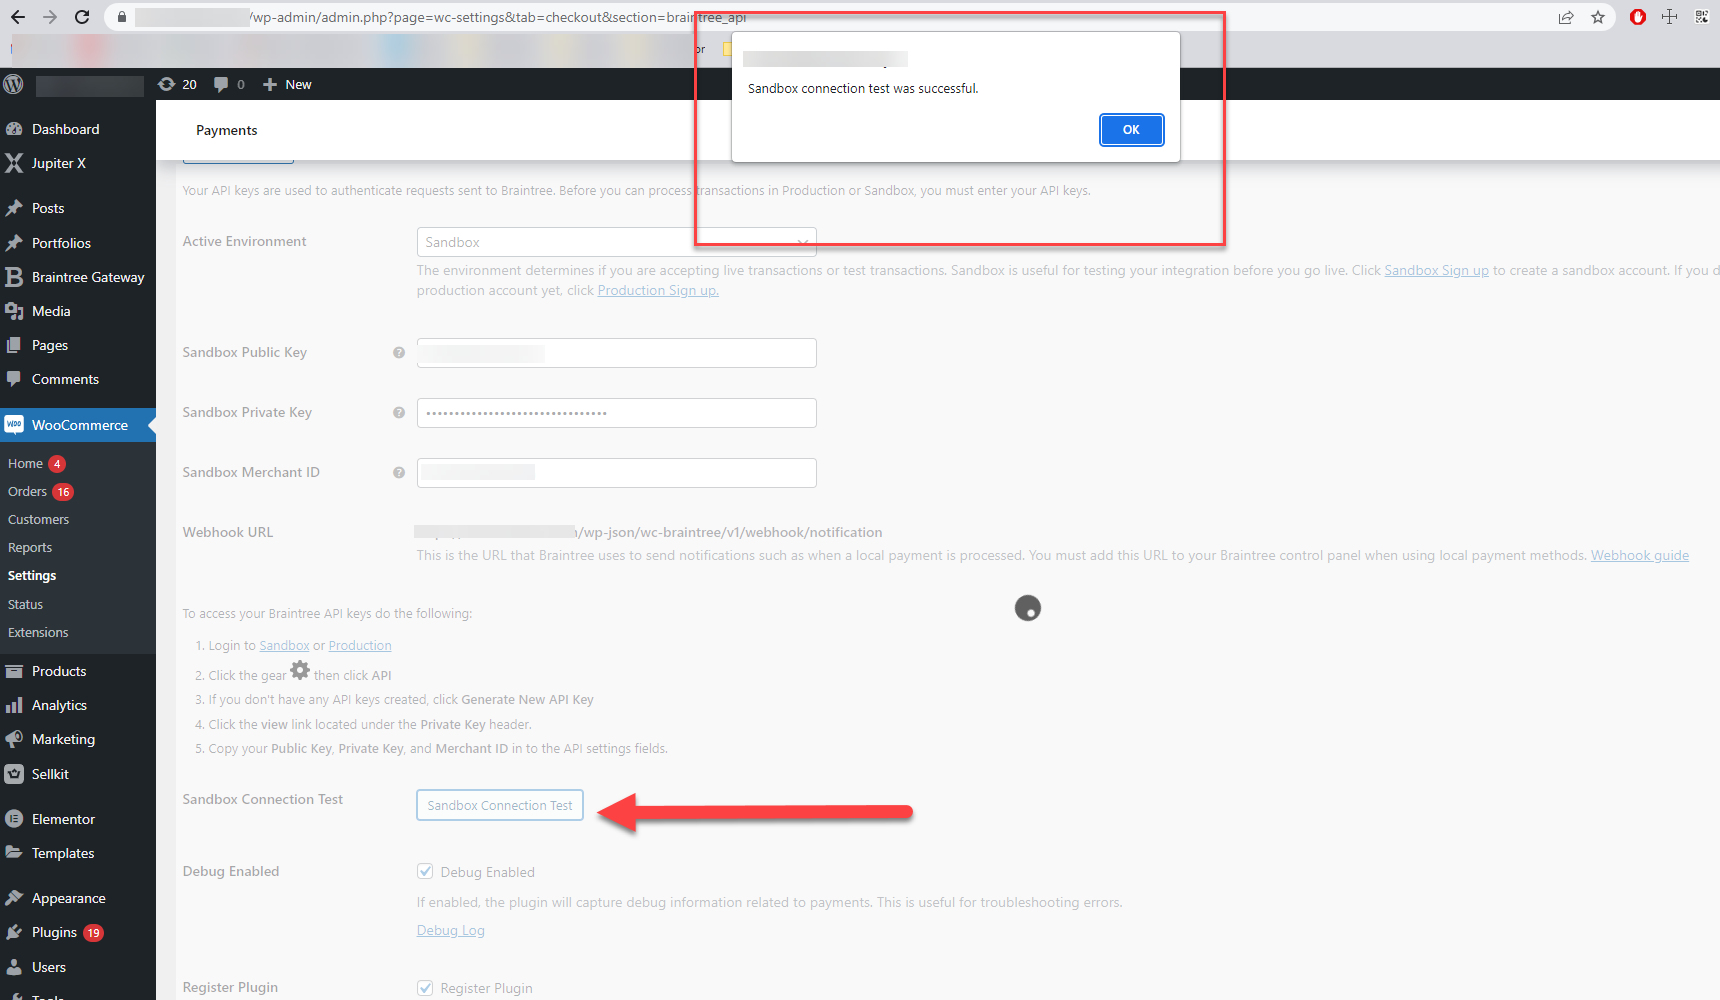
If you see the above message it means your website has successfully connected to the Braintree gateway.
Activating and adding Braintree gateways
Now let’s activate the Braintree gateway and add it to our store. We’re going to explain how to activate credit card, PayPal, Google Pay and Apple Pay gateways.
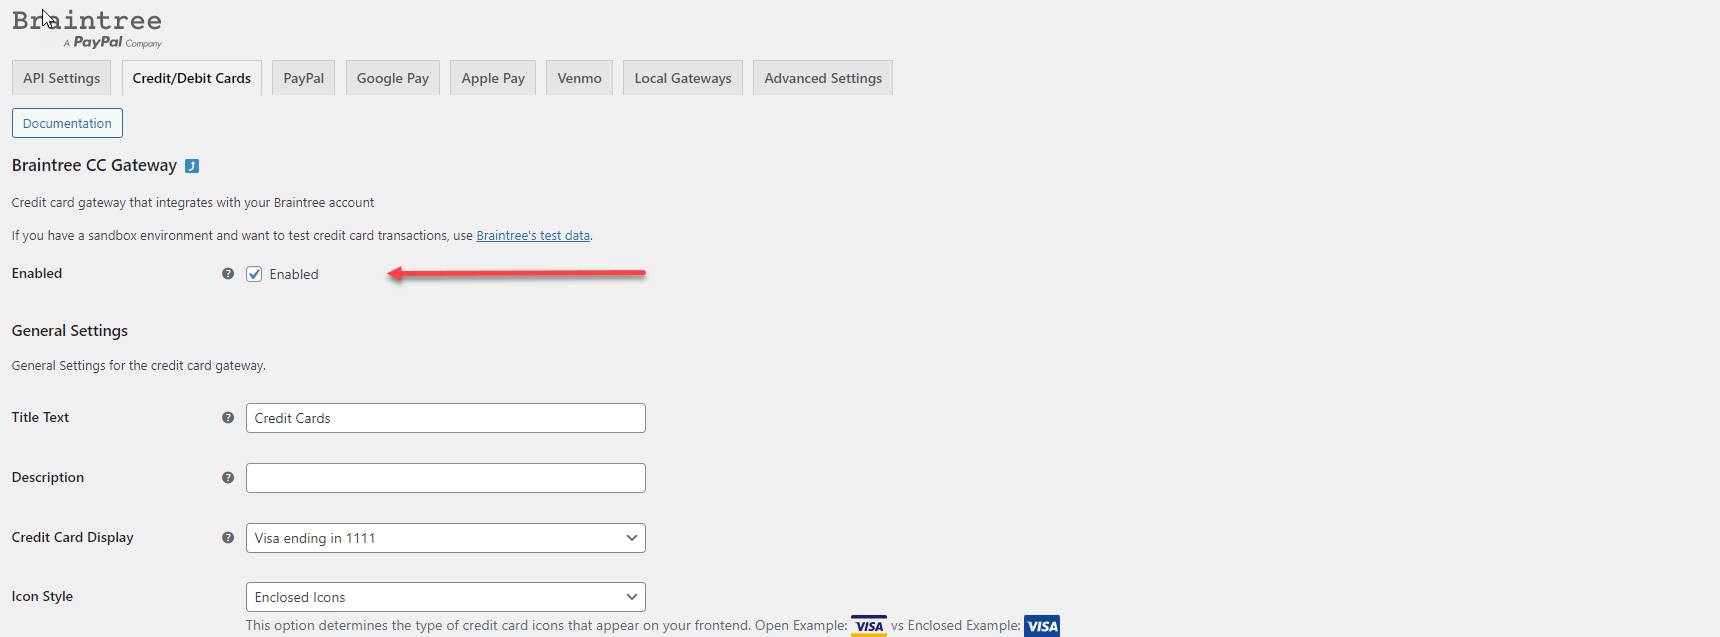
Credit cards
To activate the credit card gateway for your store, you just need to enable it through the related menu on the settings page of the plugin:
On the SellKit checkout page you can see that the gateway has been added and is ready to use:
PayPal
To add a PayPal gateway, simply navigate to the PayPal tab and enable it.
SellKit supports express checkout for PayPal. In order to enable express checkout in SellKit, choose the highlighted option in the following image:

Now go to the Braintree gateways sandbox website, click the settings icon and select ”Processing” from the drop-down menu:
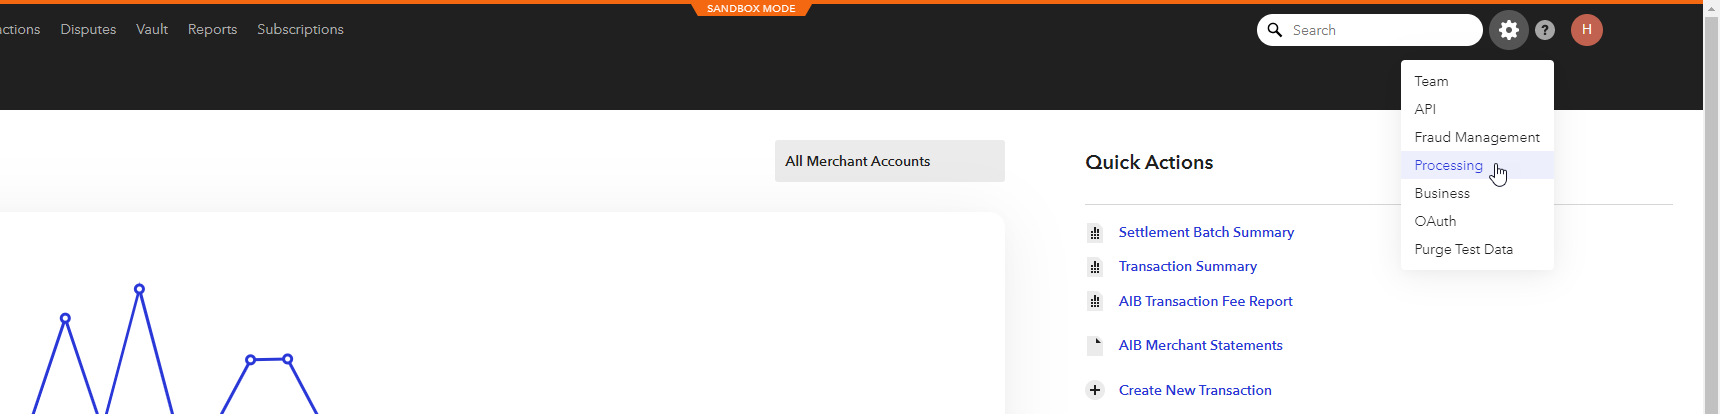
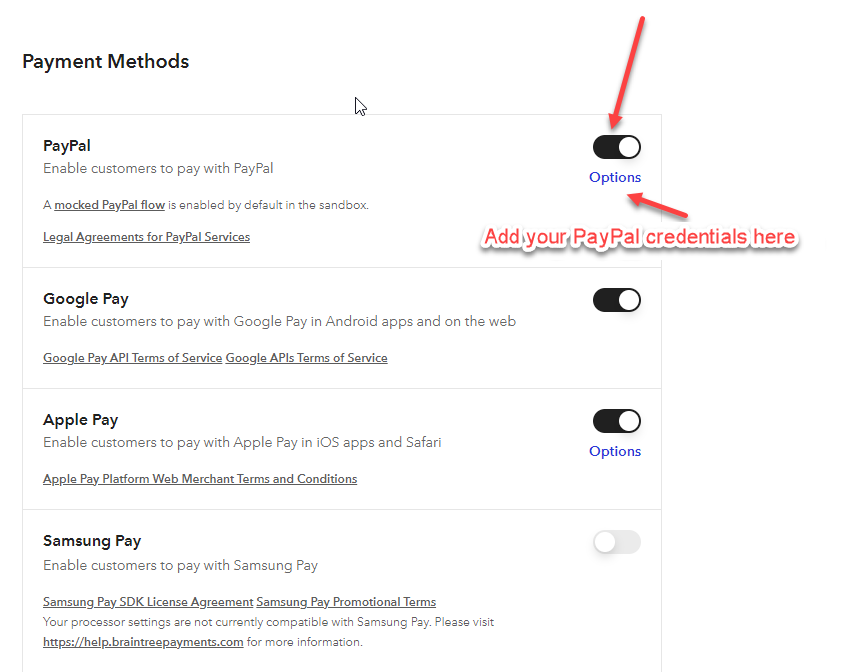
On the next page, enable PayPal and enter your credentials in the new page by clicking the Options button under the Toggle button:
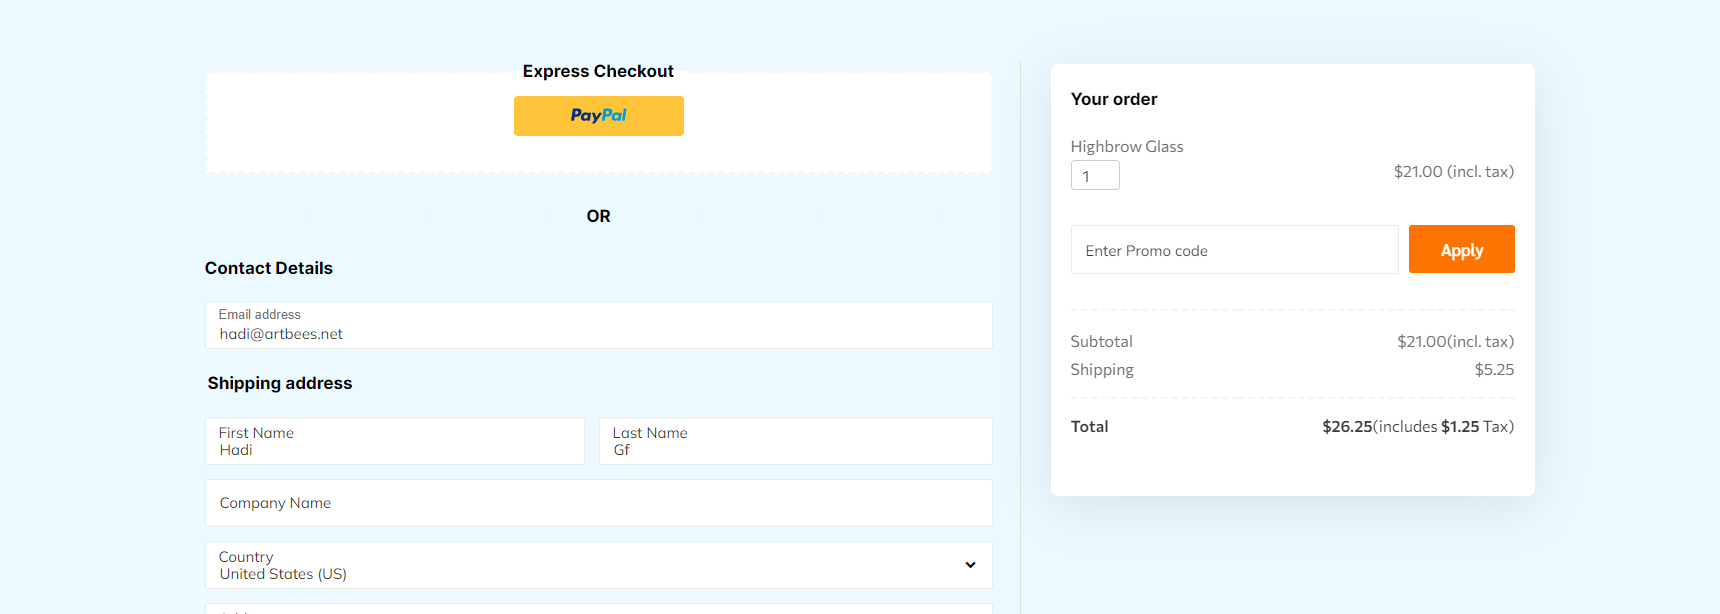
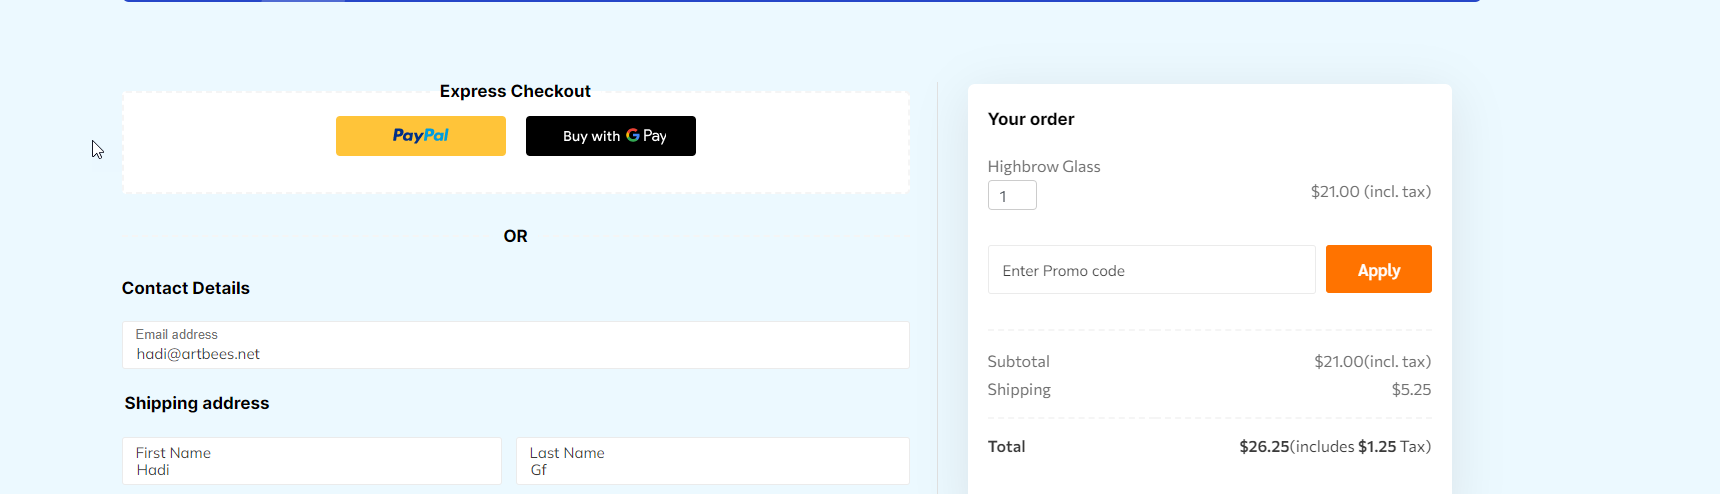
Now that you have enable express checkout, the checkout page should look like this :
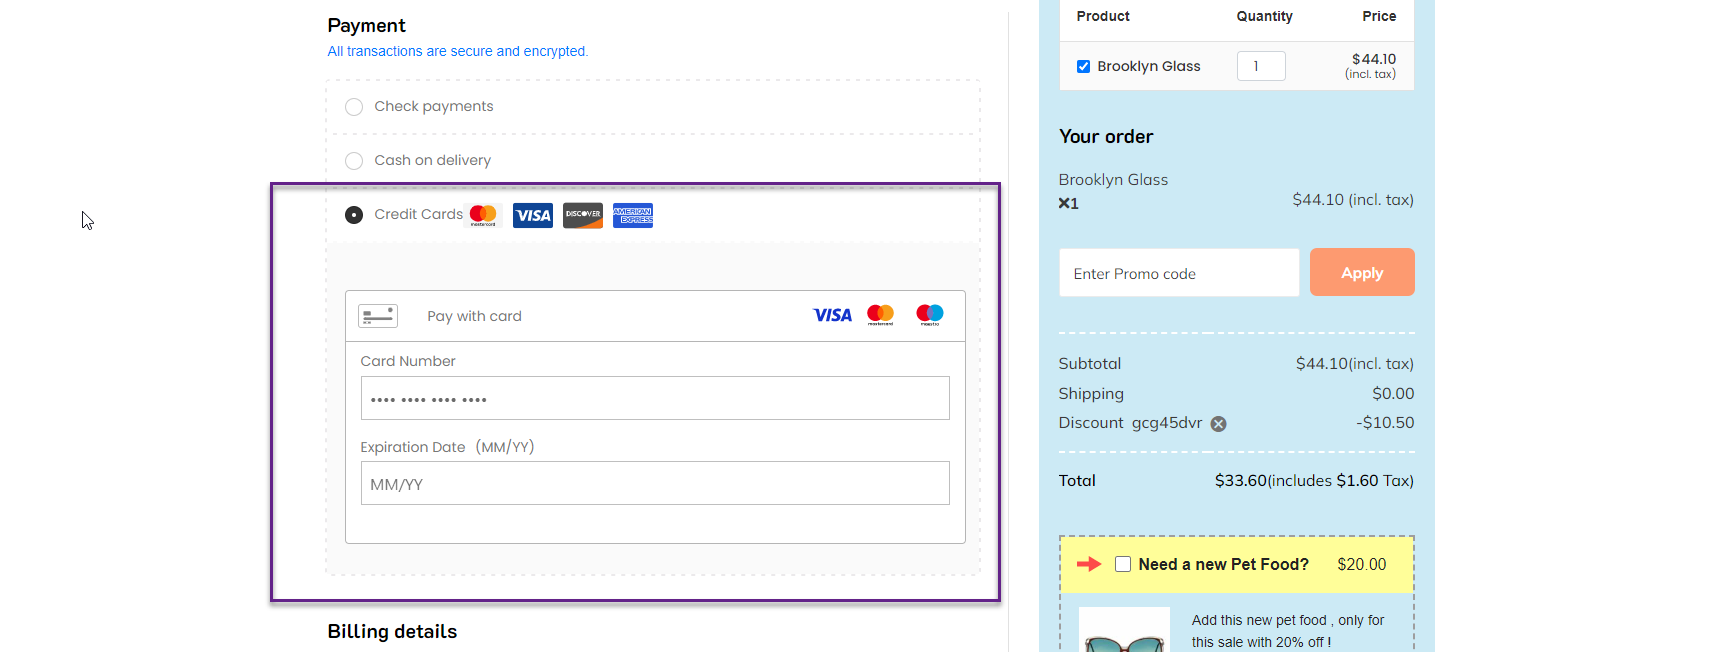
And the default payment section should look like this :
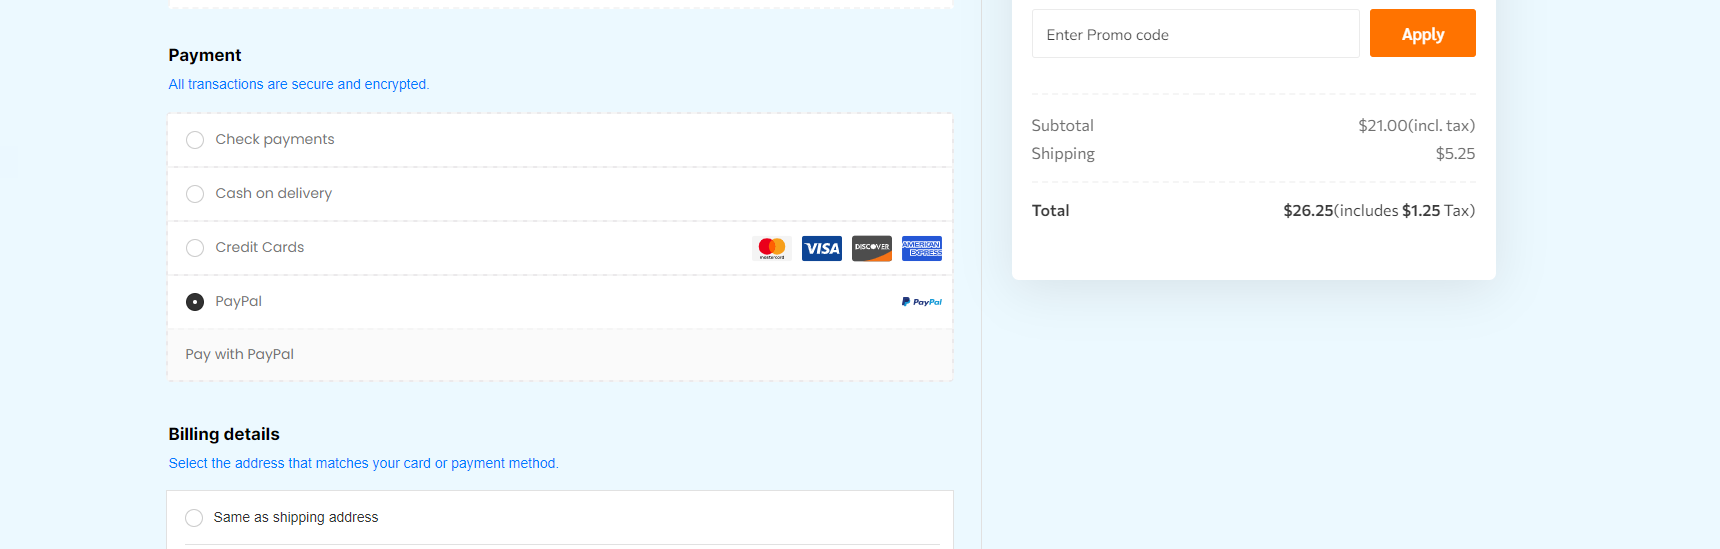
Google Pay and Apple Pay
Setup for Google Pay and Apple Pay is almost the same as for PayPal. These two gateways also support express checkout. You will need to enable these two gateways both in the plugin settings page and the Braintree website in order for them to work correctly.
It’s important to mention that Apple Pay is only available through Apple devices and not available on non-Apple devices.
Once you set up the gateway correctly, your express checkout at the SellKit should look like the following picture:
And default gateways should look as follows:

Conclusion
In this article we learned how to set up Braintree payment gateways for our WooCommerce store and now the store is ready to accept payments. Every step that we used in the sandbox mode can be used in the production mode of Braintree gateways. With the SellKit plugin you can design the perfect feature-filled checkout and set up your store with just a few clicks.
If you have any questions or feedback, feel free to let us know in the comments.

No comment yet, add your voice below!