If you have a website, you may need to restrict the content of a WordPress website to certain people. You might want to set the content of the site visible only to logged-in users – or you might need it to be even more specific and make it visible to logged-in users with defined roles. WordPress allows you to assign each logged-in user with specific roles. One can then use this role and set content to be either visible or hidden.
Why would you need to restrict content?
There are many reasons – and many ways – you can restrict WordPress website content.
Usually, such restrictions are necessary if you offer your users the chance to download an e-book, file or something else in return for doing something like registering, subscribing to a newsletter or publication.
There are certain benefits for all those WP users and web owners who try to restrict content on a WordPress website. In particular, it will help them create a stronger and larger community around their specific business or undertaking and make more money from “selling” access to tutorials, learning courses, documents, instructions, videos, and audio recordings, as well as from any other type of multimedia or content.
If you want to restrict content on a WordPress website, there are some options available:
- Set password protected and private pages
- Create a simple Members Area on your WordPress site through coding
- Free plugins that will help you control access to your site’s pages, posts, and other content
Restricting content through coding can be tricky for many users, so we’ll discuss the WP plugin you can use to limit access to different types of content.
Password protected pages
The simplest way to restrict access to your page is to use the ‘visibility‘ settings that WordPress provides by default.
You can find these options in the right-hand panel when you add a new page or post:
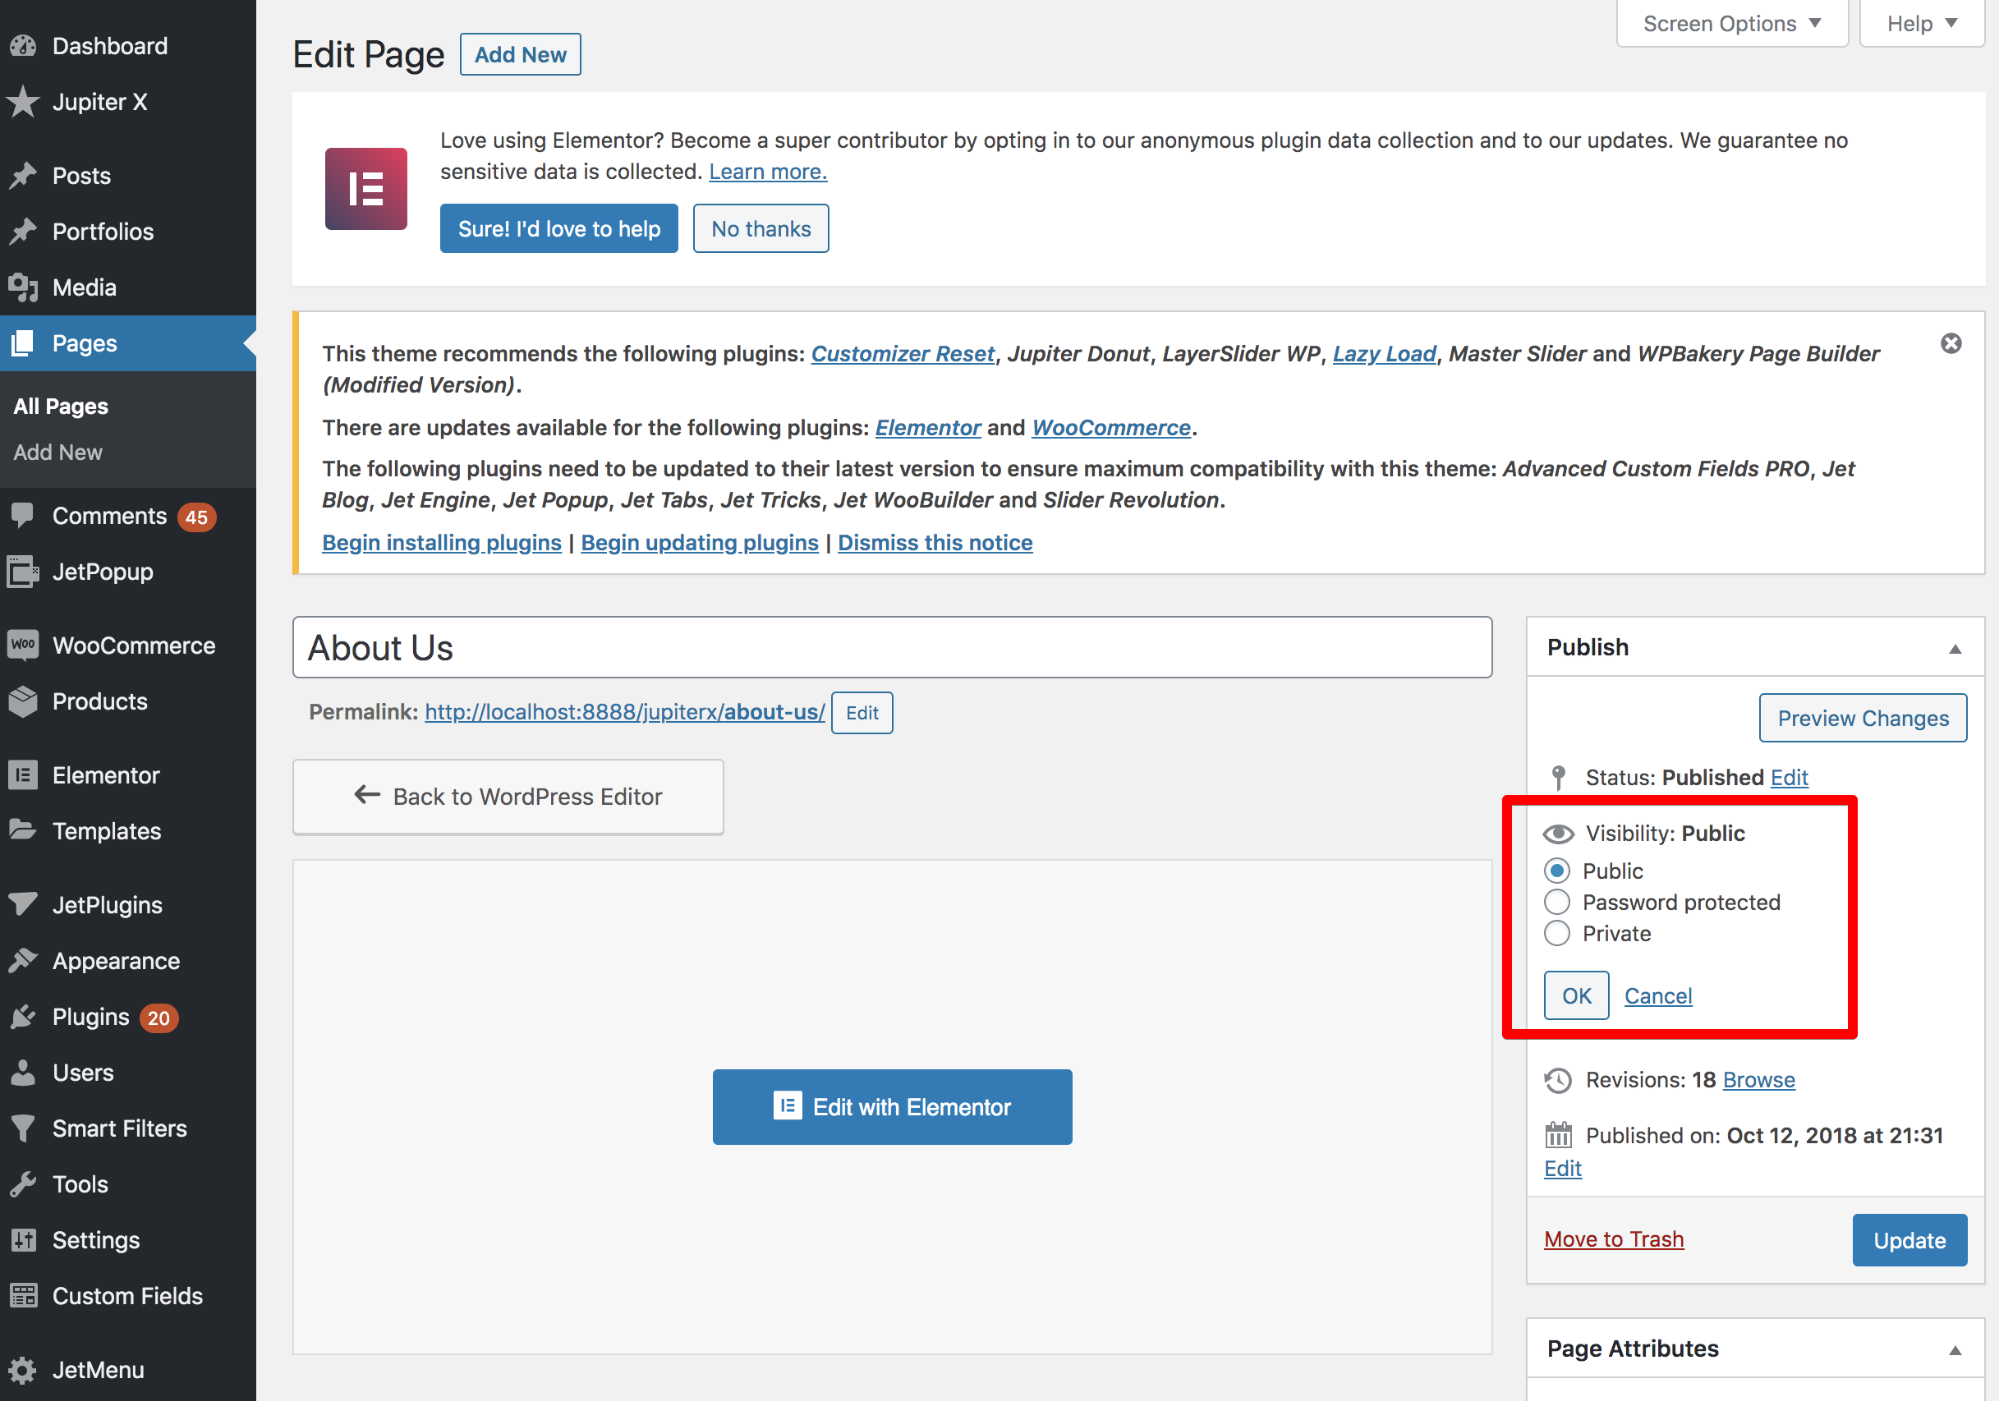
Under the visibility settings, there are three options:
Public – Under this default setting, the content is available to all site visitors.
Password protected – Only the readers with the page’s (or post’s) password can unlock access to the content.
Private – This option allows access to specific users based on their role.
In other words, the password protected and private visibility options allow you to restrict content.
Password protected pages/posts
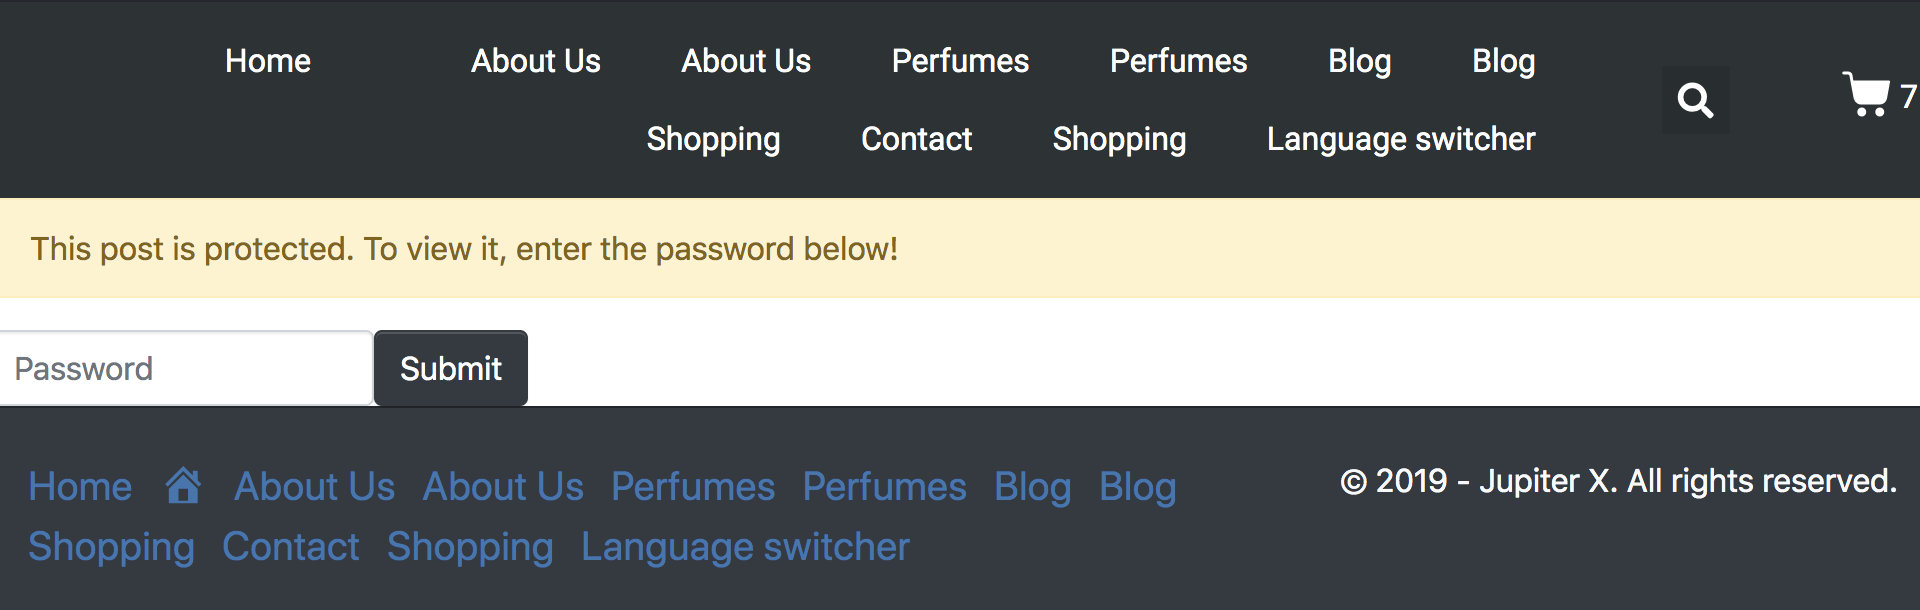
This option helps you to have specific pages and posts that are password protected simply by assigning a password to that page (or post). Anyone who knows the password can access the content.
Marking pages/posts private
Private pages don’t require individual passwords to unlock. Access to such pages is granted after checking a user’s role. Typically, only site admins or editors can view such private pages. For others, such pages will display a “Not Found” message or might not even load.
So the big difference between password protected and private pages is that if you don’t have sufficient privileges to view a page, then it won’t be displayed on the website anywhere. To avoid coding when creating a members area, consider installing one of the following plugins. They can help you protect your content from unregistered users:
– Paid Memberships Pro – With this plugin, only your members will get access to different content of your website such as pages, posts, categories, and more.
– Restricted Site Access – This plugin limits access to your site to visitors who are logged in or are accessing site content from a specified IP address range. Guests can be redirected to a different page including a login page or a message displayed by you.
– Ultimate Member – This is a simple and effective plugin that makes it possible to create an easy registration form and to build new communities online. You can create custom user roles and also engage in content restriction on a global scale and on a per post/page basis. This plugin differentiates between three categories: logged-in users, logged-out users and everyone else.
Let’s install the Ultimate Member plugin on the Jupiter X site as an example of restricting WordPress website content.
To install Ultimate Member, you can check out our article, which provides instructions on how to install any compatible third-party plugin. To get started with Ultimate Member, we suggest that you also read their documentation.
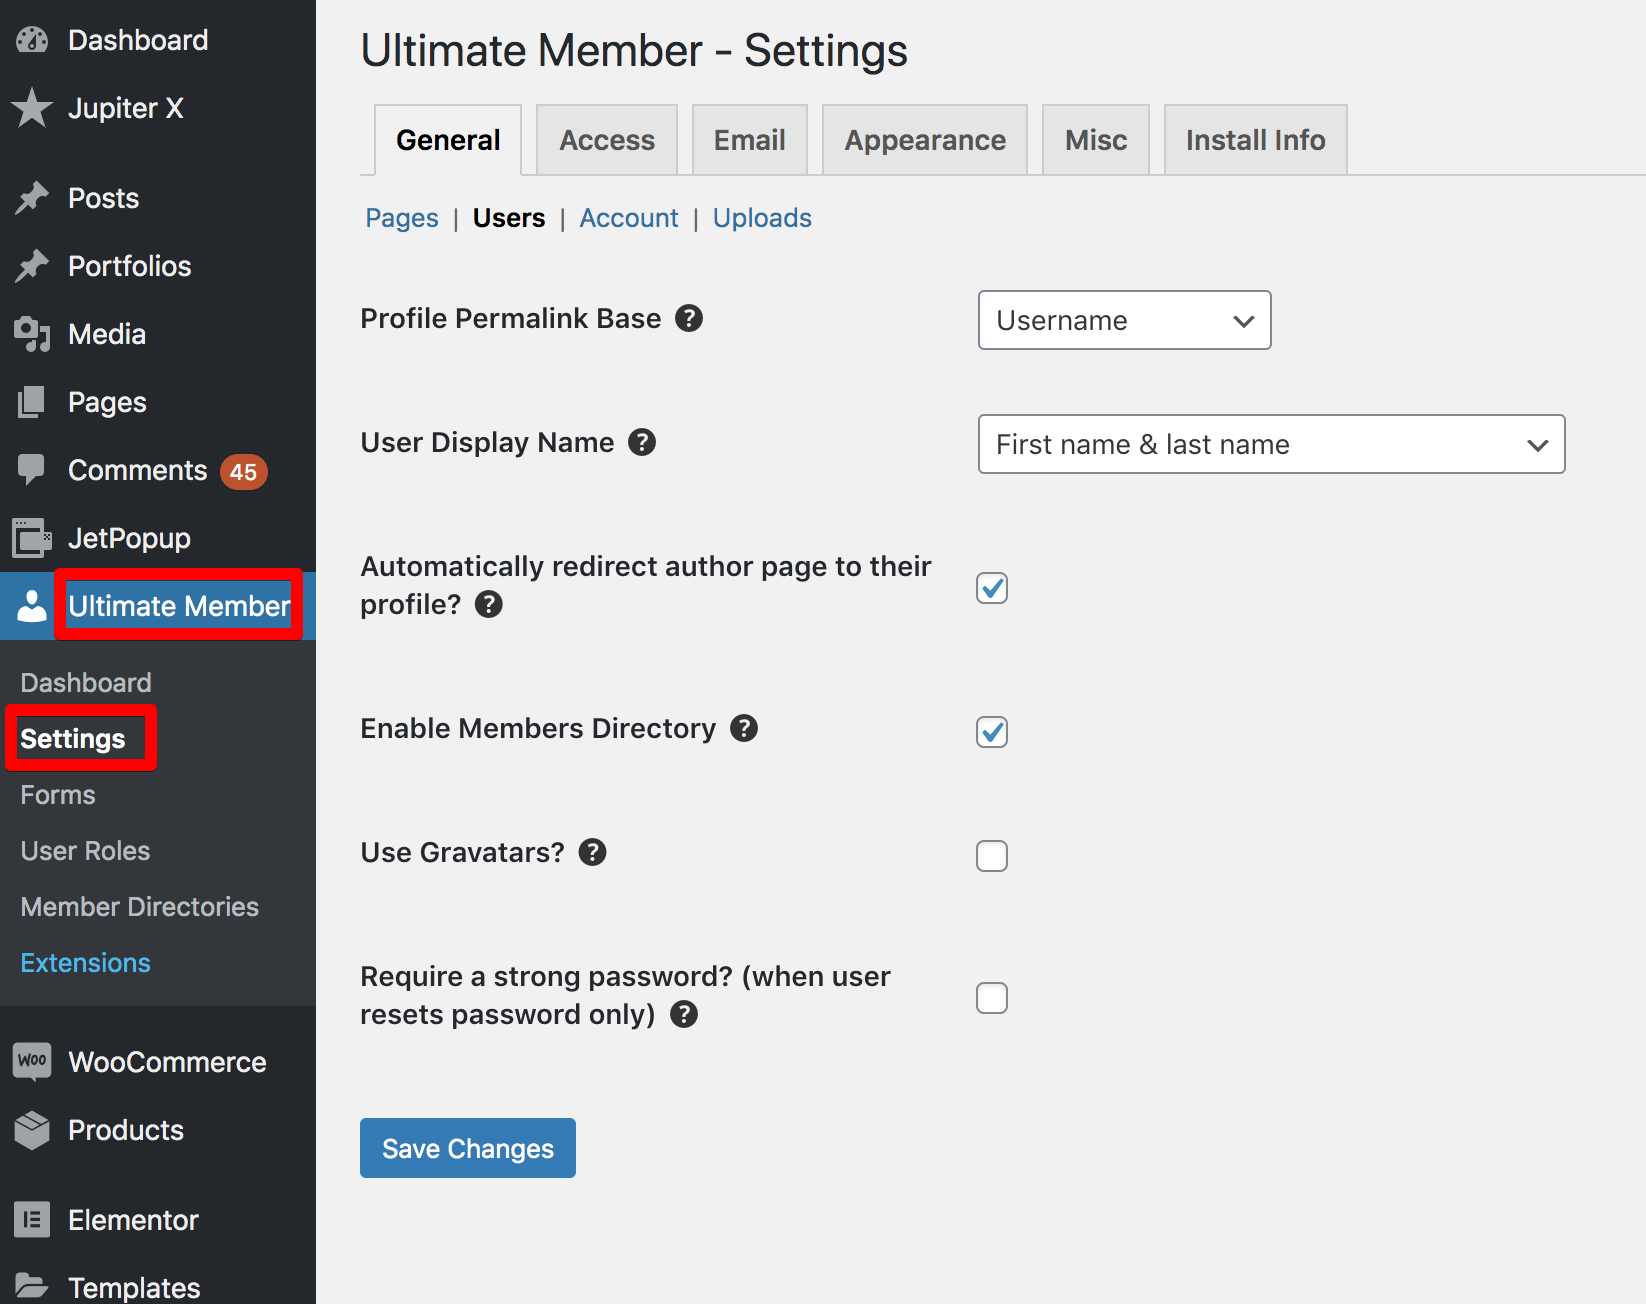
After the installation of the plugin, you’ll see the menu labeled “Ultimate Member” in your WP Dashboard. After clicking the menu, you will be able to see the settings. In the settings, you can manage everything including user roles, emails, access control, etc.
Before setting up the plugin, you’ll have to go to the general settings and tick the box labeled “Anyone can register.” This way, every user who is visiting your website will be able to register and become a member of your community.
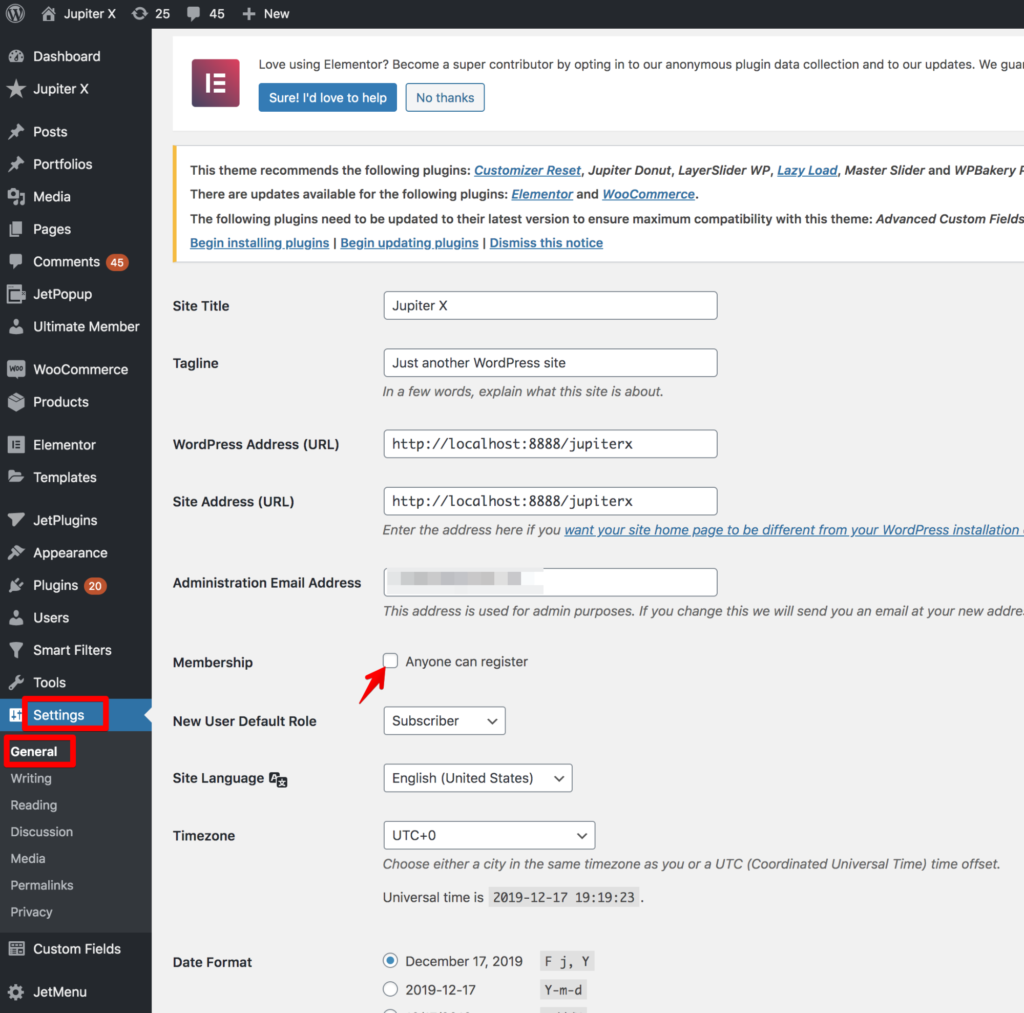
After that, check out the users setting where you can set the default roles of the members or subscribers. You can set all the fields based on your requirements.
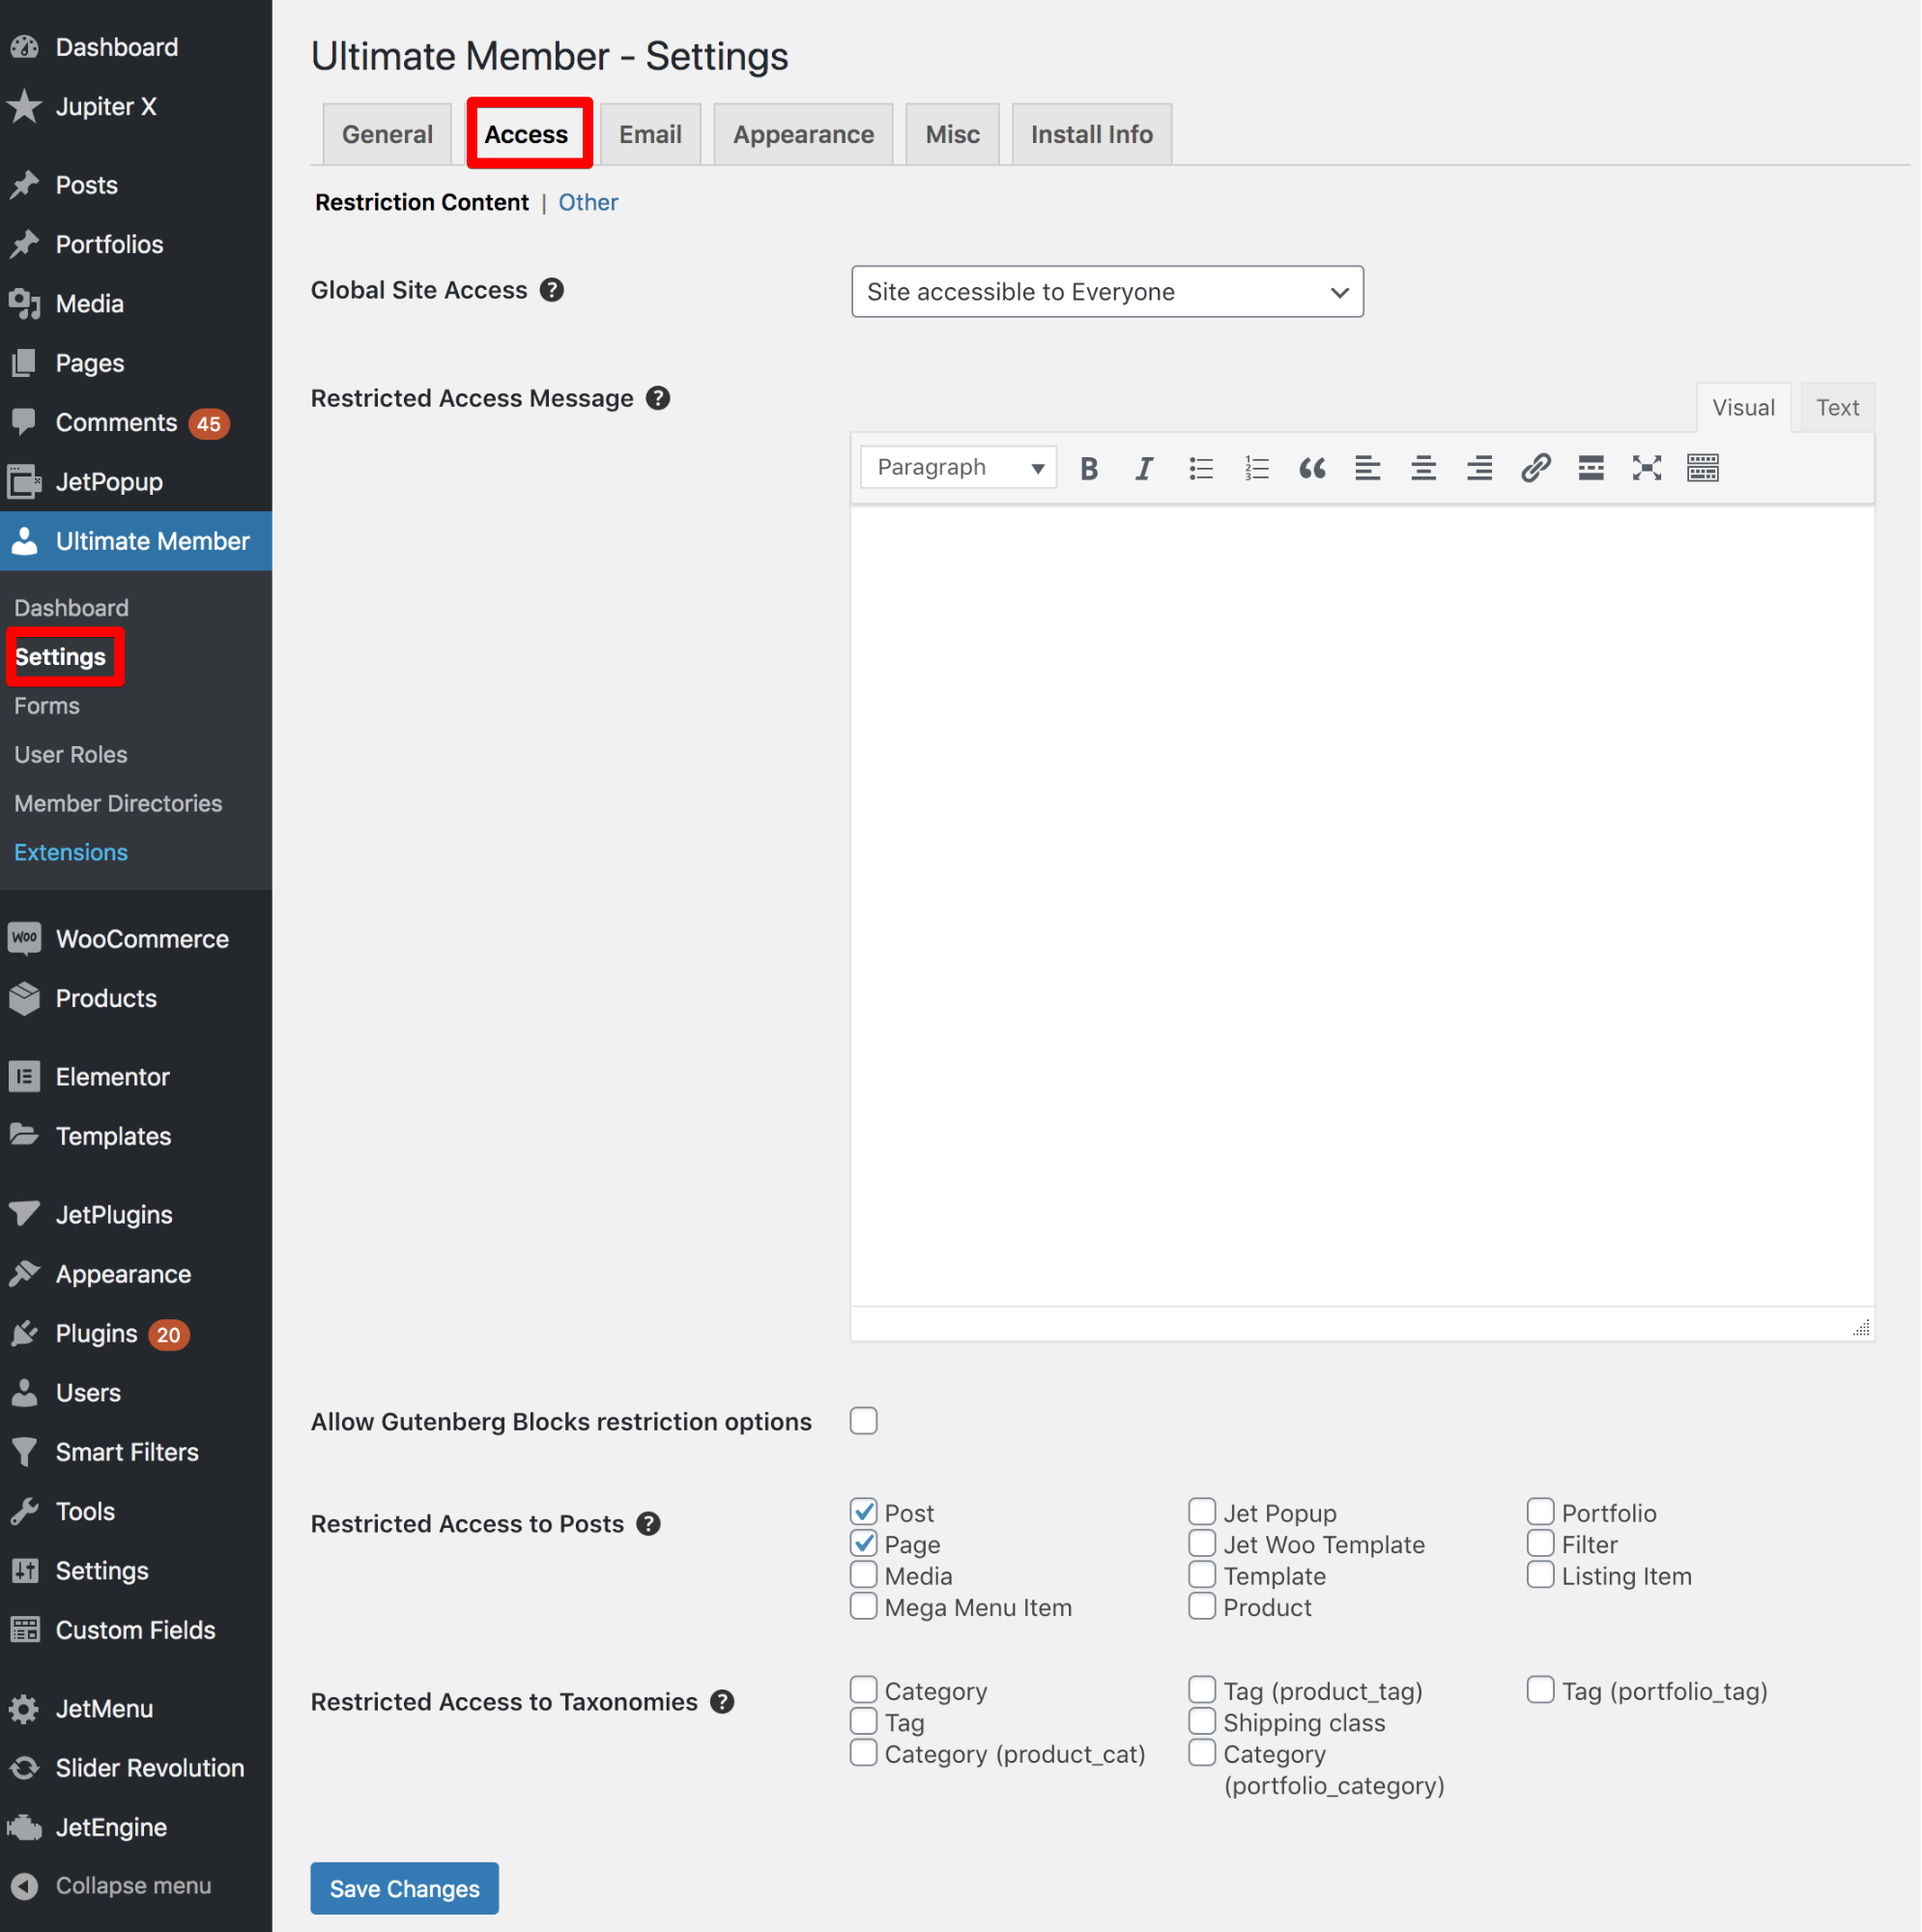
Then you can move to the Access bar where you can manage the accessibility of the website for general users and community members.
You can also build your own restricted access message that users will see when they are trying to access the content they don’t have permission to use or see. You can also restrict, post, page, category and taxonomy access if you want.
If you would like to know how to restrict content for different users, you can read the detailed instructions in the plugin’s documentation.
To learn how to create a registration form on your website, you can refer to this article, which also has detailed instructions.
Setting up a membership website with Ultimate Member is easy. However, you can use any other membership plugin that you think will be better for you, and you’ll be happy with the results. In any case, Ultimate Member offers several benefits and multiple features including front-end user registration/login, front-end user profiles, a drag and drop form builder, and much more.
Wrap up on how to restrict WordPress website content
While it’s possible for you to build a completely private website, sometimes it’s easier to just deny your visitors access to certain content based on their user roles. Select a plugin that you find is the best for your needs and set to display content to a specific group of visitors.
In this particular article, we described how to install and restrict WordPress website content using the Ultimate Member plugin on a Jupiter X site. We’re excited to hear about your experiences or questions, so please comment below!

No comment yet, add your voice below!