
One of the major challenges that so many developers face is the question of keeping code in sync while working collaboratively. Is convenience compromising quality? Is time wasted trying to sort out issues? If this is the case, then it may be worth looking into a compelling revision control system. One that we highly recommend is Bitbucket, by Atlassian.
You may be asking, “what is Bitbucket?” or perhaps you’ve heard of it but are wondering, “why should I use it?” In this article we’ll explain what Bitbucket is and why you may need it to enhance your WordPress website.
What is Bitbucket?
Bitbucket is a robust revision control system that greatly aids developers in their day-to-day tasks. If you’re part of a development team, you’re likely spending much of your time keeping track of collaborative projects. Bitbucket makes the process easier and more organized. To understand what it can do for you, let’s have a look at a list at some of its features:
- Stores code in one secure place.
- Allows anybody from the team to access the code or module.
- Offers an effective code review system.
- Keeps track of when each modification to a document is saved.
- Saves a history of each document’s state before and after modifications are made.
- Provides developers and reviewers the opportunity to make edits and explain themselves via the in-line discussions.
Why should you use Bitbucket with WordPress?
Besides the amazing features just rattled off, there are a number of other reasons why it’d be beneficial for you to use Bitbucket with WordPress.
- The quality of your code will improve, especially with the code review system and the ability to have multiple reviewers for a single pull request.
- Since Bitbucket is a web-based hosting service, you can use it for hosting your files and projects in private repositories.
- Issues can be handled with ease. The integration between Bitbucket and JIRA enables users to freely track an issue status or bug report without leaving the current tool. And if you’d rather not use JIRA, Bitbucket also has a built-in issue tracker for your repository.
Deploying from Bitbucket to WordPress
Here we’ll describe how to deploy from Bitbucket to WordPress, but before we start, be sure to check that your server meets the following requirements:
Most shared web hosting accounts won’t provide all of these requirements, but if you have a VPS or dedicated server then you should be ok.
There are many ways to automate the deployment of your website. The most popular way to do this is with Deploy. Deploy is a hosted service and due to its reasonable price and simple interface, it is the most recommended.
Deployment Steps
Step 1. Install Git version control.
Install Git if you haven’t already done so. If you’re familiar with Git commands, then proceed to the next step. Otherwise you can download and install TortoiseGit or SourceTree, both of which provide access to Git commands in a friendly manner without needing to use command line.
Step 2. Convert your local WordPress into a Git repository.
After completing Step 1, create a local repository to store your project files. You can use an existing folder or create a new one.
Step 3. Create a repository.
Create an account on Bitbucket and then set it up as a remote repository to which you can push your local code.
Step 4. Commit and push the local repository to the remote one.
After setting everything up, commit your code and push it to the remote repository. This step is important since Bitbucket will not allow you to select an empty repository when you proceed towards setting up DeployHQ with your repository.
Step 5. Create an account with Deploy.
Visit www.deployhq.com and create a free account.
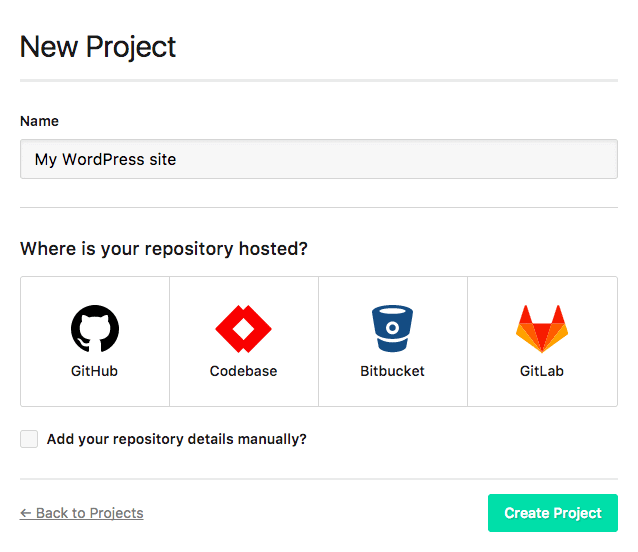
Step 6. Create a project for deployment.
After your account is successfully set up and verified, log in and create a new project.
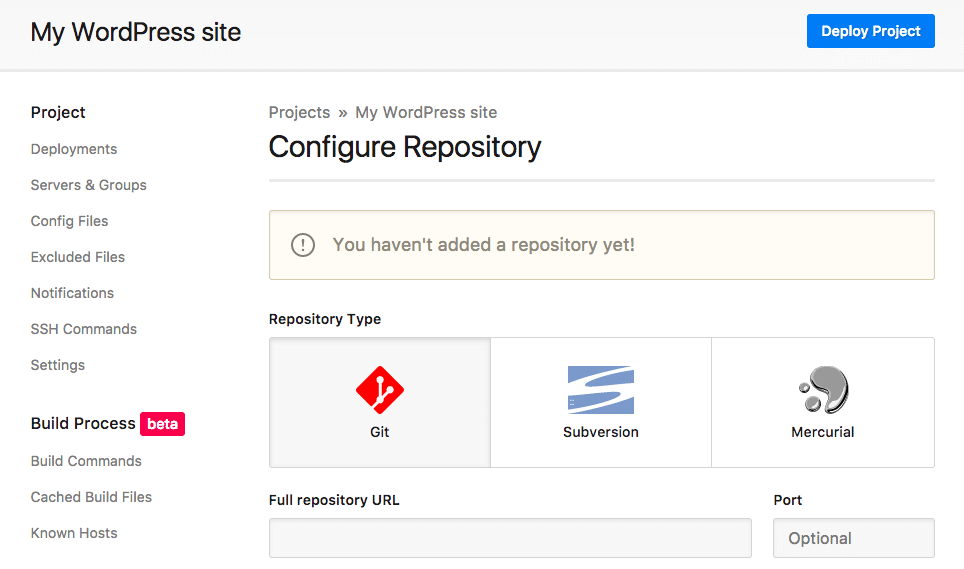
Step 7. Enter your login details.
After creating a new project, enter the login information of your code hosting repository – Bitbucket, and then click on the “Check credentials and choose repository” button. If the information is correct, you will see a list of repositories in your Bitbucket account. Choose the one that you created in Step 3.
Step 8. Configure the deployment server.
After selecting your repository, a form will appear where you’ll need to enter your first server details for deployment. Some of the details you’ll need to fill include:
- Name: The name of the destination server, e.g. My WordPress Site
- Protocol: Choose from one of the following protocol files: SSH / SFTP, FTP, Amazon S3 and Rackspace Cloud. The most commonly used option is SSH / SFTP. Once selected, more form fields will be displayed, so you’ll have to enter more information about your server.
- Hostname: e.g. sftp.mywebsite.com. You can also add the server IP address.
- Port: Enter the correct port if it’s not the default 22.
- Username
- Password
- Use SSH keys instead of Password: (this is a safer option but requires additional steps).
- Path on Server: Make sure to add the correct path depending on whether you are deploying your entire WordPress website or just a custom theme.
- Notification Email: Enter an email where you would like to receive notifications after every deployment.
- Branch to Deploy from: Enter the branch you would like to deploy from, or leave it set to the Project default (master) setting if you plan to deploy from the master branch.
- Environment: A way to name this server environment such as production, testing, etc.
- Subdirectory To Deploy From: Again, this is as important as the “path on server” field. If you wish to deploy your entire repository then leave it blank or enter the correct path.
If the details provided are accurate, you have now successfully set up your server (deployment location) with DeployHQ.
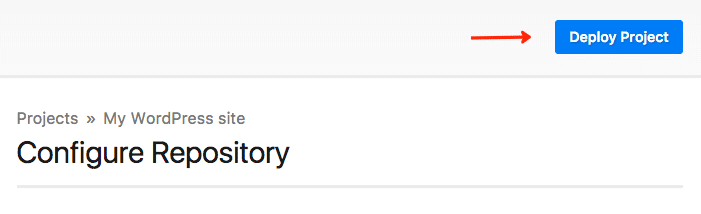
Step 9. Perform a test deploy.
Before activating auto deployment, we need to ensure everything is working right and that you have set the correct paths. Click on the large green button labelled “Deploy Now”. After selecting the revisions/commit, on the next screen you could initiate the deployment or simply preview it. Click “Run deployment” and test. If all is well, you can proceed with automated deployment.
Step 10. Activate automated deployment.
Setting up automated deployment will allow you to avoid visiting the Deploy site every single time. To set up the automation, follow these steps:
- First go to the “Servers & Groups” page which can be accessed via the “Settings” menu.
- Click on the “pencil” icon which denotes “Edit” to go to the edit screen of the server you had set up earlier for deployment.
- In the “Deploy Hook” box on the right, mark the “On” option for auto deploy. Also make sure to copy the URL displayed in the “Deploy Hook” book. This will be used with your Bitbucket repository to initiate automated deployments whenever you commit/push your local files to those repositories.
- For a Bitbucket hosted repository, visit the official guide to learn about setting up the hook you retrieved from DeployHQ.
After following the steps above, your automated deployment process will be complete, and when you want to update your site in the future, you can simply commit your local changes and then push those changes to the remote repository.
If you have any questions, you can always visit the Bitbucket documentation and DeployHQ articles which help further explain the deployment process.
This all might seem like a lot to handle but if you carefully follow all the steps detailed above, you’ll be sure to have it all set up and ready to go in no time. Your collaborations will smooth over and the quality of your work will only benefit from these changes. We hope you find the time to make it happen!
Overview of Using Bitbucket with WordPress
What is Bitbucket?
Bitbucket is a robust revision control system that greatly aids developers in their day-to-day tasks such as storing, editing, saving, and collaborating on code.
Why should you use Bitbucket with WordPress?
- The quality of your code will improve
- You can use Bitbucket for private repositories.
- Issues can be handled with ease through JIRA or the built-in issue tracker.
Deploying from Bitbucket to WordPress
First make sure your server meets the following requirements:
Deployment Steps
Step 1. Install Git version control
Step 2. Convert your local WordPress into a Git repository
Step 3. Create a repository
Step 4. Commit and push the local repository to the remote one
Step 5. Create an account with Deploy
Step 6. Create a project for deployment
Step 7. Enter your login details
Step 8. Configure the deployment server
Step 9. Perform a test deploy
Step 10. Activate automated deployment

1 Comment
Hello Dear Team,
I am using Bitbucket for the my wordpress project. so, I have only one question.
Q. We are deploy local code to production but how can we mange database change ?
Q. how that local(staging) database changes effected on production server database ?