At some point, you’ve probably heard of dynamic elements in Jupiter X. They allow you to turn your raw data into fascinating page templates without coding. However, sometimes, using custom coding is inevitable, especially when you want to use your dynamic data with a piece of Javascript code. In this article, we’ll take a look at how you can create a gaming website in Jupiter X by using dynamic data, transforming it into custom made shortcode and using it in a wheel of fortune game.
What we’ll need:
- The Jupiter X theme and its Child theme
- The Winwheel.js library
- The Jet Engine plugin (bundled with Jupiter X)
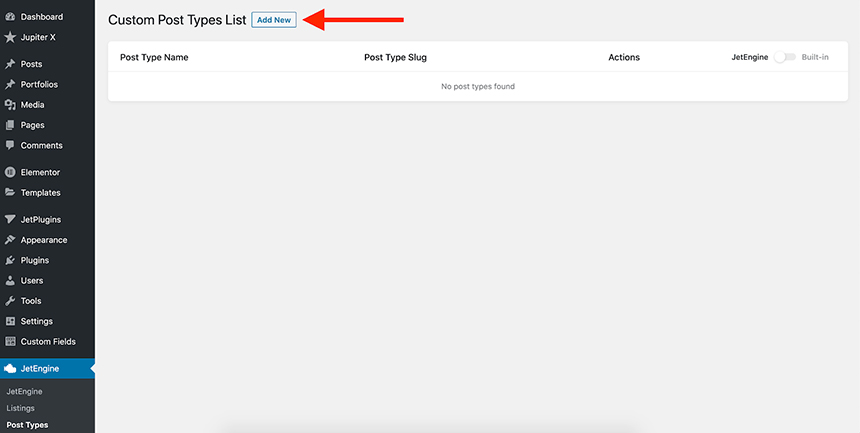
Creating a new post type: Wheels
In creating a gaming website in Jupiter X, I’m going to start by creating a new post type named Wheels. The reason is that I want to create different wheels with different colors, conditions and prizes. Imagine that you own a website where users are able to select different wheels of fortune and start the game as they wish. Also, creating a new post type using the Jet Engine plugin allows me to create the wheels upon user submission in the future. We can aim to build a gaming website with a combination of aforementioned features and a membership plugin. However, it’s just a simple example of how you can integrate your dynamic data with custom features developed on your own in Jupiter X.
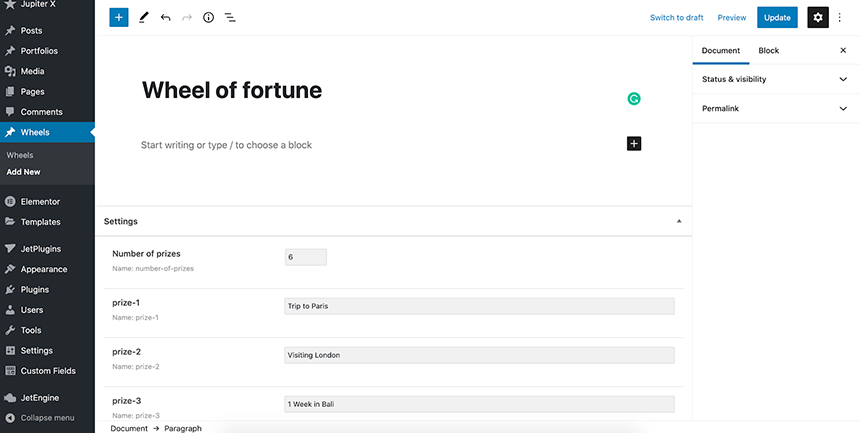
Let’s get back to work. I assume you already enabled the Jet Engine in the Jupiter X -> Control Panel -> Plugins. So, let’s create the post type “wheels.” I want to be able to create multiple wheels with different prizes.
Now, try to add as many prize options as you wish and also set a meta field for the number of prizes. This field should indicate how many prizes a wheel should have.
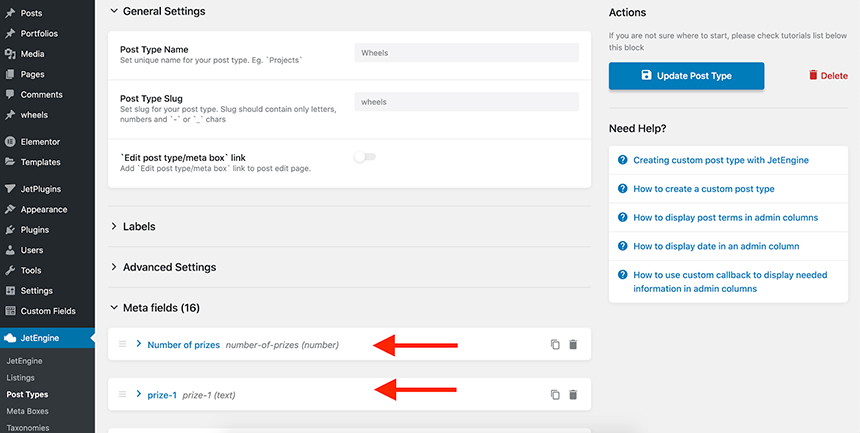
Now update the post type and then navigate to WordPress Dashboard -> Wheels and add a new wheel.
As you can see, the post looks empty in the front end, but don’t worry, we are going to add the wheel of fortune using the dynamic shortcode capabilities there.
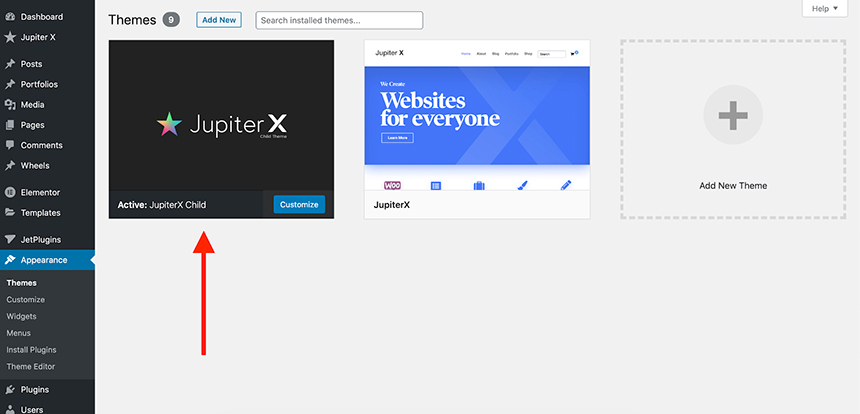
Activating the Jupiter X child theme
Since we need to create a shortcode to use in our single templates, it’s better to use a child theme, define the shortcode there and only call it in the posts. To do that, download and install the Jupiter X child theme package provided here and then activate it.
Add the shortcode in the child theme
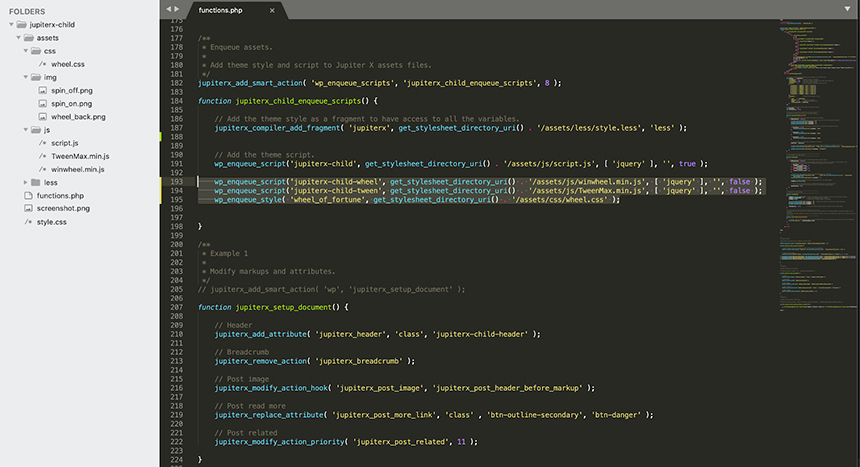
The next step in creating a gaming website with Jupiter X is to add the shortcode to show the wheel of fortune. To do that, first download the winwheel.js library from here. Then extract the files and copy the winwheel.min.js to the jupiterx-child/assets/js/ folder. You also need to add the TweenMax.js library to preserve the smooth animation while the wheel is spinning. After downloading and adding both JS files into your child theme, add this line to your jupiterx-child/functions.php to include the js file in your website.
wp_enqueue_script('jupiterx-child-wheel', get_stylesheet_directory_uri() . 'https://d3pa45a5f8vwb1.cloudfront.net/assets/js/winwheel.min.js', [ 'jquery' ], '', false );
wp_enqueue_script('jupiterx-child-tween', get_stylesheet_directory_uri() . 'https://d3pa45a5f8vwb1.cloudfront.net/assets/js/TweenMax.min.js', [ 'jquery' ], '', false );
wp_enqueue_style( 'wheel_of_fortune', get_stylesheet_directory_uri() . 'https://d3pa45a5f8vwb1.cloudfront.net/assets/css/wheel.css' );
The last line will add the necessary CSS snippets to style the wheel. You need to also add some image files into the assets folder.
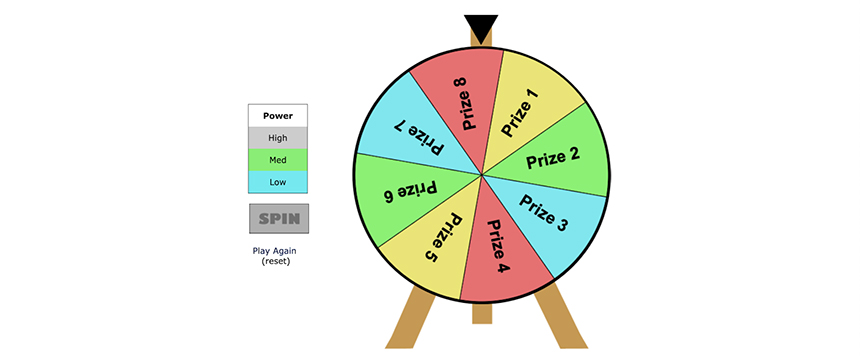
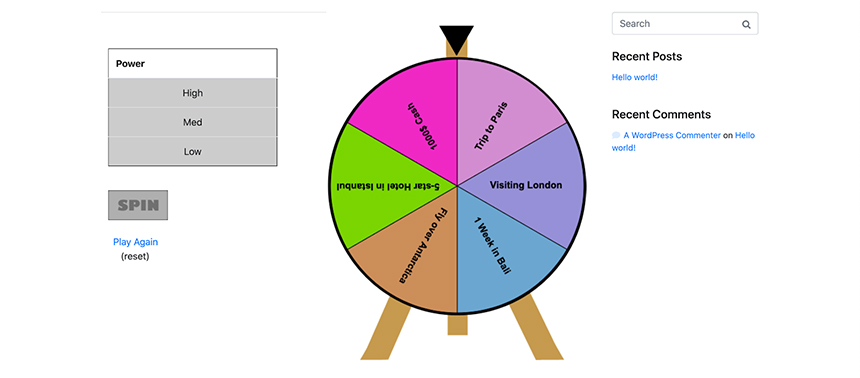
Now, to only test the static version of the wheel, I will add the codes from one of the samples in the wheel.js package and then change the image file paths and actually integrate it with my child theme. Using the below code, we are creating the [wheel_of_fortune] shortcode, but it’s just showing a static wheel. It’s not using our post meta fields to load the dynamically created wheel.
add_shortcode( 'wheel_of_fortune', 'jupiterx_wheel_of_fortune' );
function jupiterx_wheel_of_fortune( $atts ) {
?>
<table cellpadding="0" cellspacing="0" border="0">
<tr>
<td>
<div class="power_controls">
<br />
<br />
<table class="power" cellpadding="10" cellspacing="0">
<tr>
<th align="center">Power</th>
</tr>
<tr>
<td width="78" align="center" id="pw3" onClick="powerSelected(3);">High</td>
</tr>
<tr>
<td align="center" id="pw2" onClick="powerSelected(2);">Med</td>
</tr>
<tr>
<td align="center" id="pw1" onClick="powerSelected(1);">Low</td>
</tr>
</table>
<br />
<img id="spin_button" src="<?php echo get_stylesheet_directory_uri() . 'https://d3pa45a5f8vwb1.cloudfront.net/assets/img/spin_off.png' ?>" alt="Spin" onClick="startSpin();" />
<br /><br />
<a href="#" onClick="resetWheel(); return false;">Play Again</a><br /> (reset)
</div>
</td>
<td width="438" height="582" class="the_wheel" align="center" valign="center">
<canvas id="canvas" width="434" height="434">
<p style="{color: white}" align="center">Sorry, your browser doesn't support canvas. Please try another.</p>
</canvas>
</td>
</tr>
</table>
<script type="text/javascript">
// Create new wheel object specifying the parameters at creation time.
let theWheel = new Winwheel({
                'numSegments'  : 8,     // Specify number of segments.
                'outerRadius'  : 212,   // Set outer radius so wheel fits inside the background.
                'textFontSize' : 28,    // Set font size as desired.
                'segments'     :        // Define segments including colour and text.
                [
                   {'fillStyle' : '#eae56f', 'text' : 'Prize 1'},
                   {'fillStyle' : '#89f26e', 'text' : 'Prize 2'},
                   {'fillStyle' : '#7de6ef', 'text' : 'Prize 3'},
                   {'fillStyle' : '#e7706f', 'text' : 'Prize 4'},
                   {'fillStyle' : '#eae56f', 'text' : 'Prize 5'},
                   {'fillStyle' : '#89f26e', 'text' : 'Prize 6'},
                   {'fillStyle' : '#7de6ef', 'text' : 'Prize 7'},
                   {'fillStyle' : '#e7706f', 'text' : 'Prize 8'}
                ],
                'animation' :           // Specify the animation to use.
                {
                    'type'     : 'spinToStop',
                    'duration' : 5,     // Duration in seconds.
                    'spins'    : 8,     // Number of complete spins.
                    'callbackFinished' : alertPrize
                }
            });
// Vars used by the code in this page to do power controls.
let wheelPower = 0;
let wheelSpinning = false;
// -------------------------------------------------------
// Function to handle the onClick on the power buttons.
// -------------------------------------------------------
function powerSelected(powerLevel)
{
// Ensure that power can't be changed while wheel is spinning.
if (wheelSpinning == false) {
// Reset all to grey incase this is not the first time the user has selected the power.
document.getElementById('pw1').className = "";
document.getElementById('pw2').className = "";
document.getElementById('pw3').className = "";
// Now light up all cells below-and-including the one selected by changing the class.
if (powerLevel >= 1) {
document.getElementById('pw1').className = "pw1";
}
if (powerLevel >= 2) {
document.getElementById('pw2').className = "pw2";
}
if (powerLevel >= 3) {
document.getElementById('pw3').className = "pw3";
}
// Set wheelPower var used when spin button is clicked.
wheelPower = powerLevel;
// Light up the spin button by changing it's source image and adding a clickable class to it.
document.getElementById('spin_button').src = "<?php echo get_stylesheet_directory_uri() . 'https://d3pa45a5f8vwb1.cloudfront.net/assets/img/spin_on.png' ?>";
document.getElementById('spin_button').className = "clickable";
}
}
// -------------------------------------------------------
// Click handler for spin button.
// -------------------------------------------------------
function startSpin()
{
// Ensure that spinning can't be clicked again while already running.
if (wheelSpinning == false) {
// Based on the power level selected adjust the number of spins for the wheel, the more times is has
// to rotate with the duration of the animation the quicker the wheel spins.
if (wheelPower == 1) {
theWheel.animation.spins = 3;
} else if (wheelPower == 2) {
theWheel.animation.spins = 8;
} else if (wheelPower == 3) {
theWheel.animation.spins = 15;
}
// Disable the spin button so can't click again while wheel is spinning.
document.getElementById('spin_button').src = "<?php echo get_stylesheet_directory_uri() . 'https://d3pa45a5f8vwb1.cloudfront.net/assets/img/spin_off.png' ?>";
document.getElementById('spin_button').className = "";
// Begin the spin animation by calling startAnimation on the wheel object.
theWheel.startAnimation();
// Set to true so that power can't be changed and spin button re-enabled during
// the current animation. The user will have to reset before spinning again.
wheelSpinning = true;
}
}
// -------------------------------------------------------
// Function for reset button.
// -------------------------------------------------------
function resetWheel()
{
theWheel.stopAnimation(false); // Stop the animation, false as param so does not call callback function.
theWheel.rotationAngle = 0; // Re-set the wheel angle to 0 degrees.
theWheel.draw(); // Call draw to render changes to the wheel.
document.getElementById('pw1').className = ""; // Remove all colours from the power level indicators.
document.getElementById('pw2').className = "";
document.getElementById('pw3').className = "";
wheelSpinning = false; // Reset to false to power buttons and spin can be clicked again.
}
// -------------------------------------------------------
// Called when the spin animation has finished by the callback feature of the wheel because I specified callback in the parameters
// note the indicated segment is passed in as a parmeter as 99% of the time you will want to know this to inform the user of their prize.
// -------------------------------------------------------
function alertPrize(indicatedSegment)
{
// Do basic alert of the segment text. You would probably want to do something more interesting with this information.
alert("You have won " + indicatedSegment.text);
}
//});
</script>
<?php
}And finally, by calling the shortcode on a page, we can see that the wheel of fortune is successfully functioning:
The result would look like this:
Now, let’s make it dynamic and use our post to create different wheels!
Use the shortcode in the single wheel’s post templates
The exciting part here is that we can make the wheels as dynamic as we want or even allow our users to create their own wheels. To do that, we need to first make the wheel dynamic by modifying some part of the shortcode we created. The dynamic settings that we have right now are these:
- The number of prizes
- The prize names
We can add more and more dynamic fields, but for now, we just want these. So, I’m going to find the place that I would need to change. Here it is:
let theWheel = new Winwheel({
'numSegments' : 8, // Specify number of segments.
'outerRadius' : 212, // Set outer radius so wheel fits inside the background.
'textFontSize' : 28, // Set font size as desired.
'segments' : // Define segments including colour and text.
[
{'fillStyle' : '#eae56f', 'text' : 'Prize 1'},
{'fillStyle' : '#89f26e', 'text' : 'Prize 2'},
{'fillStyle' : '#7de6ef', 'text' : 'Prize 3'},
{'fillStyle' : '#e7706f', 'text' : 'Prize 4'},
{'fillStyle' : '#eae56f', 'text' : 'Prize 5'},
{'fillStyle' : '#89f26e', 'text' : 'Prize 6'},
{'fillStyle' : '#7de6ef', 'text' : 'Prize 7'},
{'fillStyle' : '#e7706f', 'text' : 'Prize 8'}
],
'animation' : // Specify the animation to use.
{
'type' : 'spinToStop',
'duration' : 5, // Duration in seconds.
'spins' : 8, // Number of complete spins.
'callbackFinished' : alertPrize
}
});All the settings are stored here, so it’ll be an easy move. I would just need to set the number of prizes dynamically and add the “segments” to in a for statement and add a random color for each prize.
<?php $number_of_prizes = get_post_meta( get_the_ID(), 'number-of-prizes', true ); ?>
// Create new wheel object specifying the parameters at creation time.
let theWheel = new Winwheel({
'numSegments' : <?php echo $number_of_prizes ?>, // Specify number of segments.
'outerRadius' : 212, // Set outer radius so wheel fits inside the background.
'textFontSize' : 16, // Set font size as desired.
'segments' : // Define segments including colour and text.
[
<?php
for ($i = 1; $i <= $number_of_prizes; $i++) {
?>
{'fillStyle' : '<?php echo sprintf('#%06X', mt_rand(0xF00000, 0xFFFFFF)); ?>', 'text' : '<?php echo get_post_meta( get_the_ID(), 'prize-' . $i, true ); ?>'},
<?php
}
?>
],
'animation' : // Specify the animation to use.
{
'type' : 'spinToStop',
'duration' : 5, // Duration in seconds.
'spins' : 8, // Number of complete spins.
'callbackFinished' : alertPrize
}
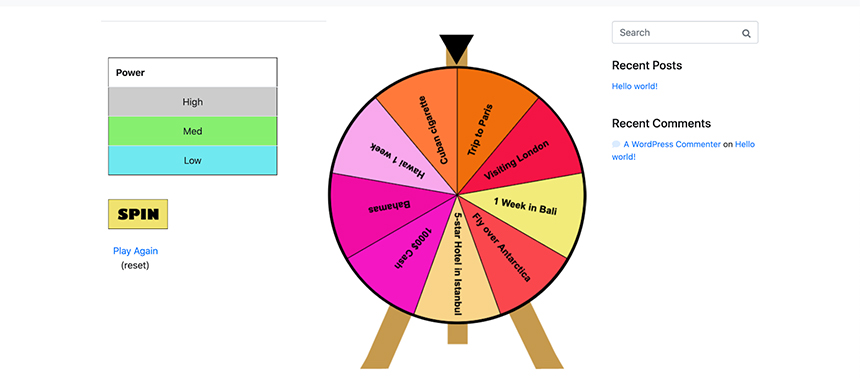
});The result looks like the following:
Now if I add 3 more prizes to this post, we can see the effect in the front end:
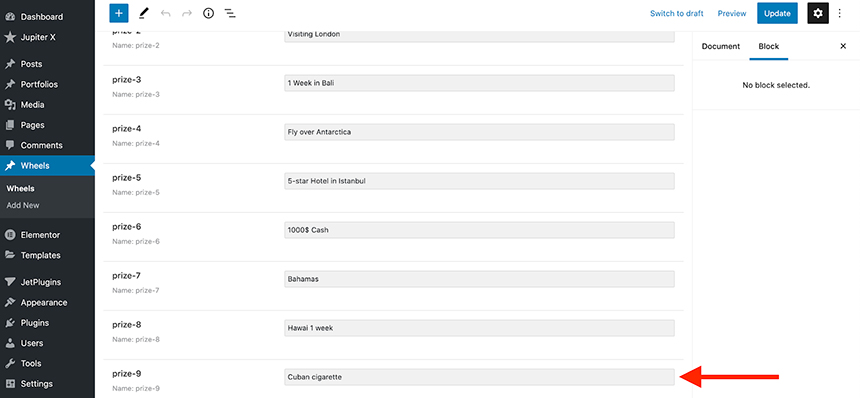
Remember to change the number-of-prizes meta field to 9 as well.
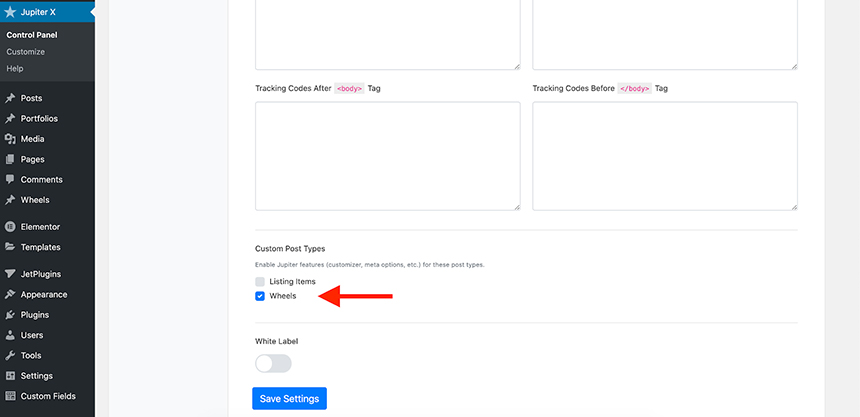
Now it’s time to use this shortcode in a post template. First I need to enable the post type option in the Jupiter X -> Control Panel -> Settings like:
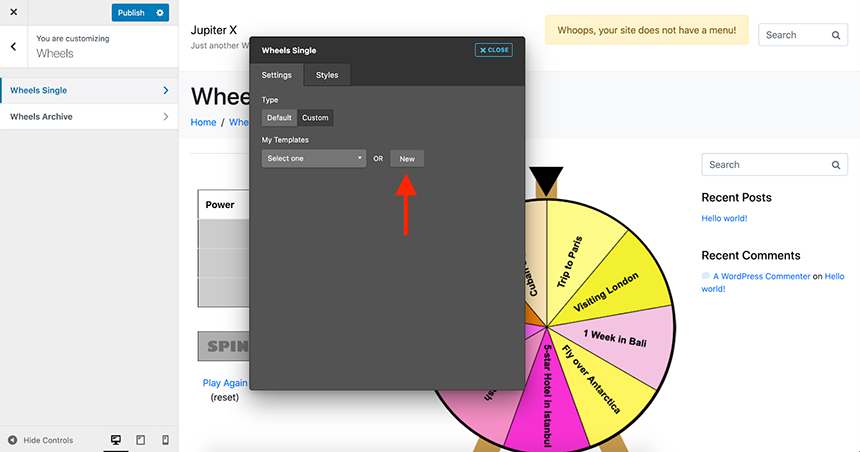
Then I can add a template in the Customizer for the wheel single posts. To do that, I’ll open Customizer and navigate to Post Types -> Wheels -> Single and add a custom template.
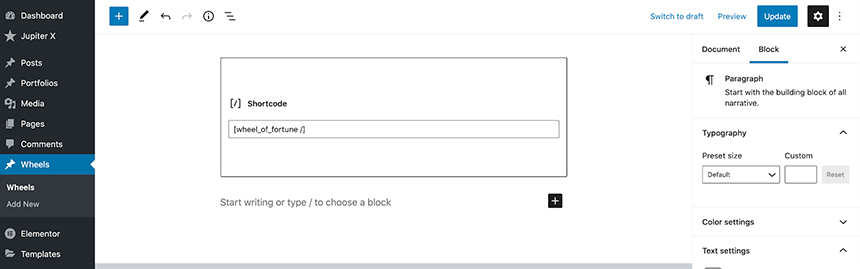
Here I will add a Shortcode element and add my shortcode inside it.
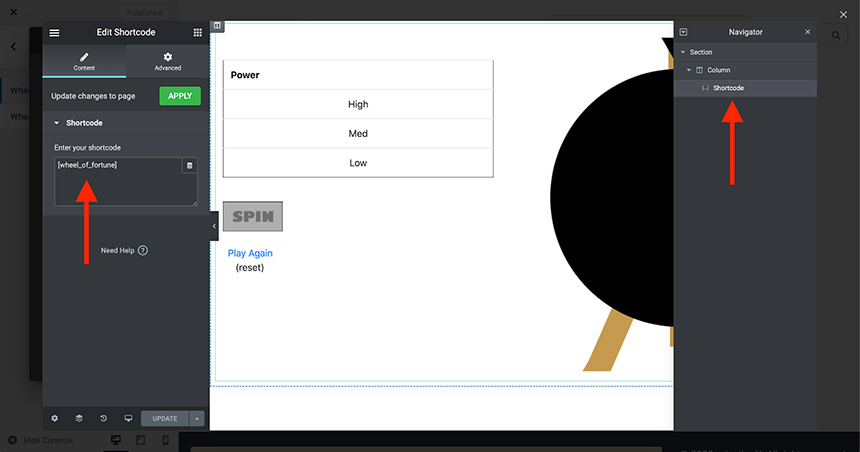
Now I’ll go ahead and save the template and refresh my page. Here’s the result:

The source code of the child theme that is being used here can be found here.
Wrapping up
Dynamic data can bring life to your website. In this article, we showed you how to easily create a gaming website with Jupiter X. Imagine using a simple game like above, and you’ll actually be able to monetize your website. You can integrate the wheels with a membership plugin, make some levels and assign people to those levels, keep their scores etc. It would be an easy way of creating a gaming and entertainment website. The features of the dynamic fields do not stop there. And we’ve already provided ways in our Artbees blog about making your own polling website using Jupiter X, building hotel and booking websites, dynamic sliders and more. If you have any suggestions or comments, please write them in the comments section below!

No comment yet, add your voice below!