One of the important things in any person’s life is his or her job. A good career provides structure and gives one’s life direction. Therefore, finding the right job is essential. Nowadays, one way to find a job is by using a job board website.
What is a job board website?
A job board (a.k.a job site, job portal, employment site) is a website or webpage that deals particularly with employment, job seekers, and resumes. It enables employers to offer job positions to potential candidates. Applicants can search job boards to find open positions and career opportunities.
There are different types of job board websites over the internet:
- General job board like Career Builder.
- Classified job board like The Guardian jobs.
- Specialist job board like Upwork.
- Employment agency like USA Jobs.
Additionally, there are job search engines. The main difference between a job board website and a job search engine is that job seekers only see job offers on one site but on the job search engine, the applicants can access job offers from several job board websites or employers’ career websites.
In this article, we’re going to create a job board in WordPress using the Jupiter X theme and WP Job Manager plugin. In case you want to use a different plugin, the following list can help you.
WP Job Manager WordPress Plugin

WP Job Manager is a simple, lightweight and shortcode-based plugin that will help you create a job board in WordPress. It allows you to create jobs, job categories, frontend job submission forms and job dashboards for users.
Features
- Add, manage and categorize job listings using the familiar WordPress UI.
- Searchable and filterable ajax-powered job listings are added to your pages via shortcodes.
- Frontend forms for guests and registered users to submit and manage job listings.
- Allow employers or recruiters to preview their listing before it goes live. The preview matches the appearance of a live job listing.
- Each listing can be tied to an email or website address so that job seekers can apply seamlessly.
- Searches also display RSS links to allow job seekers to be alerted to new jobs matching their search.
- Allow logged in employers to view, edit, mark as filled, or delete their active job listings.
- Create three default pages as Jobs, Job Dashboard, Post a Job.
Useful Shortcodes
The plugin comes with several shortcodes to show jobs and forms in various formats. You can learn more about the following shortcodes in this shortcode reference article.
- [jobs]: Shows a list of your jobs as well as filters for searching.
- [job]: Shows a single job by ID.
- [job_summary]: Shows a single job’s summary by ID.
- [submit_job_form]: Shows the frontend job submission form.
- [job_dashboard]: Shows the job dashboard used by logged in users.
Create a Job Board in WordPress with WP Job Manager Plugin
Now that we have learned about the WP Job Manager plugin, let’s create a website using this plugin and your Jupiter X theme.
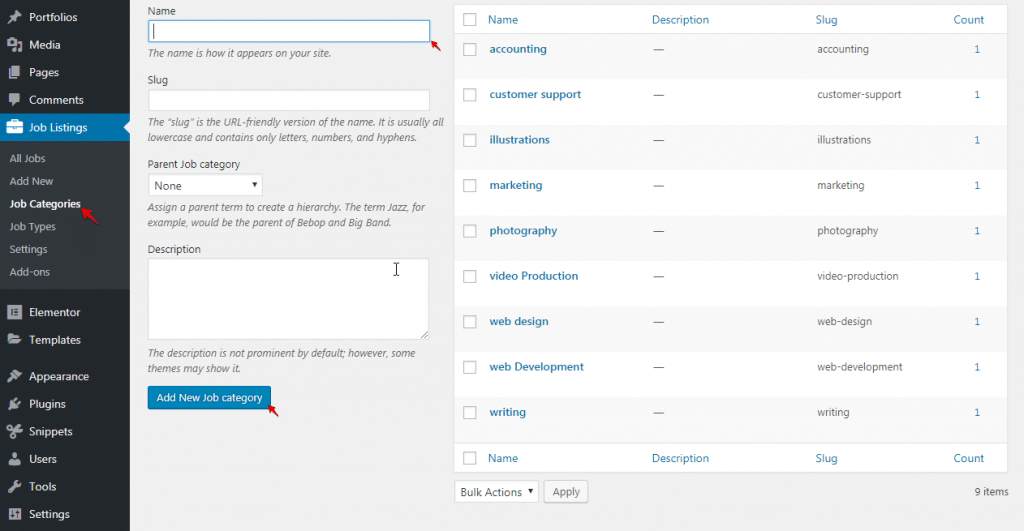
Creating Job Categories
Categories provide a clear structure to websites. It helps visitors to easily find all jobs within a specific industry or field of expertise.
For creating categories, go to Job Listing > Add Categories, then create the following categories:
Web Development, Web Design, Marketing, Accounting, Customer Support, Illustrations, Writing, Photography, Video Production.
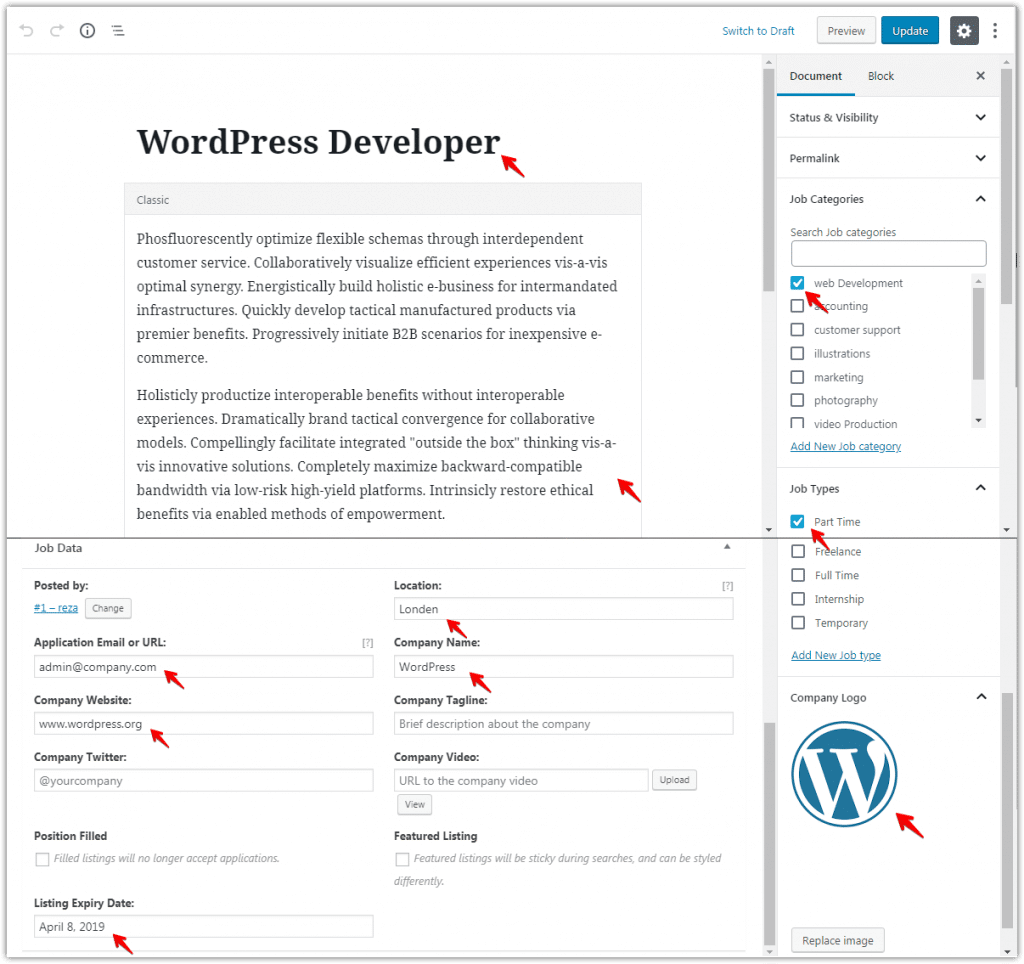
Creating Jobs
For the purpose of this article, let’s create some jobs so you can configure the plugin properly.
1. Go to Job Listing > Add New, then create some jobs and set proper values as shown below.
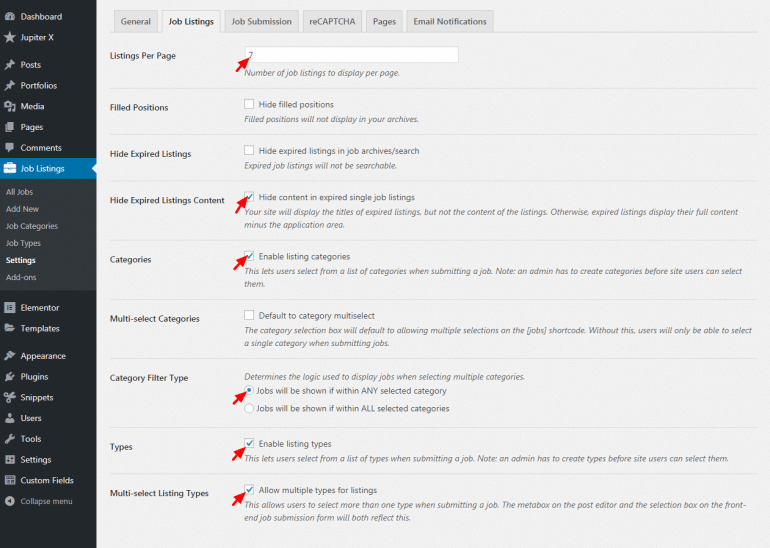
2. After creating the jobs, it’s time to configure the settings in Job Listing > Settings
3. In the Job Listing tab, set the following settings.
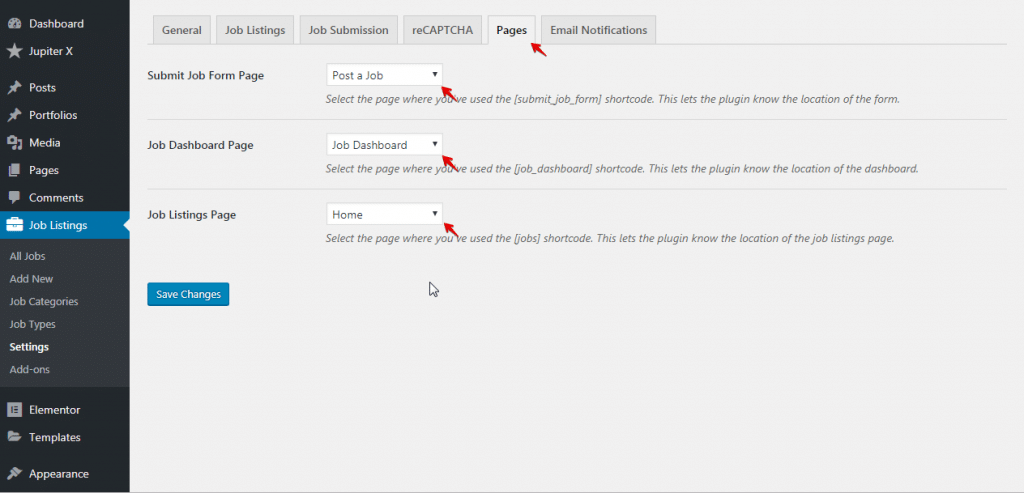
4. In the Pages tab, set the following settings:
- Submit job Form Page: Post a Job (automatically created via the plugin)
- Job Dashboard Page: Job Dashboard (automatically created via the plugin)
- Job Listing Page: Home (Will be explained in the next section)
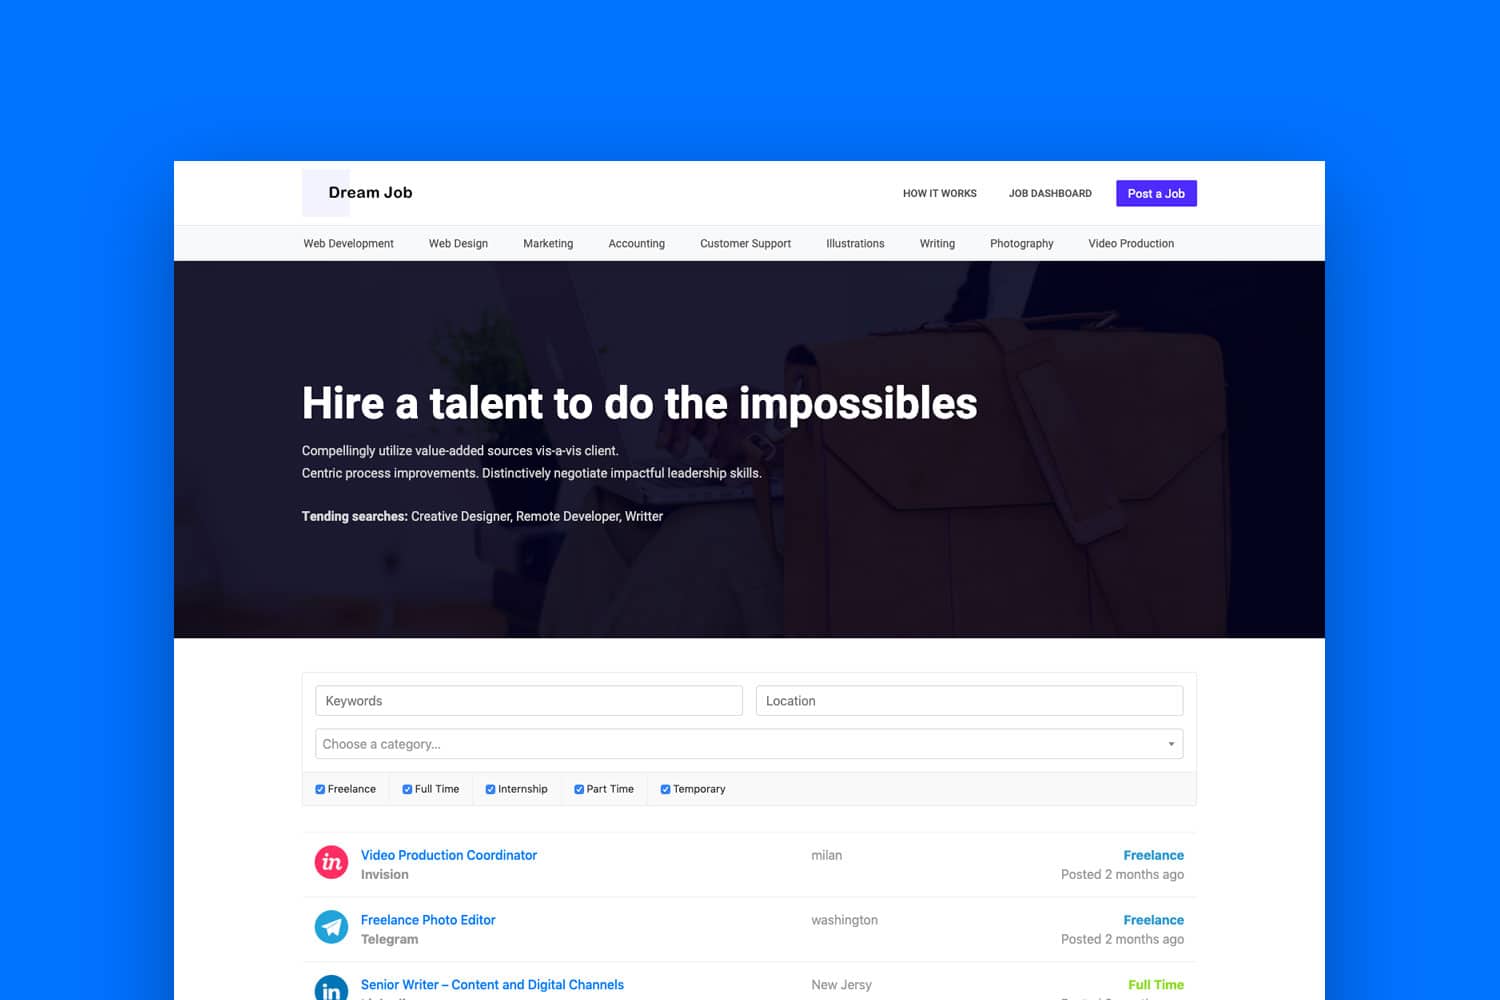
Creating a Home Page
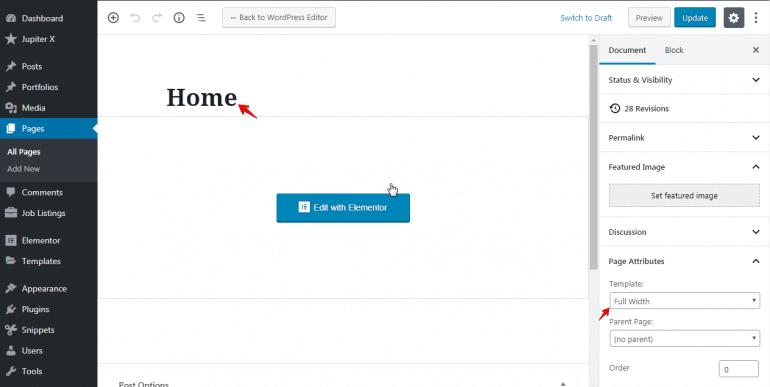
1. Create a new page from Pages > Add New. Set the following settings, then edit the page with Elementor.
- Title: Home
- Template: Full Width
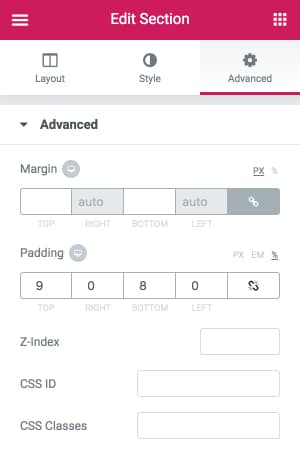
2. Add a new section. Set Padding as shown below:
3. Set the Background settings as shown below. You can download the image from Unsplash for free.
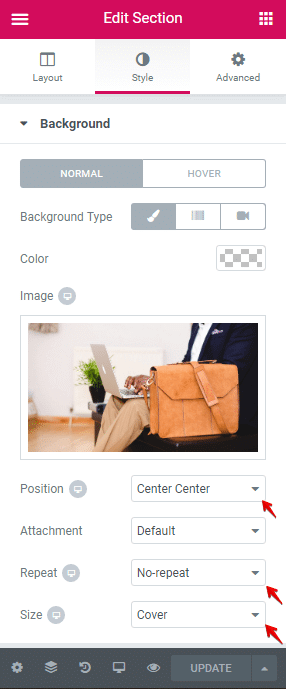
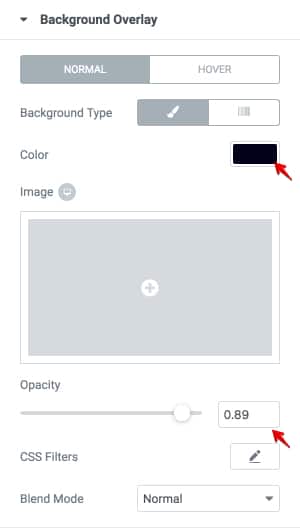
4. Set Background Overlay settings as shown below:
- Color: #000019
- Opacity: 0.89
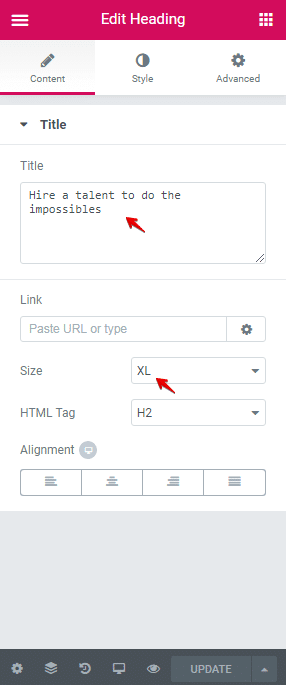
5. Add a Heading element then set the following settings:
- Title: Hire a talent to do the impossible
- Size: XL
6. Add a Text Editor element. Set line-Height to 0.8 and text to:
- Compellingly utilize value-added sources vis-a-vis client.
- Centric process improvements. Distinctively negotiate impactful leadership skills.
7. Add a Text Editor element. Set text to:
- Trending searches: Creative Designer, Remote Developer, Writer
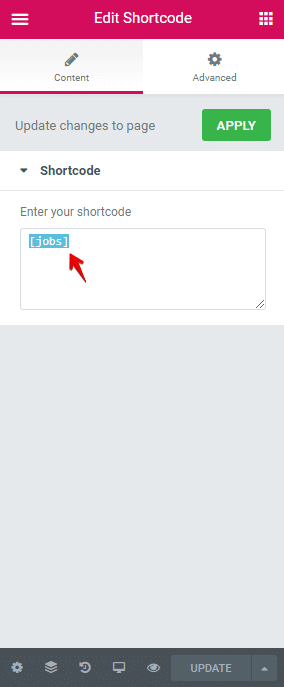
8. Add a Shortcode element then set it to [jobs].
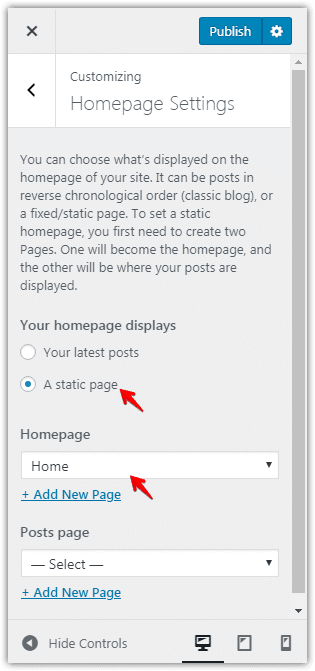
9. In the end, go to Appearance > Customize > Homepage Settings
- Set your homepage displays to A static page
- Set homepage to Home
Creating Category Pages
For each category, let’s create a specific page so users can find all jobs under that category in one page.
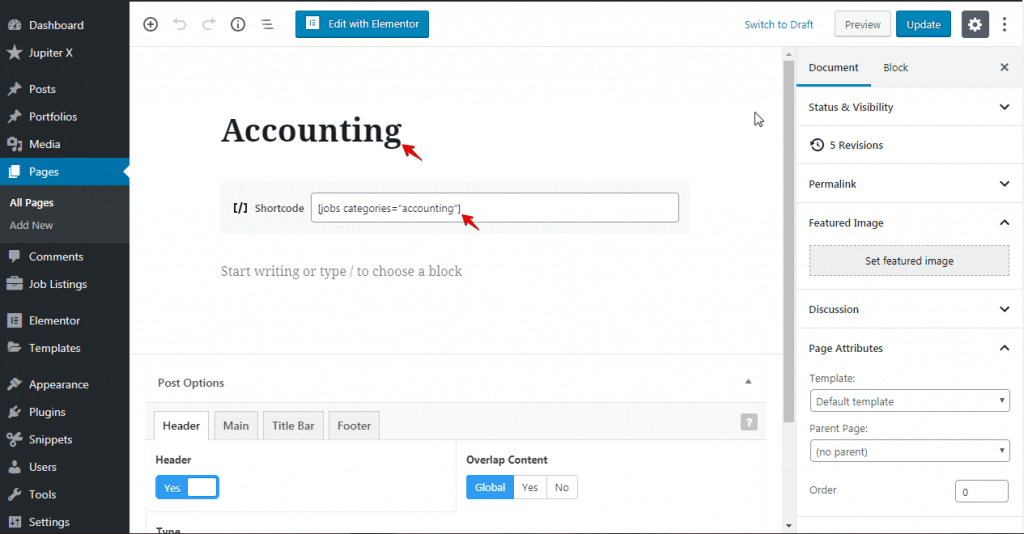
1. Create a new page. Set the Title to Accounting then add Shortcode block with [jobs categories=”accounting”] content.
2. Create the following pages similar to the previous step with the following settings.
- Set Title to Customer Support and add Shortcode block with [jobs categories=”customer-support”] content.
- Set Title to Web Development and add Shortcode block with [jobs categories=”web-development”] content.
- Set Title to Web Development and add Shortcode block with [jobs categories=”web-development”] content.
- Set Title to Web Design and add Shortcode block with [jobs categories=”web-design”] content.
- Set Title to Marketing and add Shortcode block with [jobs categories=”marketing”] content.
- Set Title to Illustrations and add Shortcode block with [jobs categories=”illustrations”] content.
- Set Title to Writing and add Shortcode block with [jobs categories=”writing”] content.
- Set Title to Photography and add Shortcode block with [jobs categories=”photography”] content.
- Set Title to Video Production and add Shortcode block with [jobs categories=”video-production”] content.
Creating Menus
When you create a job board in WordPress, you also need to create two menus as explained below.
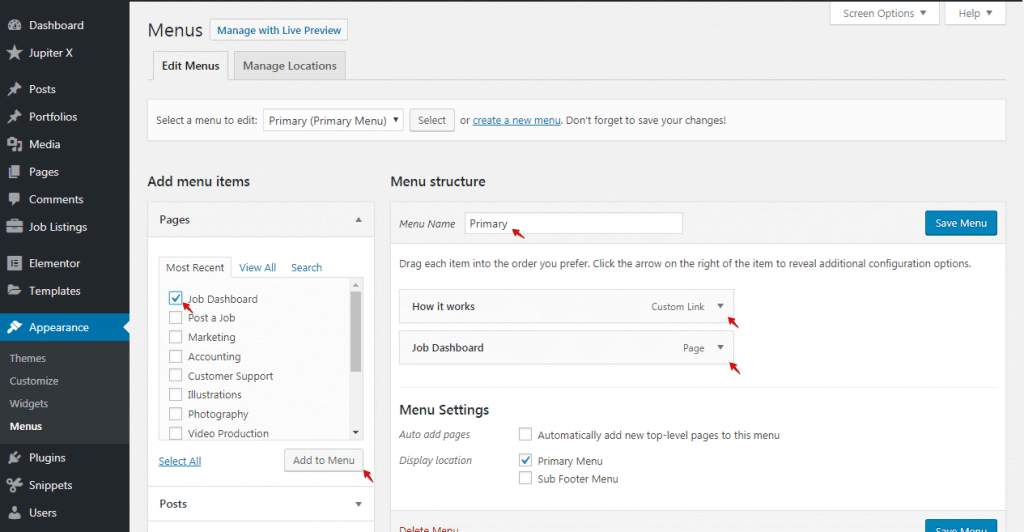
1. Go to Appearance > Menus
2. Create a new menu, then follow the below steps:
- Set Name to Primary.
- Add How It Works (page, link, …) and Job Dashboard pages to your menu.
- Save the menu.
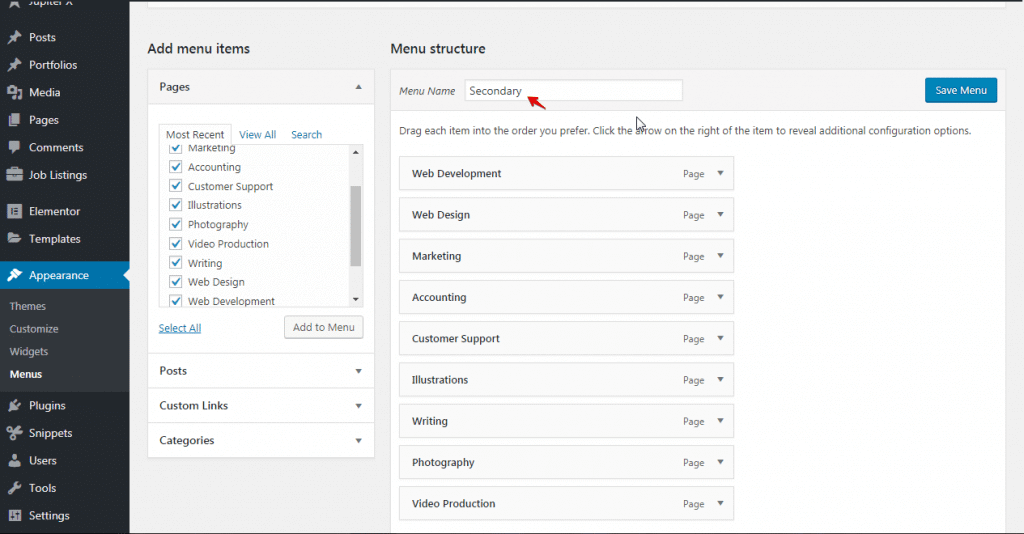
3. Create another new menu, then follow the below steps:
- Set the Name to Secondary.
- Add all the category pages you created before.
Creating a Header
In job board websites, it’s very helpful to create a header with the necessary links like categories, submit a form, etc.
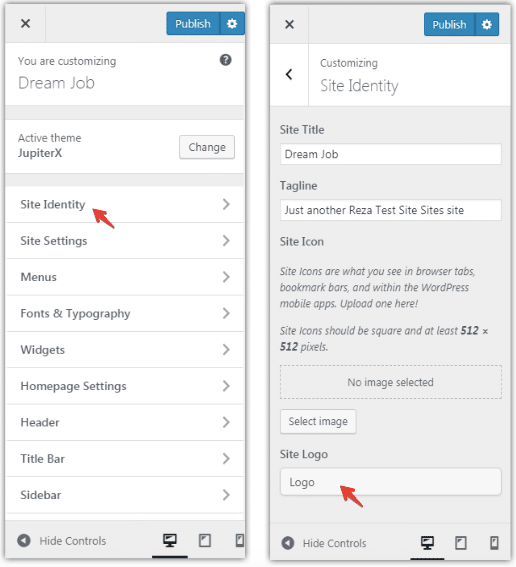
1. In the admin page, go to Appearance > Customize > Site Identity. Add your logo in Site Logo.

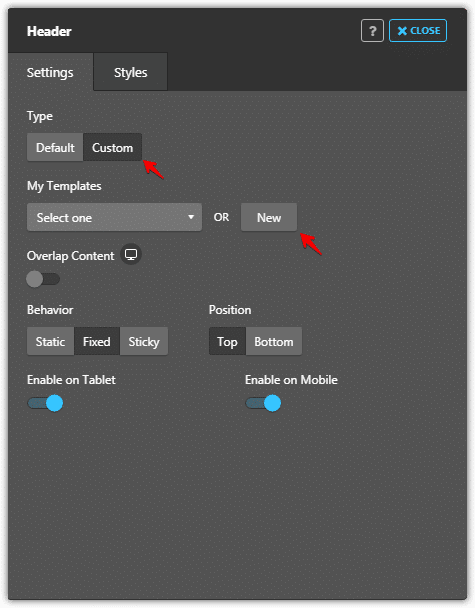
2. Go to Header. In the Settings tab, select the custom type and click on the New button.
3. In the popup, add a New Section.
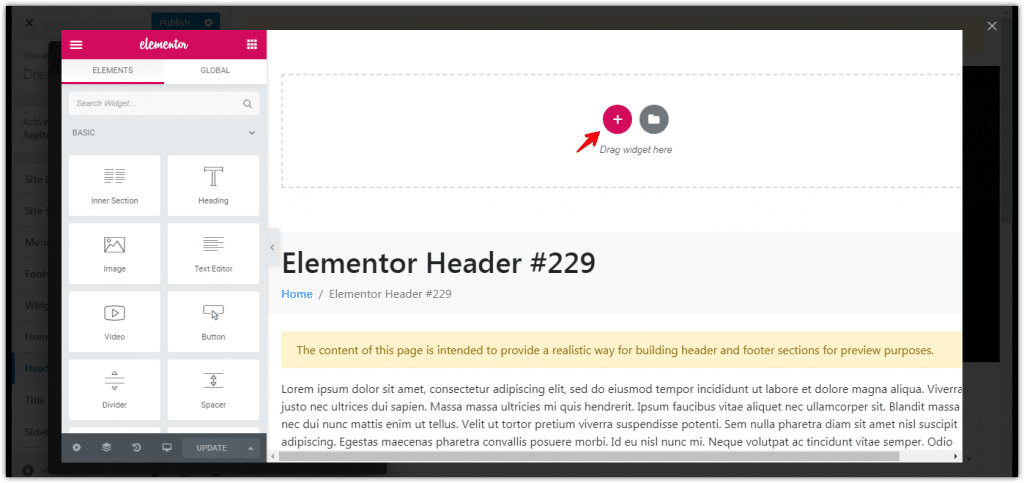
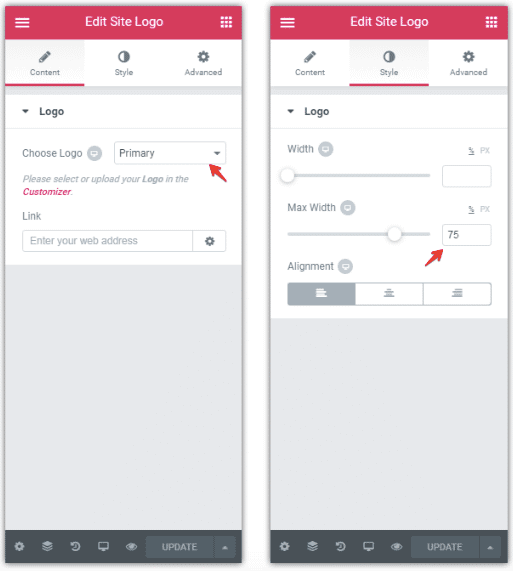
4. Add Site logo Element to section.
- On the Content tab, set Choose logo to Primary.
- On the Style tab, set Max Width to 75%.
5. Add Flex Spacer element after Site Logo in the Section.
6. Add Navigation Menu element to the section. Set the menu option to Primary.
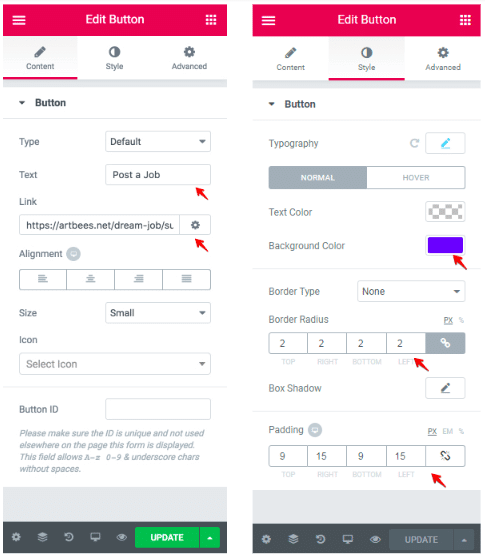
7. Add a Button element. In the Content tab:
- Set Text to Post a Job
- Set Link to Post a Job page
In the Style tab:
- Set background color to #503bff.
- Set Border Radius to 2.
- Set Padding Top/bottom to 9 and Padding Right/Left to 15.
8. Add a new Section. In the Style tab, set Background Color to #f8f9fa.
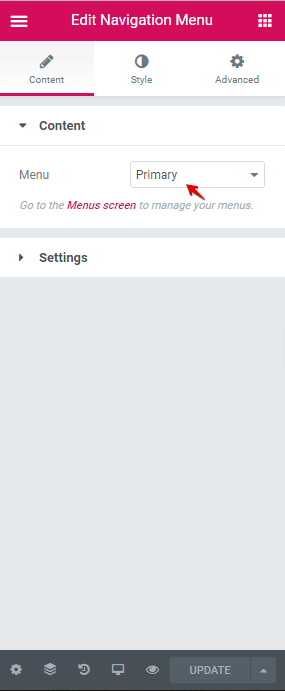
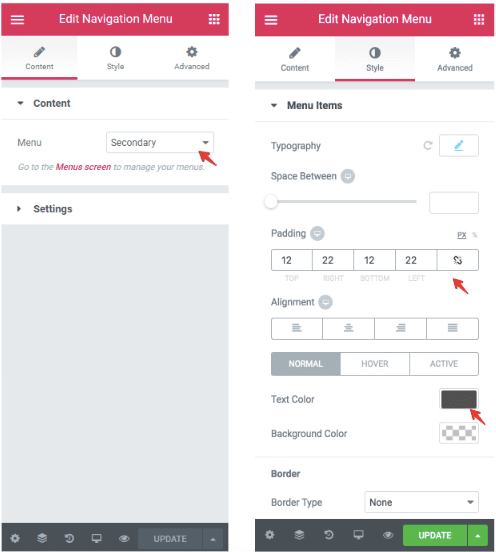
9. Add a Navigation Menu element in the section.
- In the Content tab, set Menu option to Secondary.
- In the Style tab, set the following settings.
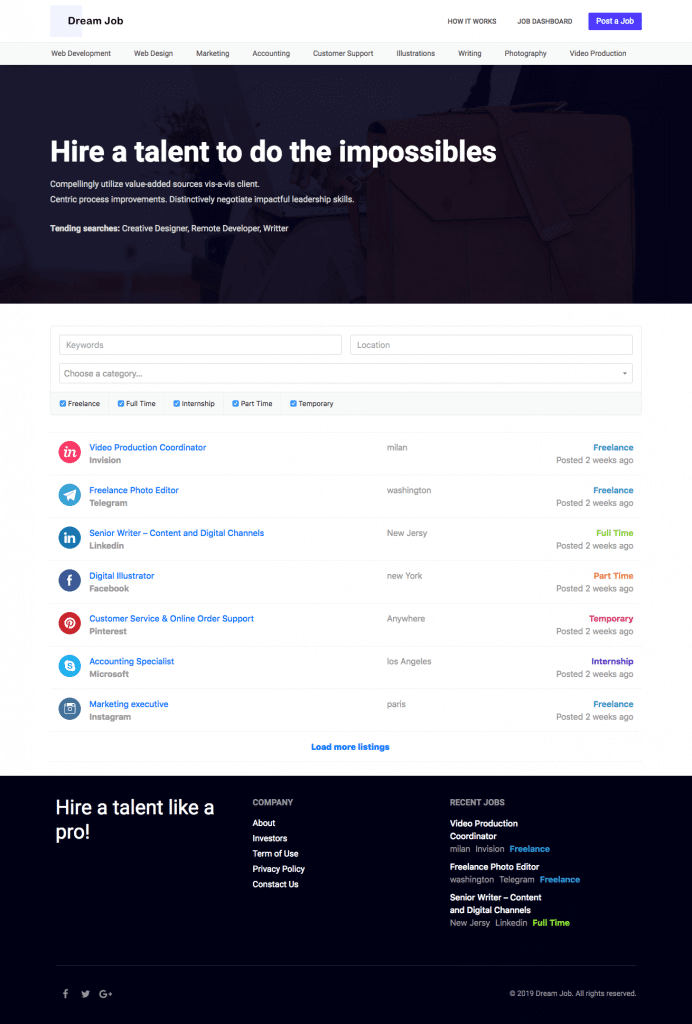
Creating Footer
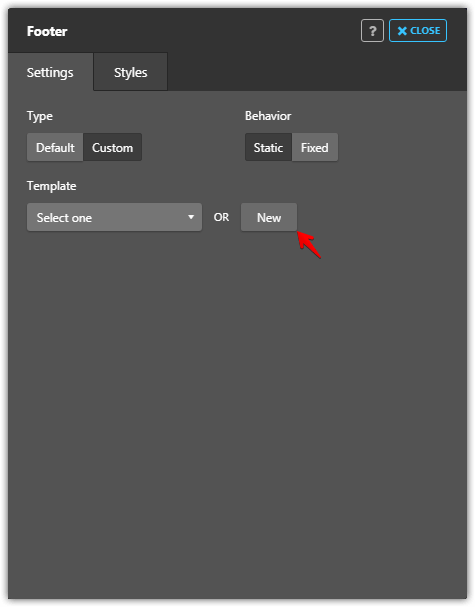
1. In the admin page, go to Appearance > Customize > Footer.
2. In the Settings tab, choose Custom type and click on the New button.
3. Click on the Add Template button.

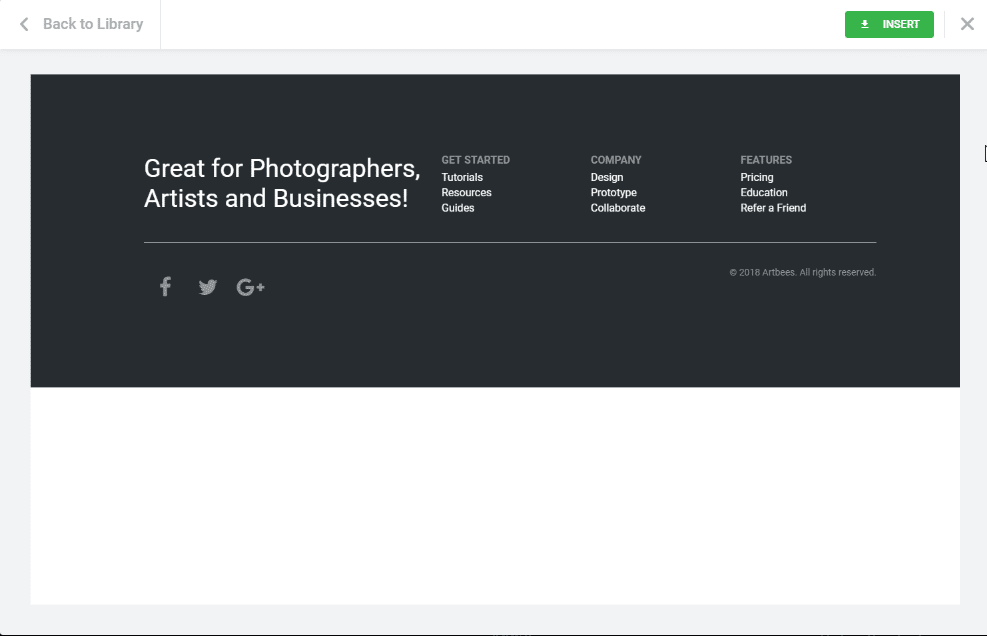
4. Choose the following block from the list of ready-made templates, then click on the Insert button.
5. Edit the Section, set Background Color to #000116.
6. Change the Heading to Hire a talent like a pro!
7. Delete the Get Started and Features columns.
8. Replace Company column items with About, Investors, Terms of Use, Privacy Policy, Contact us.
9. Add a new column then add the Recent Jobs widget. On the content tab, set Number of listings to show up to 3 posts.
Improve Default Styling
The WP Job Manager plugin has some basic styling to help you effectively create a job board in WordPress. You can improve the styling by adding the following CSS in Appearance > Customize > Additional CSS.
/* Job board filter */
.job_filters {
 margin: 2rem 0 2rem;
 border: 1px solid #e5e7e8;
 background-color: transparent;
border-radius: 4px;
overflow: hidden;
}

.job_filters input[type=text],
.job-manager-form input[type=text] {
 display: block;
 width: 100%;
 padding: .375rem .75rem;
 font-size: 1rem;
 line-height: 1.5;
 color: #495057;
 background-color: #fff;
 background-clip: padding-box;
 border: 1px solid #ced4da;
 border-radius: 4px;
}

.job_filters .select2-container--default .select2-selection--single {
 height: 38px;
border: 1px solid #ced4da;
}

.job_filters .select2-container--default .select2-selection--single .select2-selection__rendered {
 line-height: 36px;
}

.job_filters .select2-container--default .select2-selection--single .select2-selection__arrow {
 height: 36px;
right: 5px;
}

.job_filters .search_location {
 margin-bottom: .5rem;
}

.job_filters .job_types li {
padding: .7rem 1rem;
}

.job_filters .job_types li label {
margin-bottom: 0;
}

/* Job single */
.single-job_listing .jupiterx-post-author-box,
.single-job_listing .jupiterx-post-image{
display: none;
}

/* Job recent widget */
.jupiterx-widget ul.job_listings {
border-width: 0;
}

.jupiterx-widget ul.job_listings li.job_listing {
border-width: 0;
margin-bottom: 10px;
}

.jupiterx-widget ul.job_listings li.job_listing:hover a {
background-color: transparent;
}

.jupiterx-widget ul.job_listings li.job_listing a {
color: #fff;
padding: 0;
font-size: 1rem;
}

.jupiterx-widget ul.job_listings li.job_listing a div.position {
padding: 0;
float: none;
}

.jupiterx-widget ul.job_listings li.job_listing a ul.meta {
padding: 0;
float: none;
text-align: left;
display: flex;
width: 100%;
}

.jupiterx-widget ul.job_listings li.job_listing a ul.meta li {
margin-right: 10px;
}
Conclusion
In this article, we showed you how to create a job board in WordPress with the WP Job Manager plugin and your Jupiter X theme.
There are some other plugins in the WordPress Community that you can try. Feel free to share your favorite one with us in the comments section below!

No comment yet, add your voice below!