Elementor is an extremely powerful page builder. Among all its features, the ability to manage and create a landing page with custom blocks is quite handy. It allows you to build different parts of a website, then combine them into a page.
What is a custom block?
A custom block is similar to a piece of a puzzle or a brick of the wall. A landing page or complete website has several sections like a header, footer, hero, slider, testimonial, form, and so on. With the custom block feature, you can create each section separately and use each in any site or web page.
What are the benefits of a custom block?
- Ability to use readymade block templates.
- Creating a custom block once, then using it on several web pages or websites.
- Ability to export/import the custom blocks.
- Increasing the speed of creating a web page.
How to Create Custom Blocks
By using Elementor with the Jupiter X theme, you’ll be able to create different types of custom blocks: Page, Section, Header, Footer. With these types, you can create various custom blocks for any web page.
To create a custom block, follow the steps below:
1. From the left sidebar of the admin page, click on Elementor > Templates > Add New

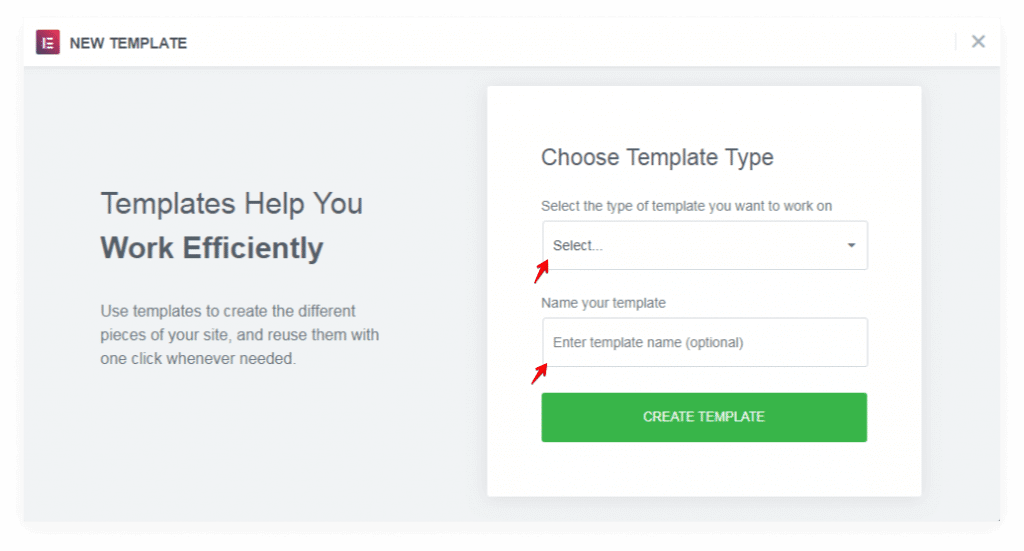
2. Select the type of custom block, then enter a template name and click on the Create Template button.
3. In Elementor editor, add a new Section then add a widget.

4. There are two methods to save the custom block.
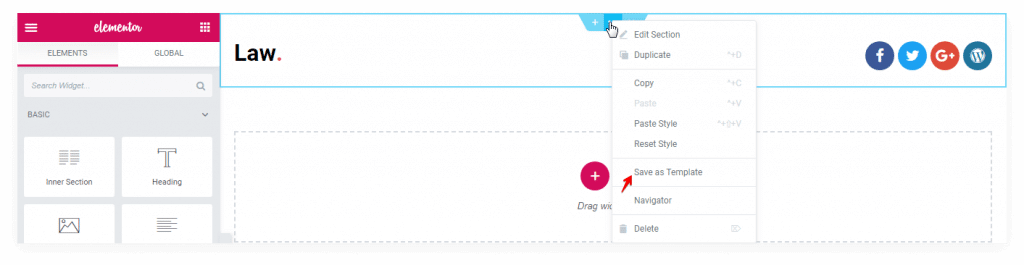
1). Right-click on the section button, then click on Save as Template.
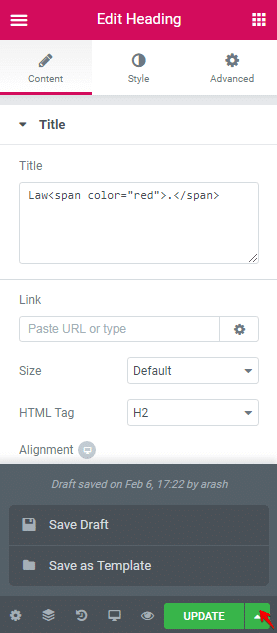
2). Right-click on the Save Options button then click on Save as Template.
How to Export/Import Custom Blocks
Another valuable feature in Elementor, particularly when it comes to creating a landing page using custom blocks, is exporting/importing. With this feature, you can easily create custom blocks and export them. Also, you can import custom blocks that have been created by other people.
Exporting a custom block
There are two methods to export a custom block.
1. Go to Elementor > Templates > Saved Templates then click on the Export Template button.
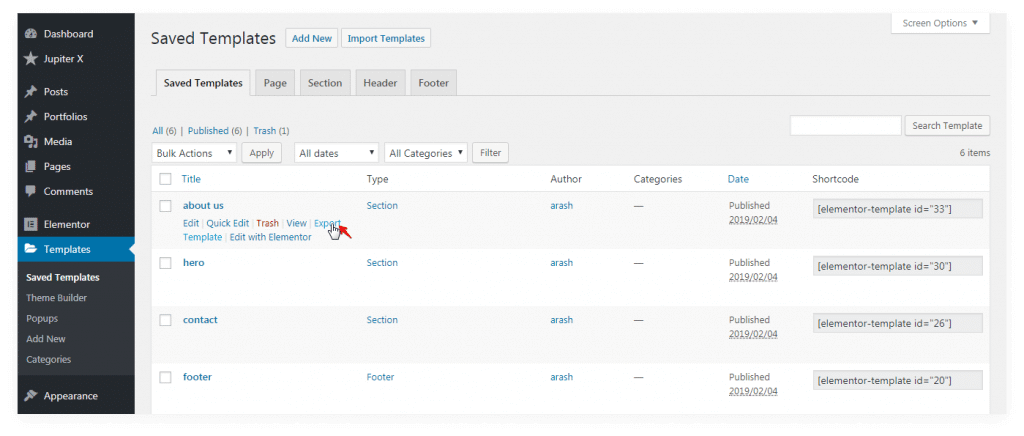
2. In the Elementor editor, click on the Add Template button then click on the Export button in the Library popup.

Importing a custom block
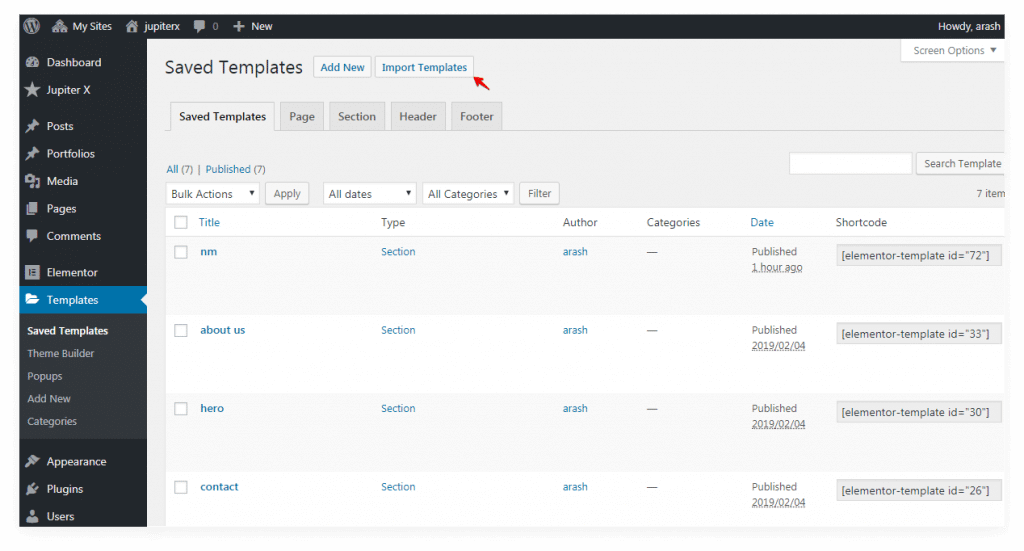
To import a custom block from your computer, click on Elementor > Template on the left sidebar of the admin page. Then in a new window, click on Import Templates and choose your file to upload it.
How to Create a Landing Page Using Custom Blocks
A landing page (a.k.a static page, lander, lead capture page) is a standalone page that shows all the important content of any website on a single web page.
Creating a Header Block
The Header block is one of the moment sections on each website. In this case, it contains brand and social icons.

- Create a Template and set the type to Header.
- Add a new Section with two columns.
- Add a Heading element then set the following settings.
- On the Content tab, set Title to Law <span style”color: rgb(248, 88, 88)”>.</span>
- On the Style tab, set color to #000000
- Add a Social Icon element the set following settings.
- On the Content tab, create 4 icons as: Facebook, Twitter, Google+, WordPress
- Also set Shape to circle and Alignment to Right.
Creating a Hero Block
The Hero block is one of the most important elements when you create a landing page using custom blocks as it represents the leading message and the product promoted by your website. In this case, it contains two headings and a call-to-action button.

- Create a Template and set the type of it to Section.
- Add a new Section then set the following settings.
- On the Layout tab, set Height to Fit to Screen and Column Position to Middle
- On the Style tab, set Background Color to #565656
- Add a Heading element then set the following settings.
- On the Content tab, set Title to Expert Legal Solution, Alignment to Center
- On the Style tab, set Color to #ffffff
- Right-click on the first Heading element, click on Duplicate, and then set the following settings.
- On the Content tab, set Title to Defend Your Constitutional Right with Legal Help
- Duplicate the previous heading then set Title to Business Law
- Add Button then set following settings.
- On the Content tab, set Text to Make An Appointment, Alignment to Center
- On the Style tab, set Background color to #f85858, Border Radius to 28px
- On the Style tab > Typography set Size to 18px, Weight to 300, Letter Spacing to 2.1
- On the Advanced tab, set margin-top to 5%
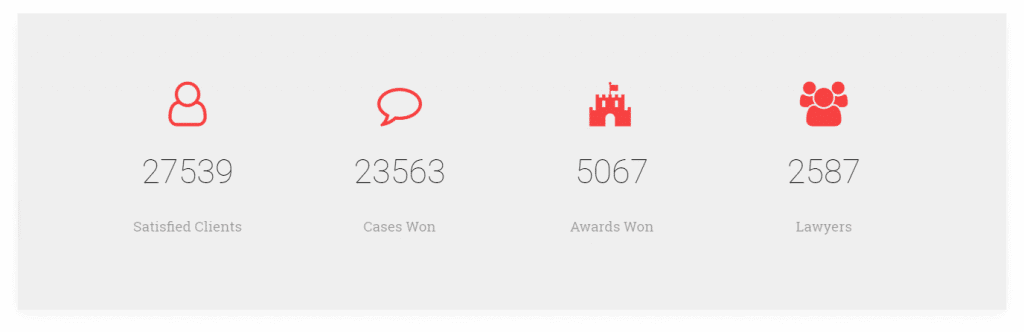
Creating a Stats Block
Stats block is a section that allows you to input information and the statistics of your operations, followers, subscribers, delivered projects, among other data points. Typically, a web designer uses a counter, progress bar, and chart.
- Create a Template and set the type of it to Section.
- Add a new Section with one column then set the following settings.
- On the Layout tab, set the Height setting to Min Height equal to 400.
- On the Style tab, set the Background color to #efefef
- Add an Icon element then set the following settings.
- On the Content tab, set Icon setting to user-o
- On the Style tab, set Color to #f74242, Size to 60, and Alignment to Center
- On the Advanced tab, set margin-top to 15px
- Add a Counter element then set the following settings.
- On the Content tab, set Starting Number to 0, Ending Number to 27539, Animation Duration to 2000, Title to Satisfied Clients
- On the Style tab > Number section, set the Text color to #000000, in Typography set: Size to 45, weight to 200, Line-Height to 1.6 EM
- On the Style tab > Title section, set the Text color to rgb(0,0,0,0.36), in Typography set Line-Height to 4 EM
- Duplicate the first column three times, then set different icons and titles as explained before.
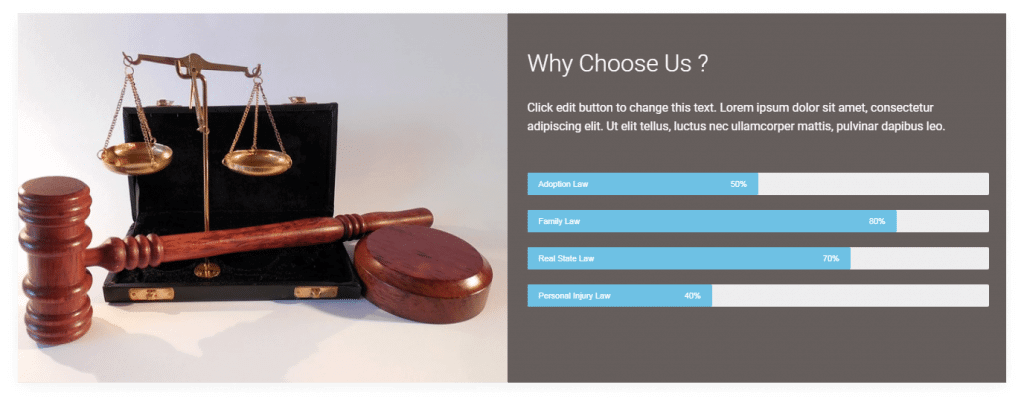
Creating an About Us Block
In web design, the aim of the About Us section is to introduce your team, experience, expertise, operations, services, and to briefly answer questions like: “who are we?” and “what do we do?”.
- Create a Template and set the type of it to Section.
- Add a new Section with two columns then set the following settings.
- On the Layout tab, set Content Width to Full Width
- Edit the left Column then set the following settings.
- On the Style tab, set Background Image to this image. Since you can’t see the background image, you need to add an element like Spacer element to the left column.
- Edit the right Column then set the following settings.
- On the Style tab, set the Background color to #665e5c
- On the Advanced tab, set Padding top to 27 and Padding bottom to 24
- Add an Inner Section element to the right column.
- On the Layout tab, set Minimum Height to 450px.
- Add a Heading element then set the following setting.
- On the Content tab, set Title to Why Choose Us?
- On the Style tab > Typography, set the weight to 300
- On the Advanced tab, set margin-top to 25
- Add a Text Editor element then set the following setting.
- On the Style tab > Typography, set Line-Height to 1.6EM
- On the Advanced tab, set margin-top to 5
- Add a Progress Bar element then set the following setting.
- On the Content tab, remove Title, set Inner setting to Adoption Law, Percentage to 50
- On the Advanced tab, set margin-top to 50
- Duplicate the previous Progress Bar then set the different settings as explained above.
Creating a Contact Us Block
The Contact Us section allows your visitors to view your business contact info. It’s also quite common to add a contact form to this section for easier communication.

- Create a Template and set the type of it to Section.
- Add a new Section then set the following settings.
- On the Layout tab, set Minimum Height to 500
- Add a Heading element then set the following settings.
- On the Content tab, set Title to Contact Us, Alignment to Center
- On the Style tab, set color to rgb(0,0,0,0.84), in Typography, set size to 47px
- On the Advanced tab, set margin-top to 95px, margin-bottom 100px.
- Add an Inner Section element with two columns.
- In the left Column, add an Icon list element then set the following settings.
- On the Content tab, create 4 items then set proper settings like Text to 198 West 21th Street, Suite 721 New York NY 10016, Icon to location-narrow. Repeat the same steps for other items with different settings.
- On the Style tab > List, set Space between to 25, Divider to On, Style to solid, weight to 1
- On the Style tab > Icon, set Color to #dd290d, size to 14
- On the Style tab > Text, set Color to #9b2f14
- In right Column, add a Form element then set the following settings.
- On the Content tab > Form Fields, create 3 fields then set the settings like Type to Text, Label to Name, Placeholder to Name, Column-width to 100%. Repeat the same steps for other items with different settings.
- On the Content tab > Submit Button, set Text to Send, Icon to Send
- On the Style tab > General, set column-spacing to 7, Row-spacing to 7
- On the Style tab > Button, set Text color to #ededed, background color to #e8241e
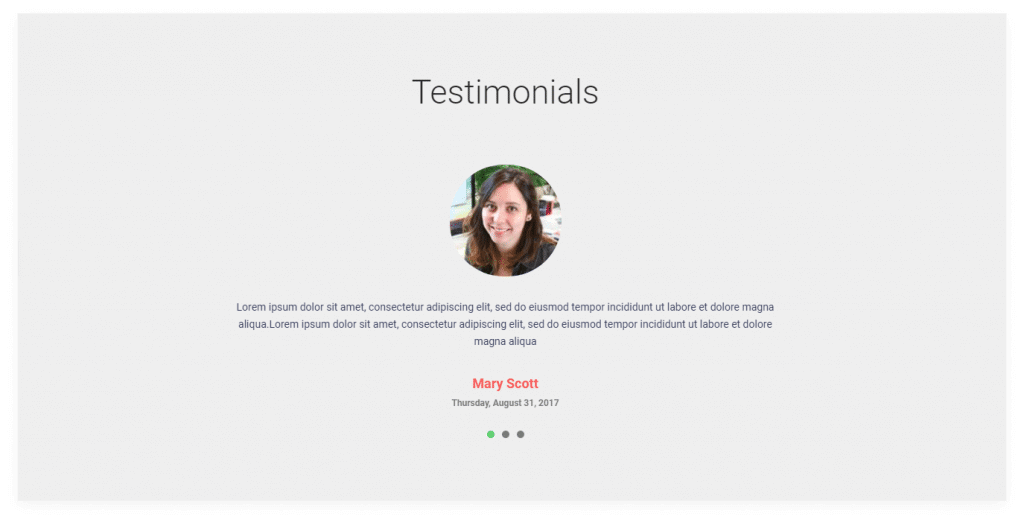
Creating a Testimonials Block
The Testimonials Section showcases user feedback about your products.
- Create a Template and set the type of it to Section.
- Add a new Section then set the following settings.
- On the Layout tab, set Height to Fit to screen
- On the Style tab, set Background Color to #efefef
- Add a Heading element then set the following settings.
- On the Content tab, set Title to Testimonials, Alignment to Center.
- On the Style tab, set Color to rgb(0,0,0,0.84),
- On the Style tab > Typography, set Size to 45px, Weight to 300
- On the Advanced tab, set margin-bottom to 75px
- Add a Testimonials element then set the following settings.
- On the Content tab > Settings, set Slides to show to 1, Effect to slide, Animation speed to 5000, Show Dot Navigation to yes
- On the Content tab > Items, add 3 items and set favorite data to Image, Comment, Name, Date.
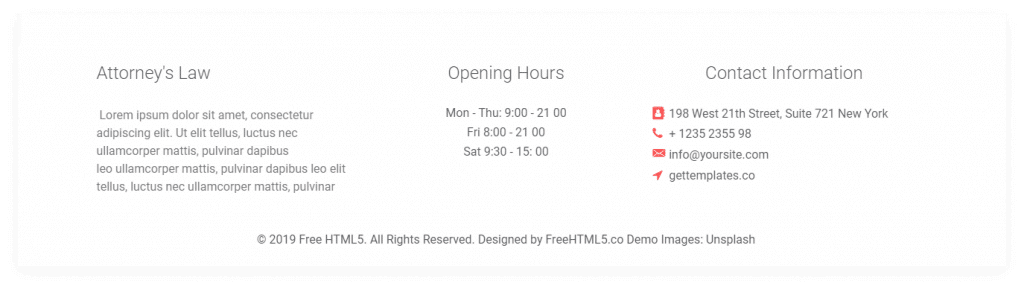
Creating a Footer Block
The Footer Section normally contains small widgets that provide information about the website. It may also contain other widgets for additional information.
- Create a Template and set the type of it to Footer.
- Add a new Section with one column then set the following settings.
- On the Style tab, set Background Color to #ffffff
- On the Advanced tab, set Padding-top to 40, Padding-bottom to 20
- Add an Inner section element with 3 columns.
- Add a Heading element for the first column then set the following settings.
- On the Content tab, set Title to Attorney’s Law, Alignment to left
- On the Style tab, set color to #515151, in Typography, set the size to 24px, weight to 300
- On the Advanced tab, set margin-top to 10px, margin-bottom 33px
- Add a Text Editor element in the left column then set your favorite text.
- Duplicate the Heading element in the first column and add it to the second column and set Title to Opening Hours and Alignment to center.
- Add an Icon List element then set the following settings.
- On the Content tab, create 3 items then set settings like Text to Mon – Thu: 9:00 – 21 00. Repeat the same steps for other items with different settings.
- On the style tab, set Space Between to 8, Alignment to center
- Duplicate the Heading element in the first column, add it to the third column, and set Title to Contact Information and Alignment to center.
- Add an Icon List element then set the following settings.
- On the Content tab, create 3 items, then set the settings like Text to 198 West 21th Street, Suite 721 New York, Icon to Address-Book. Repeat the same steps for the other items with different settings.
- Add a Heading element then set the following settings.
- On the Content tab, set Title to © 2019 Free HTML5. All Rights Reserved. Designed by FreeHTML5.co Demo Images: Unsplash, Alignment to Left.
- On the Style tab, set Color to #545454, in Typography, set Size to 16px, Weight to 400
Combining all Blocks
After creating the necessary blocks, let’s combine them to create the final page.
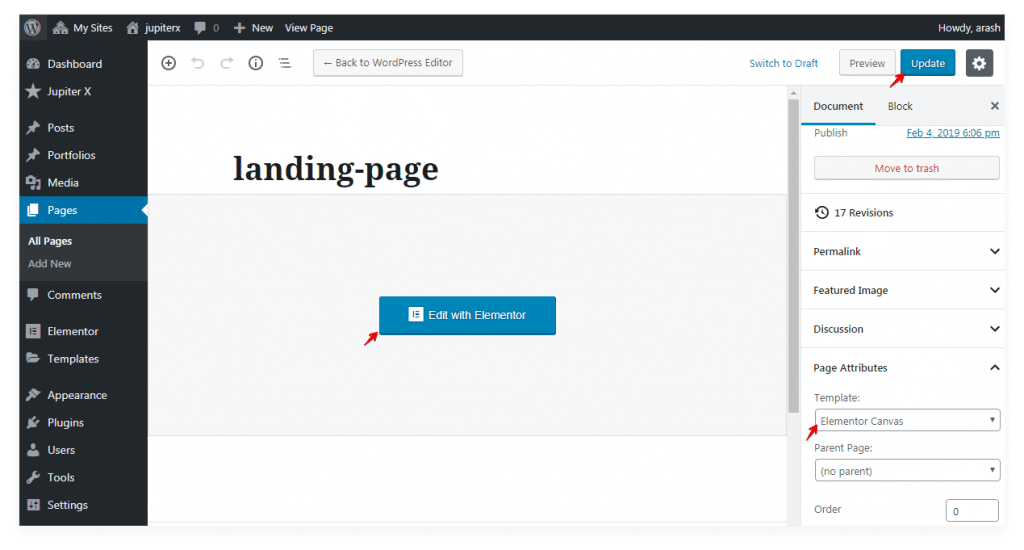
1. Create a new Page from the left sidebar of the admin page.
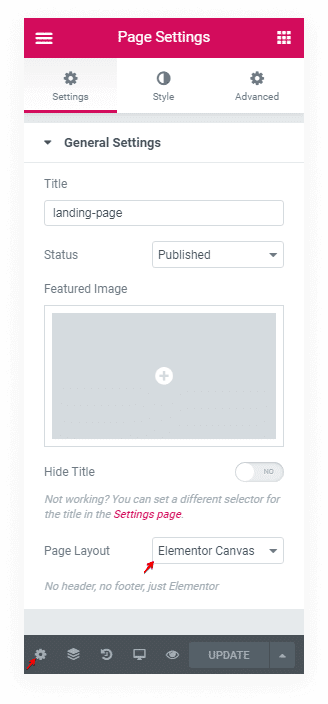
2. In the new page, set the Template to Elementor Canvas from Page Attributes. Update the page and click on the Edit with Elementor button.
3. In the Elementor editor, click on the Add Template button.

4. In the Library popup, click on the My Templates tab. In this tab, you can see your custom blocks (imported or created). Finally, click on insert.
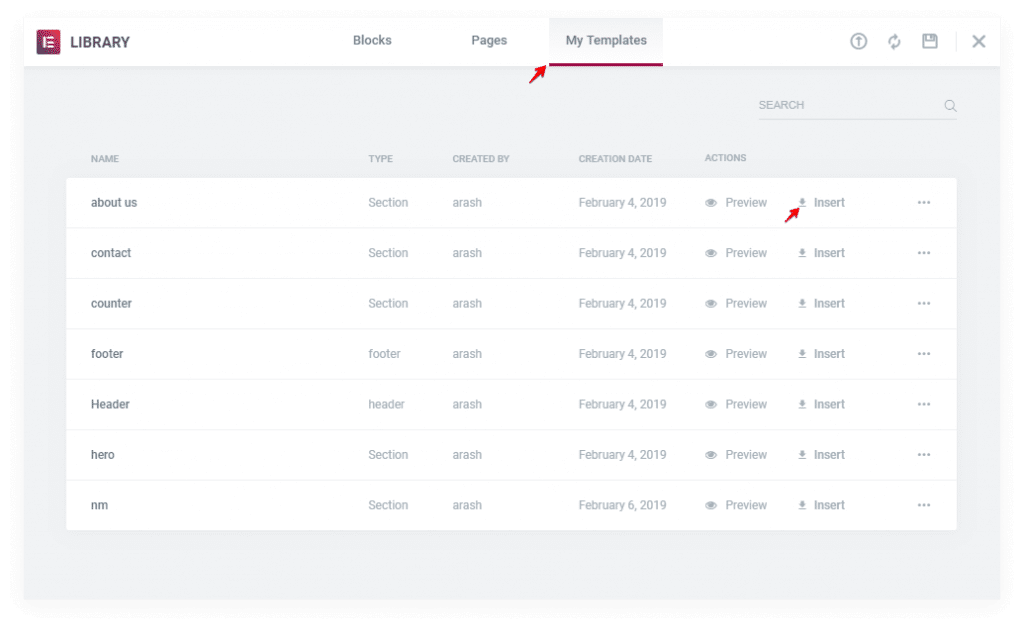
5. Add the templates in the following order: Header, Hero, Status, About Us, Contact Us, Testimonials, Footer.
Note: After adding each custom block (template), the layout of the page may reset. To assign the correct layout, click on the Settings button and choose the proper layout.
Conclusion
In this article, we showed you how to create a landing page with custom blocks in Jupiter X. We further explained the process of building custom blocks from scratch. But don’t worry – if you need readymade custom blocks, you can check out Jupiter X readymade blocks.

No comment yet, add your voice below!