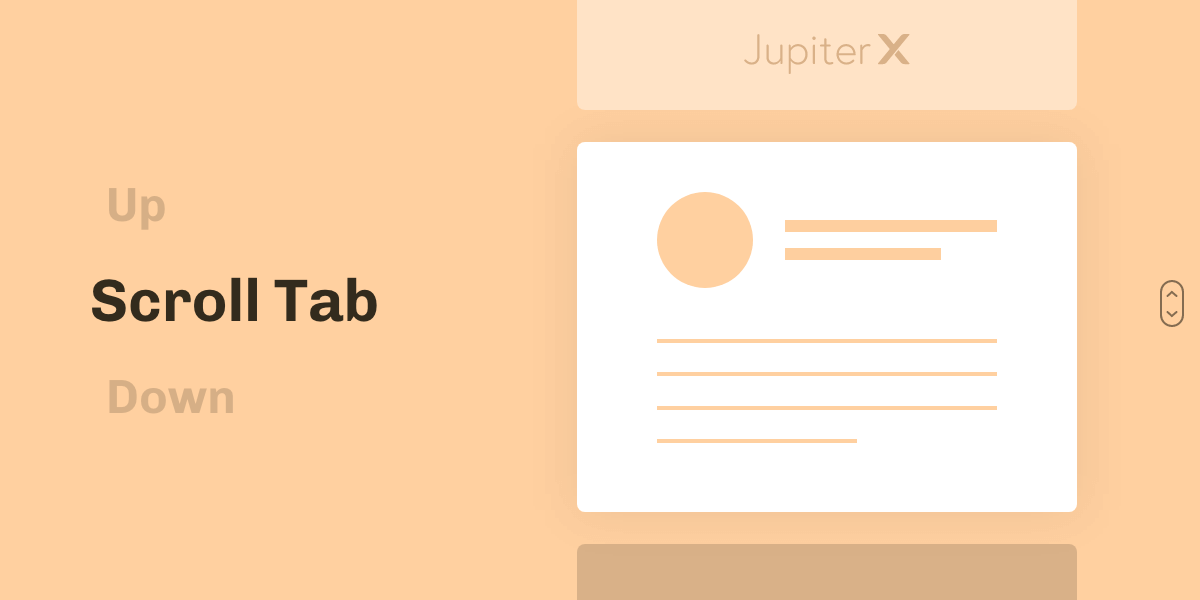
One way to provide visitors to your website with a seamless experience is through creating a scrollable parallax tab similar to the WebFlow.io homepage. Creating a scrollable parallax tab will allow users to access much of your site’s content as soon as they land on your homepage.
Many of our users asked about how to go about building a scrollable tab, and we’re here to answer! And what’s even better is that the Jupiter X theme has endless possibilities that can help you create a similar tab (as seen below) by using a simple trick. If you’re also curious about how you can build this amazing tab using Jupiter X, read this article to the end.

What we need to create a scrollable tab:
- Jupiter X Pro theme and its Elementor page builder
- Jet Tricks from the Jupiter X bundled plugins
- Raven, an exclusive Artbees plugin to extend the functionality of Elementor
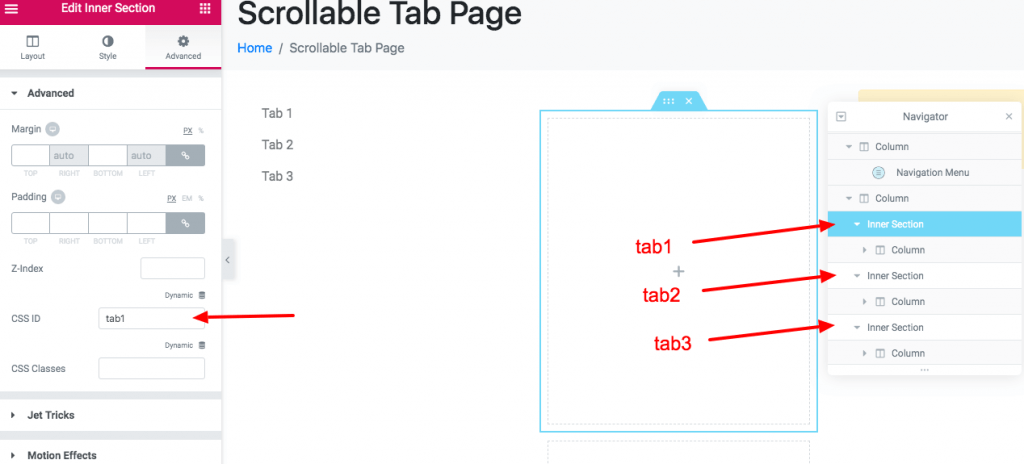
First of all, allow me to briefly explain the whole process. We won’t use any tab elements to represent this. Instead, we’ll use the Raven Navigation Menu element and anchor links (#tab1, #tab2 …) as the tab titles. Then, we’ll use multiple sections that have the same ID as the anchor links (so when you click on the menu items, scroll to those sections).
And in the end, we’ll add the Sticky effect to the column container of the menu navigation element using the Jet Tricks plugin. Then, we’ll proceed to write a custom CSS snippet to add a transition to the menu items and make them bigger when they are active. Before starting, make sure you’ve already activated the above plugins from Jupiter X -> Control Panel -> plugins.
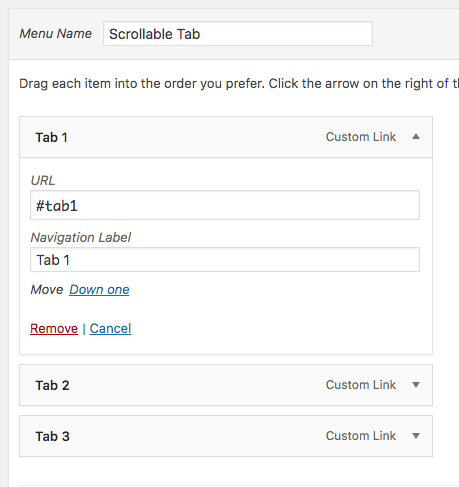
So, let’s start by building our menus. Navigate to Appearance -> Menus and create a new menu. Then add your Custom Link items. Remember to use the anchor links like #tab1, #tab2 … as the menu item link.
We are now done with this part of the process. Let’s create a page, and do the rest. From the Pages -> Add New, create a new page and start editing with Elementor.

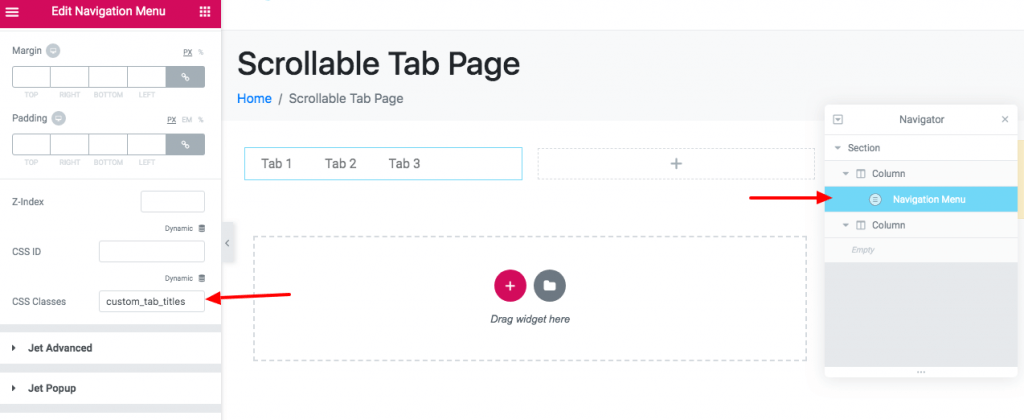
In Elementor, drop a Section into your page, and divide it into two columns. Then drop a Navigation menu to your left column, and add a CSS class to the navigation menu.
The next step is to add a custom CSS to make each menu stay in one line and also to enlarge them when they are active. So, from the page settings (bottom left corner of the page), choose the Advanced tab and then add the following CSS snippet in the Custom CSS section (JX).
/* Add Transition to the items */
.custom_tab_titles li a {transition: 0.2s all;}

/*make the items bigger when they are active while having transitions */
.custom_tab_titles li .raven-menu-item-active {transition: 0.2s all;
    transform: scale(1.3); margin-left: 0.8em;}

/* put each menu in one line */
.custom_tab_titles li {clear: both; display: block; width: 100%;}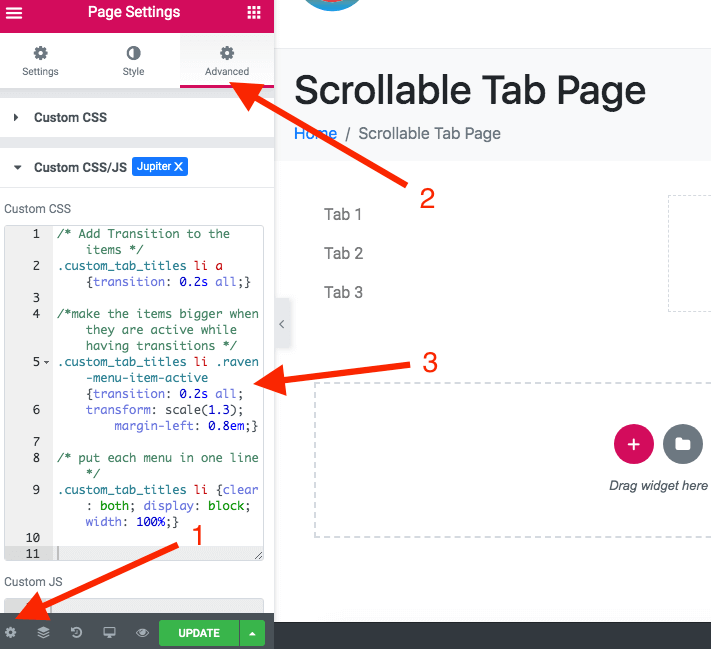
Now add some Inner Section elements to your other column. We need to assign an ID equivalent to the menu anchors in order to make them scrollable when clicked.
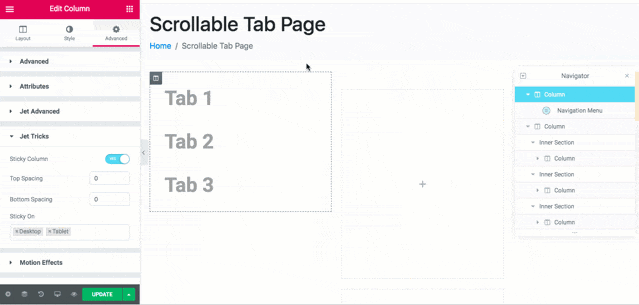
Add as much of your content as you want to your scrollable tabs. Here, I kept it empty in order to make it more understandable. I also added a min-height 400px to each inner section. You can avoid it or add more height. The styling part completely customizable, and you can do what you want with it.
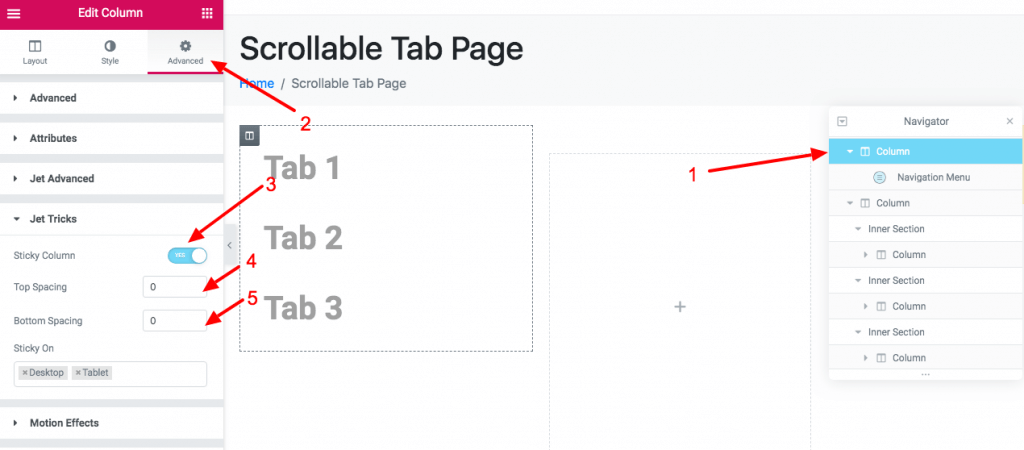
The last step is selecting the Column container of the Navigation menu and adding the Sticky behavior to it.
I also added some typography settings and color changes to the navigation menu in order to make the scrollable tab more eye-catching. Take a look at what we have now:
One of the great things about using Jupiter X to create a scrollable tab is that you have the flexibility to create a tab exactly to your liking. You have the option of adjusting the margins and paddings to fine tune the tab, as well as to style every corner of your new tab.
Additionally, you’re not limited by how many tabs you can have: you are free to add more and style them in any way you see fit. Don’t worry about getting carried away in adding too many new elements as this has been tested on all modern browsers, and it’s compatible with all of them.
In this blog post, we’ve provided you with the details on how to create a tailor-made scrollable parallax tab, similar to what can be seen on the WebFlow home. We also illustrated how to create this awesome tab with Jupiter X Pro (and the Elementor page builder), Jet Tricks and Raven.
Do not hesitate to ask any questions you may have in the comments below.

No comment yet, add your voice below!