Recently, I was about to build an online community where users could create their own polls and share them on their social networks. Search results show that there are plenty of community poll platforms out there but none of them were what I actually needed. I wanted to create a community poll website that is:
- Cheap or free of charge
- Actively maintained and updatable
- Independent and installable on shared hostings
- Customizable with a minimum amount of coding
- Community based, meaning that the community of users should populate it with their content
- Loaded with a function that allows users to share the polls in their social networks
- Fully responsive and adaptable to mobile devices
After digging a lot and testing dozens of demos, I realized each platform lacks one of my requirements or the other. Then suddenly an idea popped into my mind: why not build up the community using WordPress? We recently moved our support platform to a community built by WordPress, BBpress and Jupiter X, which is working quite well.
Then why not build another community using the same tools? So then I thought that BBPress is a community builder and probably has tools I can customize to achieve what I want. The more I looked, the more I realized that it’s exactly what I want.
- It uses WordPress, which is free. The BBPress is also free.
- Both BBPress and WordPress are actively maintained.
- I can install both of them on any shared hostings.
- I can customize everything with the minimum amount of coding.
- It’s where the users will create polls with their own content. It’s a community after all.
- It allows me to share the polls with specific permalinks wherever I want.
- By using Jupiter X, it’ll be fully responsive and customizable.
So, I decided to give it a try and start building up my community using the tools I’ve got. The BBPress and WordPress definitely were not enough, and I needed more. Fortunately, nearly all of them were available, and I was able to easily access and use them.
In this article, I’m going to share my experience of creating a community poll website on a budget.
Defining the UX
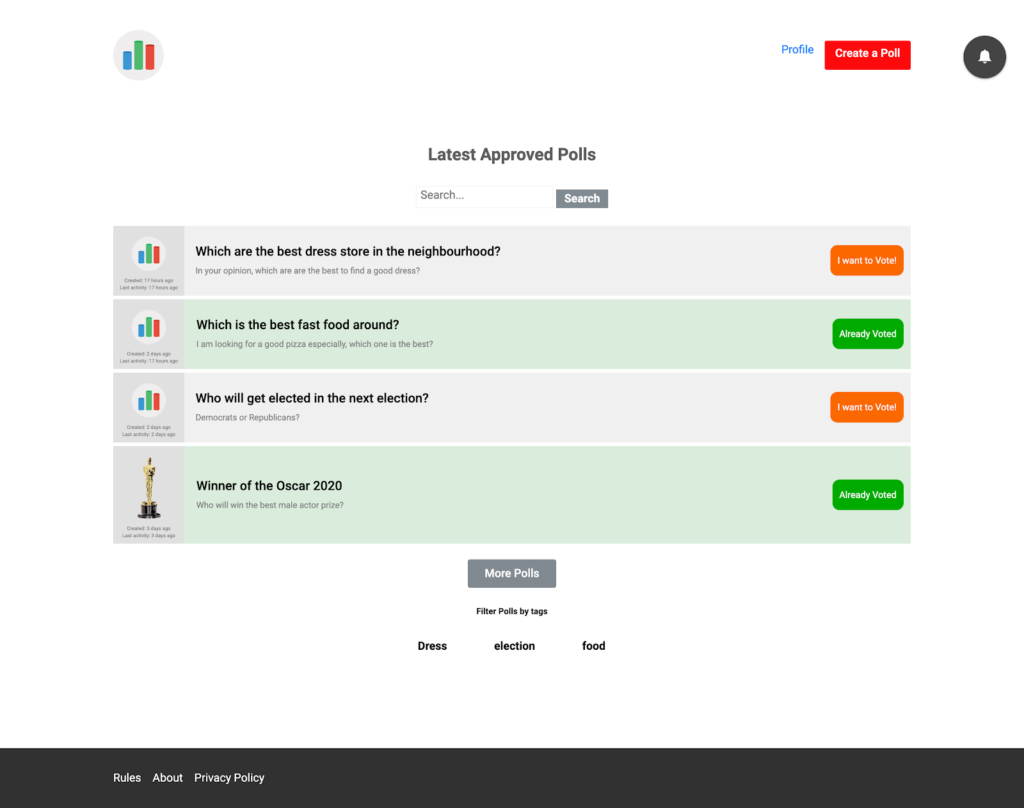
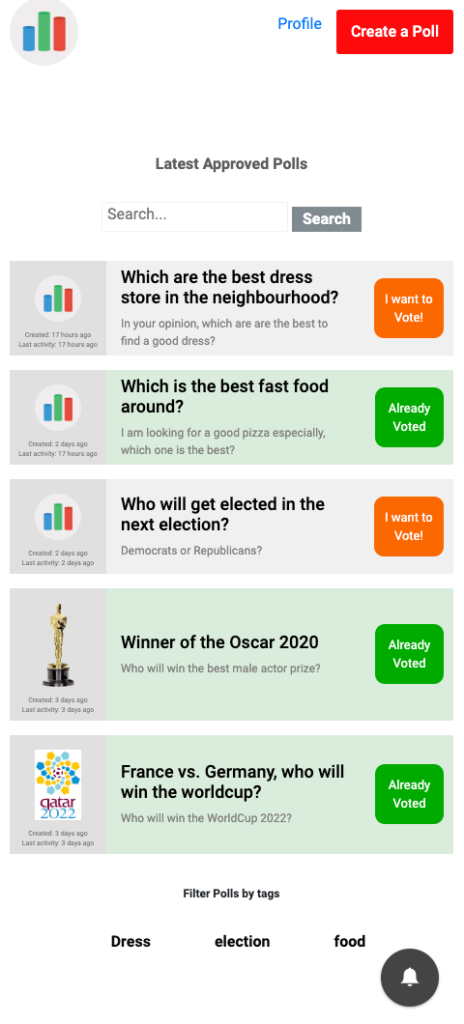
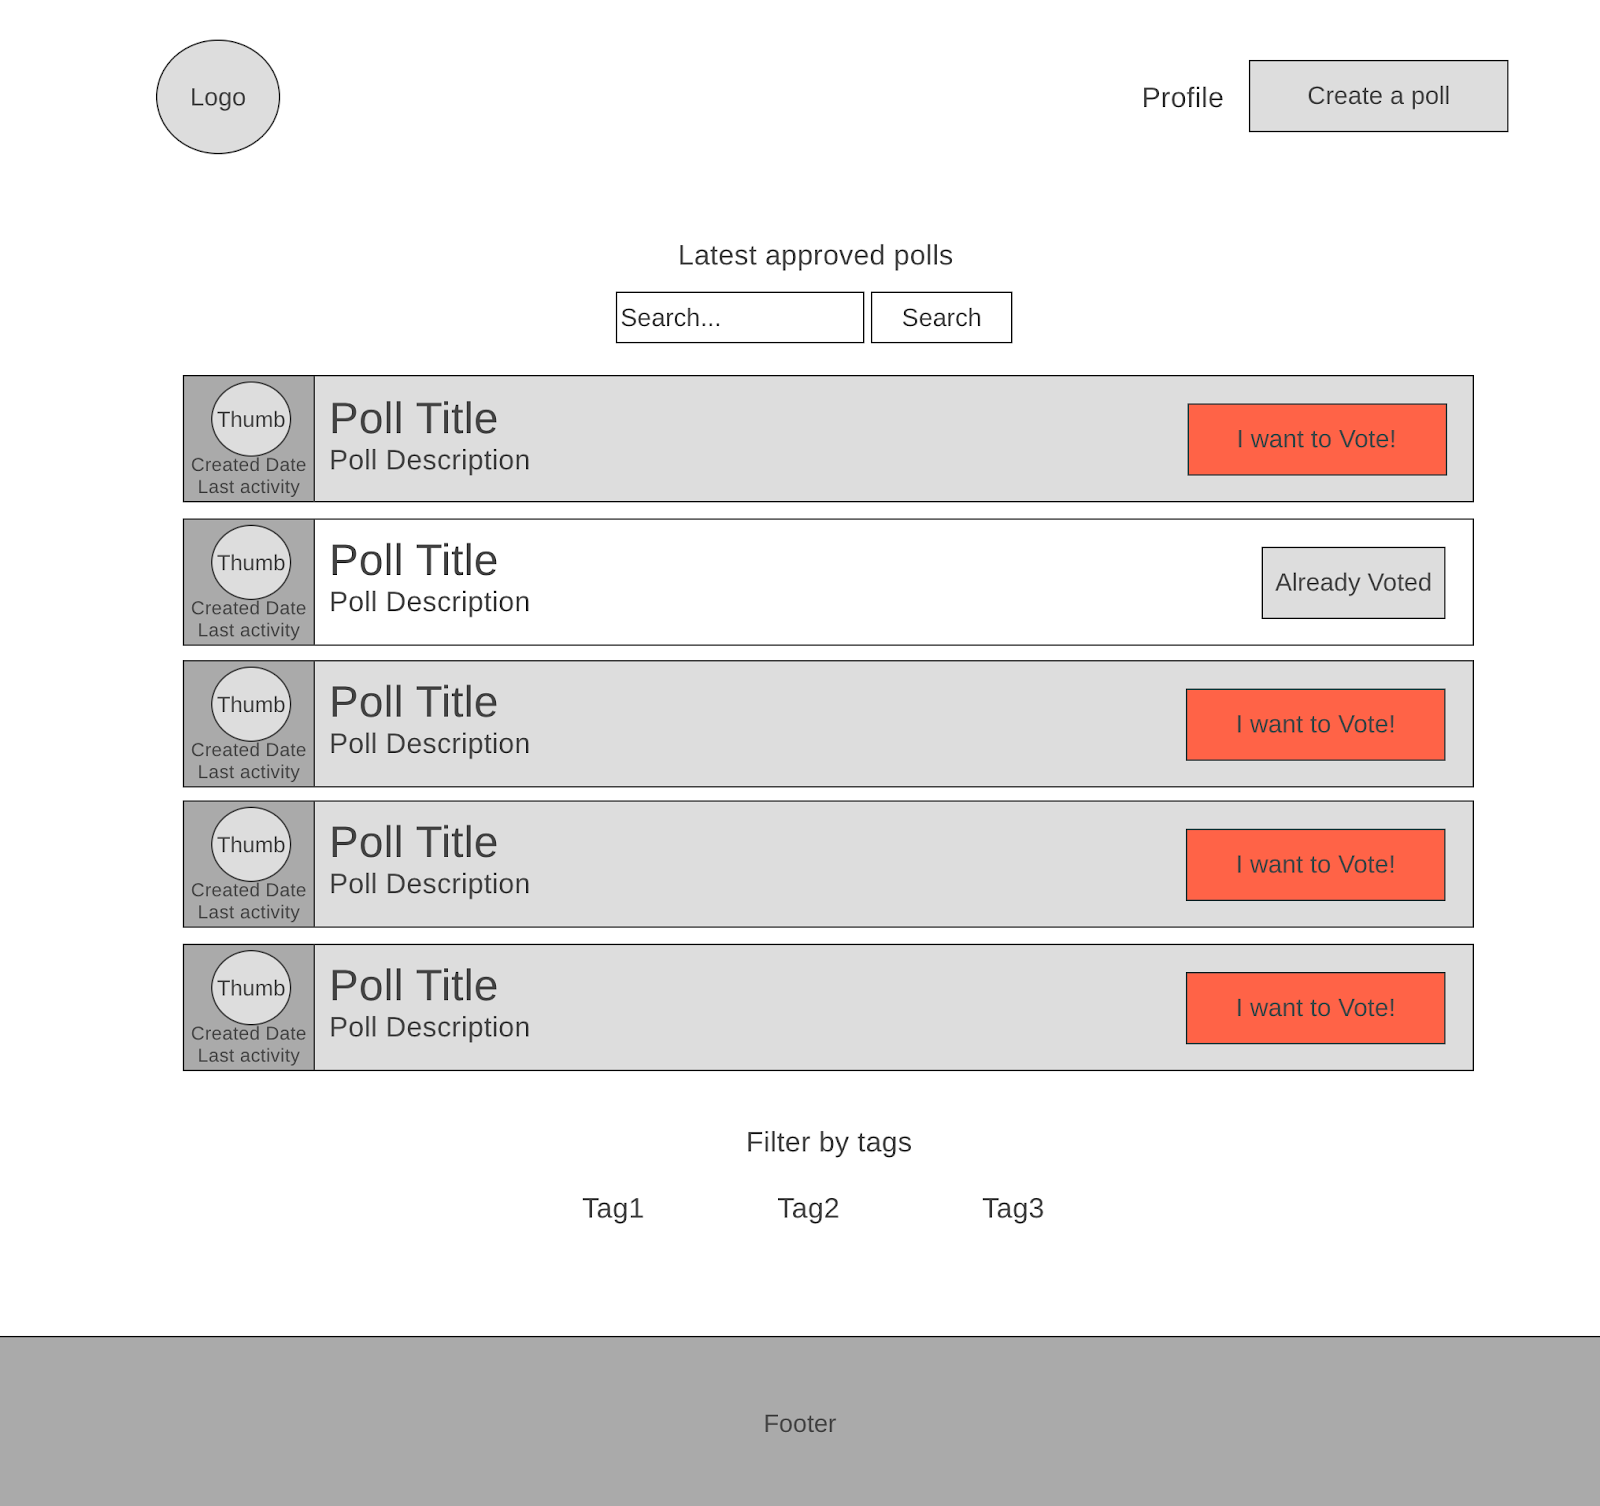
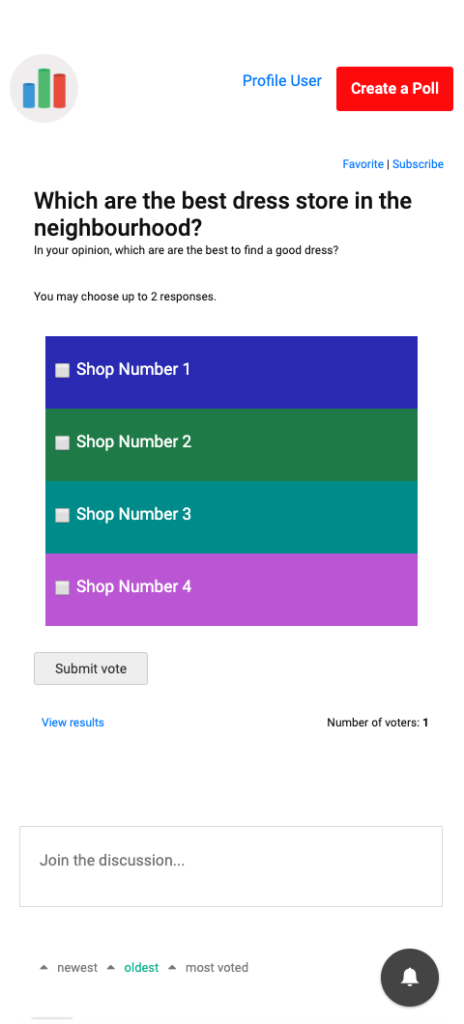
More than anything, I wanted the website to be mobile friendly. I thought that maybe later I would want to wrap the whole website into a webview and publish it for Android or iOS. This meant that I needed to consider everything to be fully responsive and think mobile first. I wanted something like the following:
I also wanted the poll single pages to be something like this:
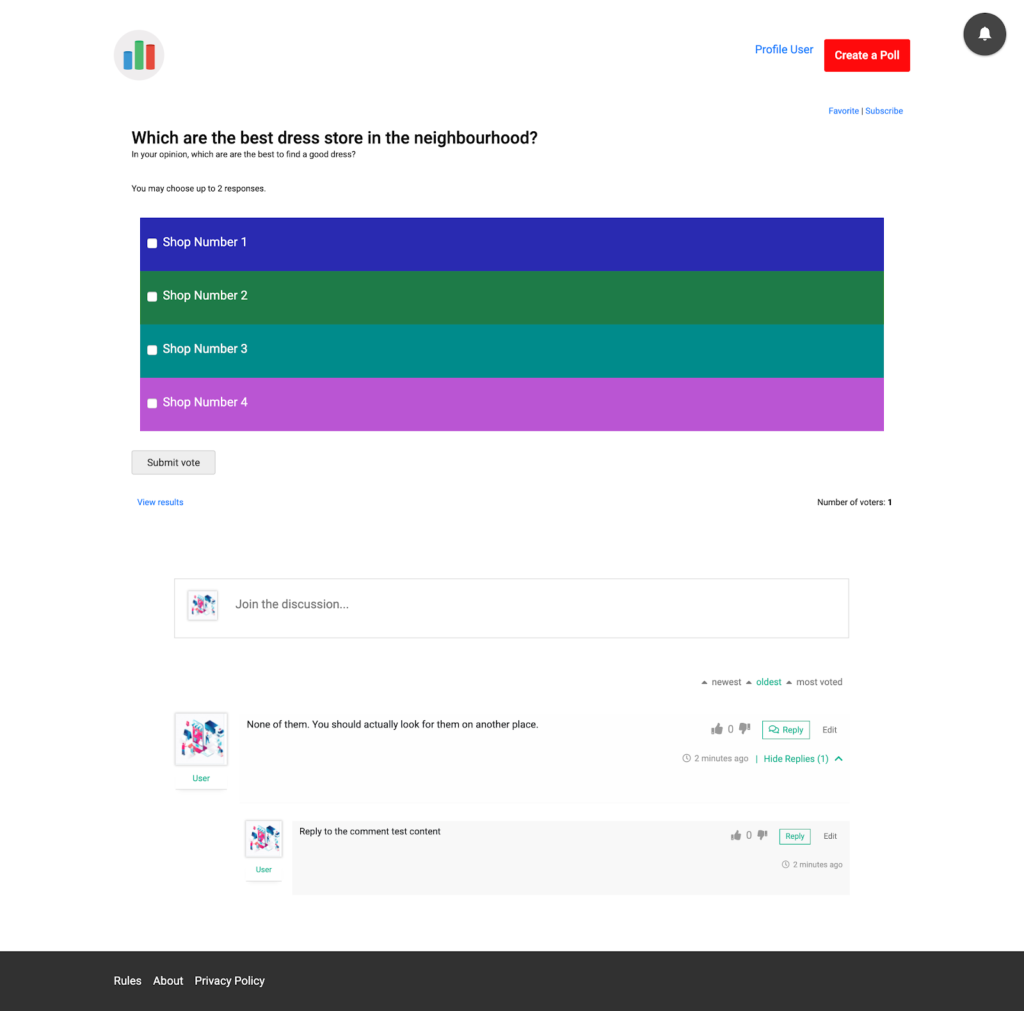
So, the experience would be like:
- Viewers will enter the website and see the content and announcements that they need to register and login to vote and participate in the discussions below each poll.
- The registration will be completed as quickly as possible and without any unnecessary steps after clicking on the registration or login button on top.
- After registration, the logged-in user will be redirected back to the page they were on before.
- Voting and commenting under the votes are visible now after logging in
- If user got back to the homepage, he can use Ajax search and filters to find an interesting poll and participate
- The poll list in the homepage is showing the voted polls and not voted with a different color
- After participating in each poll, whether the user votes on it or added a comment under it, it should send a notification to the user who created the poll.
Also, users have their own profile and clicking on the user name will navigate you to the user profile where you can see the user details, avatar and cover image, created polls, comments, favorite and followed polls. I didn’t want to create membership plans to monetize the website, but it should be possible to do it easily in future.
So, things got complicated, huh? Don’t worry. We will get through this and see how we can do it step by step.
Prepare the tools
Creating a community poll website required two major functionalities:
- Community
- Membership profiles
I chose these two plugins that are absolutely free and popular among users:
Each of these plugins can extend their functionalities using add-ons. So I needed the following:
- The GD Topic Polls for BBPress plugin makes it possible for the users to create polls.
- The Real-time notifications for Ultimate Member plugin allows users to receive notifications whenever something happens (premium plugin).
- GD bbPress Toolbox Pro. The only use for this plugin is to let users upload images and use the image as the poll thumbnail. While I could have developed this another way, this was the easiest solution and worth trying (premium plugin).
- Comments – wpDiscuz is an advanced commenting plugin and adds functionality to the discussions.
- Optional: Digits : WordPress Mobile Number Signup and Login makes it possible to change the WordPress login and allows users to register with their phone numbers instead of emails and also verify the phone numbers using SMS (premium).
- Jet Engine for its listing feature (premium)
- The Jet Smart Filters plugin can be used for its advanced Ajax search and filtering features (premium).
- The free version of Elementor can be used as the page builder
- Raven (bundled with Jupiter X) was used for creating the custom header and footer.
I wanted to use the Jupiter X theme that already comes bundled with the Jet Engine and Jet Smart Filters. So, this means that two premium plugins were already provided for free. Also, it gave me the ability to build up my custom header and footer and visuals that I needed. So, I would definitely consider this theme as a base and choose the plugins that are compatible with it.
Creating a community poll website like this also requires some coding, which I’ll explain in the following paragraphs.
Step One: Install Jupiter X, Jet Engine and Jet Smart Filter and activate the child theme
The first step is to install Jupiter X and its bundled plugins, which provides an easy way to list the latest polls based on your design and allows you to use the smart filters to create an Ajax search. Also, since Jupiter X is a fully responsive theme, it allows you to implement the whole website to easily use as a mobile app.
After downloading the Jupiter X theme from ThemeForest, install it from Appearance -> Themes and register the product. A complete guide on how you can install and activate the theme is provided here.
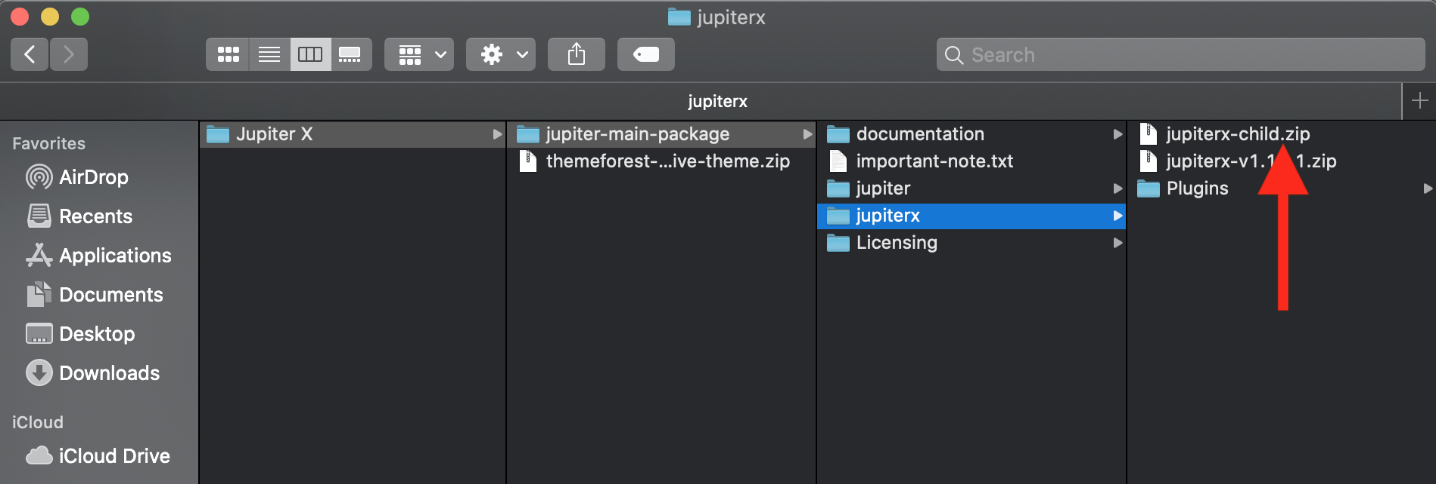
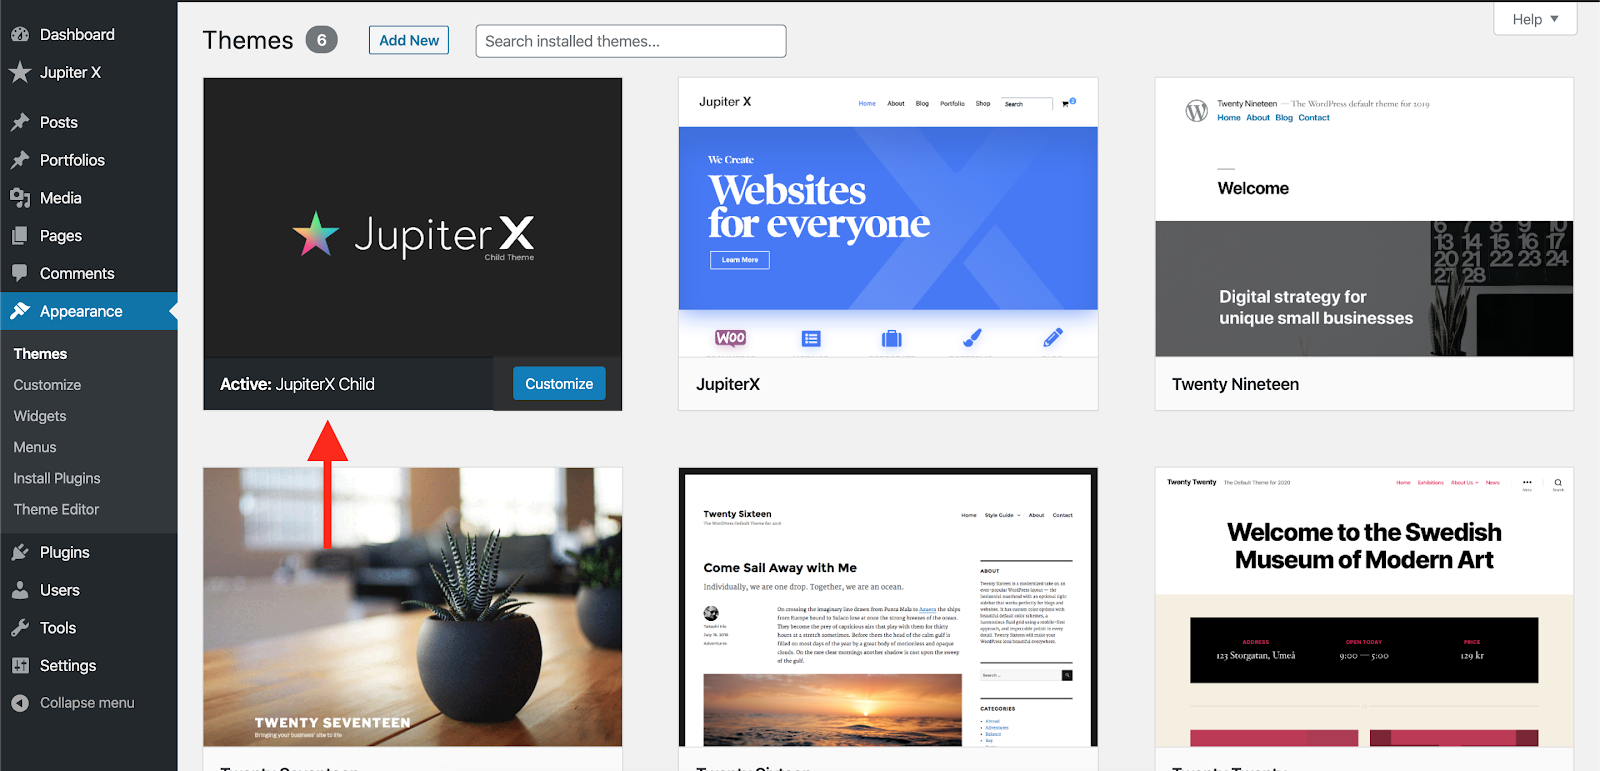
Since we need to modify some files and add some customization here and there, it’s better to use a child theme to avoid change loss in the theme and plugin updates. So, right after installing the theme, you need to install and activate the Jupiter X child theme. You can find out how to do this by reading this article. It’s as simple as finding and installing the jupiterx-child.zip file inside the same package you downloaded from ThemeForest.Net.
In order to install the bundled plugins, you need to register the theme first. So, try registering the theme like the guide provided here and make sure you can see that the theme is activated.
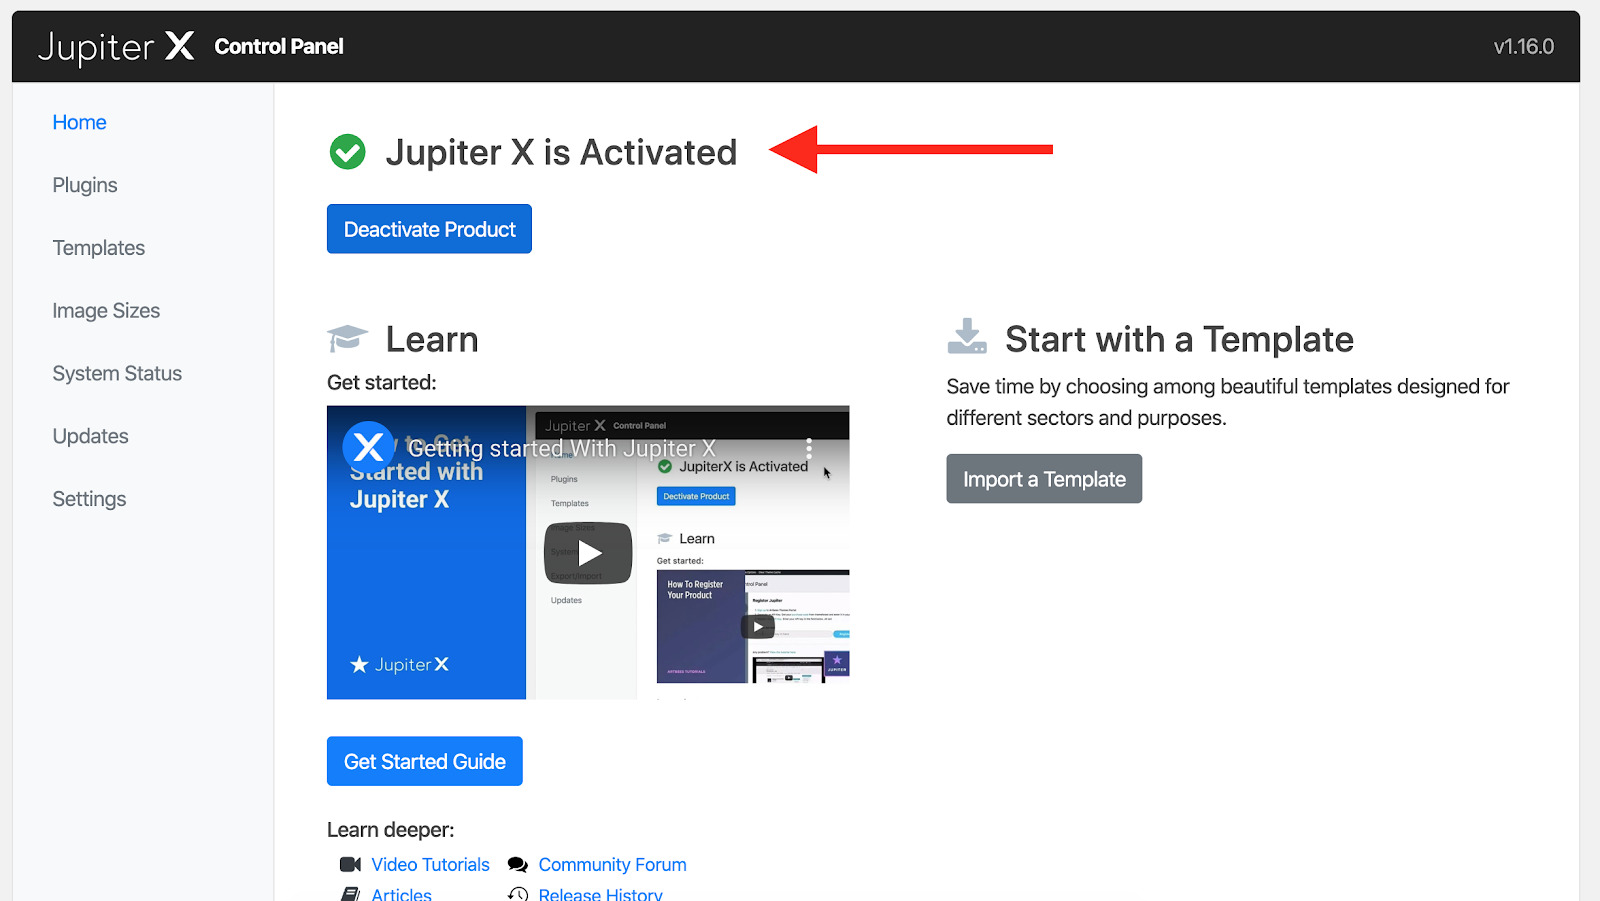
Now you can install the bundled plugins. Simply navigate to Jupiter X -> Control Panel -> Plugins and install and then activate these plugins:
- Elementor
- Raven
- Jet Engine
- Jet Smart Filters
- Advanced Custom Fields

The Jupiter X Core plugin is mandatory, and you’ll need to install it right after installing the theme, so it’s also on the list.
So, we are done here. Let’s move onto the next step.
Step Two: Install BBPress and its addons and configure
We’ll use BBPress as the main community builder on our website. Whenever you want your users to engage and provide content for your website and actually create a community of users, no matter what functionality you require, the BBPress is the best choice if you’re going to use a WordPress website as the backbone.
What we’re going to build with BBPress is one forum named Polls, then let the users create topics inside this forum and add a poll to their topics and publish it. Then, the other users can vote on each other’s polls and share it on their social networks. Also, we’re going to implement a notification and discussion board for each topic. So this means that the author is notified as soon as other users vote or add a comment to the poll. So, let’s start by adding the BBPress plugin.
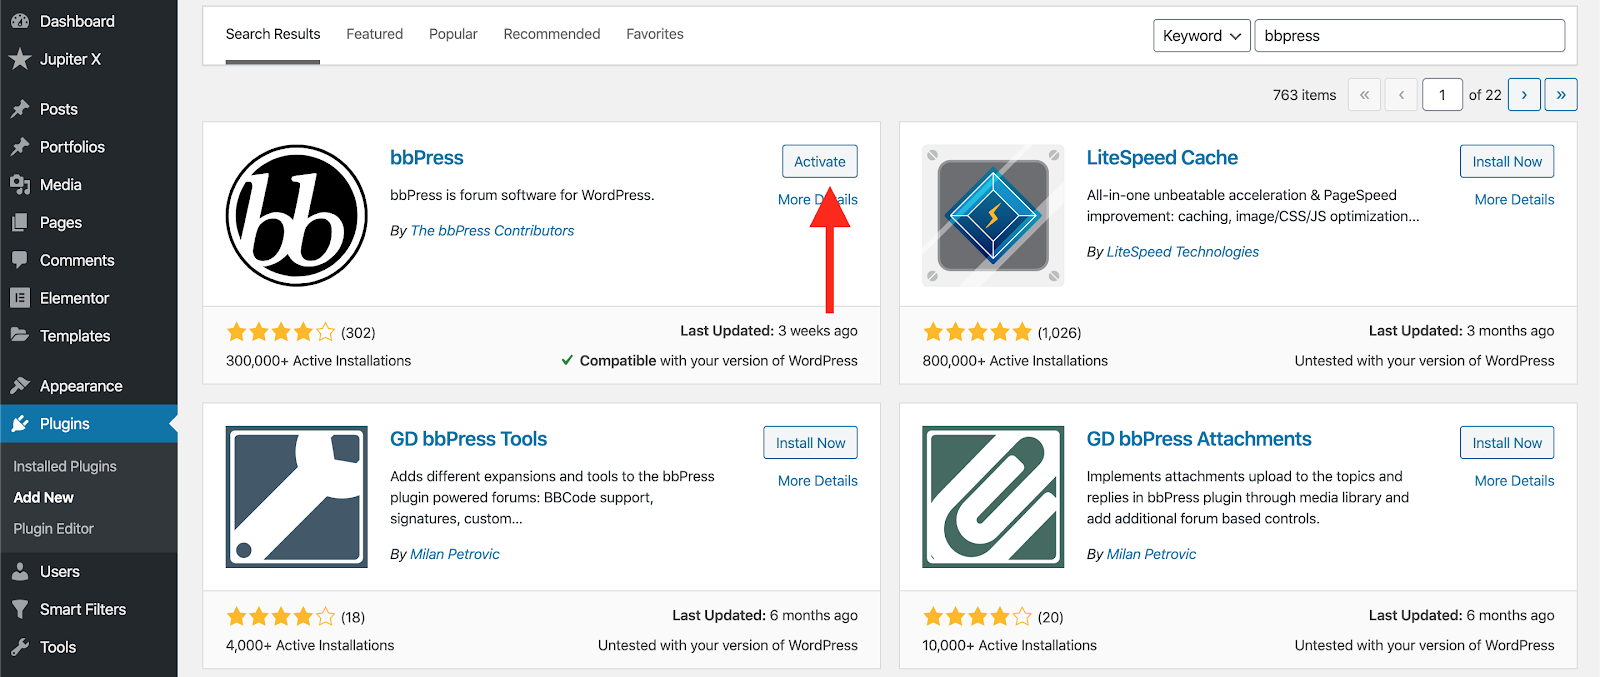
In WordPress -> Plugins -> Add New, search for BBPress. Simply install and activate.
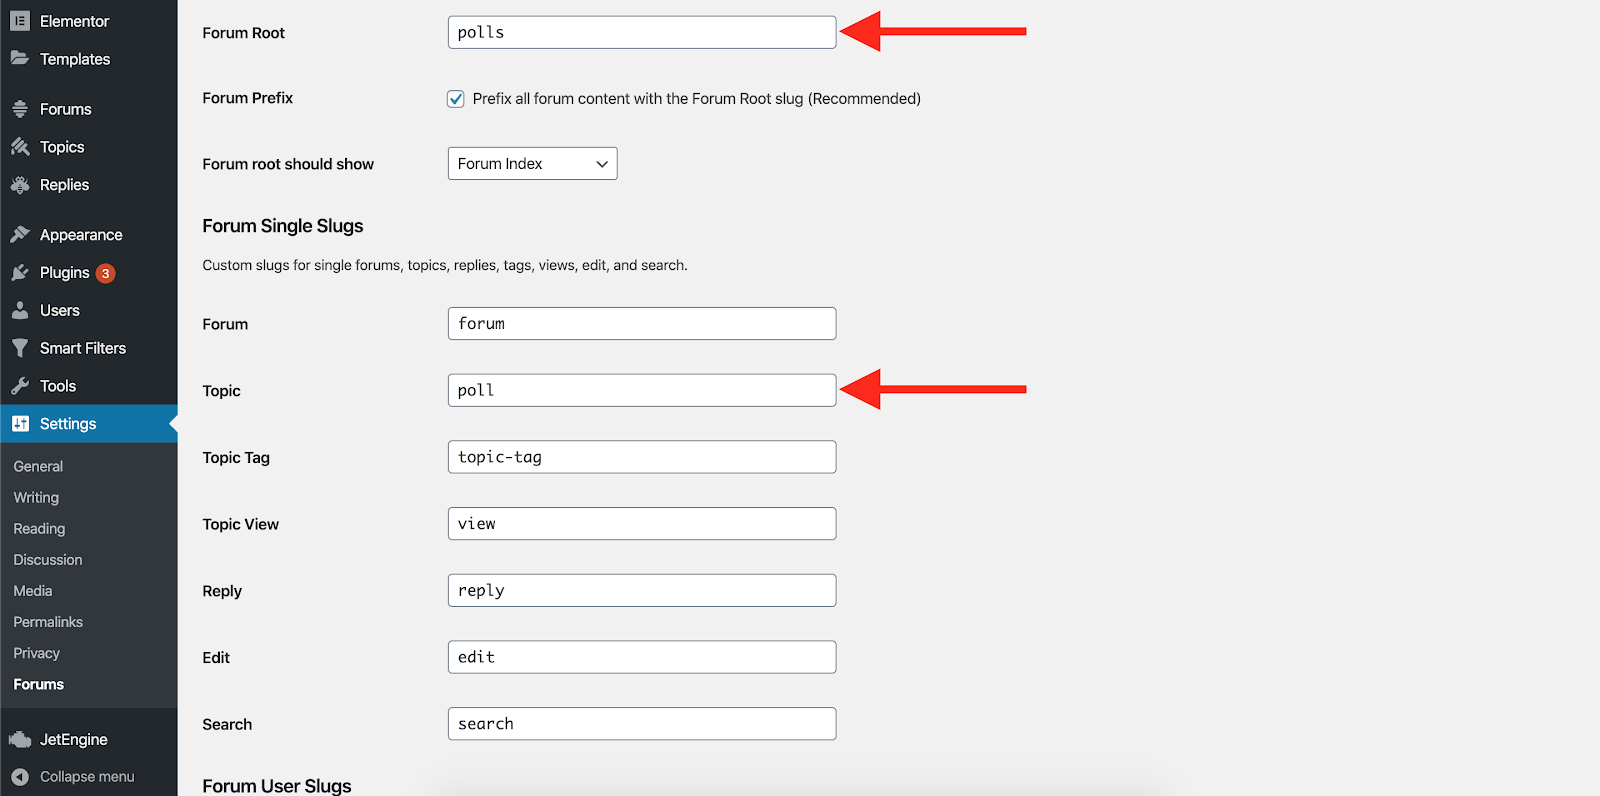
Now navigate to Settings -> Forums and change the Forum Root and Topic slugs to “polls” and “poll.” It’ll give you a better permalink structure for your polls as each topic means a poll on your website.
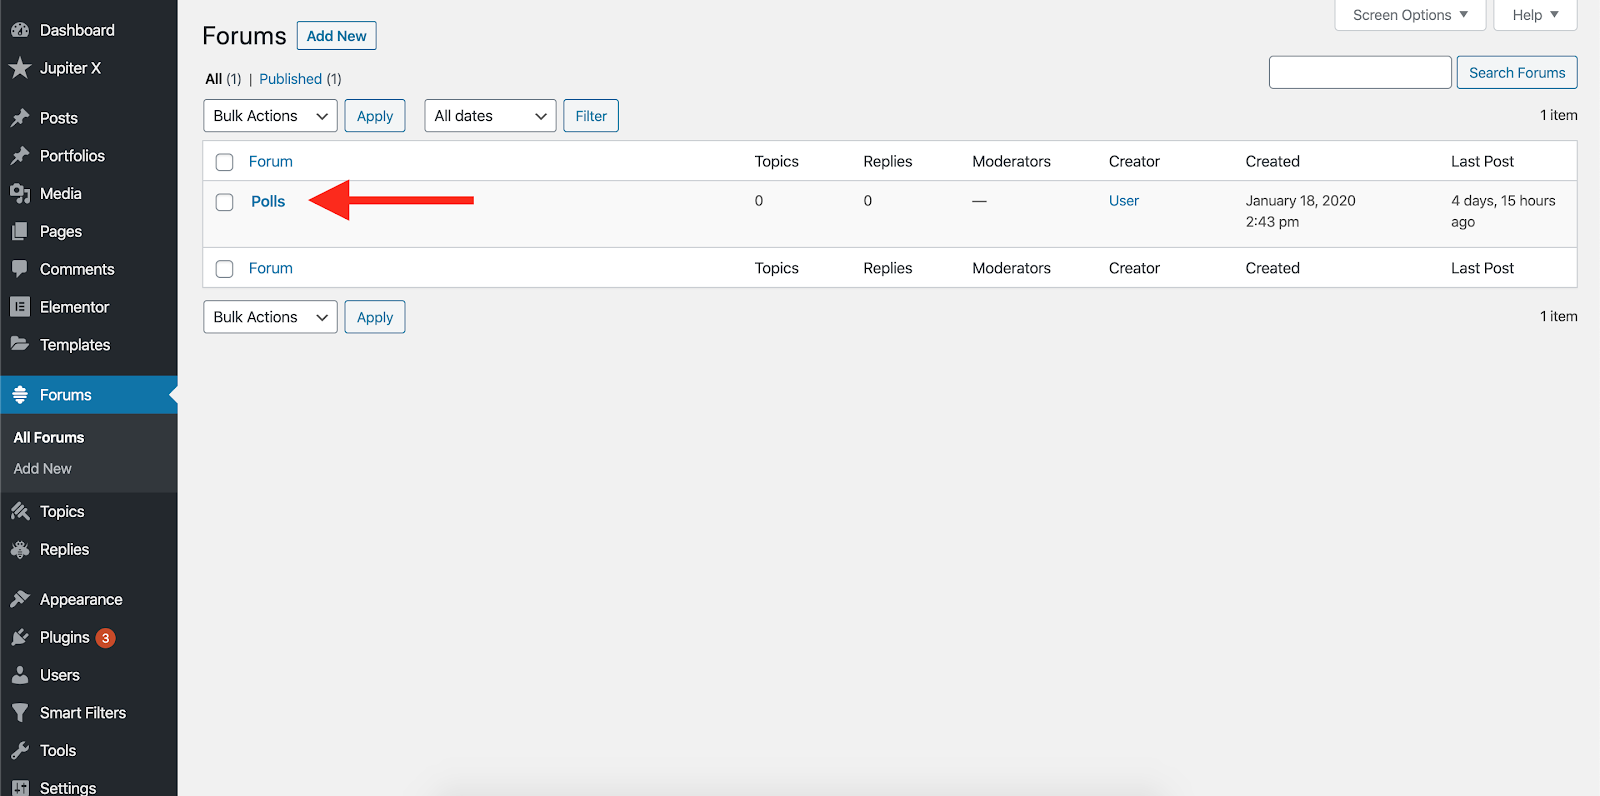
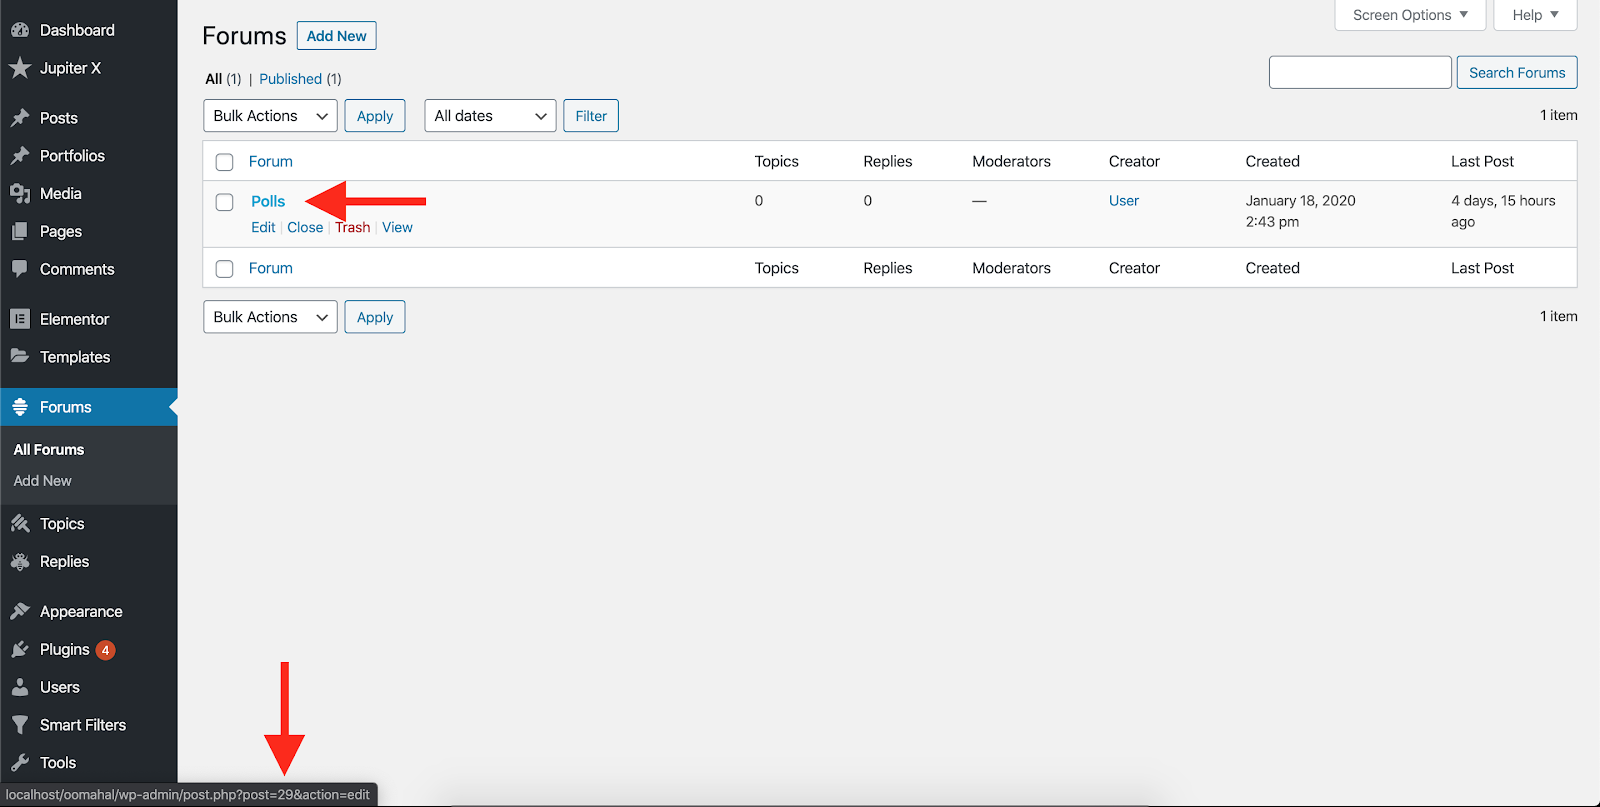
After that, go to Forums and add a new forum to the website. This is our main forum that contains all of the polls. So, call it “Polls” again.
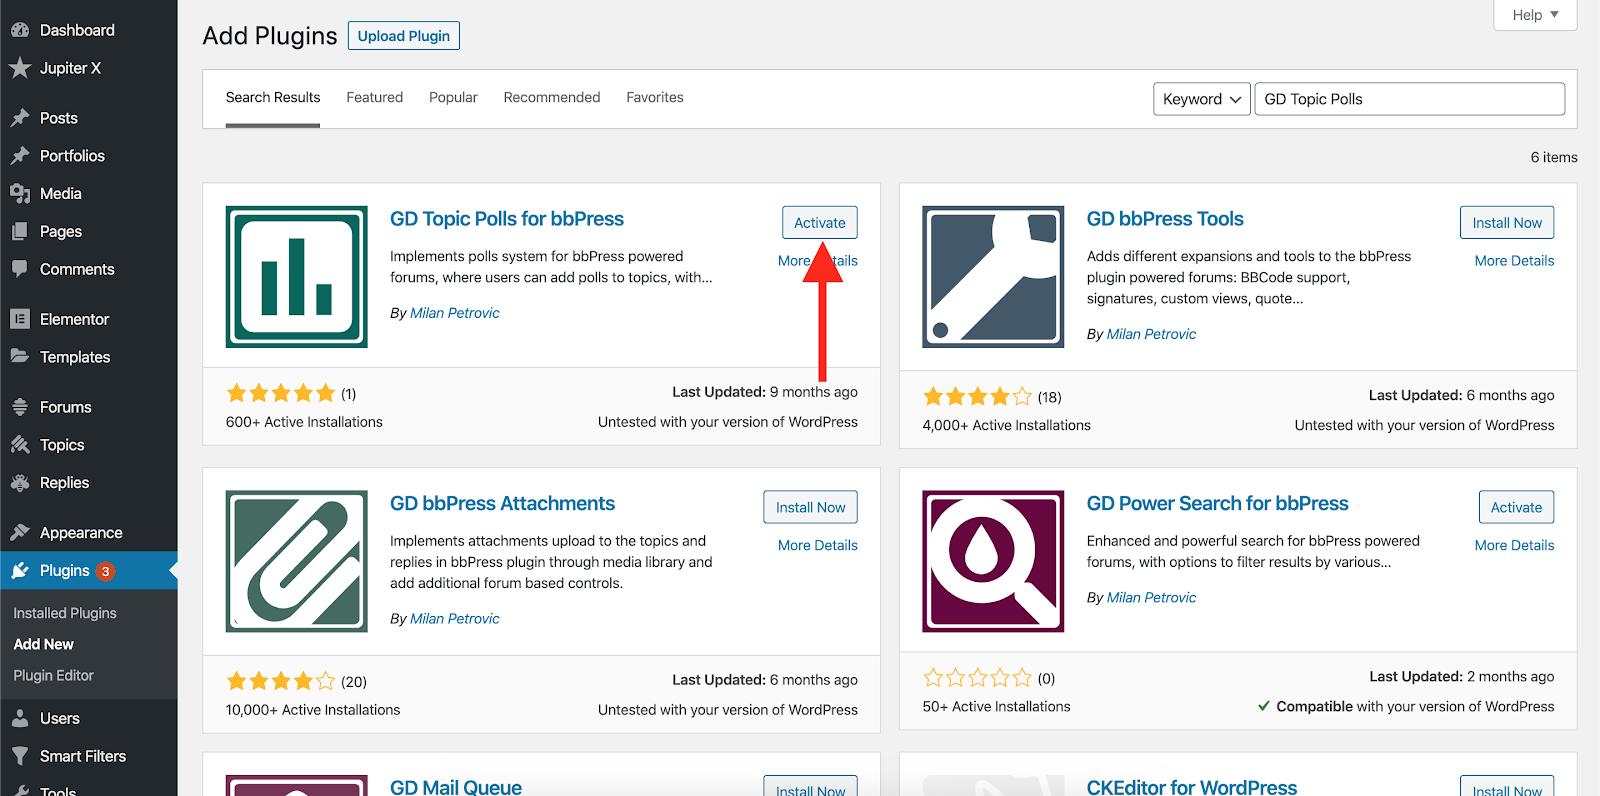
Now that the main forum is added, we need to provide a way so our users can add their own topics that contain polls in this forum. But how can we do that? First let’s add a plugin that allows the topics to have polls inside. It’s called GD Topic Polls for BBPress.
Go to Plugins -> Add New, search for it and then install and activate it.
The next step is to create a page and add a form to it where users can create topics and polls.
Step Three: Add the “Create Poll” page
We need the polls to be created by the users – but all from the front end. We don’t want them to come to the WordPress dashboard to be able to create a new poll. That’s one of the reasons we wanted to create our website using a community builder.
So, create a page and add this BBPress shortcode to it:
[bbp-topic-form forum_id=29 ]

Remember to change the 29 with the forum ID.
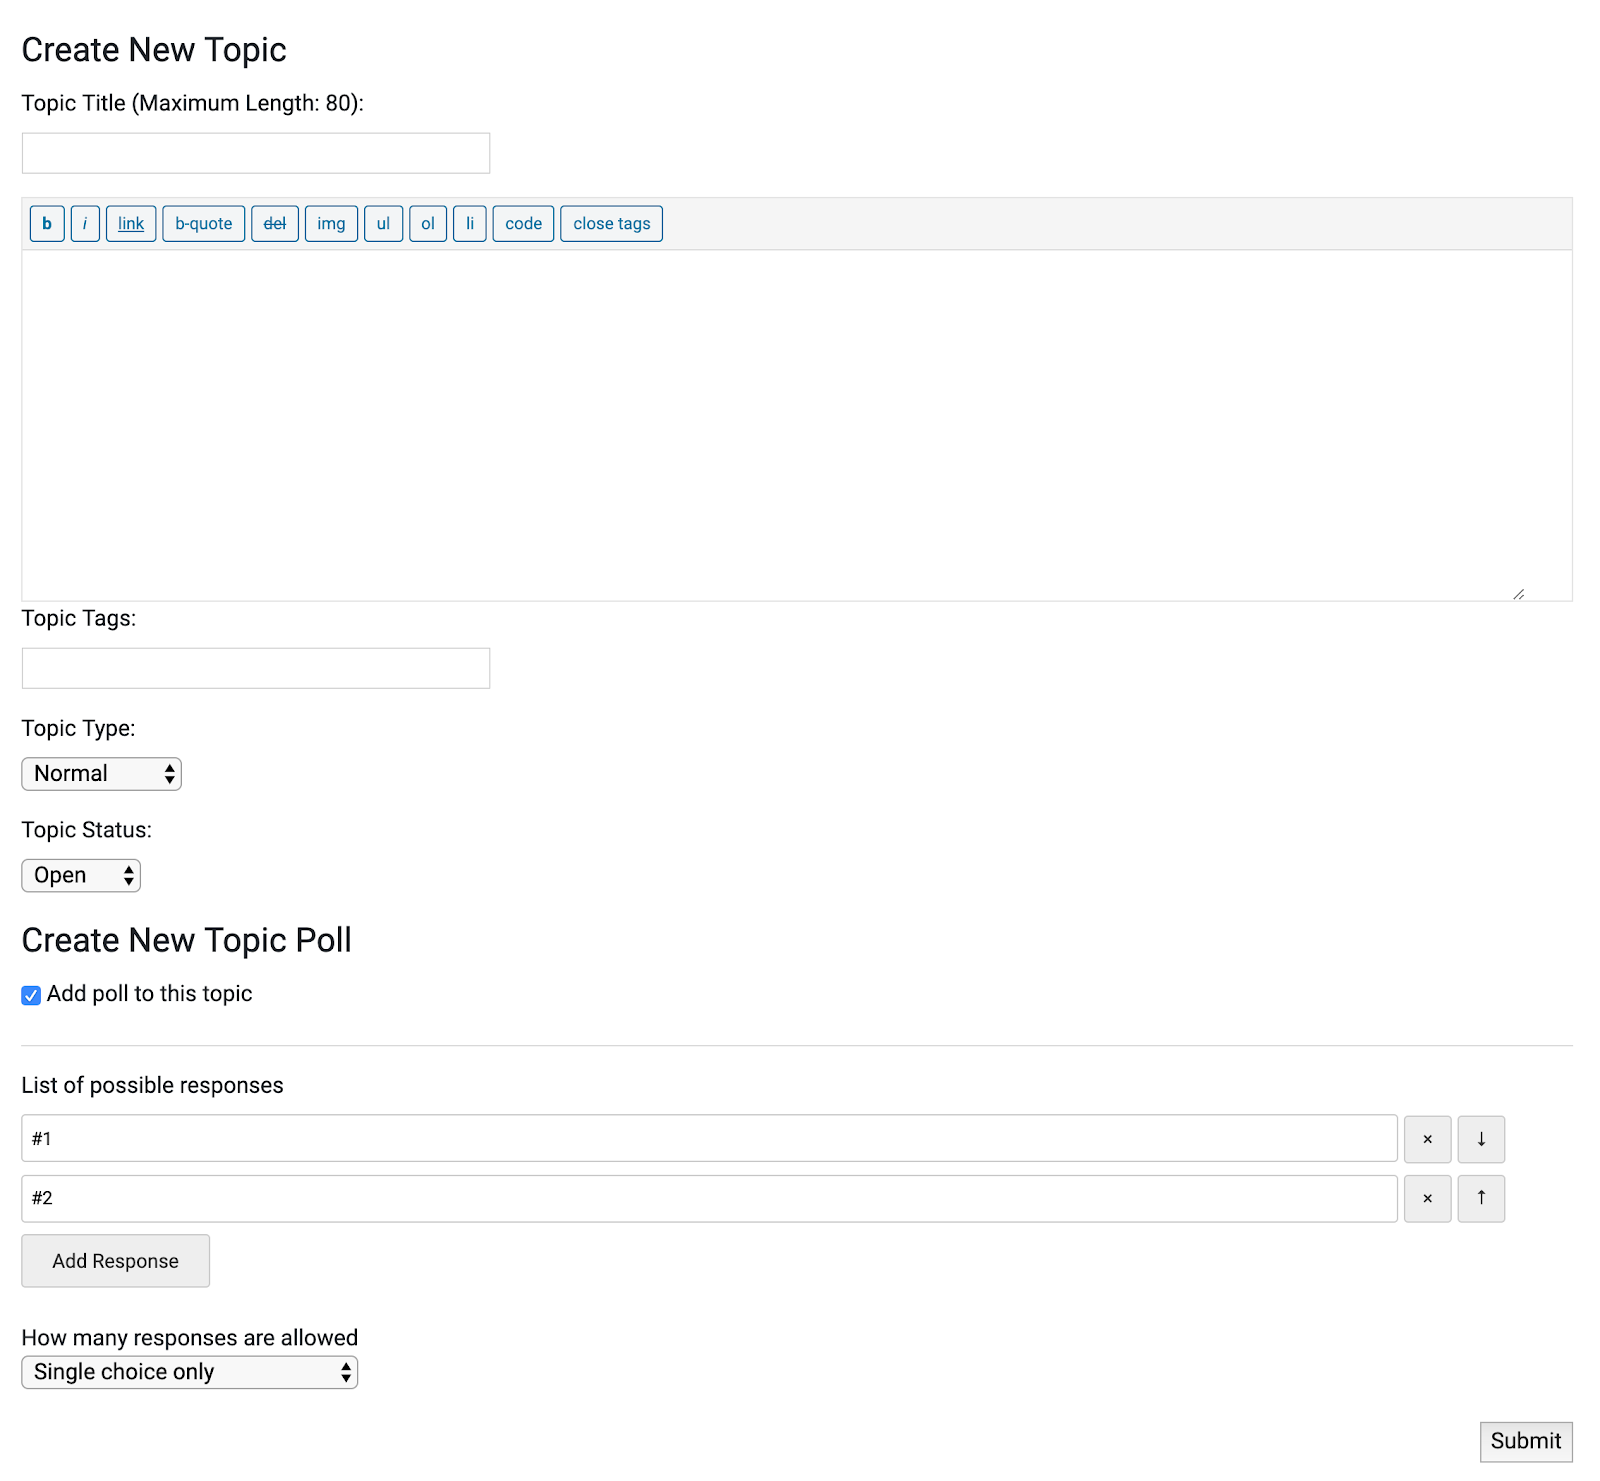
[ bbp-topic-forms ] shortcode.The result will be a page like this in the front end:
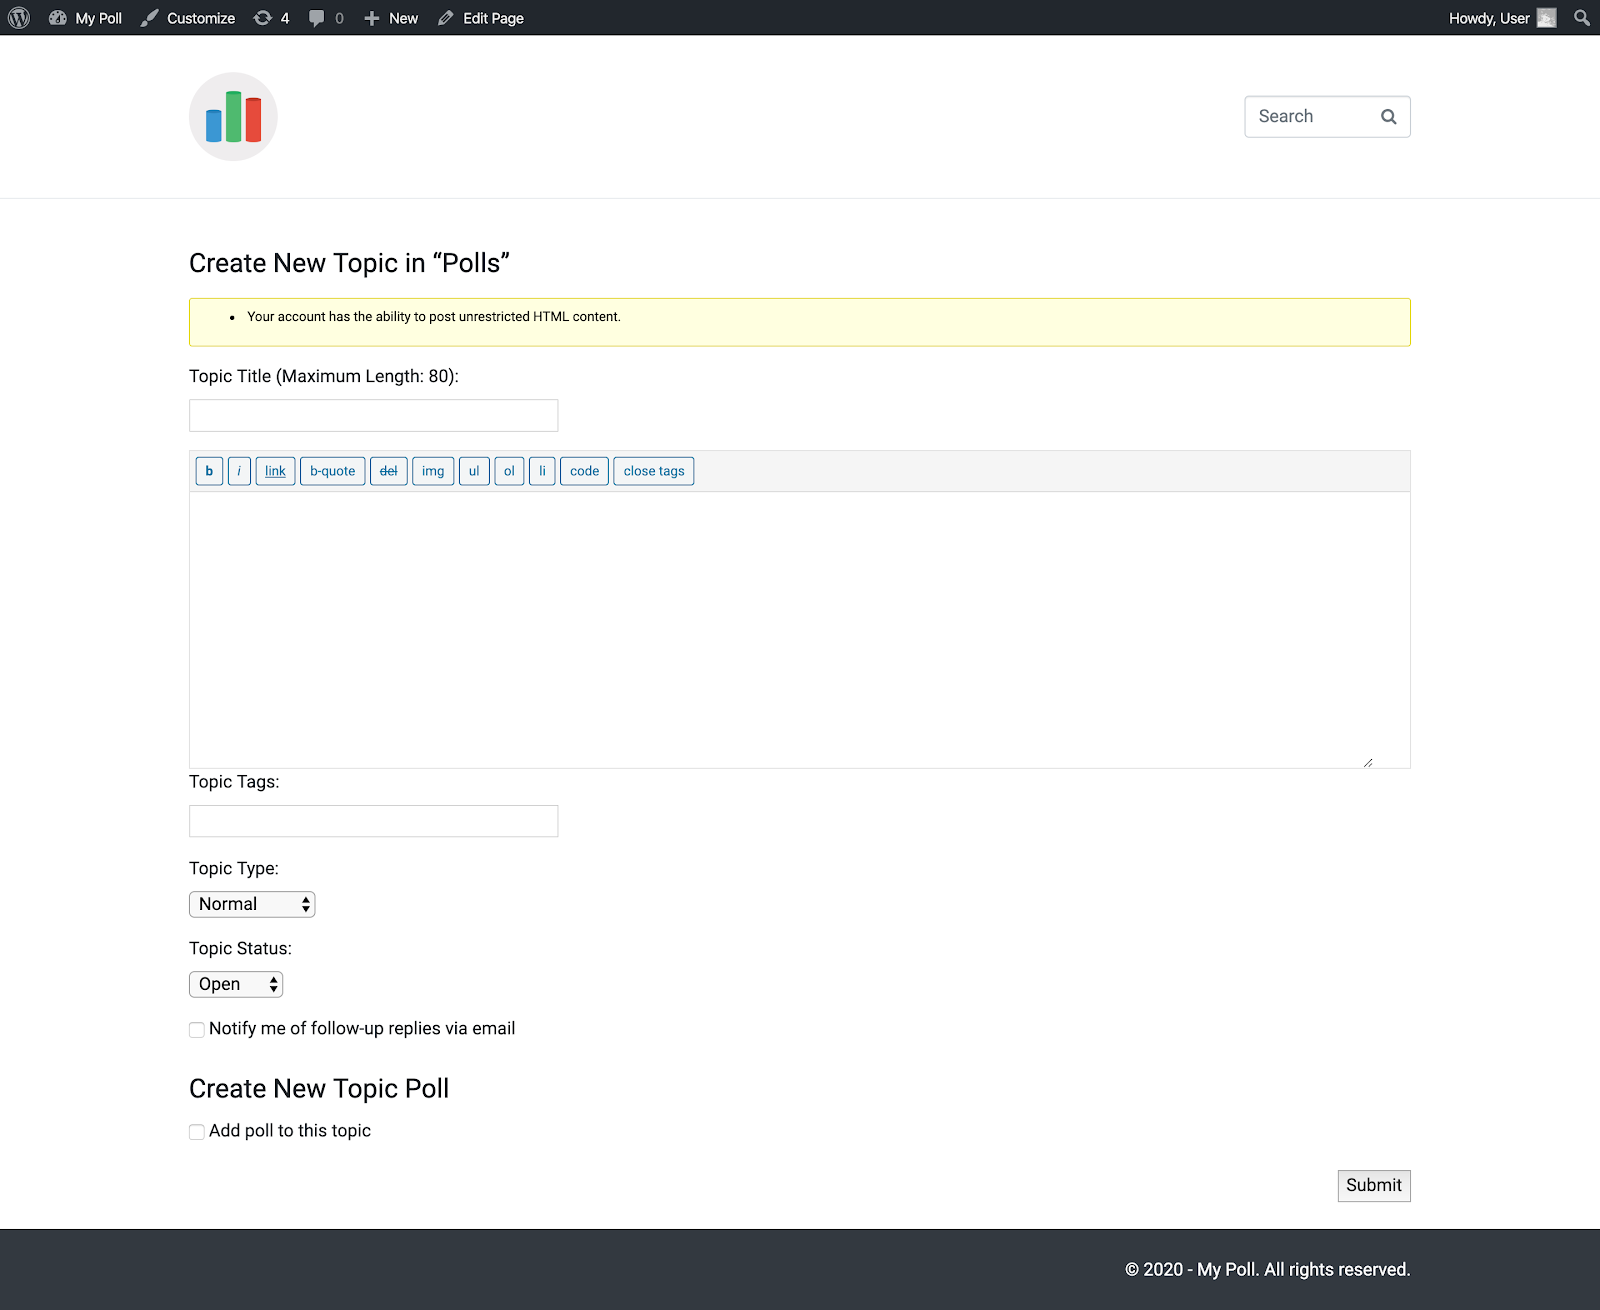
As you can see, the form is created and that page and the Create New Topic Poll is located at the end. Check the “Add poll to this topic” to see the poll form.
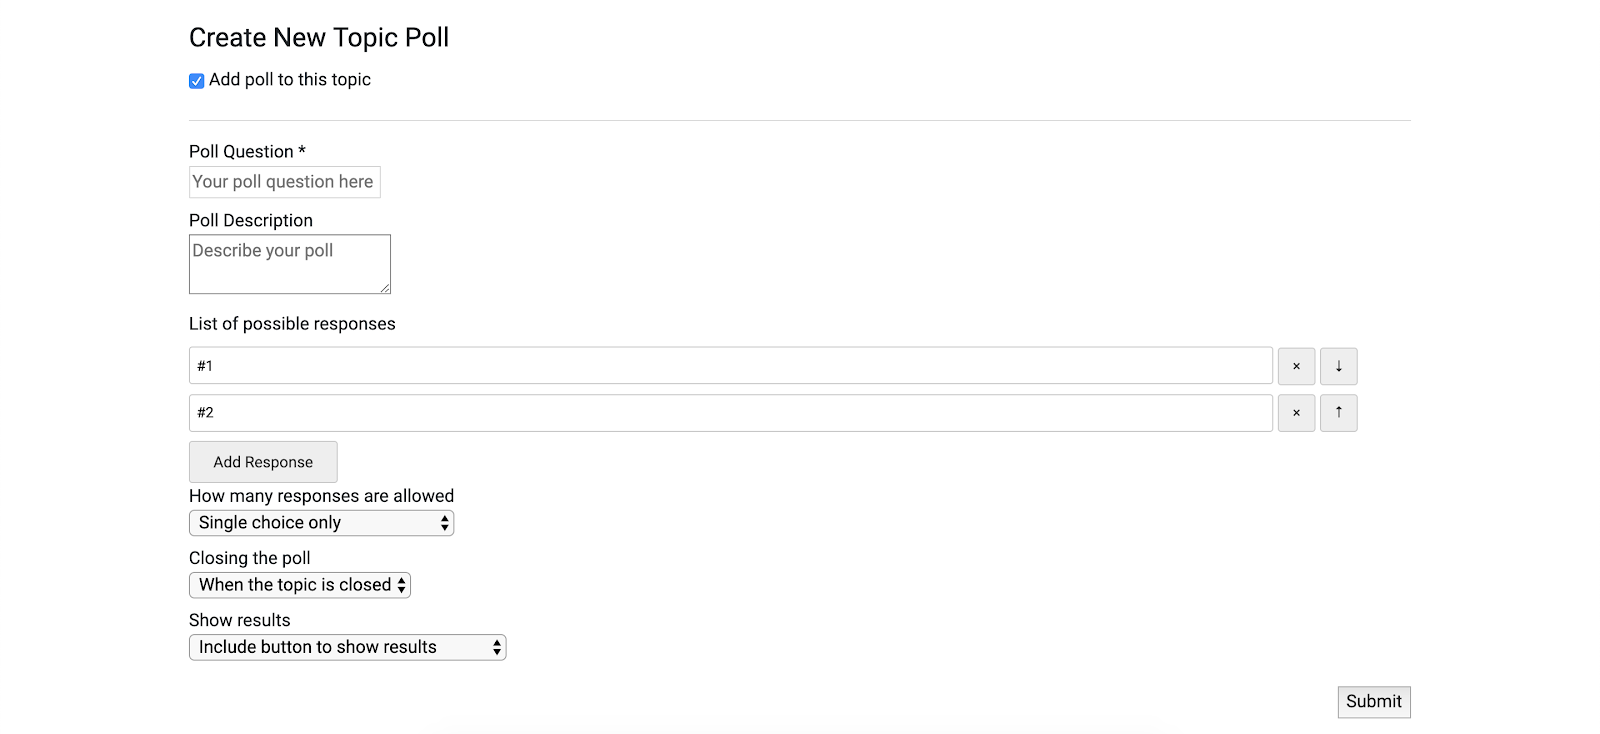
Try sending a new poll, and see the results. You’ll be able to add as many responses as you want or choose how many responses are allowed.
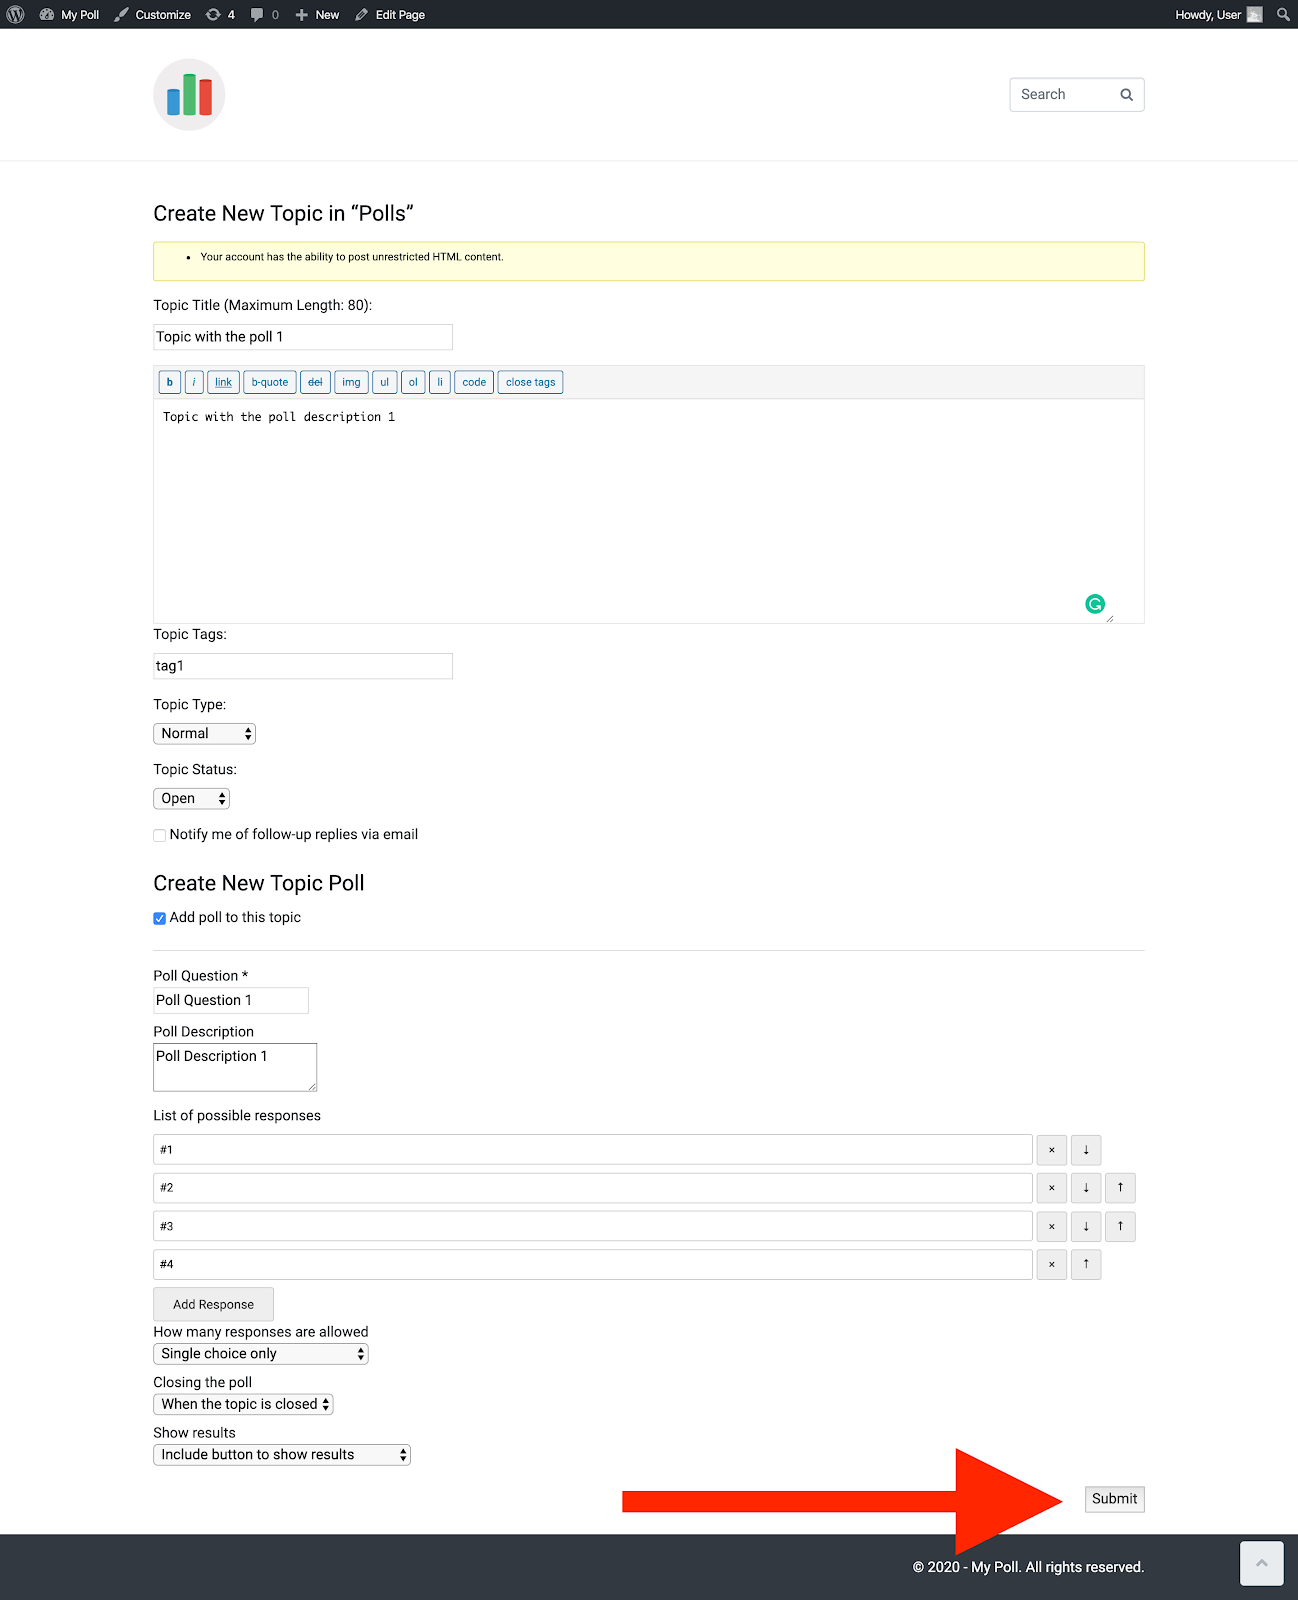
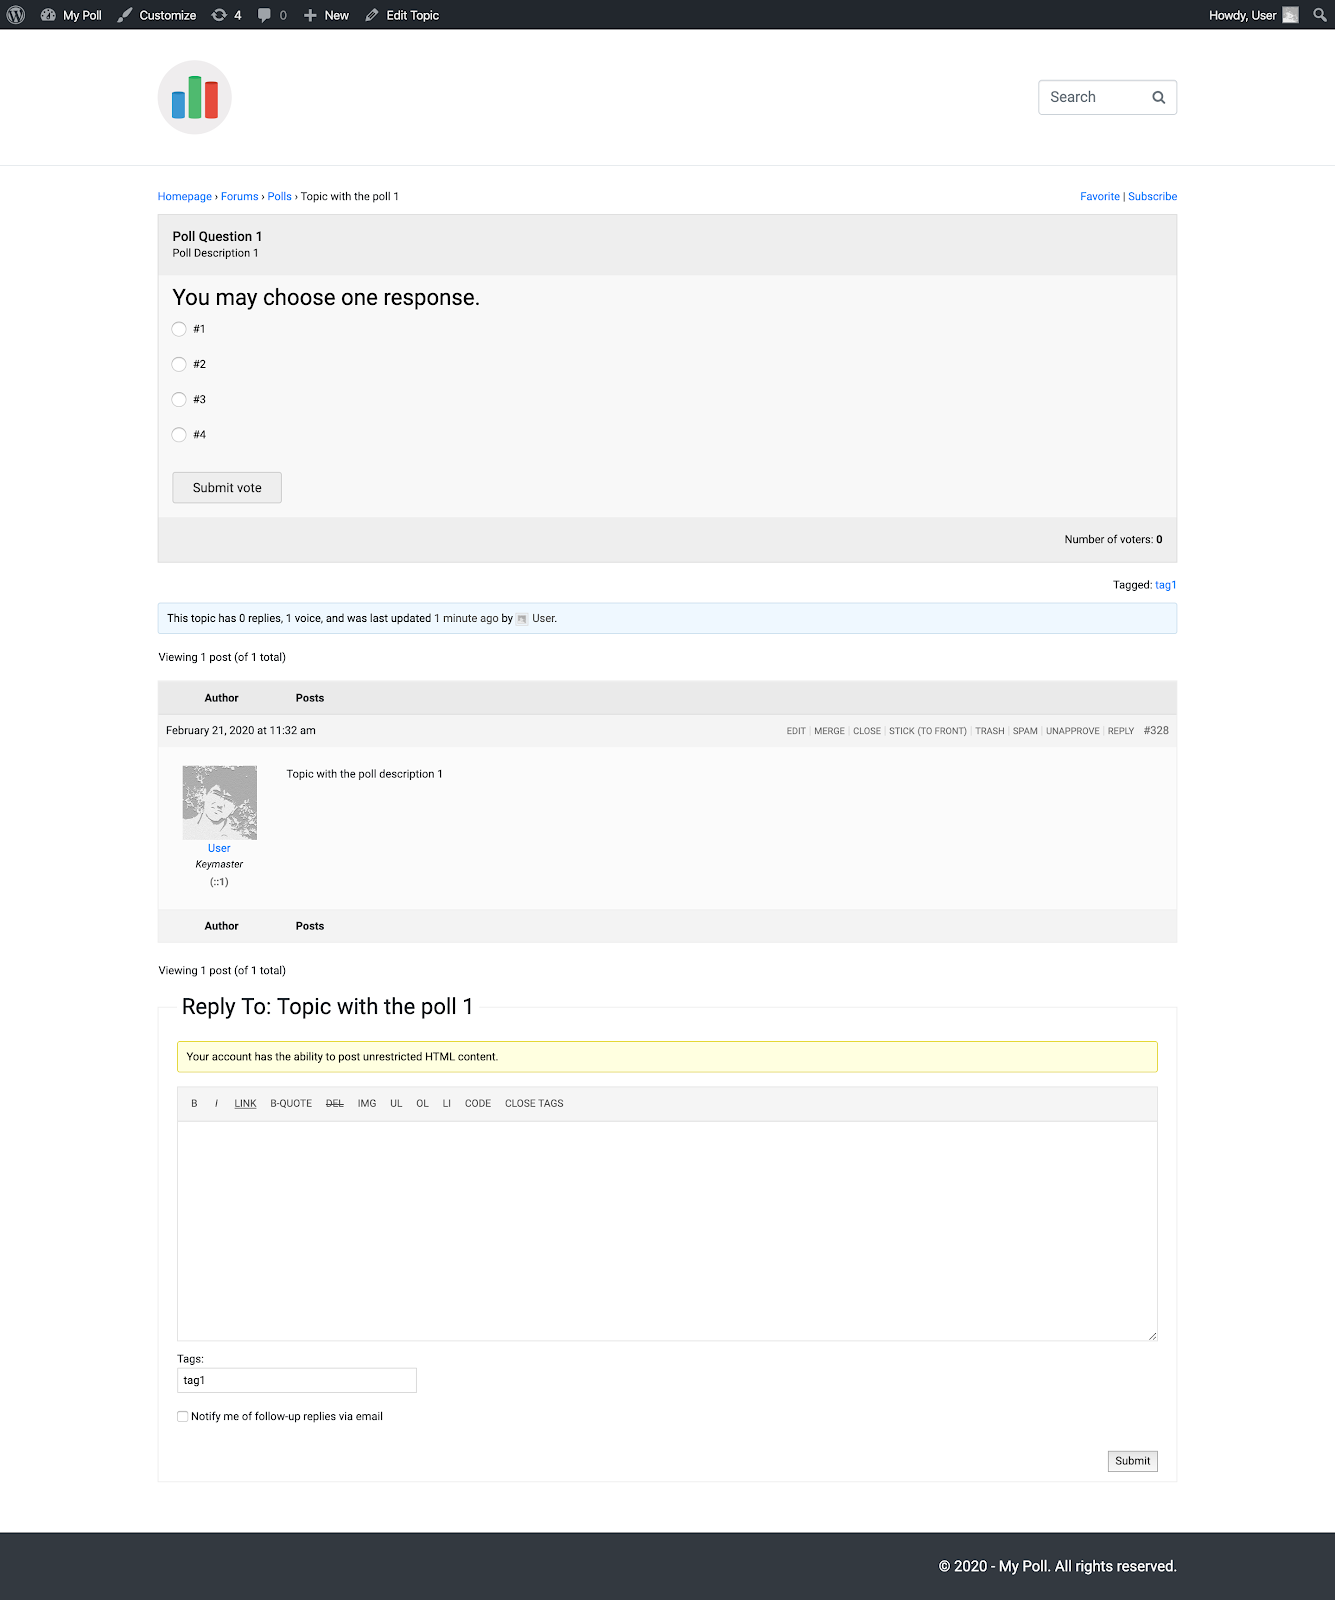
After submitting the form, you’ll be redirected to the topic, and you’ll be able to see the topic with the poll above that.
Congratulations! We’re nearly there. Before finishing, there are a few more things we need to take care of. First, I don’t want users to create a topic and then the polls. I only want Polls. So I need to somehow hide the topic or the poll title and description since I have two of them.
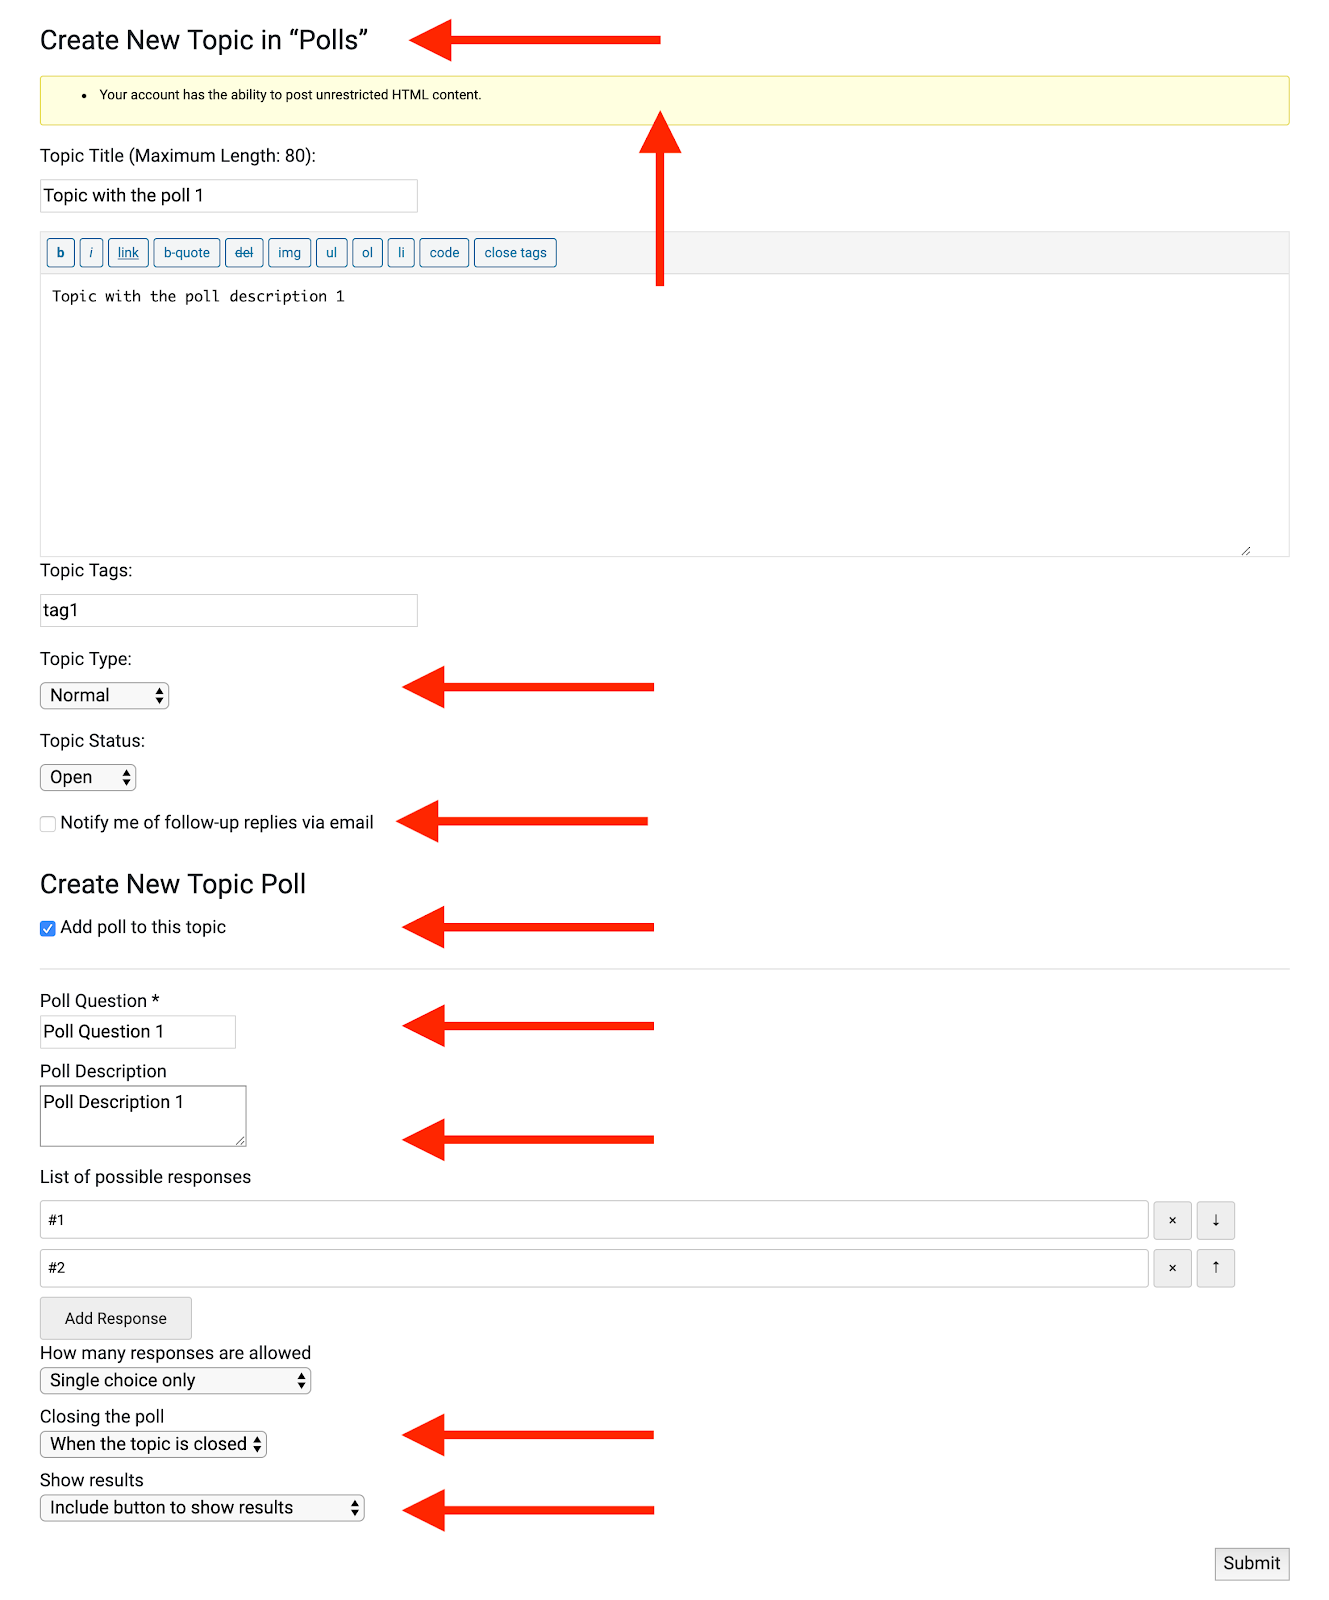
Technically, I just need to hide the extra fields and notices. Some of them can hide via CSS and some of them can get hidden by actions. However, the easiest solution would be to use the child theme and override the BBPress and GD Polls for BBPress Topics template files in it. It’s as easy as copying/pasting the proper files and the plugin template folder to my “jupiterx-child” folder and editing them.
So, from wp-content/plugins/bbpress/templates/default/bbpress/ I’ll copy the form-topic.php to wp-content/themes/jupiterx-child/bbpress/form-topic.php and then edit its codes and remove the extra fields and notices and save the file.
I should also do the same for the poll form files that are located in wp-content/plugins/gd-bbpress-toolbox/templates/default/bbpress/ and named as
- gdpol-poll-edit.php
- gdpol-poll-form.php
- gdpol-poll-new.php
So I’ll copy them to the jupiterx-child/bbpress/ folder as well.
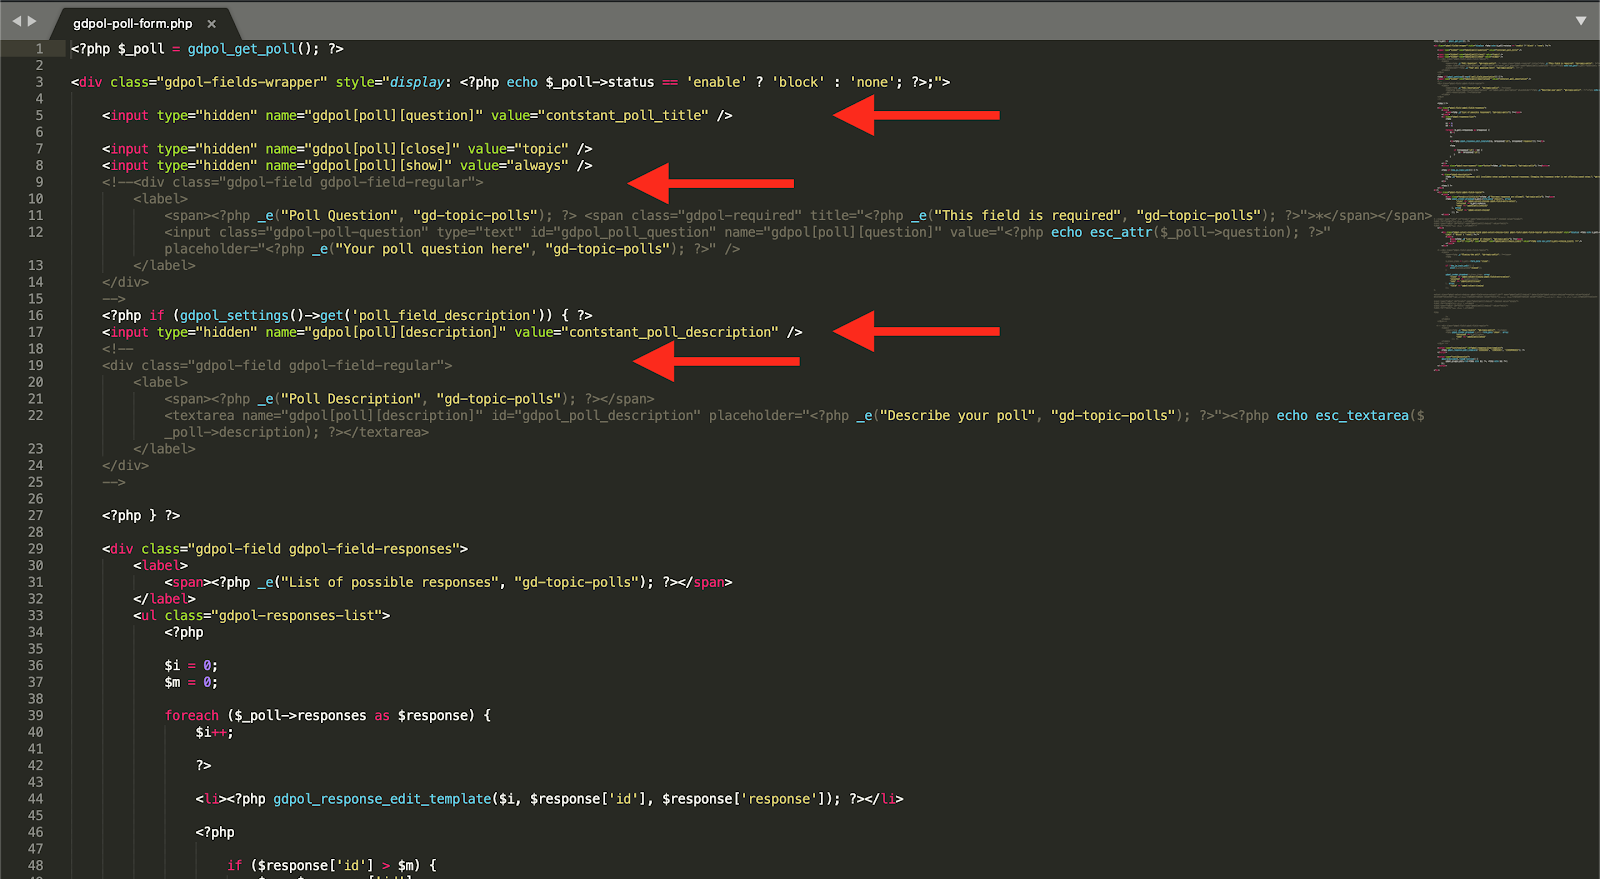
In the gdpol-poll-form.php I commented out the poll title and description fields, and instead, created two hidden fields with constant values to fill the poll description and title. This is required since the poll will not be created if the values are empty. I’ll use the Topic title and description on the polls page.
The result is now like the following:
I would like to let the users add a thumbnail to their polls as well. This thumbnail can be used in asking users’ opinions if they want to see an image before answering the poll. Adding an image to the topics are not allowed by default, so I need to find a plugin to add it or develop this part on my own.
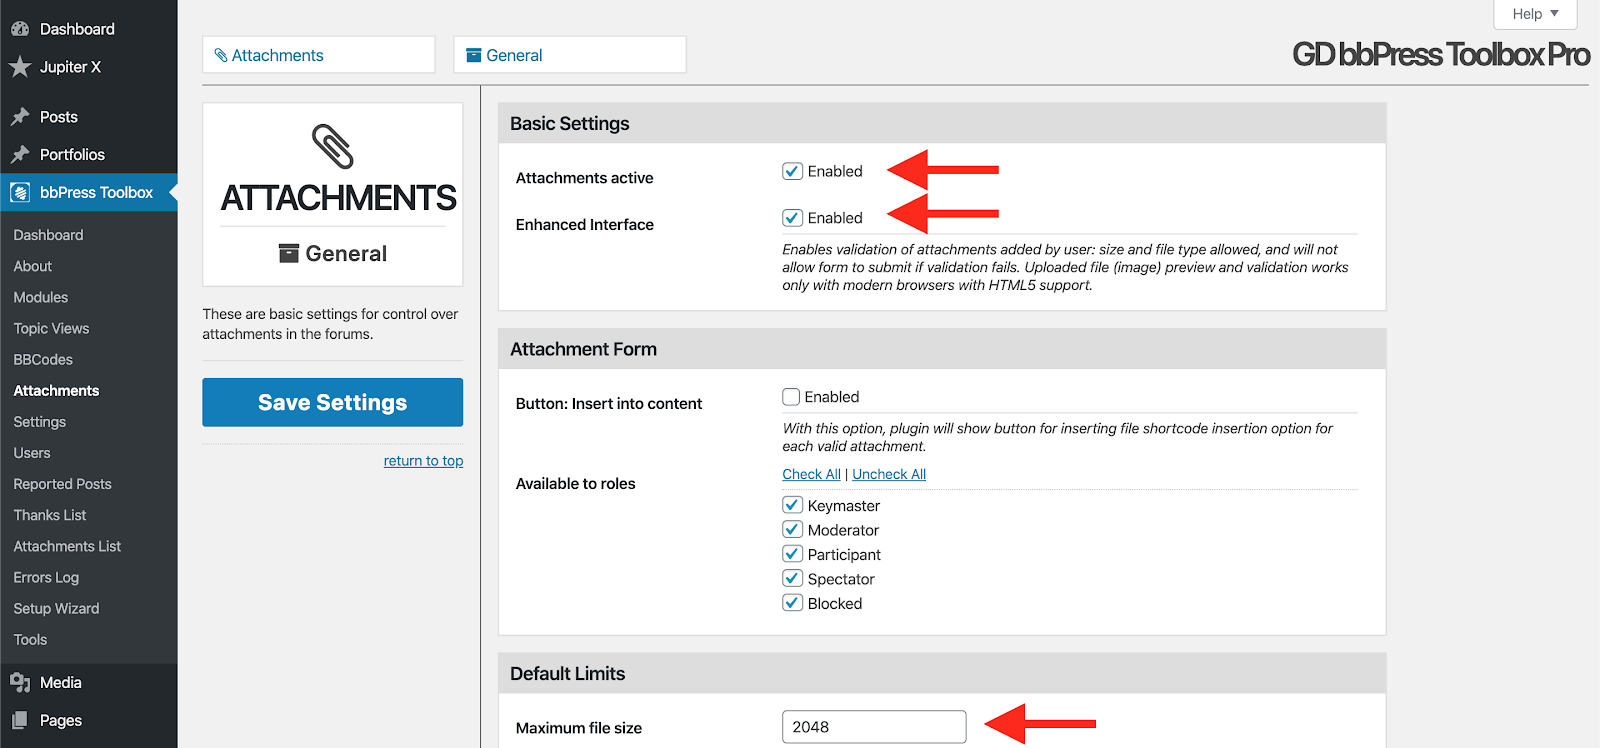
By using the GD BBPress Toolbox Pro plugin, it’s entirely possible to attach media to the topics and assign the first attachment as the topic thumbnail. It also allows you to control the attachment for the different roles. You can control the size of the image and choose from the allowed extensions. It also provides safety and security for the user file uploads. So, I’ll use this plugin and configure it like this:
Also, I would like to only allow the gif, png, and jpg mime types to be uploaded. So from the top General button, I’ll choose the “Allowed Types” and then select my desired file types.

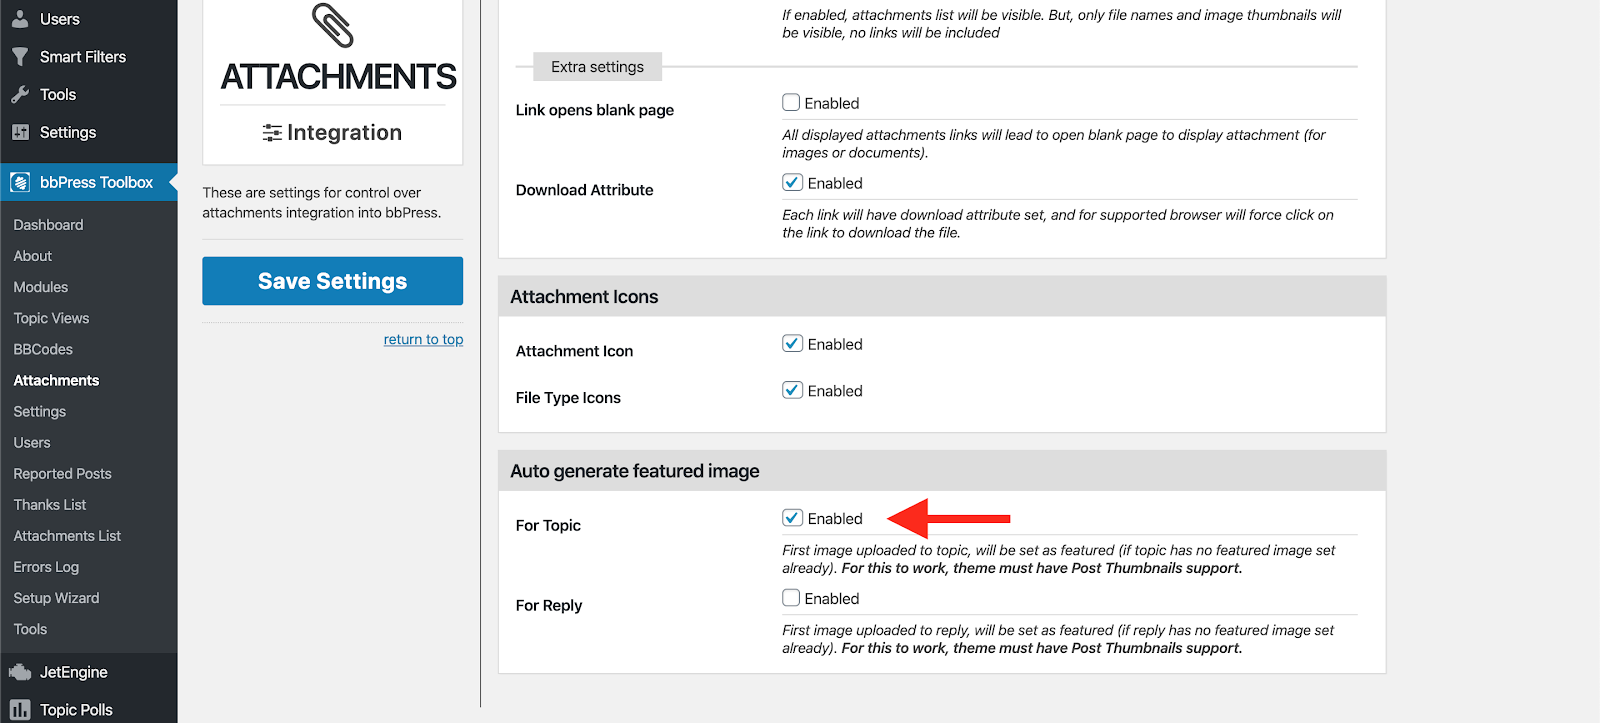
There is also another setting that needs to be configured. We need to make sure the attachment will be considered as the topic thumbnail. So, simply choose the “Integration” from the button above and then check the “Auto Generate Featured Image” for the Topics and save the settings.
Now I’ll need to style the topic creation form a little bit and hide some fields via CSS. In order to do that, I’ll write this CSS fix in jupiterx-child/assets/less/style.less and let the Jupiter X built in compiler enque it to the website. Remember to uncomment this line in jupiterx-child/functions.php before doing that:
jupiterx_add_smart_action( ‘wp_enqueue_scripts’, ‘jupiterx_child_enqueue_scripts’, 8 );
jupiterx-child/assets/less/style.less:
#gdpol-poll-status,
#wc-comment-header,
.wc_stick_btn.wc-cta-button,
.wc_close_btn.wc-cta-button,
.bbp-form.gdpol-topic-poll-form legend,
.d4p-attachment-addfile,
a.gdbbx-attachment-add-file,
.gdbbx-attachment-control>div:nth-child(3),
.gdbbx-attachment-control>div:nth-child(4),
.wc-field-submit .wpd_label {
    display: none !important;
}

.gdpol-fields-wrapper {
    display: block !important;
    border: none !important;
}

.bbp-form .gdbbx-attachments-form .gdbbx-validation-active .gdbbx-attachment-preview {
    float: left !important;
    margin-left: 0 !important;
}

.bbp-form .gdbbx-attachments-form .gdbbx-validation-active .gdbbx-attachment-control {
    float: left;
    margin-left: 15px;
}

.gdbbx-attachments-form {
    text-align: left !important;
}

ul.gdpol-responses-list li span._button:last-of-type {
    padding-left: 4px;
    width: 38px
}

form#new-post {
    max-width: 500px;
    margin: auto;
}

input#bbp_topic_tags,
#bbp_topic_title {
    width: 100%;
}

select.gdpol-select-choices.gdpol-field-extra-select {
    width: 100% !important;
    max-width: 100%;
}

.gdpol-field.gdpol-field-regular label {
    width: 100%;
}
Now let’s take a look at our poll creation page:
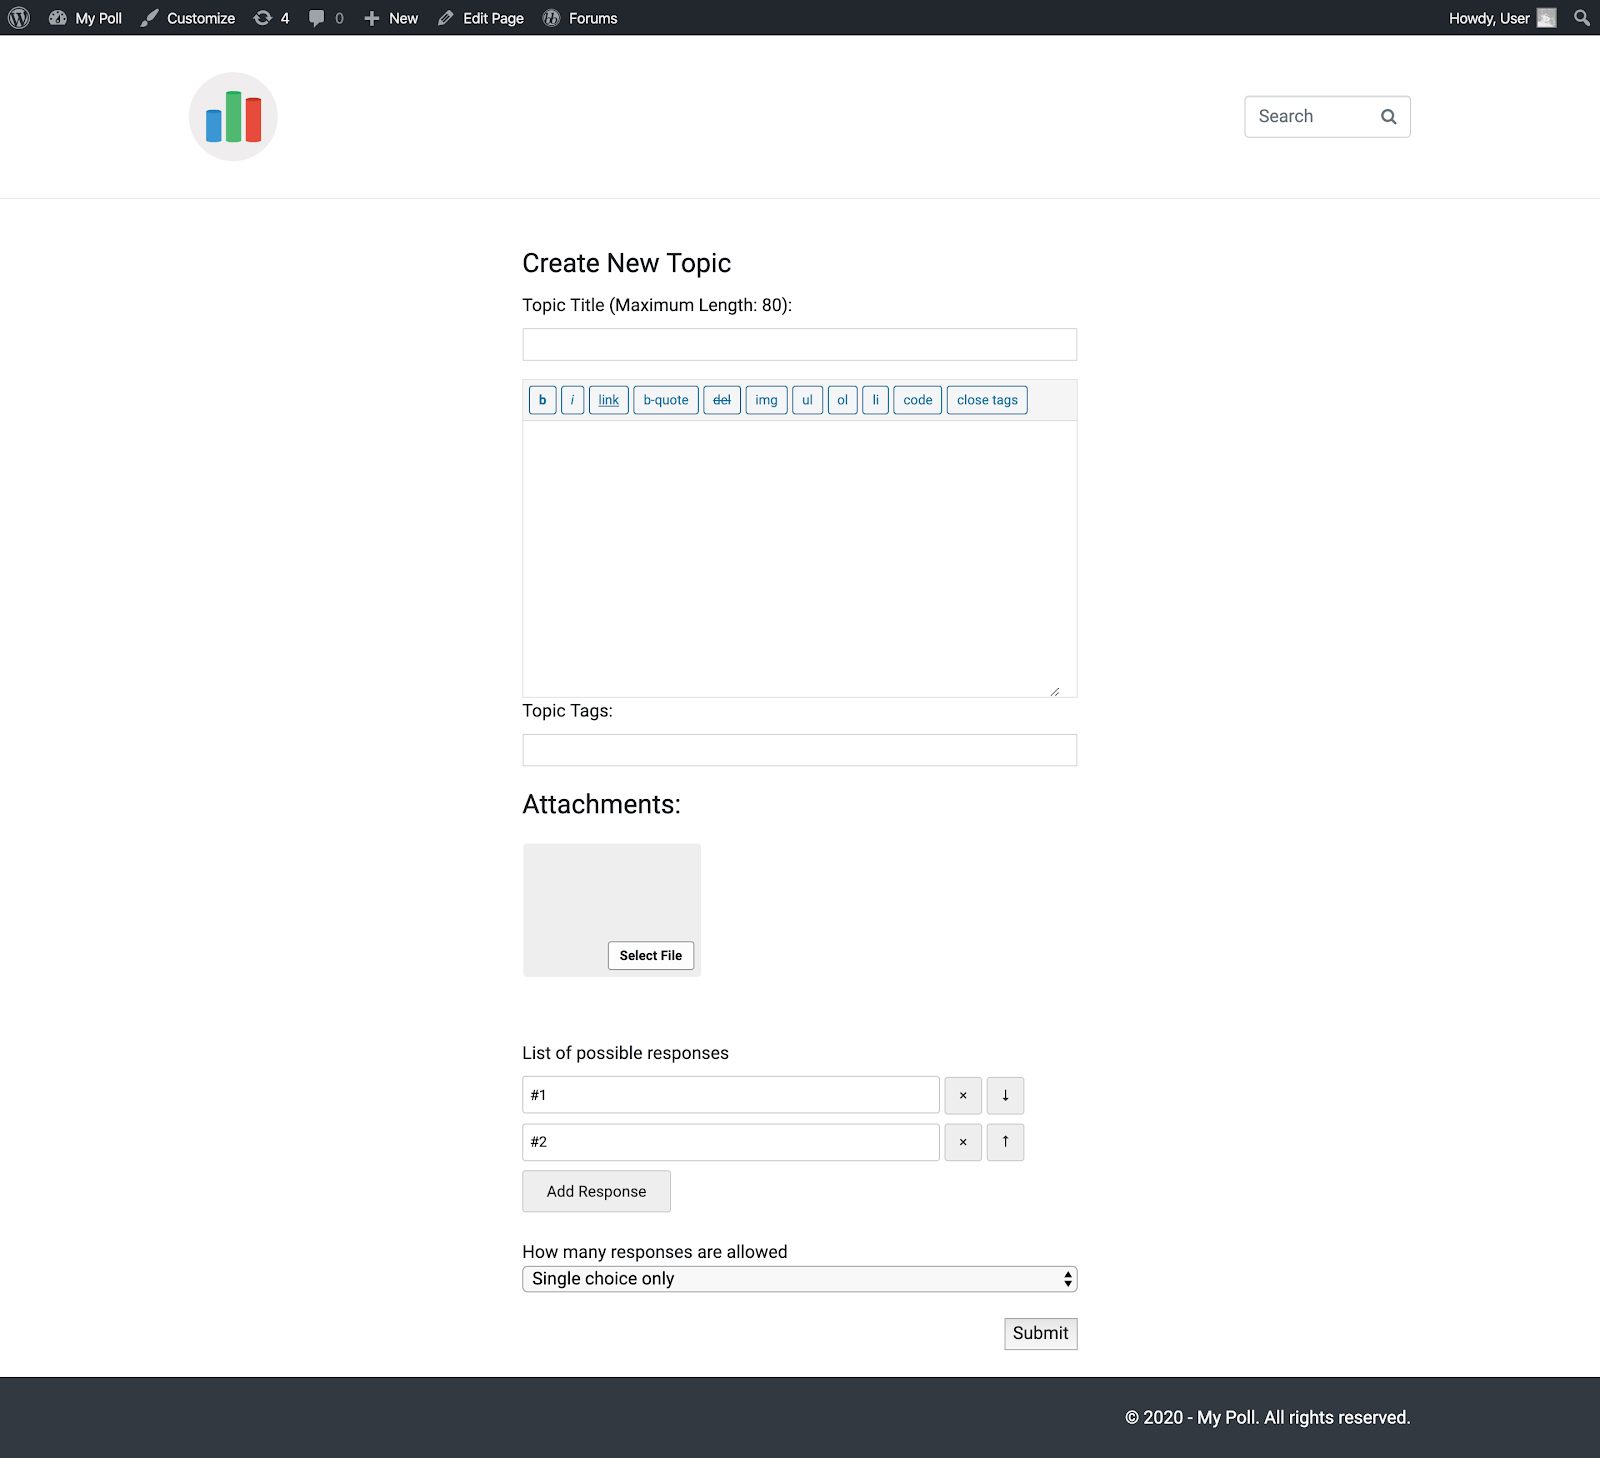
Simple, clean and quick as desired. Try submitting a new topic with the attachment and watch it work.
Stay tuned for the second part of this two-part blog series as I’ll show you how to style the single topics page, add membership profiles and implement a notification system. Also, we’ll need to display a list of the polls (topics) created and add filters and search options to it and show it on the homepage.

No comment yet, add your voice below!