
With the rising popularity of Gutenberg, building tailored Gutenberg blocks is becoming an essential skill for every developer. Throughout time, the WordPress community has made some great contributions to Gutenberg. Today, let’s take a look at the Block Lab plugin. Creating a custom Gutenberg block with the Block Lab plugin is much easier than standard custom block creation via the native Gutenberg API.
In this article, let’s see how we can create a custom Gutenberg block with the Block Lab plugin. But before going forward, you might want to check out the following articles we posted about Gutenberg if you haven’t done so already.
- A Beginner’s Guide to Create a Custom Block for WordPress Gutenberg
- How to Create a Custom Gutenberg Block Using the ACF Plugin
- How to Create a Custom Gutenberg Block with Lazy Blocks Plugin
Before diving into codes
First thing’s first. Let’s get familiar with the Block Lab plugin and then we can start creating an example block with this plugin to explore its features.
Features:
- WordPress- and Gutenberg-friendly UI.
- 19 available field types.
- Highly flexible in creating different types of blocks from easy to complex ones.
- Developer-friendly functions.
- Good documentation and tutorials.
Creating a custom Gutenberg block with the Block Lab plugin
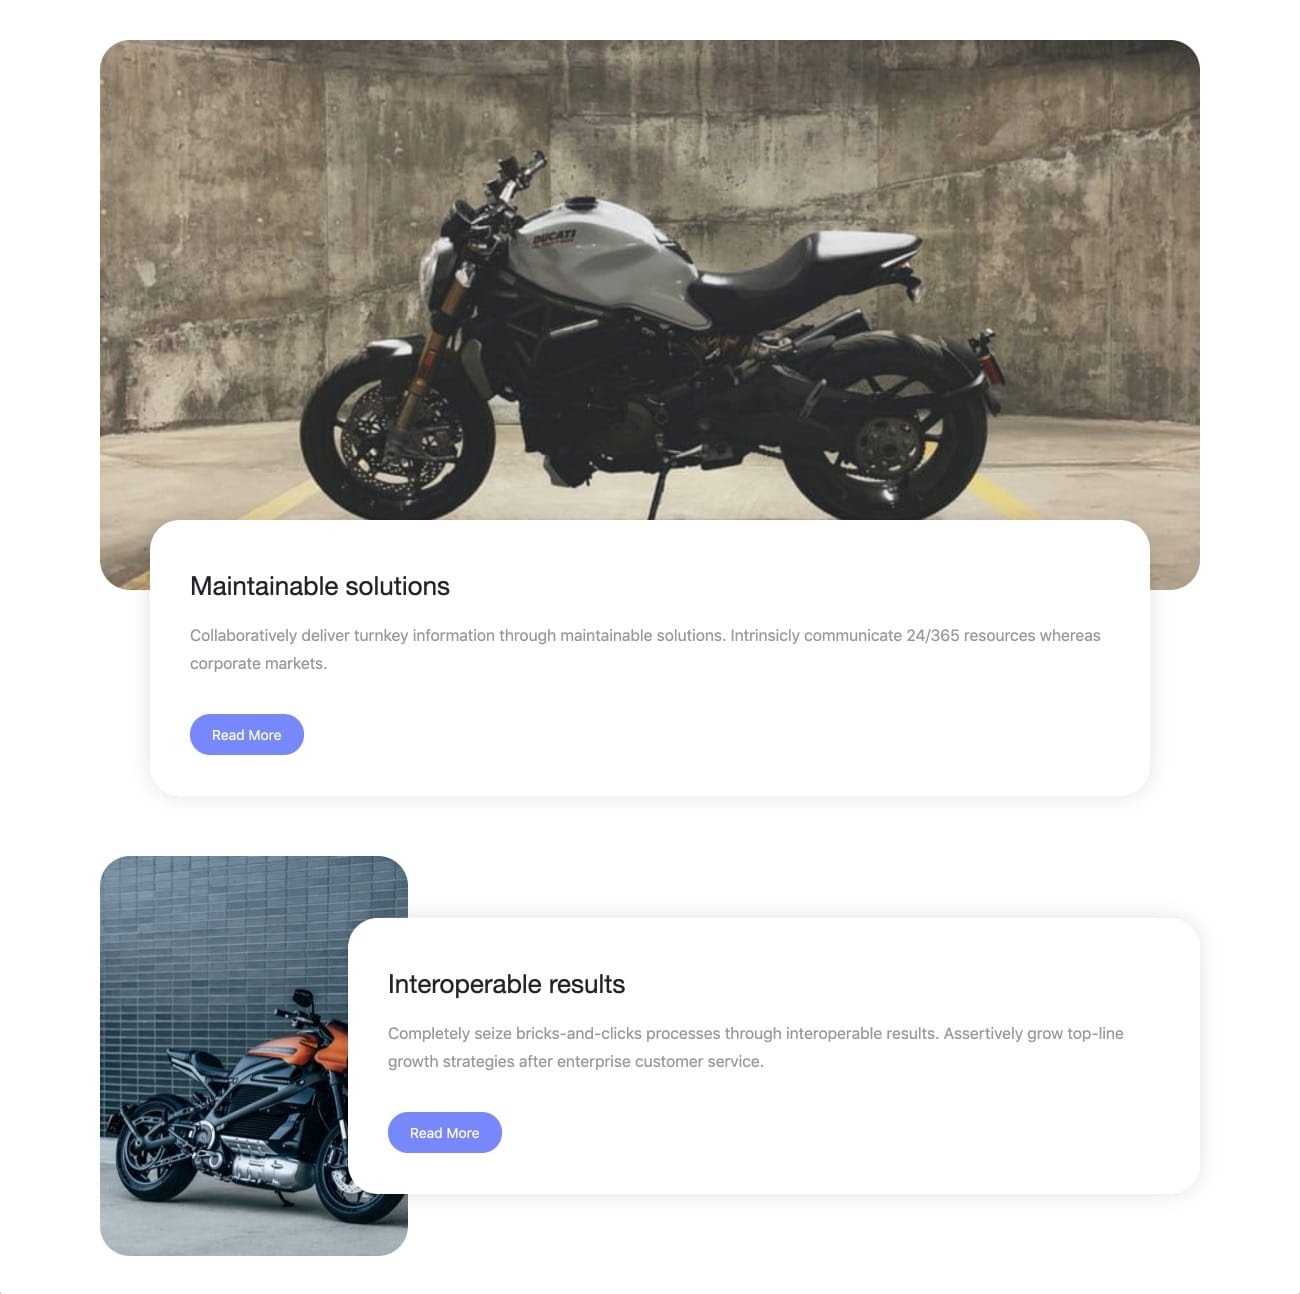
To demonstrate how this plugin works, let’s create a posts loop block in a few steps. Almost all websites need to use these types of blocks to show posts, portfolios, news and other types of content. Now imagine that you can create any type of posts loop block by yourself using this plugin.
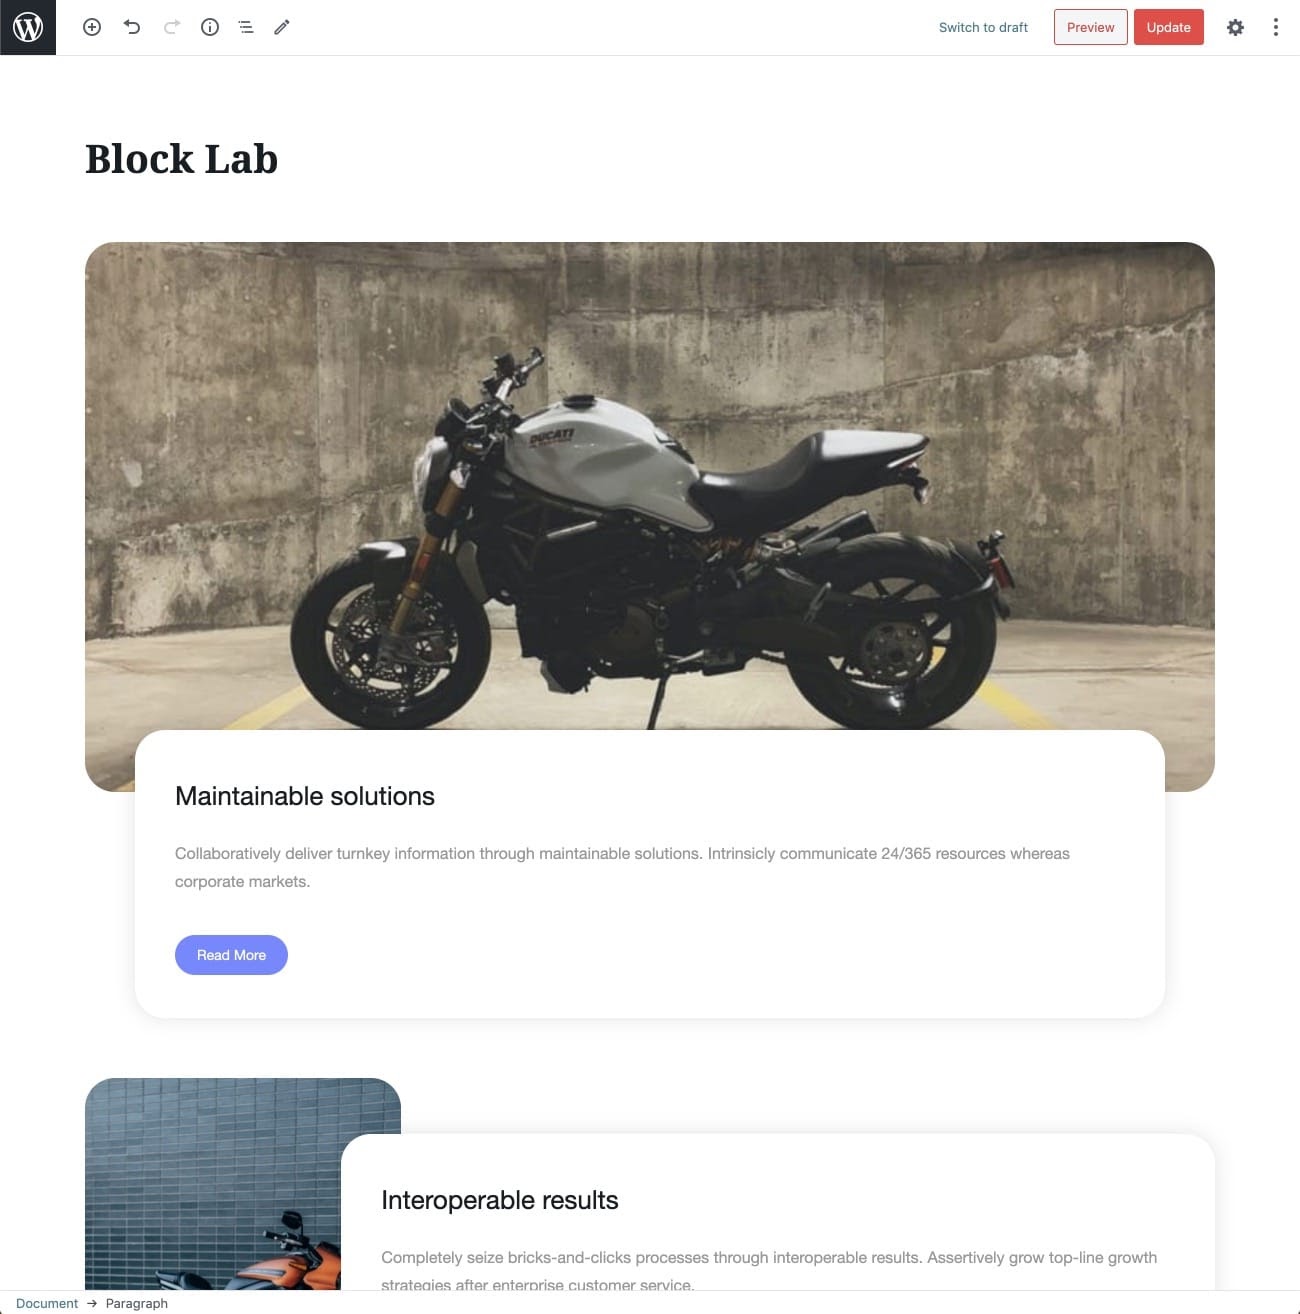
For this article, we are going to create the following posts loop block called Modern Posts. It allows you to fetch posts from different post types and to specify the number of the posts.
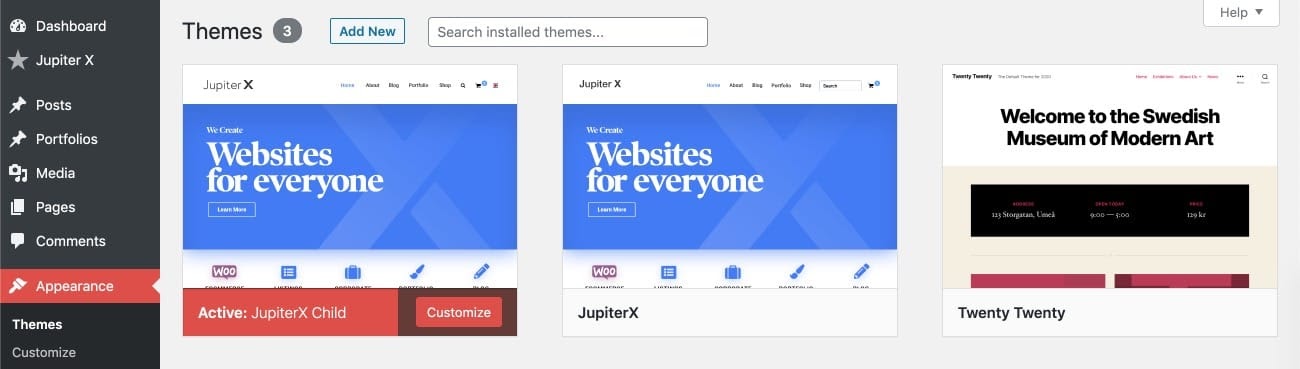
1. Install a child theme
We need to use a child theme for our PHP and JavaScript codes. For the purposes of this article, we’re going to use the Jupiter X Child theme.
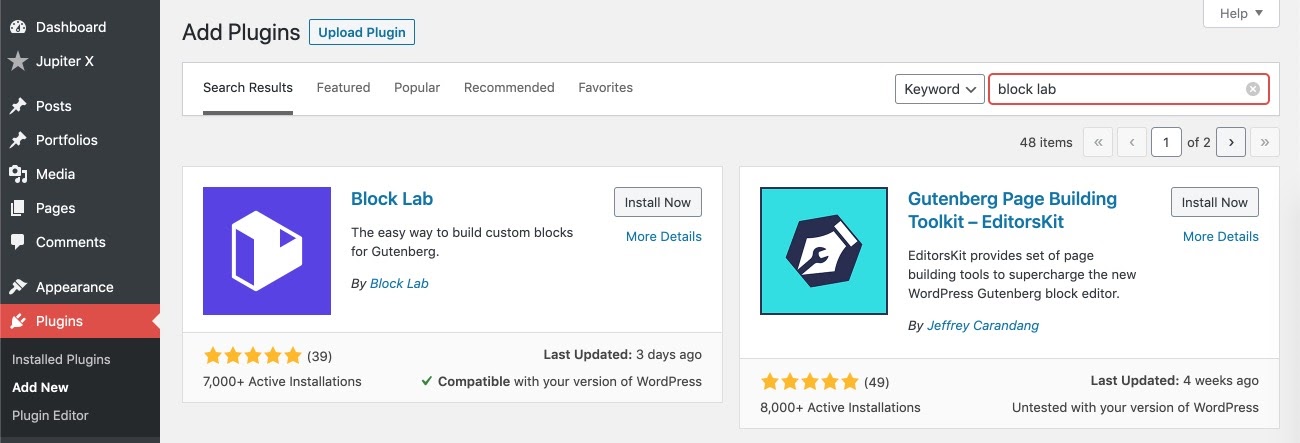
2. Plugin installation
Go to Plugins > Add New, search for the block lab, then install and activate the plugin.
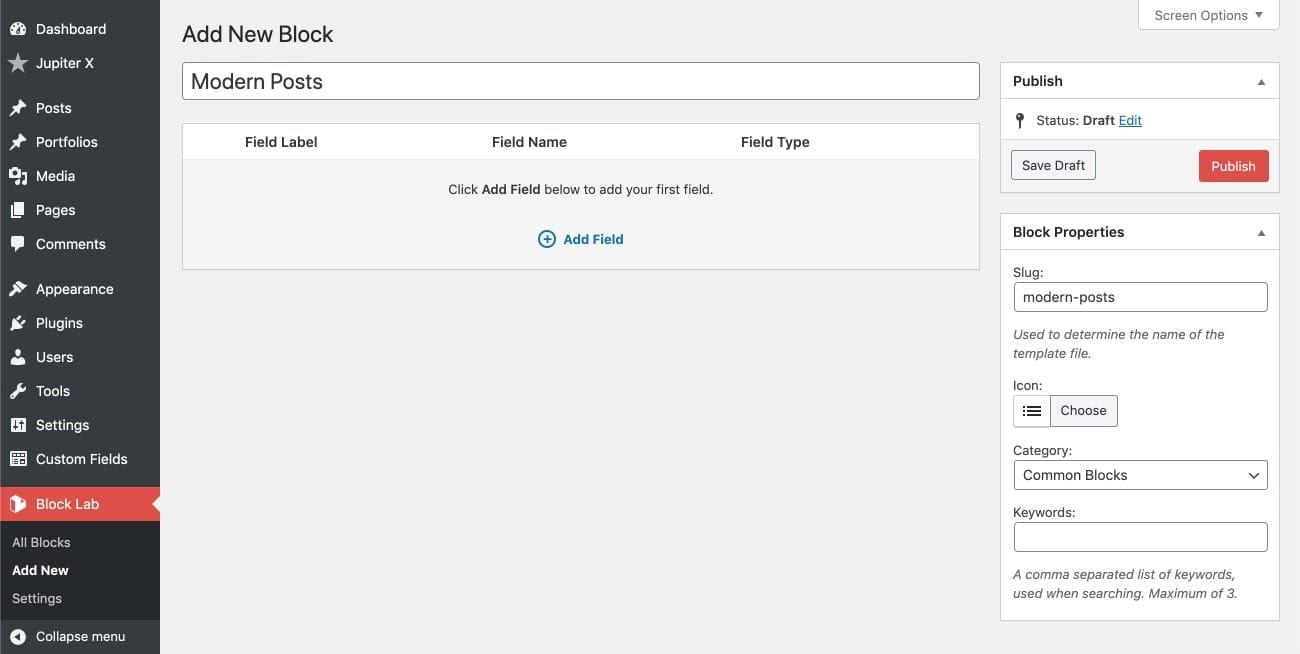
3. Configuring the block
To configure the essential settings for the Modern Posts block, go to Block Lab > Add New then fill in the Title and Icon settings as shown below. You may change other settings based on your needs.
4. Add the block fields
Fields allow us to set different settings for each block. Almost all blocks benefit from the flexibility the fields offer. We suggest that you read the Fields documentation.
To create the Modern Posts block’s fields based on the initial design (as shown above), we need the following Post Type and Number of Posts fields. You may add more controls based on your needs. Let’s create them.
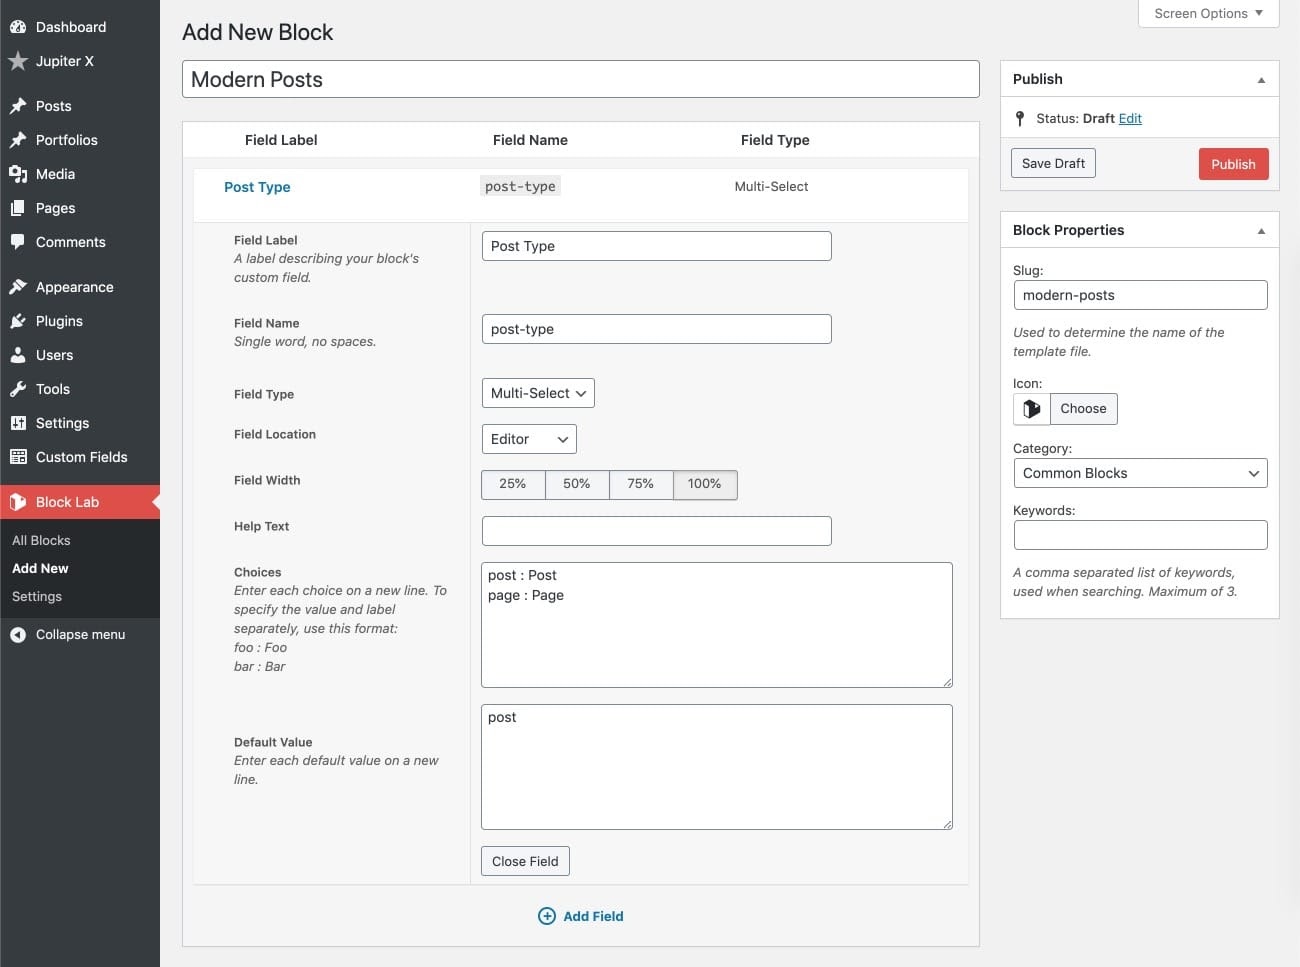
1. Click on the Add Field button to add the fields.
2. Add the Post Type field as shown below.
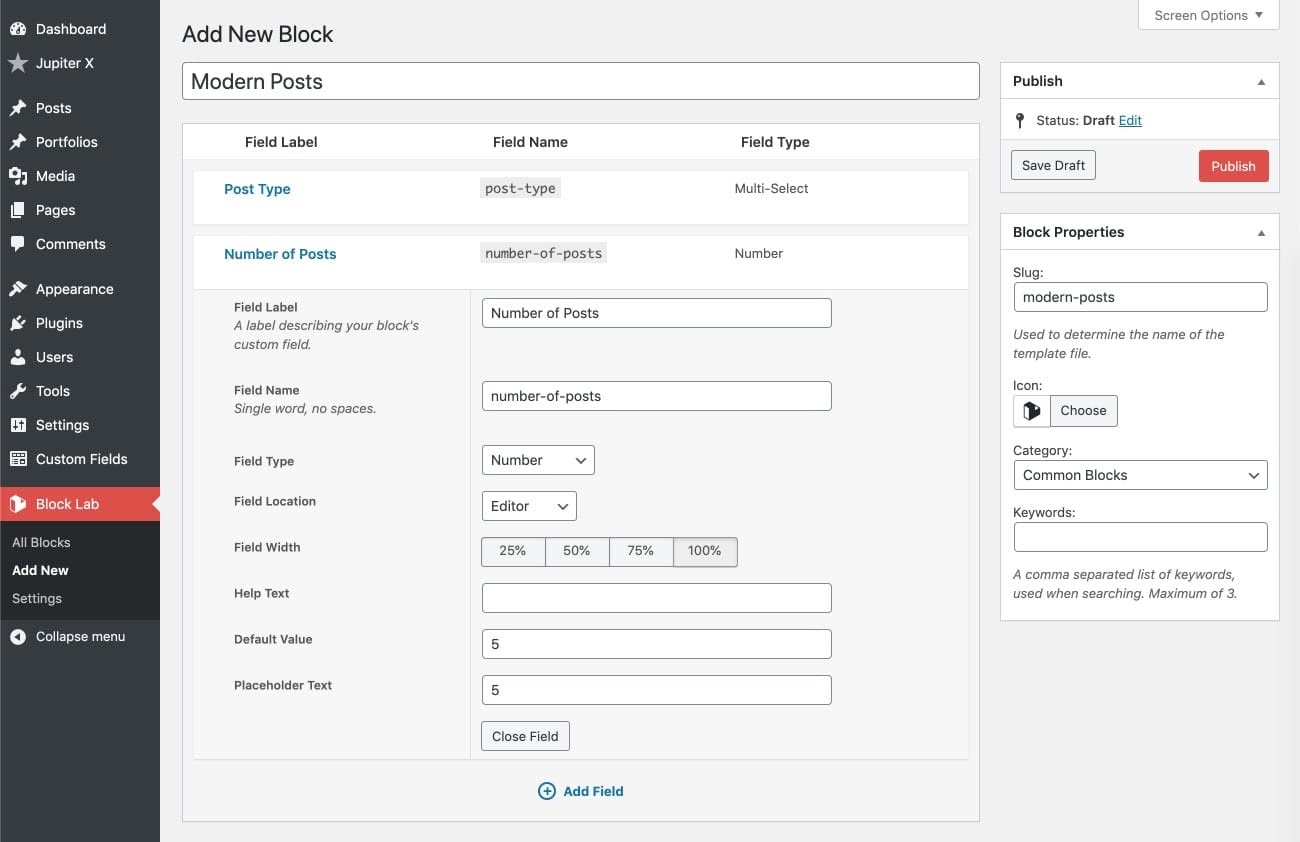
3. Add the Number of Posts field as shown below.
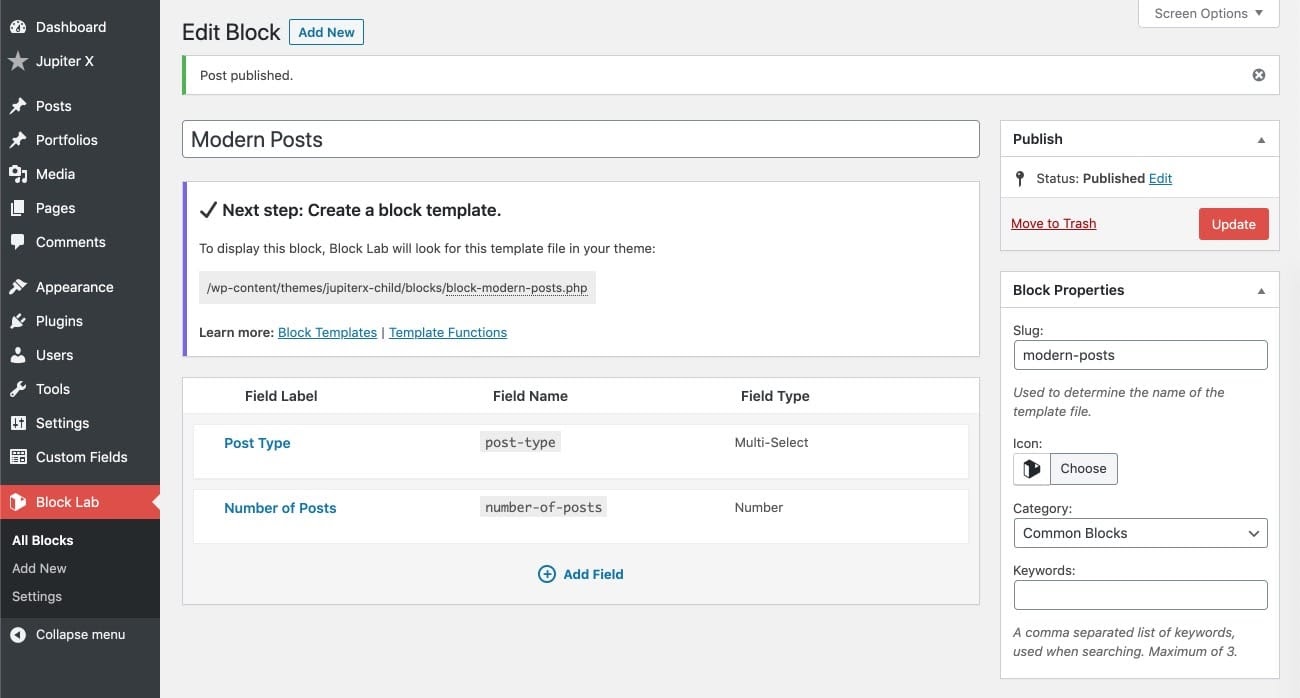
4. Click on the Publish button. Afterward, you’ll see the following message which tells you where to create your PHP file in the child theme.
5. Write the block code
Now it’s time to create the PHP and CSS files to make the block show the posts loop.
1. Create the block-modern-posts.php file in blocks folder in the child theme as shown below.
- block_value() function gets the value from the fields that we created in the previous section.
- We used a custom WP_Query to create a custom loop.
<div class="block-modern-posts <?php block_field( 'className') ?>">

	<?php
	// Variables
	$post_type  = block_value( 'post-type' );
	$post_count = block_value( 'number-of-posts' );

	// WP_Query arguments
	$args = array(
		'post_type'      => $post_type,
		'posts_per_page' => $post_count,
	);

	// The Query
	$modern_post_query = new WP_Query( $args );

	// The Loop
	while ( $modern_post_query->have_posts() ) {
		$modern_post_query->the_post();
		?>

		<div class="block-modern-posts--post">
			<img class="block-modern-posts--post-thumbnail" src="<?php the_post_thumbnail_url(); ?>" alt="<?php the_title(); ?>">
			<div class="block-modern-posts--post-content">
				<h4 class="block-modern-posts--post-title"><?php the_title(); ?></h4>
				<div class="block-modern-posts--post-excerpt"><?php the_excerpt(); ?></div>
				<a class="block-modern-posts--post-more" href="<?php the_permalink(); ?>">Read More</a>
			</div>
		</div>

		<?php
	}

	// Restore original Post Data
	wp_reset_postdata();
	?>

</div>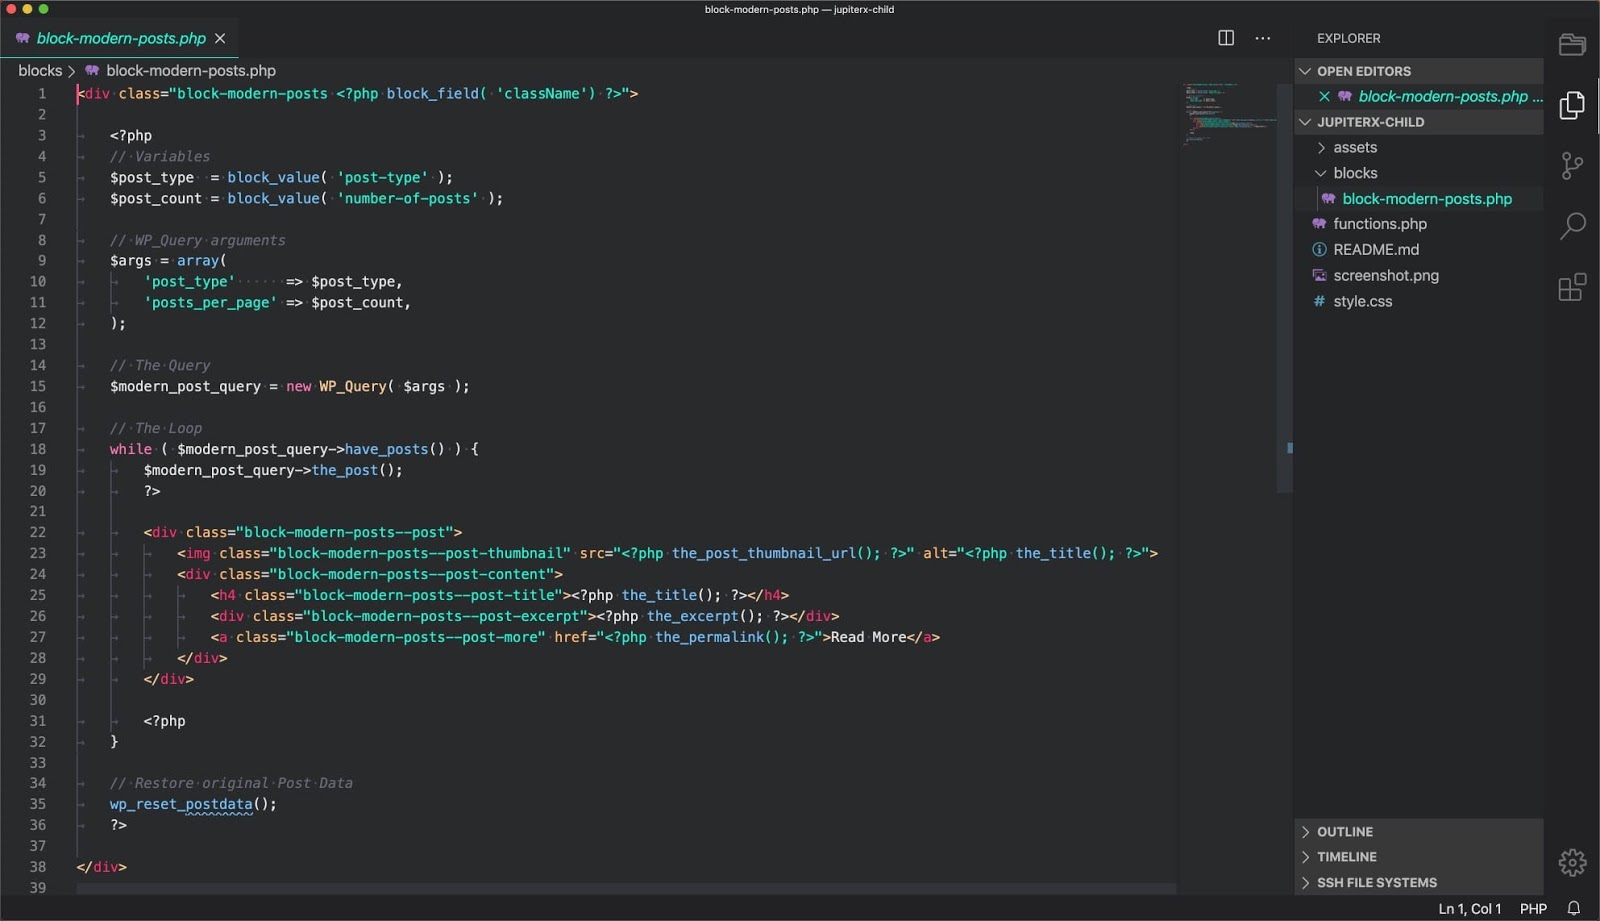
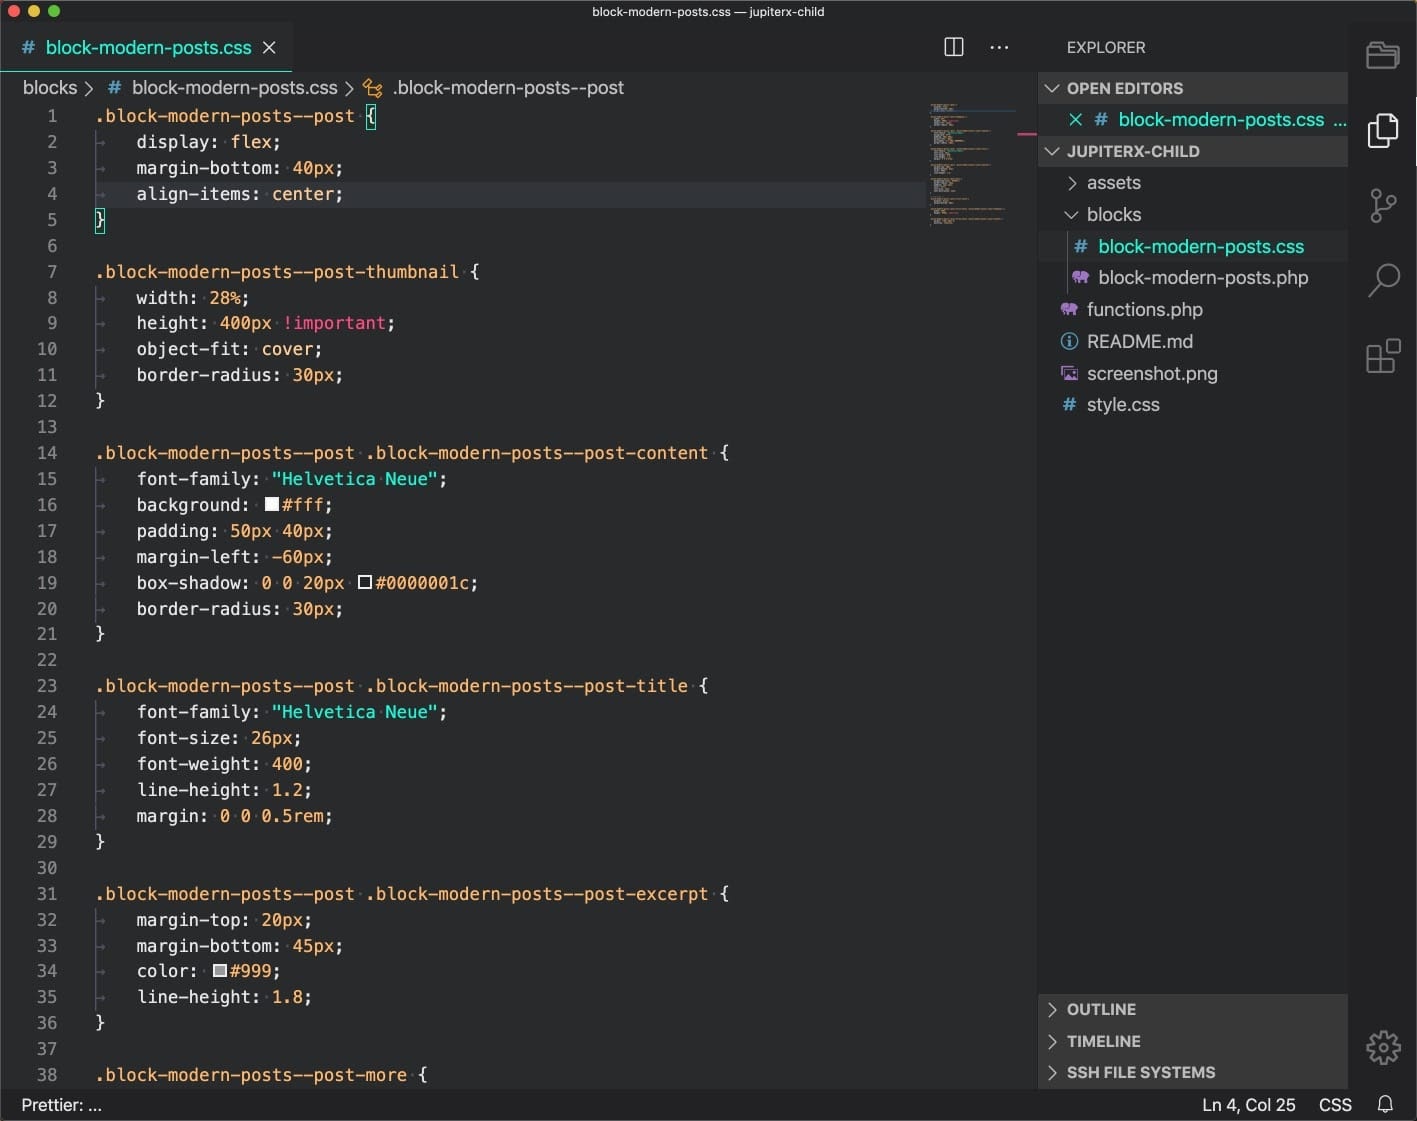
2. Create the block-modern-posts.css file in the blocks folder in the child theme as shown below.
.block-modern-posts--post {
	display: flex;
	margin-bottom: 40px;
	align-items: center;
}

.block-modern-posts--post-thumbnail {
	width: 28%;
	height: 400px !important;
	object-fit: cover;
	border-radius: 30px;
}

.block-modern-posts--post .block-modern-posts--post-content {
	font-family: "Helvetica Neue";
	background: #fff;
	padding: 50px 40px;
	margin-left: -60px;
	box-shadow: 0 0 20px #0000001c;
	border-radius: 30px;
}

.block-modern-posts--post .block-modern-posts--post-title {
	font-family: "Helvetica Neue";
	font-size: 26px;
	font-weight: 400;
	line-height: 1.2;
	margin: 0 0 0.5rem;
}

.block-modern-posts--post .block-modern-posts--post-excerpt {
	margin-top: 20px;
	margin-bottom: 45px;
	color: #999;
	line-height: 1.8;
}

.block-modern-posts--post-more {
	background-color: #7882ff;
	border-radius: 50px;
	padding: 12px 22px;
	color: #fff;
	font-size: 14px;
	text-decoration: none;
}

/* Featured */
.block-modern-posts--post:first-child {
	display: block;
	margin-bottom: 60px;
}

.block-modern-posts--post:first-child .block-modern-posts--post-thumbnail {
	width: 100%;
	height: 550px !important;
}

.block-modern-posts--post:first-child .block-modern-posts--post-content {
	margin: -70px 50px 0;
	position: relative;
}
3. After adding the files, you can now play with the block in the WordPress editor.
Wrapping up
As outlined in this post, we walked you through how you can build a custom Gutenberg block with Block Lab, which is much easier than creating the blocks with the native Gutenberg API. In other words, the Block Lab plugin is a huge timesaver when it comes to creating custom blocks.
We’d love to hear about your experiences with the Block Lab plugin, so please share your custom blocks with us in the comment section below.

No comment yet, add your voice below!