
In most cases, your menu will be the deciding factor for whether a visitor decides to stay on your website or just leaves. It’s a no-brainer to have a good looking and organized menu, and as a member of Artbees Support, I know first-hand that there are a wide range of options to customize your menu in Jupiter. It’s my hope that I can share with you different aspects of customizing your menu to really steer your website in a results-oriented direction!
In this article we’ll cover three parts to show you your options:
- Introduction to Jupiter Menu Options.
- Deciding which menu style is most suitable for your website.
- How do you start creating and customizing your menu?
Introduction to Jupiter Menu Options
Jupiter has many features which can really make your menu stand out from others while also fitting into the style of your website. Here, I want to take you through some of the features Jupiter offers that will allow you to customize your menu.
[call_to_action title=”Discover 26,000+ code scripts & plugins from our partner CodeCanyon starting from $2″ target=”_blank” url=”https://1.envato.market/c/1239055/275988/4415?subId1=plugin-related-docs-posts&u=https%3A%2F%2Fcodecanyon.net%2F” type=”link”]
- Menu icons. The use of icons next to the menu links will provide your users with a quick visual representation, making the menu a lot more user-friendly and intuitive. Jupiter offers a big icon library to choose your icons from with many options to customize its style, something we’ll cover later.

- Mega menu. The best way of adding rich submenus with multiple columns is by creating a mega menu. The possibilities are endless here as a mega menu let’s you add widgets and backgrounds to menu items.
- Menu background. Creating a specific menu item into a mega menu will let you add a background image for that menu item which is very striking and sleek.
- Menu widget. Jupiter has default and custom widgets which allow you to add engagement and highlight your submenu items. Just like the background image, a menu item has to be mega menu in order to have this feature.

- Styling. Jupiter has a whole set of options just for menu styling. You can choose from many hover styles, and completely customize menu and submenu items.

Which menu style is most suitable for your website?
Now, you can have all the options you want but if none of them fit your vision and style, they’ll be useless. So it’s important to consider the function, objective and style your menu needs to have to meet the needs of your website and business. Here I’ll list some of the different types of menus offered based on their function and your business. Depending on if your website is an online shop, portfolio or blog, here are some things to consider:
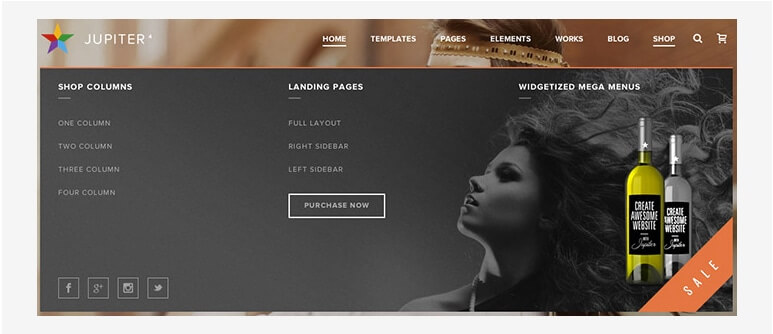
Shop. It is a must to have some kind of primary category/product navigation. Create mega menus to highlight products on sale, offers and promotions using widgets. Add a search tool in the menu for more user-friendly experience. Add a quick link to the shopping cart; the last thing you want on your online shop is visitors not being able to find their shopping basket easily.
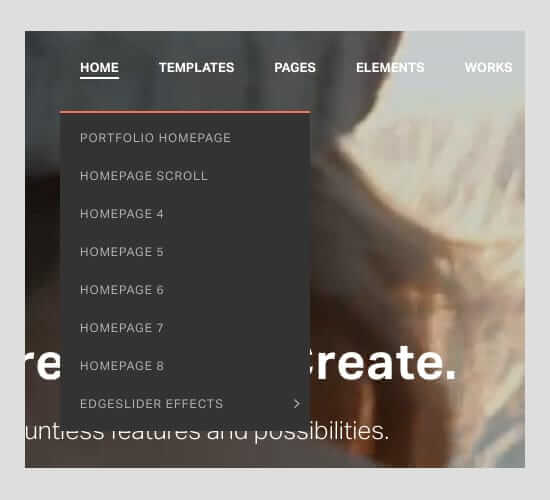
Blog or Portfolio. Feature a simple, clear and bold menu. Use menu icons to highlight the most important sections of your website. Use a different color for active menu items to let the visitor know which page is designated for which purpose. If visitors can easily find what they are looking for they will be more likely to stay on the website rather than leaving and going to another website.
Creating a menu in Jupiter, step by step.
Creating a menu in Jupter is simple and follows the default “WordPress” process. In the tutorial below, we are going to create a menu with mega menu item, widget, icon and a background image. Before we start, we will assume that you have your pages already created since they are needed for menu items to display.
The first step is to create a new menu. You can do that by navigating to Appearance > Menus from the WordPress left menu.
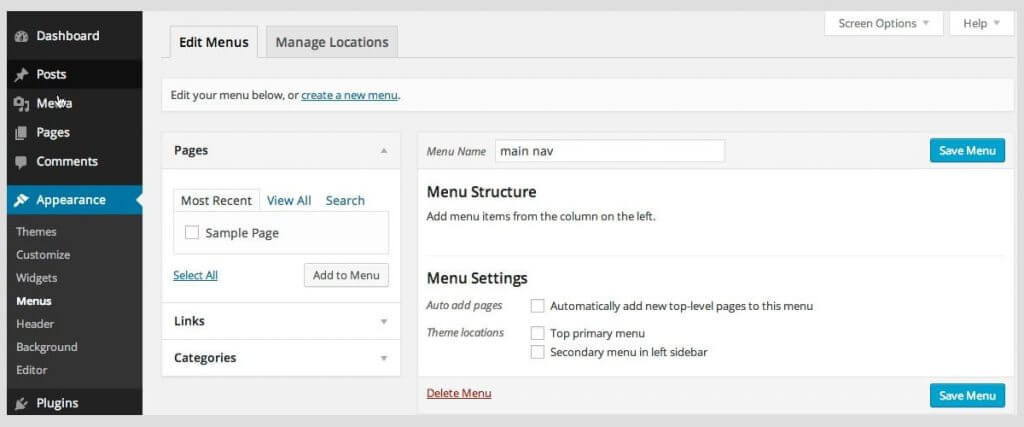
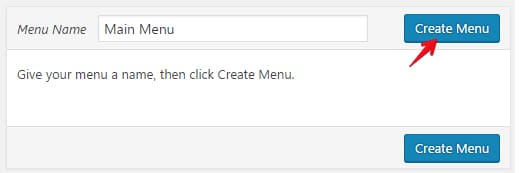
In the menus page, click on create a new menu. Give your menu a name, then click create menu.
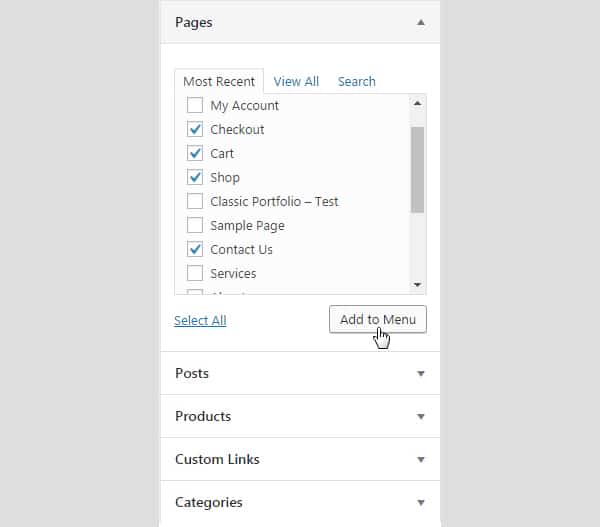
Great! You’ve successfully created a new menu. The next step is to add your menu items. As a menu item we can add pages, posts, products, tags, custom links and many other post types. In this example, we’re going to add pages as menu items. From the pages drop-down, select your pages and click on the Add to Menu button.
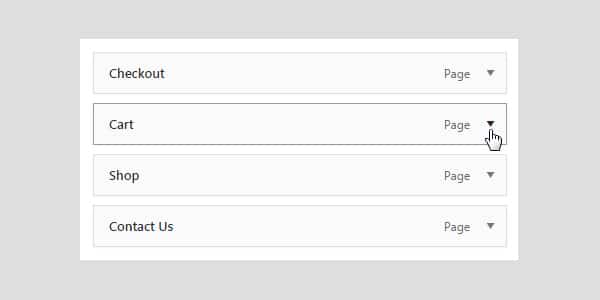
If you click on the Save Menu button and check the frontend of your website, this menu will now be displayed in the header. Now, let’s go through how to use the features Jupiter offers to customize this menu.
Customizing your Jupiter Website Menu.
Here we’ll go through different ways you can customize your menu and how they appear. There are several features you can make use of and below we’ve listed some of the most popularly used styles:
Adding a menu icon. From the same menus page, in the menu structure section, click on the dropdown icon on a specific page.
A new window will appear below, which lets you add an icon. Click on the link below the Menu item icon input field to see all the available icons.
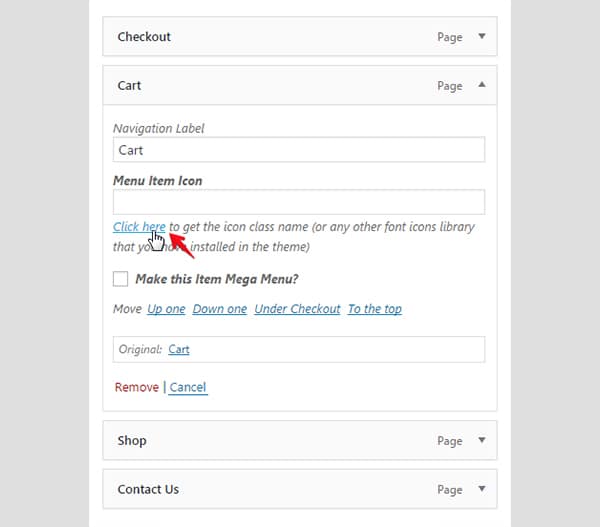
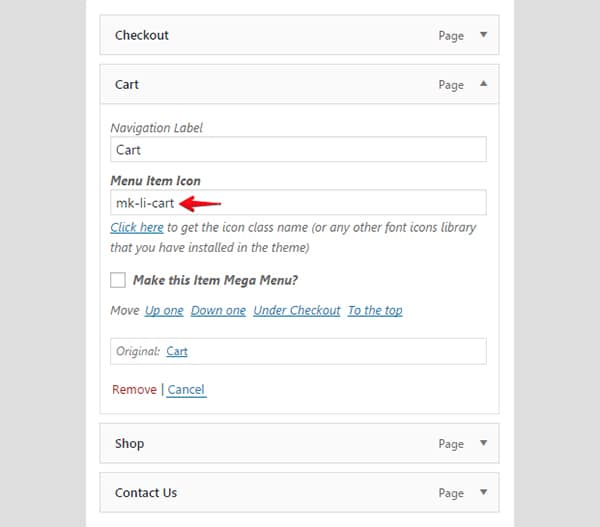
Copy the desired icon class into the Menu item icon input field.
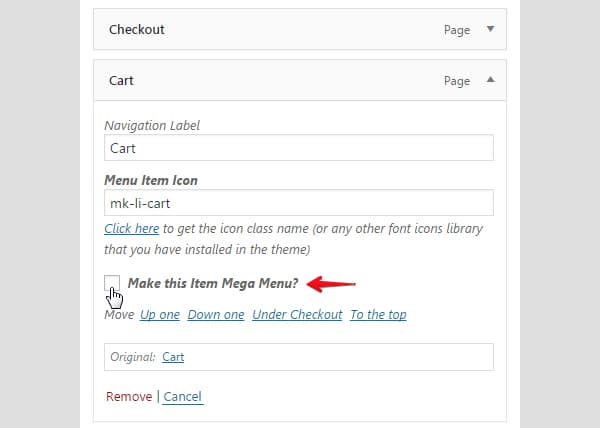
Adding a mega menu. Just like when adding an icon, in the menu structure section, click on a dropdown icon on a specific page.
Click on the Make this Item Mega Menu?
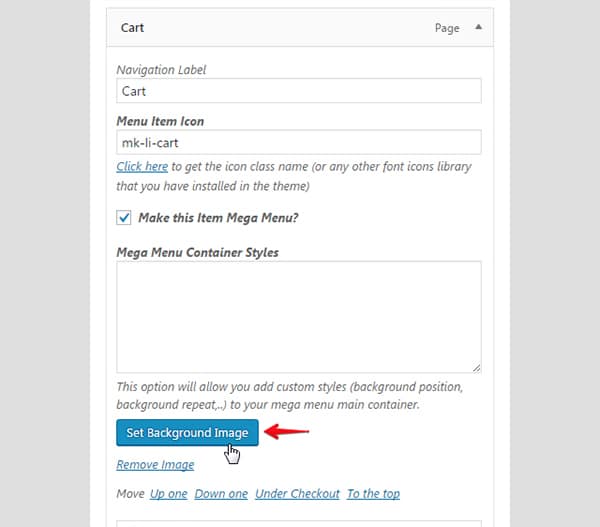
Adding a background image. After creating a mega menu item, an option to add background image will appear. Click on the Set background image button.
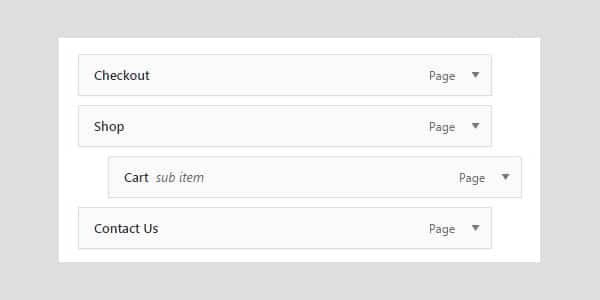
Adding a widget. Widgets can only be added to sub items. Create a sub item by dragging and dropping an item onto the parent item.
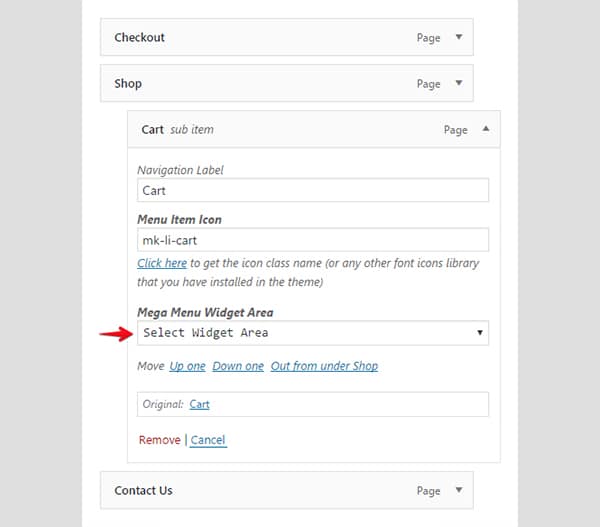
A new option to add the widget area on the sub item will appear. Click on the Mega menu widget area dropdown and select your widget area.
Styling & coloring the menu. To style the menu, from WordPress left menu go to Theme Options > Style > Main Navigation. In this section, Jupiter offers 18 options to completely style your menu. All of the options are self explanatory and have a short description of what each one does.
The thing that makes menu difficult to work with is that it can be so versatile. Because it can vary so much between websites, there are no exact guidelines in creating a menu. Jupiter is very flexible, letting you customize and adjust the menu to meet your website’s needs.
I hope that these tips gave you inspiration and insight for your menu, and introduced you to one of many great things in Jupiter.

No comment yet, add your voice below!