
Though beware of adding too many fonts, as they can slow down your site. It’s recommended that you use just two font families to prevent the slowdown of your website and to solidify your brand personality. In Jupiter, there’s no one way to add custom fonts and font icons to your WordPress website.
But, there are a few ways you can do this. Jupiter has made it easy to add custom fonts in your WordPress website. In this article, we’ll show you how you can add custom fonts and font icons without the use of a plugin.
Different Ways to Add Font Icons and Custom Fonts in Jupiter
Using CSS3 @font-face.
This allows you to use any font you want on your website. You can follow the same instructions for adding custom font icons as well.
1. Download your font in a web format. You can then convert your font in a web format using Font Squirrel Webfont Generator.
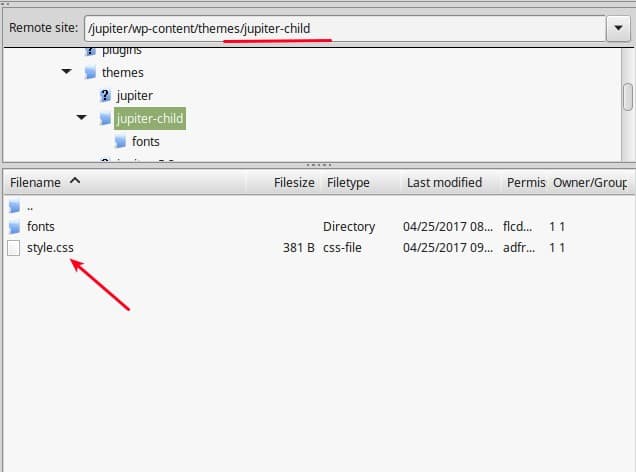
2. Create a new “fonts” folder in the theme or child theme’s directory of your hosting server, and upload the webfont files there. You can use the FTP client like FileZilla on your cPanel to do this.

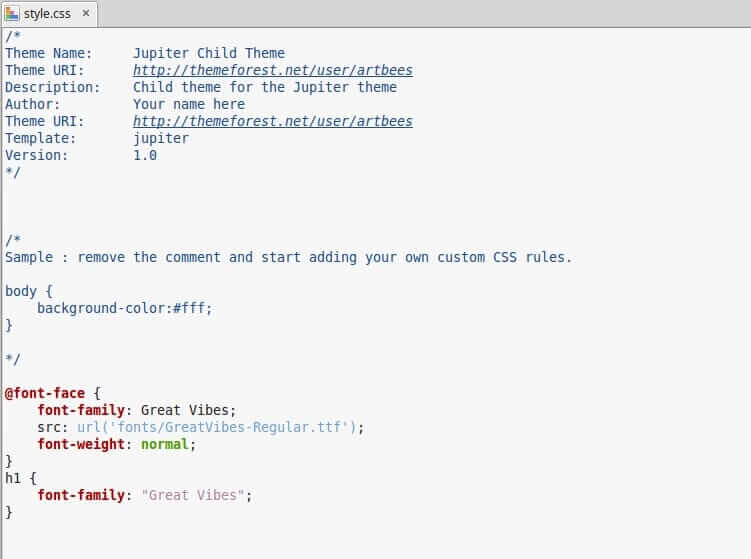
3. Load the font in your Jupiter Theme’s stylesheet using CSS3 @font-face guidelines, as shown below.
4. Replace the font family and URL with your own. Edit style.css file in the child theme and assign new font to the element you need.
5. You can now use your custom font anywhere in your theme’s stylesheet!
From Google Fonts
1. Browse through the Google Fonts collection for the font that you like.
2. After finding the right font, click the “quick-use” icon.
3. You will then be directed to another page. Search the page until you get to the procedure box containing the code that you can put to your website.
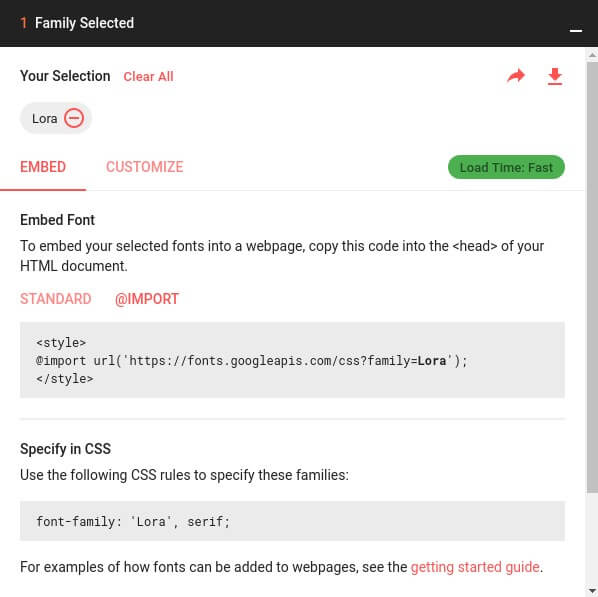
4. The simplest way is the @importCSS method. All you have to do is to access your website’s theme style.css file in the child theme, then paste the codes you copied.
5. You can also join several fonts in one request like this:

Using @import method is easy to do but it is not the recommended way to put Google fonts to your site in WordPress. This technique impedes parallel downloads and because of this, the browser will not start downloading the remainder of the content until the download of the imported file is complete.
[call_to_action title=”Give your work a boost with a huge library of design elements from our partner GraphicRiver.” target=”_blank” url=”https://1.envato.market/c/1239055/275988/4415?u=https%3A%2F%2Fgraphicriver.net%2F” type=”link”]
The standard method is the best way to add Google fonts. In this method, you have to copy the font URL you found in their library. For multiple fonts, use the | symbol to combine 2 fonts. After that, paste the code in your website’s theme head part. You need to revise your header.php file by pasting the code on top of your major stylesheet. It will then look like this:

It is important to place the font request as soon as possible. The internet explorer will not execute anything on the website until the download of the font file is complete if there’s a script tag prior to the @font-face declaration. After that, you can already begin applying it through Theme Options or your style.CSS file in the child theme, as shown below:

Even if there are plenty of child themes and theme frameworks, it is not advisable for you to alter your parent theme’s files. The modifications you make will be overridden on your next updates especially if you are making use of a theme framework. You must only use hooks and filters compatible with your framework or parent theme.
From Adobe TypeKit
Using Adobe Typekit is another option for you to add fonts to your Jupiter WordPress theme. Click here for step-by-step instruction in integrating Adobe Typekit to your WordPress website.
By Installing Use Any Font WordPress Plugin
Lastly, you can install Any Font Plugin in WordPress to add your ideal fonts. This method is fast and easy to setup because you don’t need to have CSS knowledge. It also doesn’t slow down your site as much since the fonts will be stored in your own server. (Note: the one drawback with this plugin is that the free version can only upload one font). First, you need to install the Use Any Font plugin from the WordPress directory.
- Turn on the Use Any Font plugin using the ‘plugins’ menu in your WordPress control panel.
2. Acquire the API key and validate it for you to connect to a server for the font change.
3. Click on Settings and select Use Any Font
4. Choose a font you want then upload it.
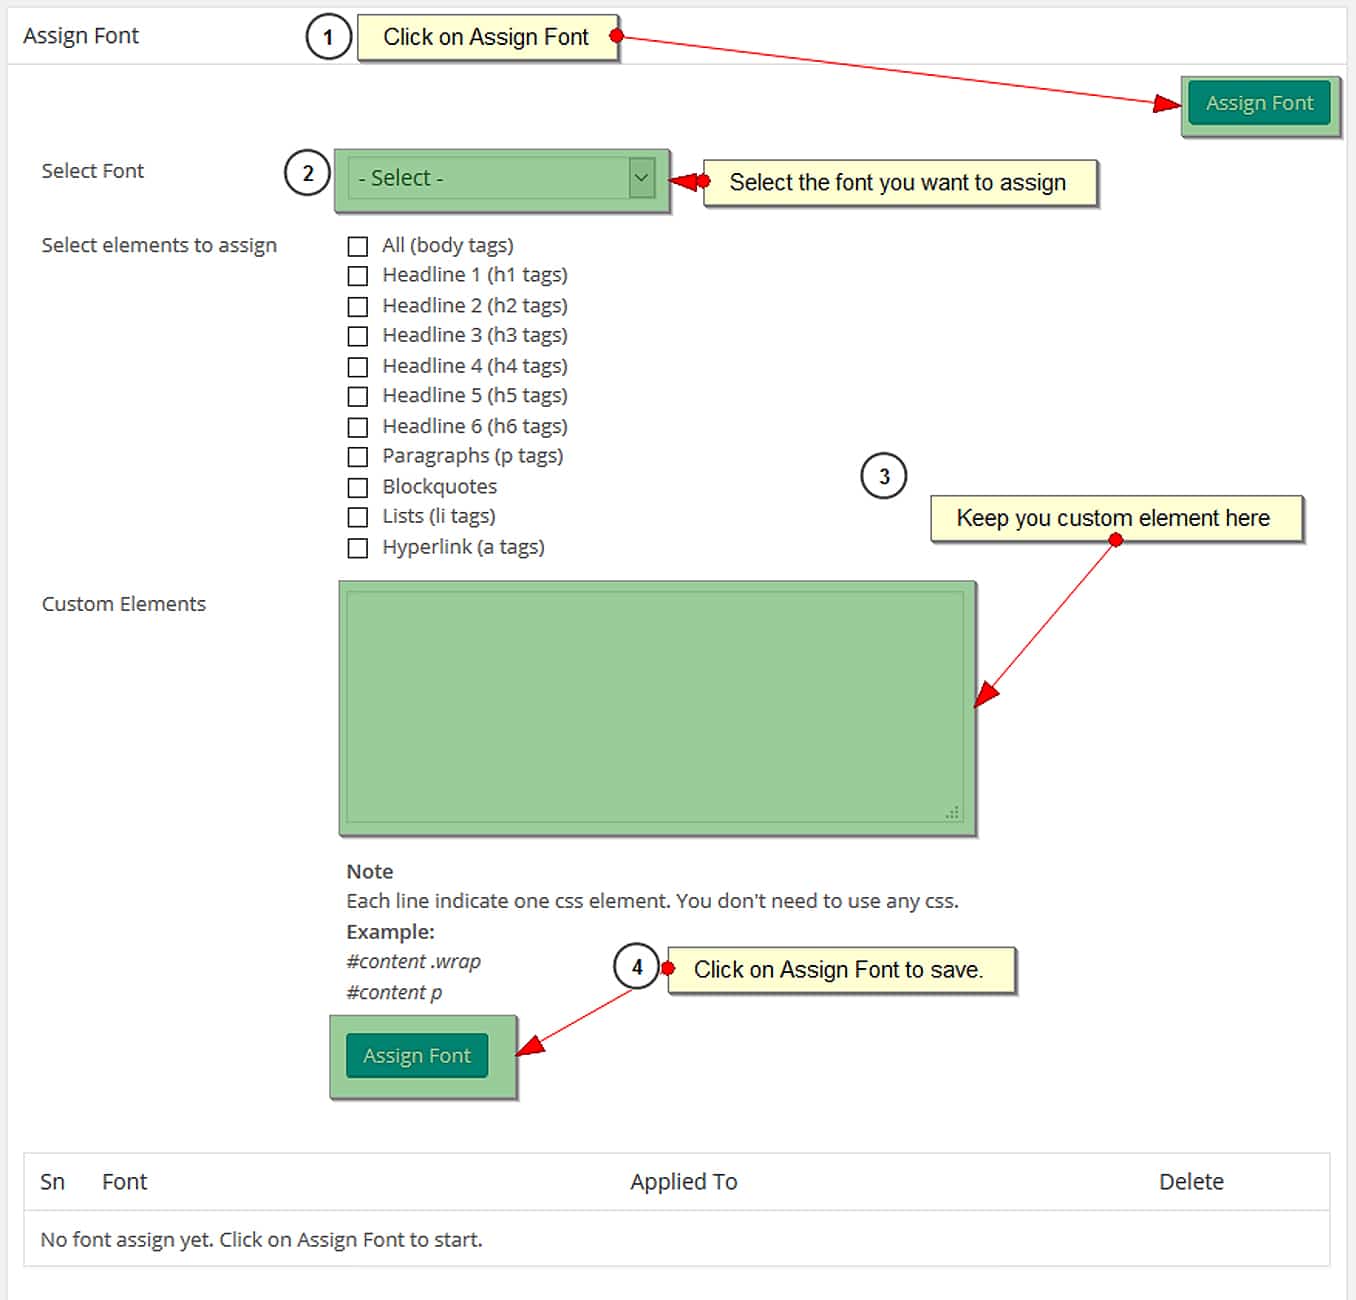
5. Click on Assign font to add the new fonts to your elements.
6. You can now use the new fonts for your website.
Final Tips:
- Don’t add too many fonts.
- If you are using a font from Google Fonts or Typekit, then it is best to serve the font directly from their server for optimal performance.
- Test the combination of the fonts first before adding them to your website.
- Keep the readability of the fonts in mind.
- Choose fonts that are consistent with your branding.
- The easiest way is not always the best way; choose a method which will not slow down your website instead.

1 Comment
As a font designer, this unique and informative blog post is so helpful for me. These step-by-step guidelines are so easy for me. Thanks.