Sign-up and login sections are essential components of any WooCommerce store as they enable customers to create an account or log in to an existing one and facilitate the checkout process. They also allow both the store owner and the customer to track orders, saving billing and shipping information.
A good registration and login section is also important from the marketing viewpoint as it enables the store owner to see the purchase history and target the customers with relevant marketing campaigns based on their purchased items or categories.
In this blog post, we’ll walk you through the steps involved in building a user-friendly and secure sign-up and login for your WordPress or WooCommerce website from sign-up to the user’s My Account dashboard.
In this post we will learn about and use the following Jupiter X widgets, many of which are introduced in the newly-released v3:
- Login
- Social Login
- Register
- Password Reset
- My Account
- Opt-in
We will also use the Layout builder to create different layouts for logged-in and logged-out stages as well as dynamic tags to populate the content with users’ personal details across different steps.
Step 1: Set up a lead magnet in your website (optional)
This step is optional based on your website’s business model and user funnel. If your website is a regular WooCommerce store, the user funnel begins directly with a signup page or a sign-up form during the checkout (in which case you can skip this step)
But if you are running a lead generation landing page, the user funnel may begin with an opt-in box in a landing page or as a call to action at the bottom of every page.
How to create an opt-in box in your landing page
In order to use the opt-in widget, make sure the Artbees’ SellKit plugin is installed during the Jupiter X installation; it is free for all Jupiter X users. If it is not installed, you can simply download it from the Deals & Addons section in Jupiter X control panel.
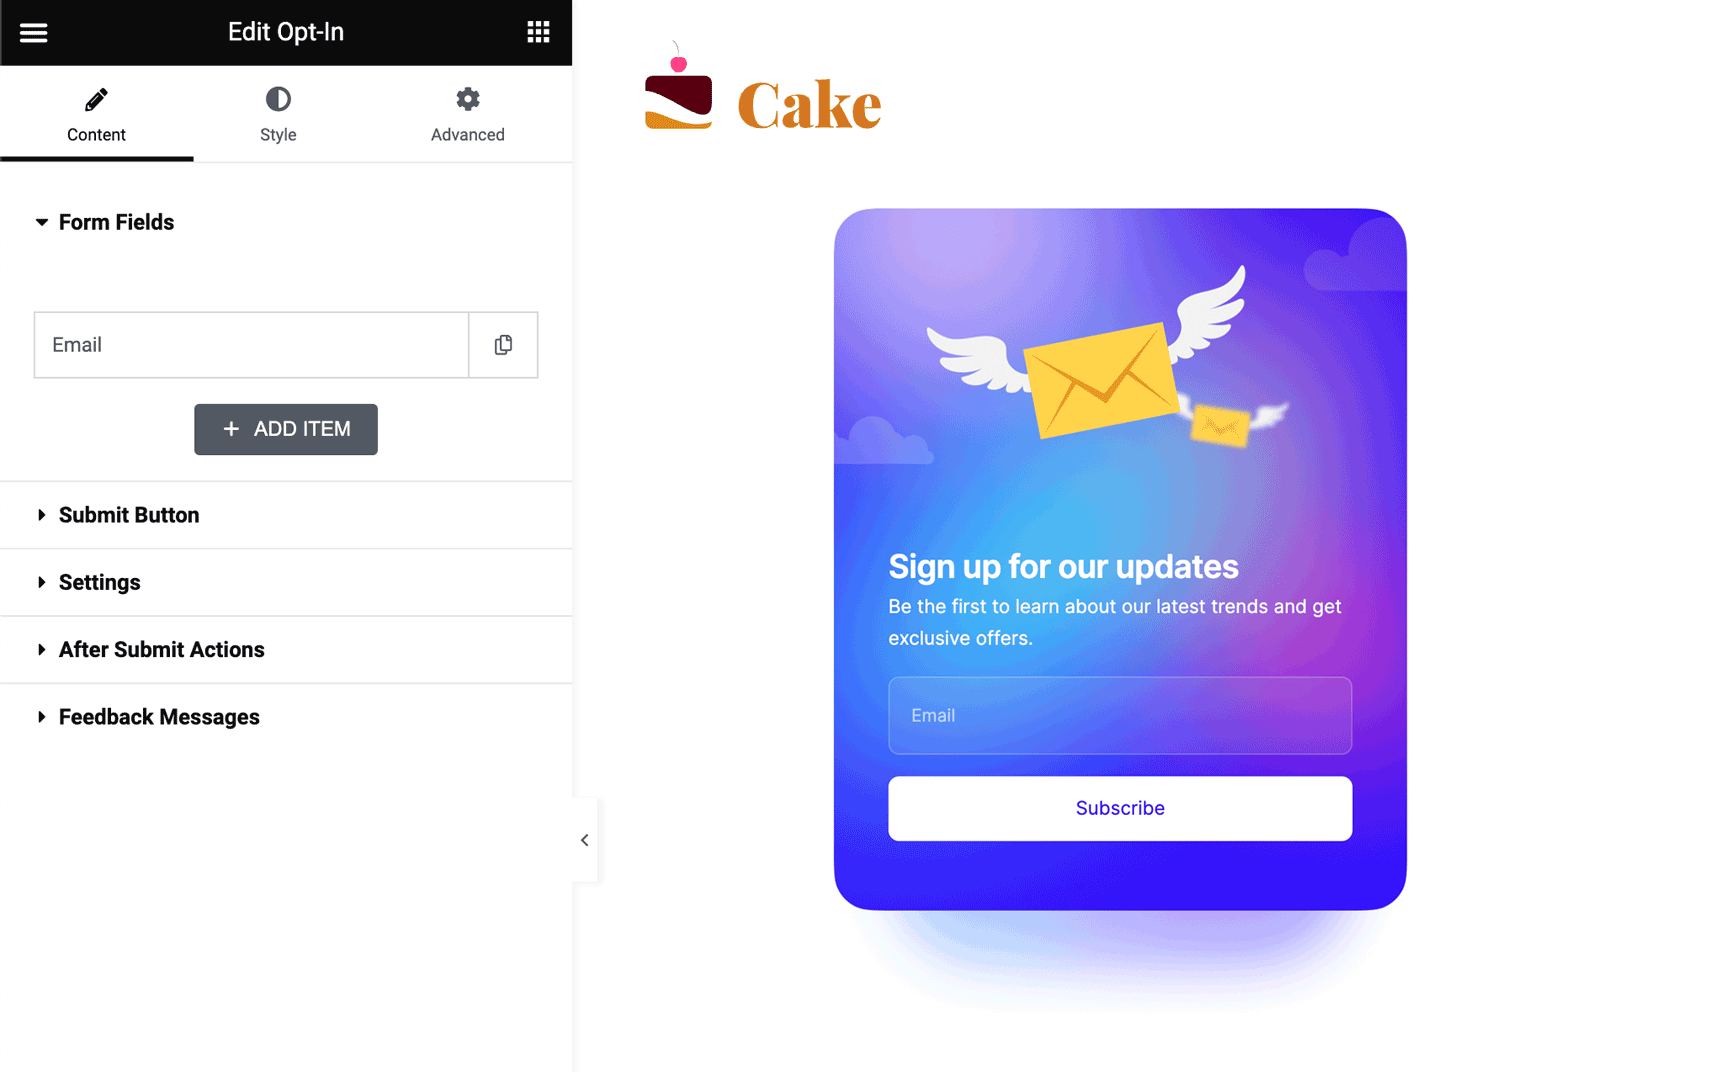
- Drag the opt-in widget from Jupiter X element library into your landing page. It can be added to a permanent section right below the footer in all pages as well.
- Add, order and visually customize the fields, set your submit button caption and appearance using the widget parameters tab on the sidebar.
- If you want the entries to be sent to your CRM tool, define it in the settings tab
- Define the after-submit
- Define custom success and failure messages if you want.
Pro tip: You can put the opt-in widget as part of bigger call to action box, save it as a global widget and insert it easily in different pages and sections across your website.
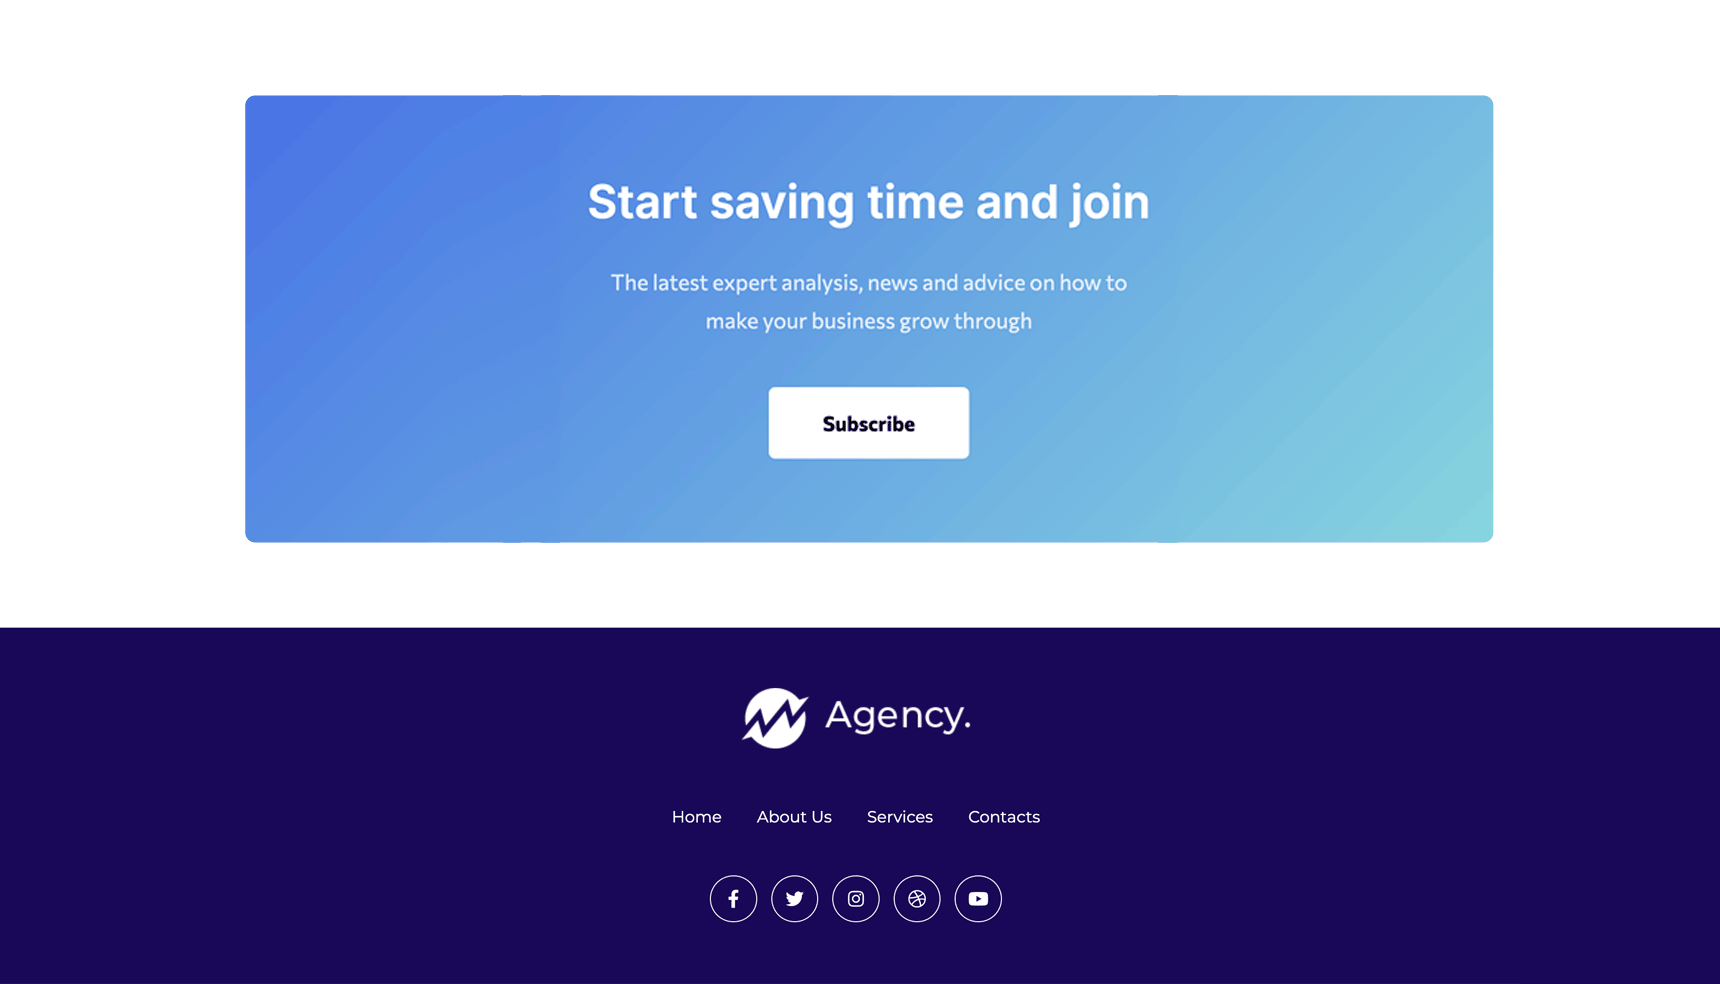
Another way to save time is to put an opt-in widget inside a permanent area above the footer to be visible in all pages:
- Simply go to WordPress admin > Jupiter X > layout builder > Footer
- Edit one of the existing footer templates or click on + Add New button to create a new footer and add your Call to Action widget or global widget.
- If you want this layout to be included or excluded from specific parts of your website, you can do so simply using the Edit conditions button below your footer layout in the Layout Builder.
Pro tip: You can always boost the engagement with opt-in boxes with reciprocity bias. Offer gated content, freebies, giveaways and exclusive discounts to increase sign up rate for your opt-in forms and popups.
Step 2: Create and customize a registration page
If your website user funnel does not begin with individual opt-in forms then the user generation funnel begins with the usual register/login page. Let’s create a register page.
- In WordPress Admin > Pages click on + Add New.
- Name the page as Register and click on Edit with Elementor.
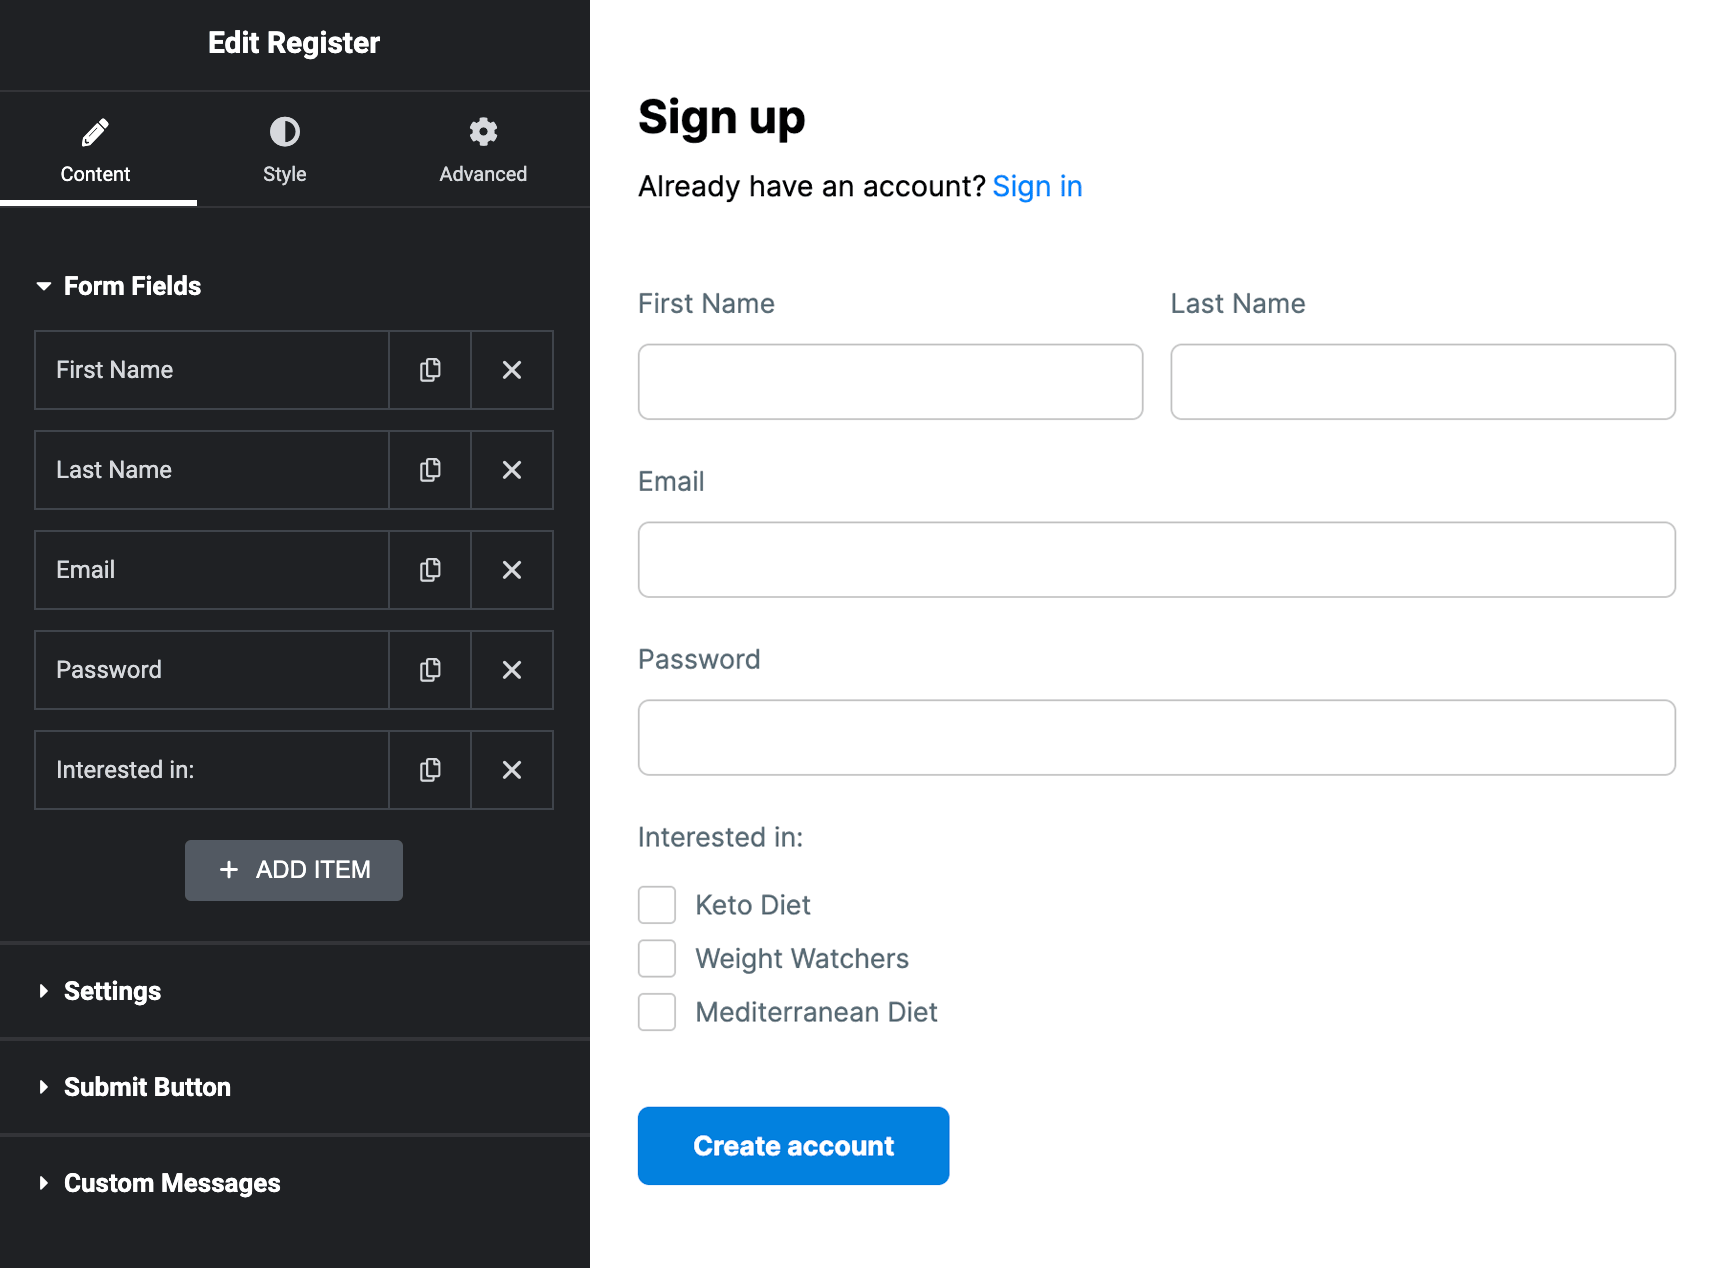
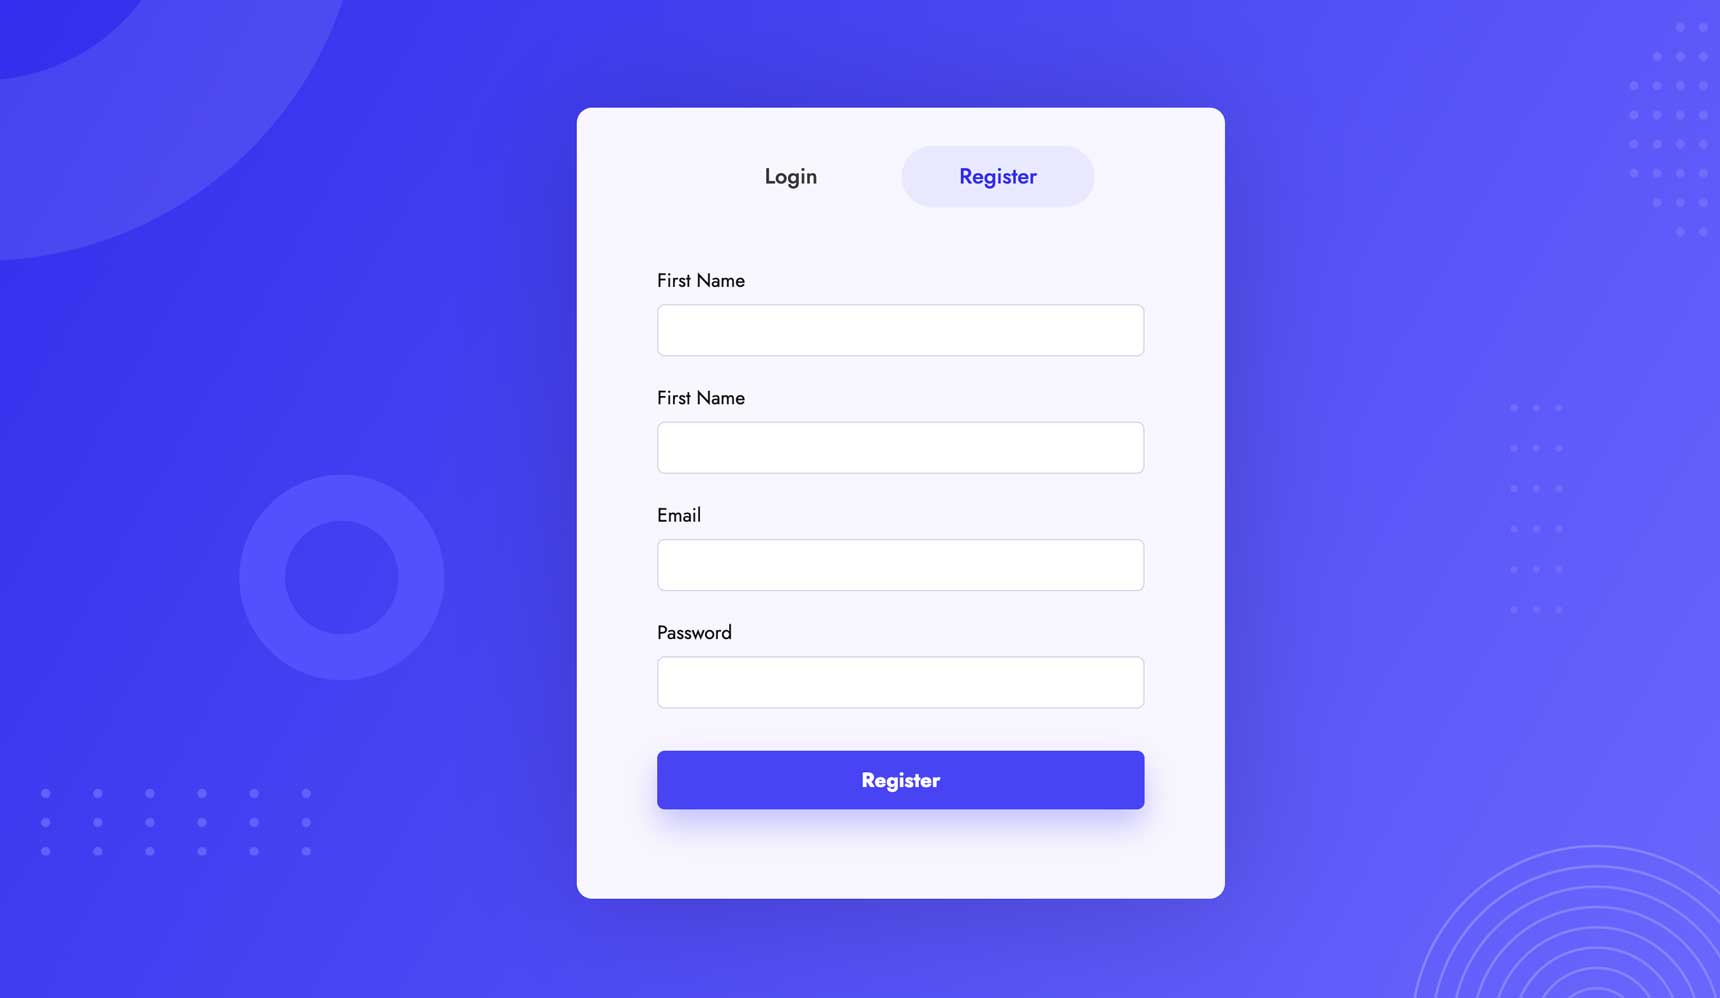
- In the page building environment drag the Sign Up widget to your canvas
- You can stick to the usual fields in a registration form or add, reorder and customize the fields as applies.
It is important to put a link to your registration page in a highly visible and preferably permanent spot in your website, for example the upper right corner in your header.
Step 3: Create and customize a WooCommerce login page
The WooCommerce login page is basically the My Account page appearing different for non-logged-in users.
Firstly, check WordPress Admin > WooCommerce > Settings > Advanced to make sure the right page is set as My Account page.
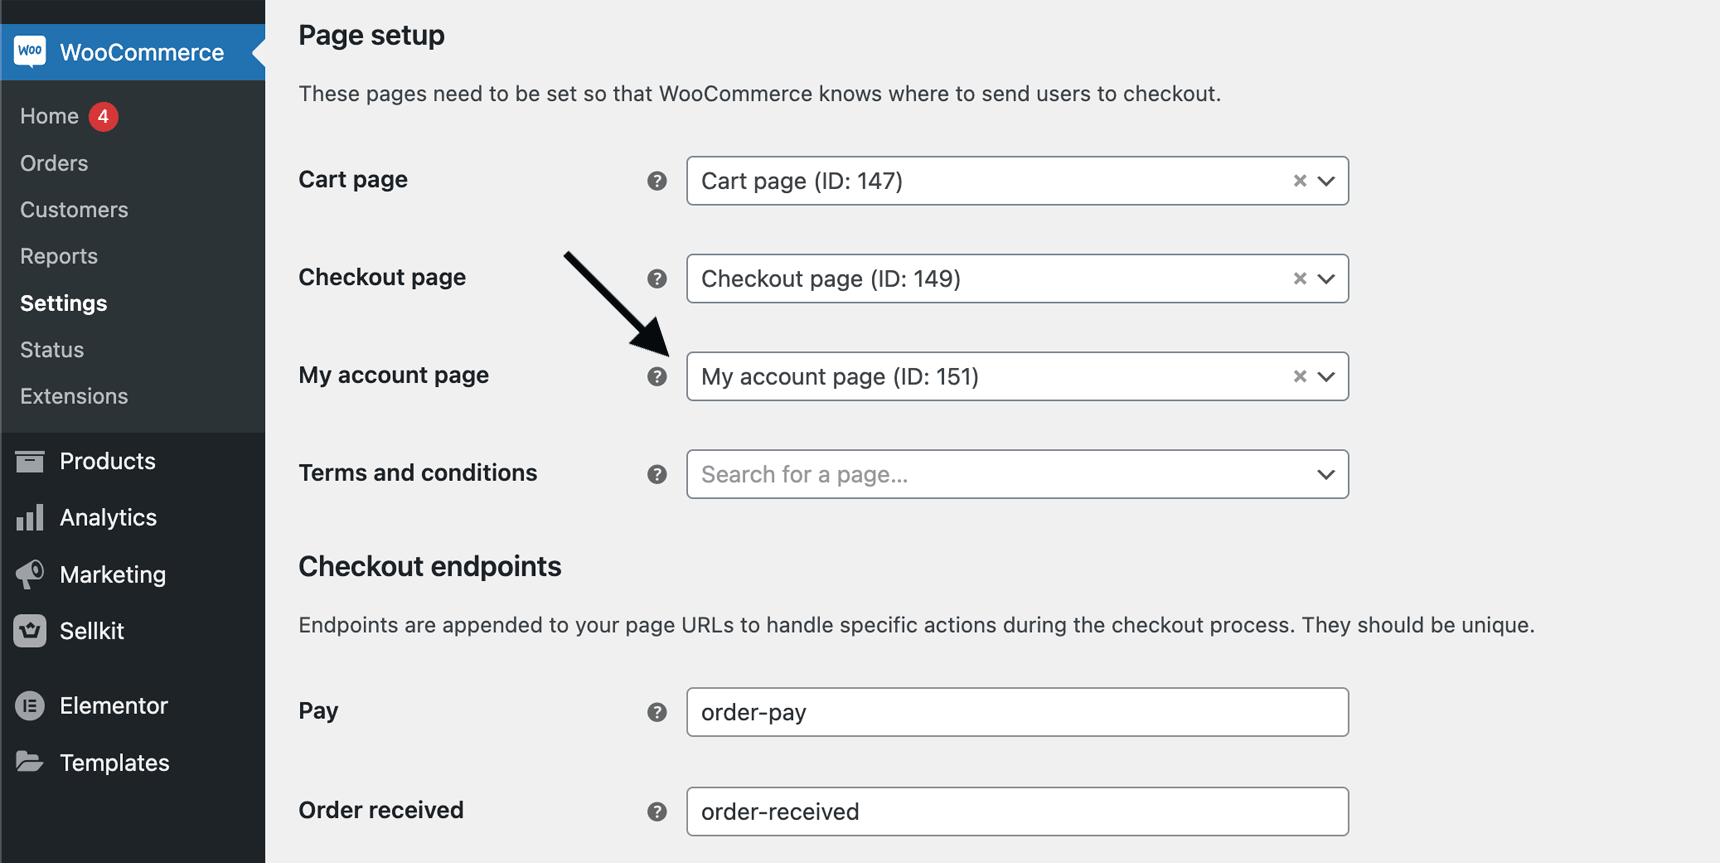
If your website happens to not have a My Account page, you should create one and select it in this menu.
- In WordPress Admin > Jupiter X > Layout Builder > Single and click on + Add New.
- Give your page the name like ‘My Account login page’ and click on the Create button.
- You will now be taken to the page building environment where you should create the content for your login page.
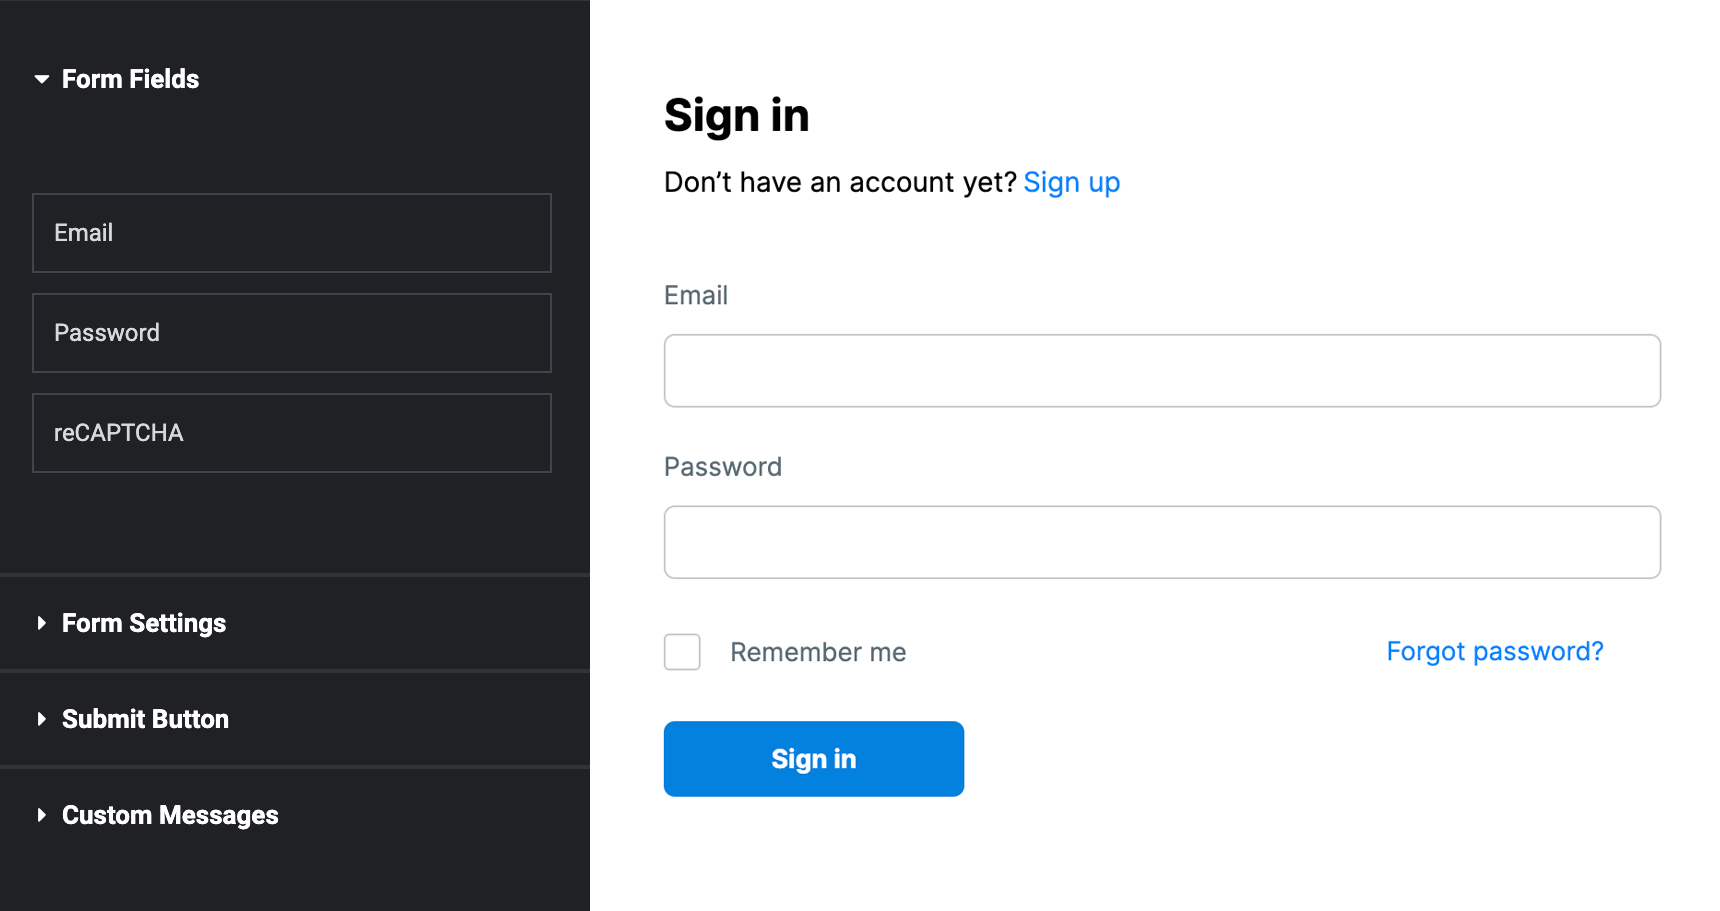
- Drag and drop the login widget from the widget library to the canvas.
- You can stick to the usual fields in the sign up form or add, reorder and customize them as you wish.
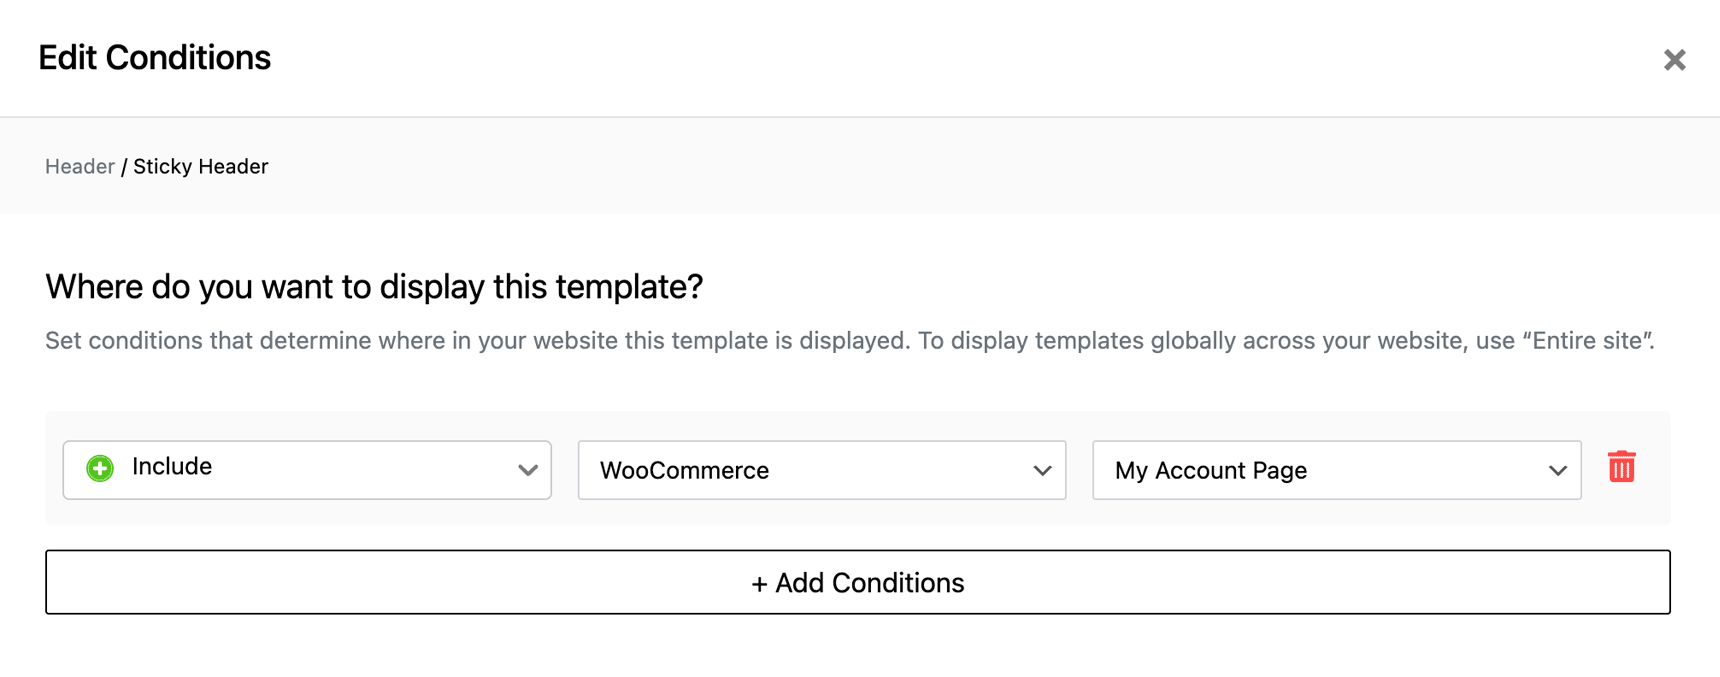
- Click on the Publish button and back on the Layout Builder in Jupiter X control panel and click on the Edit Conditions button for the page you just created.
- From the upcoming dialogue, add this condition: Include > WooCommerce > My Account Login Page.
- Click on the Save & Close button.
Step 4: Create and customize a password reset page
Every login form should also have an option to recover forgotten passwords. In order to create a password reset for your WooCommerce store:
- Open the Password Reset from WordPress Admin > Pages or simply create a new one
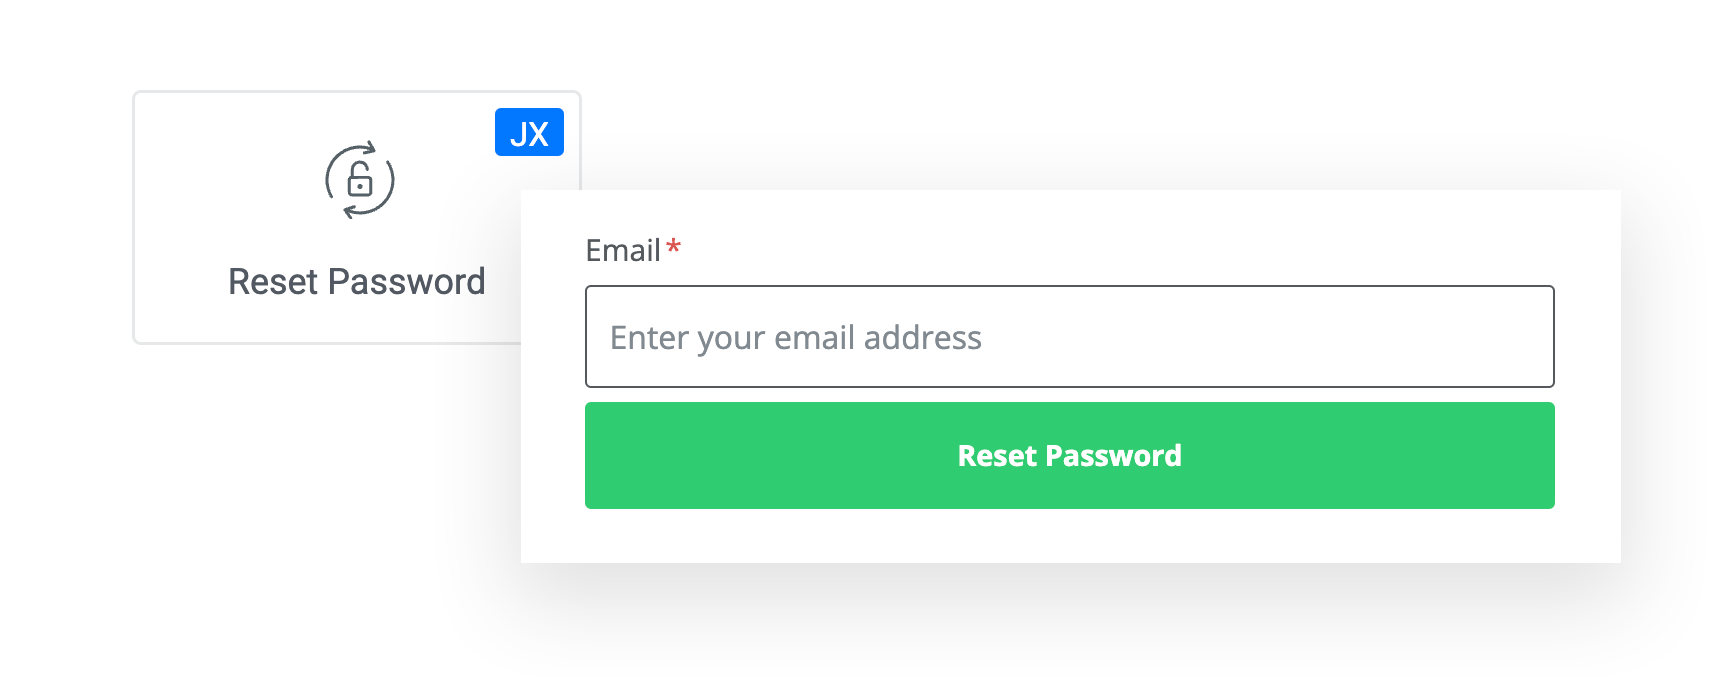
- Drag the Reset Password widget into the canvas
- Customize the fields, appearance and success message
- Click on Publish or Update button
You should then connect your sign in form to the password reset page.
- From WordPress Admin > Pages find and open the ‘password reset’ page or simply create a new one and title it as ‘password reset’
- In the page building environment, drag the Reset Password widget into the canvas
- Customize the fields, appearance and success message
- Click on Publish
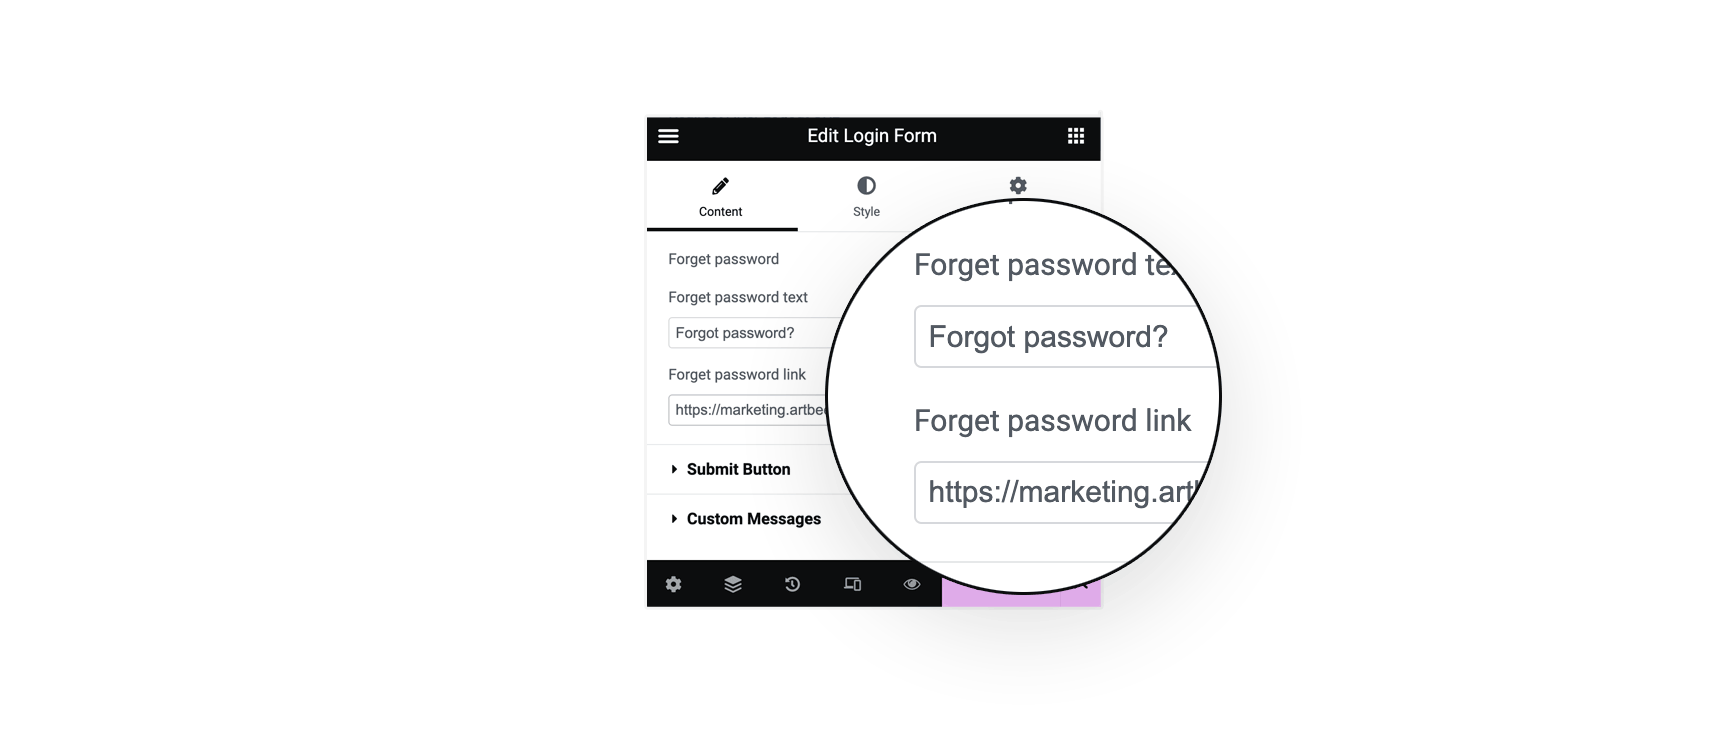
Now you need to include a link in your login page to the password reset page.
- From the Layout Builder simply find and edit the ‘My Account login page’
- In the editing environment click on the Login form widget and paste the reset password page link in the form setting sections.
Step 5: Create and customize a My Account page
My Account is the page your users will see when they log in to their account. Using the My Account widget in Jupiter X you can customize the content of this page to your preferences.
- In WordPress Admin > Jupiter X > Layout Builder > Single and click on + Add New.
- Give your page the name like ‘My Account’ and click on the Create button.
- You will now be taken to the page building environment where you should create the content for My Account page.
- Drag and drop the My Account widget from the widget library to the canvas.
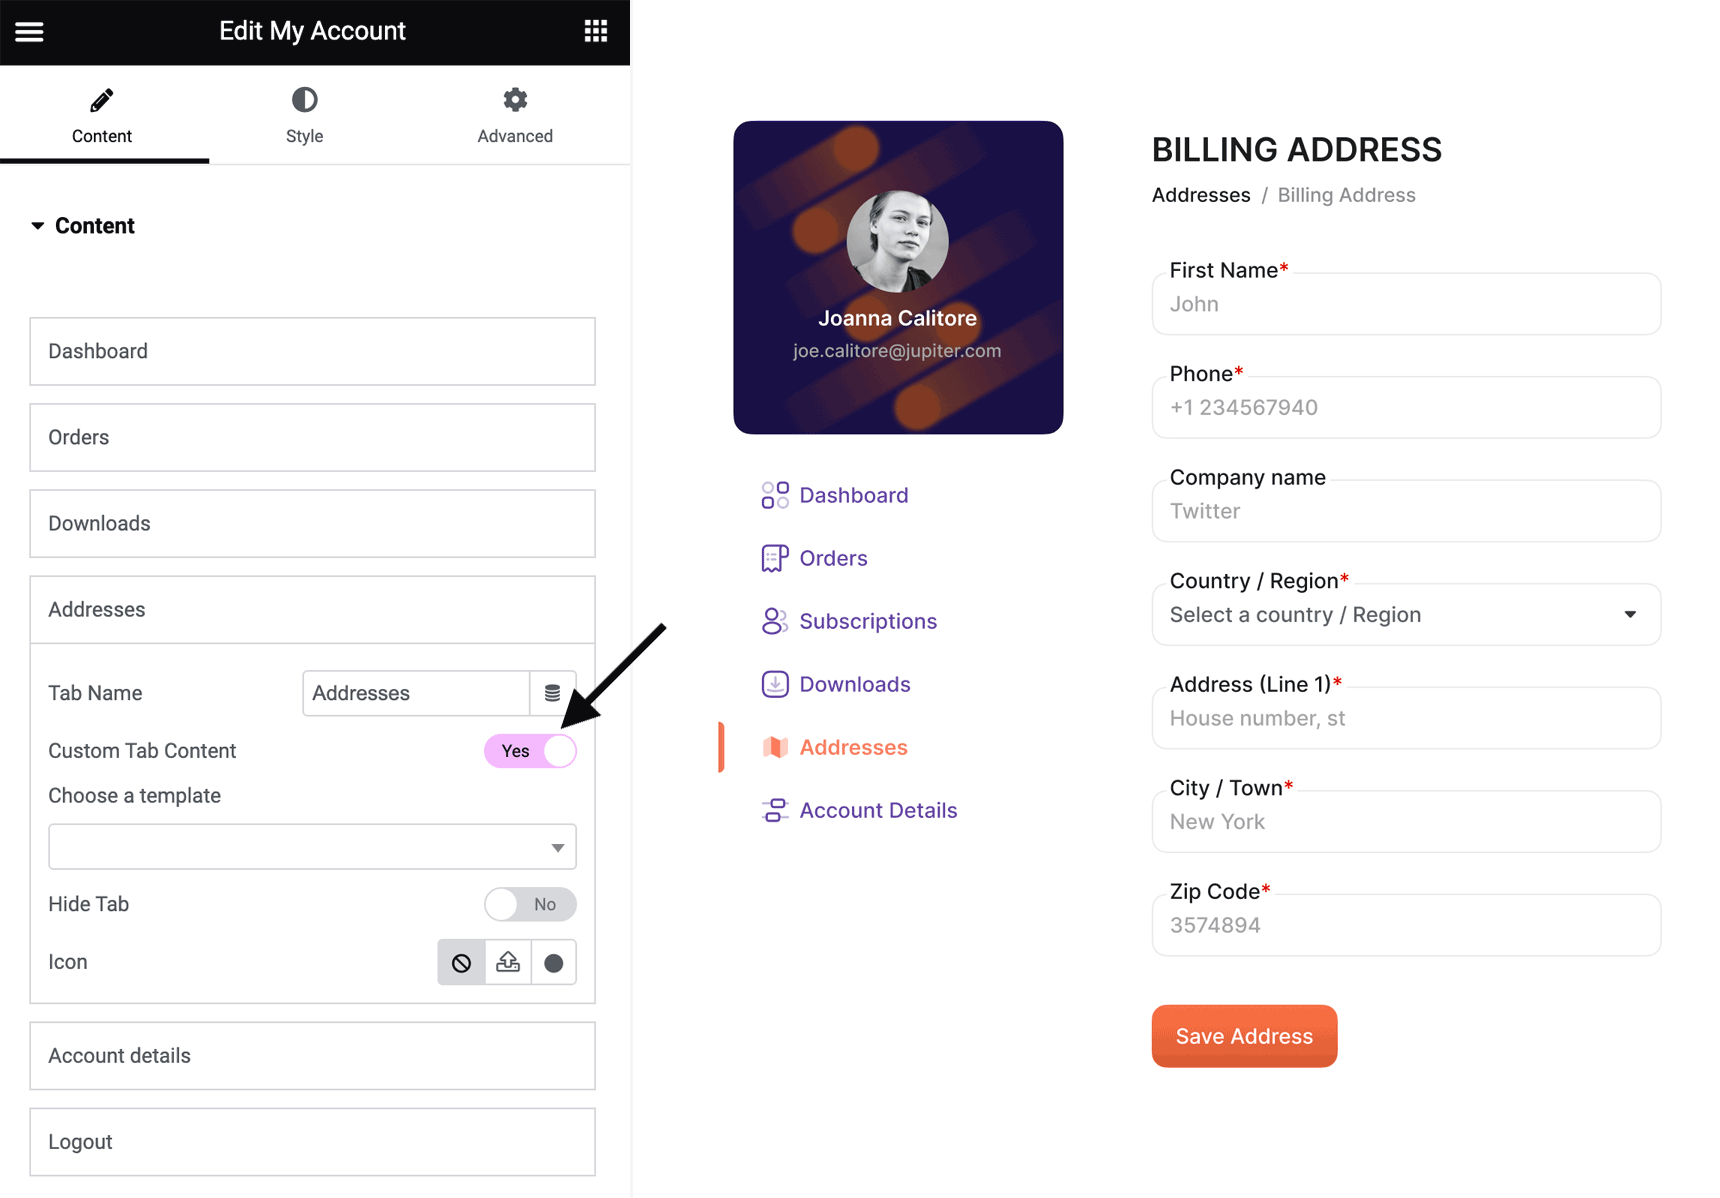
- You can stick to the usual tabs in the dashboard (Dashboard, Orders, Download, Addresses, Account Details, Logout) or add, reorder and customize them as you wish.
- By clicking on each tab you will see the range of options to customize that tab in the sidebar. You can even choose to use a completely custom content for a tab if you wish.
- Click on the Publish button and back on the Layout Builder in Jupiter X control panel and click on the Edit Conditions button for the page you just created.
- From the upcoming dialogue, add this condition: Include > WooCommerce > My Account
Step 6: Create and assign exclusive content for different user roles
In addition to the My Account page, there are many other ways you can serve exclusive content for your logged-in users. From different-looking homepages to exclusive products and blog posts, custom post types and more.
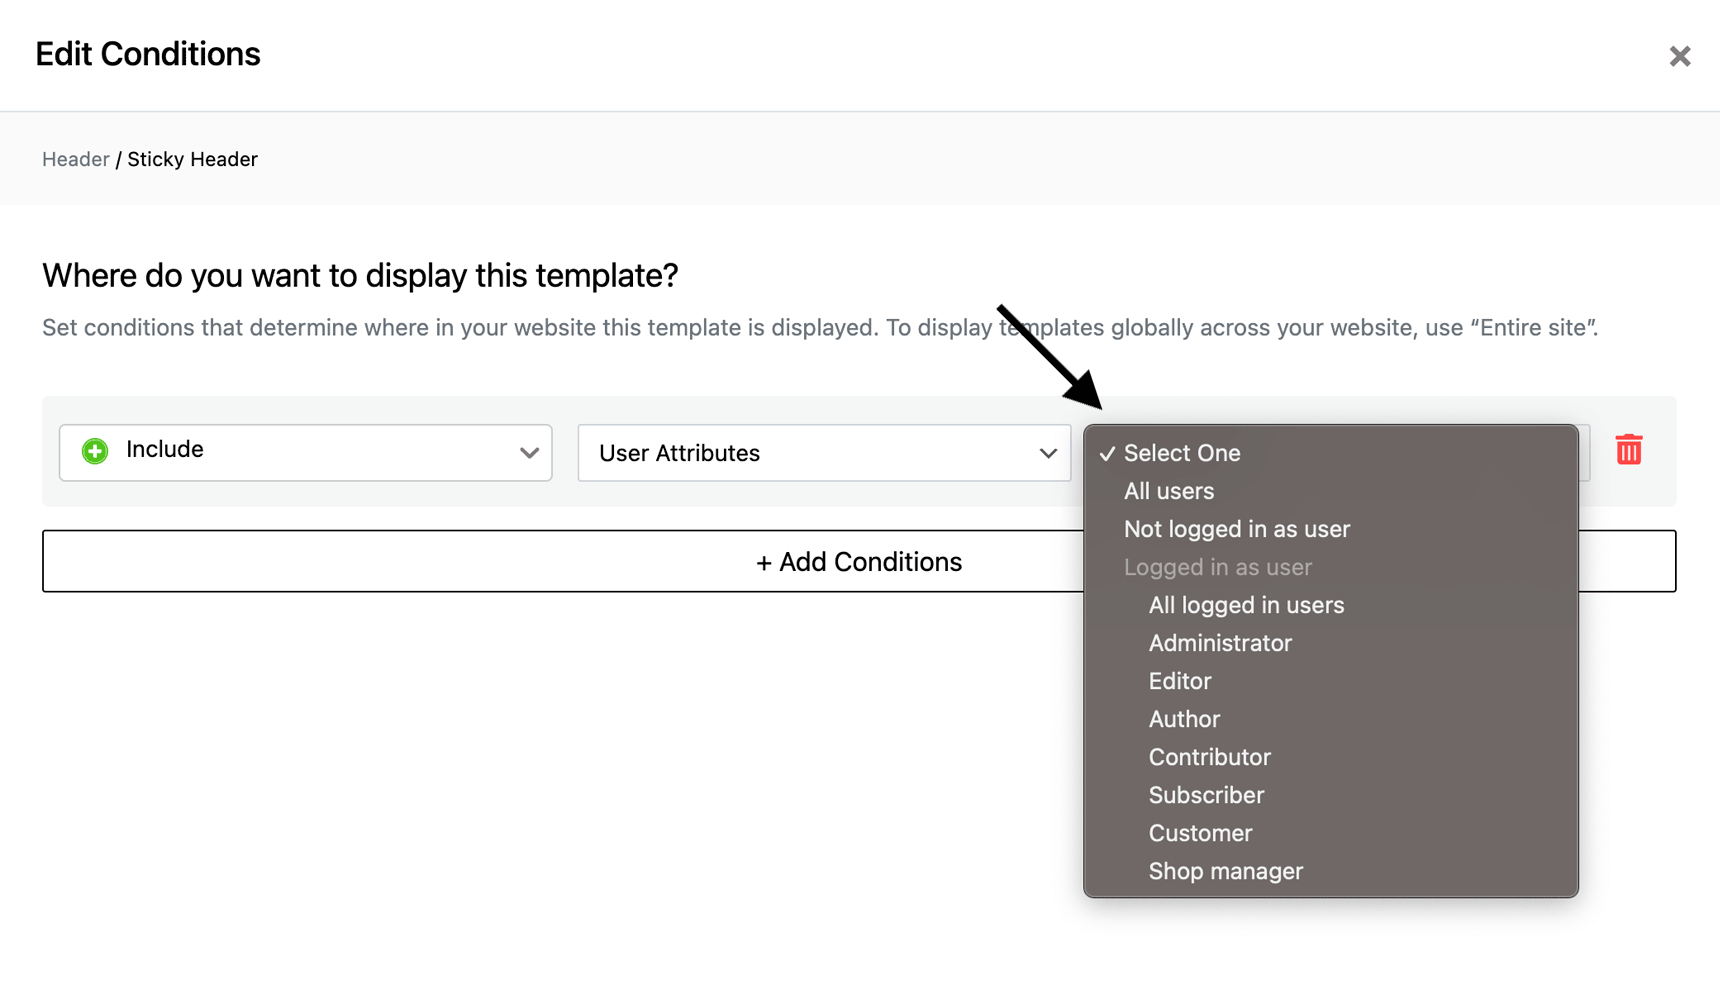
In WordPress Admin > Jupiter X > Layout Builder, you can create different layouts for header, footer, single or archive pages and in the Conditions section choose the eligible user roles from the User Attributes section.
Let’s create a basic example of a content that should look different for logged-in and logged-out users: the login section in the header.
- In WordPress Admin > Jupiter X > Layout Builder > Header and click on + Add New.
- Give your page the name like ‘Header for logged-in’ and click on the Create button.
- You will now be taken to the page building environment where you should create the content for your custom header.
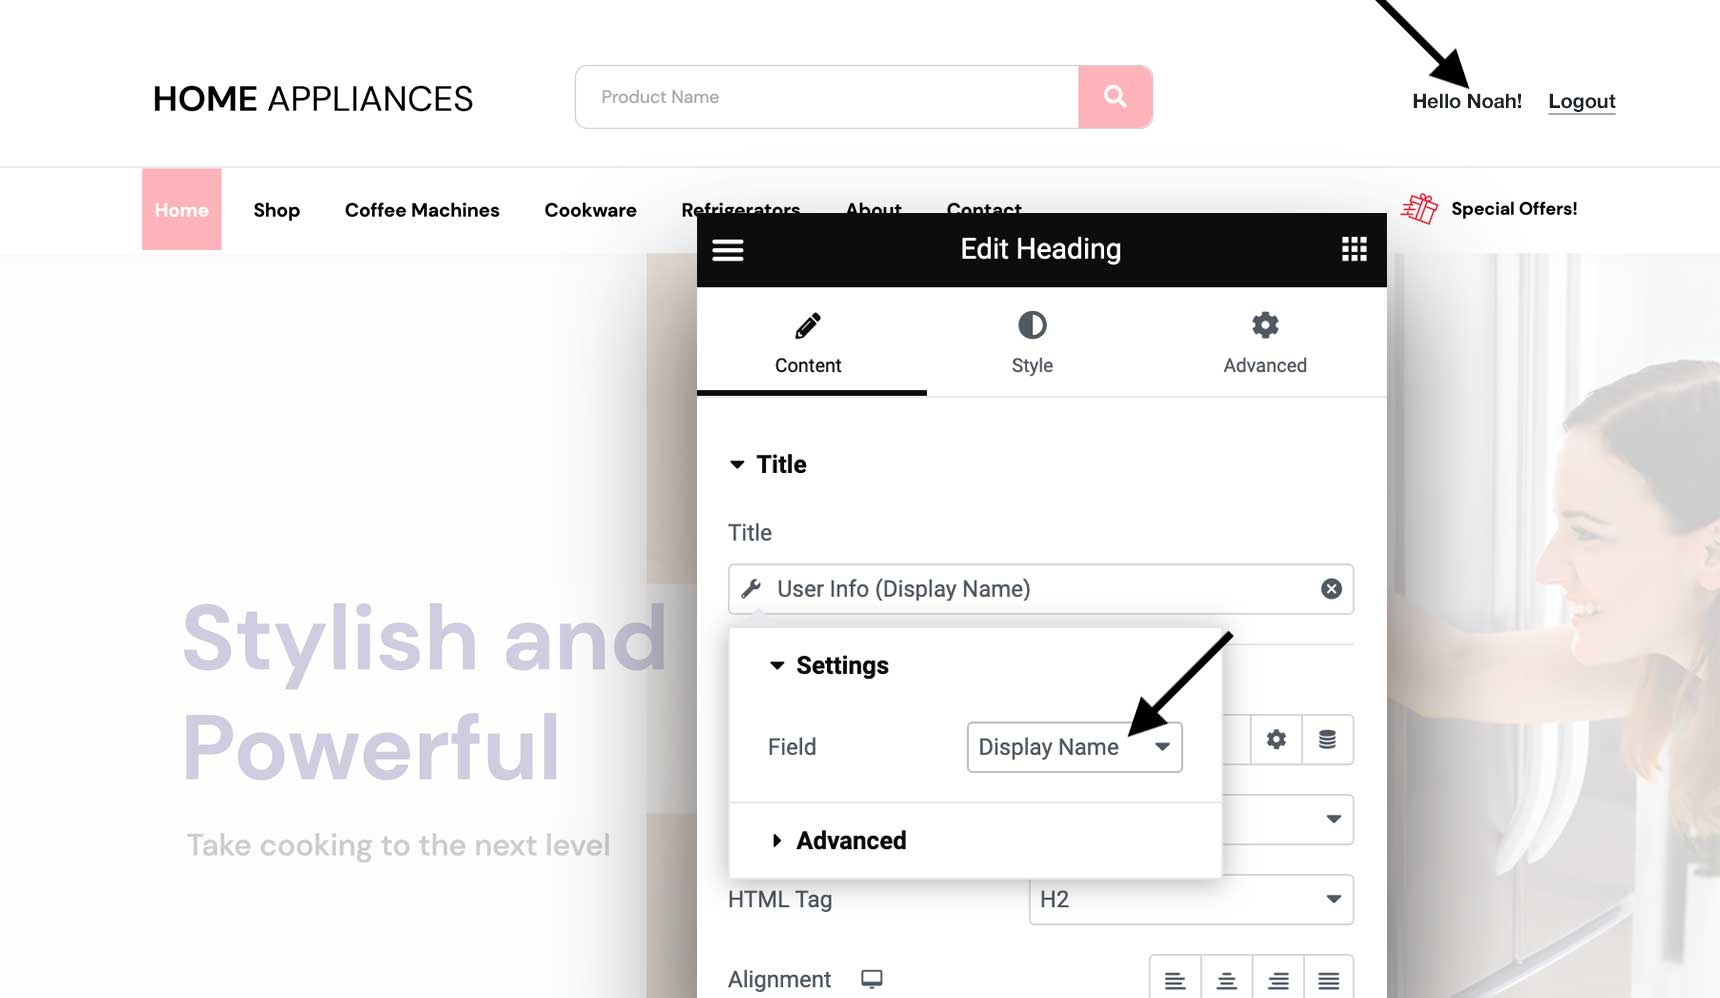
- Use the Text widget to add a Logout link somewhere in the header (maybe the right hand?) and link it to
/wp-login.php?action=logout - The same way you can also add a link to My Account page next to the Logout link.
- How about adding the display name of the logged-in user here too? Simple Add a text and set it to load the display name from dynamic keywords (user info) in the sidebar.
- Save/Publish the page and back in the layout builder, use the Edit Conditions section to Include > User Attributes > All Logged-in Users.
- Also make sure to set the condition for your regular header to not appear for the logged-in users using Exclude > User Attributes > Not Logged-in Users.
Now your logged-in users will see a header containing relevant links based on their login status.
Best practices to follow for WooCommerce Login
Unify page for WooCommerce login and sign up
For ease of use it’s great to put both registration and login forms inside one page. In this case the My Account page will include both registration and login forms.
Use social login for easier registration and login
Social login enables a single sign-on using existing information from a social services such as Google, Facebook and Twitter to sign into a website instead of creating an independent login specifically for that website.
Social login also removes the need for signing up via a form as that information will be fetched by the website owner from the social website. For example, the registrant’s name, surname and Email address.
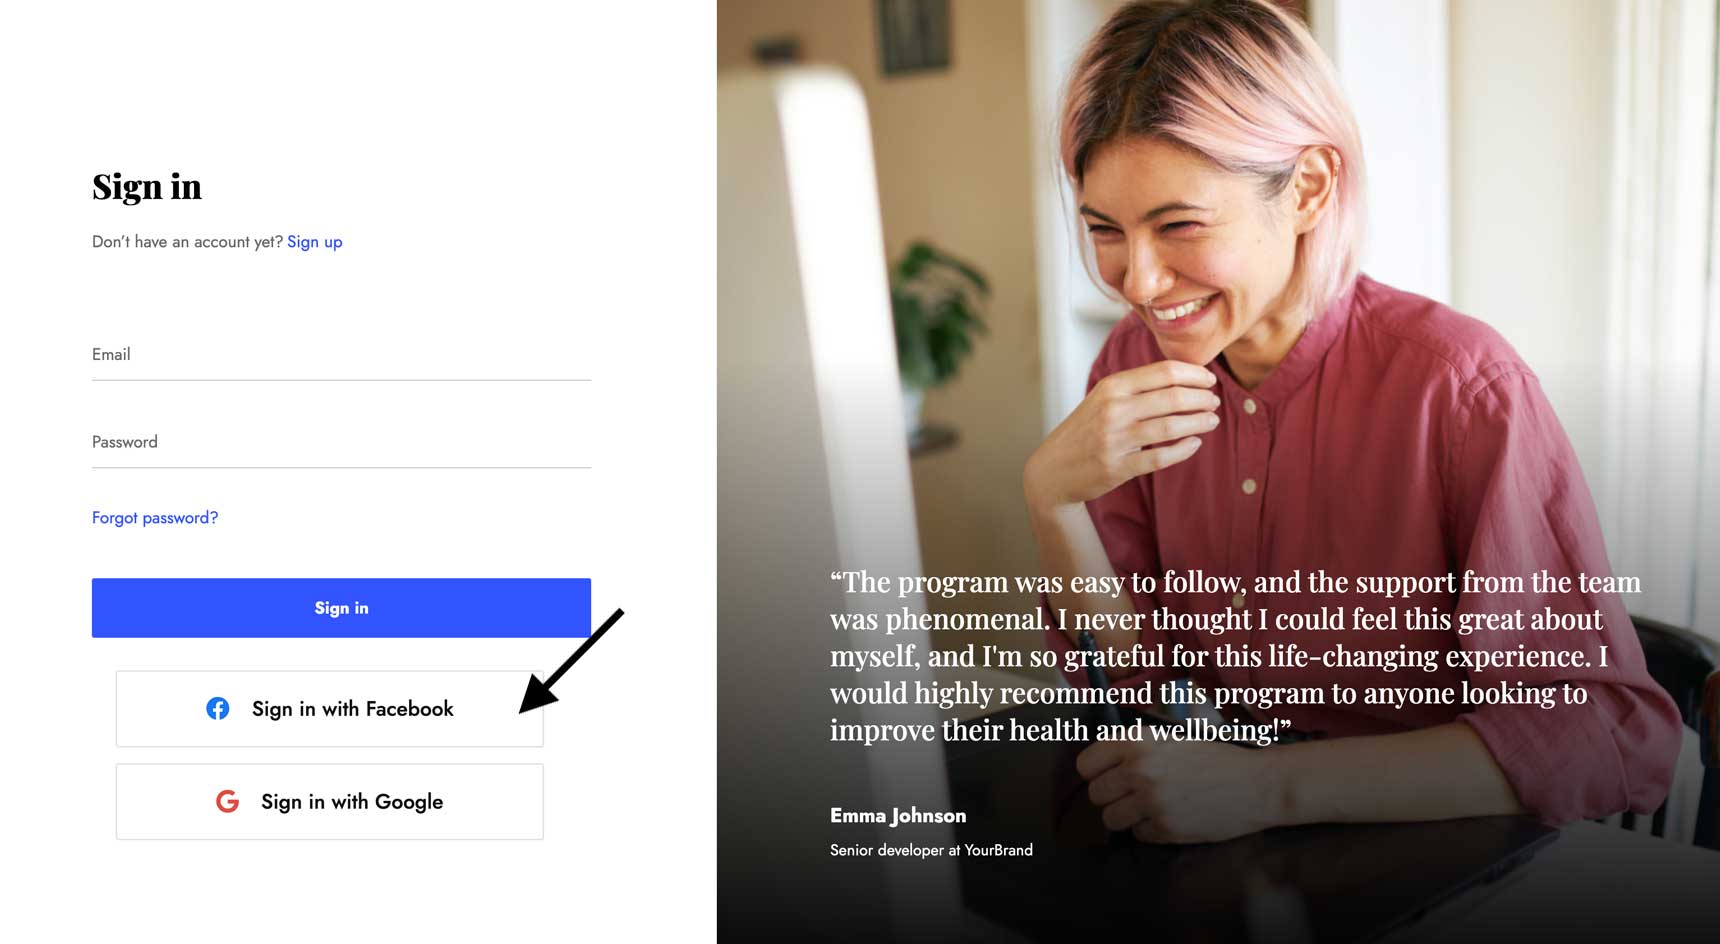
Social login has become a widely popular sign in method in credible websites for a faster signup and login experience and a big advantage for Ecommerce websites as it removes the checkout friction and streamlines the conversion process.
In order to add social login to your registration and login page, simply drag the social login widget to your My Account page.
Please note before using the social login widget, you should set your API keys in Jupiter X settings. This API key is obtained from the third-party social service that you want to use.
Allow signing up with a checkbox
Social login is good for a fast user account creation and login. But there is even a better way to minimize the friction for an impatient user.
For the new arrivals who are in a hurry or simply impatient, we can minimize the friction even further by entirely removing the need for a registration and only offer them a checkbox to create an account for them.
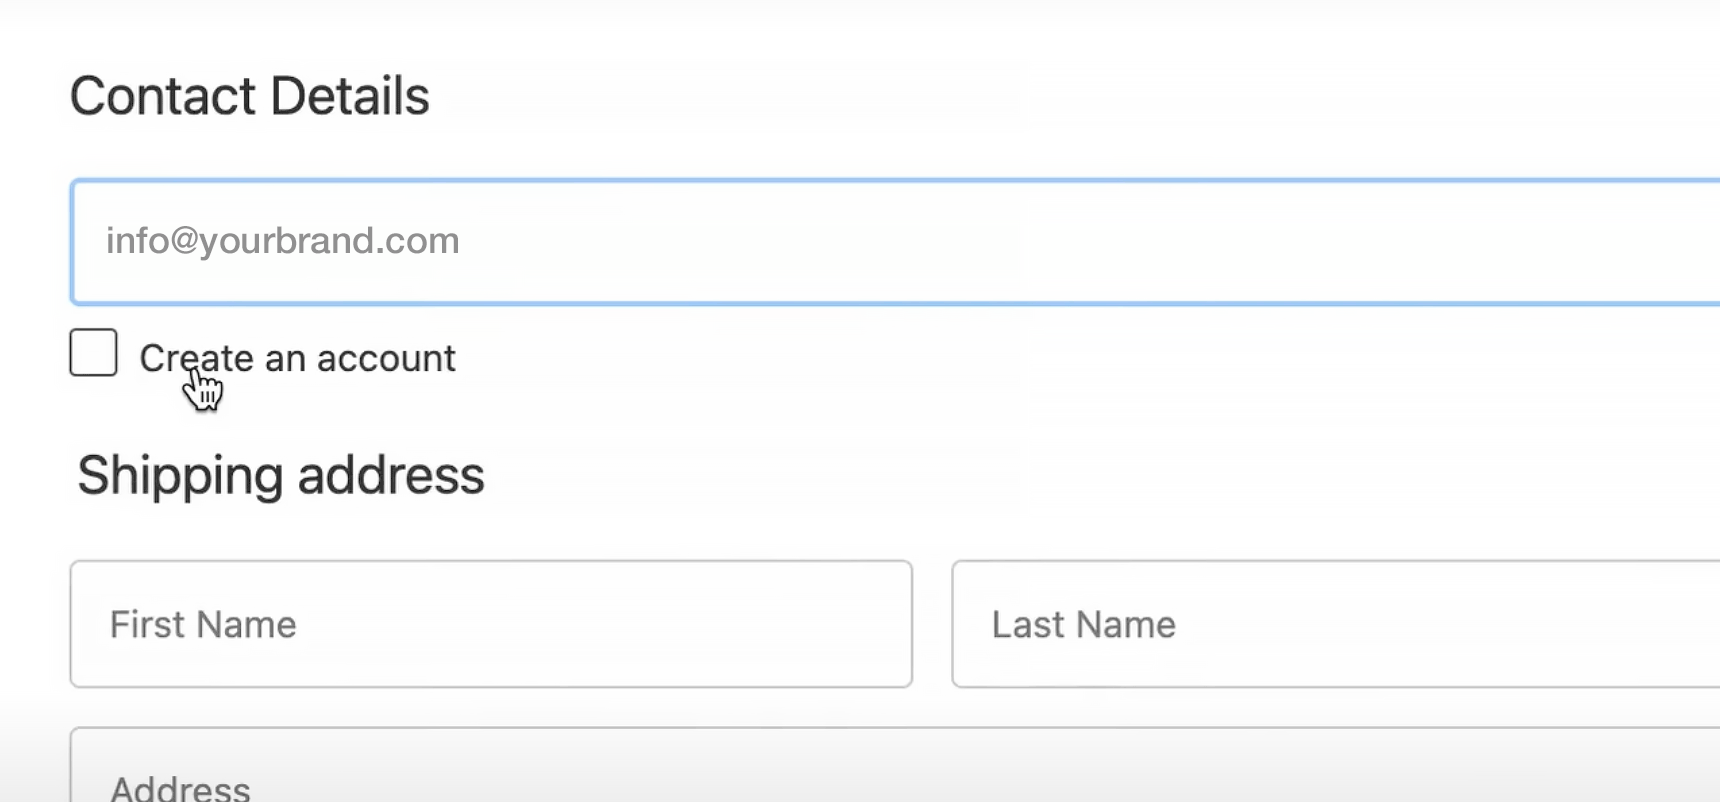
Instead of completing a long sign-up form during checkout, let customers sign up with just a checkbox and proceed with the rest of the checkout. The password will be sent to their email!
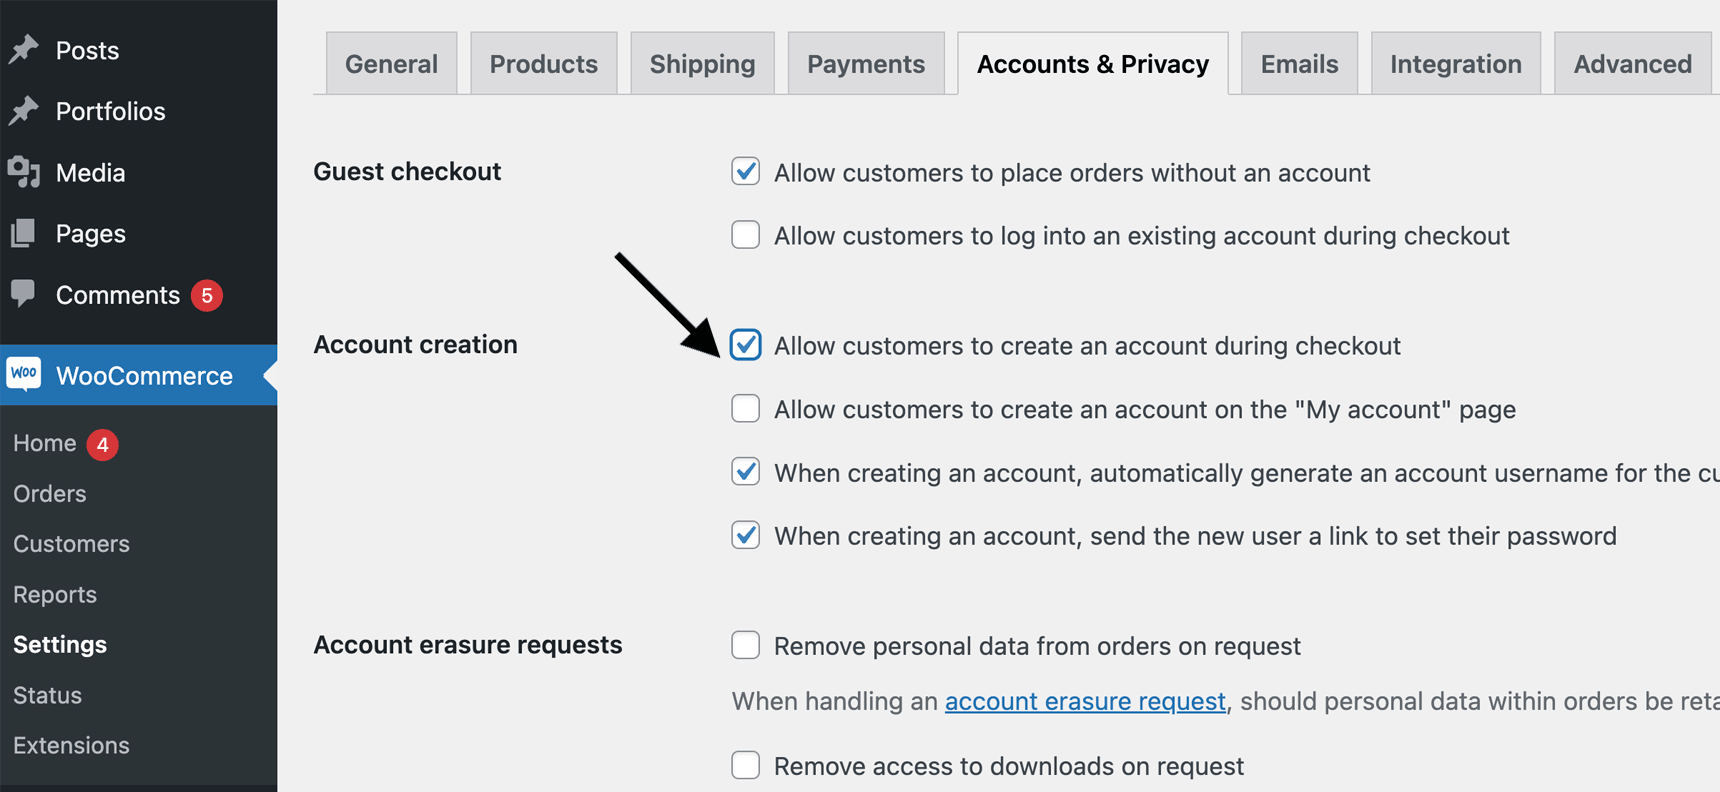
In order to add this feature to you WooCommerce store, make sure SellKit is installed in your WooCommerce website and On WooCommerce Settings > Accounts & Privacy, make sure the “Allow customers to create an account during checkout” is checked, and then you will see the checkbox on your Checkout Form.
Wrapping up
In this post I explained how to create a standard WooCommerce login from the opt-in step to my account page. However, if you are planning to create a website for a membership business, an online course provider or any type of subscription-based website, you may need to consider more details and use other tools as well.

3 Comments
Thanks for this information. I really appreciate the information that you have provided.
Helpful guide
thanks for the information , great article very helpful