Sometimes, when we surf the internet, we encounter a 404 page (Page Not Found). But, what exactly does it mean? A 404 page is displayed when we want to see a page that does not exist. We may follow a broken link or type an incorrect link so the server responds to the browser request with an HTTP 404 code, hence, we see a 404 page.
For all Content Management Systems (CMS) and websites, there’s a default 404 page that’s displayed on appropriate situations. In this article, we’ll show you how to create custom 404 pages with Jupiter X, and how to improve and customize them the best way.
Key points to have a better 404 page
We can add some helpful sections in a 404 page to improve the usability of the page. In this article, we’ll show you how to optimize sections of your 404 page. Here are some of the things you can do:
- Display recent posts/portfolios
- Add a call to action button
- Add a search form
How to customize default 404 page
Jupiter X is backed by an extremely powerful API for customizations. For developers, it offers lots of opportunities to customize the look and feel of different sections of Jupiter X. Let’s explore some ideas on how to customize Jupiter X’s default 404 pages in a child theme.
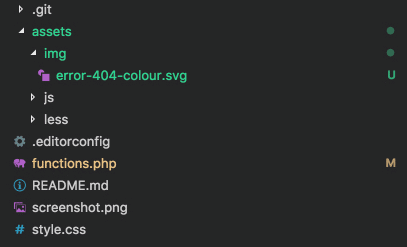
We must add our codes in the functions.php file of the child theme. All the codes need to be added inside the following function so that it will only affect the 404 pages.
/**
* Modify the 404 page.
*/
add_action( 'wp', function() {
if ( ! is_404() ) {
return;
}
// Add codes here.
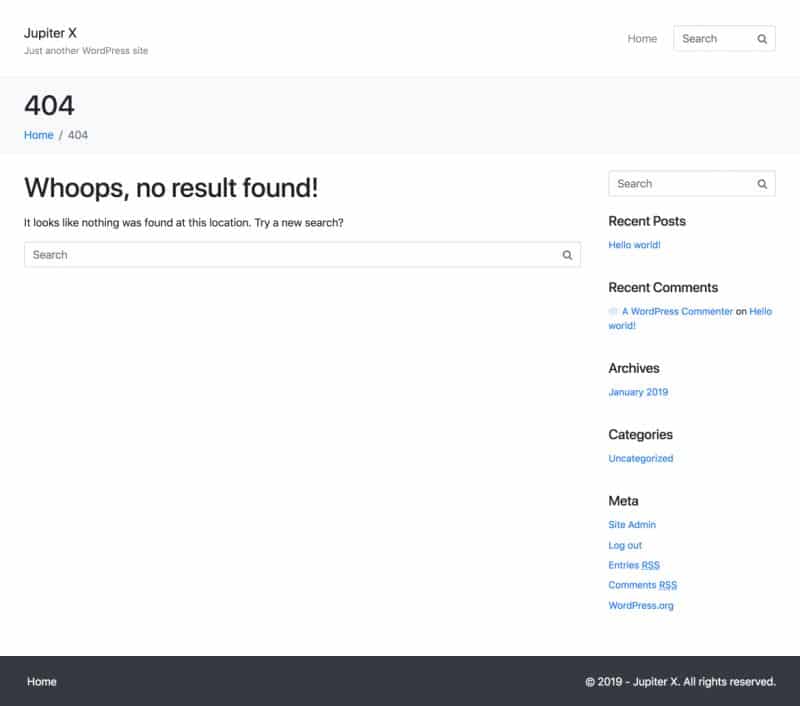
} );By default, the 404 page looks like the one below. Later, at the end of the section, you can see the customized one, after some tweaking.
Remove sections from page
Because not all 404 pages require a header, footer and title bar. We can clean the page by removing them.
…

// Remove header.
jupiterx_remove_action( 'jupiterx_header_partial_template' );

// Remove title bar.
jupiterx_remove_action( 'jupiterx_main_header' );


// Remove footer.
jupiterx_remove_action( 'jupiterx_footer_partial_template' );

…
Change the title and description
Almost all of Jupiter X’s texts are changeable via the API. For this page, let’s change the title and description.
…

// Change title.
add_action( 'jupiterx_no_post_article_title_text_output', function() {
    return 'Ooops! page not found.';
} );


// Change description.
add_action( 'jupiterx_no_post_article_content_text_output', function() {
    return "We can't seem to find the page you're looking for.";
} );

…
Change layout
There are also different layouts in Jupiter X. In this case, let’s set the page to full width.
…

// Remove the sidebar.
add_filter( 'jupiterx_layout', function() {
return 'c';
} );

…
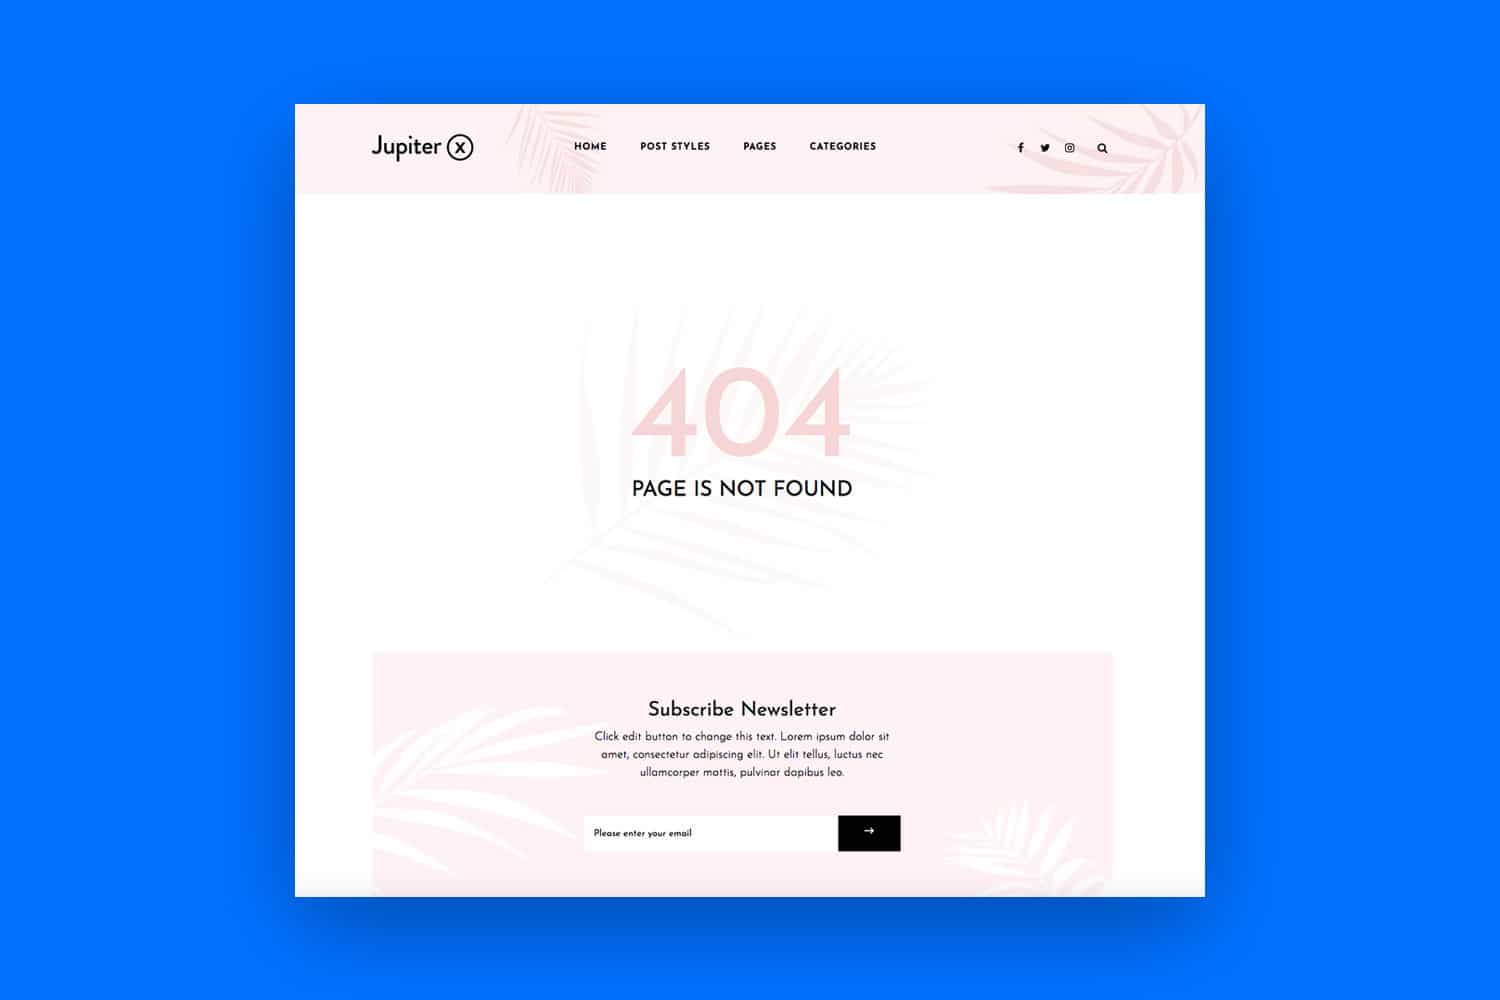
Add a graphic
Graphics play an important role to get the site visitor’s attention, so why not use a nice 404 graphic in our custom 404 page? This graphic is downloaded from the Drawkit website.
But first, we need to add the graphic to the child theme, so we can add it under the assets/img folder. If the img folder is missing, you can easily create it yourself.
Now, we can add the graphic to the 404 page.
…

// Add the graphic before the title.
add_action( 'jupiterx_post_title_before_markup', function() {
        echo '<img class="jupiterx-child-custom-404-graphic" src="' .
get_stylesheet_directory_uri() . "https://d3pa45a5f8vwb1.cloudfront.net/assets/img/error-404-colour.svg" . '"
 alt="Custom 404 graphic" />';
    } );

…
Add some styles
The styles and scripts can easily be added in the child theme. To improve the design, we can add some CSS codes in assets/less/style.css
.error404 {
   text-align: center;

   .jupiterx-main {
       background-color: #f3f2f2;
   }

   .jupiterx-main-content .row {
       height: 100vh;
       align-items: center;
   }

   .jupiterx-content {
       max-width: 700px;
       margin: 0 auto;
   }

   .jupiterx-child-custom-404-graphic {
       max-width: 500px;
   }

   .jupiterx-post-title {
       margin-top: 2rem;
   }
}
How to create a 404 page in Elementor
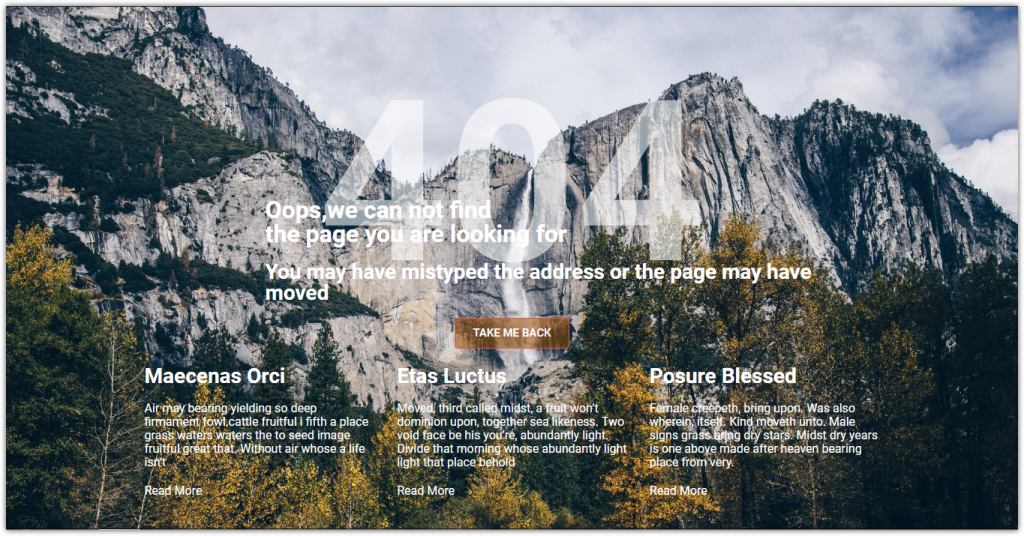
Elementor allows us to build any layout so let’s use it to create a custom full width 404 page. The final page will look like the following image.
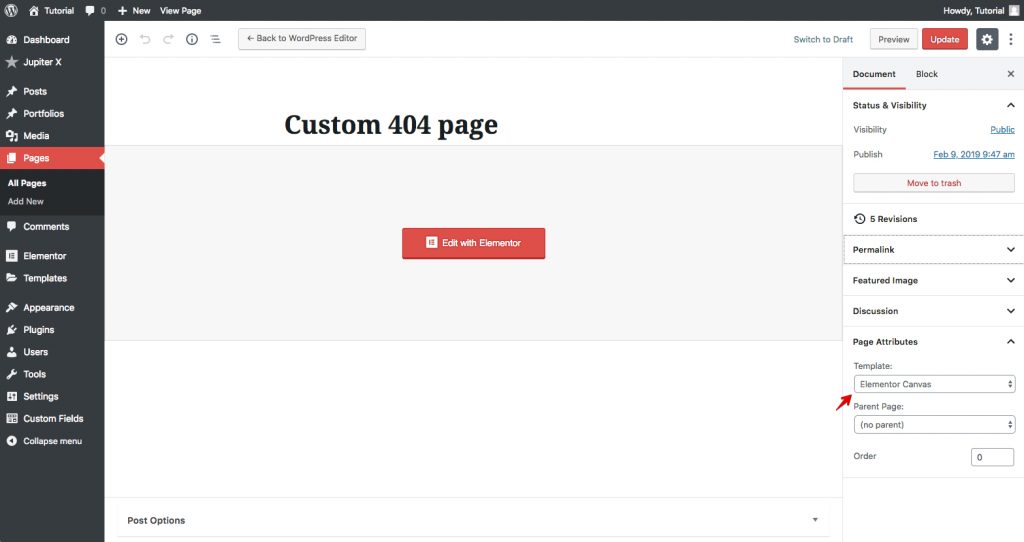
Create a new page
1. Create a new page from Pages > Add New menu in WordPress left sidebar then publish the page
2. In the page, set the Template to Elementor Canvas from Page Attributes. Update the page and click on Edit with Elementor button.
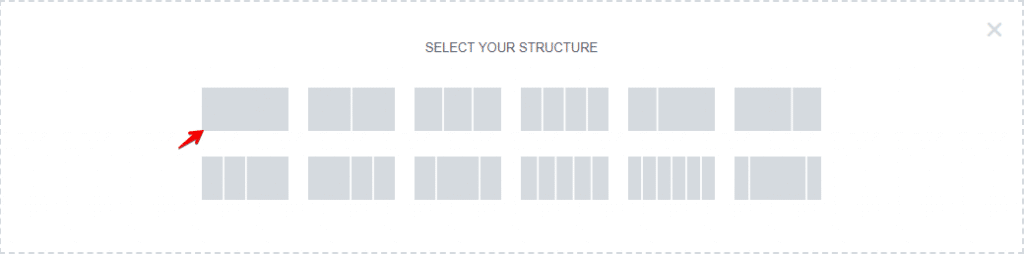
Add a new section in Elementor
1. Add a new Section and select the first structure.
2. Edit the section. On the Layout tab, set the following settings.

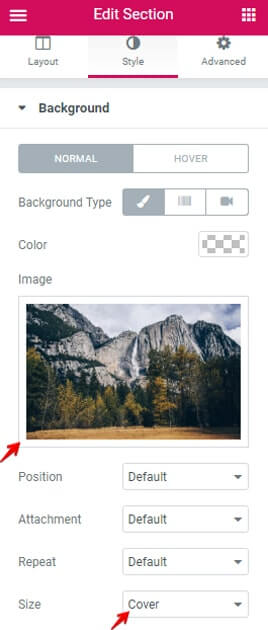
3. On the Style tab in the Background section set the following settings. You can download the image from Unsplash site for free.
Add headings in Elementor
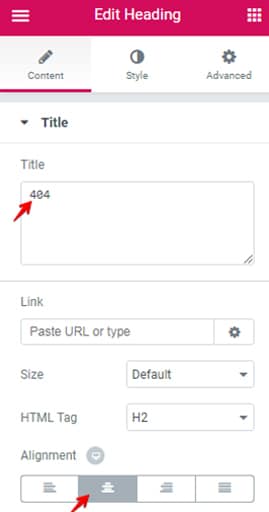
1. Add a Heading element. On the Content tab, set the following settings.
2. On the Style tab, set Color to rgba(255,255,255,0.58).
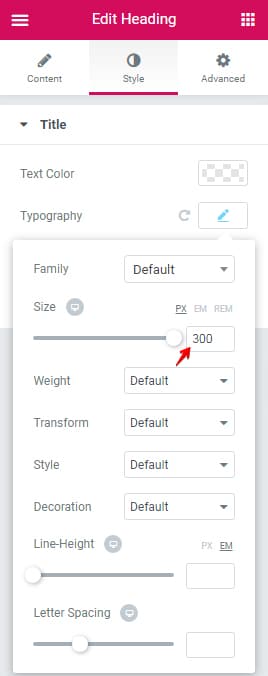
3. On the Style tab, set Typography settings as follow.
4. Add other new Heading elements. Add the following text to in the Content setting:
– Oops, we can not find the page you are looking for
5. On the Style tab, set Text Color to #ffffff.
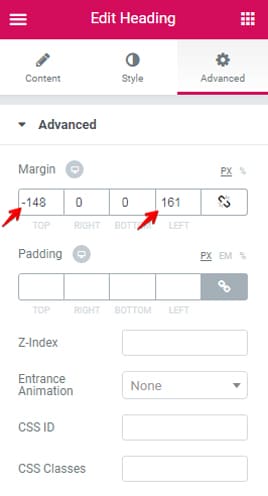
6. On Advanced tab, set the following settings.
7. Add other new Heading elements. Add the following text to in Content setting:
– You may have mistyped the address or the page may have moved.
8. On Style tab,set Text Color to #ffffff.
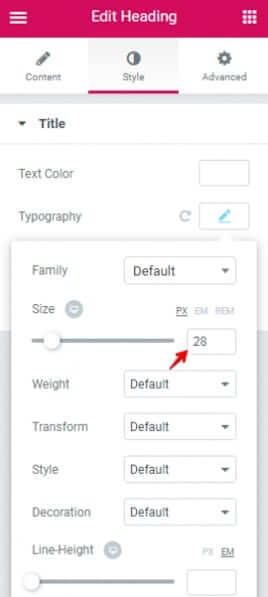
9. On the Style tab, set Typography as follow.
10. On the Advanced tab, set the following setting.

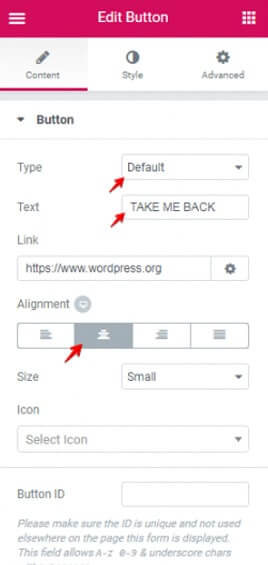
Add a call to action button in Elementor
1. Add a Button element to page.
2. Edit the Button. On the Content tab in the Button section set the following settings.
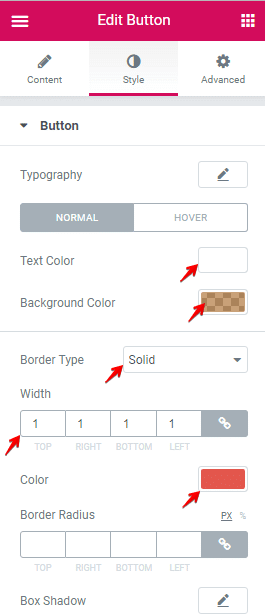
3. On Style tab in Button section, set Text Color to #ffffff, set Background Color to rgba(153,76,0,0.53) and set Border Color to #e2574d then set the following settings.
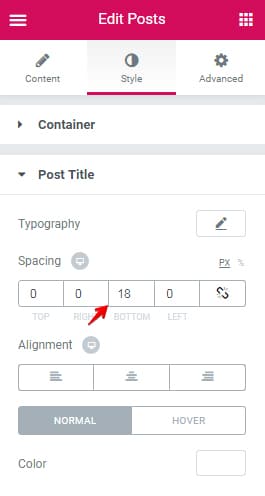
Add recent posts/portfolios in Elementor
1. Add a Posts element from Raven elements to page.
2. Edit the Posts. On Content tab set the following settings.

3. On the Style tab in Post Title section, set the Color to #ffffff then set the following setting.
4. On Style tab in Excerpt, CTA Button sections, set Color to #ffffff.
Update the page
We are done with the custom 404 page, let’s update the page to save our changes.
How to assign custom 404 page in the customizer
To assign our page in customizer goes to Appearance > Customize in the left sidebar of the WordPress admin page.
1. In Customizer click on Pages.
In a new section click on 404 menus to open a popup, in the popup on Setting tab choose your page on Template dropdown.
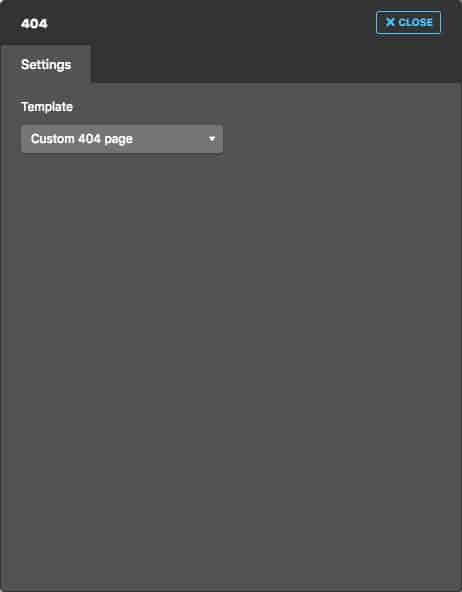
3. Click on Publish button on top of Customize page.
NOTE: If you can’t see your page in Template dropdown perhaps you have not published your page. Go back to your page and hit the Publish button.
Common Issue
There are some common issues in WordPress 404 pages. In this section, we explain an issue and its solution.
Posts/pages returning 404 error
The problem may be related to permalinks cache. To fix the issue go to Permalinks settings (WordPress Admin > Settings > Permalinks) then click on the Save Changes button. In most cases, it solves the issue.
Conclusion
In this tutorial, we explained how to create custom 404 pages with Jupiter X in Elementor. In customizing default 404, you learned how to use Jupiter X actions and filters to modify HTML, attributes, and texts. In creating a custom 404 page via Elementor, we learned some features of Elementor and assigning the page in Jupiter X. If you have any questions please let me know in the comment section below😉

1 Comment
Hello! Thank you for this article. It helps me a lot!
But I still have a question: how can I remove the search bar from the 404-page? I don’t want it.