Imagine you have an online printing shop, and you want to give customers the ability to upload their logo or design and attach it to their orders. As you know, WooCommerce default checkout fields have no upload option, even though we sometimes need to let the user upload a file during the checkout process.
In this tutorial, I am going to show you how to add a file uploader to the checkout page. Attaching files to an order has a lot of use cases, but make sure to take security precautions since it allows everyone to upload something.
This method works with JupiterX or any other theme.
Adding a file uploader on the checkout fields
First, we need to add our uploader to the checkout fields. We can use WooCommerce native hooks to add our field to any section of the checkout page that we like.
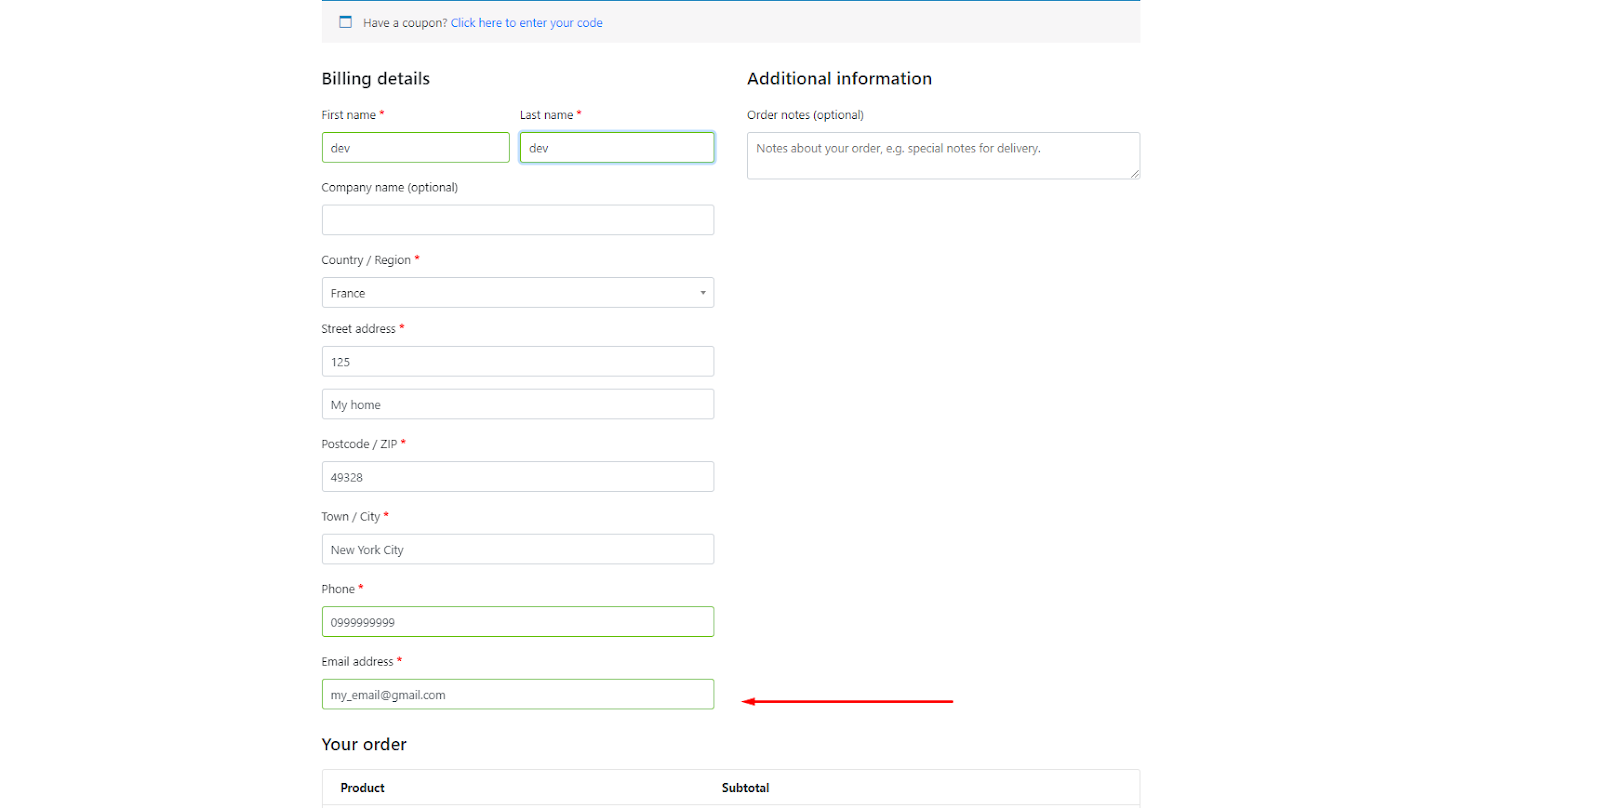
I am going to add a file uploader to the checkout page after the billing email field using the following hook.
woocommerce_after_checkout_billing_formThe uploader will appear after this field:
Add the following code to the functions.php file of your theme:
add_action( 'woocommerce_after_checkout_billing_form', 'add_file_uploader_to_checkout' );


function add_file_uploader_to_checkout() {
    ?>
        <div>
            <label>File Uploader</label>
            <p>
                <input type="file" name="billing_file" id="checkout-file-uploader" >
                <input type="hidden" name="file_uploader_id_holder" id="file_uploader_id_holder" >
            </p>
        </div>

    <?php
}
The checkout page should look something like the following image:
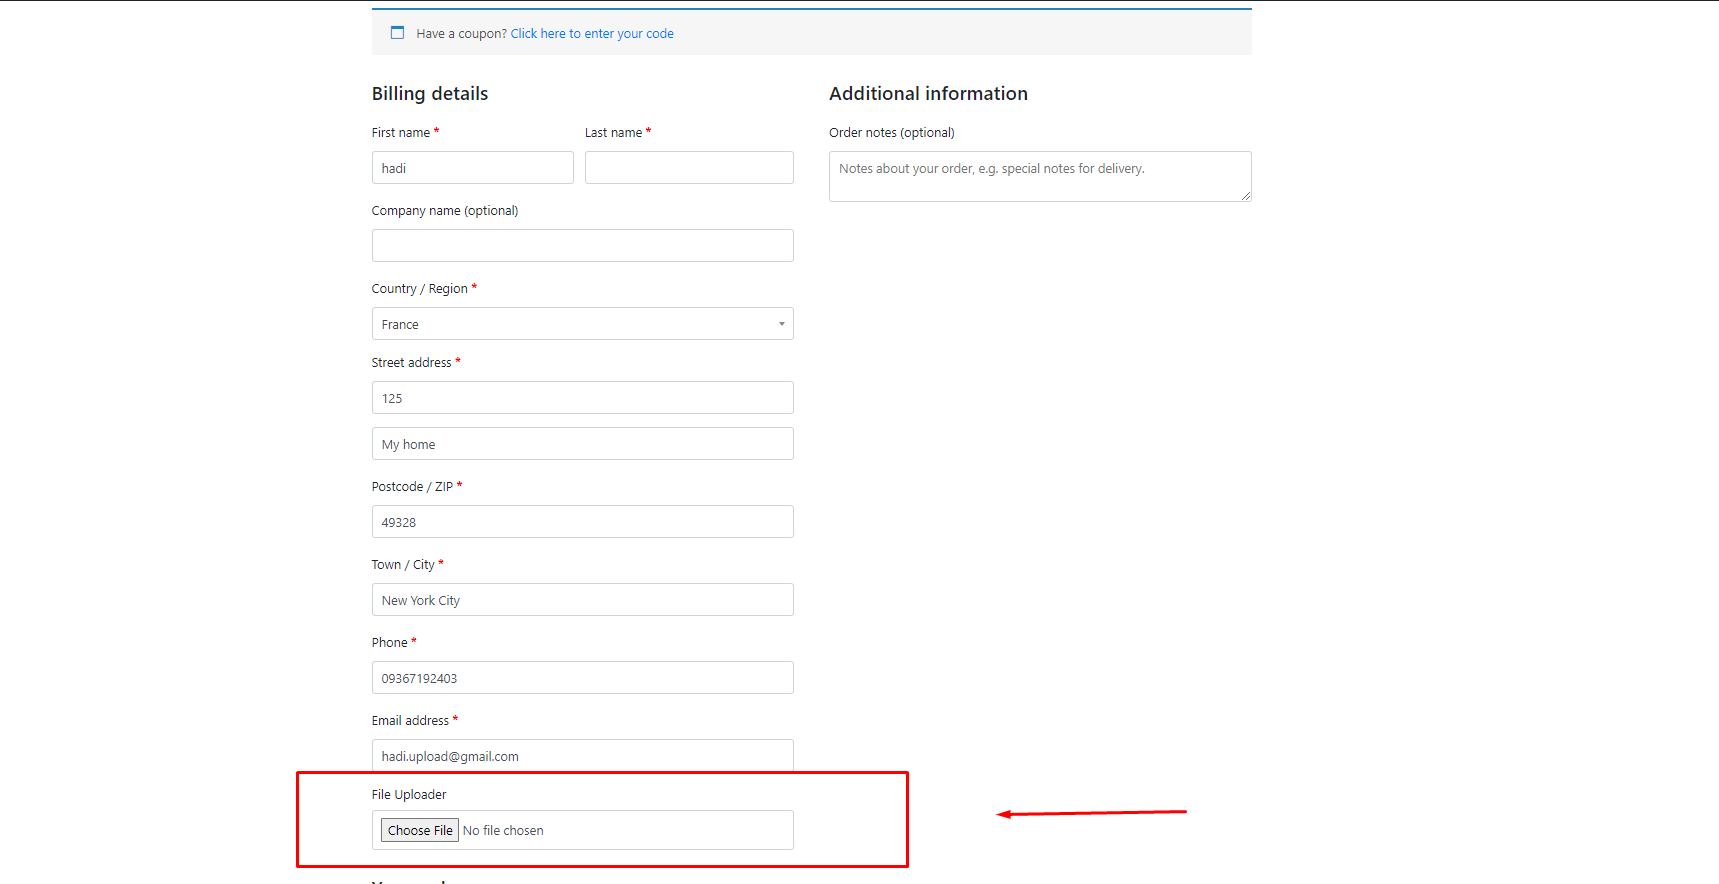
Now we are ready to upload the file.
Upload a file using the added field and Ajax
Add the following code snippet to your functions.php file so that when a user uploads a file, it is uploaded to the WordPress media library.
add_action( 'wp_footer', 'upload_file_on_checkout_by_ajax' );


function upload_file_on_checkout_by_ajax() {
    ?>
        <script>
            jQuery( document ).ready( function( $ ) {
                $( '#checkout-file-uploader' ).change( function() {
                    const file = document.getElementById( 'checkout-file-uploader' ).files[0];

                    if ( 'object' !== typeof file ) {
                        return;
                    }


                    const formData = new FormData();
                    formData.append( 'checkout-file-uploader', file );


                    $.ajax({
                        url: wc_checkout_params.ajax_url + '?action=upload_checkout_file',
                        type: 'POST',
                        data: formData,
                        contentType: false,
                        enctype: 'multipart/form-data',
                        processData: false,
                        success: function ( response ) {
                            $( '#file_uploader_id_holder' ).val( response.data );
                        },
                        error: function ( response ) {
                            console.log( response.data );
                        }
                    });
                } );
            } );
        </script>
    <?php
}
In the above code, we included JavaScript to handle the upload process. If the upload process is successful, it will add the uploaded file URL to a hidden field for later use.
Let’s handle this Ajax call by adding the following code to your functions.php file:
add_action( 'wp_ajax_upload_checkout_file', 'save_File_to_media' );
add_action( 'wp_ajax_nopriv_upload_checkout_file', 'save_File_to_media' );


function save_File_to_media() {
    $upload_to = wp_upload_dir();


    if ( ! isset( $_FILES['checkout-file-uploader'] ) ) {
        return;
    }


    // Just allow these types of files
    $allowed_files_type = [ 'image/png' ];


    if ( ! in_array( $_FILES['checkout-file-uploader']['type'], $allowed_files_type, true ) ) {
        wp_send_json_error( 'This type of file is not allowed' );
    }


    // Do not allow based on size.
    $allowed_size = 100000; // 100KB


    if ( $_FILES['checkout-file-uploader']['size'] > $allowed_size ) {
        wp_send_json_error( 'File size can not be bigger than 100KB' );
    }


    $path = $upload_to[ 'path' ] . '/' . basename( $_FILES[ 'checkout-file-uploader' ][ 'name' ] );


    if( move_uploaded_file( $_FILES[ 'checkout-file-uploader' ][ 'tmp_name' ], $path ) ) {
        $url = $upload_to[ 'url' ] . '/' . basename( $_FILES[ 'checkout-file-uploader' ][ 'name' ] );


        wp_send_json_success( $url );
    }


    wp_send_json_error( 'We could not upload file' );
}
We’ve applied some limitations to the above code. For example, we just allowed PNG image files that are less than 100KB to be uploaded. This step is good for user experience and a great way to avoid security breaches. Make sure to mention the limit somewhere near the upload field or on your checkout page.
Now that the file is uploaded to the media library, the file URL can be added to the order post meta so that the admin can see it in the order page via the admin area.
Add the uploaded file address to the order page
To do this, we need to hook one of the WooCommerce actions when an order is created, (once a user presses the Place Order button) and store the address URL as a meta for the order post:
add_action( 'woocommerce_checkout_order_processed', 'add_address_to_order', 99, 1 );


function add_address_to_order( $order_id ) {


    $file = FILTER_INPUT( INPUT_POST, 'file_uploader_id_holder', FILTER_SANITIZE_URL );


    if ( empty( $file ) ) {
        return;
    }


    update_post_meta( $order_id, 'uploaded-file-checkout', $file );


    wp_send_json_success();
}
Now we are going to show the URL address via the admin area > order screen page using the following code snippet.
add_action( 'woocommerce_admin_order_data_after_order_details', 'display_url_address' );


function display_url_address( $order ){


    $file = get_post_meta( $order->get_id(), 'uploaded-file-checkout', true );


    if ( empty( $file ) ) {
        return;
    }


    ?>
        <p class="form-field form-field-wide wc-customer-user" style="padding-top:20px">
            <img width="250" height="250" src="<?php echo esc_url( $file ) ?>" />
            <br>
            URL: <?php echo $file ?>
        </div>


    <?php
}
Here is the result:
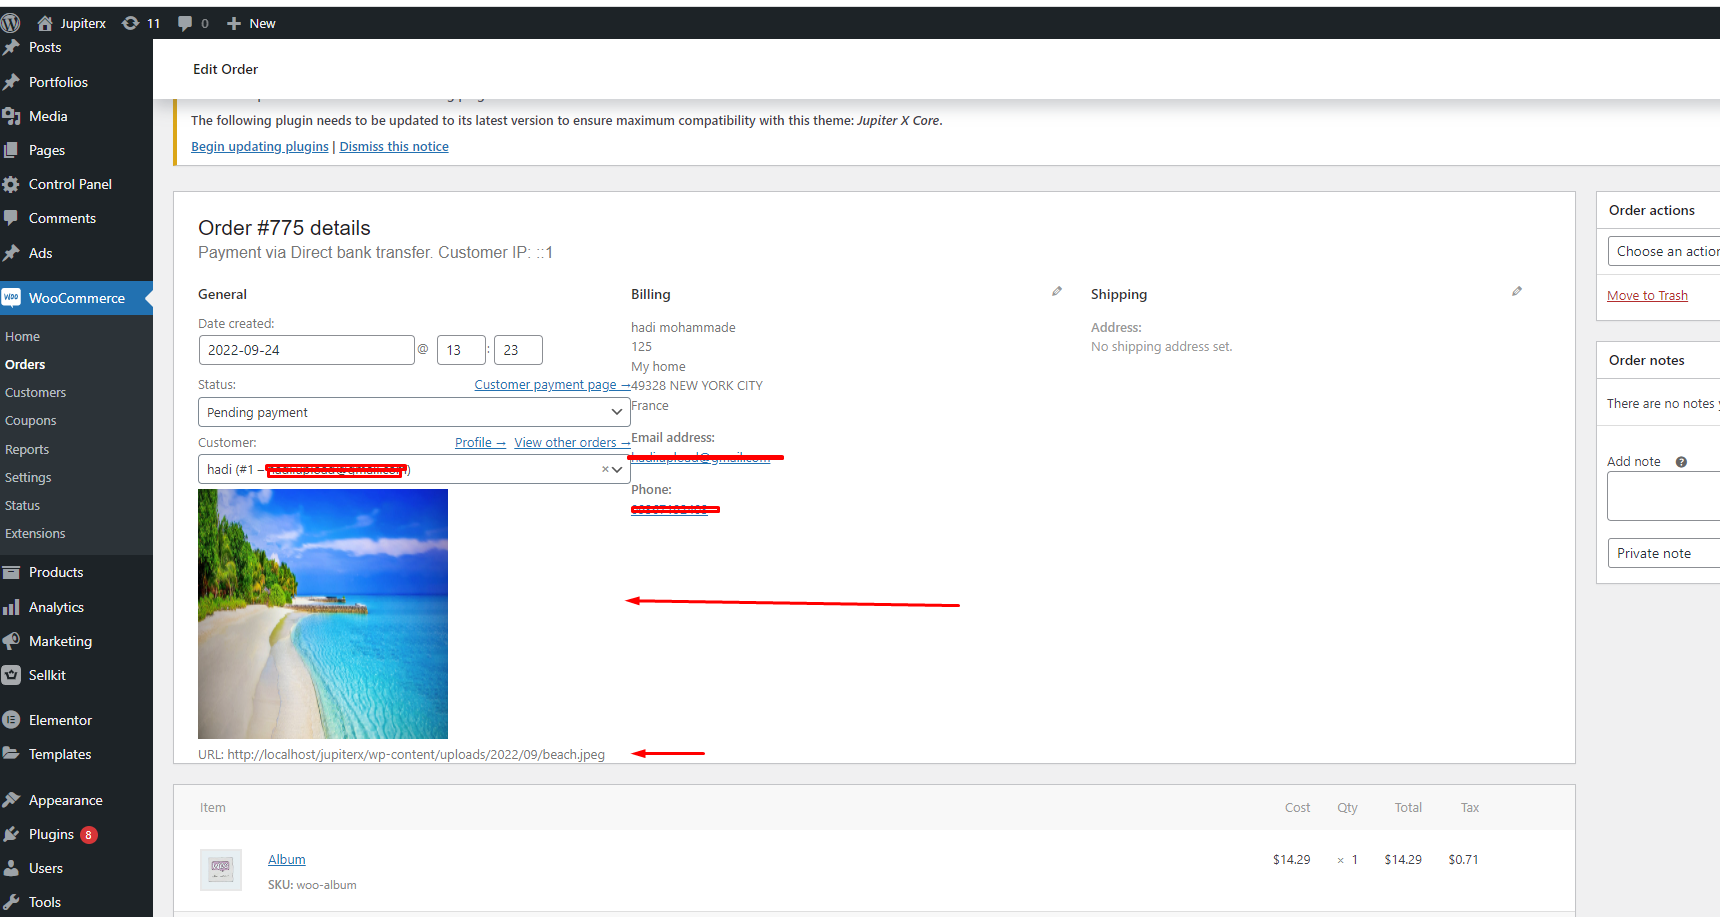
The admin can now see the image and the URL address as well.
Conclusion
There are many ways to customize your WooCommerce store checkout page. In this blog post we learned how to add a file uploader to your store that allows customers to add a file or picture to their order.

2 Comments
Nice !
Thanks for sharing this type of informative article.