Your website footer is a distinct collection of content that concludes every page of a website. Typically, it contains a copyright statement, a link to the home page and either an email link or a link to the contact page. In this article, we’ll cover how to customize footers in WordPress specifically using links and images.
So, why is the website footer an important element in website design?
- It emphasizes your content.
- It offers website visitors with a guide.
- It provides useful information about your company.
- It concludes your website content.
- It’s your last chance to convince visitors to take action and convert them into leads.
Although it’s often an overlooked component of a website, the footer can actually serve as a direct line between your visitors in you if you design it well. Here, we’ll also give you some tips about what should be included and how to do it in WordPress. Let’s begin!
[call_to_action title=”Have your custom WordPress project done by Artbees experts for competitive price.” target=”_blank” url=”https://themes.artbees.net/pages/artbees-care-wordpress-customisation-services/?utm_source=customization-related-docs-posts” type=”link”]
Leveraging your Website Footer with Jupiter
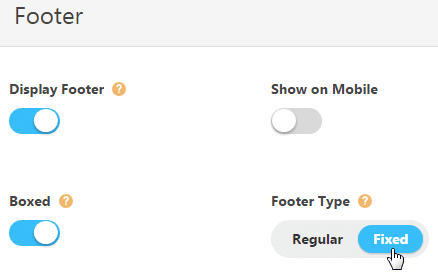
In Jupiter, the footer and sub footer are enabled by default. When a template is activated, it may change the settings for the footer or sub footer, or disable them.
To enable or disable the footer:
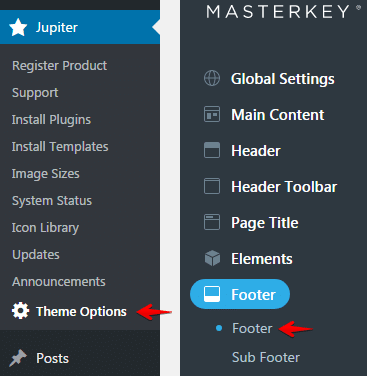
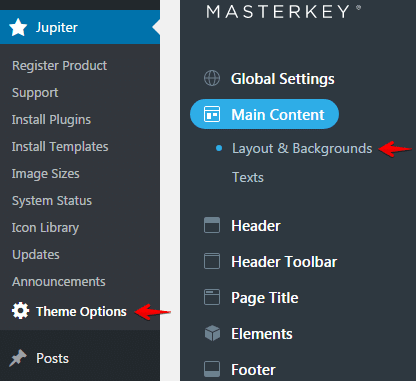
On the left menu of your WordPress dashboard, go to Theme Options > Footer.
To enable or disable the sub footer:
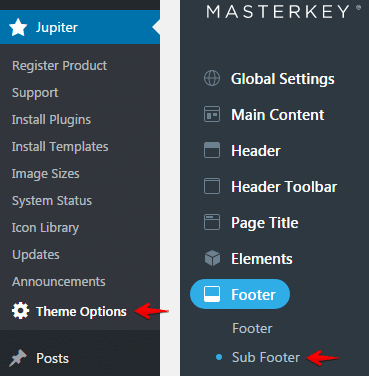
On the left menu of your WordPress dashboard, go to Theme Options > Footer > Sub Footer.
The layout of the footer determines how the content added via widgets in the footer will be displayed. It can be changed by going to Theme Options > Footer.

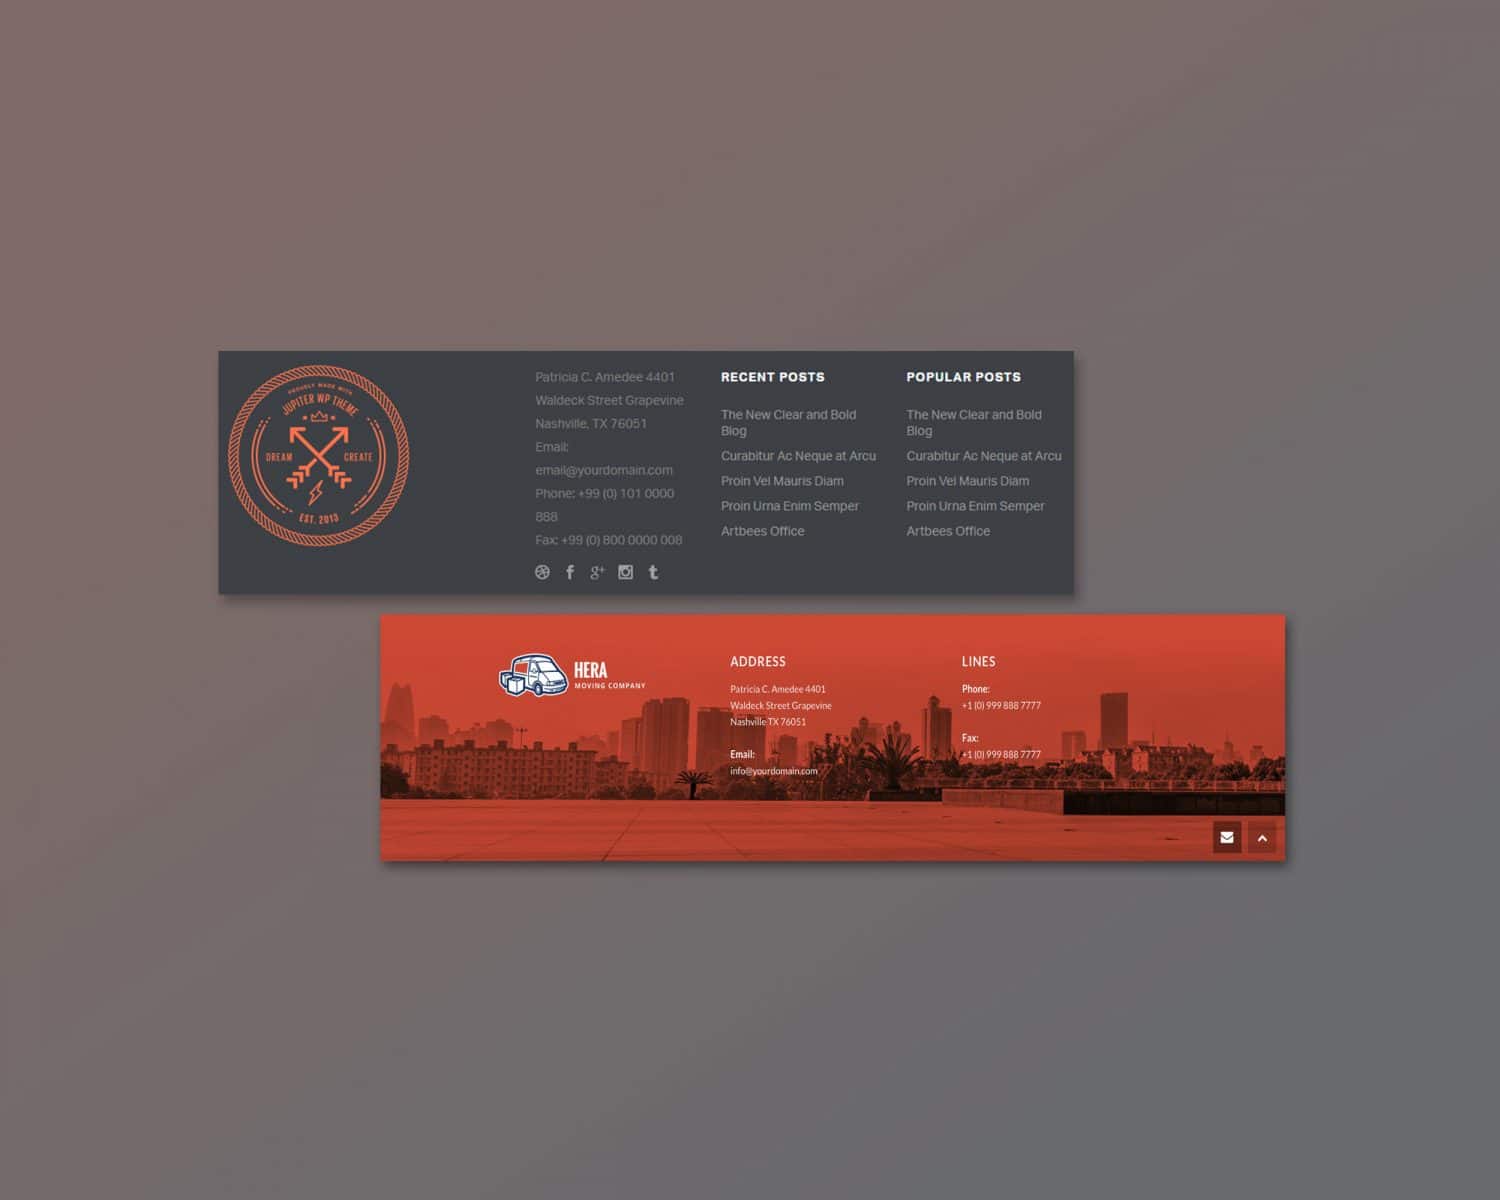
In terms of how to customize footers in WordPress, there is an option to enable the sticky or fixed footer, which sticks the footer to the bottom of the page so other sections move over it. Check out our Hera template to see the sticky footer in action.
Jupiter Footer Styling Options
There are a couple of settings in Theme Options that allow you to change the default styling of the footer.
How to Customize Footers in WordPress: Background Color or Image
On the left menu of your WordPress dashboard, go to Theme Options > Main Content > Layout & Backgrounds.
Below Background Color & Texture, click on the Footer section.
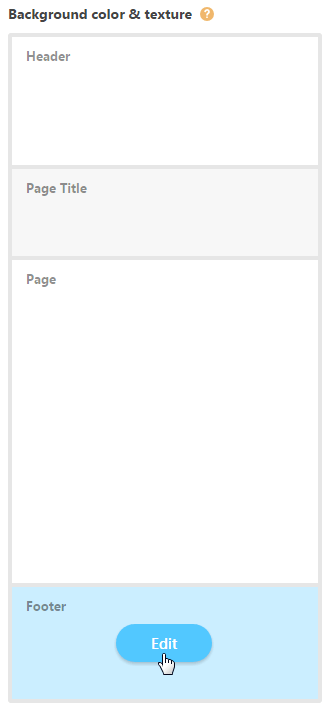
A new window on the right will appear.
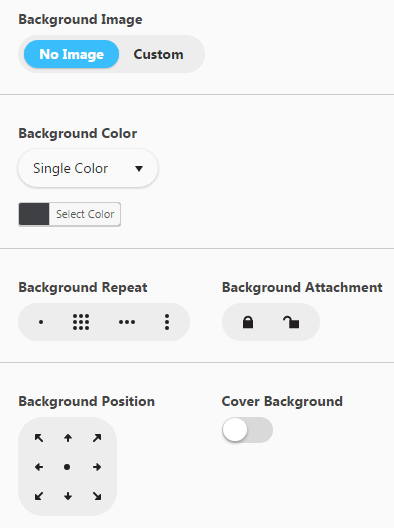
Use the color selection tool to add the background color or click on Custom to upload a background image.
In Jupiter, the footer content is mostly added using widgets. The footer widgets (content) can be added globally, so your footer has the same content across the whole website. They can also be added only to a specific page, so your footer differs from page to page.
How to Add Global Content
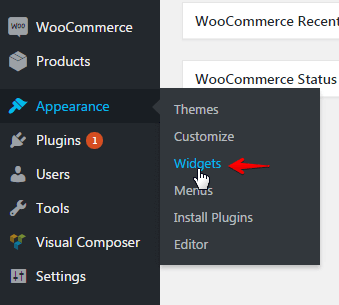
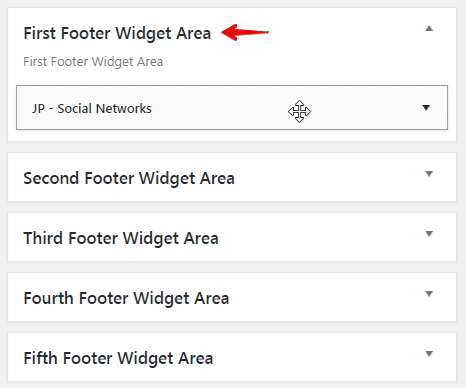
On the left menu of your WordPress dashboard, go to Appearance > Widgets.
On the Widgets page, drag and drop one of the widgets into one of the footer widget areas (the footer widget areas that can be used depends on the footer layout).
Page specific footer
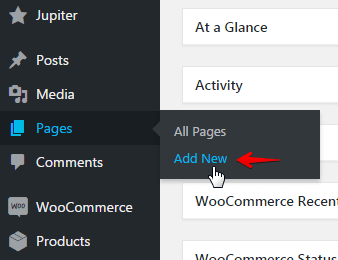
From your WordPress dashboard, go to Pages and pick your page.
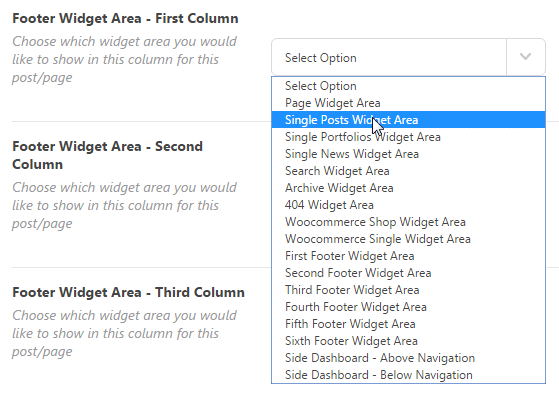
Scroll down to Jupiter Widget Options.
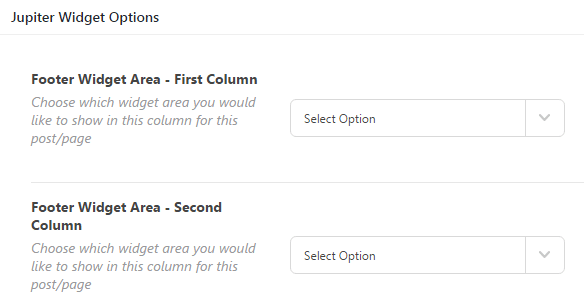
Assign your desired widget area to one of the footer columns.
Publish or update the page.
_____________________________________________________________________
Just a note that HTML codes can be added to the footer via the text widget. Below, we’ll explain how to customize footers in WordPress by adding an image (logo) and text to the footer.
Adding Images and Texts to your Website Footer
On the left menu of your WordPress dashboard, go to Appearance > Widgets.
On the Widgets page, drag and drop the text widget into one of the footer widget areas.

In the text widget content, add your HTML codes:
<img src=”https://demos.artbees1.netdna-cdn.com/jupiter5/wp-content/uploads/2015/12/jupiter-logo-footer.png” alt=”Jupiter Logo” height=”180″ width=”180″>
<p style=”color: blue”>Some text below the logo</p>
Save the widget and check the front end of your website to see the changes made to your footer. Onto the next tip for how to customize footers in WordPress!
Adding shortcode to the footer
From your WordPress dashboard, go to Pages > Add New.
From the Visual Composer Screen, click on the + icon

In the Add Element pop-up screen, search for Button and click on it to be added to the page.
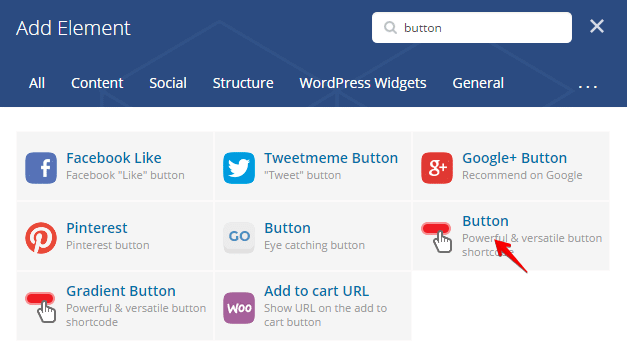
Configure the button in the Button Settings pop-up and click on Save Changes.

Switch to the backend by clicking on Classic Mode.
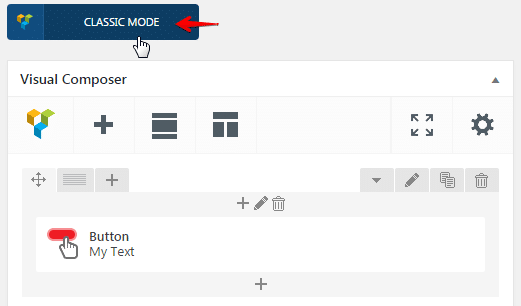
Copy the generated shortcode.

Leave the page without saving.
Then, from the WordPress dashboard, go to Appearance > Widgets.
On the Widgets page, drag and drop the text widget into one of the footer widget areas.
Paste your shortcodes in the text widget content field.
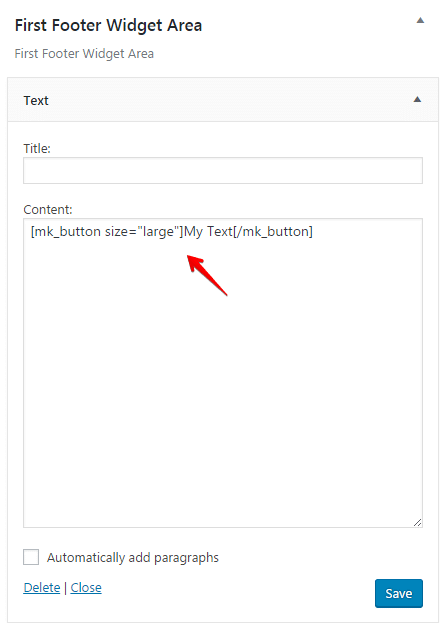
Click on Save and check the footer in the front-end of your website.
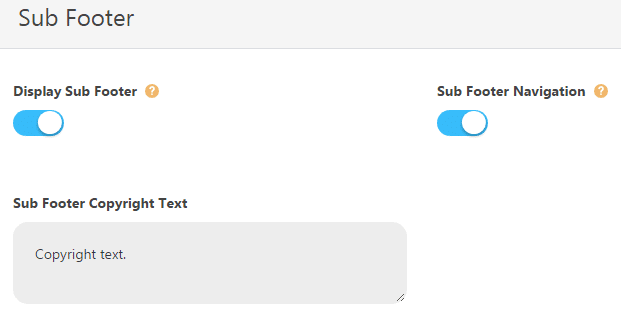
Note: The sub footer content consists of the copyright text and navigation. Both can be changed and customized.
Changing the Copyright Text and Navigation
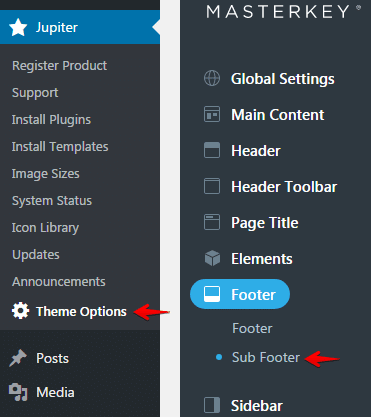
On the left menu of your WordPress dashboard, go to Theme Options > Footer > Subfooter.
Enter your copyright text to the Sub Footer Copyright Text input field.
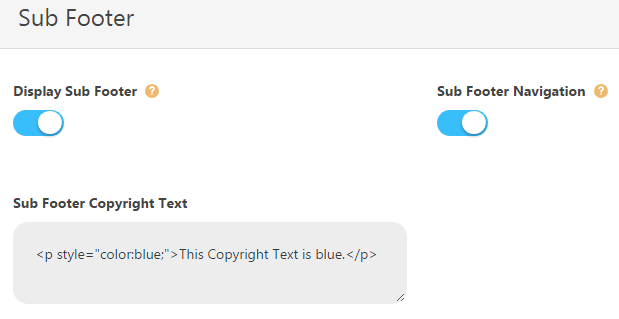
The Sub Footer Copyright Text input field also accepts HTML code, which means the text can be further customized and styled. Below is an example on how to change the copyright text color via HTML:
<p style=”color:blue;”>This copyright text is blue.</p>
Copyright text is important for website designers and developers to advertise their services. If a website visitors likes the user interface and experience of a specific website, then the website they created can serve as a calling card.
With Jupiter, you can add an outbound link that leads to your own website, so potential clients can reach you directly from the websites you created. Here’s how.
How to Turn Copyright Text into Outbound Links
To turn your copyright text into outbound links, you can follow the same steps as changing the copyright text (instructions above). However, there’s a difference in the HTML code:
To turn copyright text into a link use this HTML:
<a href=”YourLinkHere”>Copyright text</a>
______________________________________________________________
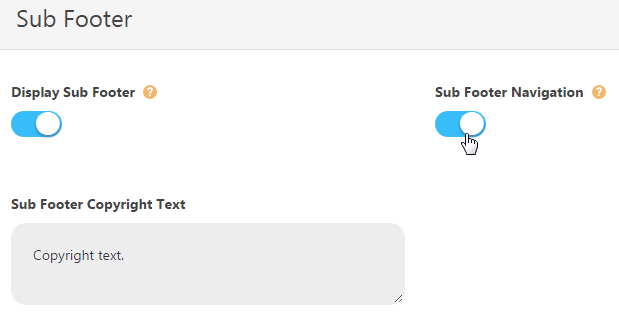
To configure the sub footer navigation:
From the WordPress dashboard menu, go to Theme Options > Footer > Subfooter.
Enable Sub Footer Navigation.
On the left menu of your WordPress dashboard, go to Appearance > Menus.
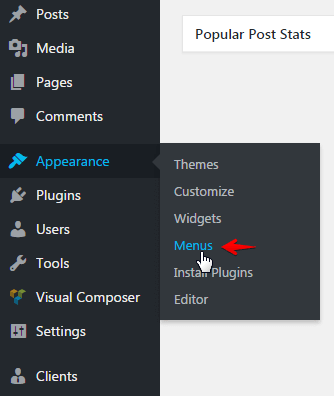
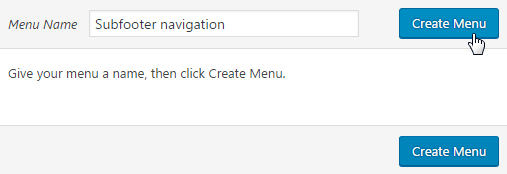
Click on Create a New Menu.
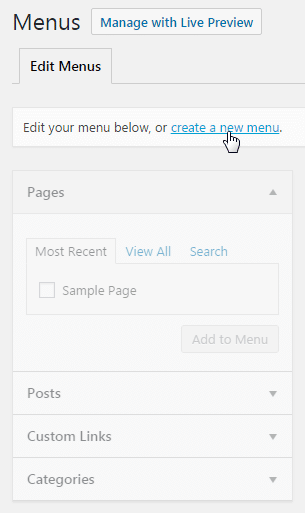
Give your menu a name, and click on Create Menu.
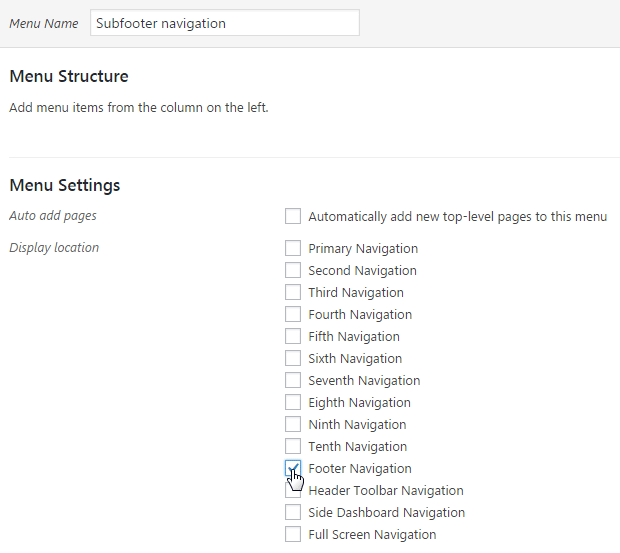
Add menu items from the column on the left. In Menu Settings, tick Footer Navigation.
Save the settings and check the front end of your website to see the changes made.
So, why is the website footer an important element in website design?
- It emphasizes your content.
- It offers website visitors with a guide.
- It provides useful information about your company.
- It concludes your website content.
- It’s your last chance to convince visitors to take action and convert them into leads.
Enjoy creating a beautiful website footer and generate more traffic and leads with your site!
If you have any more ideas and suggestions about how to create great website footers, let us know in the comments section.

No comment yet, add your voice below!