
When operating an online store, one of the best ways to engage customers is by displaying related products based on their cart items. This will increase engagement on your site, which increases the chance of selling even more.
In this article, I will show you how to display related products based on items in a customer’s cart and then show them where you want to. By the end of this article, you will be able to locate the data you need to show the items related to those added to the cart and use it anywhere.
Determining the items in the cart
Logically, the first step would be to determine what items are in the cart. We also need to make sure that the cart is not empty. We can do this easily using WooCommerce functions:
$cart = WC()->cart;

if ( $cart->is_empty() ) {
    return;
}

// Now we can get cart items.
$cart_items = $cart->get_cart();
First, find the WC () –>cart object and check if it is empty. Return if the cart is empty. Then, add get_cart () in the $cart_items variable. This way, we can ensure that the $cart_items variable includes some items that are customers’ cart products.
Displaying related products
Now that we have the items saved via the $cart_items variable, we just need to display related products based on each cart item. We want to use WooCommerce’s native function to pass ‘product_id’ in the cart:
$product_ids = []; // We need it to save all related products id.

foreach ( $cart_items as $item ) {
    $related_products = wc_get_related_products( $item['product_id'], -1 );

           $product_ids = array_merge(
               $related_products,
               $product_ids
           );
}
As you can see in the code above, we add a loop for each cart item and call the wc_get_related_products function (WooCommerce native function) before merging all the products in $product_ids.
Let’s take a look at wc_get_related_products. This function displays related products based on product categories and tags. The function accepts three arguments:
- $product_id, Product ID (int) (required)
- $limit Result Count (int) (optional)
- $exclude_ids array of product ids (array) (optional)
Feel free to exclude products by adding an array containing those product IDs to the third parameter of this function. For more information, please refer to this link.
Show related products based on cart items
Let’s put the code together and see the result. First, wrap them all in a function named get_related_products_base_cart_items() as follows:
function get_related_products_base_cart_items() {
   $cart = WC()->cart;

   if ( empty( $cart ) || $cart->is_empty() ) {
       return;
   }

   $cart_items = $cart->get_cart();
   $product_ids = []; // We need it to save all related products id.

   foreach ( $cart_items as $item ) {
       $related_products = wc_get_related_products( $item['product_id'], -1 );

       $product_ids = array_merge(
           $related_products,
           $product_ids
       );
   }

   $args = [
       'post_type' => 'product',
       'posts_per_page' => -1,
       'post__in' => $product_ids
   ];

   $query = new WP_Query( $args );

   if ( $query->have_posts() ) {
       while ( $query->have_posts() ) {
           $query->the_post();
           the_title();
       }
   }
}
We have a list of product IDs that we know are related to the items in my cart. Now the only thing we need is to query those IDs, get their posts and alter them according to the template we want to show to visitors.
Here we pass the arguments to the WP_Query, after which we can print the results in a while loop. You can use template files or pass the results through a [products] shortcode (by calling the do_shortcode() function) to ensure they will have the same look as the other product loops on your website.
Alternatives
There are alternative ways to show products based on cart items:
Using Jupiter X’s Products Widget
If you are using the Jupiter X theme and Elementor as your page builder, you can use the JupiterX products widget, which allows you to display related products based on cart items without writing one line of code. This widget also features lots of options to change the query and style of the product display.
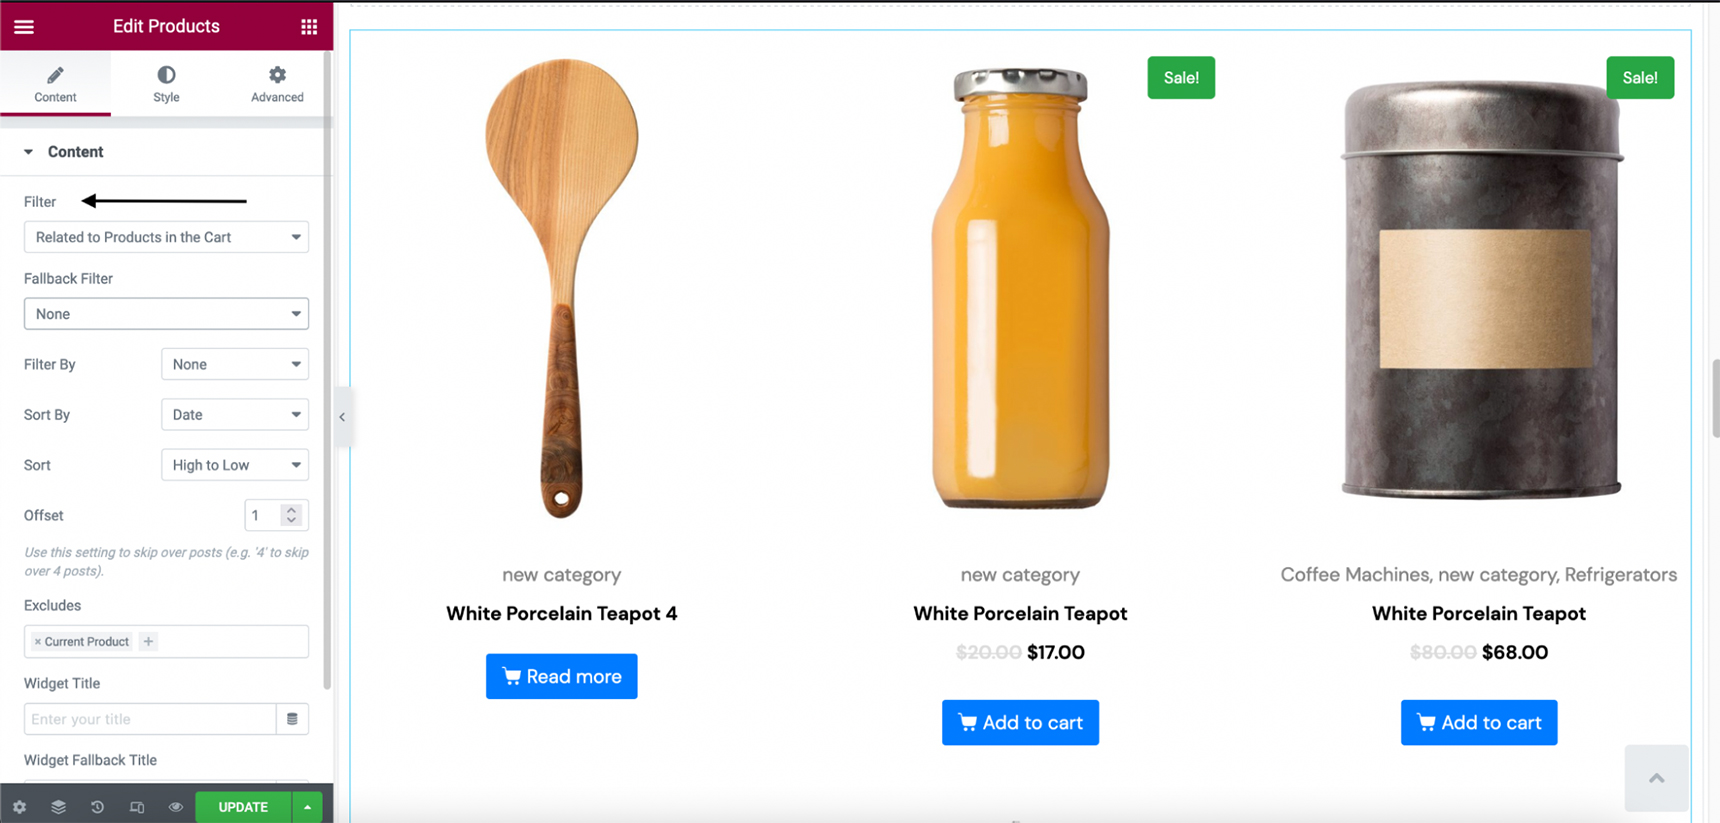
In order to do this just drop the “products” widget wherever you want on a page, whether it is in your single product page template, a product loop, or even the cart or checkout page. Then set the filter to “Related to products in the cart”. With this method you can style the loop as you wish, which is very helpful.
Using Growmatik
Using Growmatik, you can personalize your pages, including the cart page, and add related products. To do that, follow this guide to register and integrate your website with Growmatik. Then from the Growmatik dashboard, choose Workshop -> Personalization. Then add a personalization to your cart page, or any page you want.
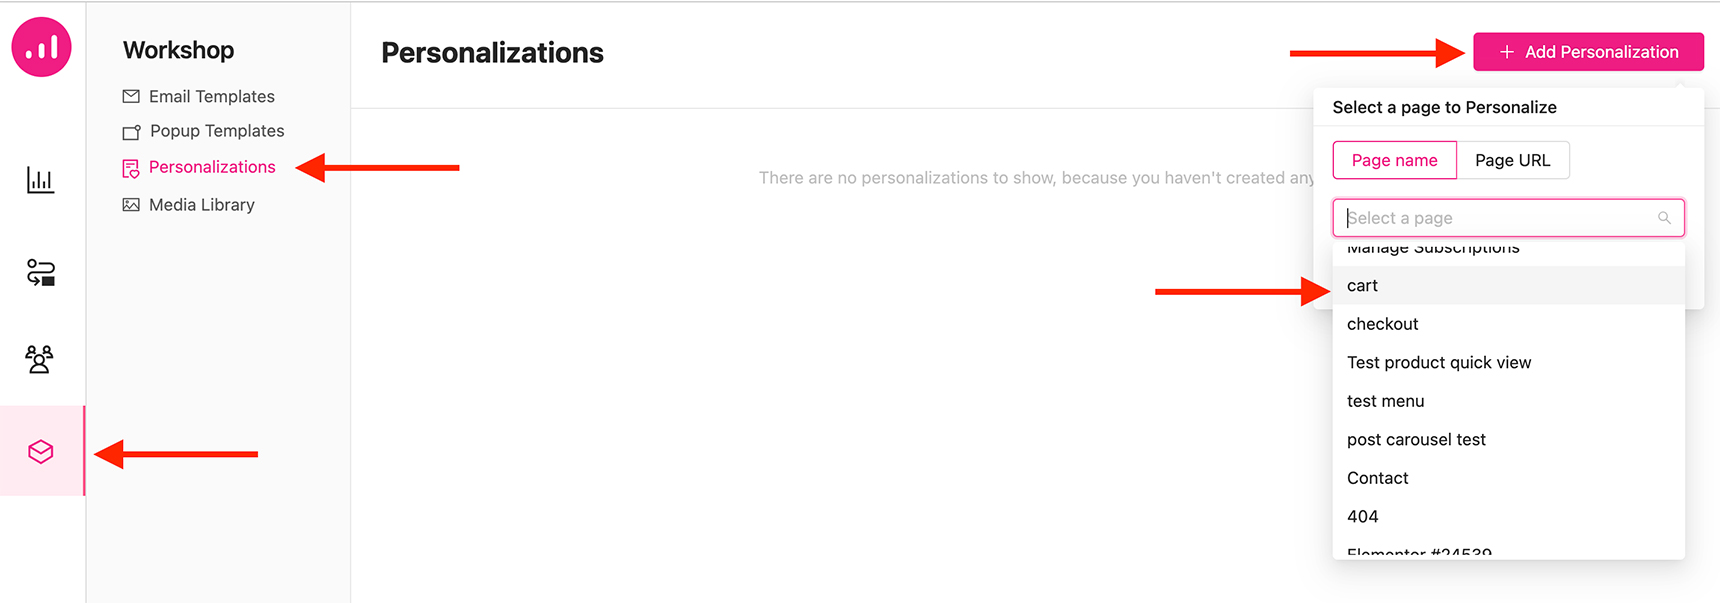
Give your personalization a name and click on the + button after finding the spot where you want to add the products.

Now choose the settings on the products widget and find the “Related to Products in the cart” filter inside the “Filter” dropdown. You can choose a fallback filter so that when there are no products in the cart, it shows that value. Choosing the Fallback filter as None will show nothing when there are no products in the cart.
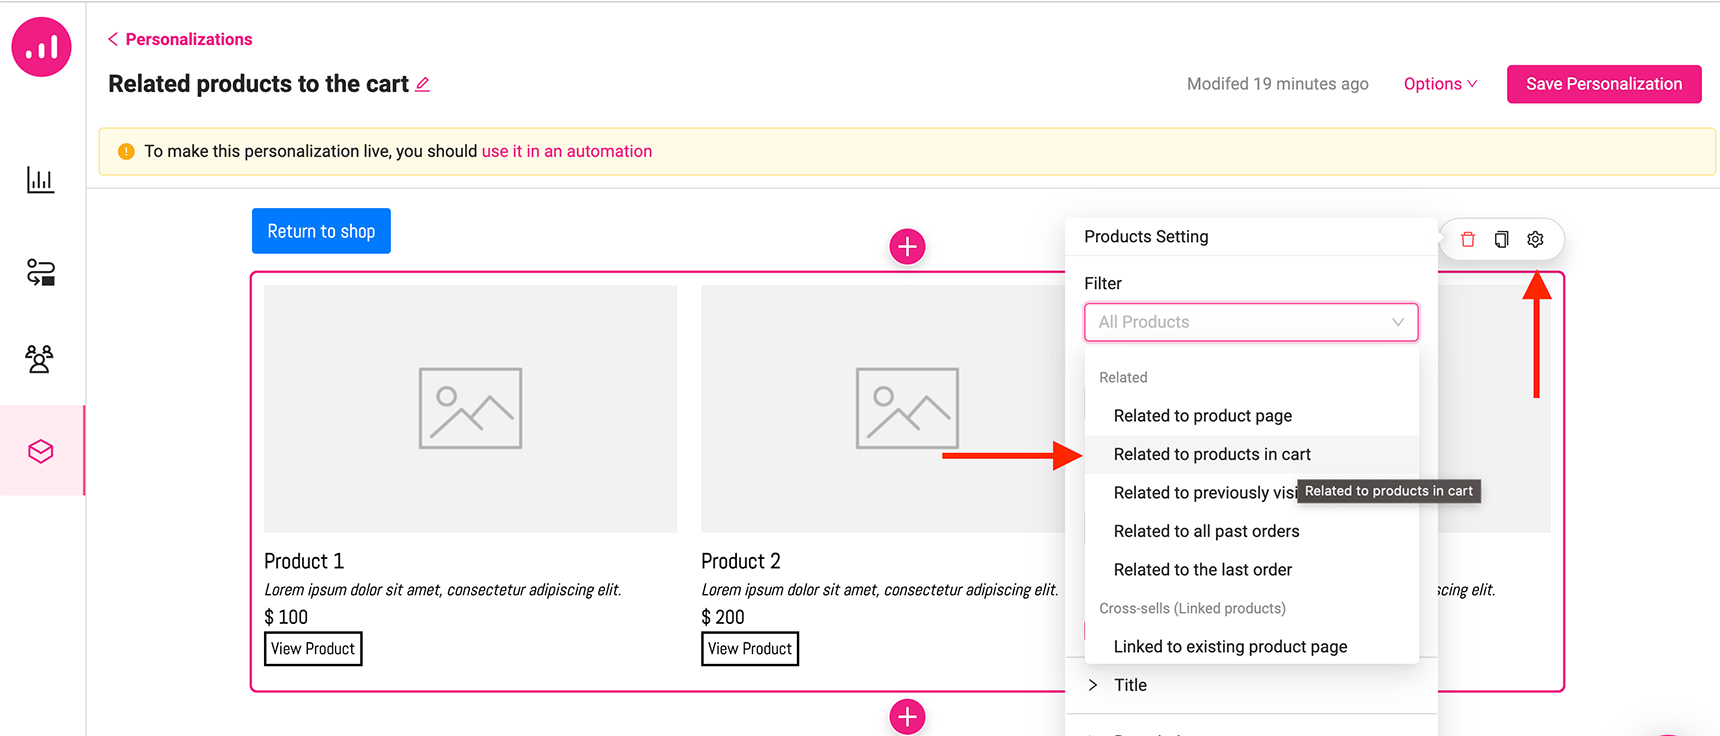
Now save your personalization. Remember that, you need to use it inside automation to make it work. Save your personalization as a template by clicking on the burger icon at the bottom right corner and do the next step.
Now it is time to add automation. Navigate to the Automations tab and add a new rule. You can also bypass this step by clicking on “To make this personalization live, you should use it in an automation” in the yellow notification bar.
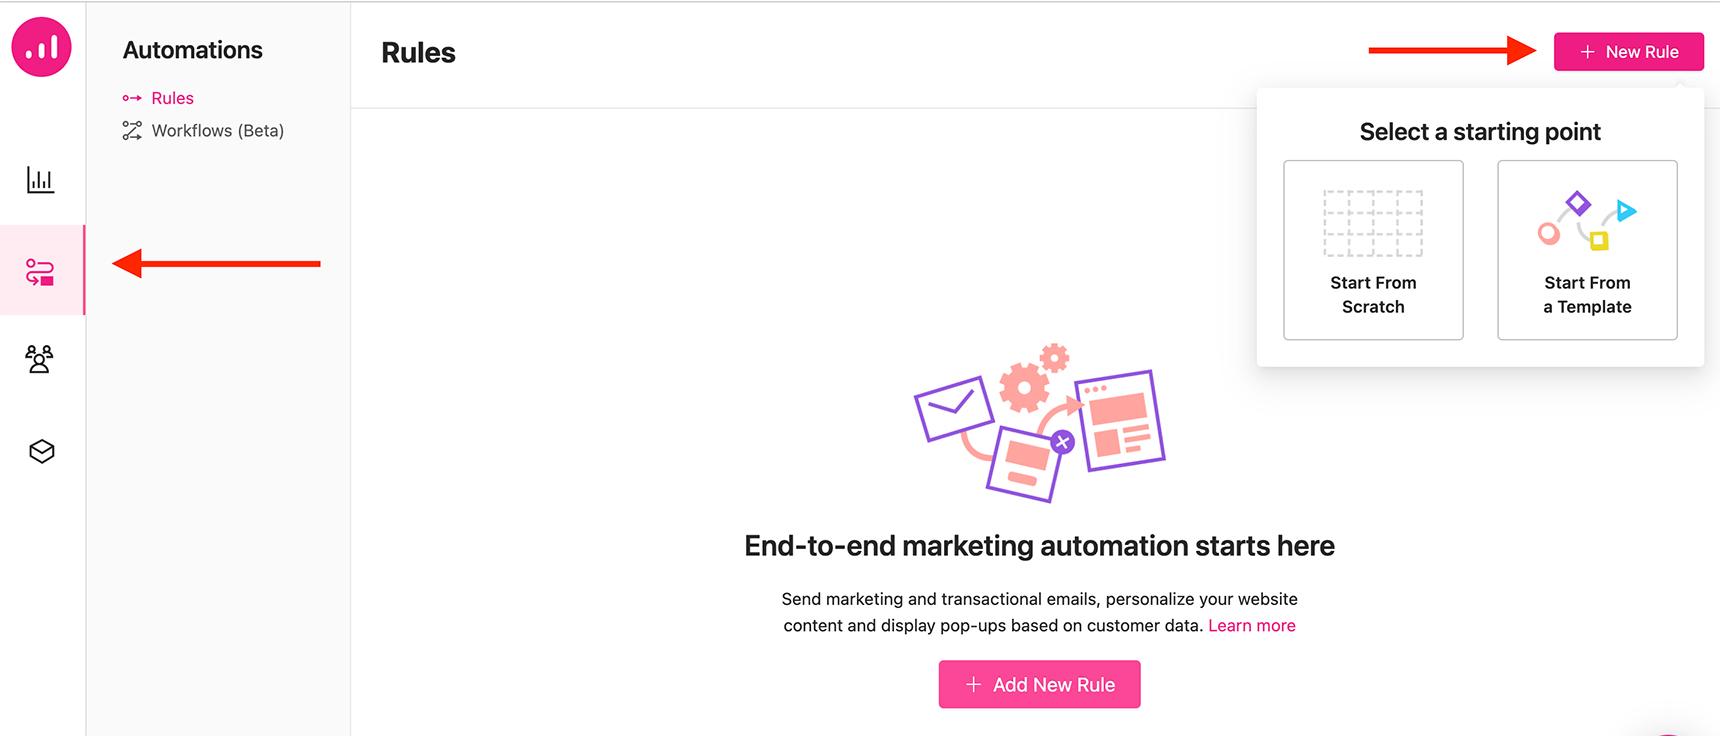
The good thing about this kind of personalization is that you can choose who sees these products. If you want everyone to see the products, simply choose the event “None” so it triggers every time a user visits the page. Then set the audience to “Everyone” and choose to run a personalization in the actions panel. After that, select the page you want and choose the personalization template you created.

Save the rule and activate it. Then check your cart page. You will see the related products that are added to your cart. You need to define the product relativity by choosing the same tags on WooCommerce.
You can use this method to add related products to an email template and to recover the abandoned cart and increase sales.
Conclusion
To increase user engagement and sales, it is possible to show items related to those in the customer’s cart. Logically, users are more likely to buy stuff related to what they are already planning to buy. In this article, we showed you three workarounds to dynamically display related items in your online shop based on products already in the customer’s cart. One solution involved using native WooCommerce code, while the other used the Jupiter X products widget, and the third one is to use Growmatik.ai service that helps you personalize any page and recover the abandoned carts.
If you have any questions or feedback, don’t hesitate to reach out in the comments.

No comment yet, add your voice below!