
Choosing WP themes and plugins can be a daunting task, but this article will help you run a WordPress site hassle-free with an upgraded performance using WPRocket and the Jupiter X theme. WP themes and plugins are the bread and butter for the smooth functioning of every WordPress site. Therefore, we need to tread cautiously.
As many people often fail to choose the right themes and plugins for their WordPress site, I decided to do the hard work so you won’t make the same mistake.
So, in this article, I’ll provide more detail on both Jupiter X (as well as how to install it) and WPRocket and walk you through step-by-step how to install and set up WPRocket with Jupiter X, so you can be on your way to boosting your site’s performance in no time flat.
What is WPRocket?
WPRocket is one of the fastest WordPress caching plugins that loads your WordPress site in just a few clicks. It offers rocket-speed performance with minimal configuration settings, so you don’t need to waste your time on complexity. With such a killer performance booster plugin, your site will experience superior performance without any effort. If you face any issues with the speed of your website, then the Rocket support team is on standby to fix your site issues. You’ll never experience simplicity like WPRocket, as it starts caching your pages instantly without any coding skills required.
The goal of this test will be to compare the results before and after optimizing one of our demos. We’ll first look at the test results on a demo that has not been optimized and then we’ll enable features of WPRocket to see it how impacts the site’s performance.
How to install the WPRocket plugin
Before you install and set up WPRocket with Jupiter X, ensure your site meets the following basic requirements:
PHP 5.6 or more, Apache (with mod_rewrite, mod_expires, mod_deflate), NGINX, Litespeed or Windows, Pretty permalinks, Self-hosted WordPress site.
Follow these simple steps to install the WPRocket plugin using the WordPress dashboard panel.
If you have already logged into your WordPress dashboard, go to Plugins> Add New> Upload Plugin.

You must have a zip file of the WPRocket plugin. Click on Choose file and browse the zip file from your system and click on Install. Wait for the theme to be installed.
If everything goes smoothly with the installation process, the plugin will be installed successfully. You just have to activate it – no more manual steps required.
Site score before optimization
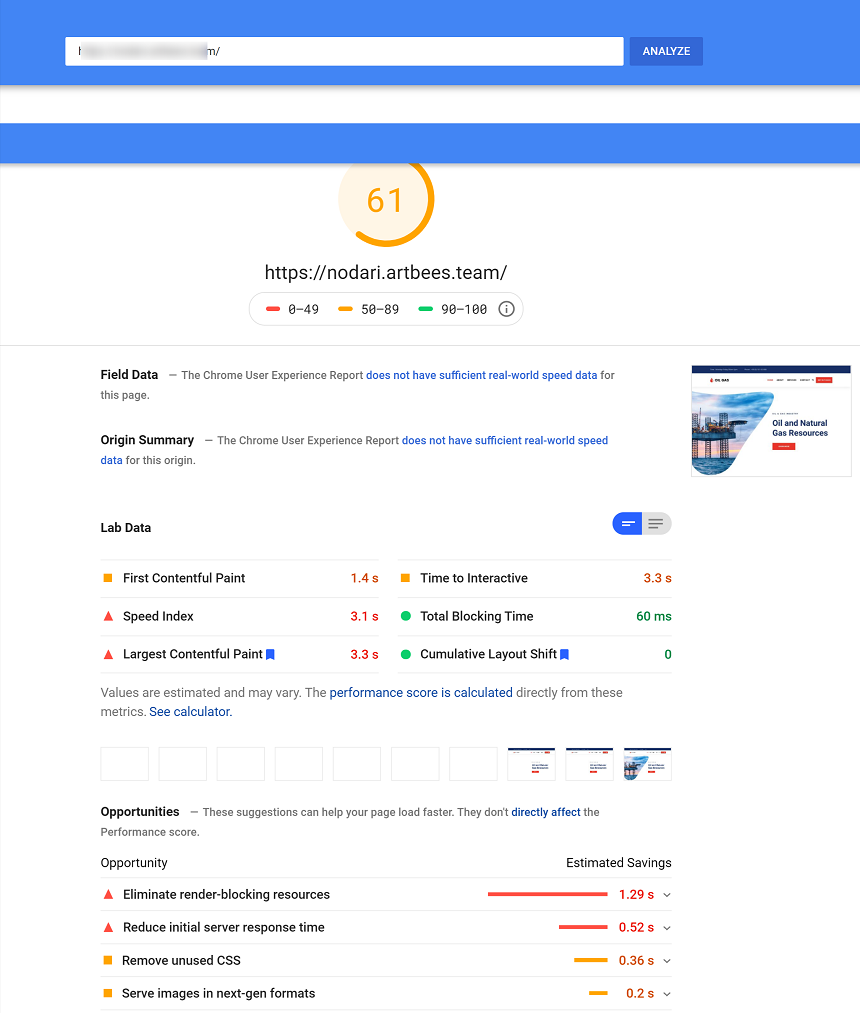
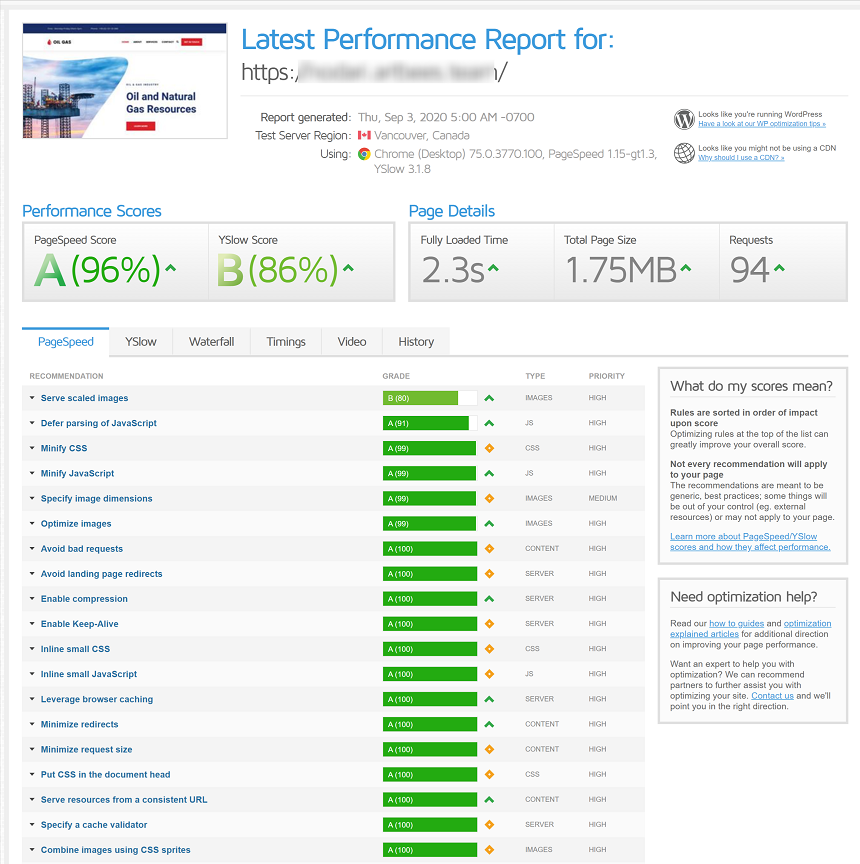
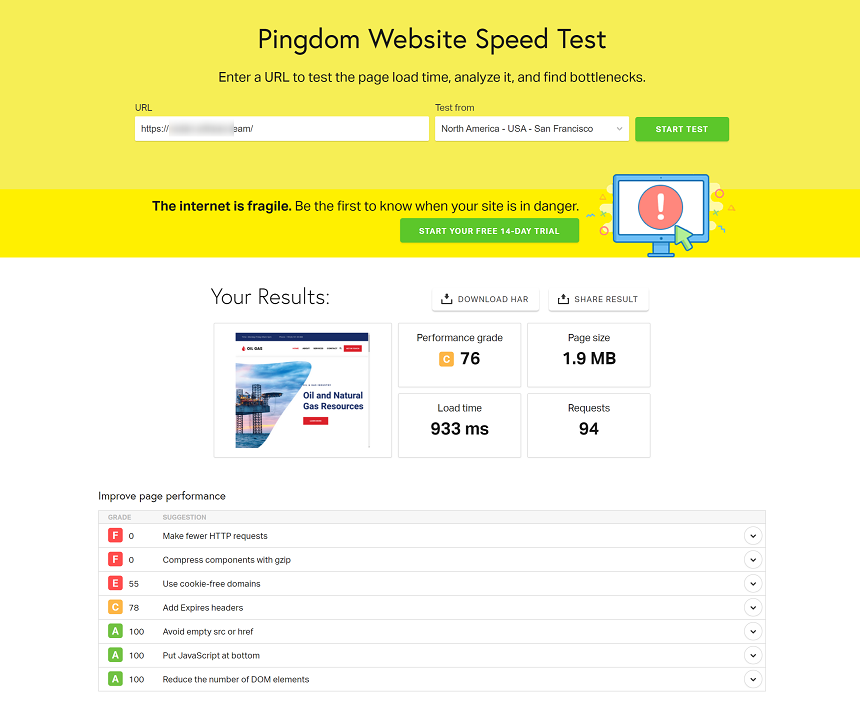
Now that we have installed WPRocket, let’s go ahead and measure our site’s current optimization status. This is crucial as these scores are going to improve after optimization.
For this purpose, we’ll use Gtmetrix.com tools.pingdom.com and Developers.google.com. Here are the results of the initial rung of the tests:
Now, let’s activate the WPRocket plugin and dive into settings such as cache, file optimization, image optimization, and CDN.
You’re probably wondering which is the best setting for my site to use for the best optimization. We should first mention that every site might use different demos, a different set of plugins, different configurations for them, as well as various testing environments. That said, the configuration for a particular site depends on the site itself and its not universal for all sites.
WPRocket starts working right after the plugin is first activated, even if you haven’t enabled any settings. Keep in mind that activating all the settings at once is not a good idea as it could lead to issues, and it’ll be difficult to figure out which setting caused the problem.
Let’s choose the safest way and begin activating settings one at a time.
Caching
By activating WPRocket, your site will experience an ultra-fast loading time. It happens due to the immediate page caching activation.
It further improves your site rank in search engines instantly with cache preloading, as we all know that speed is yet another ranking signal.
The lighter the code, the faster your site’s speed will be. By reducing the weight of HTML, CSS and JavaScript files via minification, your WordPress site becomes lighter and loads extremely quickly.
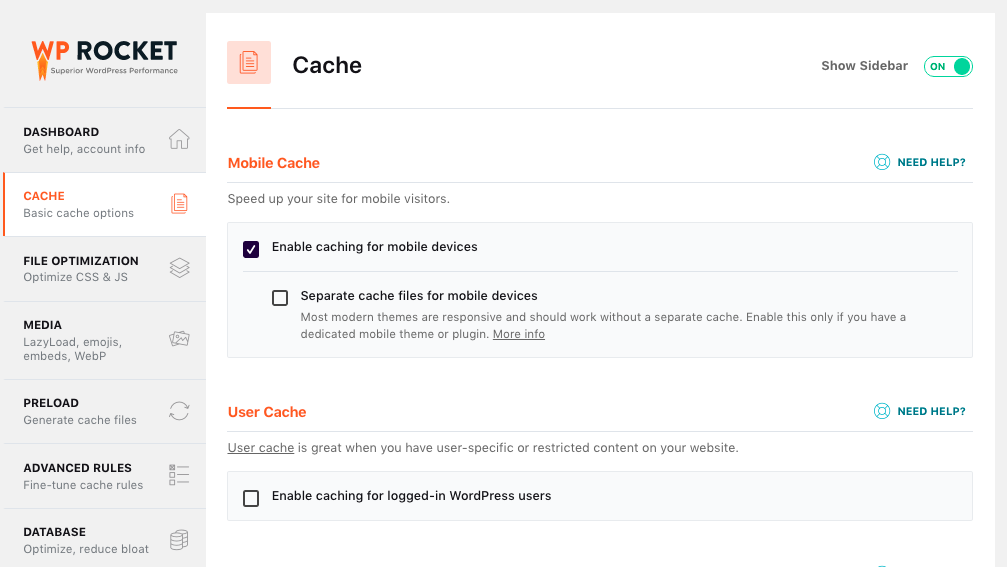
It compresses the files without harming the quality or effectiveness of the static files. WPRocket enables mobile caching by default to load your site faster for mobile visitors.
If you have a dedicated mobile theme or plugin, enable the “Separate cache files for mobile devices.”
You can enable caching if you have user-specific content on your website by clicking on “Enable caching for logged-in WordPress users.”
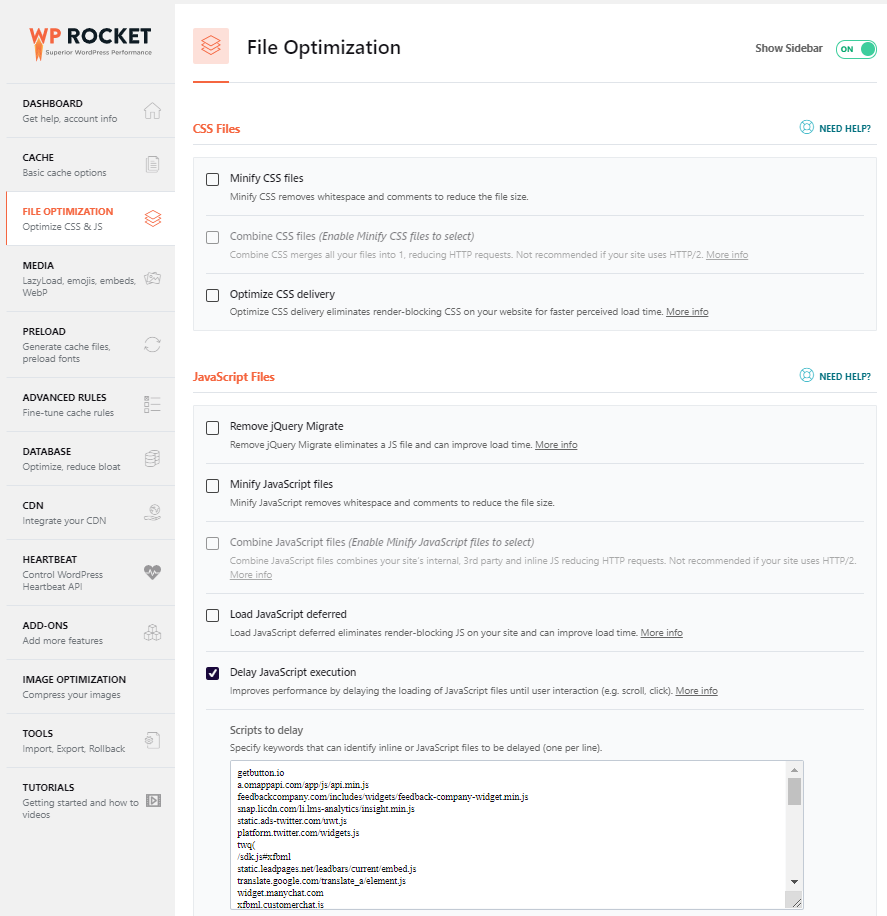
File optimization
Options here in the Basic setting will not dramatically improve the page speed of your site but it’s a best practice that can be considered as optimization, its safe to activate and will usually not cause any problems.
The minification of CSS and JS files will remove white space and comments from these files and will reduce files size. We can also combine CSS or JS files into one file to reduce URL requisition – so what does this actually mean? Let’s say you’re loading 8 CSS files. If you use this option, they’ll be combined into one file; instead of 8 requests from your browser, you’ll only have one. The same can be used for JS files.
After enabling these options, it’s important to check your site and compare the before and after scores to find the best configuration for your site. Please also consider that combining JS and CSS files may improve the score of our site, but it will not improve the speed of the site.
Media
Do you know which strategy is implemented by big websites like Facebook and YouTube?
The technique used by these websites is to load the images as the user scrolls down the page. WPRocket offers the same image on request expertise and improves your page load time.
By enabling LazyLoad for images, iframes and videos, your site will load much more quickly.
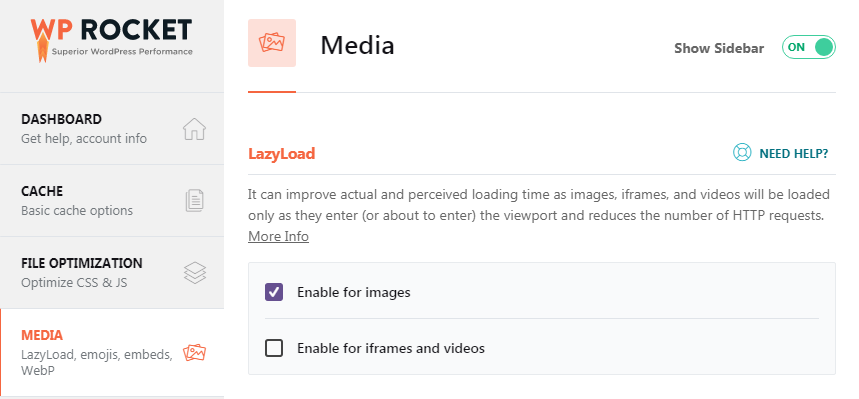
Once you enable Lazy load, open your site in the Incognito window and check whether it works or not. It’s easy to check. Once you start scrolling down on the site, you’ll notice how images appear in the viewport once you scroll over them.
Check several pages of your site and make sure everything is working. If you don’t see any issues while browsing and if everything looks good to move on to the next tab, let’s move onto checking the file optimization.
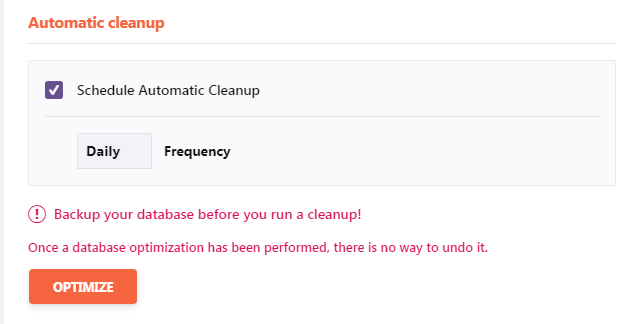
Database
The database tab of the WPRocket plugin offers various methods to optimize your website’s database. This question becomes more important if you run an active blog and you have many blog posts and content on your site. In this scenario, cleaning up a database is a vital task.

In this tab, you may find options to clean up post revisions, drafts, trashed posts, spam comments and transients with different options. You may also schedule an automatic cleaning of your database daily, weekly or monthly if you want to save time on doing it manually.
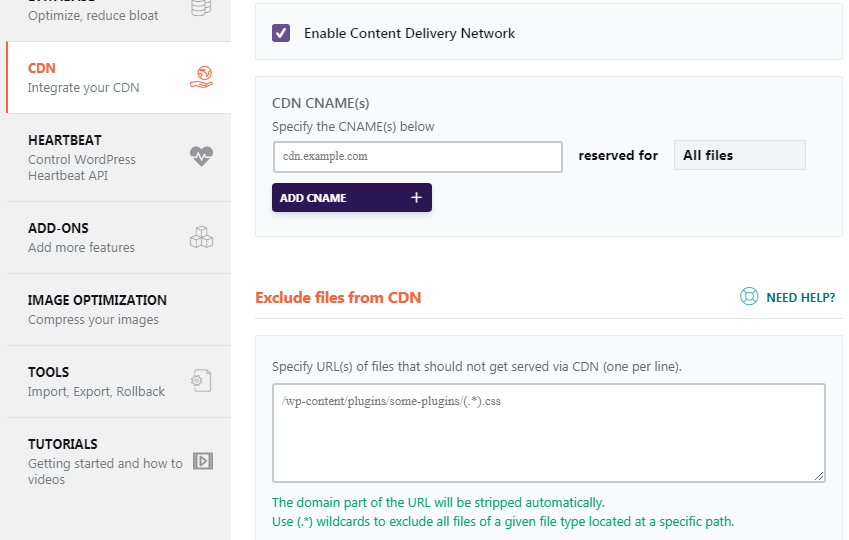
CDN network
If you’ve purchased RocketCDN (or any other CDN), enable it in the WPRocket dashboard.
Go to WPRocket dashboard > Integrate CDN, and click on Enable Content Delivery Network.
Specify the CNAME(s) in the box, and if you want to exclude some files from CDN, specify the URLs in the “Exclude files from CDN” box.
WPRocket is a clean, developer-friendly plugin that offers easy customization for developers.
Results
Now, let’s take a look at the results of our optimization.
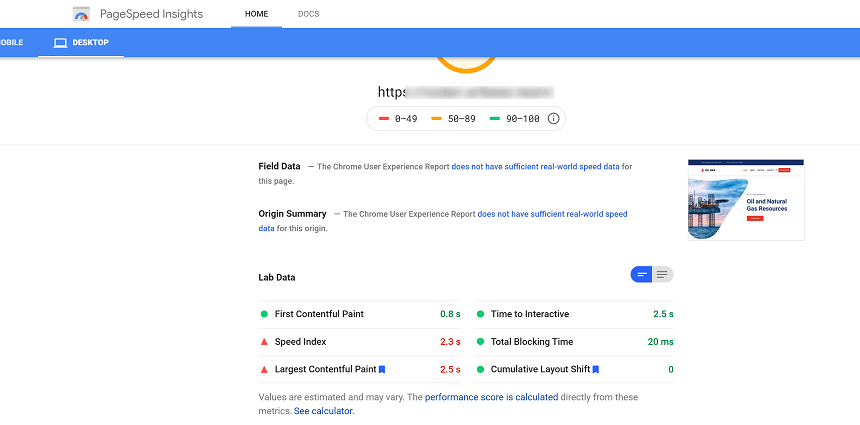
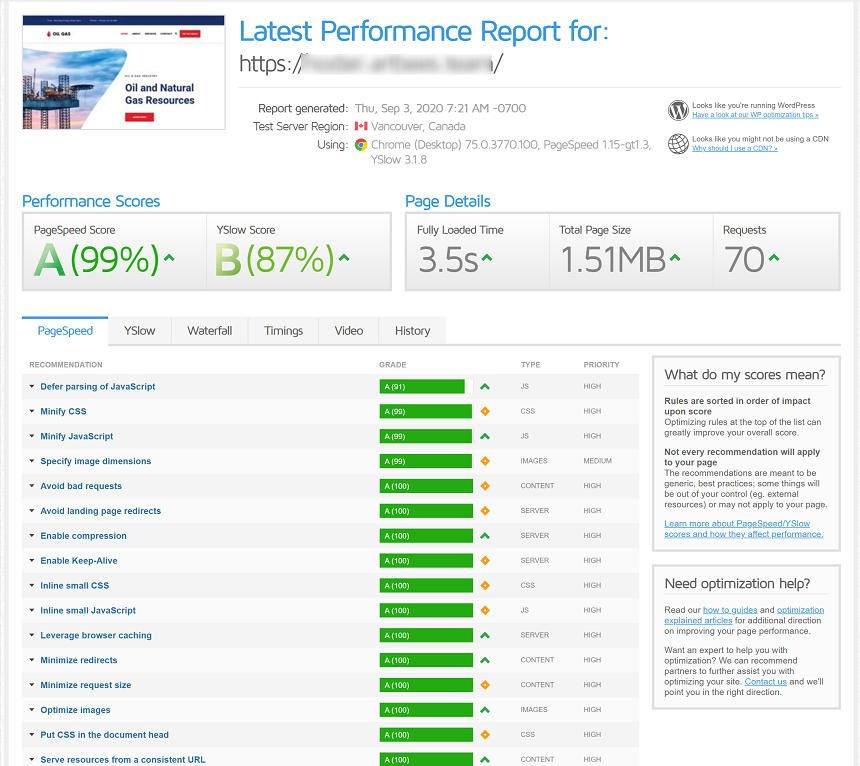
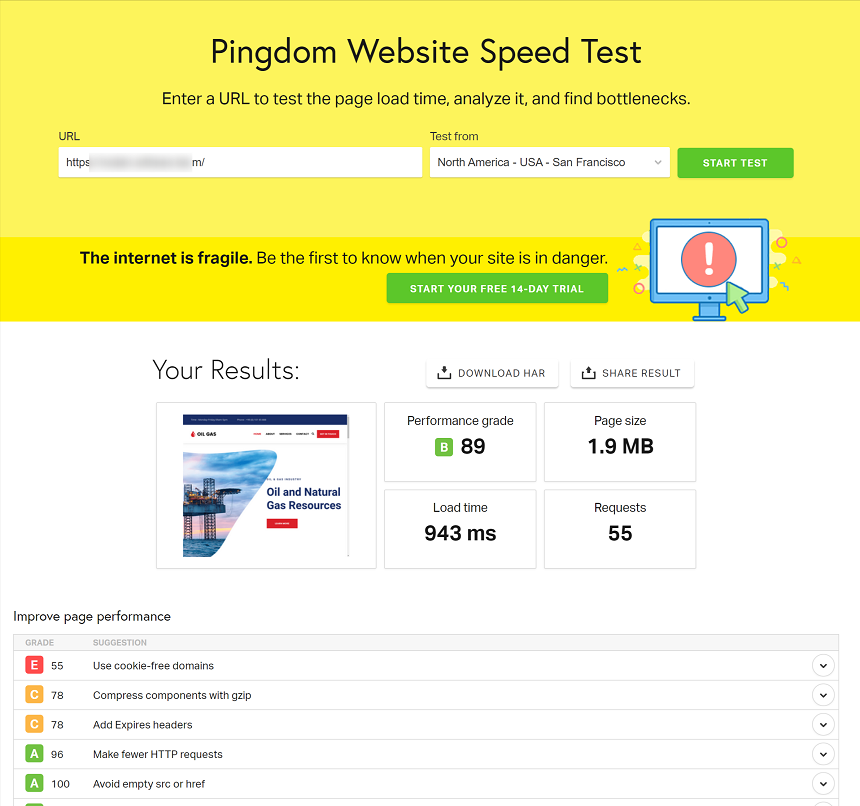
As we can see, our site’s optimization has been greatly improved. We can also see a decrease in the number of URL requests and more optimized images. As we can see scores of the optimization are better than before.
Conclusion
We hope this article was informative in showing you how to install and set up WPRocket with Jupiter X in order to optimize your site’s performance. As I said before the optimization of your site is highly dependent on the individual site itself. In some cases, activating particular settings may not lead to the desired effect; instead, it may cause slow loading or pages that are not optimized. So, it’s very important to run a test after you’ve changed the setting in the plugin.
If you have any queries regarding both the theme and plugins, feel free to ask in the comment section.

1 Comment
What is the score after optimization with PageSpeed??? Don’t appear.