
Thankfully, the tech support team of Artbees is always ready to extend their help. See, that’s one of the benefits of being a premium WordPress theme user.
Shoutout to @Atakan for teaching me how to use Disqus on my Jupiter website! Now readers and website visitors can easily engage with my content.
If you’re looking to increase your website’s engagement rates with blog commenting as I am, then look no further. Disqus can help you do just that. How? Let’s start with the basics.
What is Disqus?
Disqus is a very popular commenting system for blogs and online communities. To date, Disqus has more than 2 million users in 191 countries. The platform is very similar to how a social media site functions. Basically, if you have a Disqus account, you can post comments on already-integrated websites within one account.
Advantages to Using Disqus
Disqus benefits both the publisher and the reader. It’s simple and easy-to-use. You can track and control your previous comments on your accounts, much like your Facebook Timeline. For users who don’t have a Disqus account just yet, they can log in with their Facebook, Twitter, and Google accounts, eliminating the need to go through a lengthy signup process.
It’s no wonder that millions of users prefer Disqus over other blog commenting plugins. For publishers and website administrators, the process is just as simple. Detailed reports about your web pages are provided. You can check all the comments posted on your site as well as your own comments. You can even monetize your engagement with ads — all within the Disqus platform.
Here are some more great advantages of integrating Disqus with Jupiter:
- Fast and easy installation process
- Increase engagement
- Provide a better and easier way for readers to comment on your blog
- Detailed reports about your audience
- Monetize your engagements
- Totally compatible with Jupiter
- No space required for the comments on your database* (great for growing blogs)
Convinced about giving Disqus a try? Let’s move on to integrating Disqus with your WordPress website.
Installing and Configuring Disqus on a Jupiter-Based Website
Installing Disqus is a very easy process, as I mentioned above. Luckily, there’s an official Disqus plugin for WordPress users which is very easy to configure. For this tutorial, we’ll integrate Disqus on a Jupiter-based website through the official WordPress plugin.
On Disqus.com:
- To start integrating Disqus on your website, you need to create an account (it’s FREE) on their official website by clicking the “GET STARTED” button. You can sign up using your Facebook, Twitter, or Google accounts.
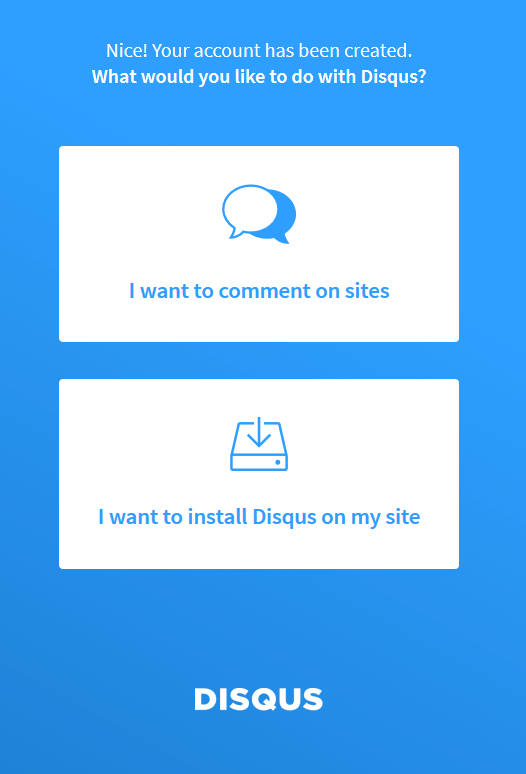
- Next, you need to choose your intent. Click on “I want to install Disqus on my site”.
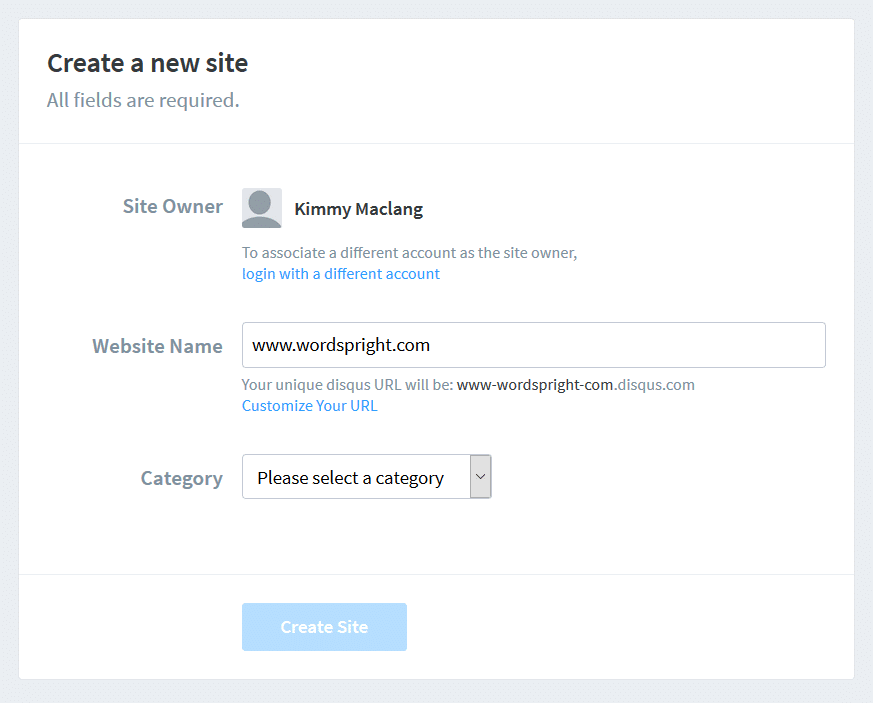
Then, proceed to adding your website on Disqus. Fill out the fields with the necessary information and click the “CREATE SITE” button.
- After creating your website, select your membership plan.
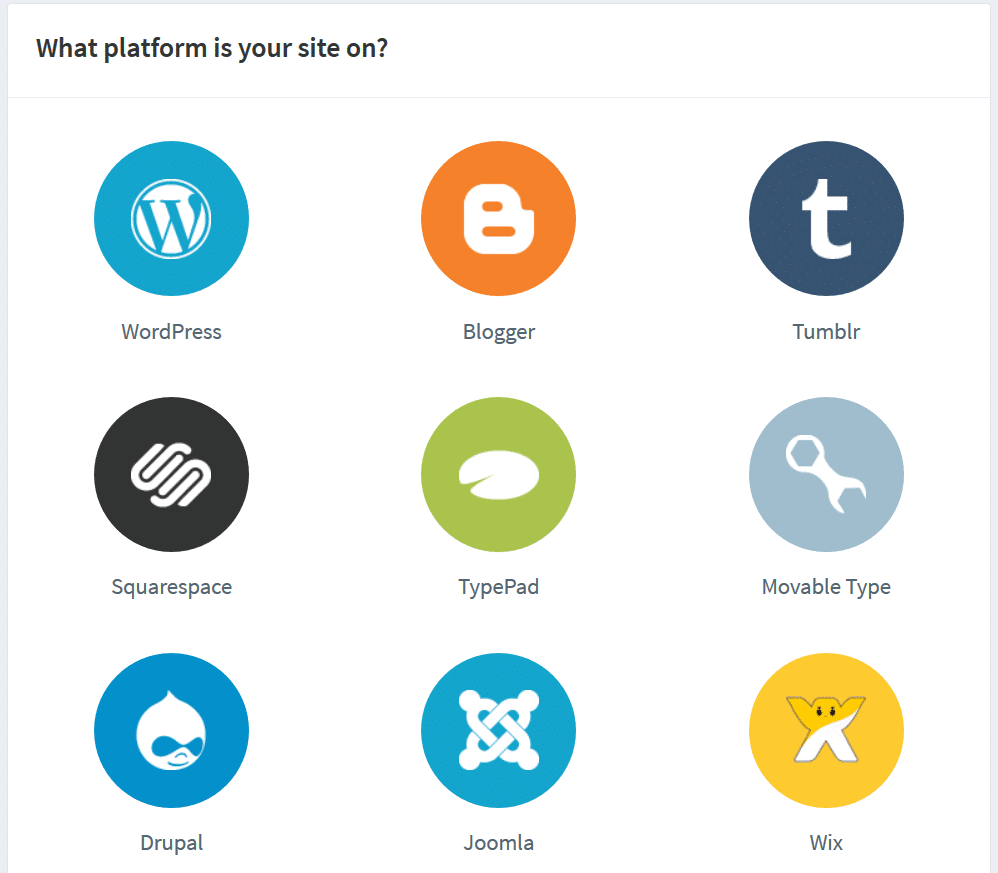
- Choose the platform that your site is on. Disqus is compatible with a wide range of CMS platforms such as WordPress, tumblr, Blogger, Squarespace, Joomla, Drupal, and a lot more.
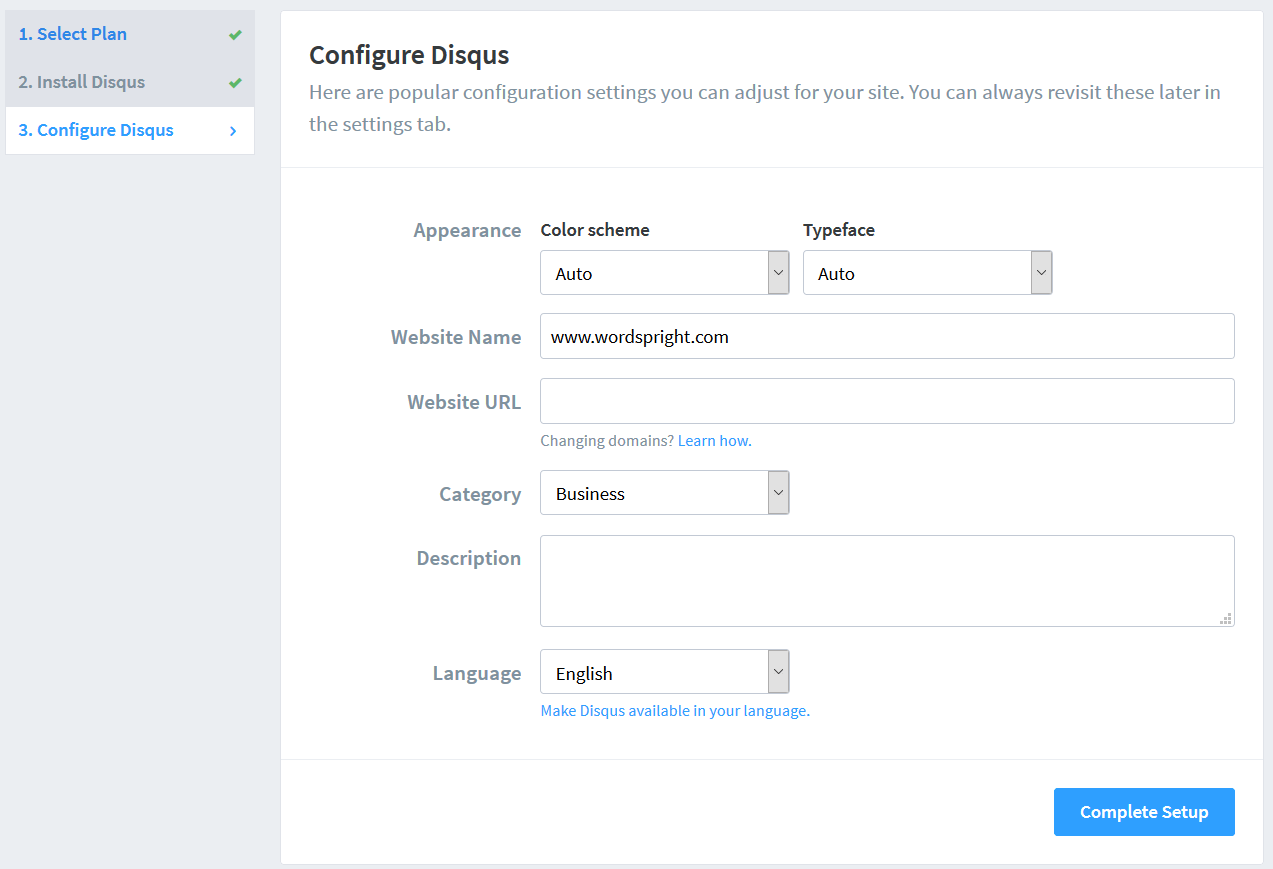
After choosing your CMS platform, you will be given instructions on how to install Disqus on your WordPress website. But, before you do that, let’s configure Disqus for your website.
The process is very similar to Jupiter’s API generation. You have to create your website on Disqus FIRST, and then access the platform through the plugin. We’re done on the Disqus website. Let’s move to your WordPress website to finish the configuration.
On your WordPress website:
Login to the dashboard of your WordPress website.
- Install the Official Disqus plugin at https://wordpress.org/plugins/disqus-comment-system/ or use the search function on your WordPress dashboard. On the left side of your dashboard, go to Plugins > Add New. Type “Disqus Comment System” on the search bar.
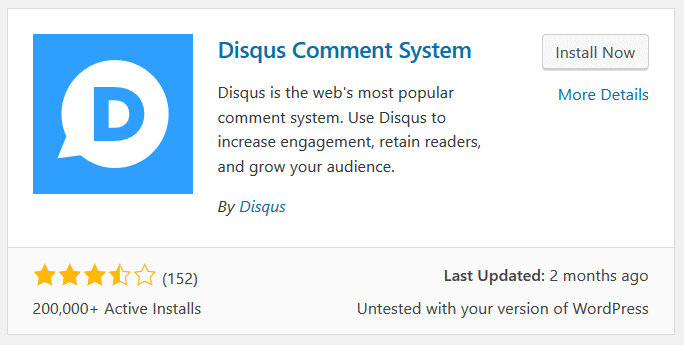
- “Install Now” and then “Activate”.
- After a successfull installation, go to Comments > Disqus on your WordPress admin panel. Place your Disqus username and password that you’ve just created at the Disqus website.
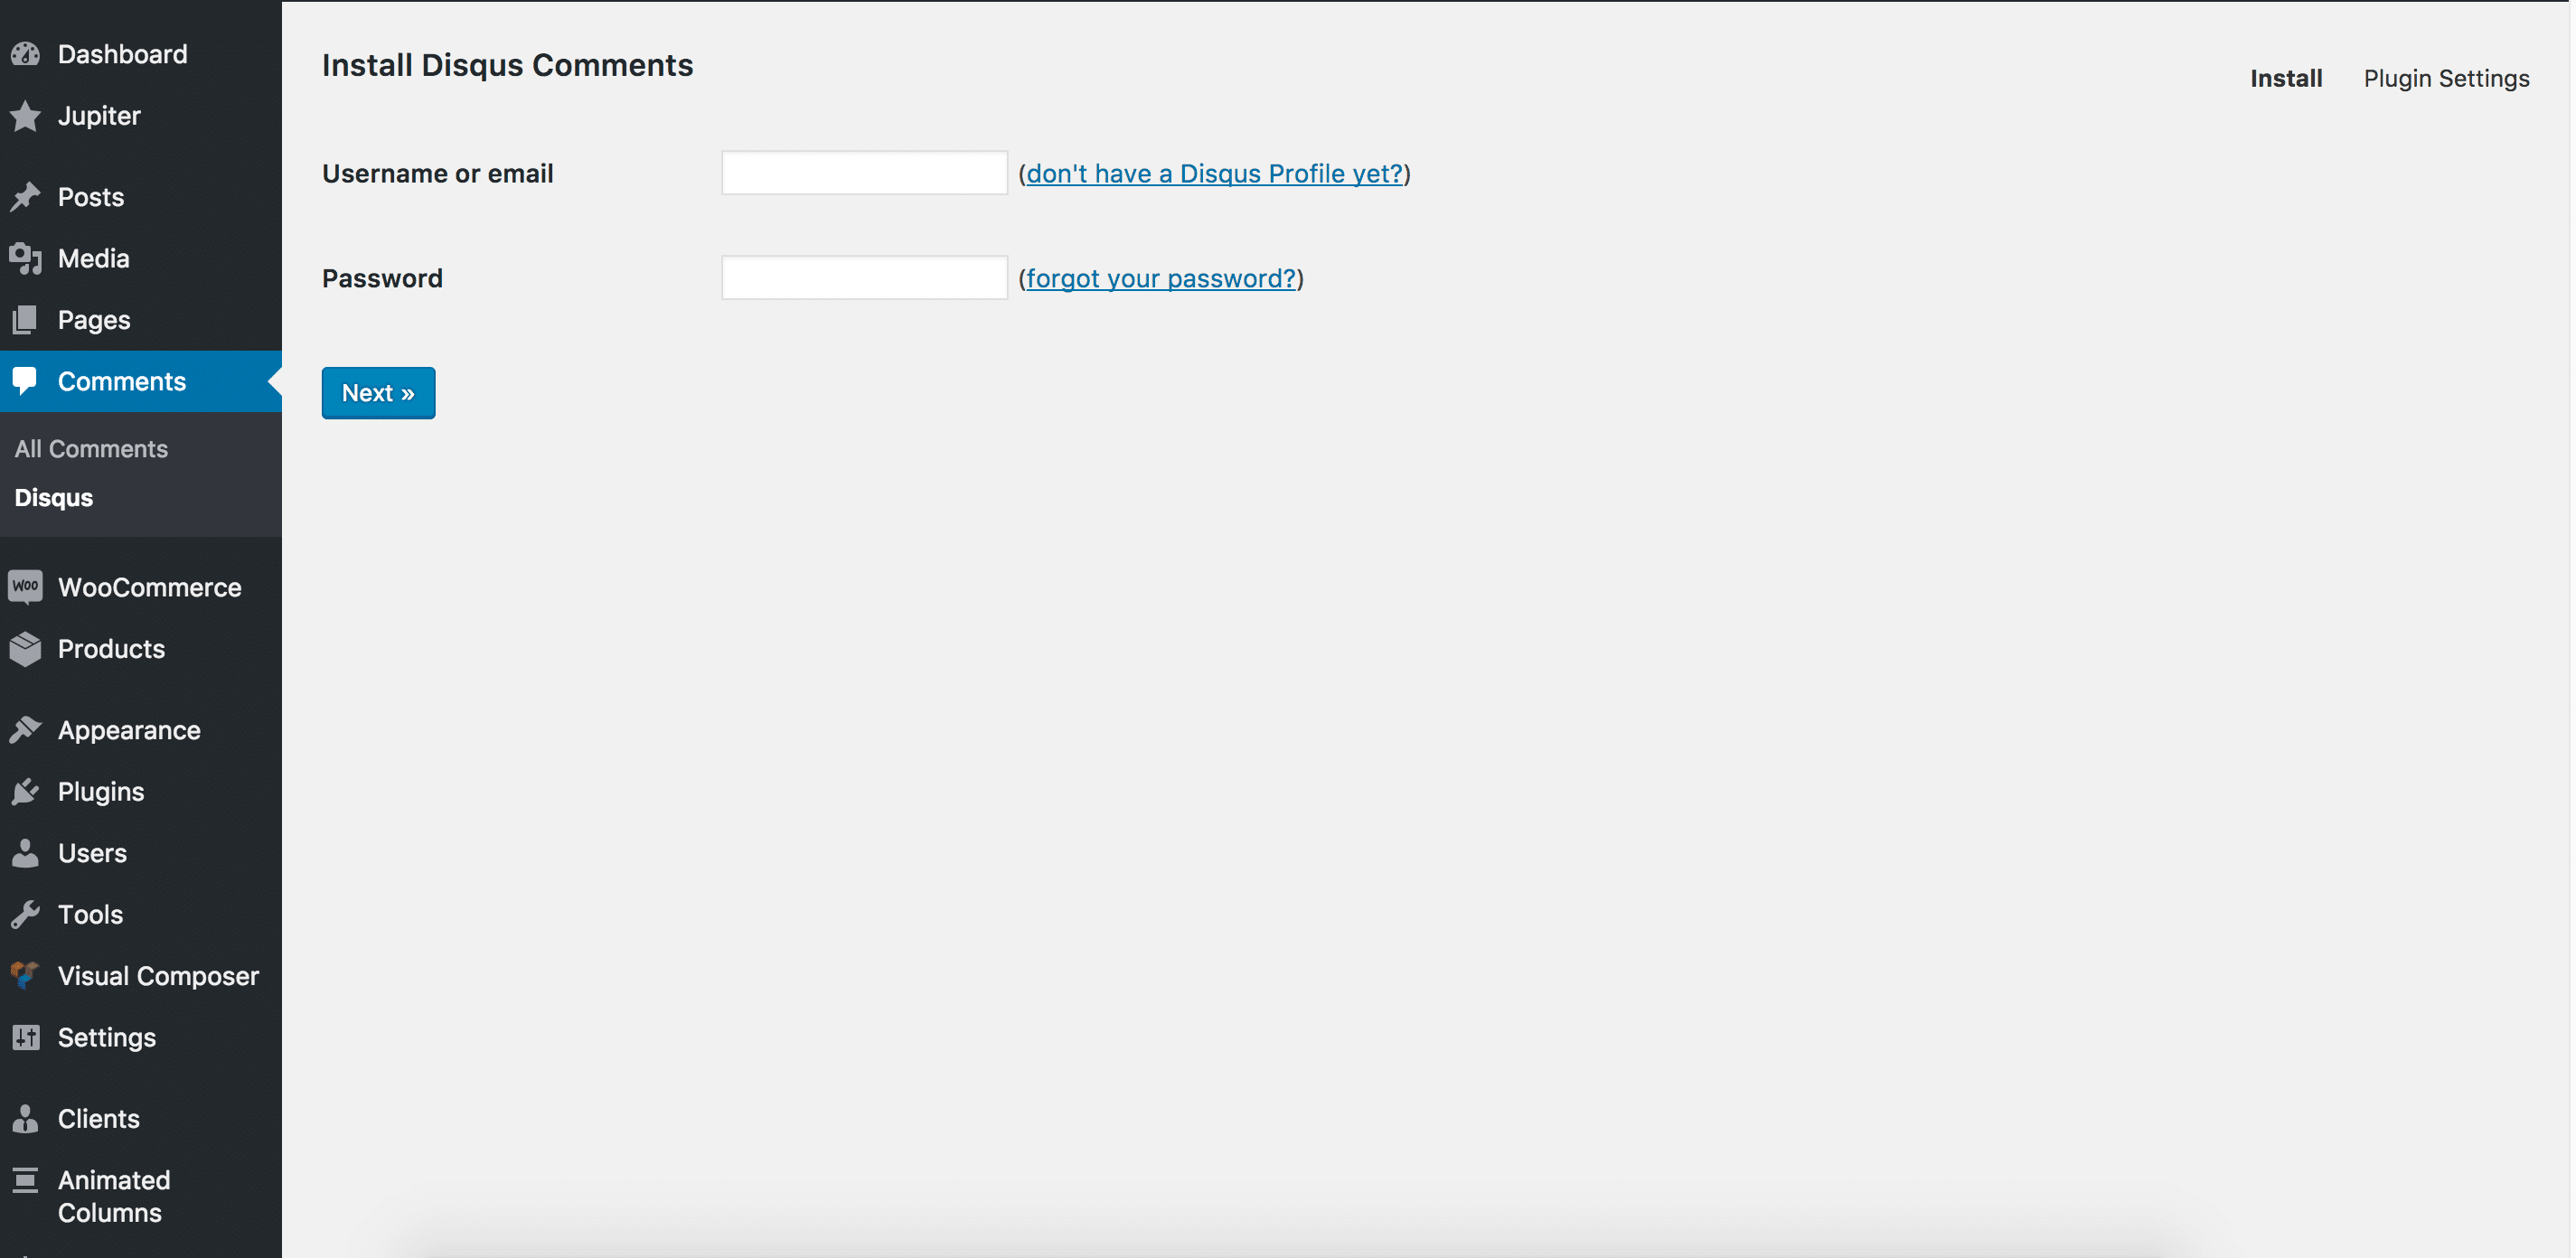
- Select the website that you already created to complete the process.
That’s it. Now, your readers can leave their comments through Disqus on your Single Blog Posts.
Importing Existing Comments on Disqus – The Migration
Importing existing comments is a crucial point if you already have a blog posts that have comments on it. You can simply go to Comments > Disqus > Plugin Settings (small text link on the top right of your screen) and use “Export comments to Disqus” option under the Import and Export Section.

Using Disqus on Local Development Environment
Follow the same steps as, I instructed above. Create a profile, insert your website’s information (even if it’s not yet live) and complete all the same steps. Then, you need to enable the developer mode by adding the following code in Jupiter > Theme Options > Advanced > Custom JS section:
var disqus_developer = 1;
After you add this code, you’ll be able to use Disqus on your local environment, too.
Optimizing Disqus
As I mentioned before, Disqus is a third-party service, network-like comment system. It gets the datas from remote sources. If you have a lot of comments on your blog, it might take some time to get the data, and the plugin can affect your website’s speed.
To avoid this issue, you can use Disqus Conditional Load plugin which you can find at https://wordpress.org/plugins/disqus-conditional-load/. This plugin provides Lazy Load feature that activates Disqus ONLY when you scroll down to the comments section.
IMPORTANT: You have to remove the official Disqus plugin to use the Disqus Conditional Load plugin because the plugin works as the Official Disqus plugin too.
Final Words
One of the best things about Disqus is that comments are stored in database rows on WordPress without consuming space in the the user’s hosting service. Most of big blogs or magazine websites prefer third-party comment services because of this.
If you’d like to encourage website visitors to engage with your content, consider installing Disqus on your WordPress website. It’s already widely known and it’s easy to use. Your readers and website visitors will find it very easy to comment on your content whether or not they already have Disqus accounts.

No comment yet, add your voice below!