With such an important role, creating unique headers in WordPress requires a better understanding of every element in the header. You don’t have to be a professional designer to create something beautiful, impressive or intuitive. Artbees has added a new Jupiter Header Builder feature in the Jupiter theme specifically designed for creating unique headers in WordPress.
What’s the key to a good header?
Your website header could be compared to the cover of a book. There’s the saying: “Don’t judge a book by its cover,” but let’s face it—as we browse the bookstores, there’s certain book covers that always tend to catch our eye and interest. People tend to make snap judgements about people, products and companies. All of your visitors, or at least a majority of them, will quickly judge your website based on the first thing they see – your header.
[call_to_action title=”Get your website the custom design it deserves by Artbees designers ” target=”_blank” url=”https://themes.artbees.net/blog/jupiter-v6-guide-creating-unique-headers-in-wordpress/” type=”link”]
The key to a good header design is that it must align with your target audience. If you wanted someone to read your book, you’d make a cover that attracts the kind of readers who would enjoy your content. Otherwise they won’t bother opening it.
Similarly, when a customer visits your website, he/she will make quick judgments to see if it’s right for him/her. You want every aspect to be attractive to your target market- from the colors used, to the words included, to the tabs offered. If that means using a tagline or phrase that describes what your site is all about – do that! If that means adding a splashy icon – add that! The key to a very successful header entails a lot of thoughtful customization, which is now possible with the new Jupiter Header Builder.
Getting started with the new Jupiter Header Builder.
Before getting started, you’ll need to activate the new Jupiter Header Builder. Luckily, it’s quite easy to do. All you have to do is go from your WordPress Dashboard > Theme Options > Header > Header. And then under the section that says “Create site’s Header by:”, click “Header Builder”. If you need more detailed instructions or visuals on how to do this, please check out this knowledge base article.
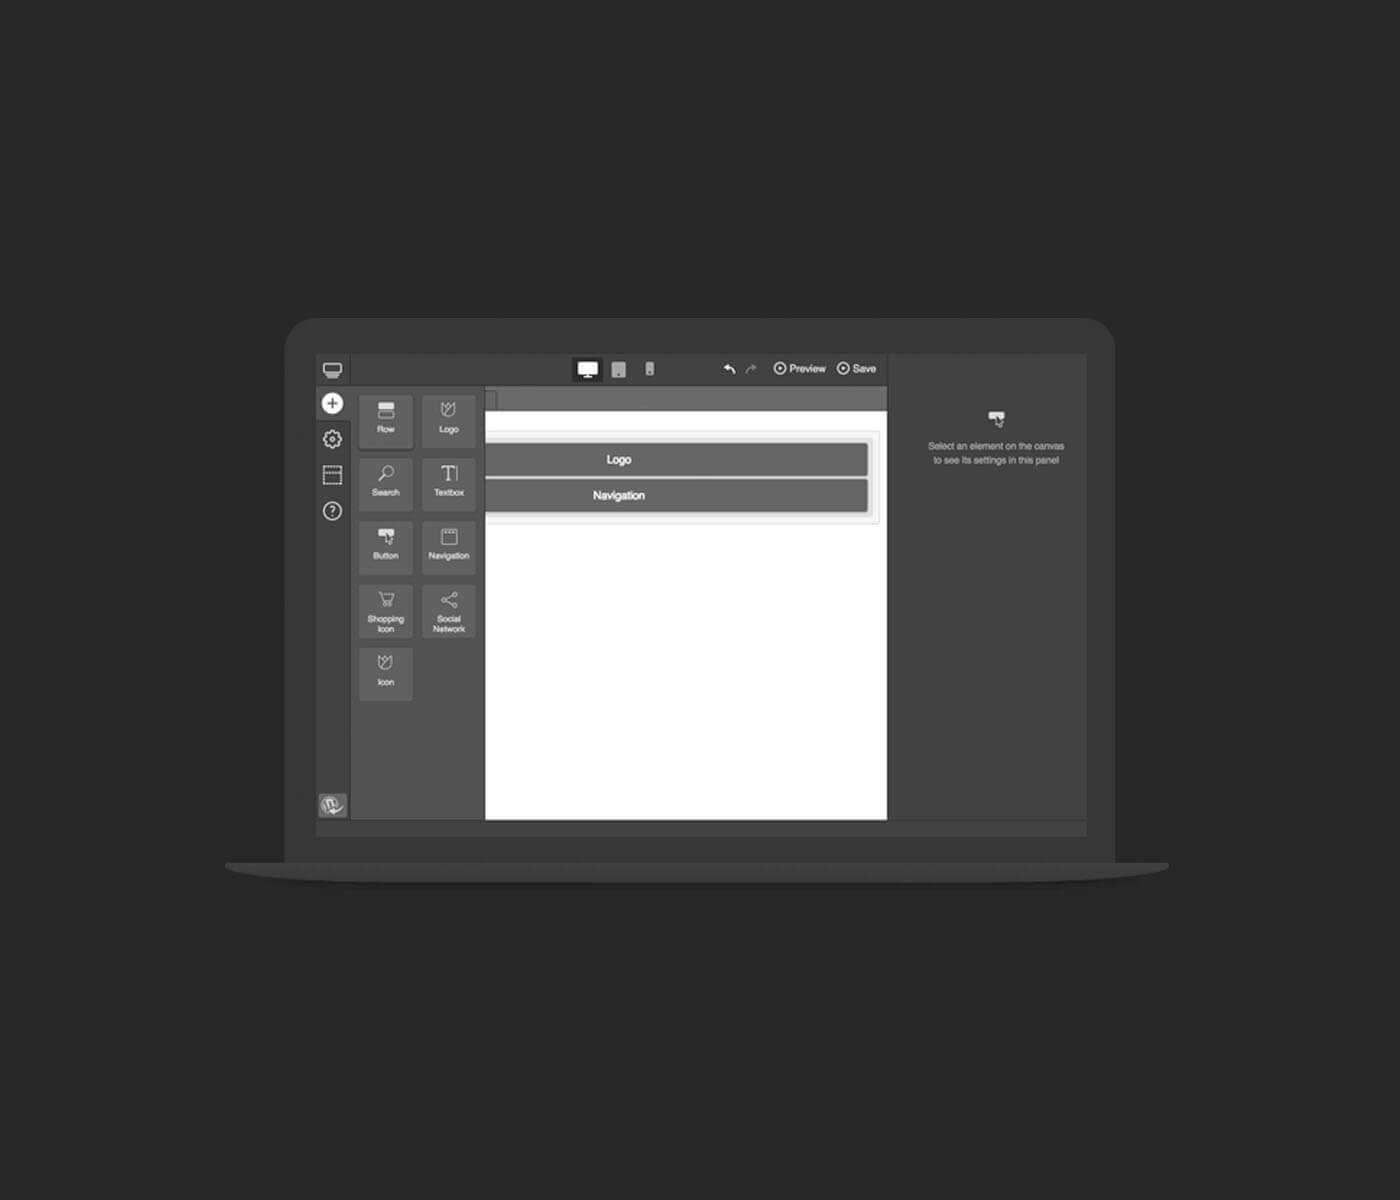
When you create your own header using the new Jupiter Header Builder, you have the capability to drag and drop elements, edit colors and styles, and change around the entire layout of the header. Our biggest tip is that you don’t overload your header with elements. It’s enough to have a background image, the name of your site, a potential tagline and a menu. Just because you’re creating unique headers in WordPress, doesn’t mean you need to overdo it; sometimes simple is better.
What can you do with the new Jupiter V6 Header Builder?
As we’ve said, the new Jupiter Header Builder is a great feature where you can create your own customized header with the exact elements you need. You don’t need to be a coder or have any excessive coding knowledge for this: just drag and drop the elements into the required column or row. Below we’ll list some of the greatest benefits Jupiter V6 Header Builder offers to you for creating unique headers in WordPress websites:
Header ViewPort
There is now the possibility to create different headers for the same website on desktop, mobile and tablet:
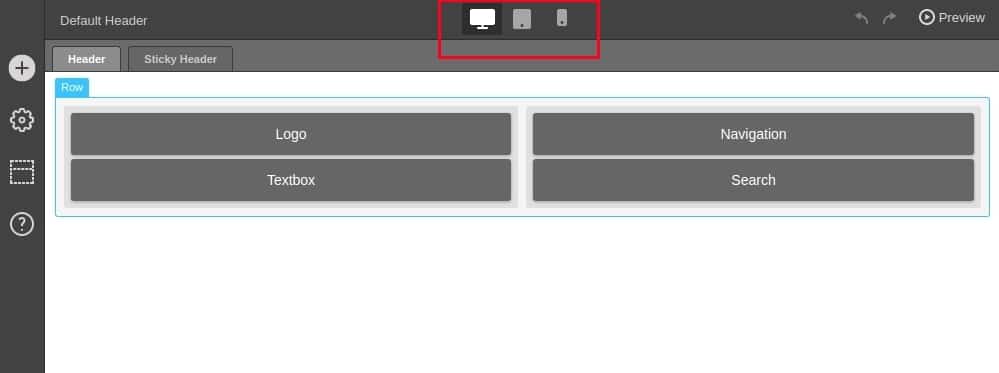
No need to worry anymore about how your desktop header will look on mobile, or to use custom css code to adjust its view: now you can create a completely separate header for mobile and tablet devices.
When creating a new header for desktop or tablet, there are multiple variations of grids you can use: just select the layout that fits your design best.
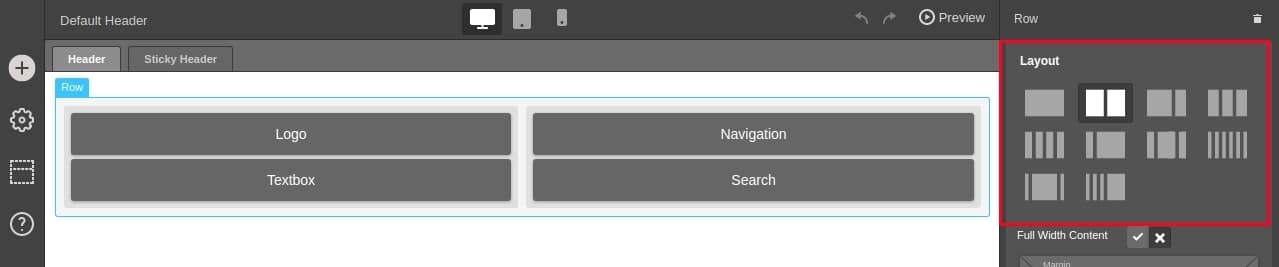
Please note that this layout feature is available only for desktop and tablet headers – not for mobile.
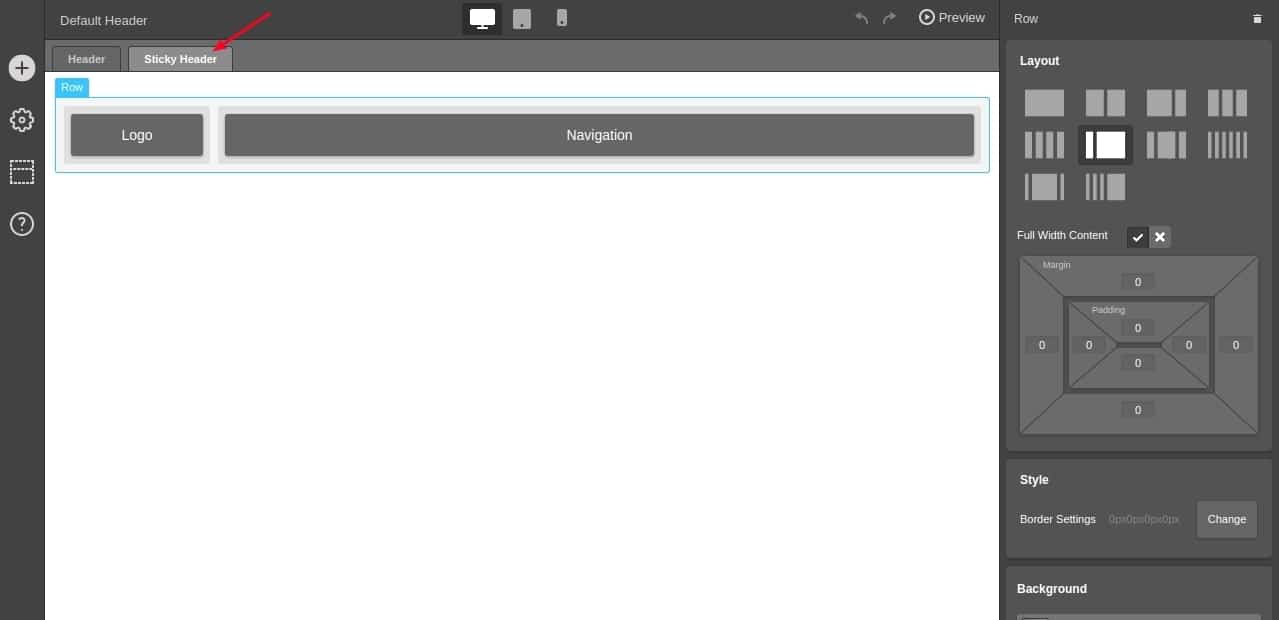
Fixed Header vs. Sticky Header
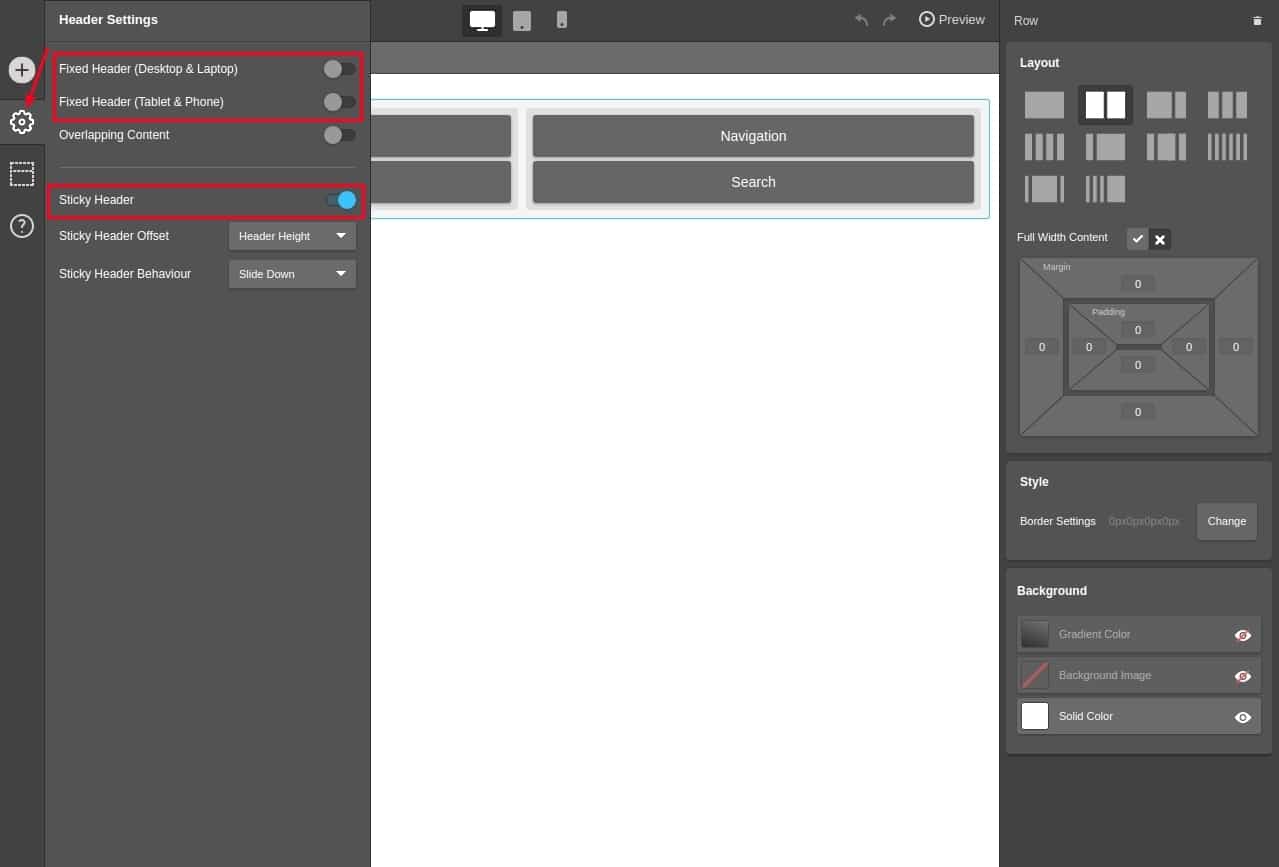
In the Header Settings there are the options of Fixed Header and Sticky Header.
Which one to choose? It really depends on what your site needs. We’ll help you understand the difference between them:
Fixed Header will show the same main header when you scroll the site page. Whereas, the Sticky Header can be created as a separate header and may differ from your main header. So, when a visitor opens the site, he/she will see one header, and when he/she starts scrolling the page another header with different elements may appear. That’s if you activate the “Sticky Header” option and add or edit elements. As you can see there is a tab dedicated to the Sticky Header:
Header Templates
If you prefer not to create your entire header or find it too time-consuming, you can always use built-in templates and customize them to your needs. This will be an effective way to incorporate some customization into your website’s header.
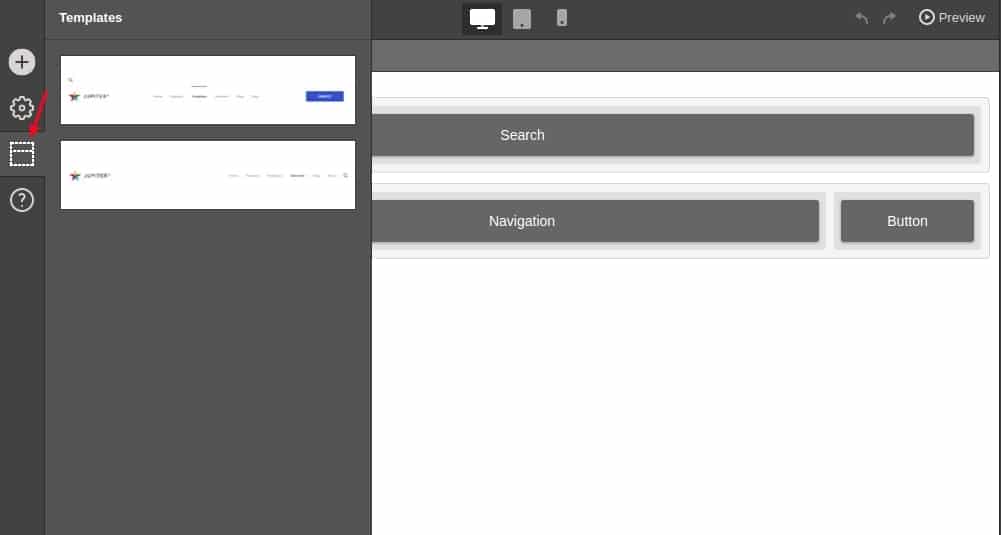
As of right now, there aren’t too many templates in the Template Library to choose from, but the list will continue to grow with more items as the new Jupiter Header Builder improves with time.
You can learn more about Header Templates in this article.
Font Styling in the Header
There’s a chance you might want to add some text to your header and you need to style its font. This can be done on the righthand side, once you click on an element that includes text:
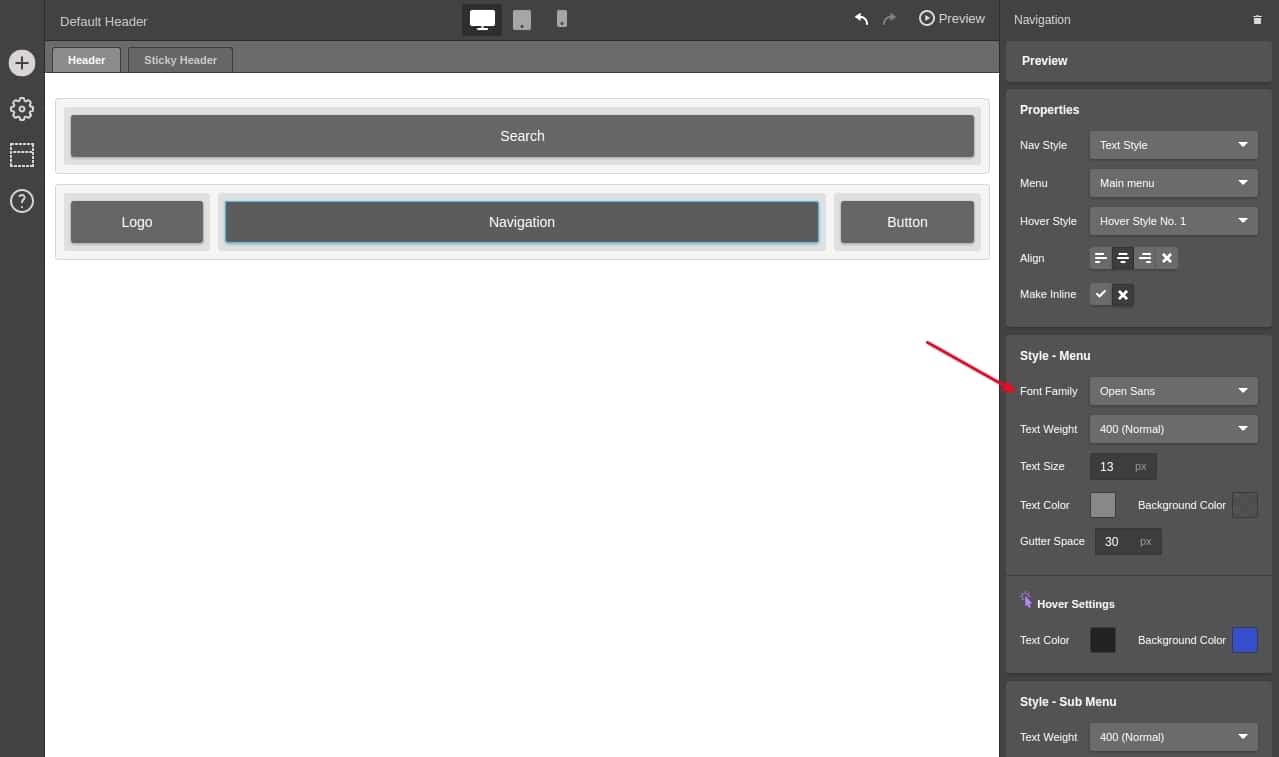
There are hundreds of fonts you can use to customize your header. But just because you can use lots of different fonts, doesn’t mean you should. If you’re just getting started, make sure you choose something simple and professional.
You’d hate to choose a font that will communicate the exact opposite of what you’re going for. If you’re unsure of what fonts to choose, take a look at Google Web Fonts, see how they look and select the best for your needs.
Row and Coumn
Another nice aspect of the new Jupiter Header Builder is that you can divide it into various rows and columns. This can be done by adding a new row, and then choosing a layout of columns from the righthand side:
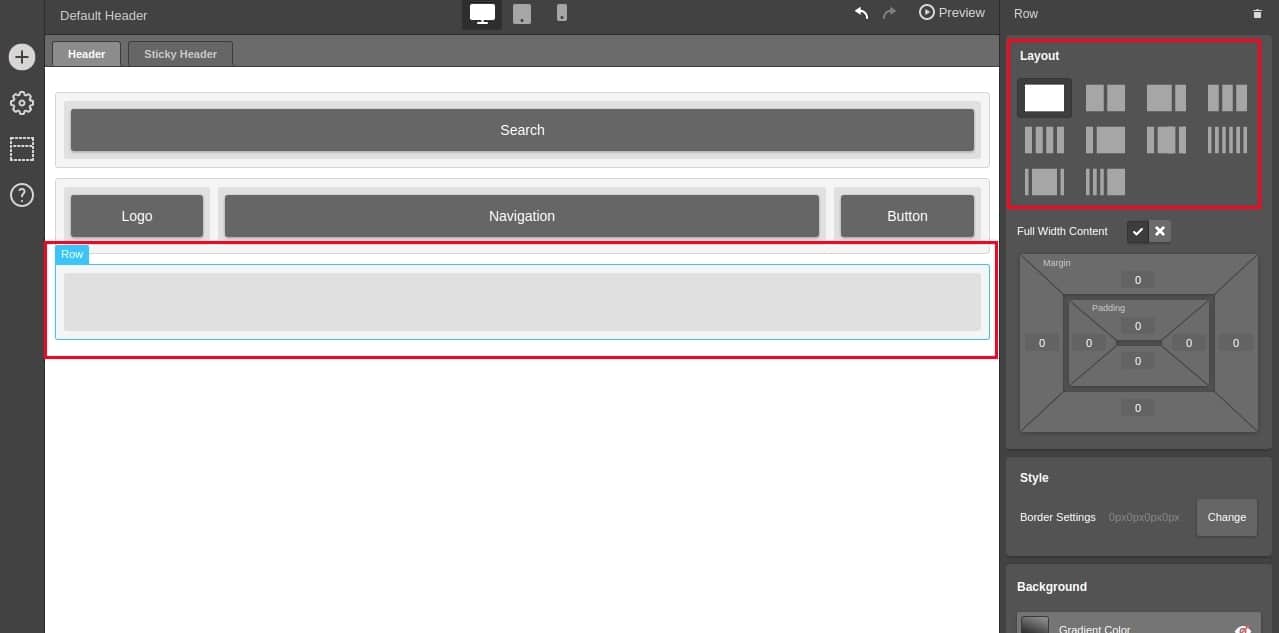
Select a row (you’ll see its border is highlighted with blue color) and on the right side of the screen you’ll see the settings which help you customize the row (set background color or background image, add margin/padding values, etc.).
Selecting a column will allow you to customize only this column, not the whole row. You can style each column separately.
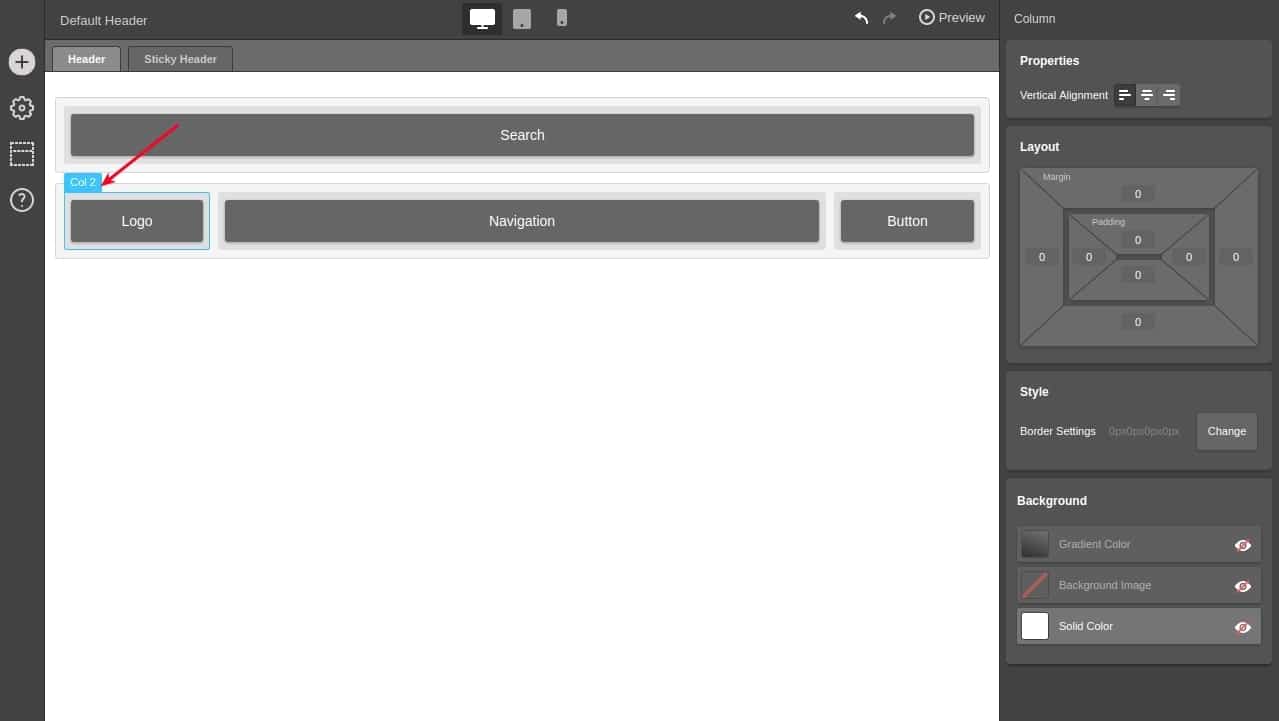
This is helpful if you want to style the columns in the row differently.
We hope that the new Jupiter Header Builder will simplify and improve the header customization of your website and help you make the design more attractive and unique. Give it a try and let us know your feedback! Is it helpful? Are you satisfied? Is there something else you’d like us to add. Happy header building!
Review of the new Jupiter Header Builder:
What’s the key to a good header?
The entire design of your website’s header must align with your target audience.
Getting started with the new Jupiter Header Builder.
To activate the new Jupiter Header Builder is quite easy. All you have to do is go from your WordPress Dashboard > Theme Options > Header > Header. And then under the section that says “Create site’s Header by:”, click “Header Builder”.
What can you do with the new Jupiter Header Builder?
Header ViewPort
Fixed Header vs Sticky Header
Header Templates
Font Styling in the Header
Row and Column

No comment yet, add your voice below!