
Today we’ll talk about one of the features – Multisite, which means setting up several WordPress websites from one installation. Yes, it’s really possible and even useful. You want to know how and why? Don’t be quick, we’ll describe all the information below.
What is Multisite?
A WordPress multisite network allows you to run and manage multiple WordPress sites from a single WordPress installation.
You can create new sites instantly and manage them using the same username and password. Now you might ask “What is Multisite Network?”. Well, there are two words you should be aware of: network and site.
Network refers to the entire Multisite network, i.e. your WordPress installation.
Site refers to one of the blogs or sites created as part of the network.
Creating a multisite network is useful for:
- A magazine site with different sections managed by different teams.
- A business site with sub-sites for different locations and branches
- Government or non-profit sites can use multisite for different departments, locations, and regions.
- Your own network of blogs running on multiple subdomains.
- Schools and colleges allowing students to create their own blogs on school servers
Advantages of using a Multisite Network:
- As the network admin, you can easily administer multiple sites from a single dashboard.
- Each site can have its own admins with capabilities to manage only their own site.
- Install plugins and themes on multiple sites with one download.
- Multisite network also makes it easier for you to manage updates. You only need to update your WordPress, plugins, or themes on one install.
How is Multisite different from a single WordPress install?
A WordPress Multisite installation and a single installation are not much different. However, you will find differences in three main areas:
- WordPress admin screen
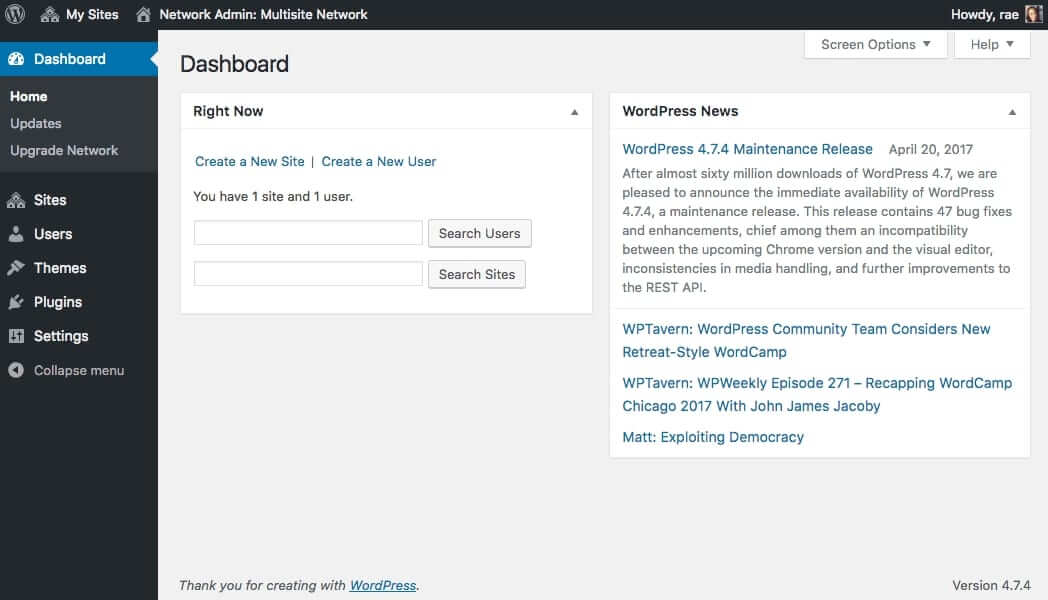
When you activate Multisite, some new screens will be added to your admin panel for managing the network. These are accessible only to the Super Admin who manages the network (that’s you) and will let you install themes and plugins and create and manage sites. You can see below there’s a special dashboard for managing the network.
- Changed File Structure
Multisite also introduces changes to the wp-config.php file and the uploads folder found in wp-content. The config file of a Multisite network requires additional lines of code to make it work.
In addition to that, this type of WordPress install will create subfolders inside the uploads directory for managing media files for each site on the network separately. Don’t worry if this sounds complicated, it is all done by WordPress automatically.
- Database changes
Inside the WordPress database, most of the standard WordPress tables will be duplicated for each subsite created. It means you’ll have a lot of tables and it is necessary to keep the content of each site separate.
Getting started with Multisite Feature in WordPress
On a WordPress multisite network, you can have your sites installed in either subdomains or sub-directories.
If you choose subdomains, then you will have to configure wildcard subdomains on your server (you’ll have to contact your hosting provider support to get it done). The link to your site will be http://site.example.com.
On the other hand, if you choose sub-directories, then the only thing you need to do is enable pretty permalinks on your root site and all sites get appended to your site address like posts or pages and would look like http://example.com/site/.
Multisite Network feature comes built-in with each WordPress install. All you need to do is install and setup WordPress like you normally do. Also you can read about it in WordPress Codex.
- Download WordPress and use the “Famous 5 minute install” to install it on your server or local machine.
- Open your wp-config.php file which you’ll find in the folder where you installed WordPress. Find the line that reads:
| /* That’s all, stop editing! Happy blogging. */ |
- Above that line, create a new line that reads as follows:
| define( ‘WP_ALLOW_MULTISITE’, true ); |
- Save your wp-config.php file.
Now you’re ready to set up Multisite.
- In the WordPress admin, go to Tools > Network Setup. You’ll be prompted to choose subdomains or subdirectories for your installation: choose the one that works for your network.
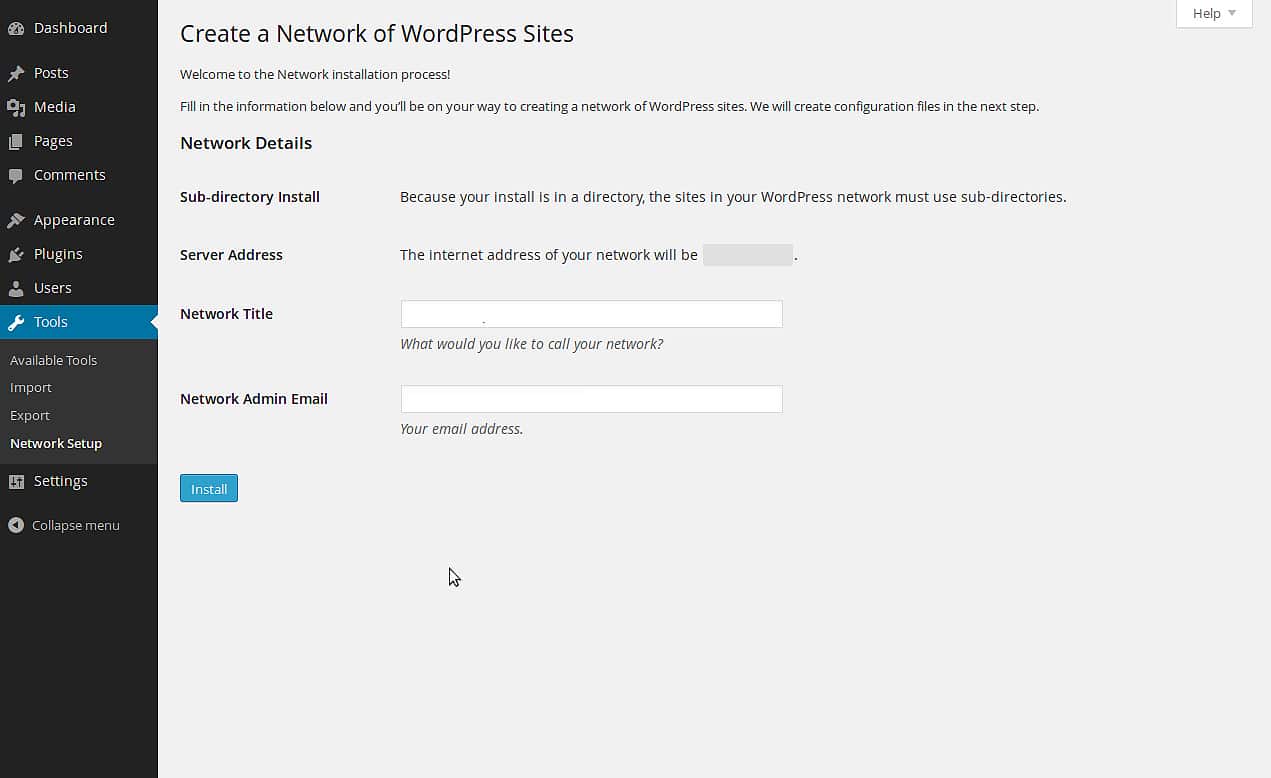
2. Edit the title of your network and email address of the network administrator when prompted, or leave them as they are.
3. Click the Install button.
You will be asked to add some code to both wp-config.php and your .htaccess file.
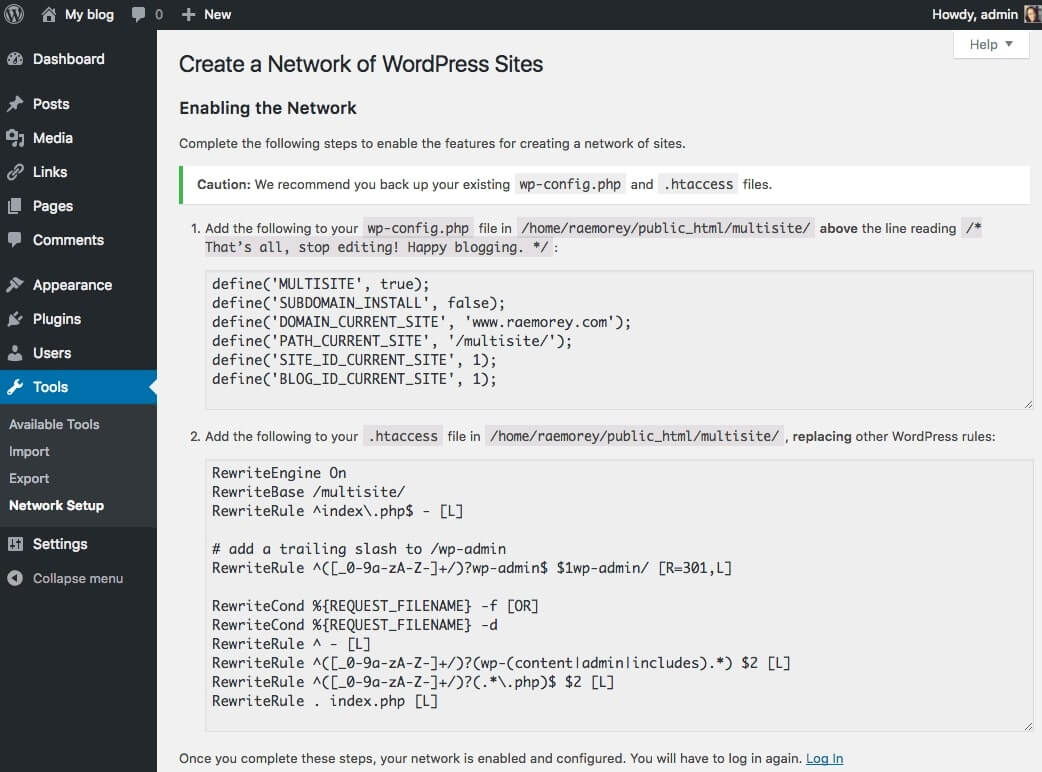
Open each file and make the edits as explained on screen. Be aware that .htaccess might be hidden on your server and you will have to enable Force show hidden files in your FTP client to edit it.
WordPress Multisite will now be installed. You’ll need to log in again, and when you do so you’ll see the Multisite dashboard. Now you can start adding sites, plugins, themes and more.
Adding new sites to Multisite Network
To create a new site you need follow these steps:
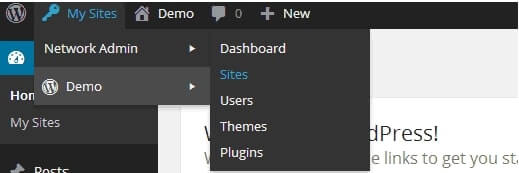
- Go to the network admin screens by clicking on My Sites > Network Admin in the admin menu.
- Go to Sites > Add New.
- Type in the site address (i.e. the subdomain or subdirectory), the site title and the email address of the site administrator, as shown in the screenshot:
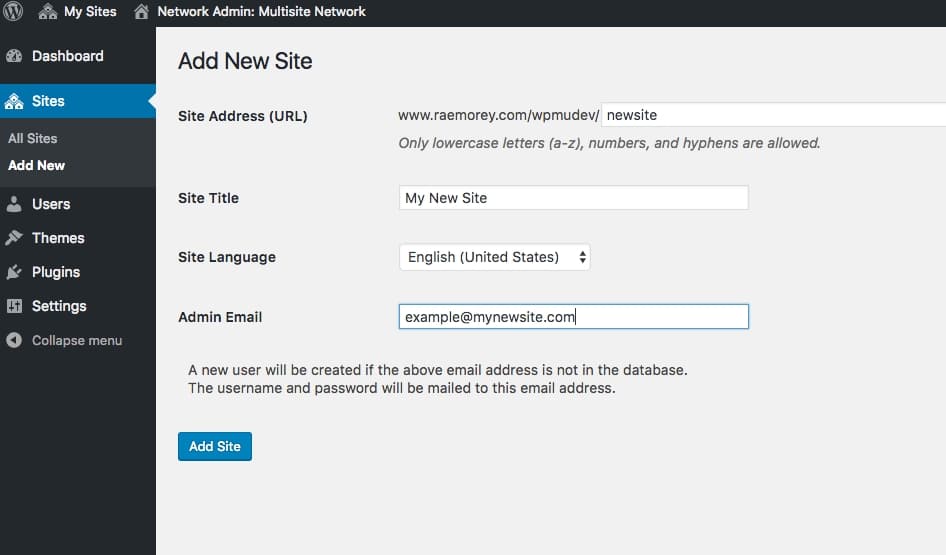
- Click “Add Site” button and new site will be added.
Click Sites > All Sites to view all of your sites.
Installing themes and plugins
Only network administrator has the ability to install themes and plugins and make them available for sites within the network.
- In the Network admin screens, go to Themes > Add New and install the theme in the same way as you do for a standard WordPress site.
- On the ‘Installing Theme’ screen that appears, click the Network Enable link.
You can also enable a theme just for one site. This can be useful if your network runs lots of sites each of which will need a different theme, for example if you’re hosting client sites.
- In the Network admin, click on Sites to view all of your sites.
- Hover over the name of the site you want to enable the theme for and click the Edit link that appears.
- Click the Themes tab to view the themes settings screen for the site.
- Under the theme you want to enable, click the Enable link.
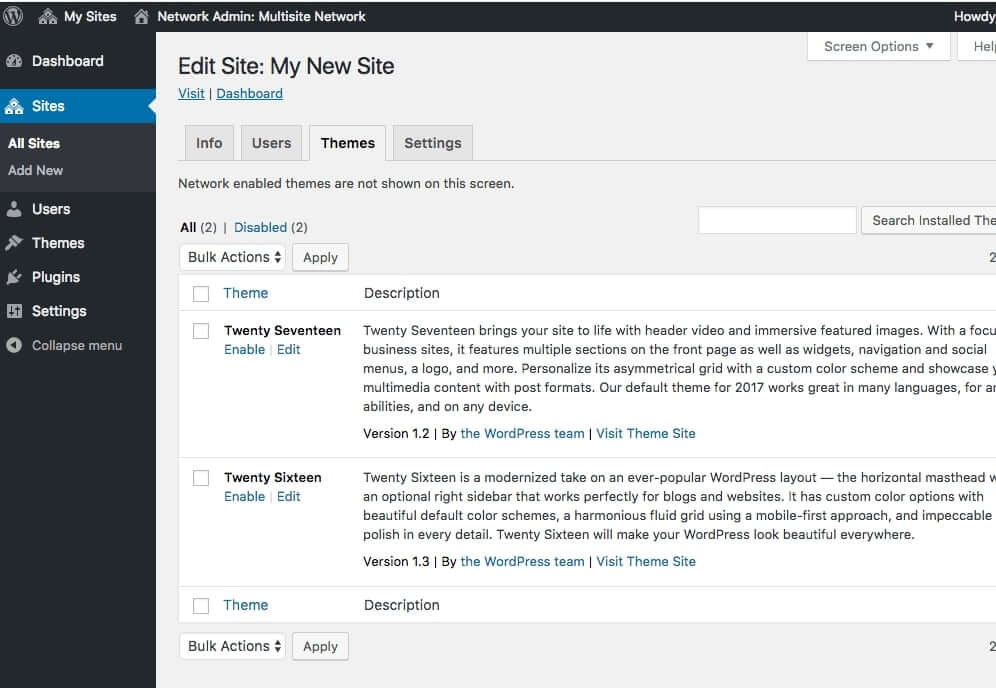
The chosen theme will now show up under Appearance > Themes for that site. Unlike themes, plugins can not be limited to individual sites. Once installed, they are available for the entire network.
- In the network admin screens, got to Plugins > Add New and install the plugin as you would in a normal WordPress site.
- In the Installing Plugin screen, click the Network Activate link.
If you want to activate plugins on one site, you can do this by installing the plugin as a network admin and then activating it if you have site admin privileges for the site.
- In the network admin screens, go to Plugins > Add New and install the plugin as you do in a normal WordPress site.
- In the Installing Plugin screen, click the Return to Plugin Installer link.
- Visit the site admin screens for the site you want to activate the plugin for and click the Plugins link in the admin menu.
- Under the plugin you want to activate, click the Activate link as you do in a normal WordPress site.
You’ll notice that in the Plugins screen for a site admin, there’s only the option to activate or deactivate plugins, not to delete or update them. So after all of that, we hope you learned all you need to know about the multisite feature in WordPress. Hopefully you’re thoroughly convinced of what a powerful and advantageous tool it can be. Activating the multisite feature in WordPress just takes a few extra steps once you’ve installed WordPress.
Fortunately, managing your network and creating additional sites isn’t all that complicated. If you’ve worked with WordPress before, we don’t doubt that you’ll quickly find your way around the changed interface and be able to grow your business without restriction or limitation. Best of luck!
Writer’s Note: I’d like to especially thank Ziba Sidrys, Artbees Writer & Editor, for her contributions and help in writing this article.

No comment yet, add your voice below!