During the testing phase of your editing process, your website can go down, or some buttons may not work. Your website followers and visitors won’t be happy when they land on a broken website. For this reason, it’s important to setup a development environment before you start doing some revisions on your WordPress website.
What is a development environment?
A WordPress development environment is a collection of tools that allows you to safely test your projects before they go live.
It’s almost always a good idea to try out any major features in a testing environment before deploying them. Here’s why.
- It allows you to test your changes locally or create a subdomain on an existing server. You can spot any problems, without any risk of a website visitor or customer seeing them first.
- You can configure your testing (also staging) environment to your liking. This will enable you to test if any themes or plugins you installed show compatibility errors, among others.
- Relying on a local testing environment is usually faster (and cheaper) than connecting to a remote server.
Once you’ve tested your site, you can then upload it to your live site.
How to Setup your WordPress Development Environment
If you’re a beginner and want to use an easy process of creating a staging site, then we recommend choosing a WordPress hosting provider like WPEngine, which offers built-in staging functionality. But, more on this later.
Below, we’ll describe other ways of setting up development environment. But first, you need to create a subdomain on your main domain.
Creating a Subdomain
A subdomain will allow you to run your website in a separate folder, without affecting your main database, files, or uploads.
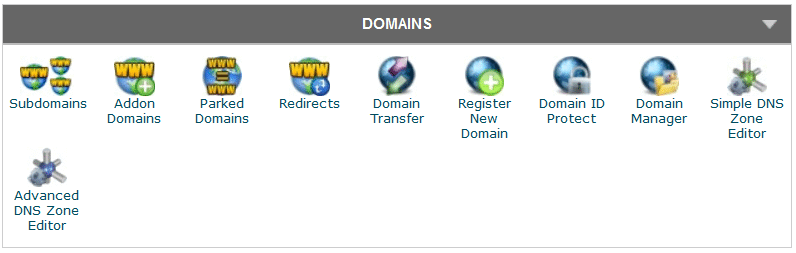
As cPanel is mainly used by many hosting providers, we’ll explain the setting up process in this panel:
- Log in to your hosting account with your username and password.
- Go to your cPanel, and find the Domains box.
- Click on Subdomains
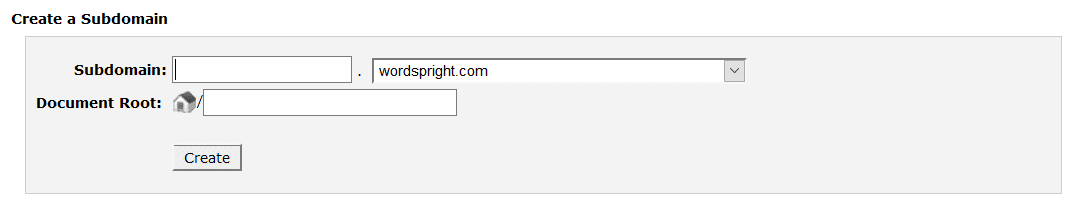
- Enter the Subdomain name. The Document Root field will be auto populated for you.
- Click the Create button to set up your subdomain
Now that your subdomain has been created, you’ll need to create the database for use by WordPress. Note that if you’re just about to create a new website, you can also do this when you install WordPress for the first time.
Creating a Database
- In cPanel, find the Databases box and click on MySQL Databases

- Enter a name for your database in the Create New Database box. Make sure that the database name is descriptive and unique. Do not use spaces and try not to use special characters. Keep it simple, for example: mydomaindevDB

- Click the Create Database button.
- Take note of your database name and write it down somewhere. Trust me, you’ll need it later.
- Click Go back to return to the MySQL Databases screen.
Your database can now be used for your WordPress testing site. You now need to create an SQL database user.
Creating a Database User
Then you need to create a database user and give them permissions for your new database. If you already have a user created then you can add it to the database. Otherwise you will need to create a new user. First, we will walk through creating a new user:
- Scroll down the MySQL Databases screen until you see MySQL Users.
- In the field below Add New User, enter a username. The username should be unique and separate from the one you’re already using.
- Enter a strong password or click the Password Generator button, if there’s one provided.
- Click the Create User button.
- Make a note of the username and password (again, you’ll need these later)
- Click Go back to return to the MySQL Databases screen.
So, you have created a new user you need to add them to the database.
Adding a User to the Database
If you already created a user, then these are the steps to adding that user to your database.
- Scroll down the MySQL Databases screen until you see Add user to Database.
- Select the user in the first drop down and select your database in the second drop down.
- Click the Add button.
- You should be redirected to the Manage User Privileges screen.
- Check the All Privileges box or select every check box manually.
- Click the Make Changes button.
- Click Go back to return to the MySQL Databases screen.
The database is set up! The next step is to download WordPress and install it. The installation process is described in this Artbees article. You can follow the instructions there.
Copying Data From Live Site to Staging Environment
For your site to run all the same themes and plugins as the live site, and display all your images and other attachments, you’ll need to copy some files.
- Open your FTP program (for example, FileZilla) and find the themes, plugins and uploads folders inside the wp-content folder in your new staging site.
- Delete everything in them. This is so that there aren’t any extra themes or plugins that have found their way in via your installation, that aren’t in the live site.
- Now, go to the wp-content folder in your live site. Copy the contents of those three folders, and paste the files into the equivalent folders in your staging site. You can copy everything to your local machine and then copy that across to the staging site. It takes a bit longer, but it means you have a backup just in case.
- After that, you need to copy the database tables.
You can use the WordPress exporter and importer tools to export all of your posts, pages etc. from your old site into your new site. The importer is a great tool as it also imports images that are attached to posts. However, it doesn’t import any of your settings nor does it import any media that isn’t attached to a specific post or page.
A more thorough way of doing this is by copying the database tables. You’ll need to use phpMyAdmin to do this, which you access via cPanel.
- Open phpMyAdmin for your site and find the database for your live site (NOT the new staging site).
- Click on the Export tab.
- Click Go, and an SQL file with your database will be downloaded to your local machine. If you have more than one database on your hosting account or server, you can find out which one applies to this site by checking the site’s wp-config.php file.
- Before you can import your database tables to the new site, you’ll need to make some edits to the SQL file you just downloaded. It’s better make a copy of this file before starting.
- Open the SQL file in your code editor and replace all instances of the old domain name for the site with the new domain name. In other words, replace all instances of http://yourdomain.com with http://staging.yourdomain.com (or any subdomain name that you created).
- Save your SQL file.
- Before you can import the database from your old site, you need to delete (drop) the new tables that WordPress has created for you in your staging site. In phpMyAdmin, find the database for your staging site and click on the Structure tab.
- Select all of the database tables.
- Click on the With selected: drop-down box, select Drop and click Yes.
- Still in phpMyAdmin, select the Import tab and click the Choose file button.
- Select the SQL file that you’ve edited (on your local machine) and click Choose or OK.
- Click Go and your database tables will be imported.
You’re done! Now check your staging site. It should look exactly like your live site.
Tools for setting up a Development/Staging Environment for WordPress
There are alternative ways to creating a development environment unlike the steps we described above. Let’s take a look at some tools that can set up a development or staging environment for your WordPress site.
WP Debug
WP_DEBUG is an essential WordPress command for anyone testing their code. By default, it’s set to false in your wp-config.php file.
When testing your code (and only in a testing environment you don’t want the error messages it throws up appearing on a live site), set it to true instead, and you’ll be provided with an error message every time you miss out a semicolon in your code, or worse.
To learn more about WP Debug please refer to WordPress Codex.
MAMP
If you’re setting up a local development environment, MAMP is the most useful tool you can have.
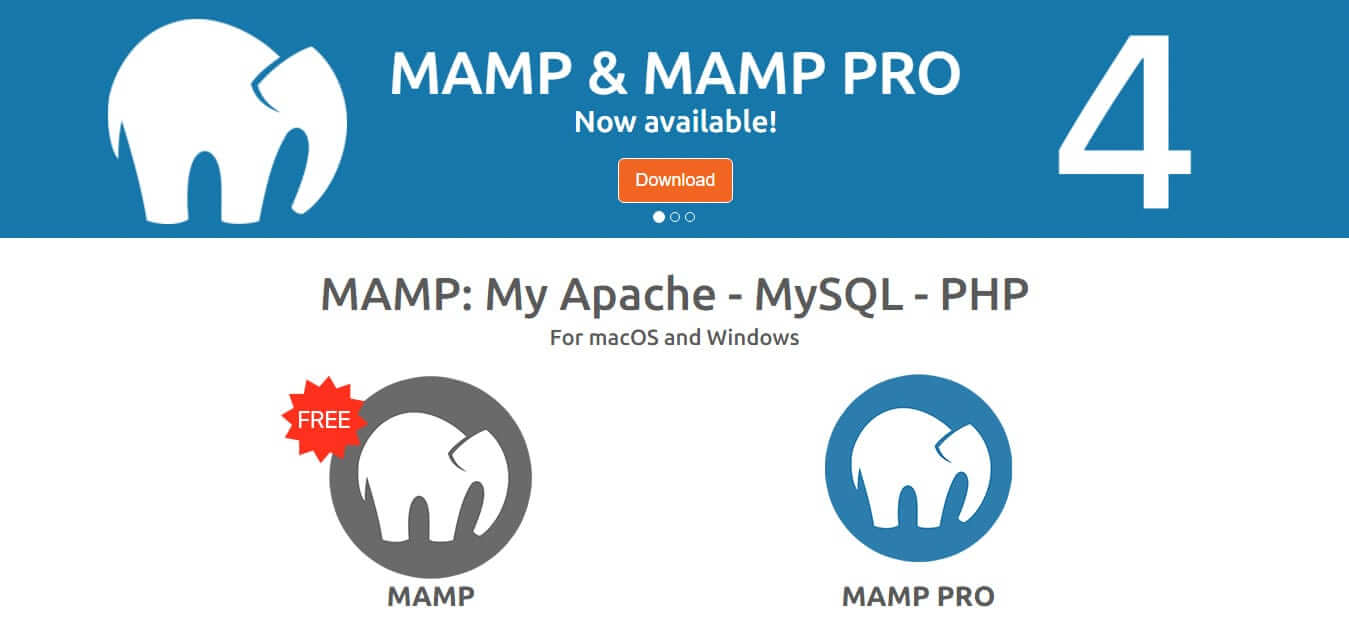
MAMP stands for My Apache – MySQL – PHP. It lets you run a database-driven website on your local machine, something you can’t do without a tool like MAMP. The free version has all the features you need to install and run WordPress locally. It used to be that MAMP was just for Mac, but it now works on Windows machines too, making it even more useful.
XAMPP
If you’re running Linux, MAMP won’t work for you, so you’ll need to install XAMPP instead. Like MAMP it’s free, and lets you run Apache, MySQL and PHP, meaning you can install WordPress locally.
XAMPP is open source which means it’s a great alternative for people who prefer to use open source software, as it works not just on Linux, but on Windows and Mac too.
Duplicator
Since it’s bad practice to make live changes, the best option is to clone your site using a plugin such as Duplicator.
Using this plugin, you can create a copy of a live site and set it up in your staging environment. This will enable you to test any changes safely, before uploading it back to your live server.
Wrapping It Up
From now on, every time you need to update WordPress, or a theme or plugin, you can do it on your staging site first, test that, and then make the updates on your live site.You can do it in a way that is safe and avoids creating any errors.

1 Comment
Thanks, I love this theme so much