
A great way of establishing this trust is including the logos of clients you’ve worked with as social proof in your website. That’s why I’m going to give you the lay of the land with the Clients post type found in Jupiter theme to help give your website that extra edge of credibility. So, if you have clients, then show them, no need to hide.
Adding Clients element to a page
The Clients element can be found in Visual Composer editor when you create a page and allows you to showcase your previous and current clients’ logos to give potential clients an instant view of your work history.
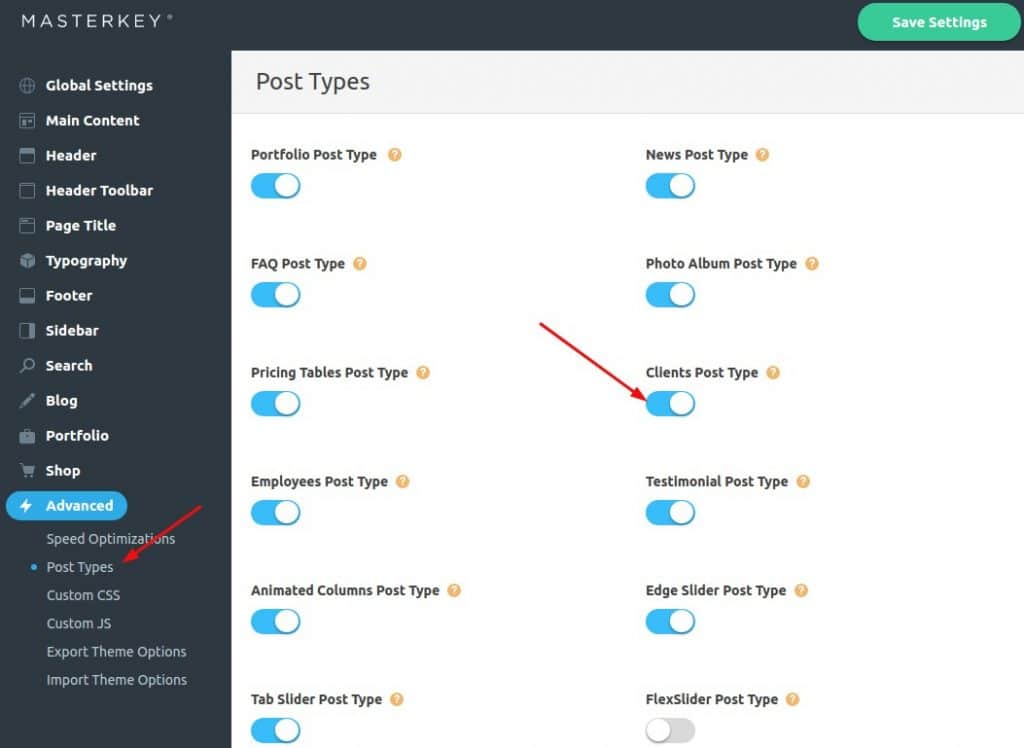
But before adding the Clients element to a page, you first need to create a Client item using Jupiter post type Clients which can be enabled in Jupiter > Theme Options > Post Types
You can find here some more directions on how to add a Client item, take a look through Jupiter’s knowledge base documentation.
Styling Clients logos
There are 2 styles you can select in the Clients element settings:
1. Column
2. Carousel

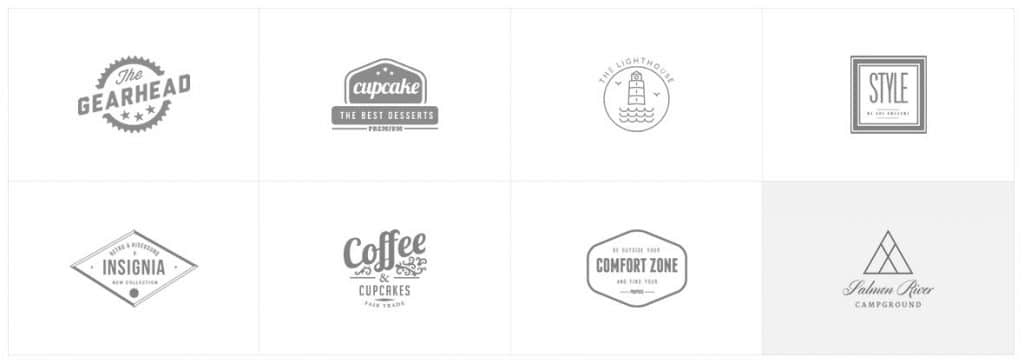
They can be styled with different options: borders, background colors, border colors. Find the description of each option in the documentation mentioned above. Also, to see live examples of the different styles and options for Clients logos, check out the Jupiter demo page.
Playing around with these options will attract your visitors if you create colorful logos, so my recommendation is to use background colors and borders in the settings. Also borders can be set differently. You can select the Boxed border option and you’ll have 4 different borders around the logo:

Or select the Open Edges option and you’ll get partial borders as shown below:

If you decide to use the Carousel style, a good tip is to use the Autoplay option so your visitors don’t need to scroll clients logos manually, but just view them with auto-scrolling functionality.
Positioning Clients Logos
Where should you position your clients’ logos?
Rather than creating a separate page for the logos, it would be better for you to place them directly on the homepage, so that visitors can see the logos once they open your site. This way, instead of hoping visitors just stumble upon your working history, it will be immediately visible on the first page of your site.
Now that we’ve given you a better idea of how much you can style, customize and spruce up your client logos, go ahead and play around with your page to figure out how to best present your work history to prospective clients. Taking the time to set up your client logos in a part of your website that will entice and attract customers will be worthwhile, so don’t be shy and show off your experience!
Writer’s Note: I’d like to especially thank Tatyana Hutsol, Artbees Support Specialist, for her contributions and help in writing this article.

No comment yet, add your voice below!