This utility works in the background and gives a command to the server to perform a particular job at a specified time, date, or interval. Usually, Cron is used to automate a repetitive task you have on hand.
For example, you have a blog post that you want to be published automatically on a set schedule. Cron can do the work for you and you can focus on other tasks to further build your online visibility.
In the case of WordPress, such function is managed by WordPress Cron, usually called WP-Cron. It is defined as an automatic task scheduling system that handles various time-based tasks.
Two of the best examples of a WP-Cron functionalities are:
- Scheduling a post that has to be published at a particular time; and
- Predefining a schedule for a backup plugin.
If you want to learn how to automate tasks with WordPress Cron jobs, stick to this tutorial until the end.
In this post, you’ll learn how to create, modify and run a WordPress Cron job. But, before we dive deep into the world of WP-Cron, let’s first understand why you need to use them.
Uses of WordPress Cron Jobs
WordPress is a great platform where you can build almost any kind of website for a plethora of purposes. WordPress supports countless plugins that you can use to bring different functionality and features together into your site. So, what roles does WP-Cron play in WordPress?
WordPress Cron jobs let you relish a fantastic feature on your site. As said earlier, WP-Cron manages to schedule time-based jobs in WordPress. It can be maximized and used in multiple ways.
Execute Repetitive Tasks
If you have any task that needs to be done repetitively over the course of a week, WP-Cron can be your best buddy. Since you can schedule tasks like posting a blog article, you can now focus on other things to better your website. A big help to meeting your objectives the soonest possible time.
Get Things Done At The Right Time
WP-Cron can be a helpful tool in getting various tasks done at the right time. It’s an important and much-needed too you can leverage so you can multitask.
However, you need to be aware that some hosting services don’t offer access to the system cron. So, do take note of this. Moreover, WordPress API is a better option to set-up cron job.
Backup Data
Another benefit of WP Cron is that you don’t lose your data in case your scheduled tasks do not run on time (whereas this is NOT possible with system Cron).
With WP Cron, jobs are always in a row and you never lose your tasks. It can even backup data while you’re sleeping! It’s a great tool to have some peace of mind when you’re trying to build and maintain your site.
Check for Updates on Themes and Plugins
You want to keep your site constantly updated with the latest versions of themes and plugins. There might be some important patch notes that you might miss because of your busy schedule.
Good thing, there’s WP-Cron that can help you check and update your themes and plugins. This can greatly keep your site up to speed with the latest developments.
How is WP-Cron Different from a Regular System Cron?
It’s also good to take note that WordPress Cron is totally different from a system cron. Each utility has its own benefits and drawbacks. For instance, WordPress Cron is dependent on intervals while a system cron depends on a defined time. It would be nice to understand what each utility can offer so you can implement the best option for your site.
How to add WordPress Cron Jobs
Let’s cover the basic recurring jobs WP-Cron can execute, so that you can have a better understanding of the overall process.
We are sure that once you know how to add basic jobs, you can then add more complex WordPress Cron jobs on your own.
Setting Up a WordPress Cron Job
Before we begin, you will need the following:
- A scheduled event. It can be anything that your WordPress site will be executing on a regular basis.
- A function with a code to perform.
Do take note that the event should run while WordPress is loading and that it should be automatically unscheduled when a plugin is deactivated.
To schedule WordPress Cron events, you will need to create custom hooks first. WordPress offers you a timed hook in which you have to “hook” your own function.
WordPress provides only three schedules at the beginning. Therefore, you will also get to see how you can add your own intervals that will suit your specific needs.
How to create a scheduled event
- First of all, you need to create a function that will schedule your event.
Let’s give it a name – ‘myfirstcronjob’. It will run once a day.
- Next, you have to write the following code into your plugin’s primary file. Make sure it is outside the primary function.
//create a scheduled event (it it does not exist already)
function cronstarter_activation() {
if(!wp_next_scheduled(‘myfirstcronjob’)) {
wp_schedule_event(time(),’daily’,’myfirstcronjob’);
}
}
//and make sure it’s called whenever WordPress loads
add_action(‘wp’,’cronstarter_activation’);
Keep in mind that the function should be unscheduled when your plugin is deactivated.
- For that, you will need to add the following code:
//unschedule event upon plugin deactivation
function cronstarter_deactivate() {
//find out when the last event was scheduled
$timestamp=wp_next_scheduled(‘myfirstcronjob’);
//unschedule previous event if any
wp_unschedule_event($timestamp,’myfirstcronjob’);
}
register_deactivation_hook(_FILE_,’cronstarter_deactivate’);
Now you have created a hook “myfirstcronjob” that will be executed once everyday. Now it is time to add your own function to it.
Add Your Function
To check whether your function is working or not, you can add your email address in the code. Check out the code below as reference.
//here’s the function we’d like to call with our cron job
function my_repeat_function() {
//do here what needs to be done automatically as per your schedule
//in this example we’re sending an email
//components for our email
$recepients=’[email protected]’;
$subject=’Hello from your Cron Job’;
$message=’This is a test mail sent by WordPress automatically as per
Your schedule.’;
//let’s send it
mail($recepients,$subject,$message);
}
//hook that function onto our scheduled event:
add_action (‘myfristcronjob’,’my_repeat_function’);
Take note that you have to add the function of the specified event that we created earlier in the last line of code.
So as not to waste any time in waiting for the test email to arrive, we should set an immediate schedule for it to be sent out. Here’s how you can do just that.
How to Create a Custom Interval
By default, WordPress offers three time intervals: Daily; Twice a day; and Hourly. However, you always have the option to add your own interval.
//add custom interval
function cron_add_minute($schedules) {
//Adds once every minute to the existing schedules.
$schedules[‘everyminute’]=array(
‘interval’=>60,
‘display’=>_(‘Once Every Minute’)
);
return$schedules;
}
add_filter(‘cron_schedules’, ‘cron_add_minute’);
Now, we will add an array known as ‘everyminute’ to the current default intervals. For the same, you have to make your scheduled event along with the array name.
You can use the following code to create ‘myfirstcronjob’ event for every minute.
//create a scheduled event (if it does not exist already)
function cronstarter_activation() {
if(!wp_next_scheduled(‘myfirstcronjob’)) {
wp_schedule_event(time(),’everyminute’,’myfirstcronjob’);
}
}
//and make sure it’s called whenever WordPress loads
add_action(‘wp’,’cronstarter_activation’);
The unschedule function will be the same as above.
Testing Your Scheduled Events
After all the codes have been put in place, it’s important to check whether the event functions as it should. As such, it’s necessary to conduct a check and balance so you won’t be too far down the rabbit hole before you realize that something’s not right!
- There are two ways to test scheduled events.
The first one is setting up the email function as we have mentioned earlier. You may set up a schedule to ‘once every minute.’ Then, refresh the front page of your WordPress site and check your inbox. You should receive an email in a minute.
- The second way to check if it’s working is through a plugin created by Simon Wheatley, known as Cron View.
Just activate this plugin and it will give you complete details of the events that are scheduled by WP. The plugin lets you see all the scheduled cron events together with the complete details about it, including when they are due and on which schedule they are, among others.
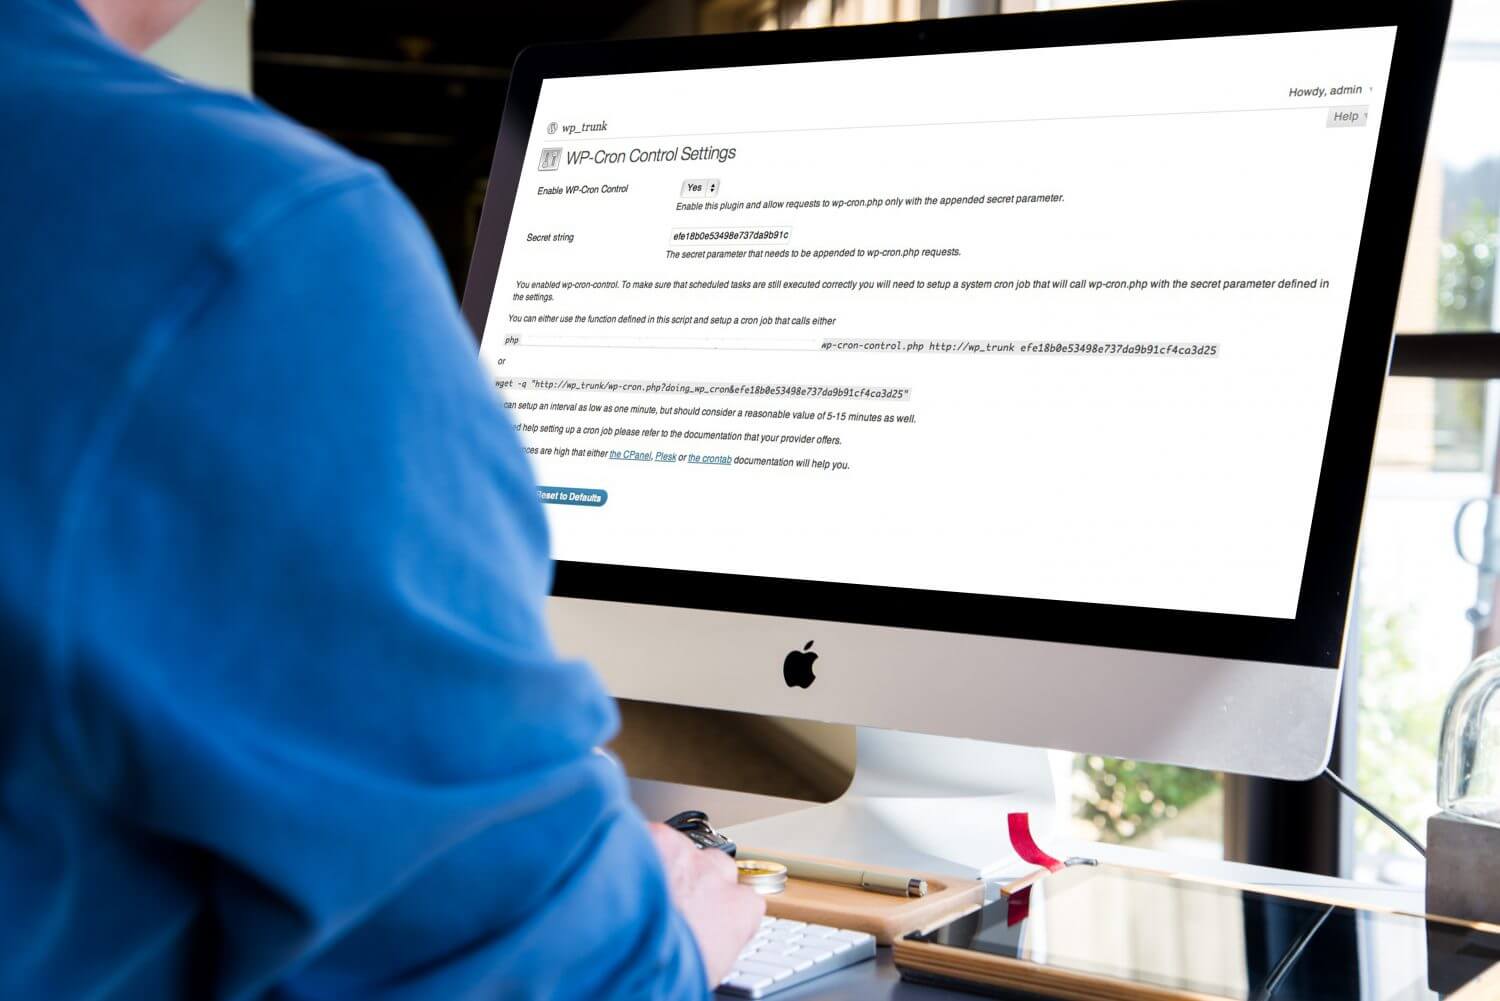
If you’re not satisfied with the performance of ‘Cron View’, you may also check out WP Crontrol. It is one of the most powerful WordPress plugins that can help you take control over what’s happening in your WordPress Cron job.
How to change the WordPress Cron Job with Plugin
There are two ways for you to get your hands on this plugin.
One way is downloading this plugin from the WordPress repository. The second option for you to install it is to search for it within the dashboard of WordPress under ‘Add New’ Plugins.
With just a few clicks, you’ll be able to activate it on your site. Some of the advanced features of this plugin are:
- It lets you view all of your cron events with their recurrence, arguments, and upcoming runtime.
- With the help of this plugin, you can easily and immediately edit, add, delete, and run any of your cron events.
- You can delete cron events in bulk as well.
Once you have activated the WP Crontrol plugin, you are allowed to change the cron job schedules straight from the settings of your WP dashboard. This makes the process more efficient so you won’t have to worry much about the next steps.
The following screenshot will give you a clearer idea.

Moreover, you can also add additional schedules in a snap. The intervals can be added with a code, using a filter:
add_filter(‘cron_schedules’,’example_add_cron_interval’);
function example_add_cron_interval($schedules) {
$schedules[‘five_seconds’]= array(
‘interval’=>5,
‘display’=>esc_html_(‘Every Five Seconds’),
);
return $schedules;
}
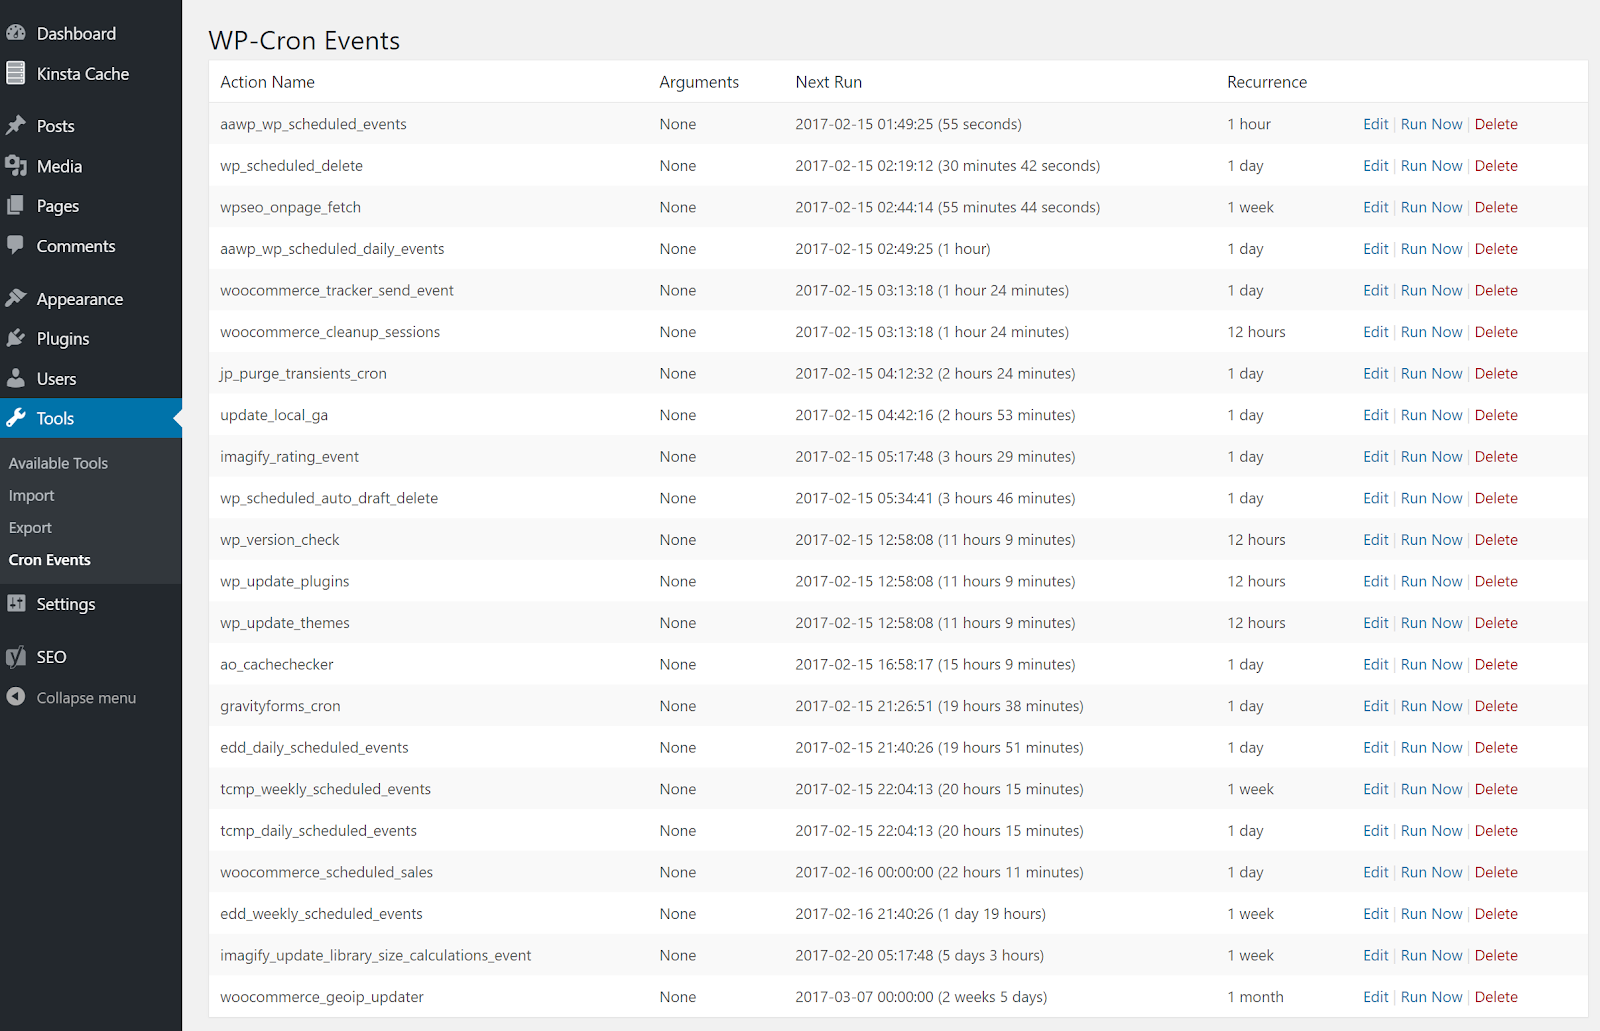
How to See WP-Cron Events
As said before, you can also use the WP Crontrol plugin to view all your current WordPress cron jobs that have already been scheduled. It’s a great platform for you to have an overview of all the cron jobs lined up for your site.
For that to happen, you have to click on ‘Cron Event’ option located inside the tool. To run the cron event immediately, you simply need to click the ‘Run Now’ button available alongside action name. You should see WP Cron Events like below.
Modifying Cron Event using this plugin
With this plugin in place, editing any Cron event now comes easily. All you have to do is just click ‘Edit’ button next to the action name. Next, you have to change the arguments, action name, scheduled recurrence and the next run.
Since numerous plugins of your site rely on their cron job to work properly, you should be extra careful with the options. Take time to go through the edits to make sure that there aren’t any errors that were placed.
Adding a Cron Event
Adding a cron event is fairly easy. Whether you want an automatic comment system or a post, you can do that quite quickly.
Managing WP Cron
The plugin lets you manage WP-cron jobs and events in WP-CLI. For instance, the following command will help you get the existing cron event list.
Wp cron event list
A cron job is an excellent solution to schedule tasks on a web server. It’s a highly efficient way to manage all the work that needs to be accomplished so your site is well-maintained. The beauty of WordPress cron job is that it lets you do a lot of tasks, including publishing scheduled posts and checking updates automatically, among others. Hopefully, this post helped you have a better understanding on how to automate tasks with WordPress cron jobs.

No comment yet, add your voice below!