WordPress now powers more than a third of the world wide web (36,5% as of May 21, 2020). This includes blogging, businesses, online stores and service websites in a wide variety of niches and sectors. And there is a huge line-up of businesses that evolved around the dominant CMS that builds and maintains WordPress websites: WordPress themes, hostings, managed services and, of course, maintenance and outsourcing businesses that help in developing and maintaining WordPress websites on your behalf.
Due to its piecemeal structure, WordPress is not as easy of a website building solution as its competitors such as Wix, Squarespace, etc… In recent years, this has led more individuals and businesses to consider using third-party services to complete the technical side of WordPress for them. In this article, we’ll take a look at the ins and outs of outsourcing WordPress development. We’ll answer the most common questions about outsourcing work in WordPress, whether or not you should do it, as well as tips on how to go about it the right way.
Why choose outsourcing WordPress development?
There’s no doubt that WordPress is easy to use, but it’s not very easy to set up and maintain. Unlike a SaaS solution, you have to put together different sections of the CMS together like lego pieces in order to get it working. This, on one hand, makes WordPress formable and extendible, which gives it a huge advantage over its competitors. On the other hand, this also makes it difficult to create and maintain. There are many solutions and options for each of these lego pieces you must choose from: themes, page builders, plugins, hostings, caching service and more.
You should either develop knowledge, experience and skillset to work with each of these yourself or break the bank to recruit and hire an in-house developer(s) to do it. But there’s a third option: outsourcing WordPress development to a ghost middle-man who specializes in WordPress. And even in a specific theme or plugin such as Jupiter X or Elementor. But in what ways is this beneficial to you?
Leverage expertise without having it
A WordPress specialist has developed years of experience and skills about the ins and outs of WordPress that your in-house developer might not know right off the bat. Even if you want to tackle the learning curve, there is a period of trial and error that you can skip by simply jumping on the back of a veteran WordPress specialist.
While the process of creating and operating in WordPress themes and page builders is standard, clear and documented, there are dozens of ways to do one single thing. And the result can vary widely based on which way you chose to do it. Specialists have learnt the best way to do different things after years of working with that theme or plugin.
Eliminate legwork and focus on creativity
Digital media production has a serious drawback in general: legwork. And it’s even worse with creation within WordPress. Some WordPress tasks involve more legwork than creativity. You spend tons of time converting your PSD to WordPress, playing with Elementor to create a page template or moving your content from an existing source to your new website.
There can be times when you spend more time building a template in Elementor than it took you to design it in Photoshop or Sketch!
The most important benefit of outsourcing is that it can free up your time to focus on what matters and what can only be done by you. Being a leader, designer, thinker, strategist, an ideator are things that cannot be outsourced. So you might save some time and focus on your creativity rather than installing WordPress.
Increase productivity and velocity
Development and QA is where the bottleneck happens in most teams. Especially if it involves new and unexplored areas where some research and trial and errors are involved. And it’s at that point where you can get a hand from an expert to get you out of a jam, smoothen your workflow and increase productivity by focusing on the other parts of the workflow like strategizing, customer development and marketing.
Having a smooth development workflow will give you confidence to work on more projects simultaneously. This is particularly important for high-volume teams where velocity is limited to the number of the few developers working in-house and you cannot assign them multiple tasks from different projects freely. By outsourcing to the right team, you’re actually doubling or tripling your team size without actually increasing your workforce.
Cut costs and increase profit margins
High-volume WordPress businesses such as agencies might reduce production costs by outsourcing WordPress labour instead of spending money to recruit, hire and employ staff.
What are white-label services?
White-label services ensure that your brand – and only your brand – will appear on the final product, even if you had a freelancer or agency doing the work on your behalf. Make sure to hash out the terms for branding and disclosure in the contract.

This is good for your brand and will protect your clientele. However, this also increases your and your contractor’s responsibility to assure the quality of the work. If there are any problems, the responsibility will lie on your shoulders (not your contractors), and your brand may be at stake.
White-label + partnership: The ideal formula!
White-label services are suitable for high-volume WordPress businesses and the regular flow of projects you want to outsource to someone reliable. It would be ideal if you can form a long-term relationship with your contractor and strike an agreement that would work in the interests of all parties involved. For example, a special rate exclusive to you when you promise to outsource a specific number of projects every month.
A long-term relationship fosters trust and reliability and transforms your contractor into a partner. There are some white-label agencies where you can have your own permanent team of experts who work on your projects, you get to know each other over time and perfectly improve the productivity as a result of long-term collaboration.
Who should outsource? Freelancers, agencies or end-users?
The short answer is everyone! Freelancers, agencies and end-users alike would benefit from getting help from a WordPress expert. It might be an end user who just bought a WordPress theme and needs help customizing it, a freelancer who needs a hand doing a job for their client or an agency with a large clientele who needs another team to lift off part of the workload.
What can be outsourced?
Custom WordPress development
You might want to consider outsourcing if you need advanced WordPress development for particular requirements on your website or you need WordPress plugins developed from scratch for your project. You require a lot of knowledge and skills with WordPress to get something like this yourself or by your developer.
- ✅ I want a custom calculator plugin …
- ✅ I want a few custom post types for my hotel website …
- ✅ I want a custom booking plugin built for my WordPress website
- ✅ I want a custom header design to look and feel like on example.com
- ✅ I want my popup to be showing a dynamic carousel populated by a post type in the WordPress backend.
- ✅ I need my portfolio to have some custom fields with specific relations
- ✅ I need a custom language selector for my multilingual website
- ✅ I need to integrate an LMS with WooCommerce
- ✅ I need to customize my Membership plugin
- ✅ I need a custom shortcode to show a content under specific conditions to a group of my users
Theme customization
This is one of the most popular outsourced services on the WordPress market: You bought a WordPress theme, and you want to customize it by adding a custom functionality, capability or some custom codes to add a specific visual function that is not possible with built-in features.
- ✅ I want a custom menu look in my template
- ✅ I want plugin X installed and optimized in my theme
- ✅ I need my current mega menu to to have a different look in mobile and desktop
- ✅ I need to make the plugin X look like the other parts of my website in my theme
- ✅ I need to customize my blog page to look like this
Performance & security optimization
This is another area where having extensive knowledge and skills is crucial – without which, you may risk your website health, data and security. If you have an active WordPress website with high traffic or several pages, you might want to have it audited by an expert for possible security measures and performance improvements.
Performance and security improvement checklists usually include the installation of SSL, caching and CDN services, which may require server and development knowledge and hands-on experience with different protocols and tools. It’s better if this is done by an experienced engineer.
- ✅ I need a 90% Google Page Speed for my client WordPress website
- ✅ I need a security checkup for my WordPress website
- ✅ I need a checkup on the performance leaks of my WordPress website (unused plugins, image optimization, compression, etc.)
Converting to WordPress
This may be the most popular outsource WordPress task among different WordPress teams. Let’s say you like and select a WordPress theme but don’t know how to implement the designs you or your designer did. Or you’d just like to get it done by someone who is an expert on that theme and already knows the best practices rather than playing around with trial and errors.
For instance, a Jupiter X expert could help you achieve maximum design loyalty as well as the efficient usage of elements and plugins to convert your design from a variety of sources such as PS, Sketch or Adobe XD.
- ✅ I need to create these templates with Elementor.
- ✅ I’d like to build my landing page with Jupiter X WP.
- ✅ Can I convert my Sketch designs to WordPress?
Custom design
Well, this is not directly a WordPress development job but definitely a part of it. If you’re creating a website for a very picky client or with special brand characteristics, you might want to have your website designed by expert designers exclusively based on your very own needs and preferences.
- ✅ Design me the most beautiful WordPress website!
- ✅ I’m representing a client with very unique brand characteristics, and we need a WordPress website for them.
- ✅ I want to add a brand new template in harmony with the rest of my theme.
Maintenance, migration & content management
If you’re running an active website for yourself or for a client with regular content updates, you may want a helping hand in completing the usual maintenance such as WordPress updates, plugin updates, theme updates and regular health checkups, as well as content additions such as the creation of weekly or monthly posts.
You may also need help migrating your content from an existing website with many posts, pages or products to a new WordPress theme (for example migrating from Jupiter to Jupiter X.)
You could handle this yourself if you have the skillset and enough knowledge about the original and destination platform. But if not or if you’re sensitive about your content and want a seamless migration, an expert will be helpful. They can assure a migration with maximum loyalty and with the best migration practices or content recreation in the destination platform for parts of your content that are not natively compatible and supported by the destination platform.
- ✅ I want a seamless migration from Jupiter to Jupiter X.
- ✅ I need a hand migration from Divi to Elementor.
- ✅ I want a regular maintenance checkup for my WordPress website.
What should not be outsourced?
It’s good to think of outsourcing as a solution to get something that you don’t know much about done by an expert. Or if you have the knowledge base but you simply don’t have enough time to complete the project. If it’s the former, it’s still important to have basic knowledge about the essence of what you want done. This may include basic knowledge of WordPress and how it works. Some coding knowledge of the language you want can also be helpful if your project is purely related to development.
If you’re running a dev team and considering outsourcing part of the development to another team, then you probably have a deep knowledge of your WordPress plugin or app and you should note your contractor may take time to achieve the same amount of knowledge and familiarity with your product.
There might be a learning curve, trial and errors and even possible defects before your contractor learns as much as you know about your plugin.
- ❌ I want to build the next Facebook with WordPress. Is that possible!?
- ❌ I want to build an open-source CMS to rival WordPress.
- ❌ I want a plugin developed to do all my accounting, site maintenance, online payments and security checkup for my WordPress website.
How to choose a WordPress outsourcing service
1- Begin small
If you’re new to outsourcing, it’s better if you start with small projects. You may face problems with outsourcing you didn’t expect and you were informed during your contractors sales pitch. It may take time for both of you to know each other’s needs and capabilities.

If you’re considering a long-term relationship, starting small will help you minimize possible damages and errors and learn the best practices along the way. This is particularly true about the development projects where tight collaboration and in-depth knowledge of both parties is crucial for a successful collaboration.
2- Provide clear descriptions
Make sure to specify all the details and material your contractor requires to start your WordPress project. This changes depending on the project type but below might come in handy for common project types:
- WP conversion > Well-organized design files with proper layer folder and naming conventions
- Theme customization > Detailed list of requested functionalities – if a visual feature, possibly with an explanatory video.
- Custom Design > Possible samples of design that you admire and reflect the design characteristics you want in your design. Also detailed brand guidelines.
- Content management > Well-organized content that you want posted on your website such a text, images, video with details about publishing date, category and tags.
3- Consider the best price, not the cheapest
When it comes time to outsourcing, the cheapest price is not always the best deal. It’s the value/price ratio! Like we discussed earlier, there may be a dozen ways to do a specific thing in WordPress. If a candidate contractor offers a price slightly higher than others, try to ask them and figure what specific feature or capability makes them eligible for that.
If your project is just another ordinary WordPress conversion project, then anyone who knows Elementor and Photoshop can convert it. In other words, there is not high loyalty and quality standards for you or your client. This means that you’re better off considering a lower price. However if you have a special and loyal client who trusts you because you respect their values and brands, then you should make sure your outsourcing contractor shares those values as well so the final product you deliver to your client is coherent, consistent and seamless.
In which case you should not consider the low prices and be open to pay more for a team who aspires to high-quality standards and cares as much for your client as you do.
4- Work with good communicators
When outsourcing WordPress development, communication is maybe the most important factor to take into consideration after the value for price. The best teams to collaborate with are not those who have the best engineers or best-in-class designers, they are the best communicators. The most important factor that leads to a positive and progressive collaboration is communication, and without proper communication, your collaboration will be painful and will fail to produce satisfactory results.

Make sure you know how you’ll communicate with your contractor team. Is it through a WhatsApp channel? Or an advanced briefing section built into their website? If you’re considering a long-term relationship with the contractor team, it’s good if you can establish a direct communication line and account manager who can directly interact with you.
Ideal white-label outsourcing teams offer different communication options such as phone calls, Zoom calls and briefing sections for their high-end and loyal clients.
5- Don’t proceed without a plan and written agreement
A risk factor of many outsourcing companies is that they are a group of coders and designers sitting in some unknown country behind computers and getting something done for you. You’re sharing critical information about your project, your business and your clients, so you should research the credibility of the team you are considering before starting working with them.
Check to see if they have written and coherent terms of service. If they do, then study it carefully so you’re informed about possible incidents along the way.
Do you see your rights reflected in the agreement you sign? Do they have a refund or dispute policy? Do they accept your NDA terms? And so on.
Furthermore it’s best practice to use the briefing section you are granted to write down and document everything so it can be used in case it’s required in the future to refer to a specific part of the conversation or project. Conversations made over the phone or on a Zoom call might not be referred to in the future if necessary.
6- Find reliable partners – not doers

An ideal team to get help from should be like any other team member, not an outside contractor just working behind the scenes delivering projects. If you want the best outcome from an outsourcing collaboration, you should foster a solid relationship that rewards both you and your contractor team and makes them as integrated into your team as your employed engineer or product manager. That is, of course, a mutual responsibility for both parties to achieve this level of trust and integration through offering each other the maximum value and mutual benefits.
What is WPDone?
Earlier this year, we rebranded our former custom modification subservice called Artbees Care into a brand new white-label WordPress Service called WPDone. WPDone is powered and operated by Artbees, the maker of the Jupiter X WordPress theme, and applies a decade-long experience with WordPress in delivering its clients’ projects.
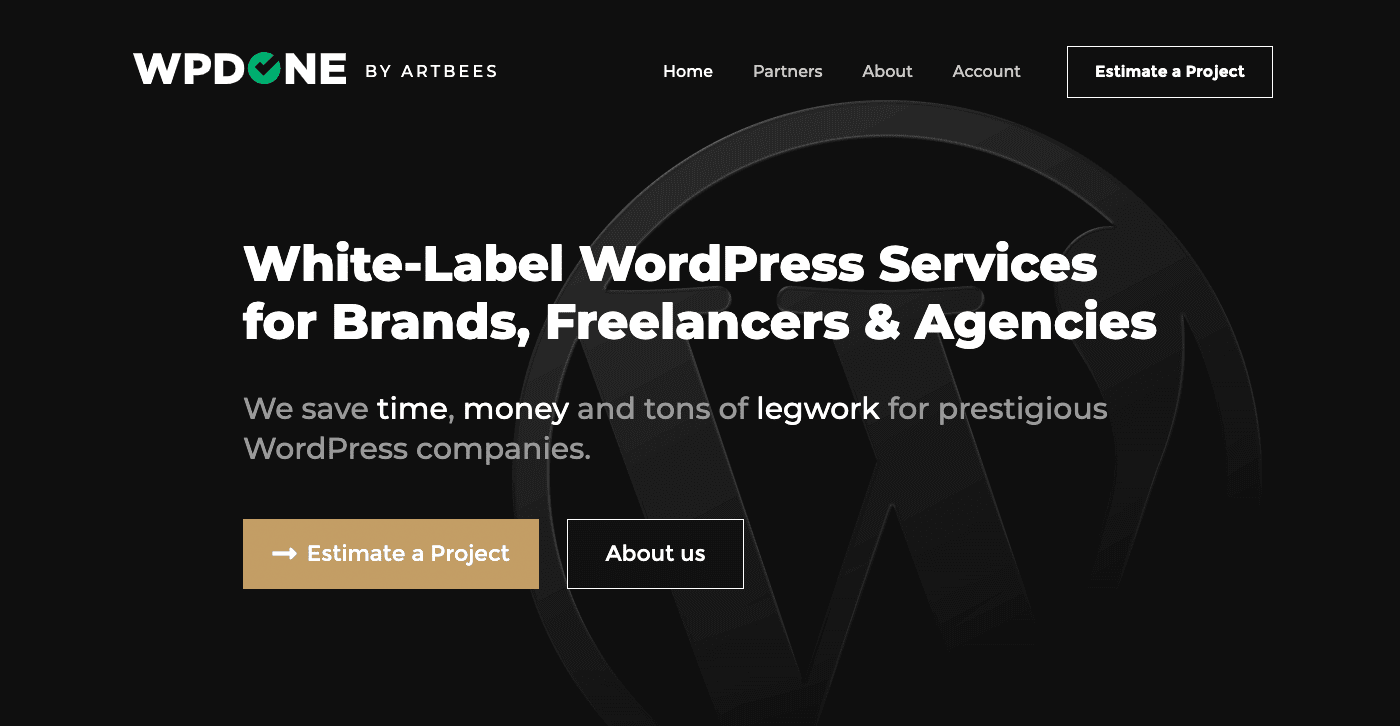
In WPDone, our goal is to become another member of your team – not just a contractor – and to build good products without our name on it. We helped achieve the highest quality standards, development technologies and aesthetics values for more than 11 global WordPress agencies from different continents within the scope of more than 600 WordPress projects.
If you’re a high-volume WordPress freelancer or agency and are considering outsourcing WordPress development as part of a long-term collaboration with a white-label savvy WordPress team, then you can check out the WPDone Partners program for surprisingly good rates considering the high quality service you get.