Regardless of what kind of business you run, you’ll always have times when reality doesn’t match your expectations. But without the proper data, it’s virtually impossible to determine what needs to change with your marketing. One key piece of data is the conversion rate. This figure helps you test out the effectiveness of your marketing plan and determine where and how to adjust it. To learn more about conversion rate and how to boost it using cross-channel personalization, read on!
Explaining the conversion rate
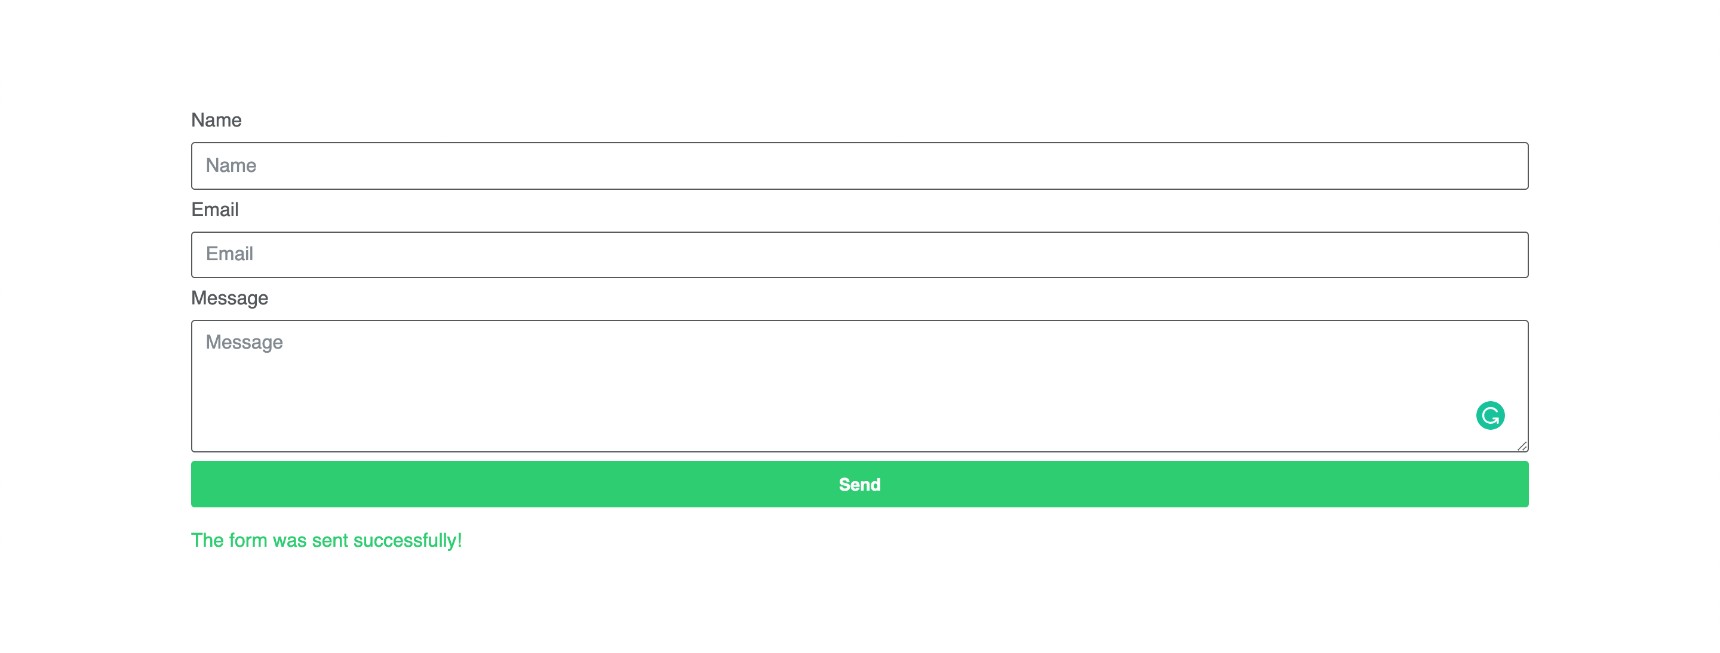
First thing’s first, what is a conversion rate? It’s a marker showing how many visitors from different sources have been converted. Depending on your marketing goals, customers count as converted if they have made a purchase, downloaded something, subscribed to your website and more.
This indicator will be the yardstick by which you measure how well your marketing works. Whether you’re running campaigns or relying on the design of your webpage, paying attention to your conversion rate will help you regularly adjust your strategy to ensure maximum return on investment. If something needs to be altered -or scrapped completely -your conversion rate will tell you.
The specific conversion metrics you monitor depend on the kind of business you are running. Here are the most common kinds of conversion rates out there:
- Converting a visitor into a prospect (someone who fills in a contact or inquiry form)
- Converting a visitor into a subscriber/lead
- Converting a lead into a customer
- Converting a customer into a repeat customer
Using personalization to boost conversion
Crafting a better user experience involves more than just a well-designed website. Rather, it’s about giving the user what they’re looking for in the form of personalized content. Nowadays, personalization doesn’t stop at adding a user’s name to your emails, but involves a whole strategy for personalization at scale. To put your best foot forward through personalization, you need to make sure that you have a unified cross-channel strategy. Here are some ways to use personalization to boost your conversion rate:
Personalize text with dynamic keywords
What’s a dynamic keyword? It’s any text in your content that can be replaced with a new value, and it’s a key element in personalization. At the simplest level, dynamic keywords help you address each user individually based on their attributes. Because they feel like you are addressing them personally, users are more likely to respond to your marketing material and ultimately convert.
Target specific locations
Geolocational targeting lets you change content based on location of your visitor. This could involve changing the language of your landing page, or showing the local weather conditions. Businesses use this tactic for different purposes, but it generally increases engagement and chance of conversion. Geo-targeting works partly because search engines are more likely to show localized page results or sites with regional pricing.
Personalize your landing pages
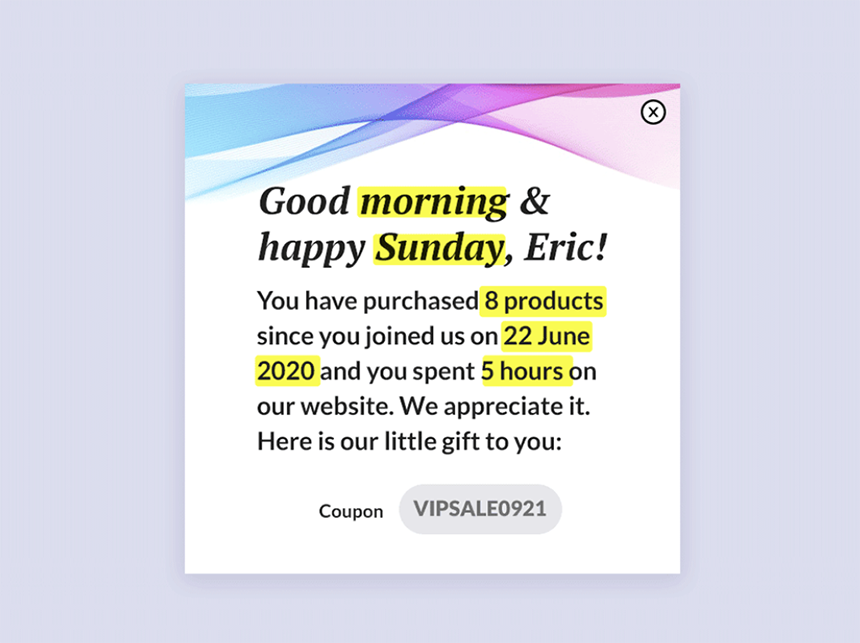
Relevant customer segmentation and audience behavior should guide how you choose to personalize. With the right information about customer attributes, behavior and preferences, you can craft custom messages that truly feel personal.
Personalization can be based on the following:
- On-page behavior including:
- Scroll: scrolling halfway down the page triggers a popup.
- Click: users who click on a specific CTA receive an email.
- Visit: users visiting a specific category are shown a popup.
- Spent time: users spending more than 30 minutes on your website are shown special offers.
- User activities including:
- Number of orders: sharing coupon popups with users who have placed a certain number of orders.
- Amount of orders: Thank users who have spent over a certain amount with a ‘thank you!’ popup and a discount for future purchases.
- Away users: share a personalized greeting and recommended blog reading with users returning after a period of inactivity.Purchase-history: increase engagement by adding cross-sell items to your website and emails.
Personalize your email campaigns
Customized emails do more than just boost your open and click rate. They foster a trusting relationship with your users, allowing you to increase conversion and ultimately beat out the competition. Your emails should be relevant and personalized from the subject line to the greeting and content.
Wondering what the easiest route for email personalization is? Growmatik can help you out. The software covers both personalization and sending so that you don’t need to rely on a third-party email service such as Amazon AWS.
For the following categories of emails, personalization can significantly impact conversion:
- Welcome emails
- Upselling and cross-selling emails (with or without discounts)
- Follow-up emails to inactive customers
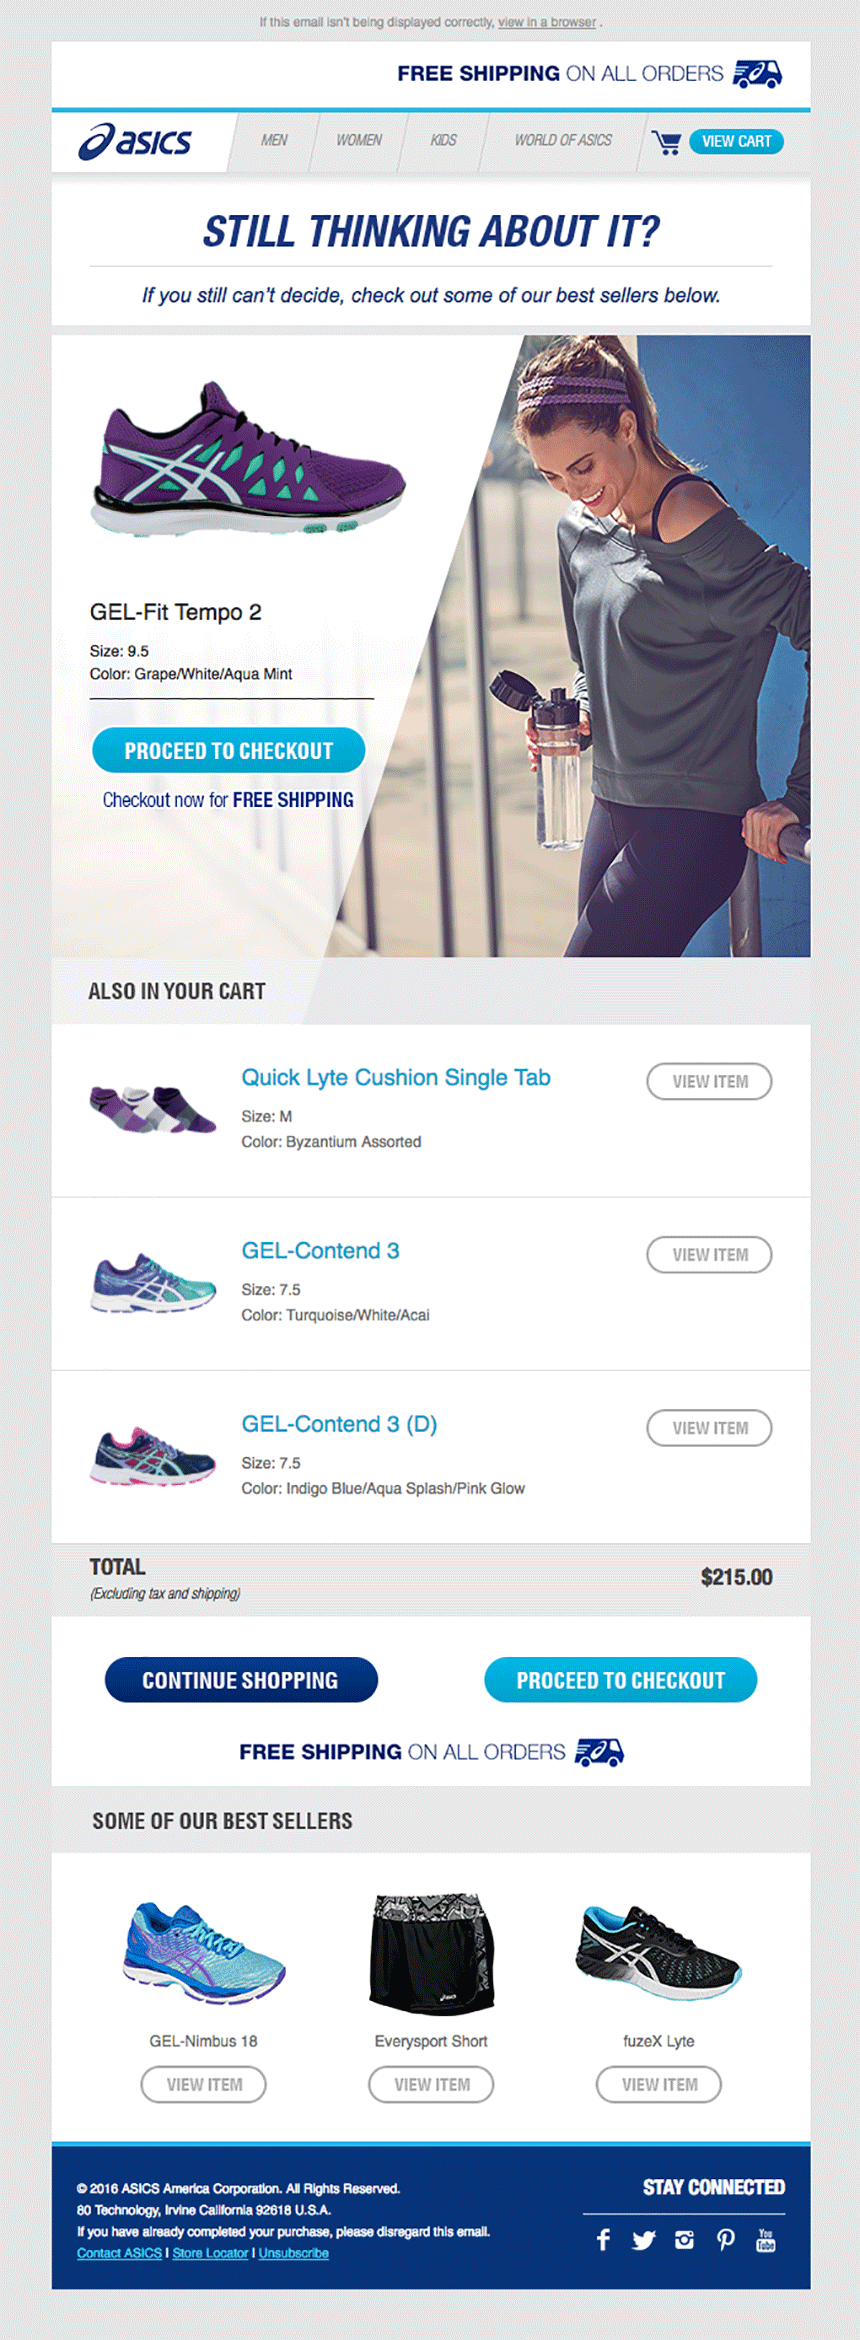
- Abandoned cart reminder emails
- Newsletters
- Special offers to loyal customers
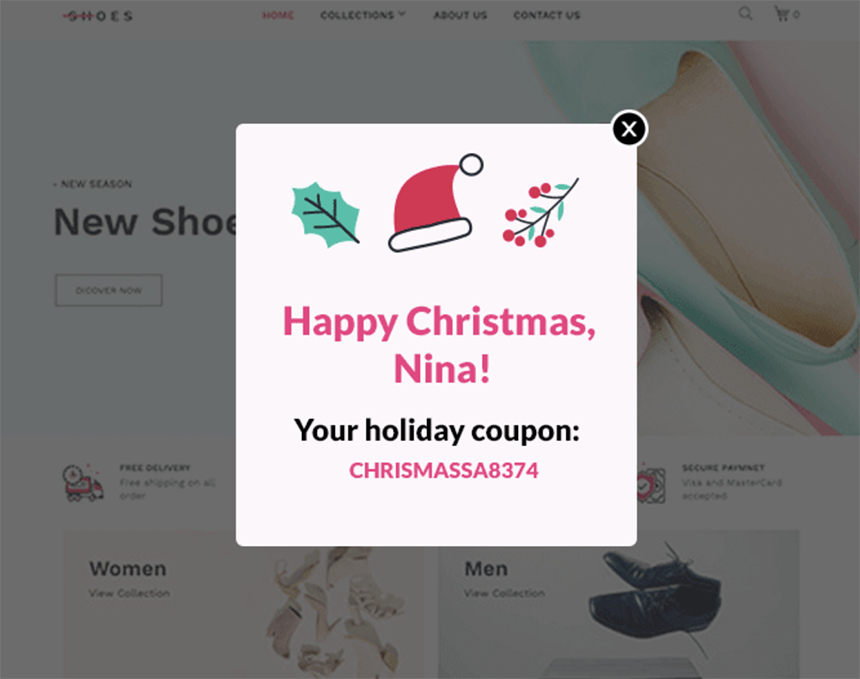
- Holiday-specific emails (such as Christmas offers)
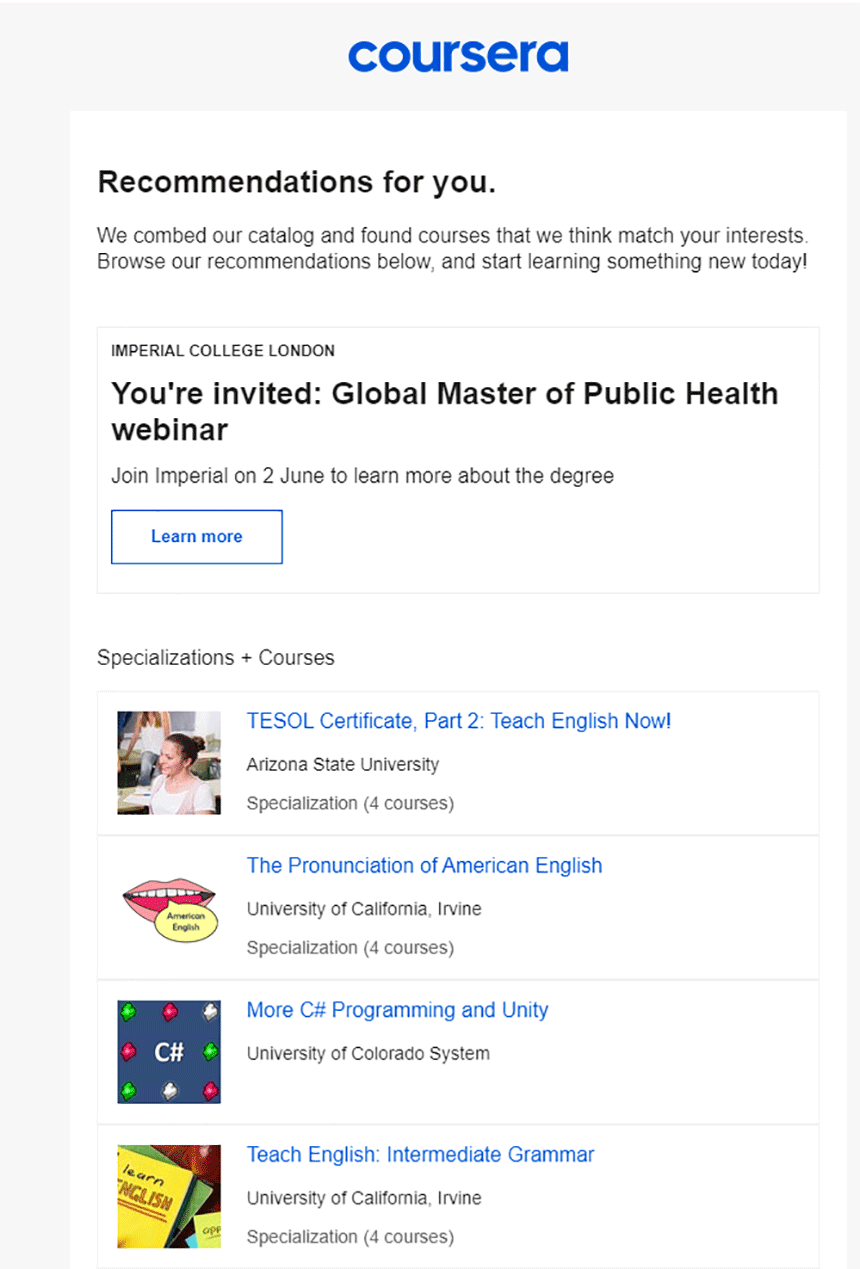
For example, to increase engagement with its courses, Coursera sends personalized emails to its leads and recommends courses that might interest them.
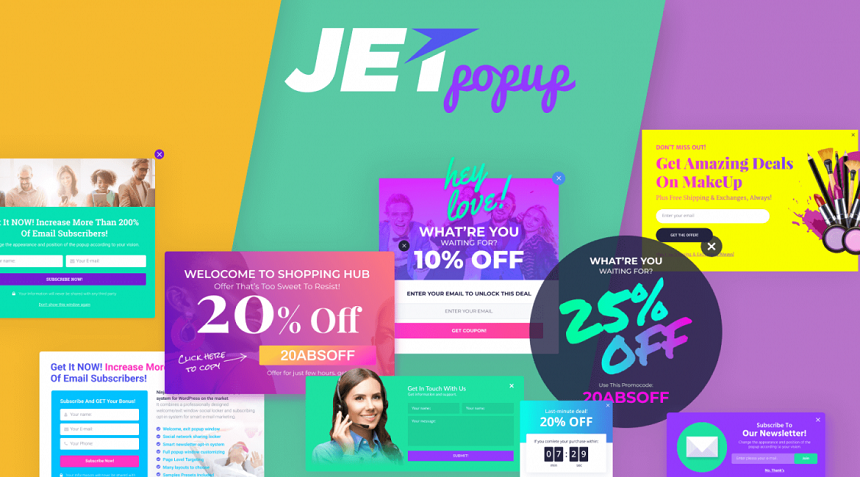
Employ personalized popups
The truth is, displaying popups doesn’t always positively impact marketing outcomes. Annoying, irrelevant or poorly-timed popups even have the potential to make you lose customers. That’s why designing eye catching and highly targeted popups is all the more vital for driving conversion.
Here are some common situations for displaying popups:
- Exit intent: when visitors attempt to leave the webpage.
- Scroll-based: when visitors reach a specific part of a page.
- Value-based: display exclusive offers or personalized messages to your most valuable customers, or to inactive customers..
- Source-based: show different popups to users coming to your page from different sources.
On key holidays, such as Christmas or Black Friday, try offering occasion-specific discounts on your products page!

Display personalized product lists
Use the information you have about your customer’s habits and preferences to speed up the purchase process. Cross-selling and upselling emails are particularly helpful for boosting your conversion rate.
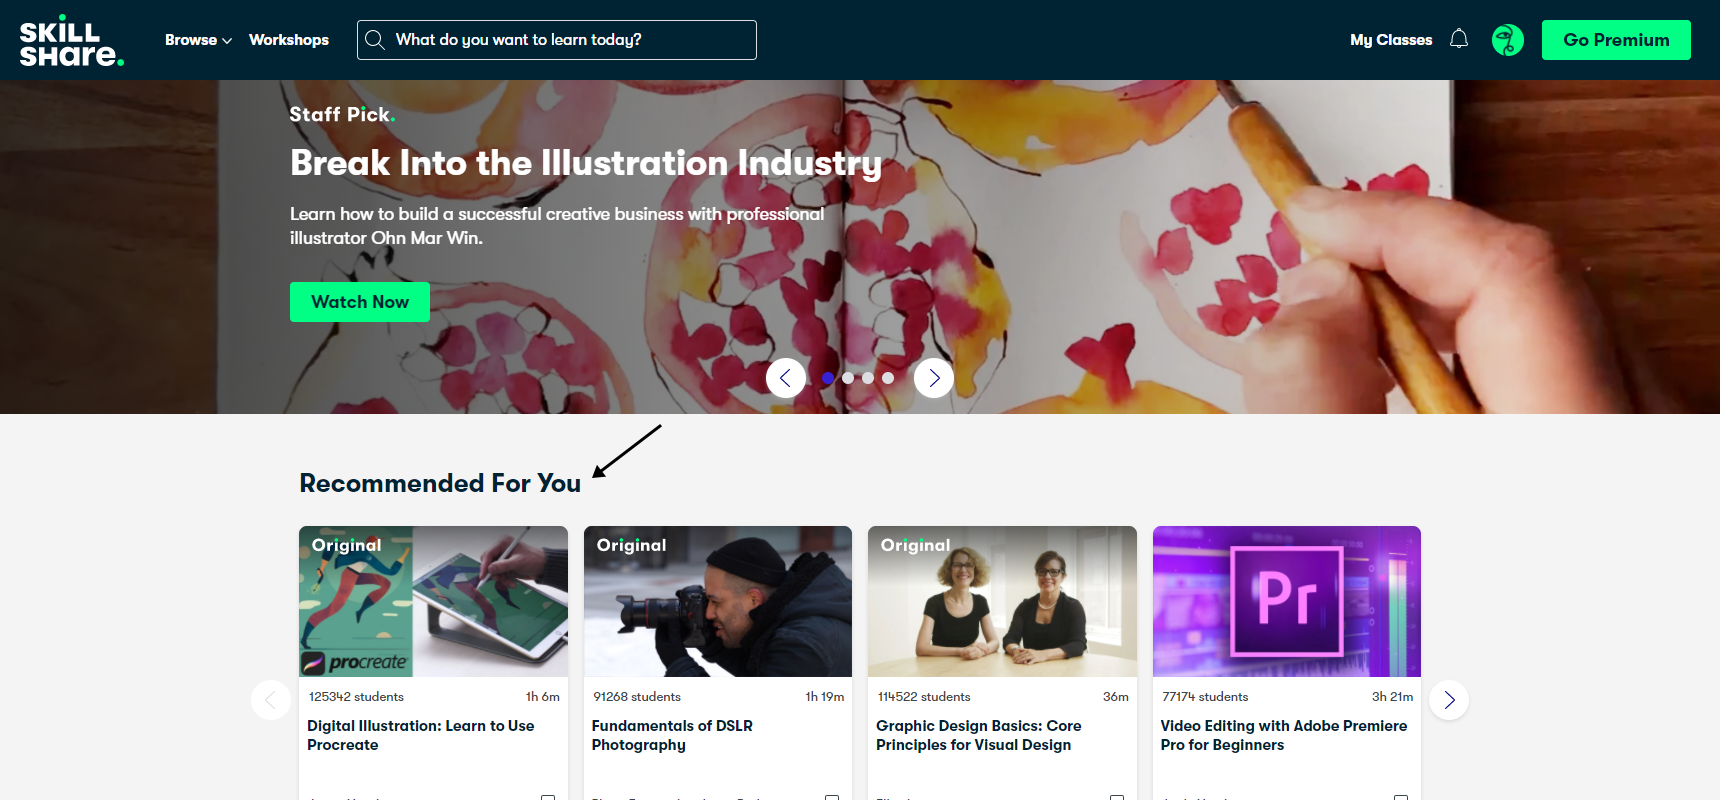
Display personalized blog lists
You can do something similar with blog lists. Use your user’s reading history to recommend new blog posts via personalized pages or emails. It’s likely something will catch their eye and bring them back time and time again.
Implementing personalization to increase conversion
We’ve now covered all the basics behind the conversion rate. Now, let’s look at the nitty-gritty of using personalization to boost it! For this we’re opting for Growmatik as the perfect tool to implement cross-channel personalization.
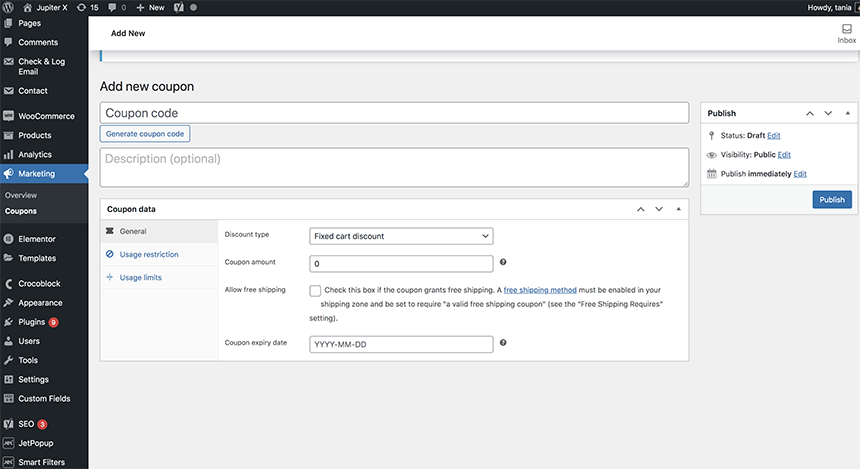
Give VIP customers exclusive offers
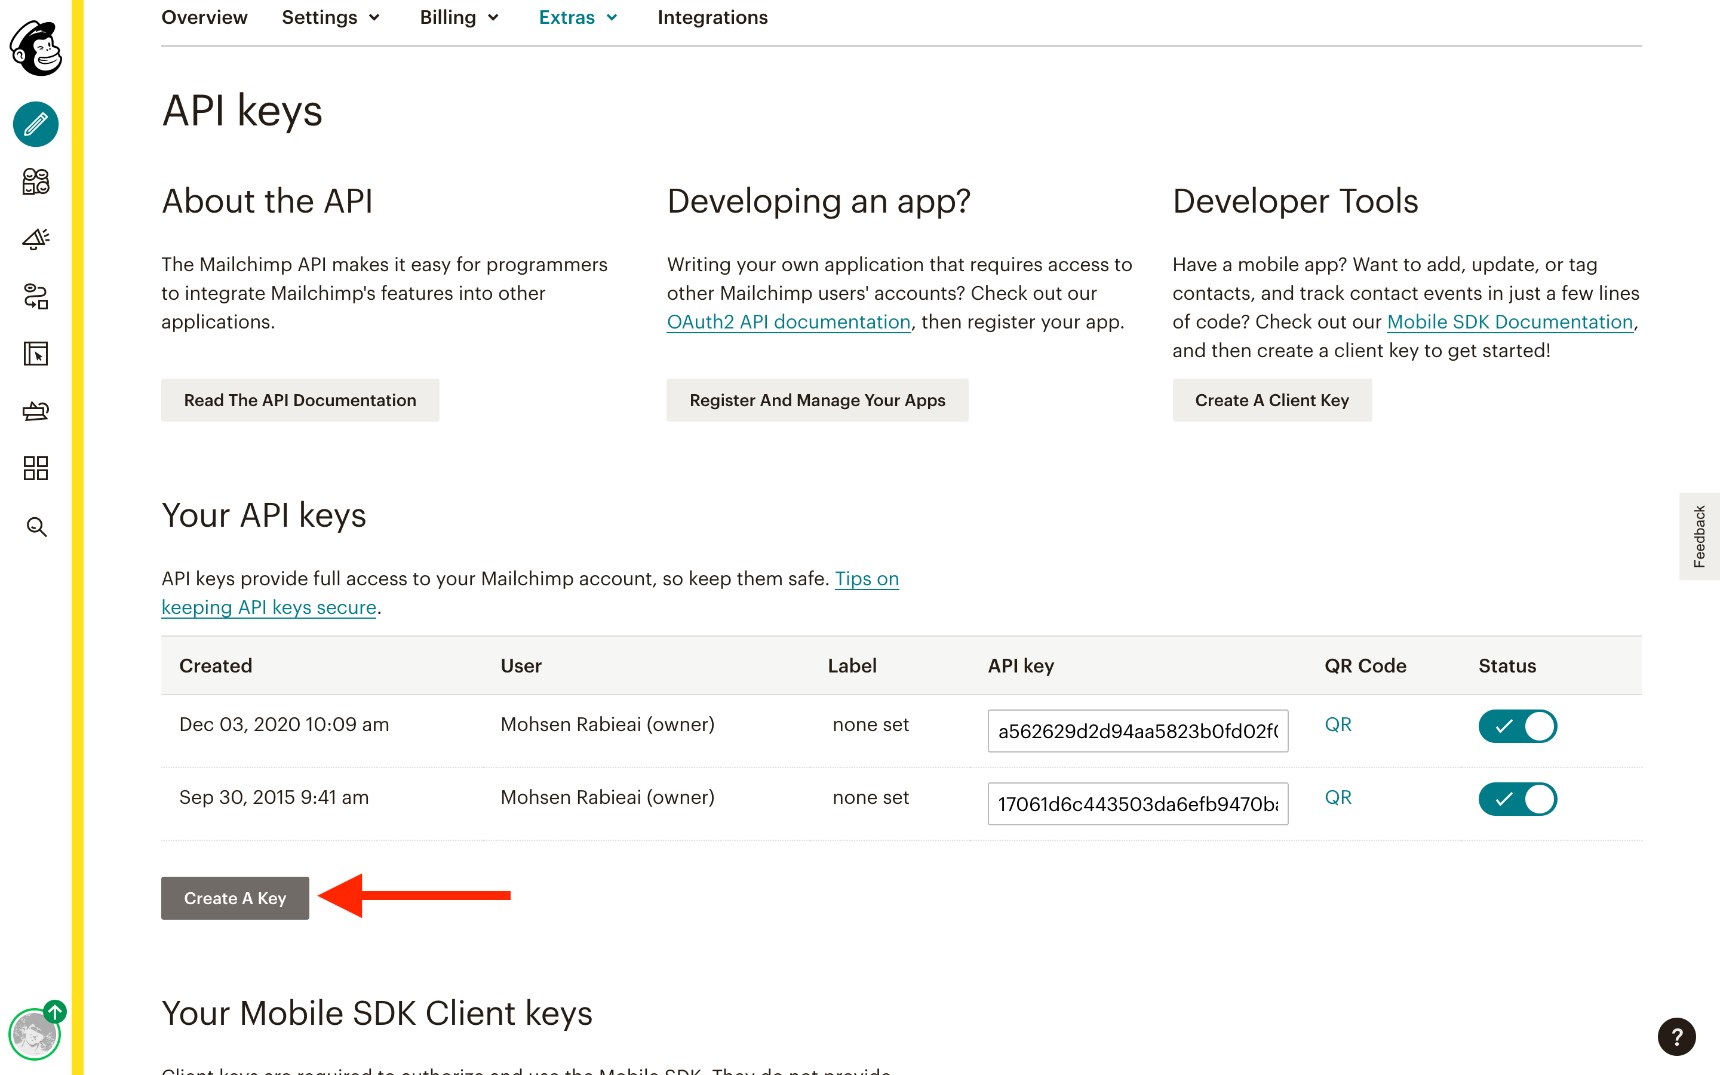
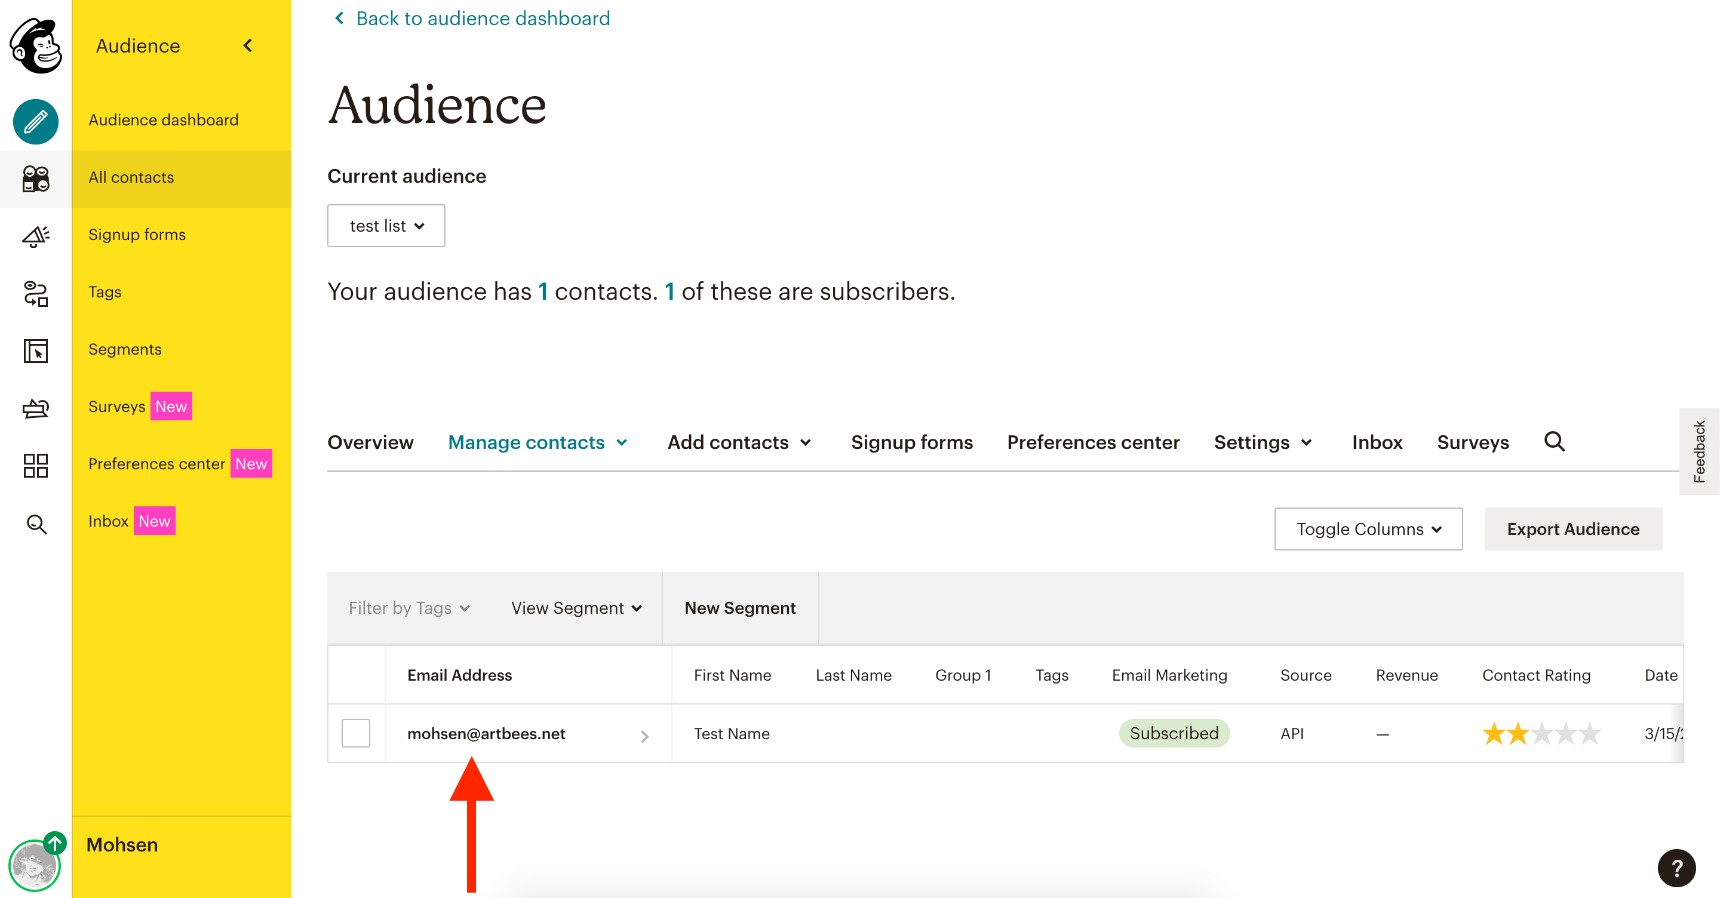
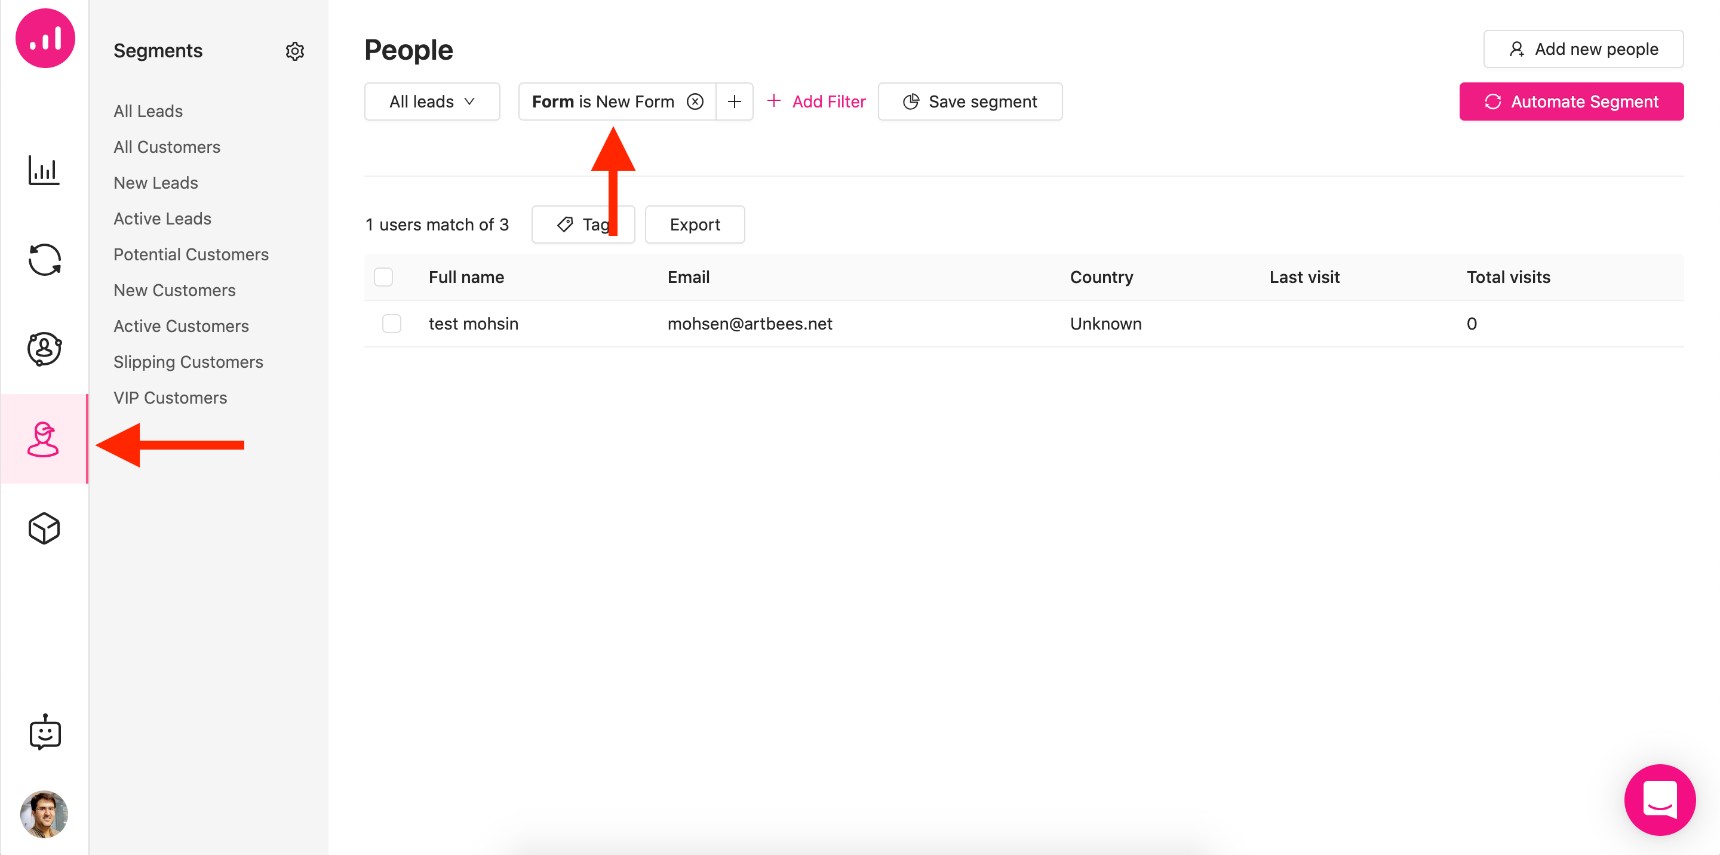
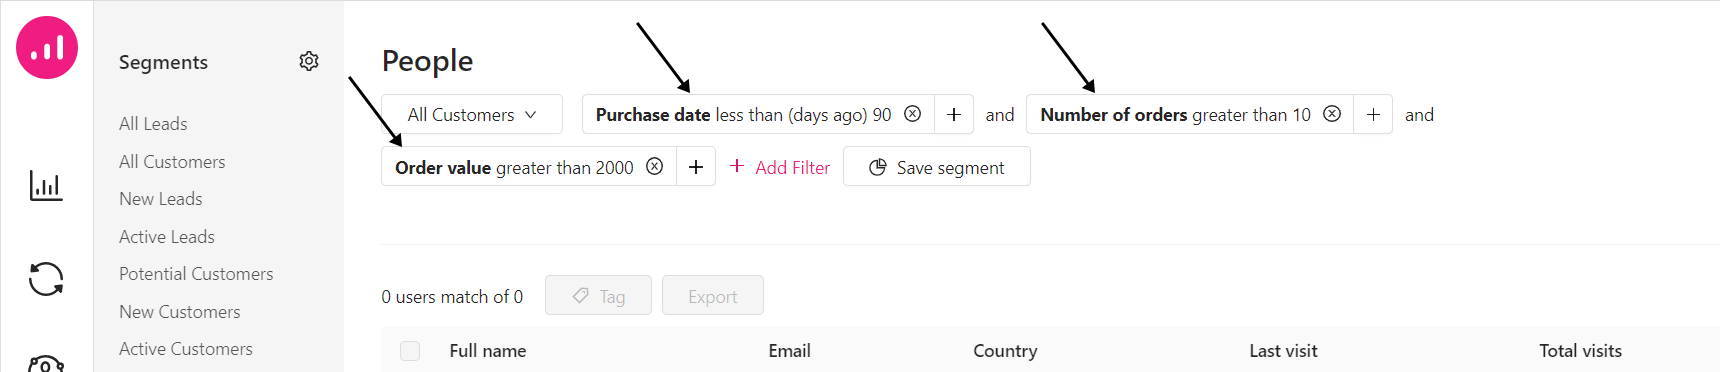
You’ll need a plan for engaging your best customers, or they might take their business somewhere else. This would be a huge loss! According to the book Marketing Metrics, businesses have a 60% to 70% chance of selling to existing customers. I recommend using RFM segmentation to segment your most valuable customers. Next, go to Growmatik’s People page, select all customers and input the following filters:
Shopping activity > Purchase date > less than X
Shopping activity > Number of orders > greater than Y
Shopping activity > Order value > greater than $
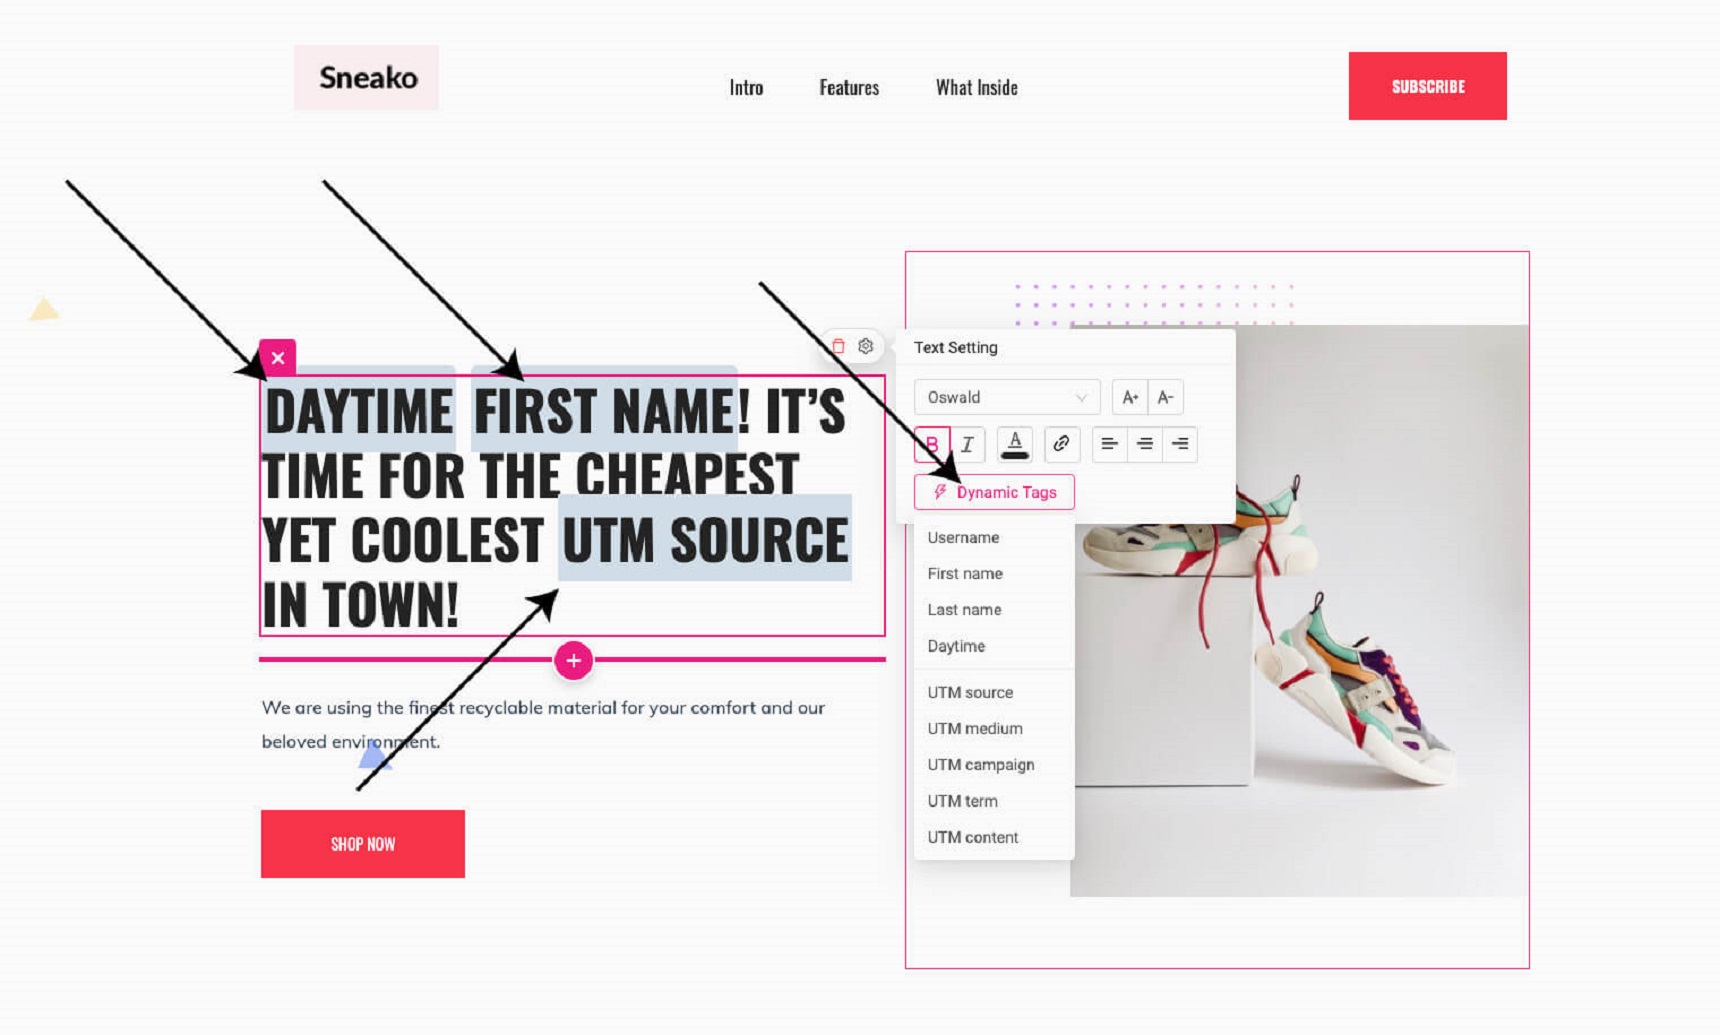
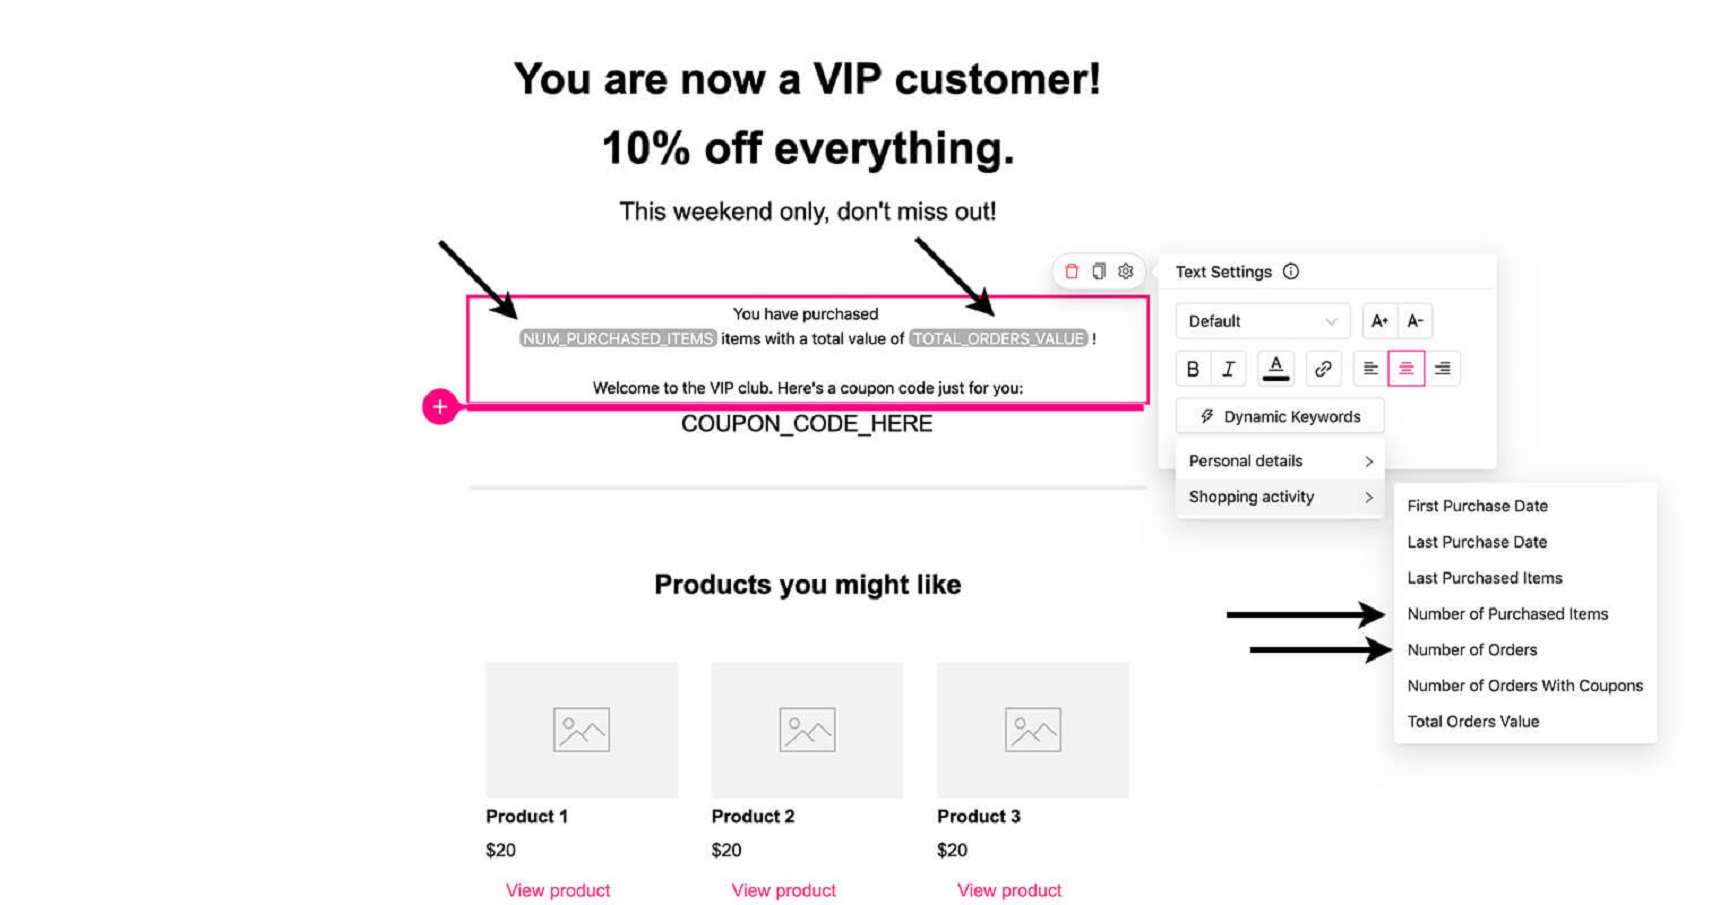
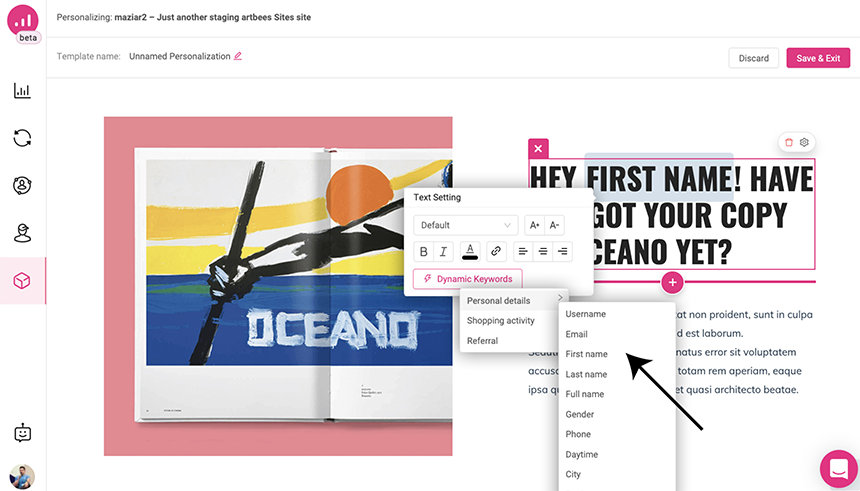
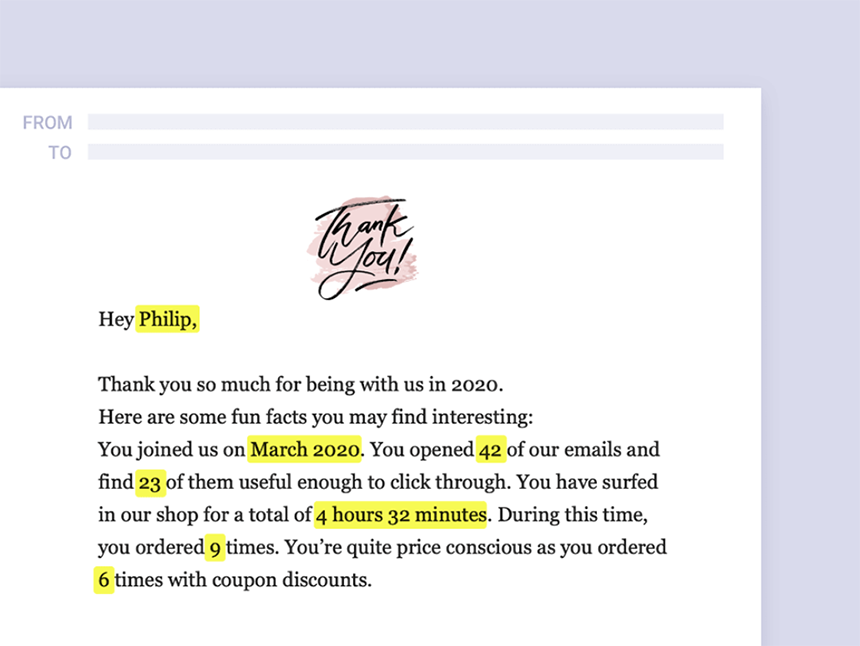
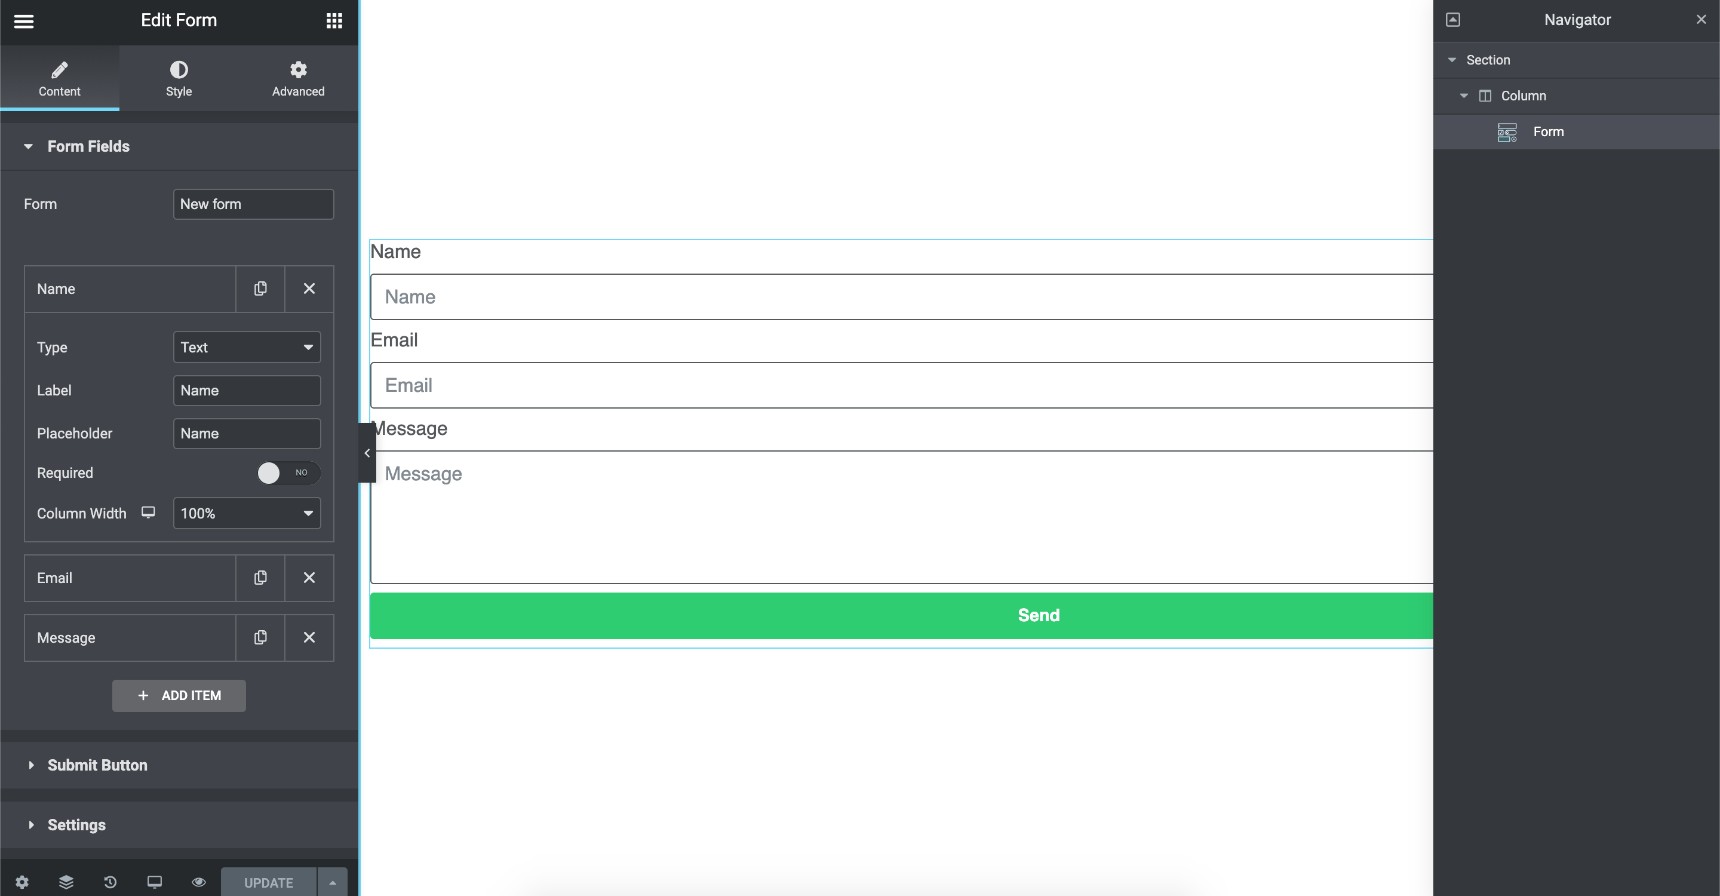
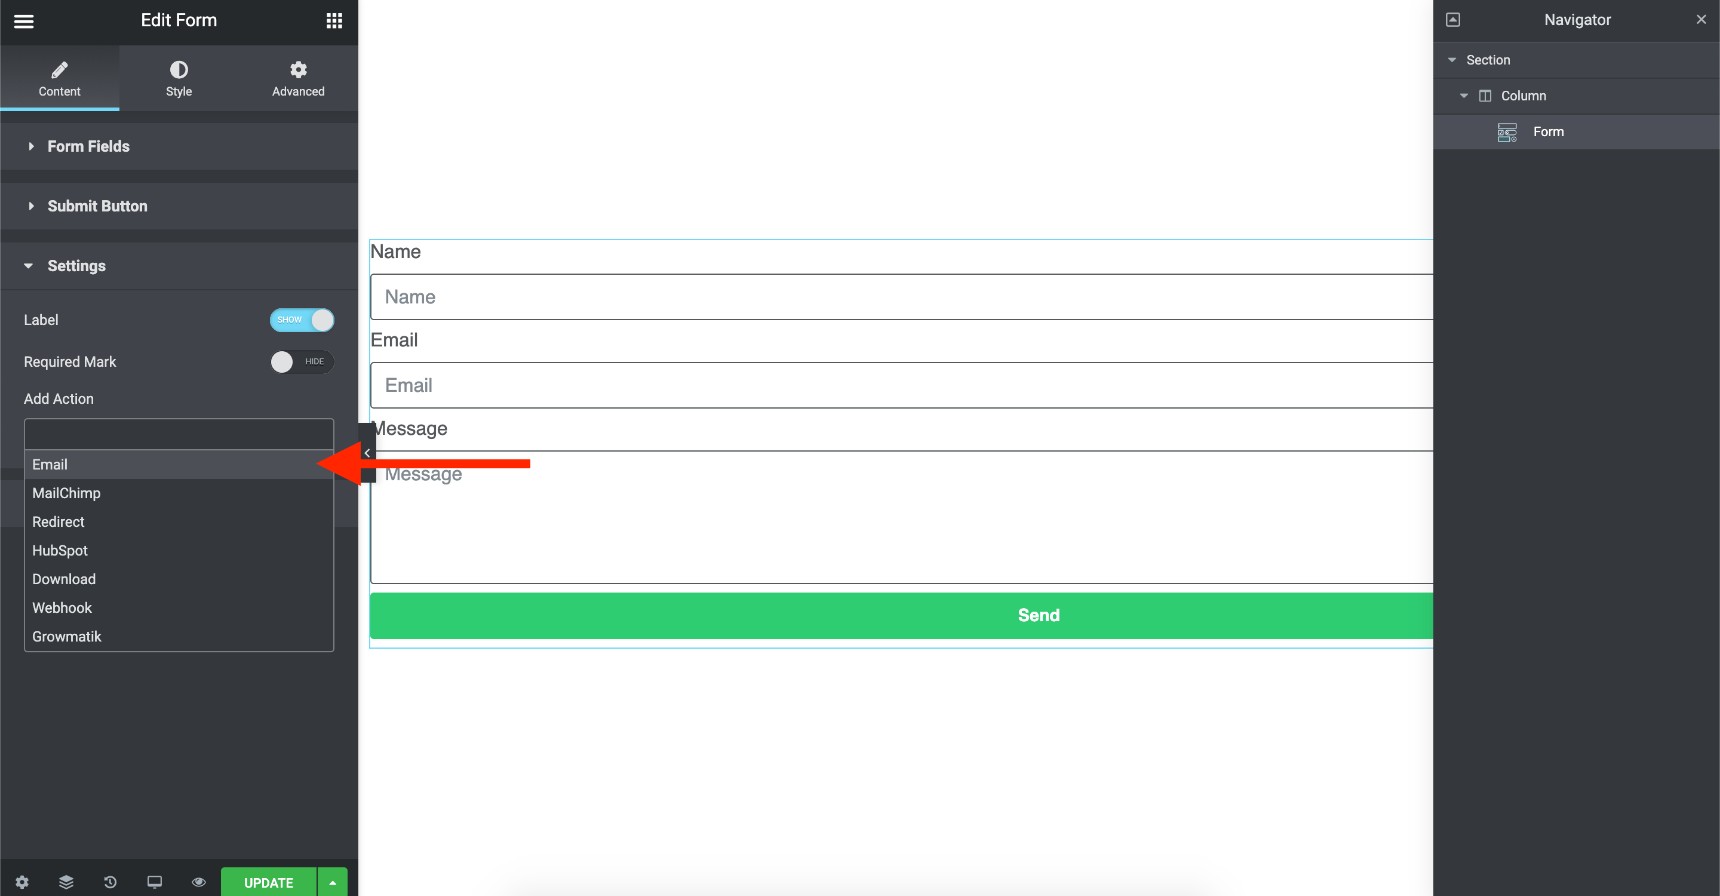
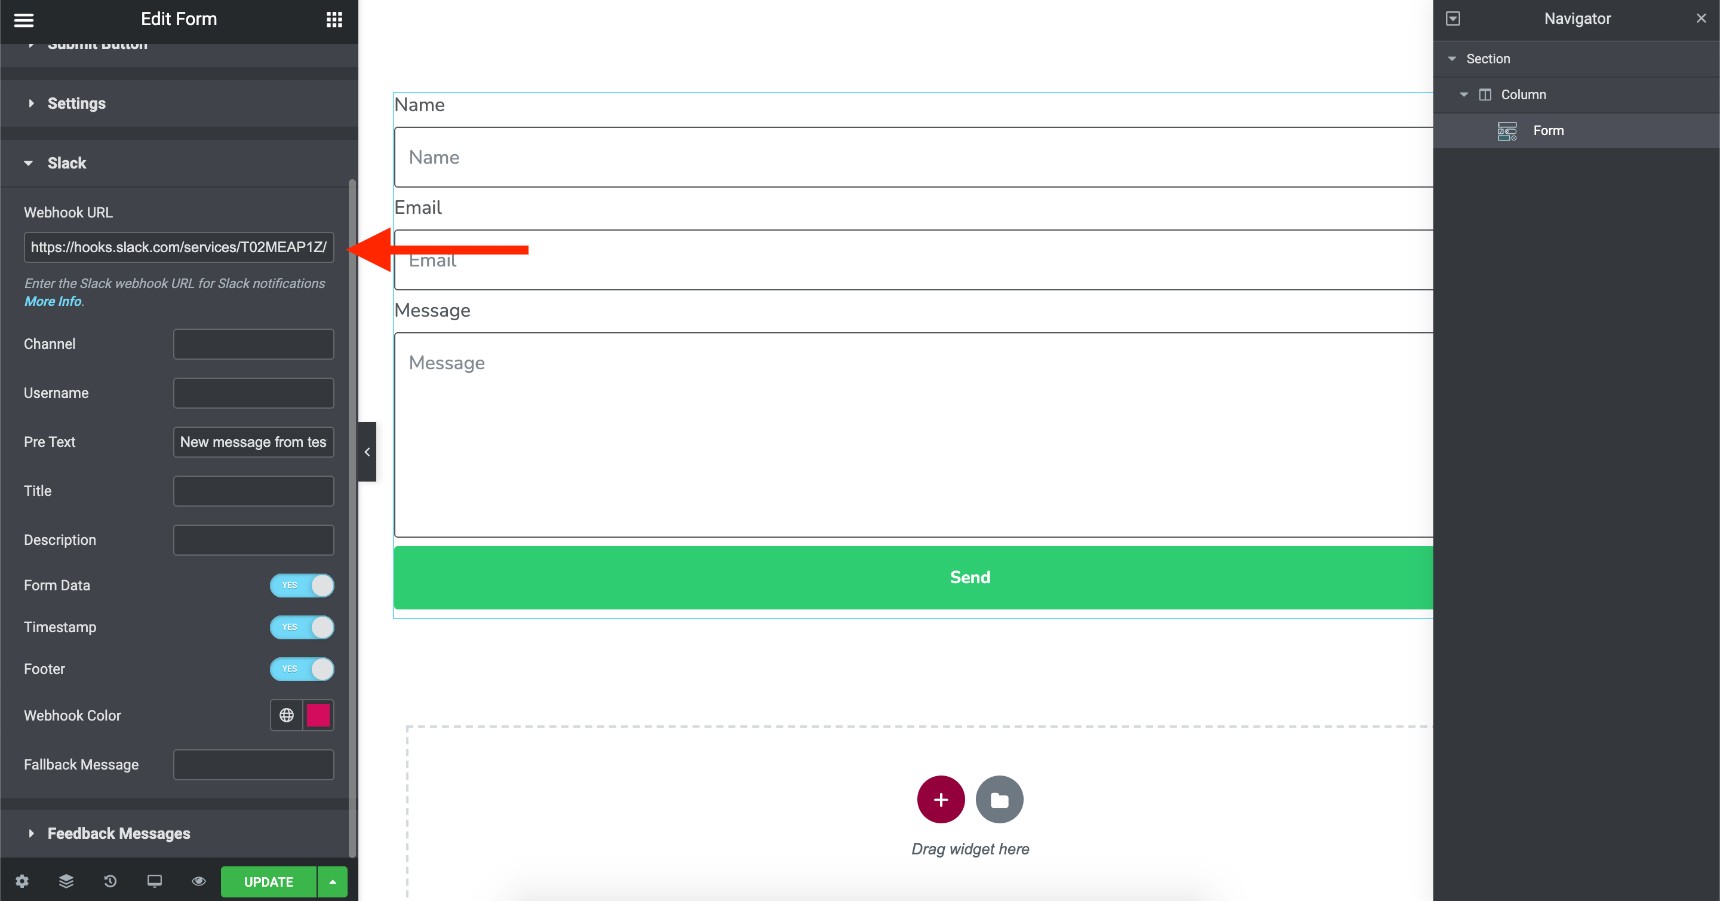
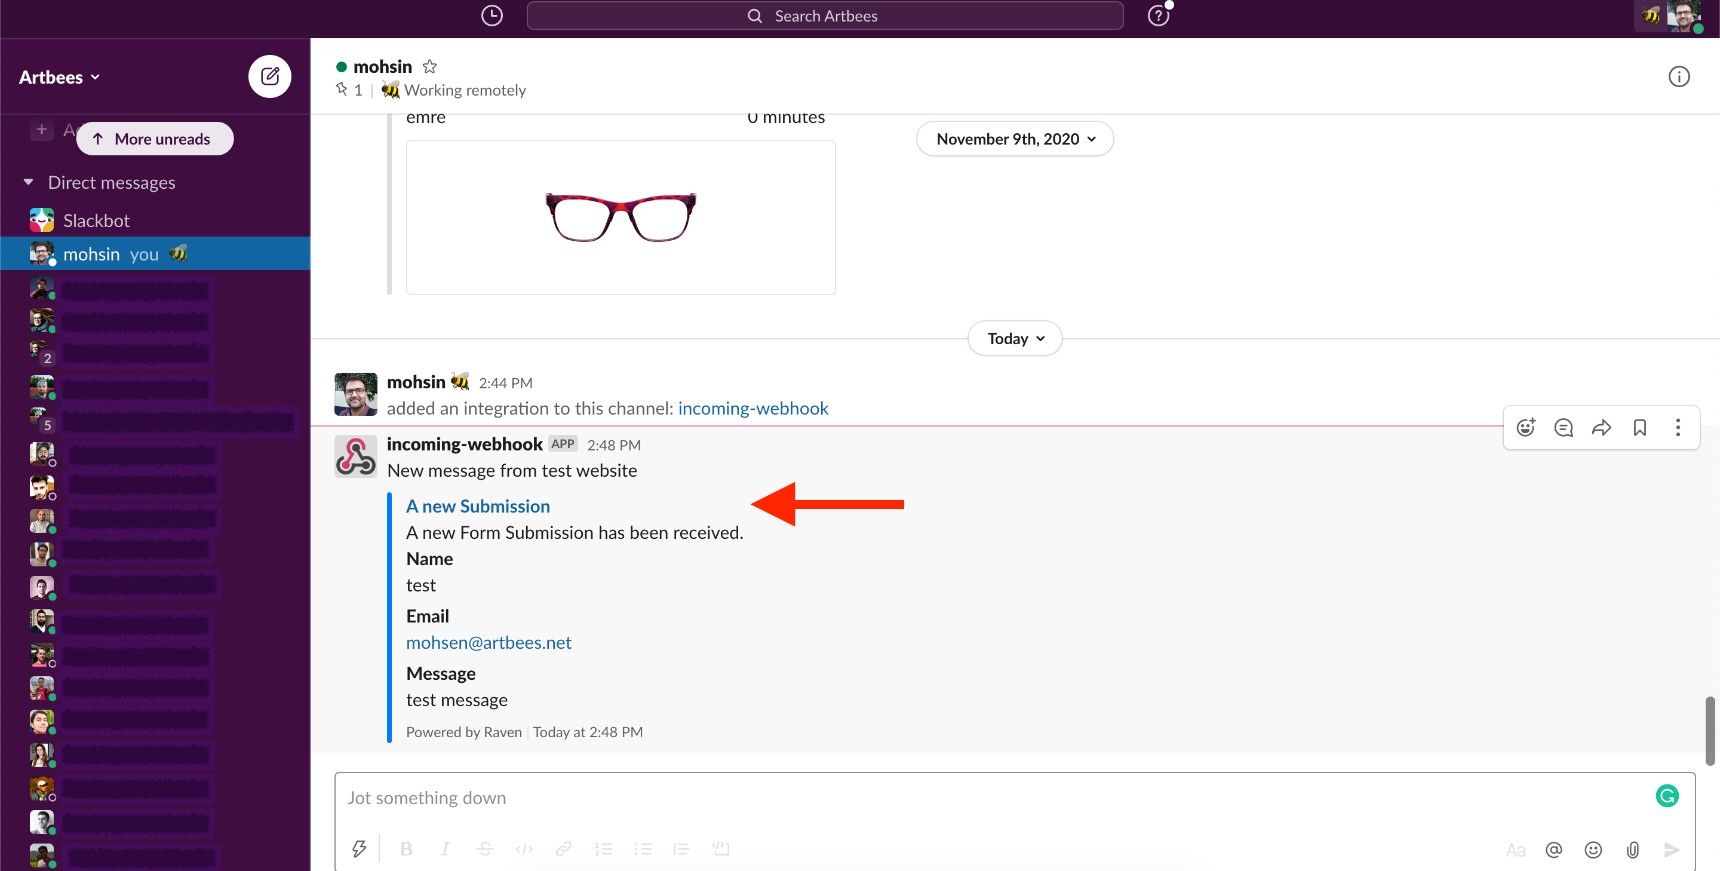
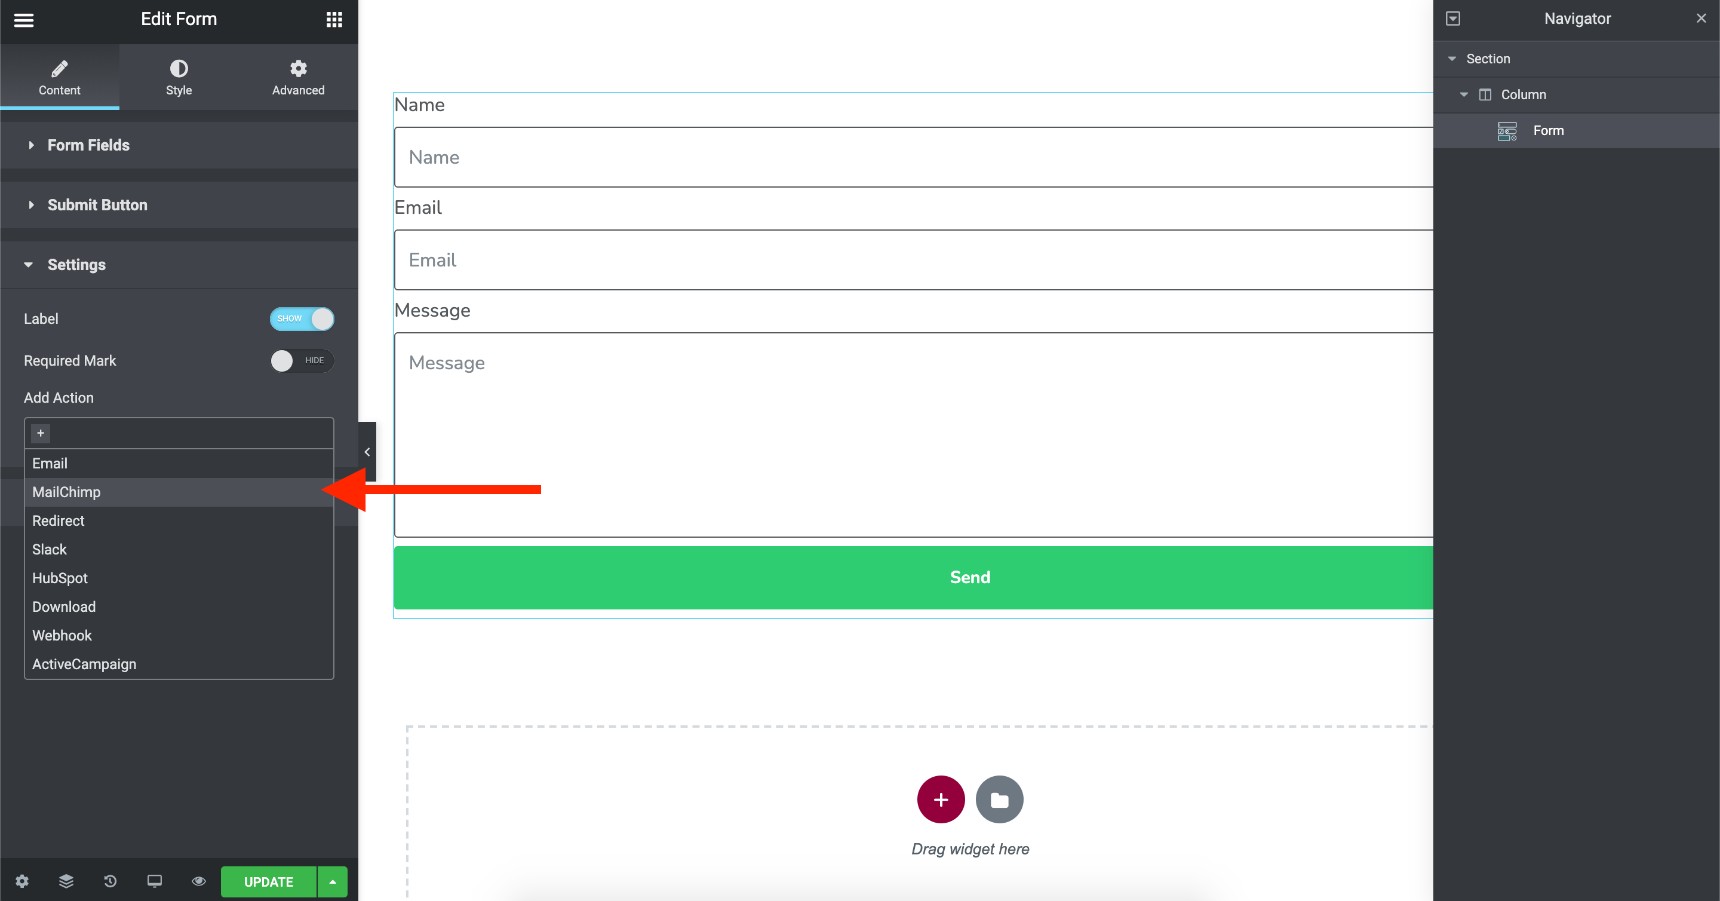
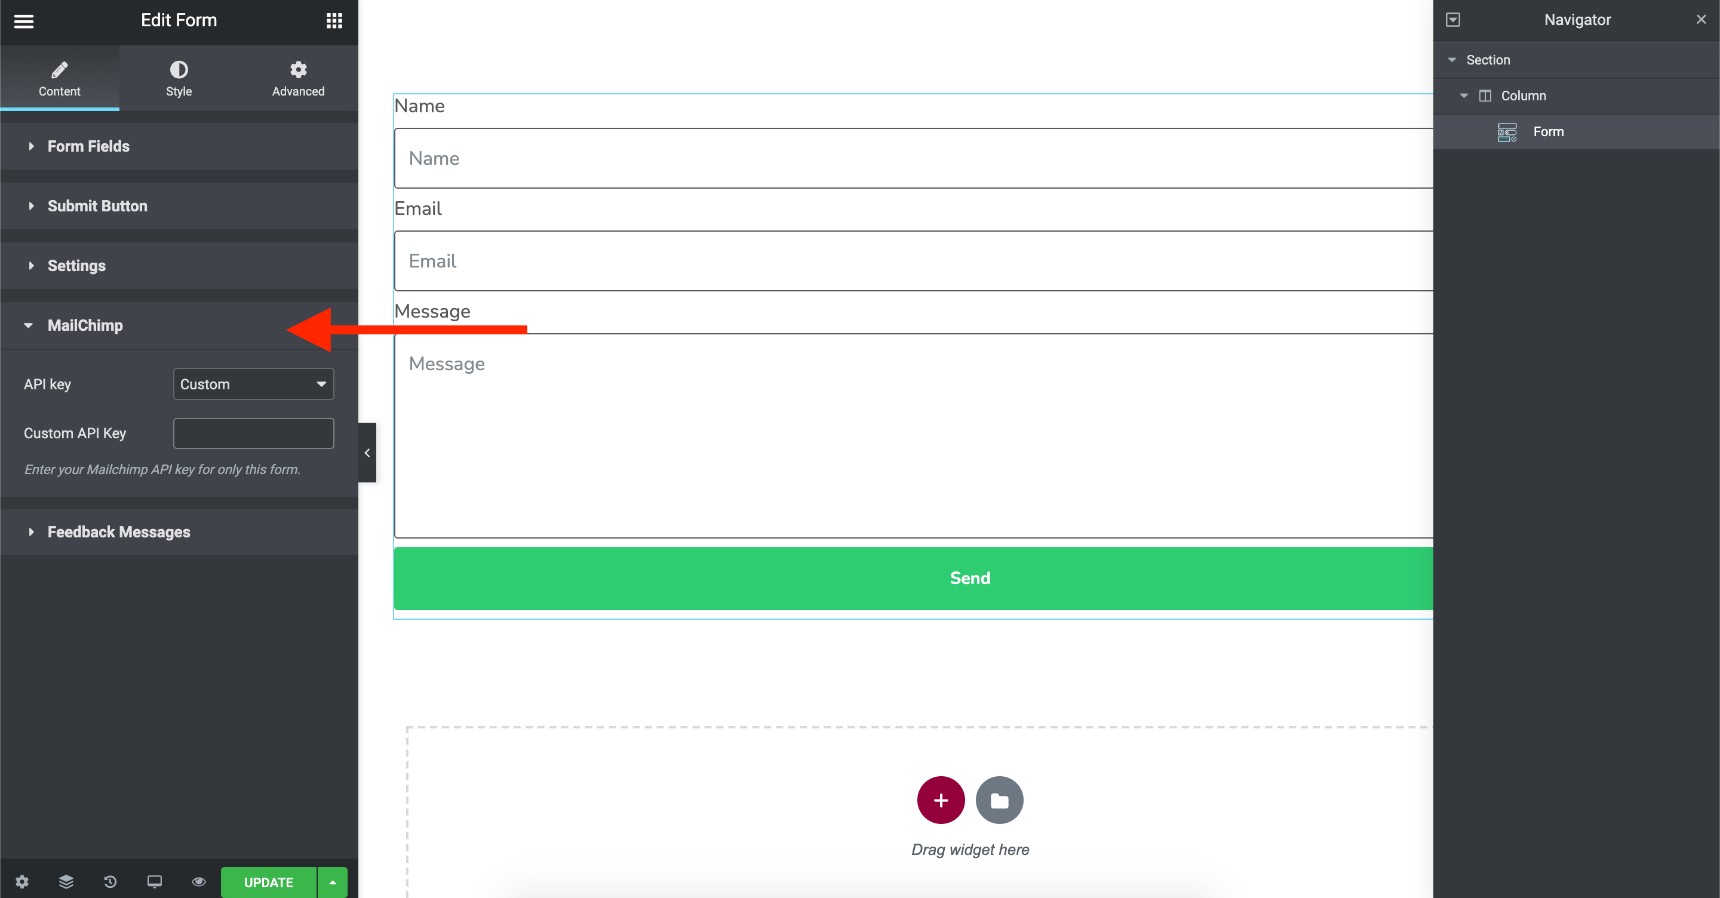
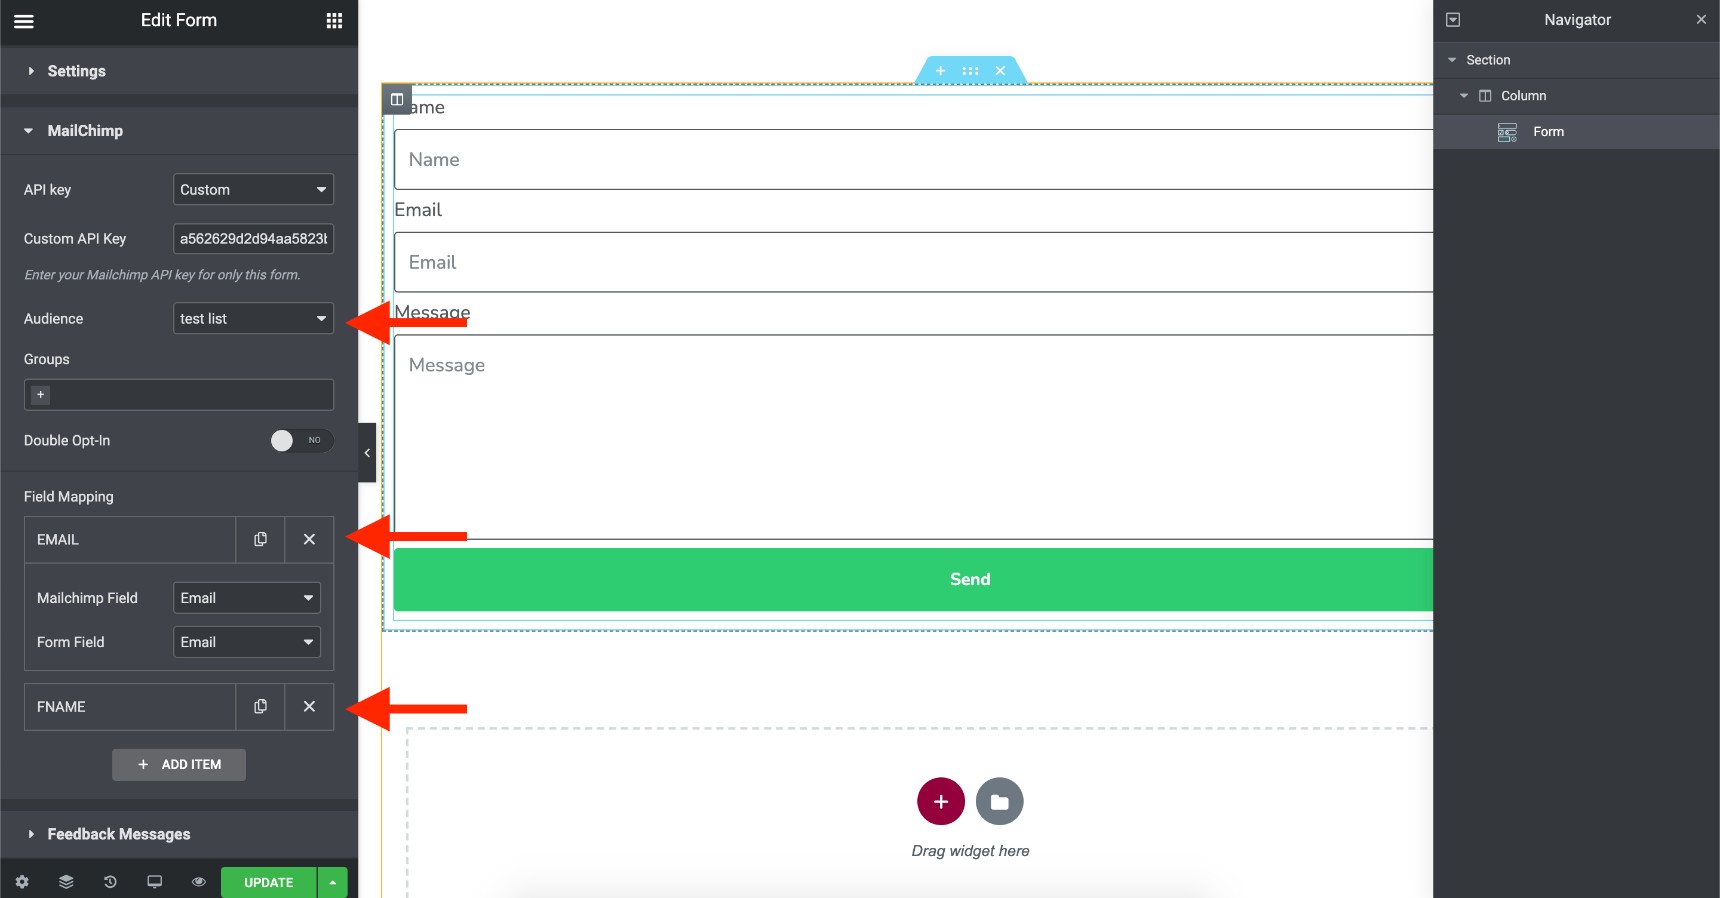
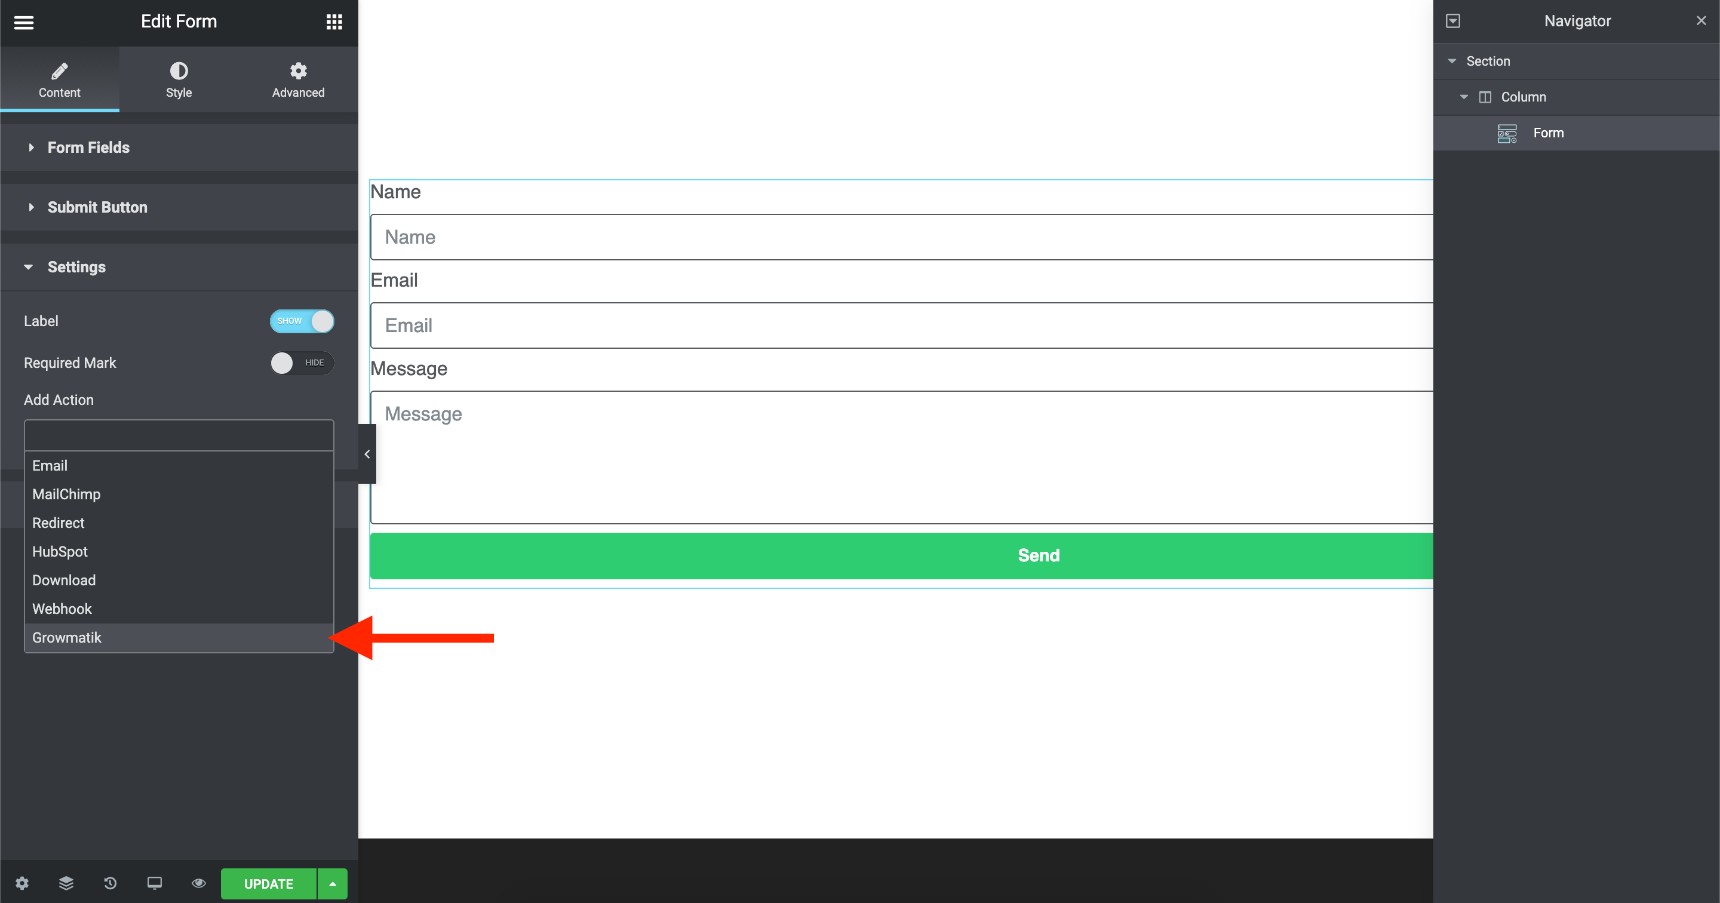
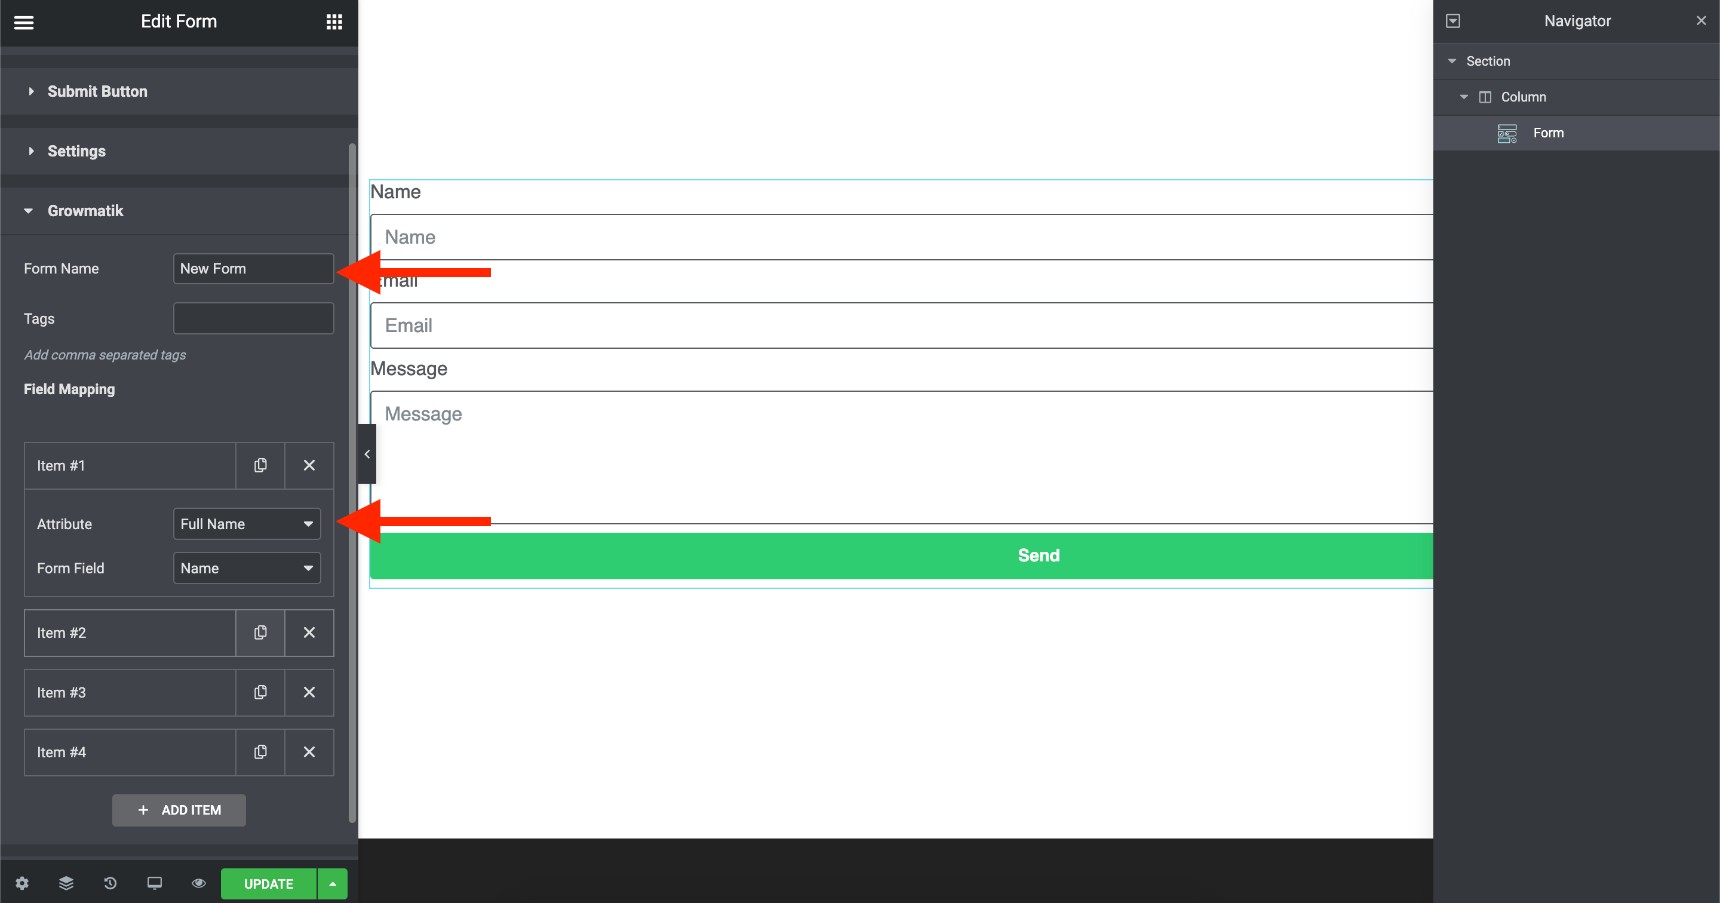
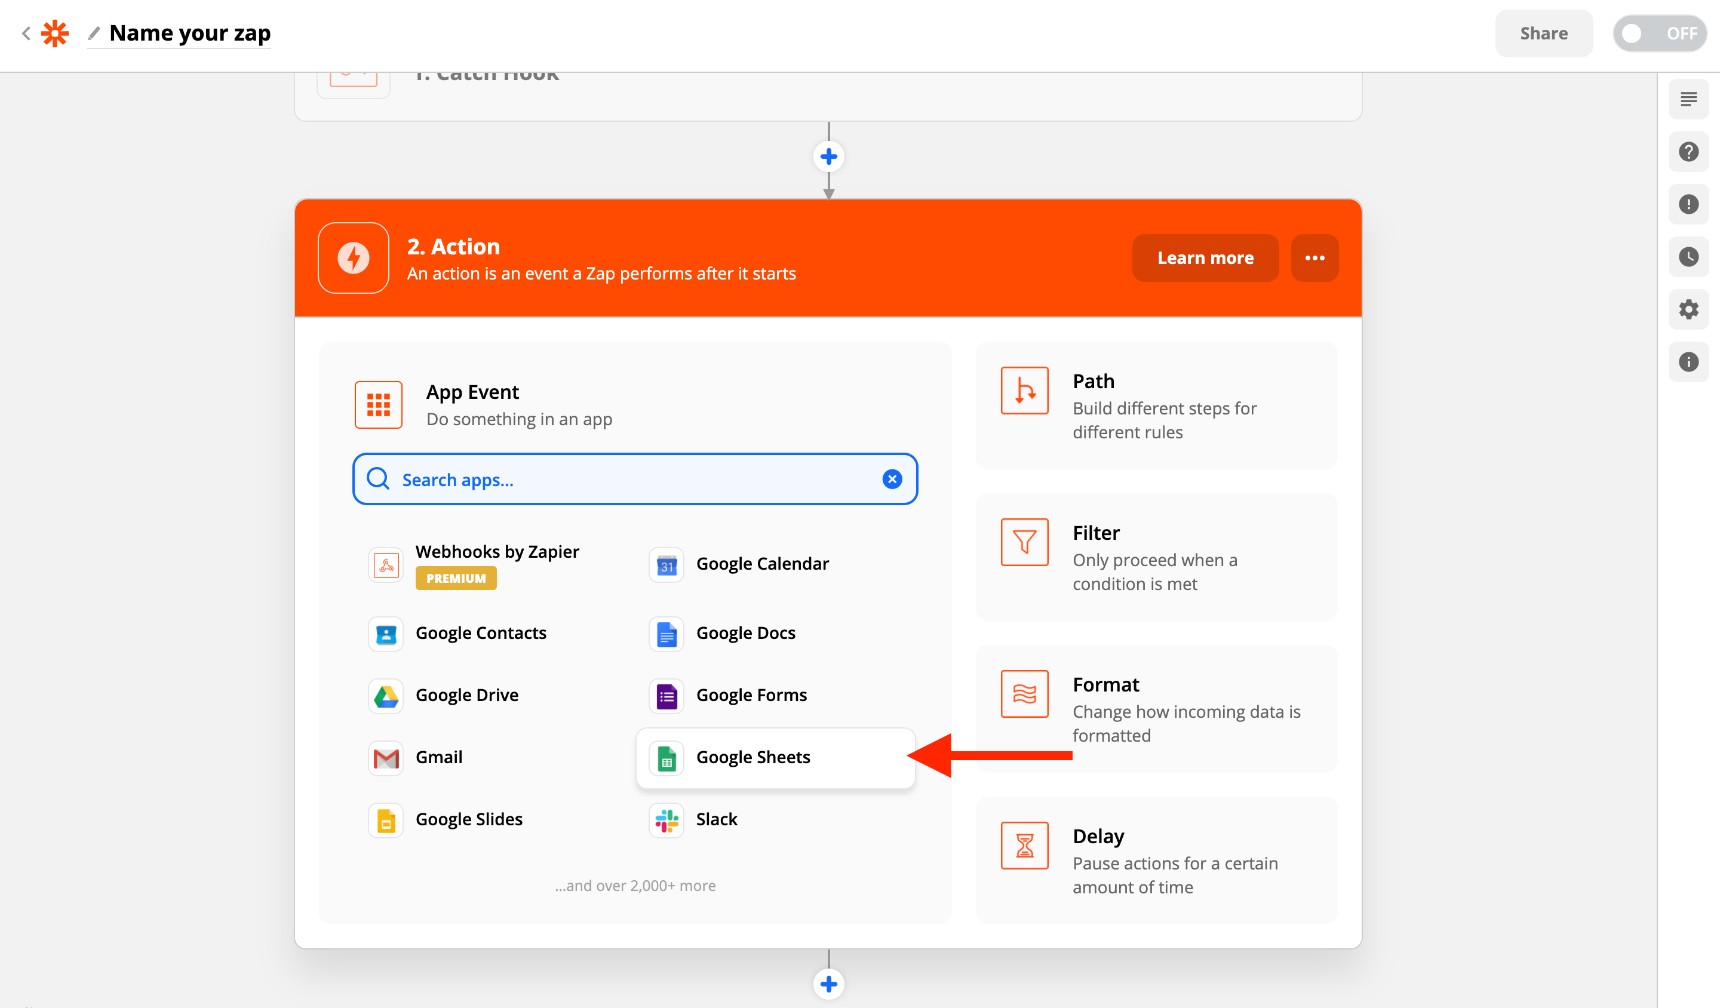
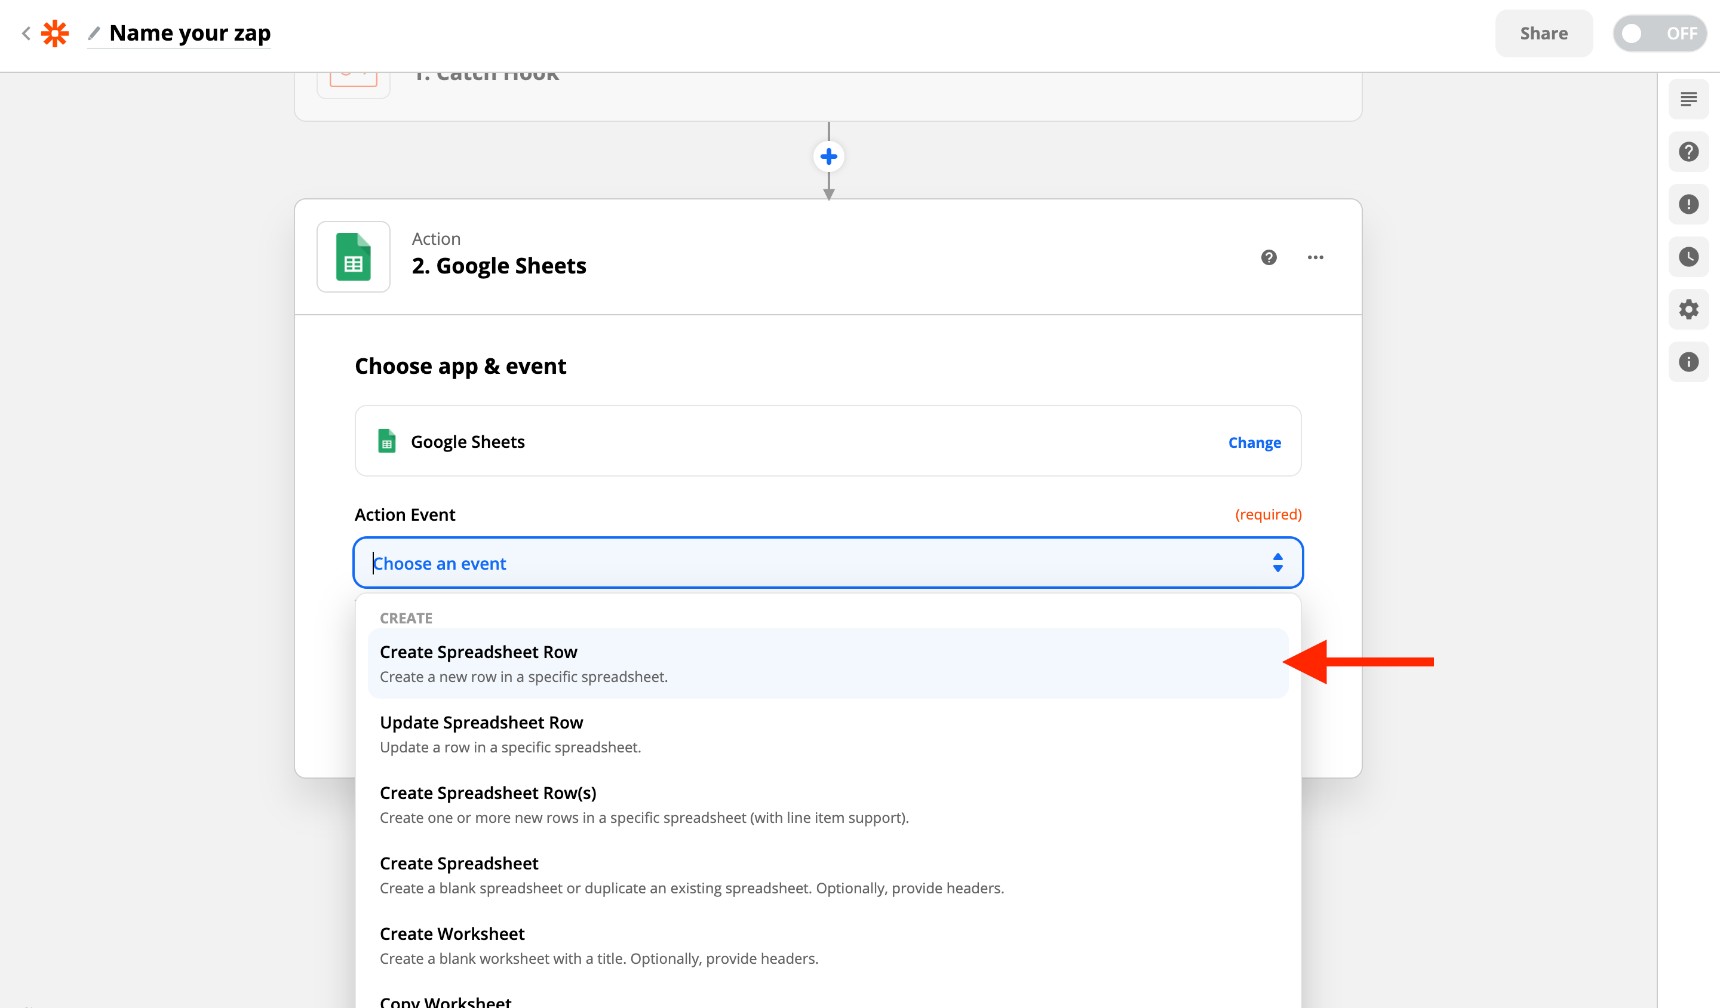
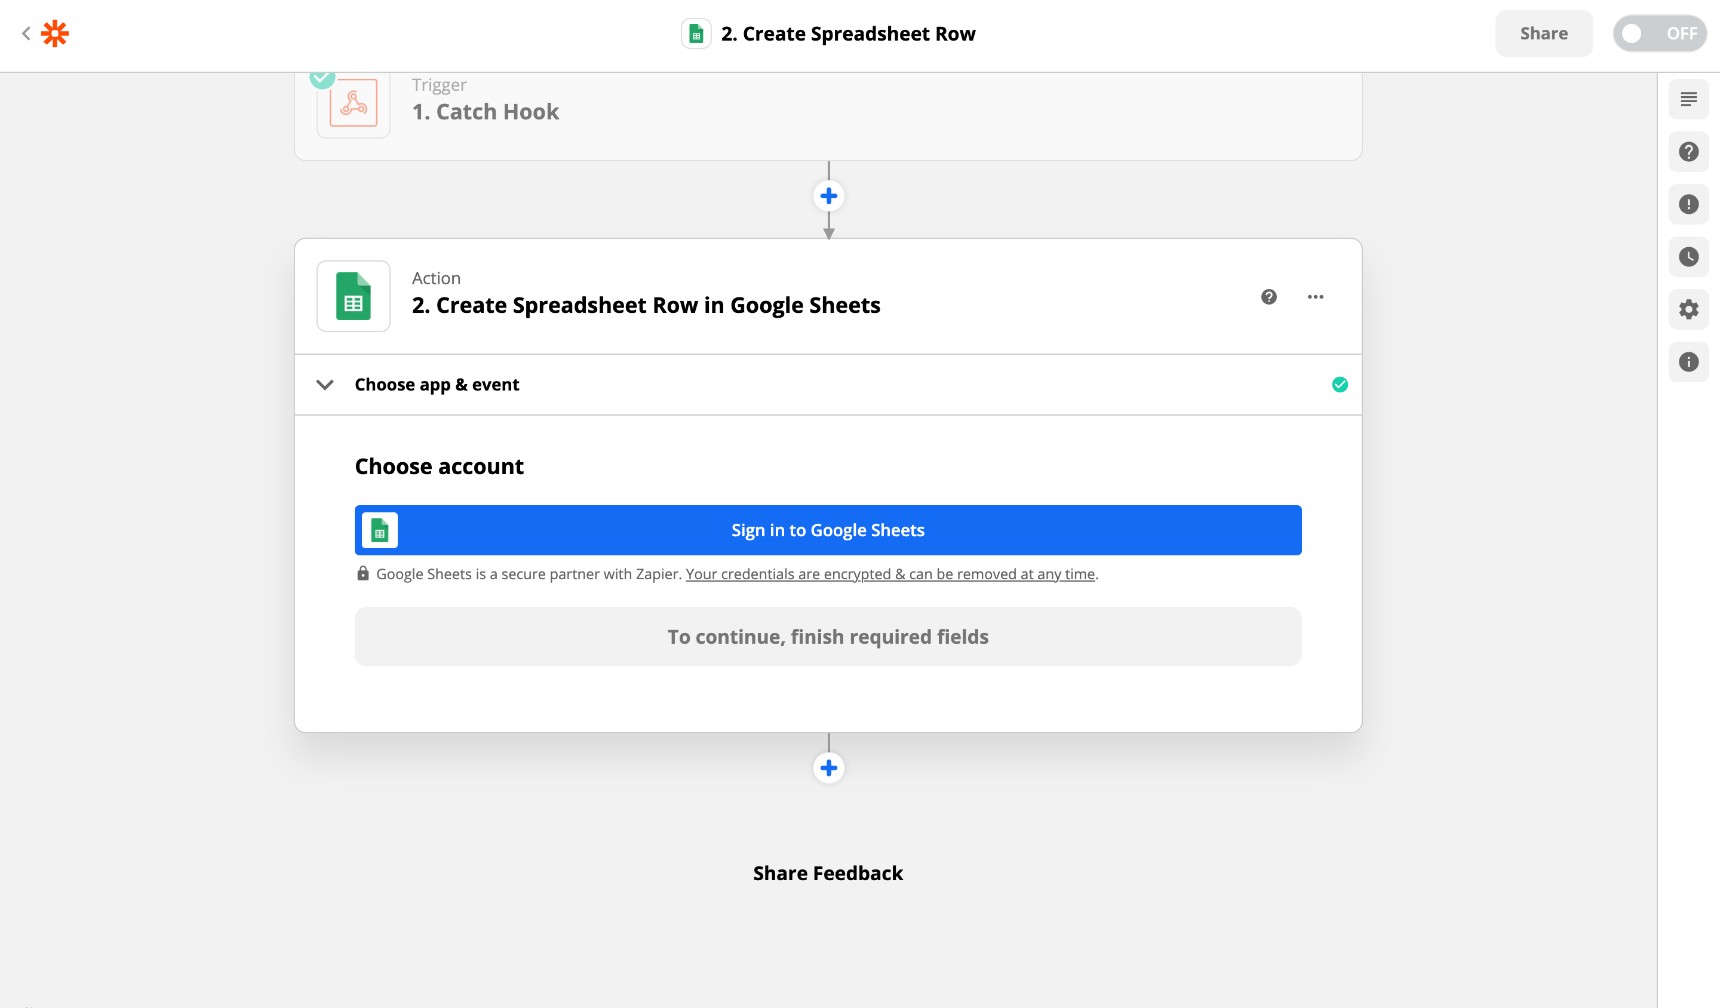
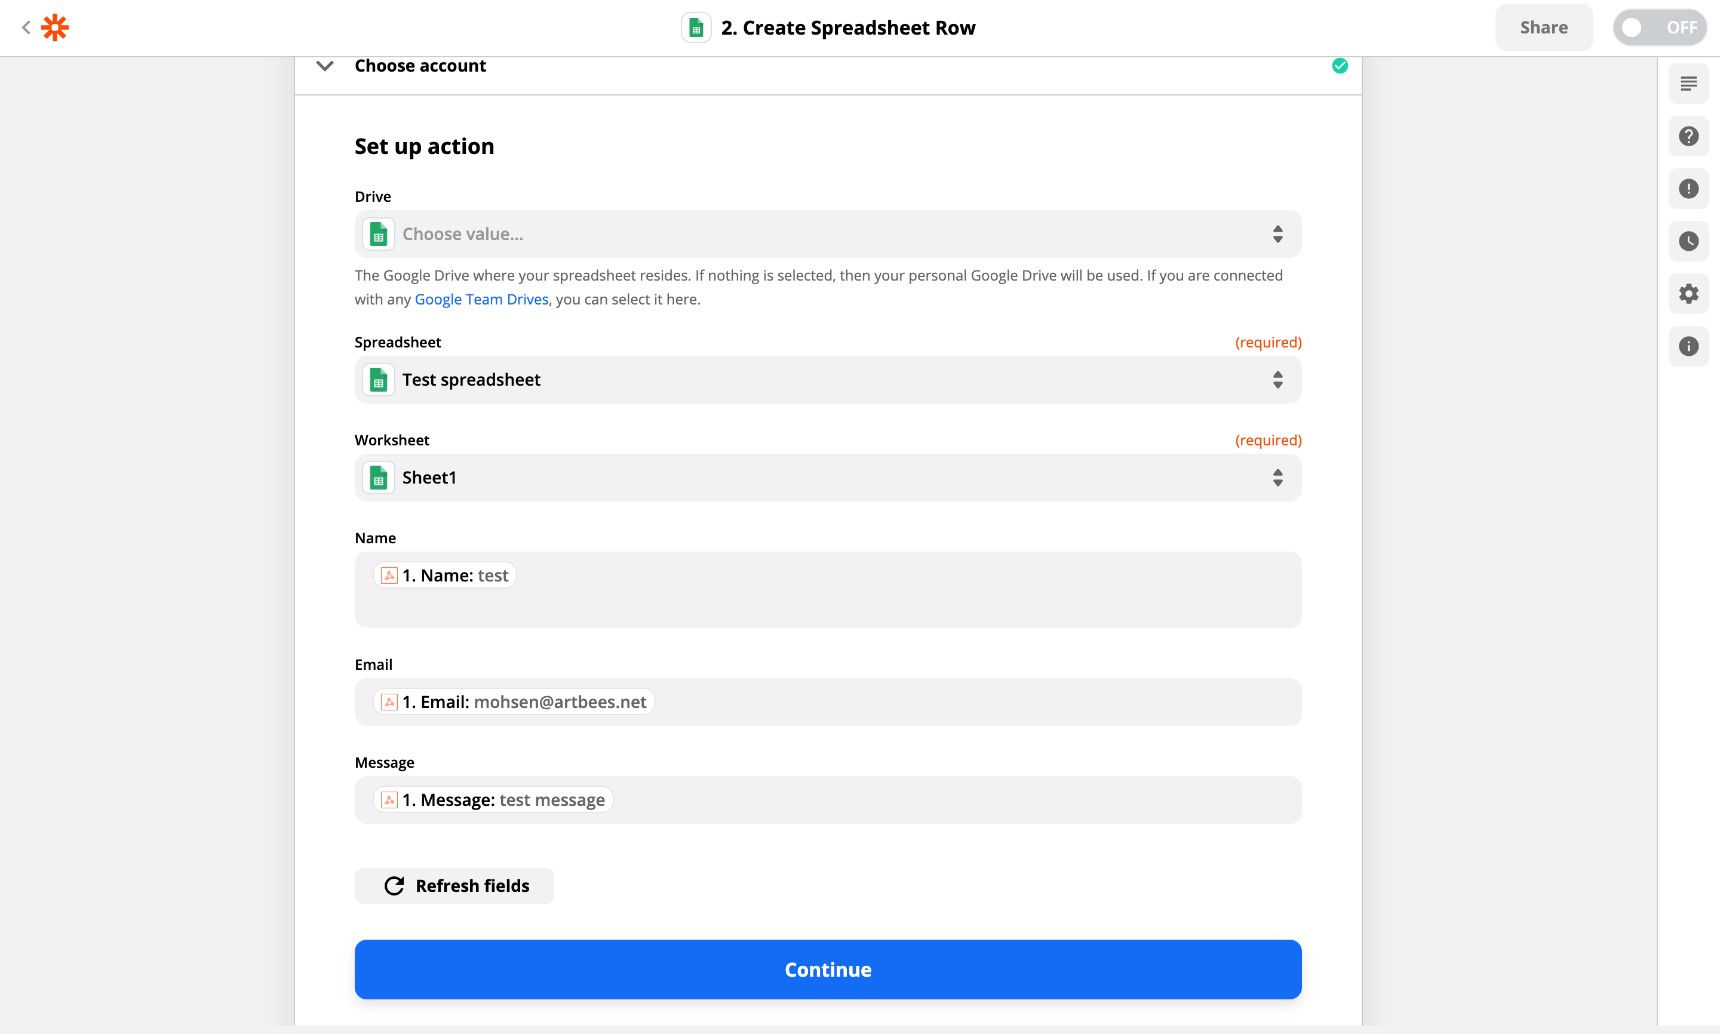
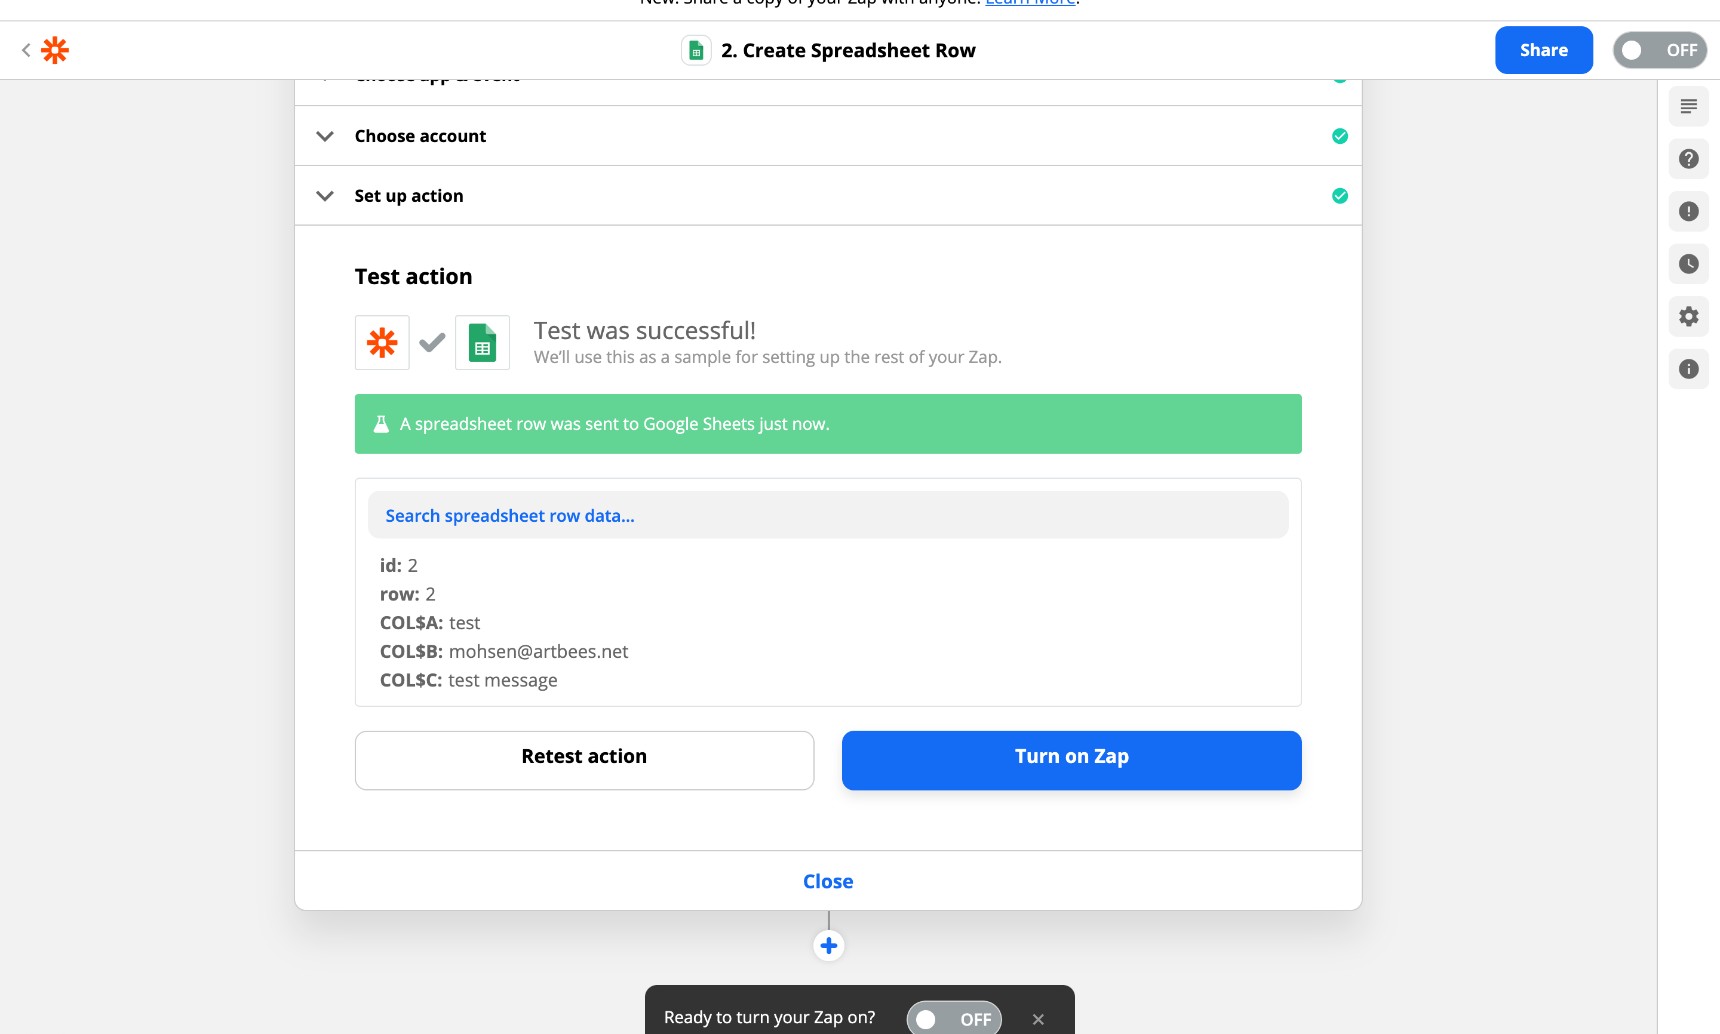
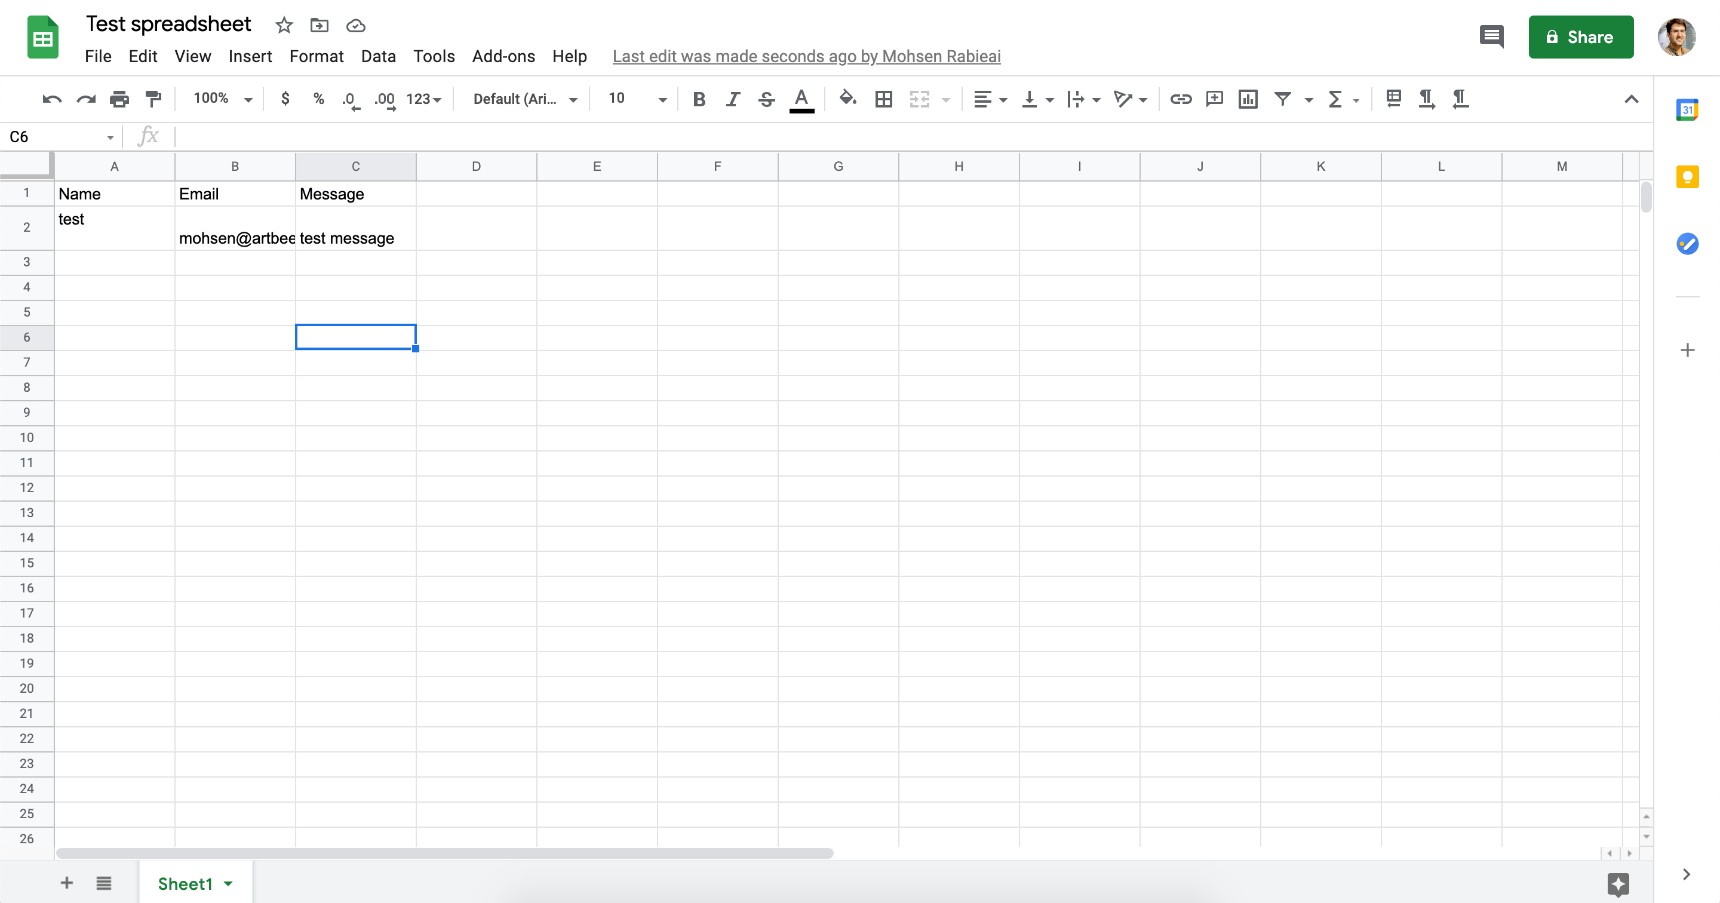
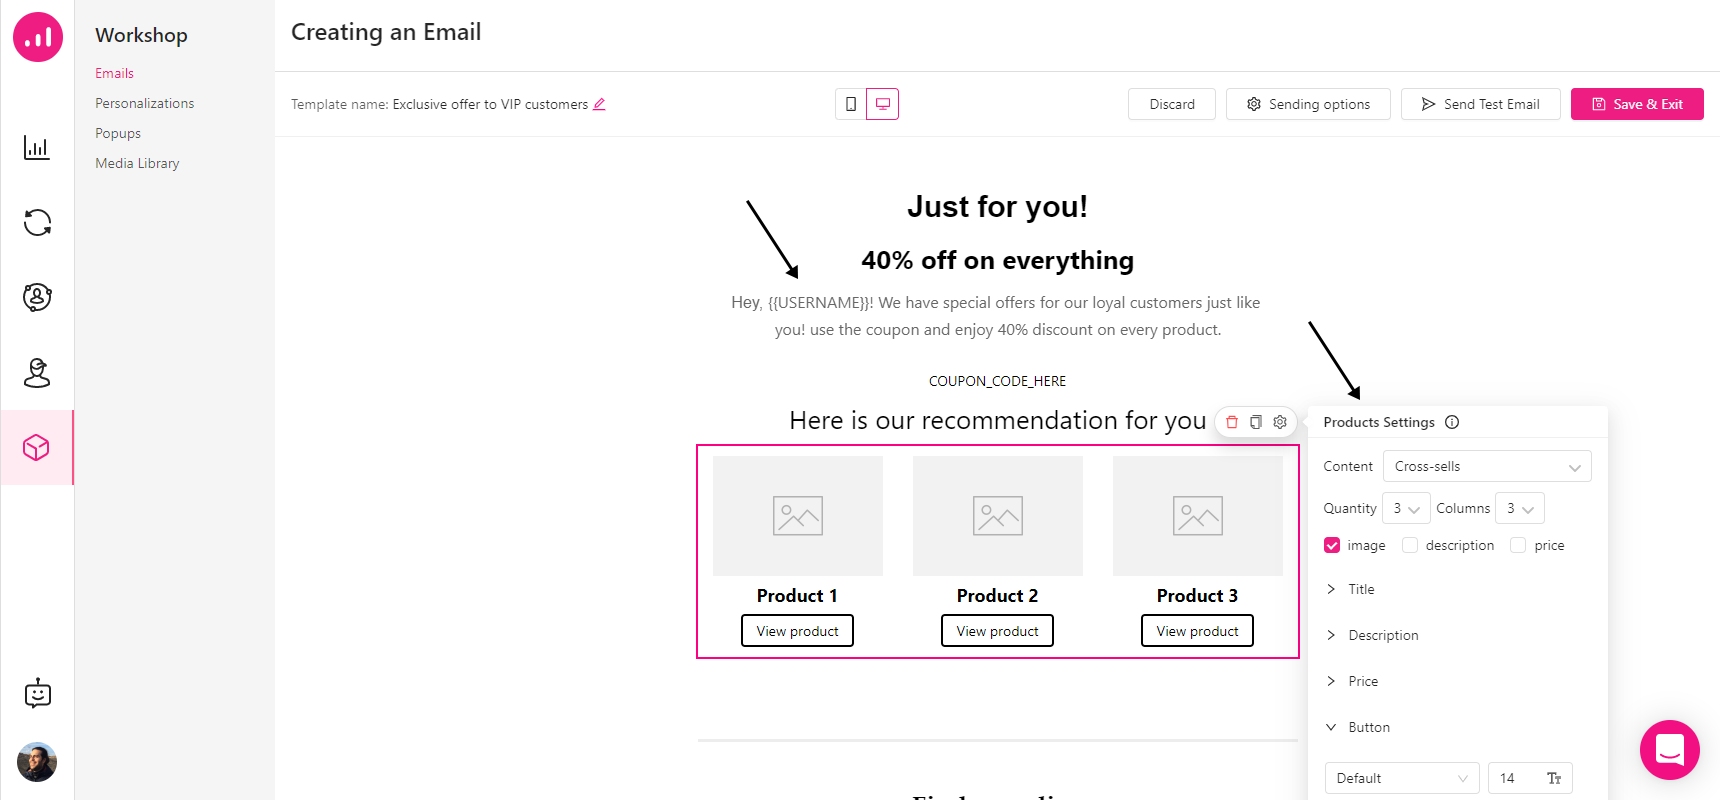
Something as simple as addressing users by name across all touchpoints can up conversion rates. In Growmatik, you can add dynamic keywords to personalized emails by doing the following:
- Go to Workshop > Emails
- Click Create Email
- Select a template to start with
- Edit the template by selecting text and clicking on
 . Then, click on Dynamic Keywords to insert any keyword from Table 1. Add other elements, such as a product list to drive engagement, by clicking on .
 - Save the email template and assign it to a rule
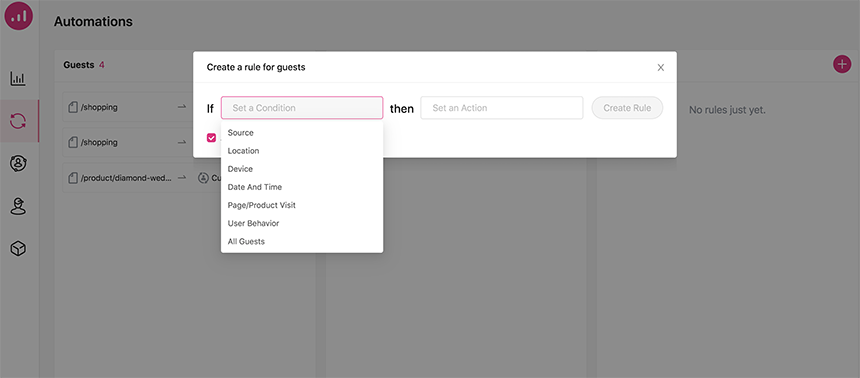
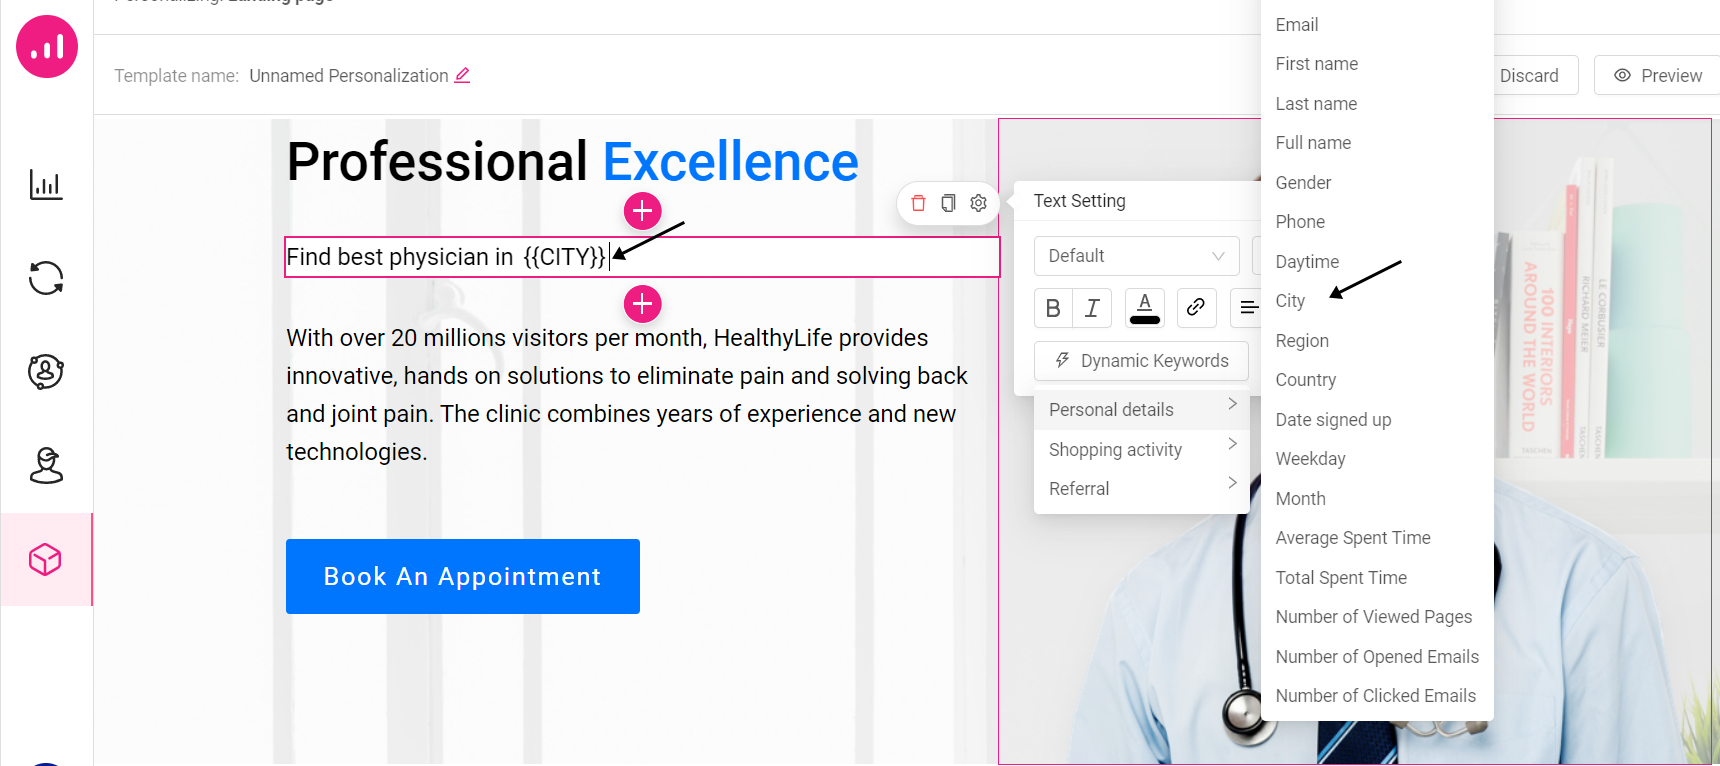
Create a regional landing page
Use dynamic keywords to personalized your landing page as it relates to the user’s location. For example, if you are advertising legal services, add the name of the city your user lives in to the the hero section to catch their eye!
In order to do that, go to Automation:
- Click on the from Guest, Leads or Customers column.
- Click on Custom rule.
- Give a name to your automation and select “all guests”, “all leaders” or “all customers” as a condition.
- Click on Choose an action, click on personalize page and select the desired webpage.
- By adding the text element in the hero section you can add dynamic keywords.
Reactivate customers with win-back offer emails
Users who haven’t made a purchase or interacted with your website for a long time are considered inactive. How long a user must be absent before they are considered inactive is up to you. To reactivate them, try offering them a discount via your next email. The promise of a tempting discount is sure to boost open, click-through and conversion rates.
To do this in Growmatik, start at the People section, select all customers and start adding filters like:
Shopping activity > Purchase date > more than X
Site activity > Visit date > more than X
Save them and then go to Workshop > Emails.Click create Email to choose a template and start customizing it:
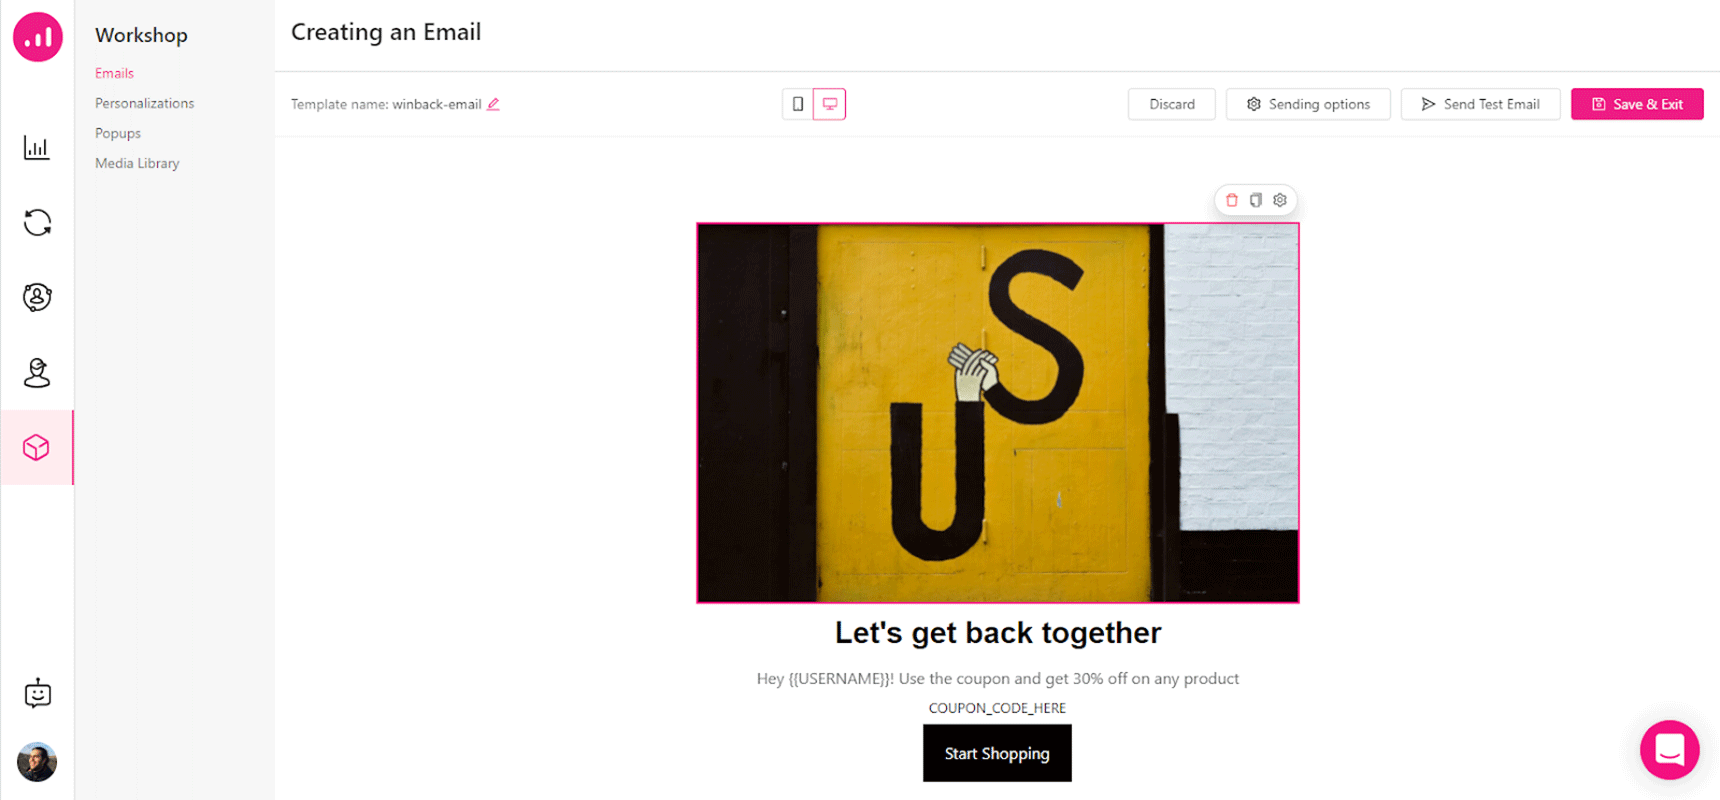
Then, edit and personalize the subject line using dynamic keywords through the sending options.
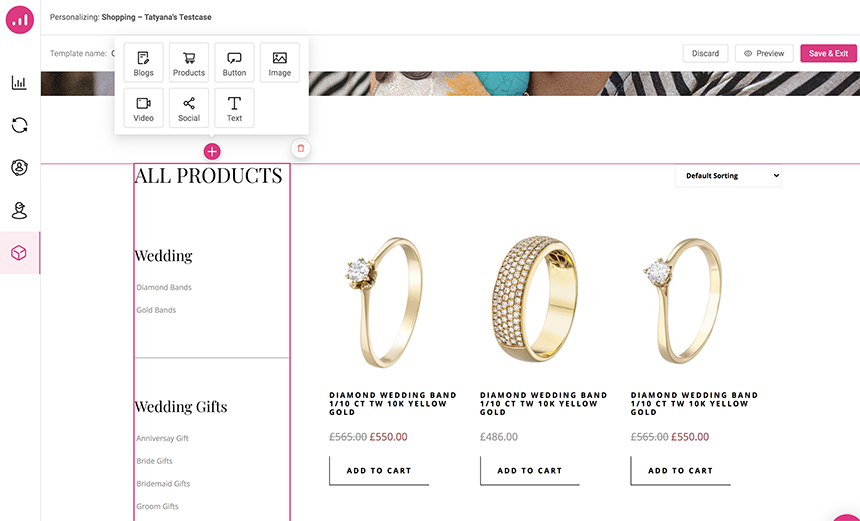
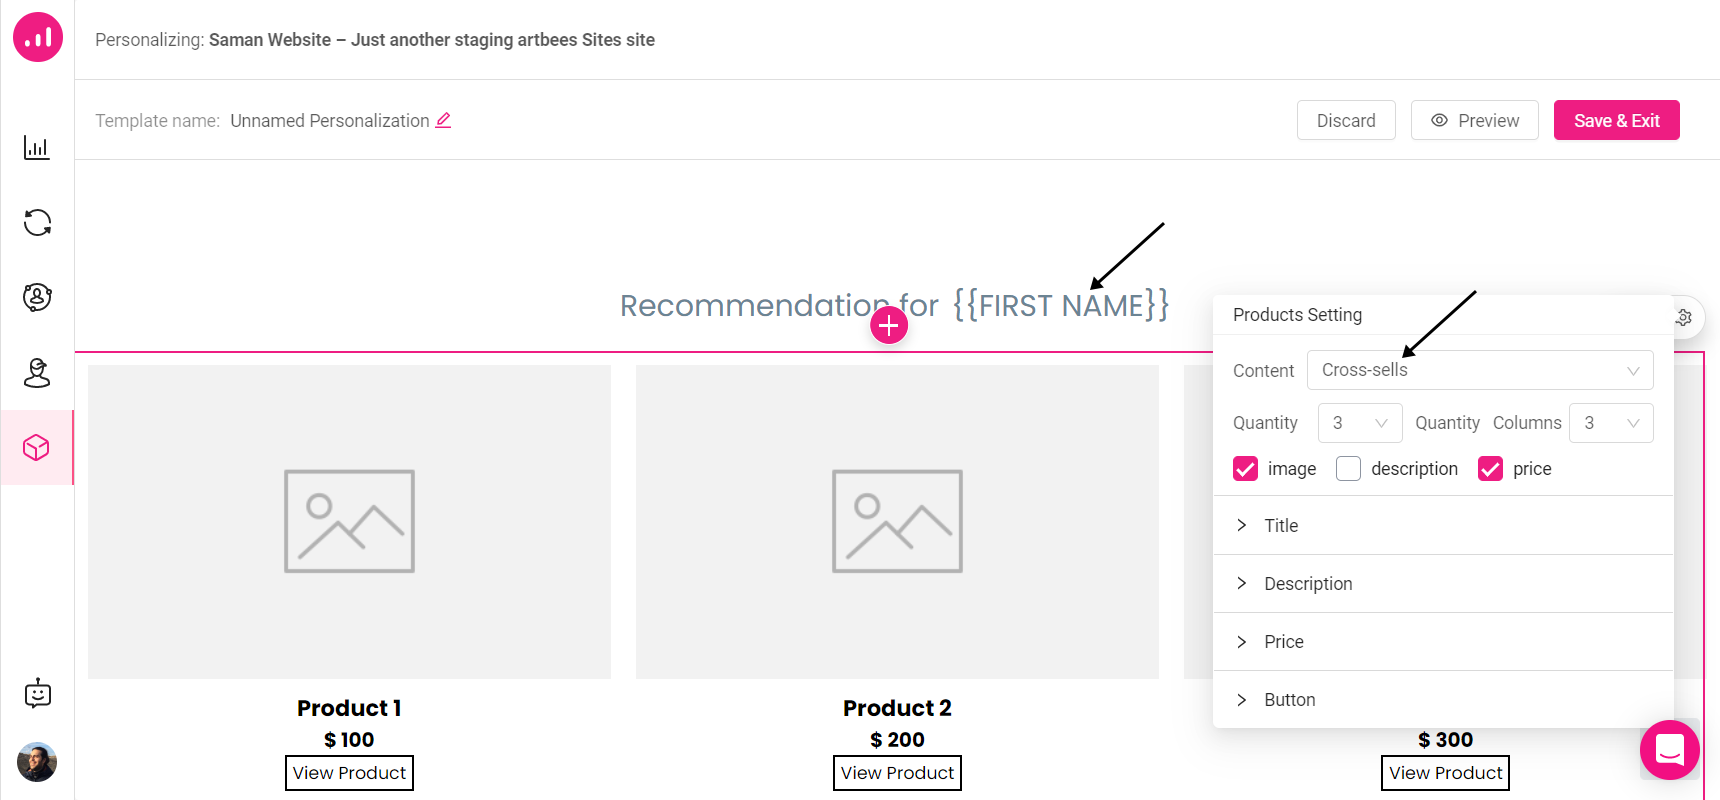
Show off cross-sells on your webpage
Using Growmatik’s “product” element, you can add upselling and cross-selling items to your web pages and emails.
To add cross-selling items to your website, first go to Workshop > personalization and click on create personalization. Next, choose the page you want to add items to:
- On the selected section of the page, click the icon to open the elements list, then select products.
- Click on the and, by clicking on the content (which shows most recent by default), you can choose cross-selling products to be displayed on the webpage.
- Click save & exit
You can automate this by going to Workshop > personalization and finding the personalization you want to create a rule for. Next, click on the ![]() icon, choose Automate and select an audience type.
icon, choose Automate and select an audience type.
You will then be redirected to the Automation page, where you should name your automation. Lastly, click on the create rule button to automate the personalization.
Parting thoughts
Want to understand what’s really going on with your business? Take a look at the numbers! Learning from key metrics is vital for helping your business thrive! In this article, we defined “conversion rate” and discussed real-world strategies for improving it using personalization.