
It helps individuals and businesses create any type of payment system on their websites: from subscriptions, to recurring billing to virtually any other monetary transaction. Stripe accepts payments easily and quickly which is mighty convenient in the fast-paced world we live in.
With Stripe you can collect your customer’s’ payment information neatly and securely on web, whether it’s from desktops, tablet or mobile devices. If you’ve got an international market, the plugin allows you to create charges server-side in 100+ currencies. It accepts Visa, MasterCard, American Express, Discover, JCB, and other credit and debit cards. What’s not to like? In this article we’ll explain how to set up Stripe in WordPress and how to start accepting payments right away.
Why Choose Stripe for Payments in WordPress?
#1 No fees, and easy earnings.
Besides the fact that Stripe is a high-performing plugin, we suggest that you set up Stripe because it has no secret installation fees, no monthly payments and no hidden costs. The only money spent on Stripe is the money your customers are spending on your website. Earnings are then directly transferred to your bank account on a 7-day rolling basis.
This is an advantage that Paypal doesn’t offer. Paypal payments, by contrast, don’t go straight into a bank account. The user has to sign into Paypal to get the money and often has to pay service charges.
#2 Saves time for returning customers.
Lucky for your customers, Stripe supports the subscriptions extension and stores information for reusing cards. When a customer pays, they’re automatically and securely set up in Stripe as a customer. If and when they create another order, they can check out using the same card and the information will be fetched and ready to go. This is a massive timesaver for returning customers.
#3 It’s simple to set up Stripe with WordPress.
A custom Stripe integration typically requires you to either be a developer or to hire one. But you can use Stripe through any number of third-parties. For the sake of this article, we’ll discuss Stripe’s integration with WordPress. To set up Stripe with a third-party like WordPress, there is no programming, hosting, or complicated setup required on your behalf.
How to Set Up Stripe in WordPress
The installation of the Stripe plugin is easy in WordPress, because the file transfer is done within WordPress without you needing to leave your web browser. So here’s how to set up Stripe in WordPress in just a series of simple and straightforward steps:
Go to Plugins > Add New on your WordPress site.
Enter “WooCommerce Stripe” in the Search Plugins bar.
Author is WooCommerce.
Click Install Now and Activate.
Please note: the WooCommerce plugin must be installed and activated first in order for the Stripe plugin to work properly.
Now that you’ve installed and set up Stripe, you need to change a few settings so that it is completely configured to your WordPress website.
From the WordPress left menu, go to WooCommerce > Settings > Checkout > Stripe.
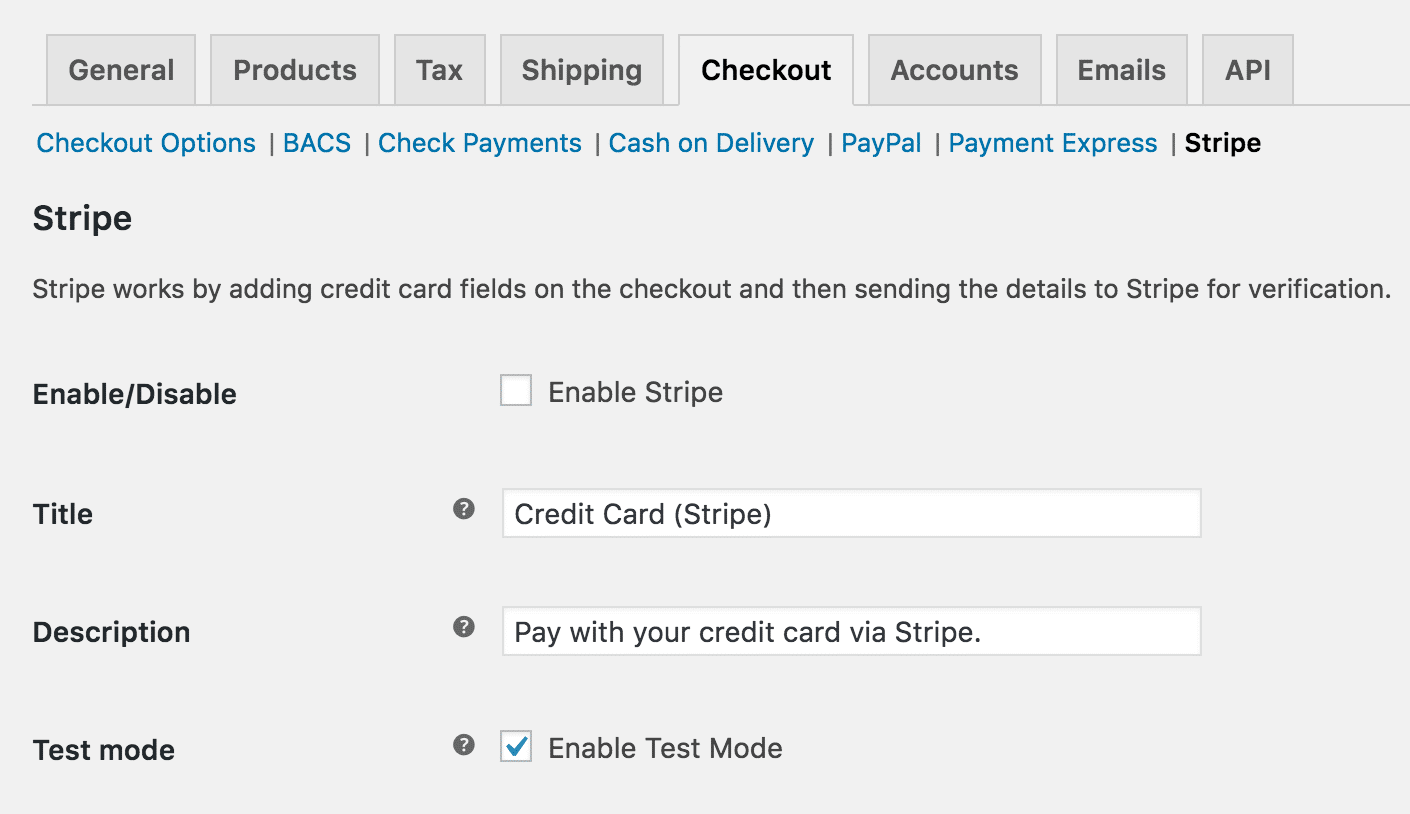
Don’t forget to tick the Enable Stripe checkbox.
Enter a Title (required) and Description (optional) which you want to be seen by the customer during checkout.
Tick the Enable Test Mode checkbox, if you wish to test before going live. Untick to begin accepting payments in WordPress with Stripe.
Enter your Live Secret Key and Live Publishable Key (obtained from your Stripe account). The Test Secret Key and Test Publishable Key are different and should only be used when Enable Test Mode is selected.
Enter Statement Descriptor: a description that appears on a customer’s credit card statement.
Tick the checkbox to Capture Charge Immediately (Authorize and Capture) or untick to only Authorize. If you untick the box, you’ll need to capture funds manually for each order via the order screen.
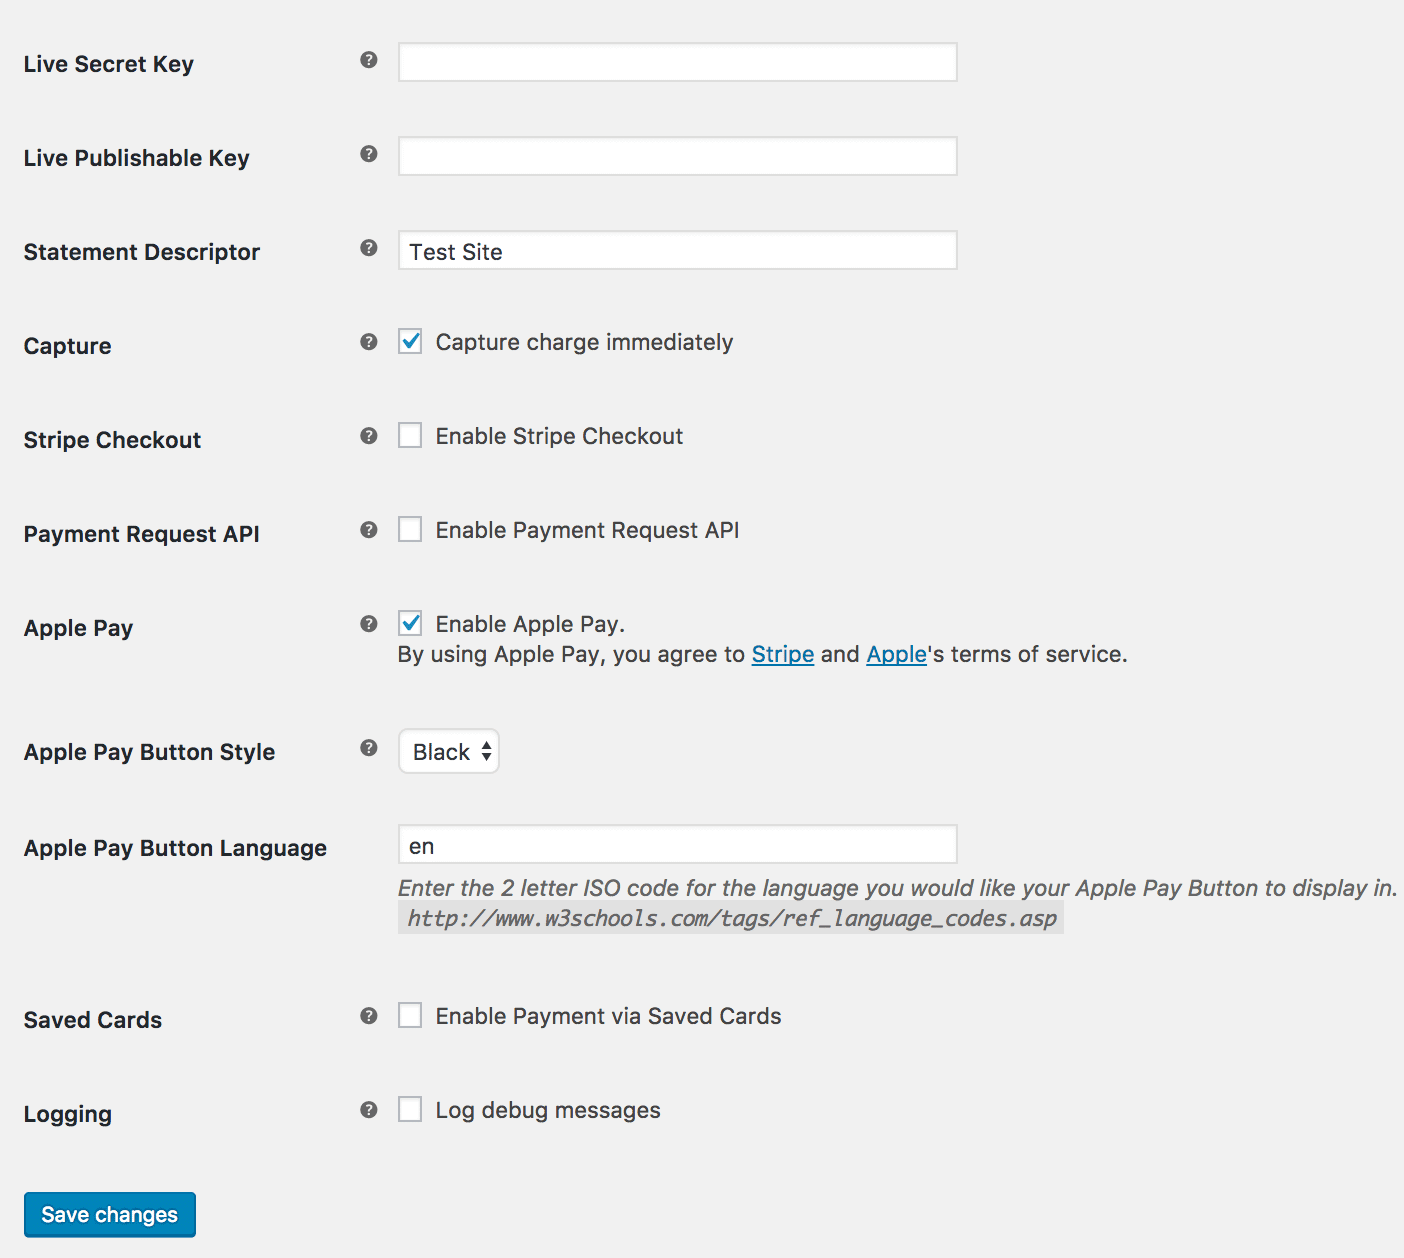
Configure the rest of the optional settings and click on the Save Changes button.
Please note: the same user account credentials cannot be used to make purchases in both Live Mode and Test Mode.
Customer Usage for Payments in WordPress
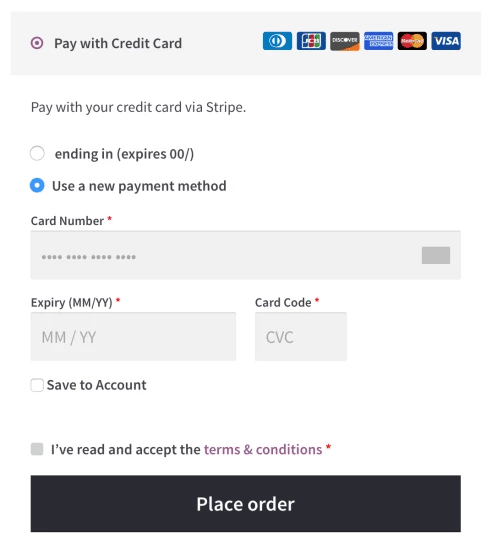
Customers can pay on the secure and simple checkout page by Stripe. Depending on whether the buyer is new, returning or an ApplePay user, their screen will look slightly different.
When new customers are entering card details, they will see a page that looks like this:
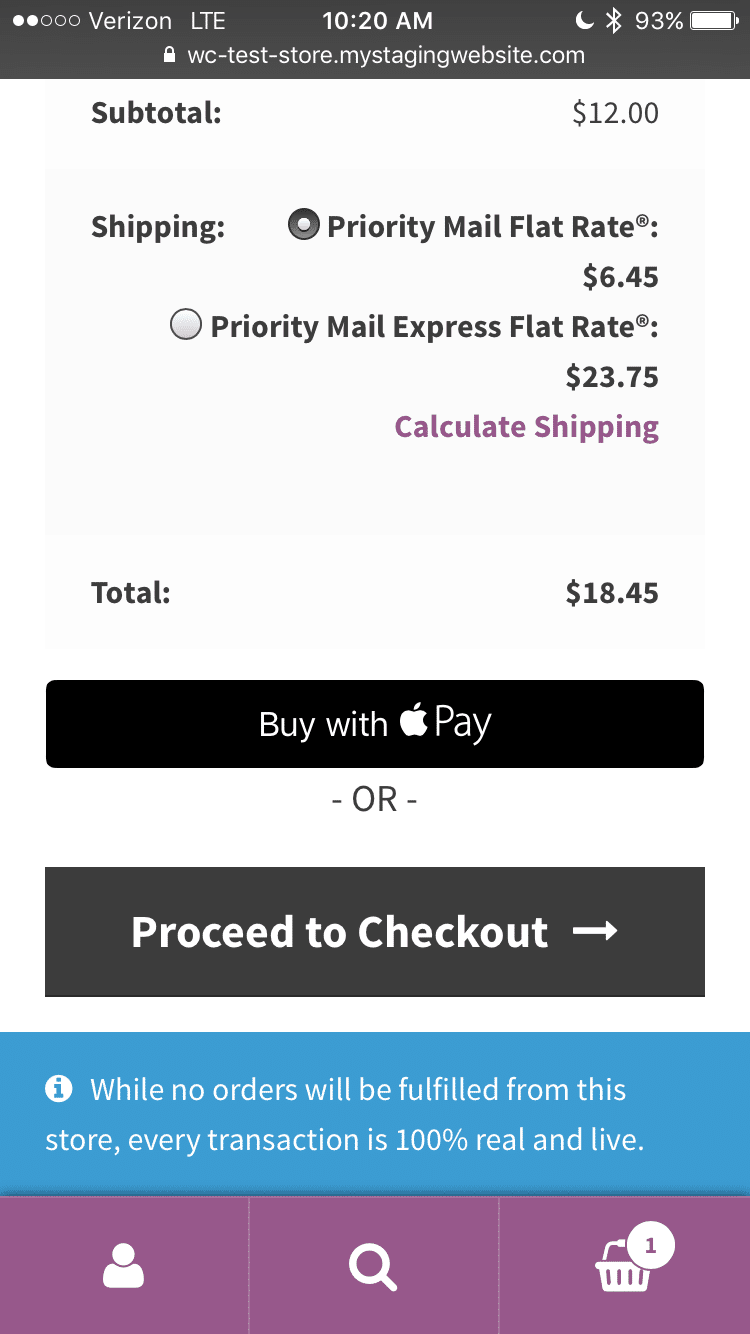
If ApplePay is enabled, customers will see a Buy with ApplePay button like the one shown below:
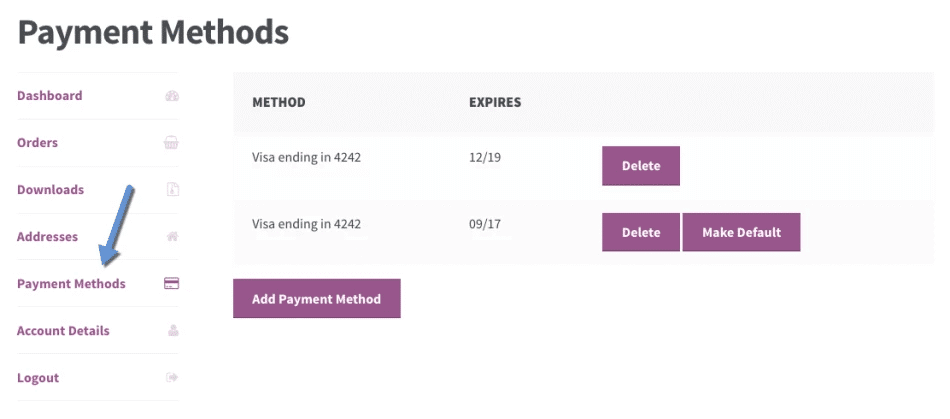
On the ‘My Account’ page, returning customers can add, view or remove cards from their account:
And that’s it! Easy. With the simplicity and reliance of Stripe, it’s no wonder that it is quickly becomes a leader in its market. Stripe is ever-expanding; many predict it will continue to break records and hit new markets in the coming year.
Review of How to Set Up Stripe in WordPress and Accept Payments
Why choose Stripe for payments in WordPress?
#1. No hidden fees and easy earnings that are sent directly to your bank.
#2. Saves time for returning customers by saving their subscription and card information.
#3. It’s simple to set up Stripe with WordPress and can be done with just a few steps.
How to set up Stripe in WordPress.
Go to Plugins > Add New on your WordPress site.
Enter “WooCommerce Stripe” in the Search Plugins bar.
Author is WooCommerce.
From the WordPress left menu, go to WooCommerce > Settings > Checkout > Stripe.
And then adjust the settings to ensure it works well and accepts payments in WordPress.
Customer Usage.
Customers can pay on the secure and simple checkout page by Stripe using:
- a new card
- an ApplePay account
- a card saved on the system if they’re returning customers.
Here’s your chance to streamline the payment system for your eCommerce website, making it easy and simple for customers to select items, check out and confirm their purchase with ease! Here, we’ve gone over how to set up Stripe in WordPress so that you can enjoy a drastic boost in your conversions! Good luck!
[call_to_action title=”Have your custom WordPress project done by Artbees experts for competitive price.” target=”_blank” url=”https://themes.artbees.net/pages/artbees-care-wordpress-customisation-services/?utm_source=customization-related-docs-posts” type=”link”]

1 Comment
Hi Matej,
Thank you for describing the Stripe adding process. But facing some issues, like why I wouldn’t see the Buy with ApplePay button.