A contact form allows your website audience to communicate with you securely, rather than displaying your email address for all (even hackers and spammers) to see. Setting up a contact form in Jupiter, or on your website of choice, also makes it easier for your visitors to send you a simple message. It eliminates the need for them to navigate away from your website just to send you an email.
If you still need convincing, check out some of the benefits that contact forms offer:
- Contact forms are user friendly, and provide a direct and secure line between you and your customers.
- Website visitors can quickly and easily send you a message straight from your website.
- Contact forms help reduce spam and keep your site secure.
- You can get warm leads and potential clients by being reachable even after business hours.
- Grow your email subscriber list by placing a newsletter option within the contact form.
- Generate an auto-response email, and quickly get back to your prospects when business hours open.
Convinced? Let’s move on to setting up a contact form in Jupiter using the Contact Form Shortcode.
Setting Up A Contact Form in Jupiter
Adding the contact form into a page is easy. You can follow the same steps whether it’s a new website you’re building, or you’re adding a contact form to an existing website.
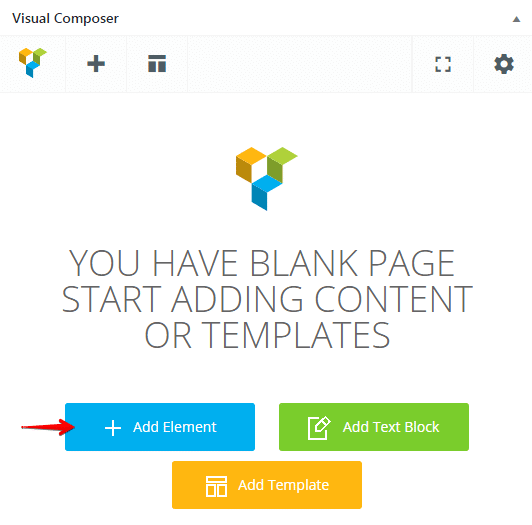
- In the Visual Composer section, click on the + button.
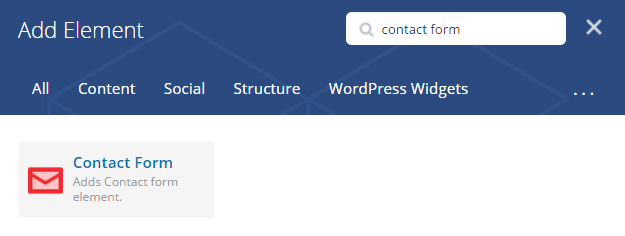
- In the Add Element pop-up screen, search for Contact Form and click on it to be added to the page.
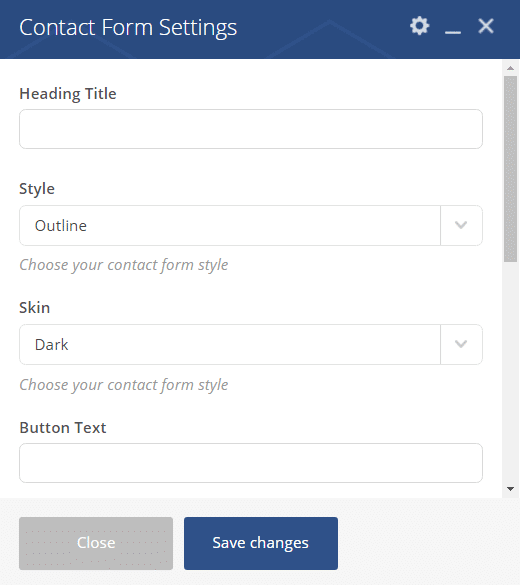
- When the shortcode is added, a new pop-up screen called Contact Form Settings will open that allows you to configure the shortcode settings.
- Click on “Save Changes” and publish or update the page to check the result. There should be a non-configured default contact form on your page now.
Configuring your Contact Form
There are several important settings in the contact form settings pop-up:
- Button Text – Sets the button text. The default text is Submit.
- Email – Sets the recipient of the emails. Currently only one recipient is allowed.
- Show Phone Number Field? – Allows you to add an extra field for phone number to form.
It’s only possible to add the Phone Number field to the form. The setting is called Show Phone Number Field? in the contact form settings pop-up as mentioned above. Adding more fields to the form is impossible by default, and several files would have to be changed to reach the result.
Contact Form Design
There are two types of settings to configure the design: Predefined Design and Design Properties.
- Predefined Design – The predefined design for the form.
- Design Properties – Settings like skin, font color, background color for the form.
Follow these steps to get change the predefined design of your contact form.
- Click on Edit Contact Form to open the contact form settings pop-up.
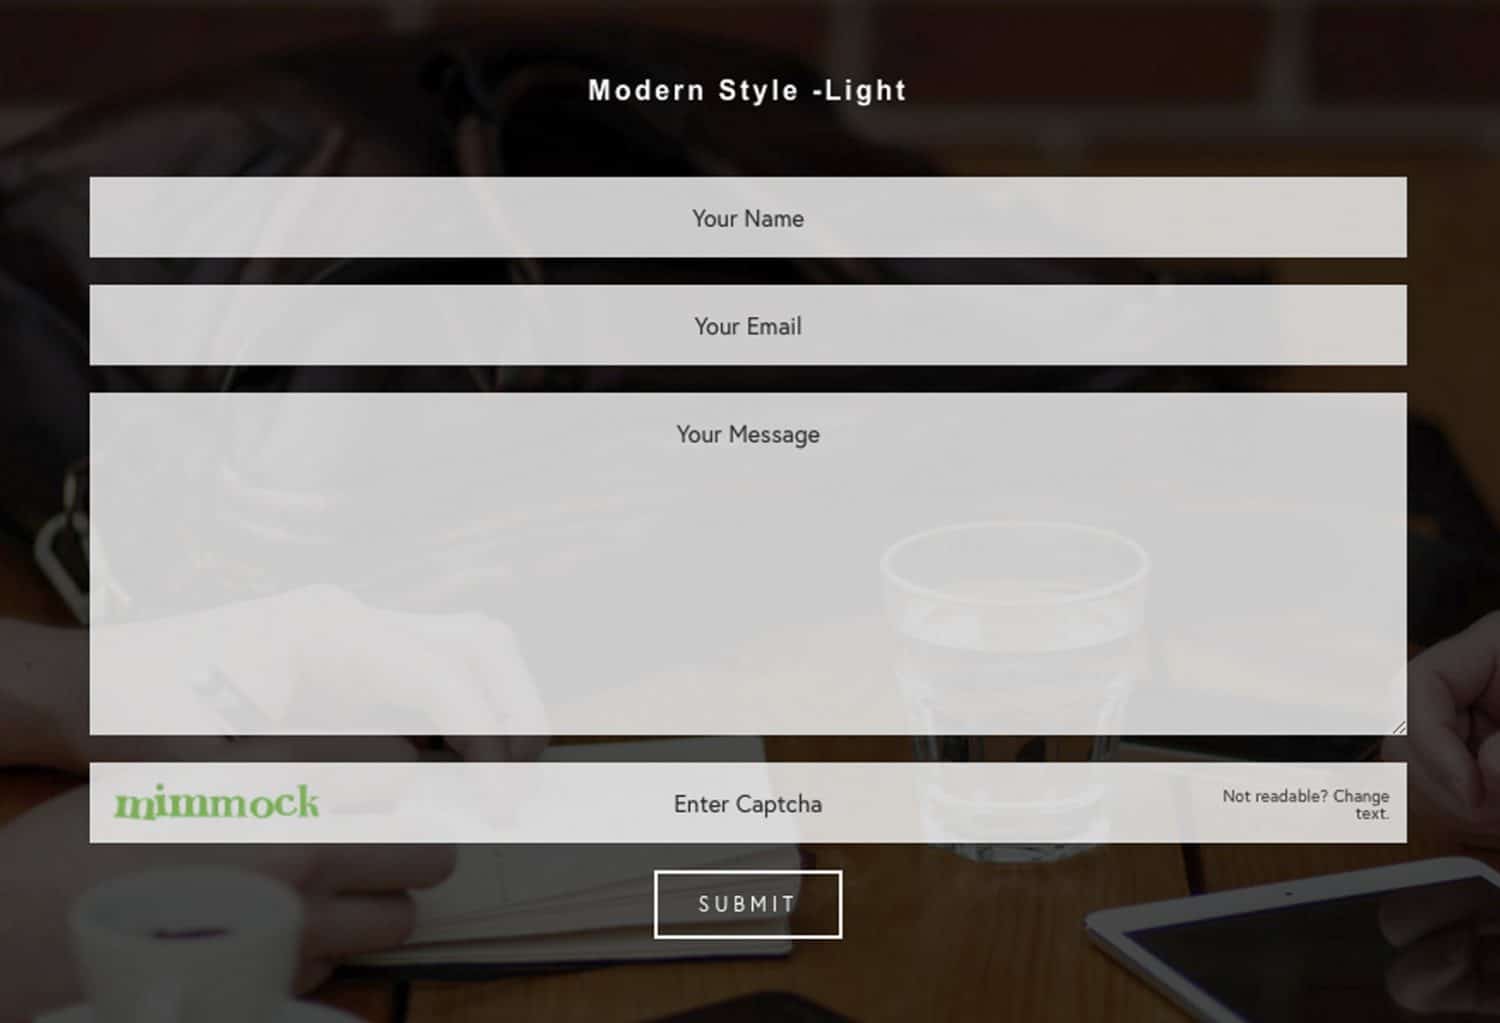
- From Style option, select one of the options: Outline, Modern, Classic, Corporate and Line.
- Click on Save Changes.
Customizing the Style of your Contact Form
There are a few settings in the contact form settings pop-up to customize the default styling.
- Skin – Sets the skin color scheme. This option is only available for the Outline and Modern predefined design.
- Background Color – Sets the fields background color in the Corporate predefined design.
- Border Color – Sets the fields border color in the Corporate predefined design.
- Font Color – Sets the fields text color in the Corporate predefined design.
- Button Background Color – Sets the button background color in the Corporate predefined design.
- Button Font Color – Sets the button text color in the Corporate predefined design.
- Skin Color – Sets the text and border color in the Line predefined design.
- Button Text Color – Sets the button text color in the Line predefined design.
Enabling the Captcha
Captchas keeps bots from submitting the forms so you don’t receive spam emails from your website contact form. Follow these step to enable the captcha.
- Install the Artbees Themes Captcha plugin. To learn more about plugin installation, read the Installing plugins article.
- In the contact form Settings pop-up, enable the Captcha Authentication? Setting.
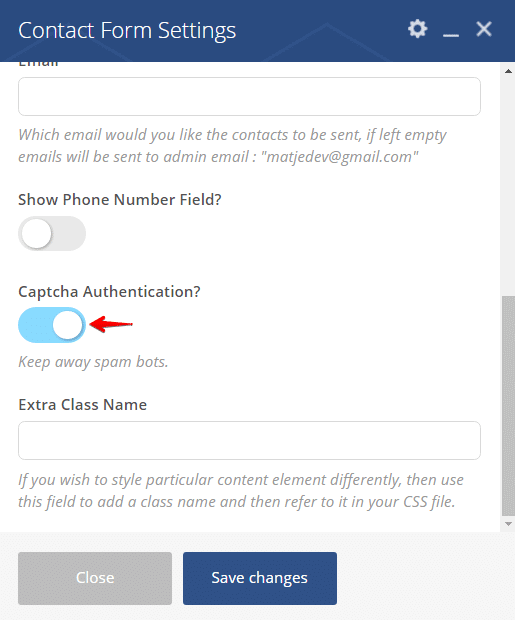
- Click on the “Save changes” button.
- Update the page to check the result.
Note: Translating the form requires a third-party app or plugin. To learn about the process, read the Translating with Loco plugin article.
By default, WordPress uses the PHP mail function to send the emails. This function is not properly configured in many shared hosting providers so it’s best to use STMP to send emails which is highly reliable.
Quick Contact Form
In addition to the classic contact form, Jupiter has a quick contact form. Having one on your website is extremely important to improve the user experience of your website visitors.
When users are scrolling through your page, they will constantly see a small icon at the bottom right of their screen, which they can quickly click or tap should they decide to send you a message.
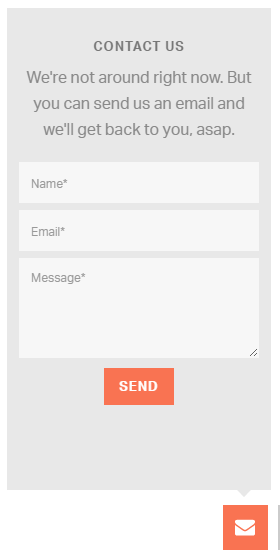
Quick contact form is a small form which is accessible from anywhere (if enabled) on your website. Initially it hides behind a small envelope icon in the bottom right corner of your screen.

Here’s how you can enable or disable the quick contact form.
From the WordPress dashboard menu, go to Theme Options > Global Settings > Quick Contact.
- Quick contact – Enables or disables the quick contact form.
- Quick contact on blog & news / single Post – Enables or disables the quick contact form on blog & news single post.
- Quick contact title – Sets the title which is displayed in quick contact form.
- Quick contact email – Sets the recipient of the form submissions. Only one recipient is allowed.
- Quick contact description – Sets the description which is displayed in quick contact form.
In contrast to the contact form shortcode, quick contact form has only 3 input fields — name, email and message. In effect, the contact form shortcode is a lot more customizable and can be added in particular sections of your website. So, it’s best if you use both contact form shortcode and enable the quick contact form at the same time.
Wrap Up
Adding a contact form to your website can be done in just a few easy steps. There are a lot of styles to choose from to match the look and feel of your brand. You can also configure the setting to fully customize your contact form.
But, remember to make it simple and easy for users to fill out. You don’t want to turn off potential leads with a contact form that asks for way too many details.

No comment yet, add your voice below!