In the digital era, the choice of web hosting platform can dramatically impact your online presence. Today’s websites demand rapidity, flexibility, and scalability from their hosting solutions—qualities often lacking in traditional hosting services.
Cloud hosting combines the power of cloud computing with the simplicity of managed services, creating an ideal environment for WordPress sites. Platforms like Cloudways represent a significant advancement by integrating cutting-edge technology with a user-friendly design.
This article introduces cloud hosting and its benefits for WordPress websites, the process of establishing a hosting environment on Cloudways, installing WordPress, and setting up the Jupiter X theme.
What Is Cloud Hosting?
Cloud hosting utilizes a network of remote servers on the internet to store, manage, and process data. This model offers WordPress sites reduced downtime, better scalability to handle traffic surges, and enhanced security compared to traditional hosting.
Cloud vs. Traditional Hosting: A Comparison
Scalability
Scalability: Cloud hosting dynamically allocates resources as website traffic increases, preventing downtime and performance lags during traffic surges— a common challenge with traditional hosting.
Security
The distribution of data across multiple servers in cloud hosting introduces redundancy, improving data integrity and disaster recovery. Traditional hosting, reliant on physical servers, is more susceptible to damage and data loss.
Cost-Effectiveness
Cloud hosting’s pay-as-you-go model means you only pay for the resources you use, unlike traditional hosting, which may require payment for a fixed resource allocation, regardless of usage.
What is Cloudways?
Cloudways stands out by simplifying the cloud hosting experience. It targets users without advanced server and DevOps knowledge, managing much of the technical workload behind a user-friendly control panel. This approach distinguishes Cloudways from providers like AWS, which can overwhelm users with complex dashboards.
Cloudways’ Value Highlights:
- Simplified Management Dashboard
- Selection of Cloud Providers (Google, AWS, DigitalOcean)
- Performance and Scalability with advanced caching
- Security Features: Managed backups, dedicated firewalls, SSL installation, two-factor authentication
- Pricing Flexibility with a pay-as-you-go model
- Easy Migration for WordPress and other platforms
- Autonomous Scaling feature for traffic management
- Additional Features: Unlimited websites/traffic, free SSL Certificates, bot protection, and seamless team collaboration.
Setting Up Your Jupiter X Website on Cloudways
Creating a WordPress website on Cloudways begins with setting up a server.
Step 1: Server Setup
Sign Up
Begin by creating and verifying your Cloudways account. Take advantage of a trial period to explore the platform’s features without commitment.
Cloudways is delighted to offer Jupiter X users an exclusive 20% discount for the first three months on any Cloudways plan. Redeem this offer by clicking the button below or entering the coupon code ARTBEES at checkout.
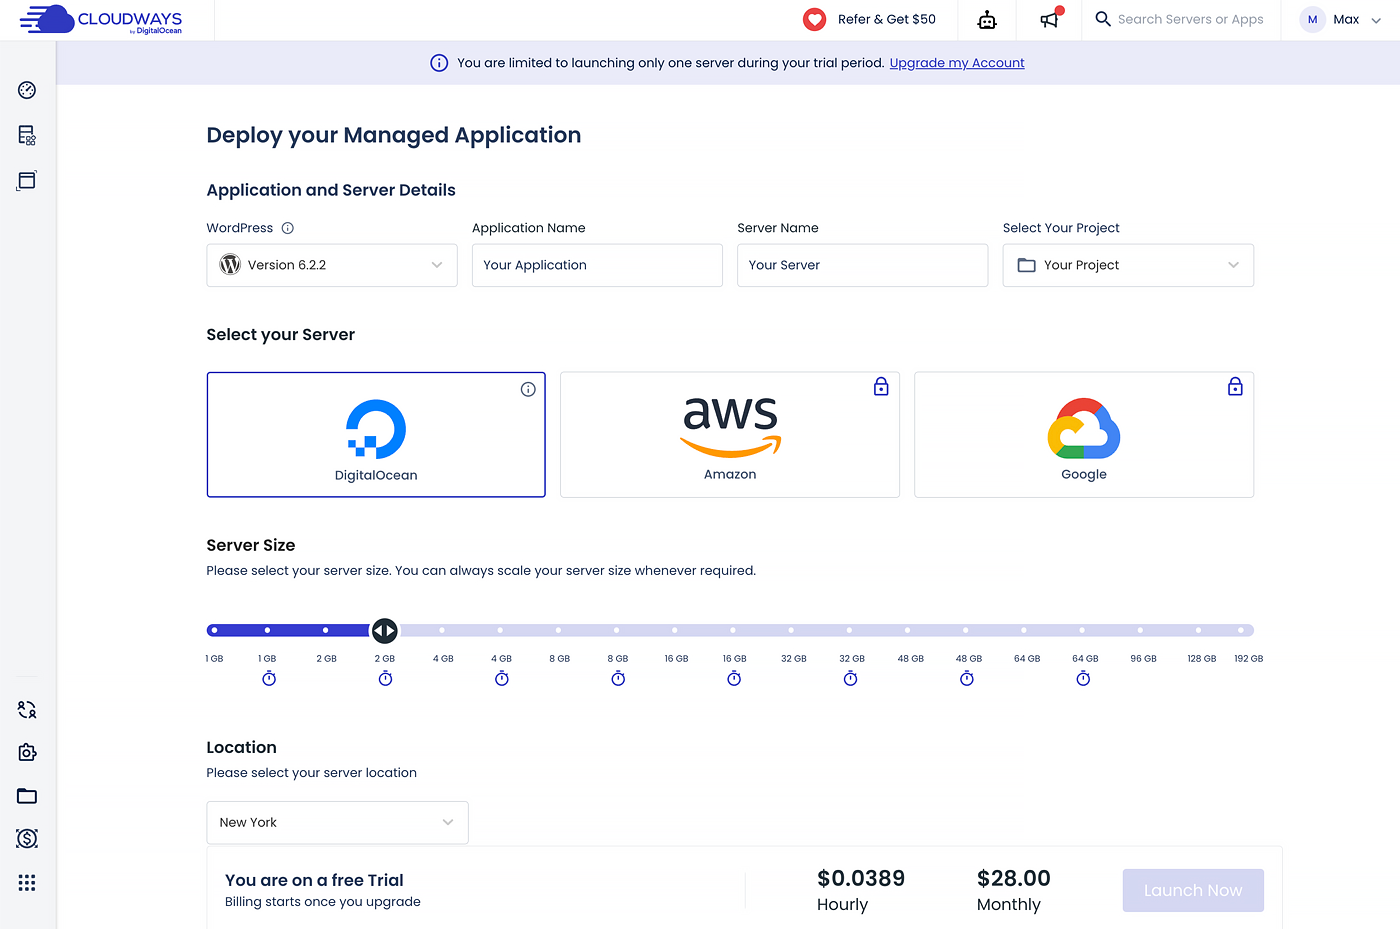
Launch Server
Choose from top-tier cloud providers such as DigitalOcean, AWS, or Google Cloud based on your needs. Select the server size and location best suited for your target audience and expected traffic. Pricing will be transparently calculated and displayed, allowing you to make informed decisions. When you’re ready, hit the Launch Now button to initiate the server setup.
Configure Server
Cloudways simplifies server deployment, typically completing the process in minutes. You’ll be provided with a dashboard showcasing your server’s health, IP address, and available services. From the server details page, easily manage various server features including monitoring, service management, security settings, vertical scaling, and backups.
Step 2: Deploying WordPress
With your server up and running, the next step is to install WordPress, transforming your server into a fully operational WordPress hosting environment.
- Access Application Management:
Navigate to the sidebar and choose Cloudways Flexible > My Applications. - Install WordPress
- Click Add Application.
- Choose WordPress as the application type from the dropdown menu.
- Assign a name to your WordPress application for easy identification and click on Add Application again.
- Configuration and Site Details:
- The deployment of your WordPress site will complete within a few minutes.
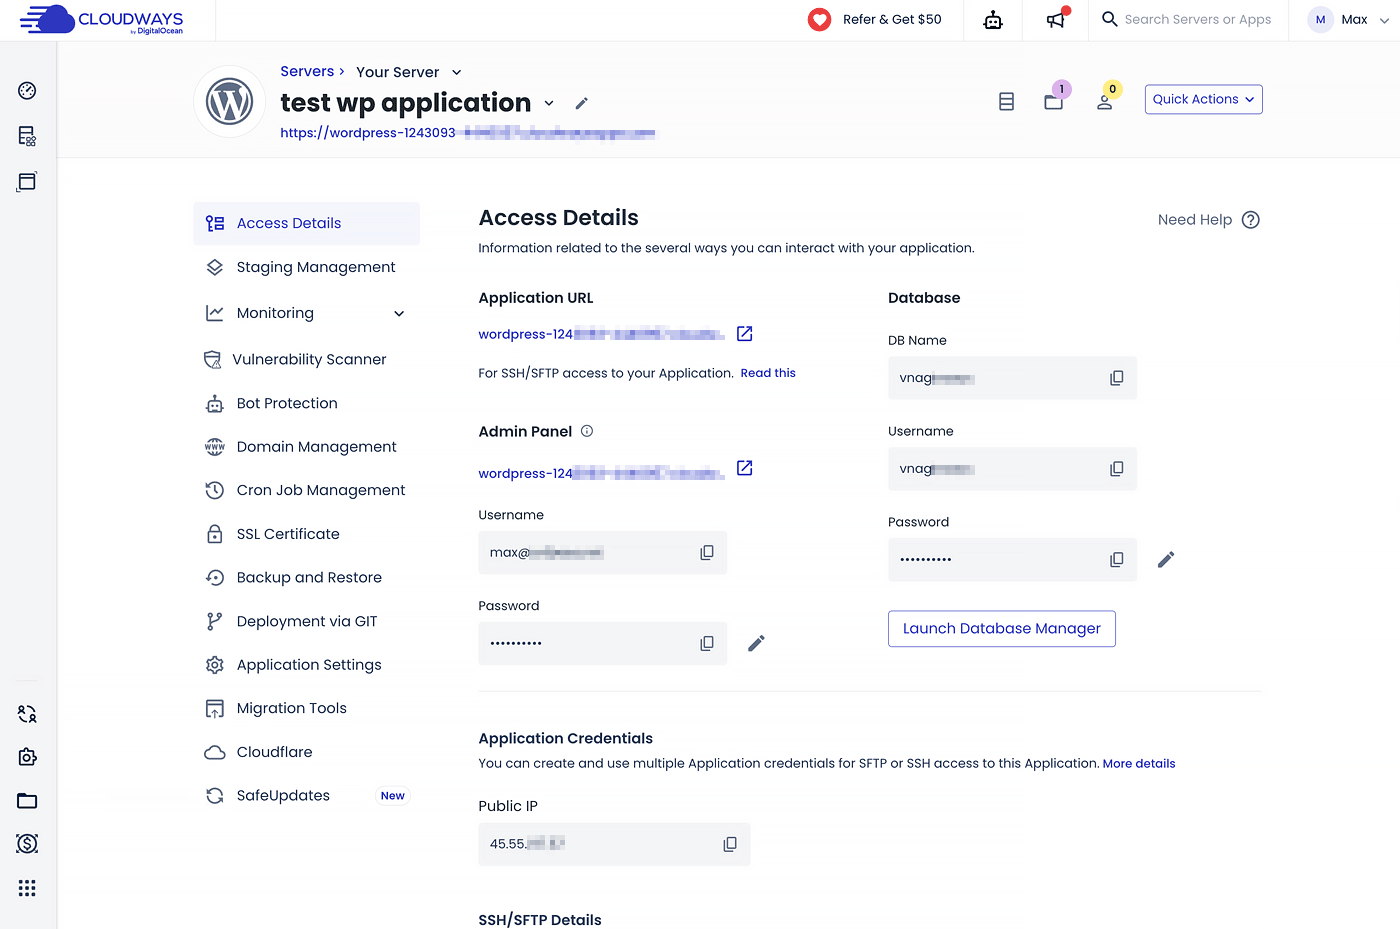
- Once installed, select your application to customize various settings. Here, you can access critical details like your site’s URL, WordPress admin panel credentials, database access, and more.
- This section also allows you to manage staging environments, analytics, domain management, cron jobs, backups, SSL certificates, among others.
- Migration Plugin (Optional): If you’re transitioning from a different hosting provider, Cloudways offers a seamless migration process with its custom WordPress Migrate Plugin. Simply navigate to the Application Management section, find Migration Tools, and download the plugin to start the migration.
Cloudways supports the deployment of various applications on a single server, enabling you to run multiple WordPress sites, WordPress Multisite, WooCommerce stores, or even custom applications built on PHP, Magento, and Laravel.
Step 3: Installing Jupiter X Theme
Now, it’s time to bring your cloud-hosted WordPress site to life with the Jupiter X theme:
- Access Your WordPress Dashboard: Locate your WordPress admin credentials in the Cloudways Application dashboard under Access Details > Admin Panel. Log in to your WordPress dashboard to begin the theme installation.
- Install Jupiter X:
- Navigate to Appearance > Themes > Add New.
- Choose the Upload Theme option and select the Jupiter X zip file from your local device. For detailed instructions, refer to the Jupiter X Installation Guide.
- Click Install Now to proceed with the theme installation.
- Activate and Setup
- Once Jupiter X is installed, go to Appearance > Themes and activate Jupiter X by clicking Activate.
- Simply use Setup Wizard for the easiest and simplest onboarding to Jupiter X. Alternatively, skip the Setup Wizard and proceed with the following steps individually.
- Register your Jupiter X license via WordPress dashboard > Jupiter X > Dashboard > License Setting (more info here).
- Plugin Installation: After activation, Jupiter X might suggest installing additional plugins to unlock the full potential of the theme. These plugins enhance your site’s functionality and design capabilities.
- Choose a Pre-Made Template: Explore over 400+ pre-made website templates available within Jupiter X by going to Jupiter X > Templates. Select a template that best fits your business or project needs and import it to jumpstart your site’s design process.

Optimizing Your WordPress Experience during cloud-hosting
Running a WordPress website on cloud hosting offers immense potential for enhancing performance and maintenance. Let’s explore key features and practices to maximize your WordPress experience on Cloudways.
Set up SSL for your website
SSL is crucial for website security, and Cloudways provides a free SSL certificate for your website. Easily install and manage SSL certificates via the Application Dashboard > SSL certificate.

Monitor your website and server and take timely action
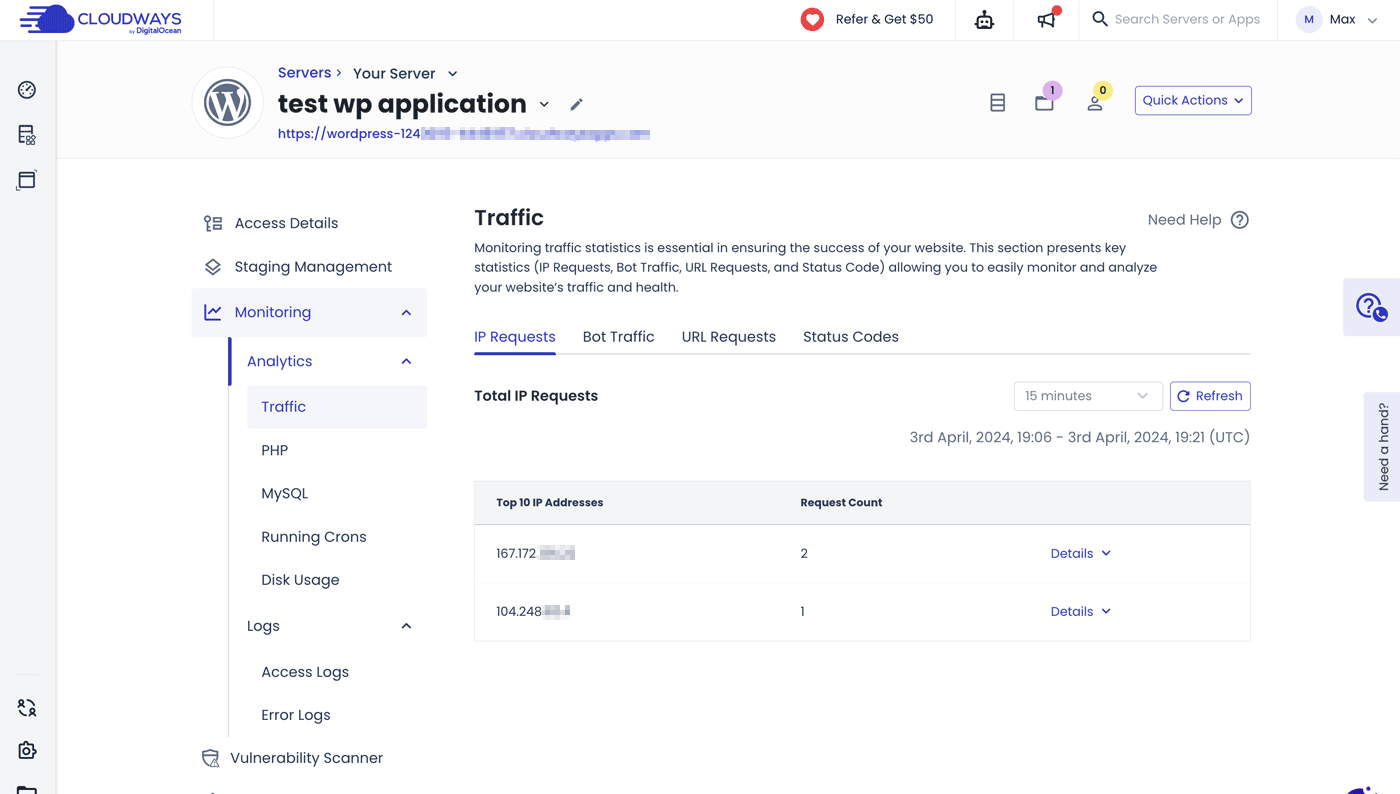
Monitor both your server and website analytics to determine necessary actions such as scaling up the cloud server or activating bot protection.
Access detailed analytics about your website and server performance via the Application Dashboard > Monitoring and respectively using the Server Dashboard > Monitoring your analytics about CPU usage, RAM usage, disk usage, bandwidth and more for your entire server.
Scale up when needed
If your website’s traffic stats are growing, scale up your server resources to meet increasing demands. Utilize the Server Dashboard > Vertical Scaling to add more CPU, RAM, disk space, and more to your server resources (additional fees may apply).

Regular backups for a healthy website
Regular backups are essential for WordPress sites, preventing data loss from various causes like server issues or hacking. They enable quick restoration, minimizing downtime and preserving site integrity, ensuring business continuity and user trust.
Using the Application Dashboard > Backup and Restore you can take and manage your site-level backups and using the Server Dashboard > Backup section you can take and manage server-level backups.
Boost website performance with CDNs
CDNs (Content Delivery Networks) store your website content on multiple servers located in various geographical locations and ensure faster delivery of content to users worldwide. This reduces latency, improves page load times, and enhances overall website responsiveness. Additionally, CDNs help mitigate traffic spikes, distribute server load, and provide an extra layer of security against DDoS attacks.
Set up Cloudflare CDN for your website via the Application Dashboard > Cloudflare (additional fees may apply).
Experiment risk-free via staging websites
A Staging website is a segregated space for experimentation, allowing you to trial fresh code, plugins, and themes without risking damage to your actual website. By setting up a staging site, you replicate your live site, enabling you to implement changes safely. Easily set up and manage staging websites via the Application Dashboard > Staging Management.
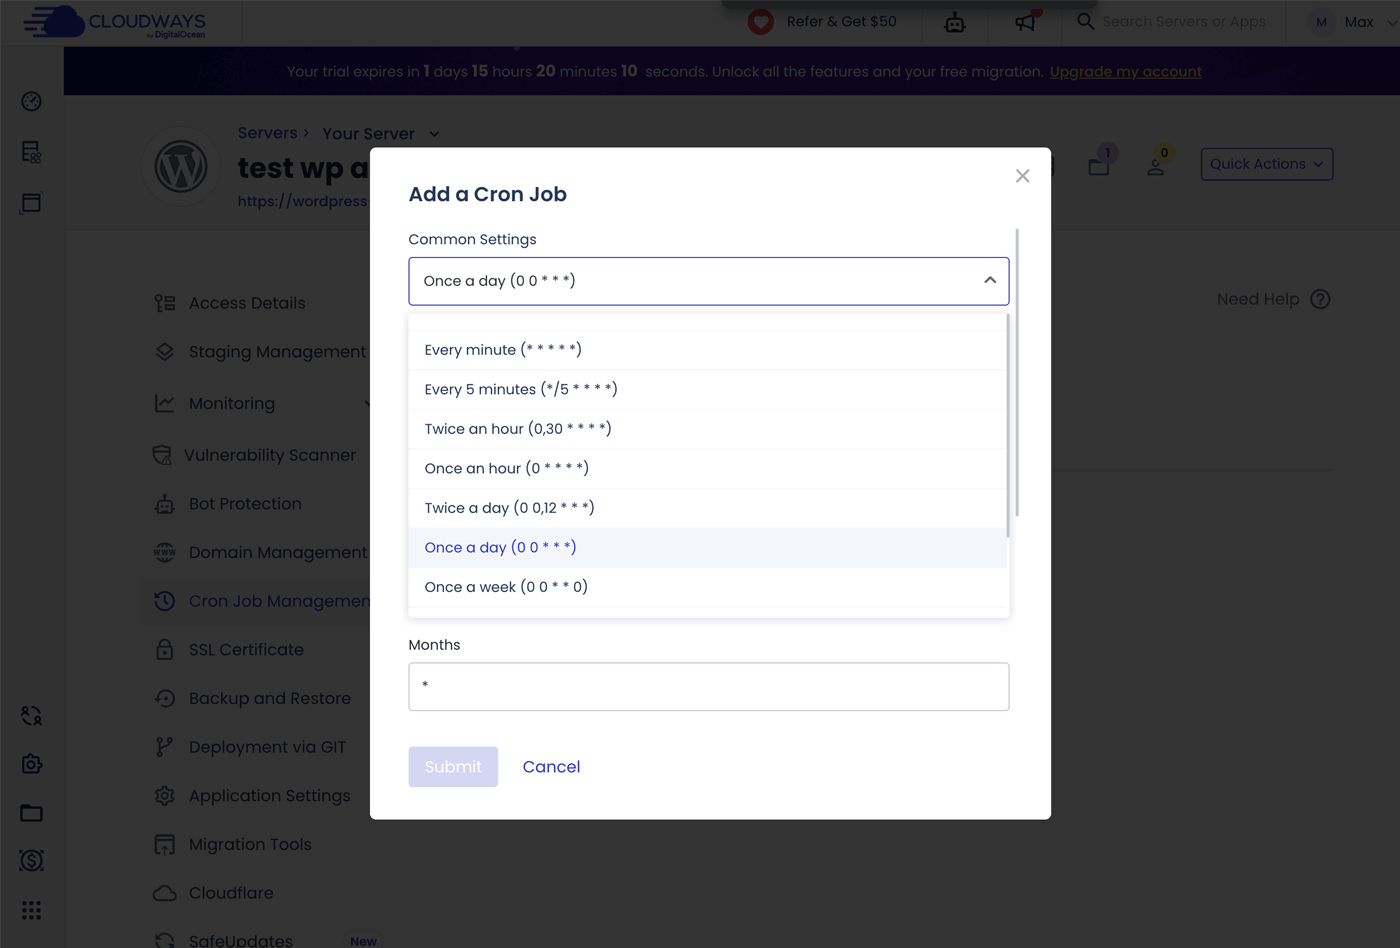
Automate tasks with Cron jobs
Cron jobs are essential for automating repetitive tasks on a server, and when it comes to cloud hosting platforms like Cloudways, here are some examples:
- Database Backup: This ensures your site can be restored in case of any unforeseen circumstances
- Security Updates: This automatically checks for and applies security updates and keeps protected against vulnerabilities.
- Cache Clearing: Clear the cache at regular intervals so your users always see the latest content.
- Scheduled Tasks: Automate routine tasks such as database optimization, system maintenance, file cleanup, sending emails and more using cron jobs.
Access Cron job management via the Application Dashboard > Cron Job Management section.
Conclusion
In the journey to digital success, the foundation you choose for your WordPress site can make a significant difference. Cloud hosting emerges as the key to unlocking scalability, performance, and security, critical factors for any website aiming to thrive in the competitive online arena. It offers the flexibility and efficiency that modern websites need to manage traffic surges, enhance user experience, and safeguard against online threats.
Cloudways stands out by providing the power and scalability of cloud hosting with a management layer that removes the complexity typically associated with these environments. This approach makes Cloudways an attractive option for WordPress users looking for a balance between performance, flexibility, and ease of use. You can also refer to this detailed Cloudways review for deeper insights on the service.
Whether you’re scaling an e-commerce platform, optimizing a blog, or enhancing a business site, Cloudways and Jupiter X offer the pathway to a dynamic, resilient, and beautiful web presence.

No comment yet, add your voice below!