Get ready to groove and shout as Artbees releases its new addition to its collection of PSD files giveaway – the PARTY one-page website template!
This is Artbees’ newest and coolest “webpage” ever and we’re very pleased to invite you to download this template that’s totally free for everyone. You don’t have to go through anything to get a pass. Enjoy its unique elements now and experience its features for you and your business.
The best part? You can get Photoshop files instead of complicated CSS codes, so you better not miss this opportunity to have a well-thought-out party design. But wait, no hurries on your part since this is free forever. Yes, you read it right!
This free Party website template is perfect for entertainment businesses, events companies, and party lovers alike, So set aside those second thoughts and grab the perfect investment that will make people line up outside your event.
Now, let’s run through its key features to get a full glimpse of what this free Party website template offers.
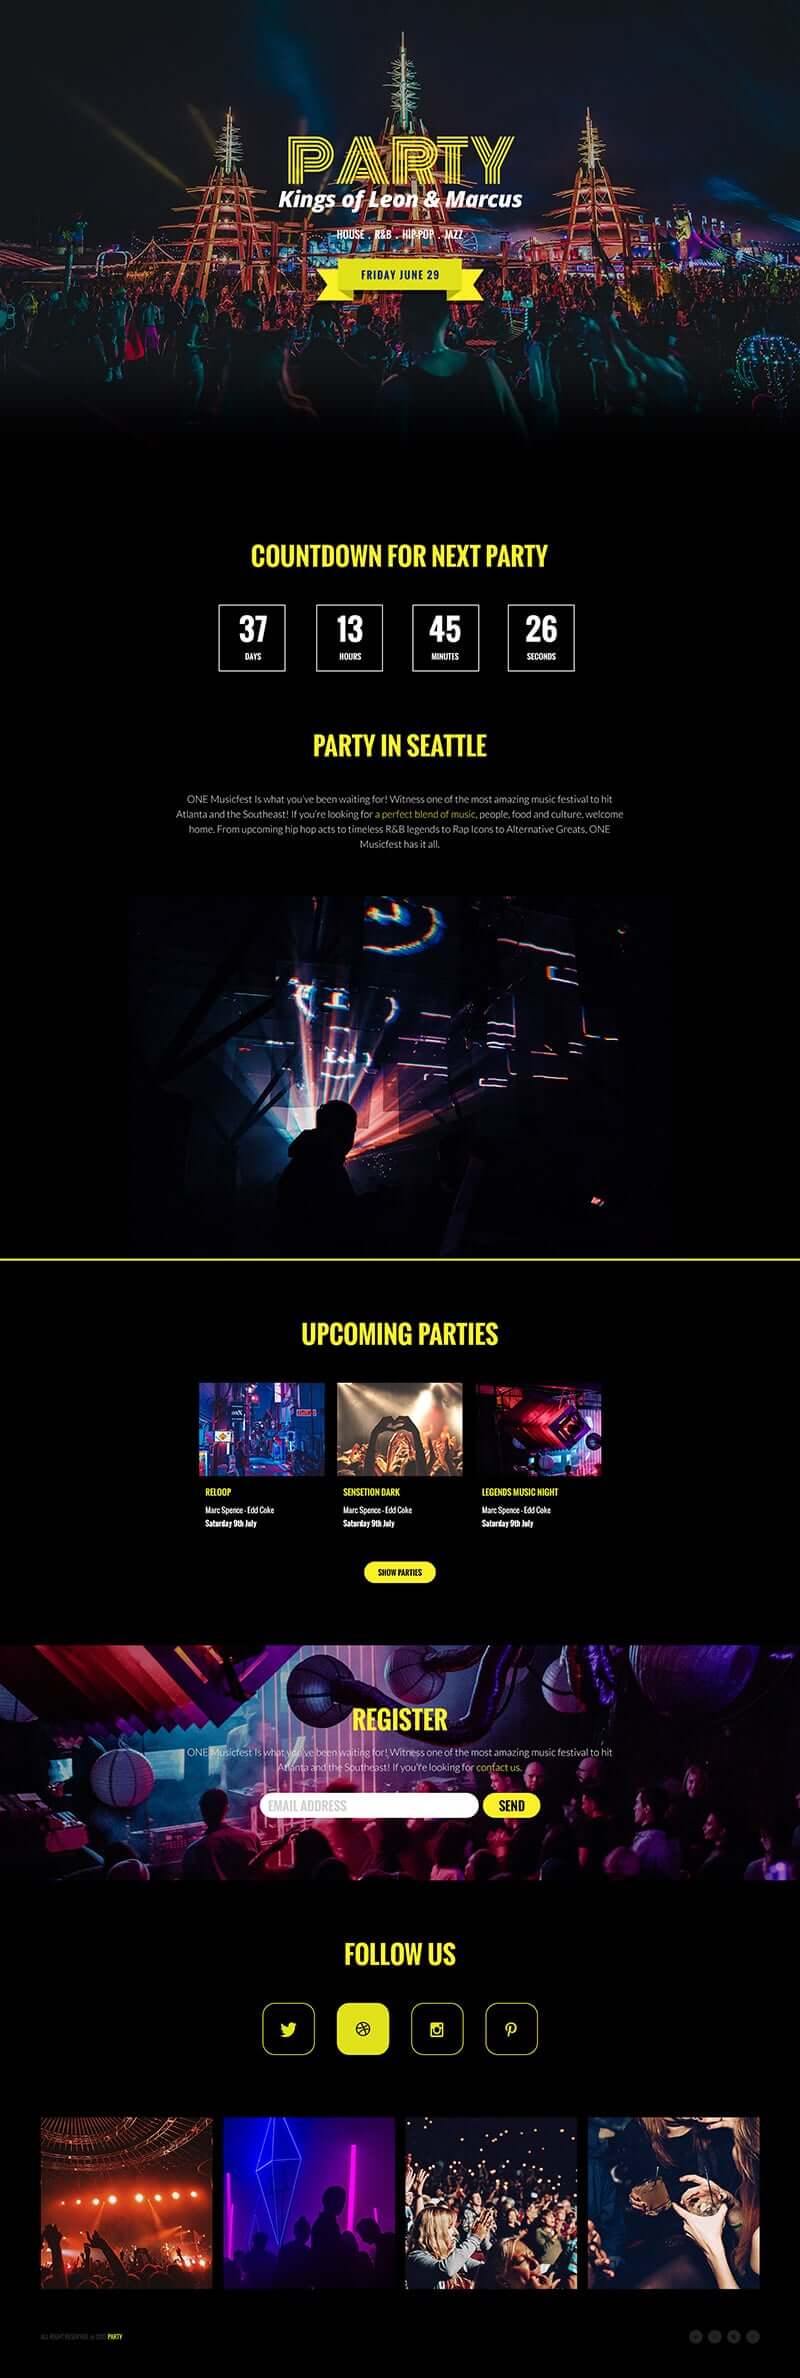
The Stage
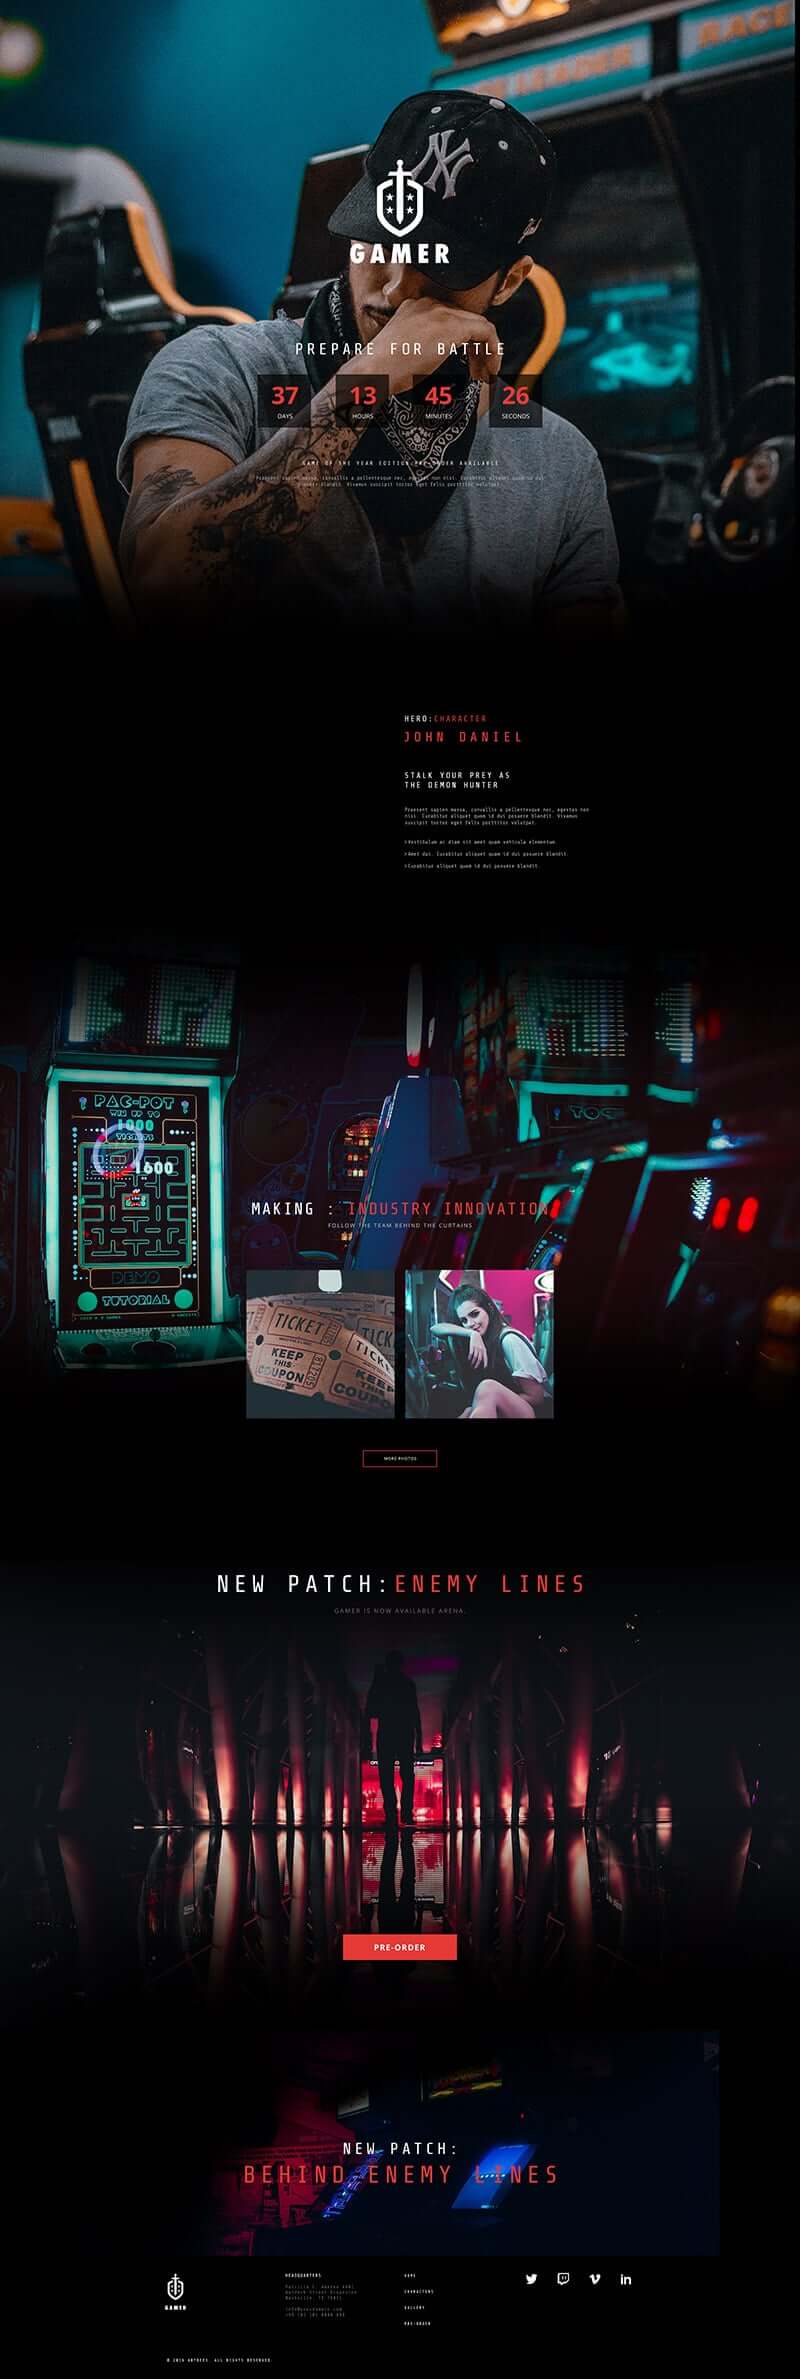
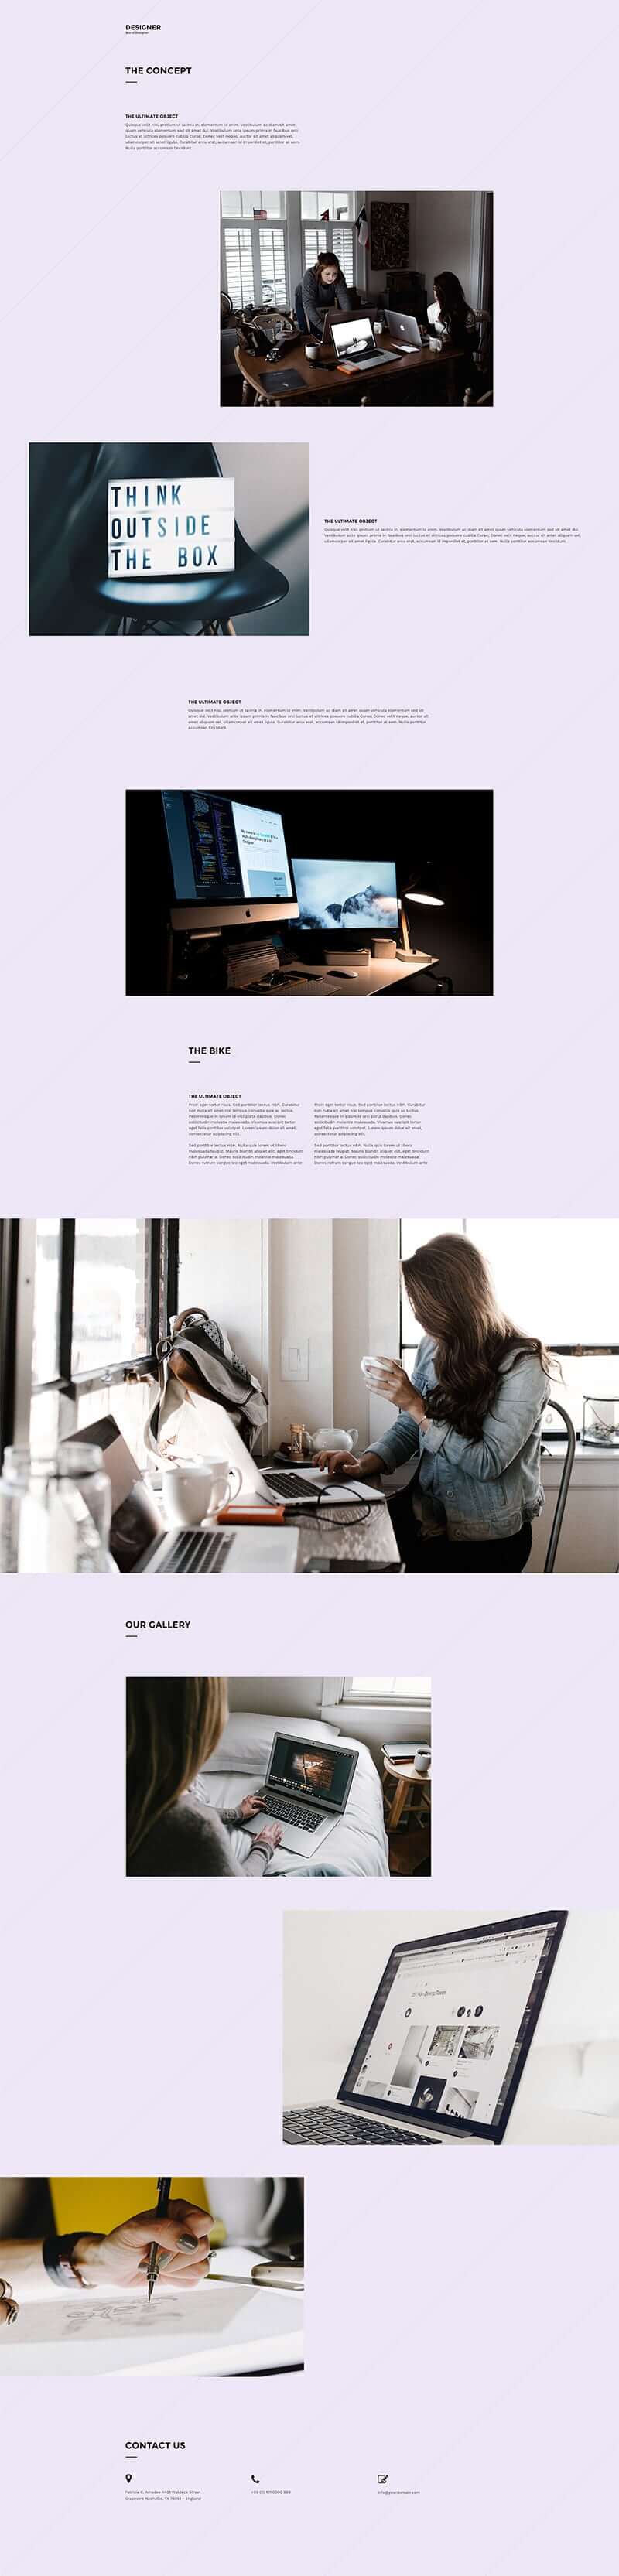
This free Party website template sets the stage without the ordinary layout and style. It’s packed with fancy and sensational accents of hot pink and blue and abstractly comes with strikingly bright party lights. The musical elements are also magnified front-and-center, and the fonts used on the title are kind-of smooth and fancy as well.
The thematic colors and positioning suit the interests of party-goers. The title page gives you that night revelry vibe right from the get-go.
Table Tops
What conventional features can this free Party website template put on the table?
Well, this dazzling one-page website template is overflowing with fun photos of party people and lively background images that evoke a youthful ambiance.
There’s also an Event Countdown feature where web visitors can anticipate the next party they can go to. There’s no navigation menu but the Icon Box 2 provides wide information about the business that can be very helpful especially for new visitors.
To gain and nurture relationships with prospects and loyal customers, Artbees integrated a MailChimp Subscribe Form so you can keep in touch and update them about future events. The Image Gallery lures people to join the parties as this is a good credibility portfolio for the business. Images use smoky yet captivating and vivid hues. Of course, it’s a necessity to place Social Network buttons where they can engage with you outside of the website.
The Party Lovers
This free Party website template is perfect for businesses related to the entertainment industry; music festivals, concerts, bars, clubs, or even those event planners inclined to host parties.
There’s no reason not to party for this free Party website template! From fonts to colors and images, it’s bursting with everything that you need for a perfect party website. Not to mention that the overall template is friendly and easy to customize so you can deliver a remarkable user experience.
This is entirely free, so do not wait any longer and grab this gift from Artbees now. We’re more than excited for you to try this out!
[abb_downloads file_type=”free_file” title=”Download Party Template” tweet_text=”Enjoy the free Party webpage template from @jupiterxwp! Download here: https://bit.ly/2LtykPW #FreeJupiterWPTemplates”]
To enjoy more than 160 advanced templates that are already coded with the highest standards, download Jupiter WordPress Theme!
[call_to_action title=”Download Jupiter WordPress Theme Now” target=”_blank” url=”https://themeforest.net/item/jupiter-multipurpose-responsive-theme/5177775?utm_source=PartyFreeJupiterWPTemplate&irgwc=1&clickid=Q3XVRp27-Vd-W5SUr%3AxaIR5HUkg0Z4yRFRdWRY0&iradid=275988&irpid=27795&iradtype=ONLINE_TRACKING_LINK&irmptype=mediapartner&mp_value1=&utm_campaign=af_impact_radius_27795&utm_medium=affiliate&utm_source=impact_radius” type=”link”]
***Important Note: Artbees free templates cannot be sold or distributed as it is — only derivative works for end users can be sold.