As a WordPress support agent, I know about all the conflicts, problems, and issues the users of our products face. Dealing with these issues is always a new and interesting challenge, which is the good part of being a support agent. There is nothing more valuable than learning from an issue, and the support desk is there to help you do just that. Even though many of the issues are a result of a misunderstanding or misconfigurations on the servers, there is always room for learning.
In this article, I’m going to share 5 common mistakes that lead to the issues when using the Jupiter X WordPress theme. These are most probably common for every WordPress website, so in fact, this article is not limited to only common issues with Jupiter X, but rather essential troubleshooting that can teach you a lot about WordPress.
License related issues
“Our previous developer is out of reach, and we need to update the theme”, or “when trying to register the theme, I see purchase code already in use, contact support”. These are simple but confusing issues for many users. In fact, if you know how licensing works, you can avoid many of the licensing issues. Here is how Jupiter theme licensing works.
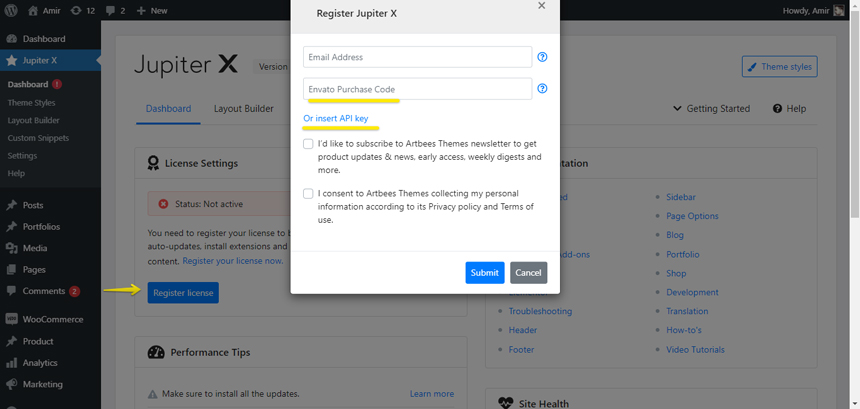
Artbees is an exclusive author of ThemeForest. This means that you purchase the item from ThemeForest.net. Every legal aspect of purchasing, payment, and refunds will be handled by ThemeForest. In fact, you buy the theme from ThemeForest and ThemeForest has to deal with licensing stuff. It’s also a good idea to extend the support trial on ThemeForest. However, since the Envato market doesn’t give enough features to support users, we at Artbees have added a second layer of authentication for our themes. It allows us to have a separate support desk, update panel, forum, and many other features in what we call the Artbees Portal. What you get from ThemeForest itself is a purchase code. The purchase code is this:

You will have to use that purchase code to register your theme.
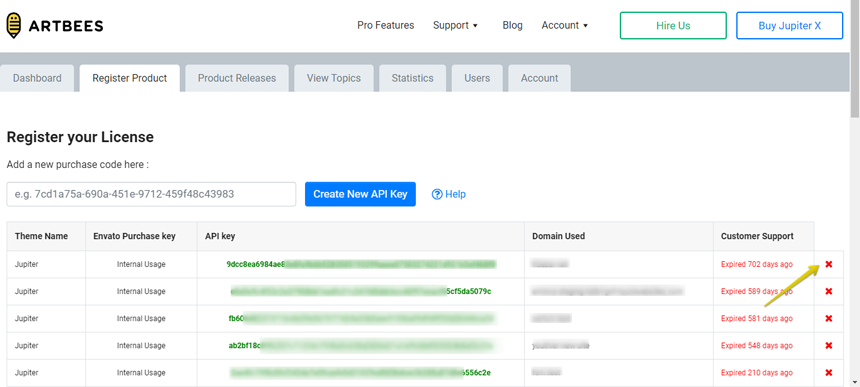
While registering the theme, an account will be made on our portal using your purchase code and email address and the account information will be sent to your email. Using that account, you can open support tickets, download different versions of the theme and, more importantly, manage your registrations.
In fact, each license in Envato is allowed to use only one domain at the same time. We used this rule to empower our customers by allowing them to register the theme on an unlimited number of subdomain folder installations on the same domain and also use the license on staging and development environments. When you finish the work on your staging website, you can simply revoke the license on this page and register it again on another domain.
Ok, so what to do about common issues with Jupiter X that I pointed out at the beginning? I explained how the licensing works, but this process is not foolproof. Some users will lose their purchase code, some will forget what account they were registered with the first time, some don’t have the purchase code at all because somebody else bought the theme for them.
So what should we do in this case? You first need to find your purchase code.The purchase code is everything you need. The provider of the purchase code is the owner of it and resolving any issue is possible only with the purchase code. If you don’t have the purchase code, try to get it from the person who bought it for you or buy a new one. You can always find your purchase code in your Envato account. If you have found the purchase code, then you can ask to resolve issues with it through ThemeForest. Simply submit your query from here so that we resolve it for you and then you can access the actual support desk afterward.
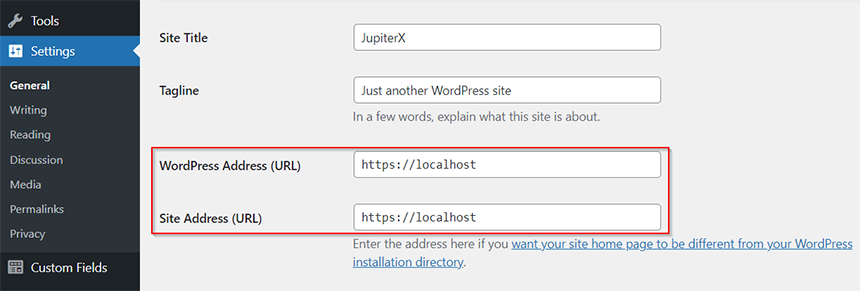
By understanding the licensing workflow, these questions can be addressed: How can I revoke my license? How can I transfer my license to somebody else? How can I use the theme on localhost? How can I find my purchase code?
Server configuration issues
Many of the most common issues with Jupiter X can be avoided if the server requirements are met. The server requirements of Jupiter X are like this:
- PHP – Version 7 or greater
- MySQL – Version 5.6 or greater
- mod_rewrite – The Apache module needs to be activated for pretty permalinks.
- cURL – Supported by the server.
- upload_max_filesize – 8 MB or greater
- iconv – this extension must be installed on your server
- SubstituteMaxLineLength – 20M or greater
- PHP and WordPress Memory Limit – 256MB
- PHP Modules : PHP XML, MBString, SimpleXML, Fsockopen/cURL, SoapClient, DOMDocument, GZip, Zip Archive, Iconv, OpenSSL > 1.0.2
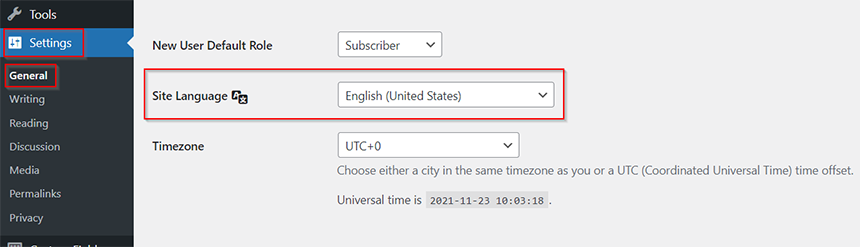
You can always check them through Tools -> Site Health -> Info. If any of the above is missing or not provided, the functionality related to it will become unavailable or work incorrectly. Allow me to share this valuable information with you: The first thing we do every single time we receive a ticket is make sure the requirements are provided correctly. In most cases, one or two modules are missing or the memory limit is wrong. As part of troubleshooting a WordPress theme, it’s recommended to check the requirements first thing.
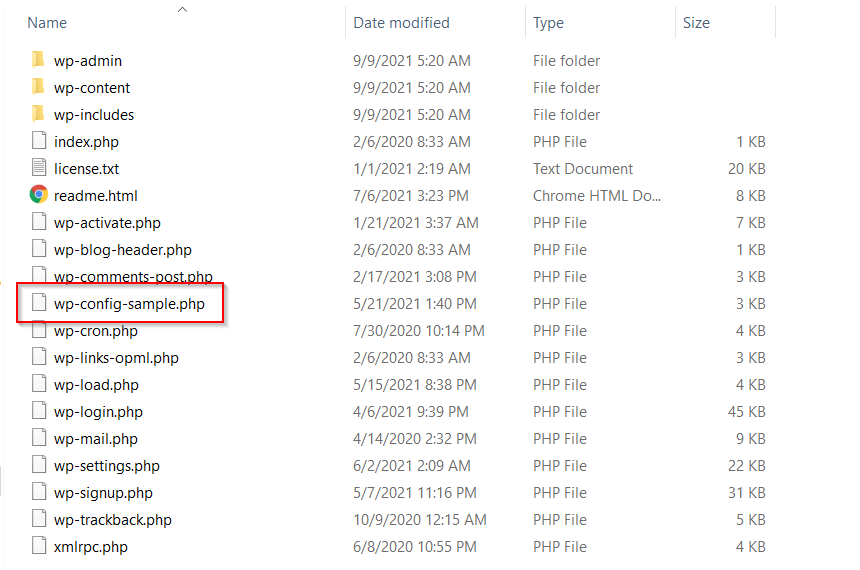
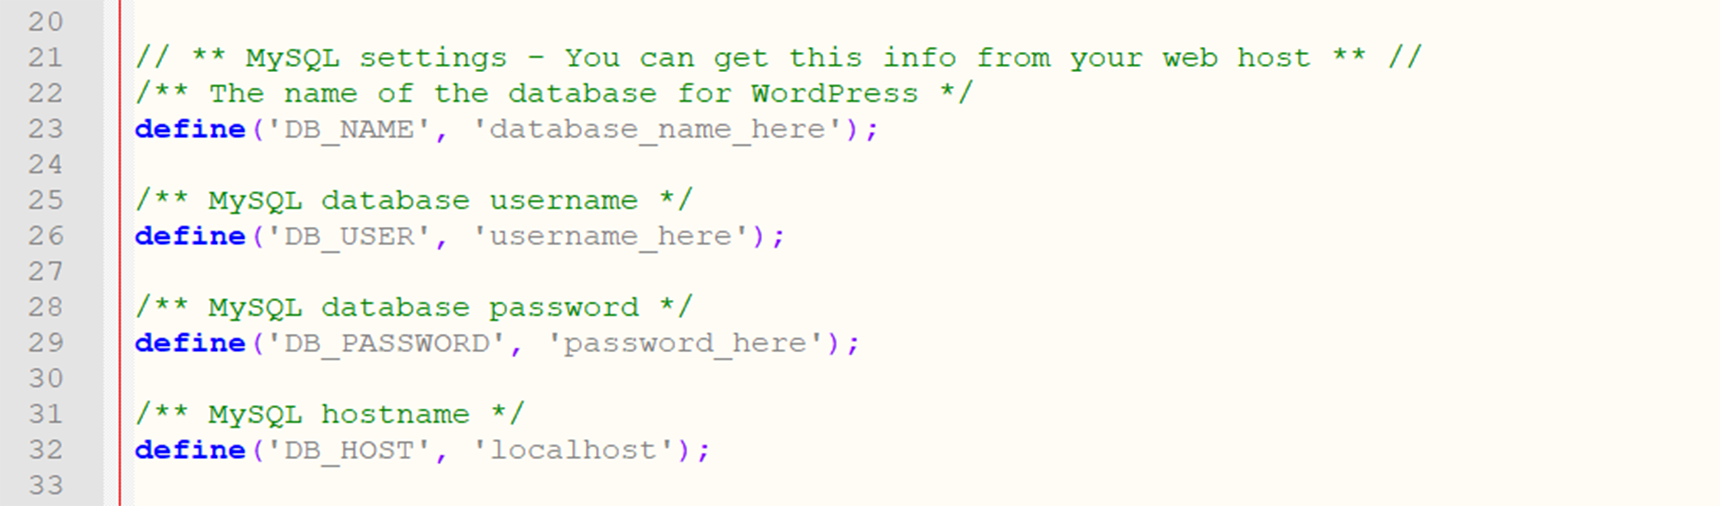
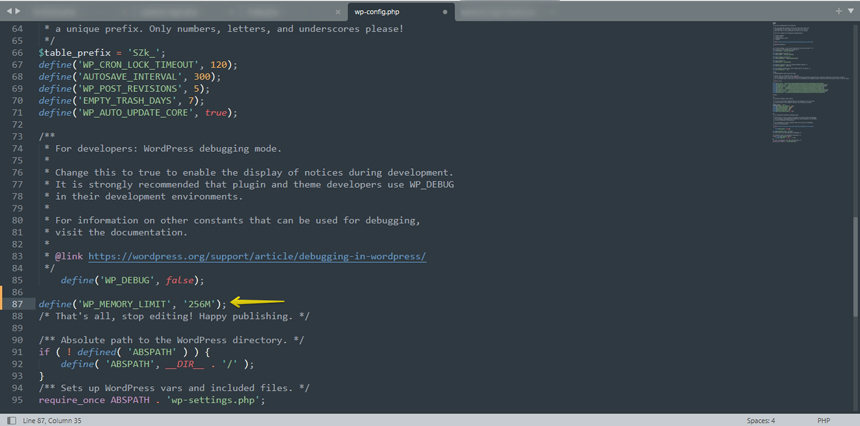
Many issues with Elementor not loading are related to low memory limit or missing define( 'WP_MEMORY_LIMIT', '256M' ); in the wp-config.php file. We have already provided an article on how to configure the WP-Config.php file here.
In case you need assistance enabling the PHP modules or you can’t find where to do it, you need to contact your web host support and ask for help. The place you need to check might be different depending on your hosting control panel, so the best person to help in this case is the hosting support.
For more information about the Server Requirements, please refer to this article.
Template installation issues
While installing demo templates should go smoothly in most cases, some users may face errors while installing the templates. In these cases, the best troubleshooting technique is to make sure your web host meets the server requirements of Jupiter X. I covered it in the previous section.
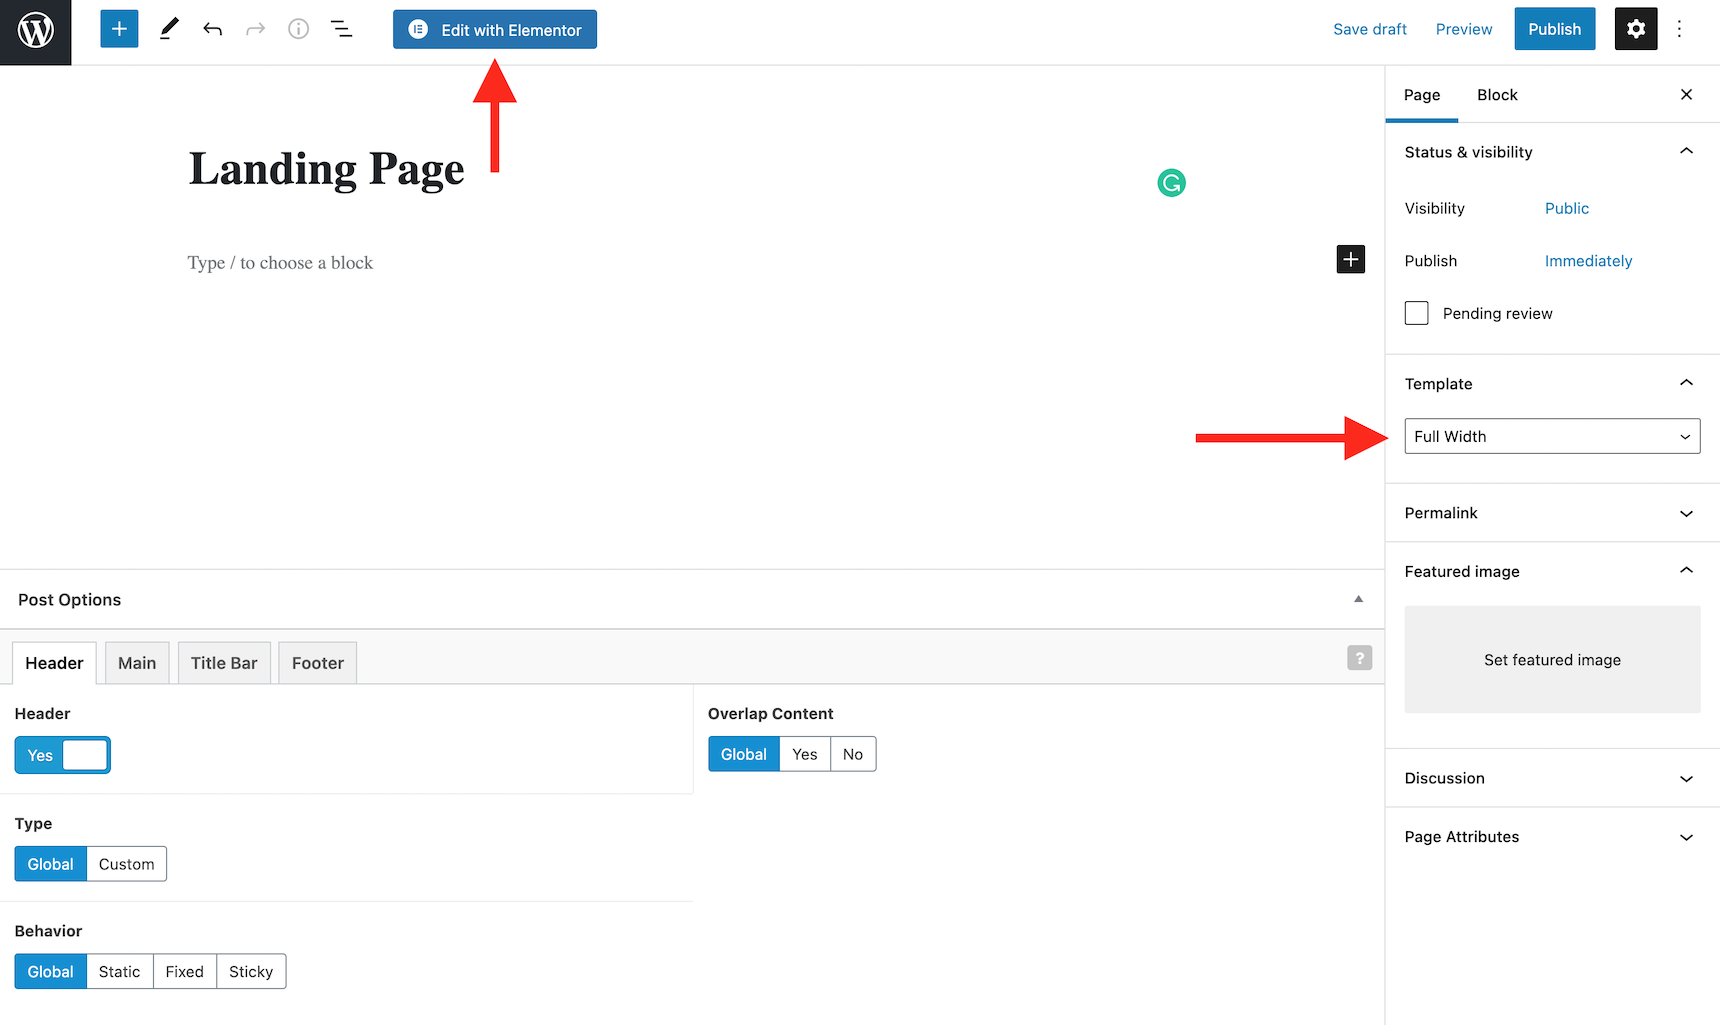
However, there is another common issue with Jupiter X that I would like to talk about. When you install a new template in Jupiter X and choose the Full Import option, your current content, settings, widgets, etc. will be removed and the database will be reset. These will be replaced with page contents and settings of the new template that will be imported.
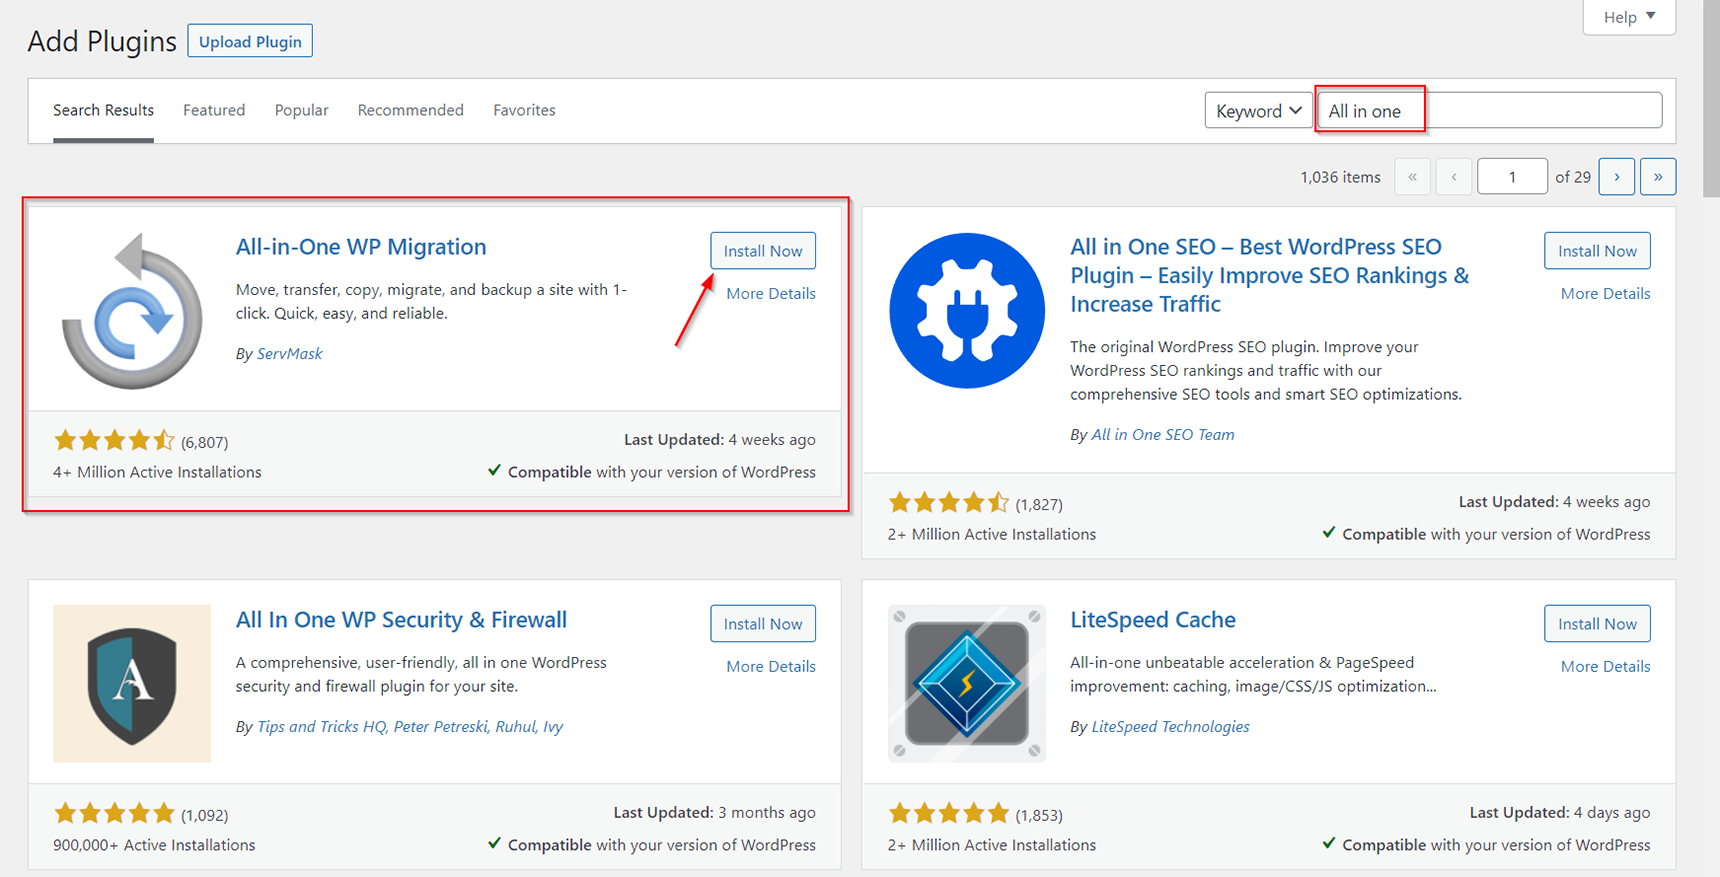
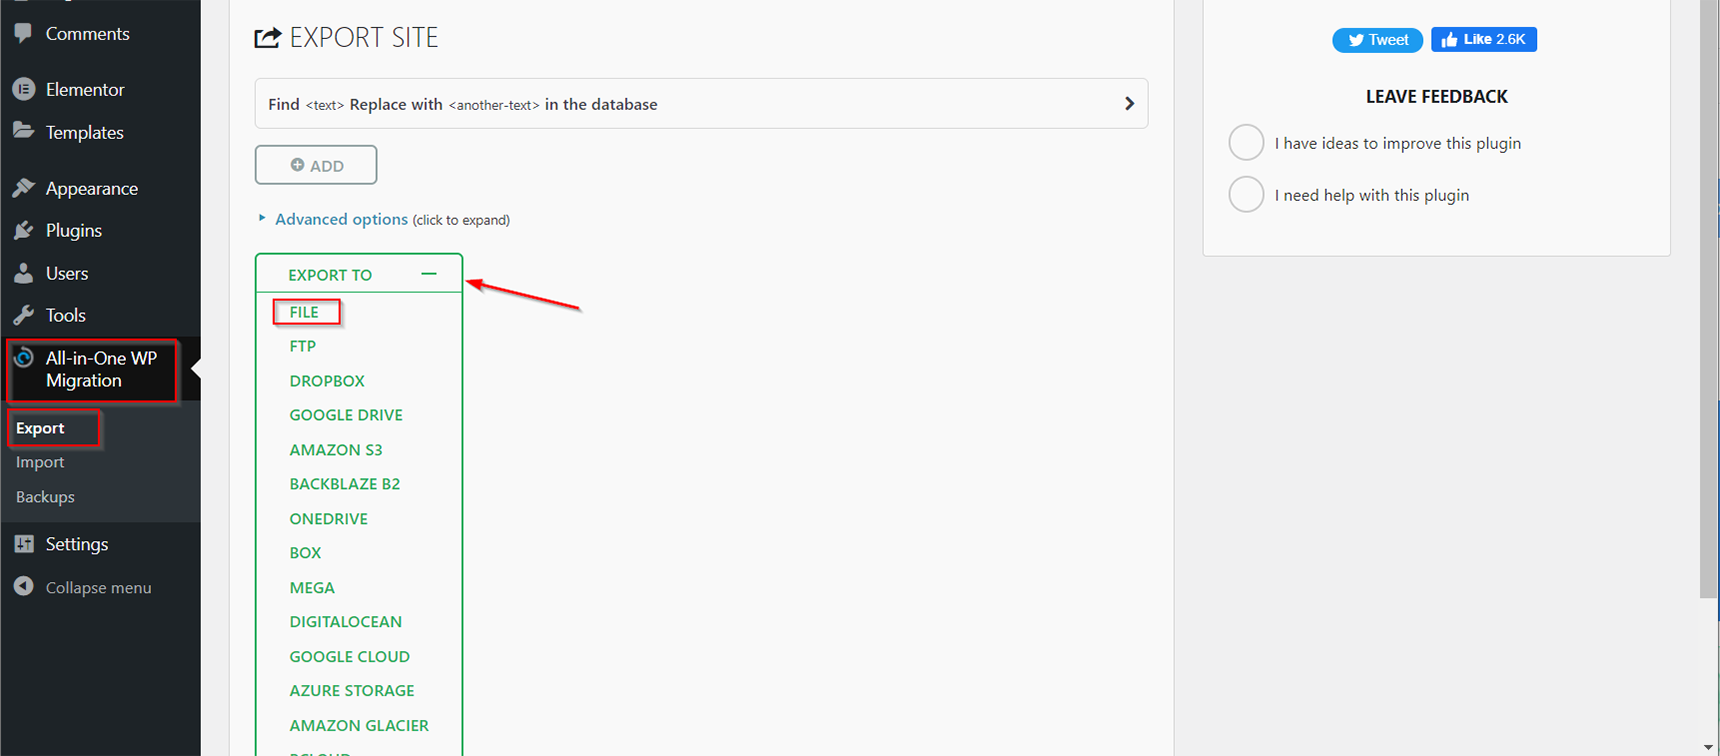
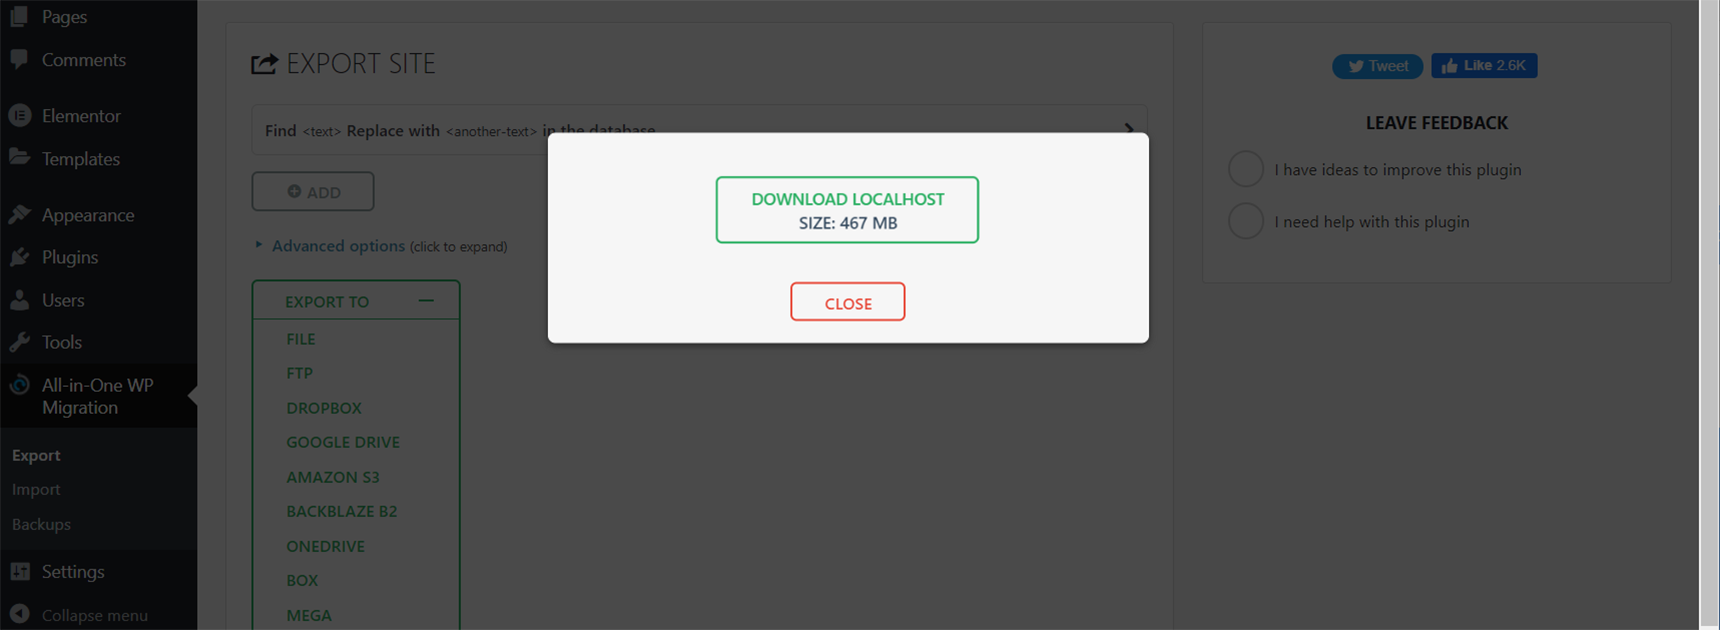
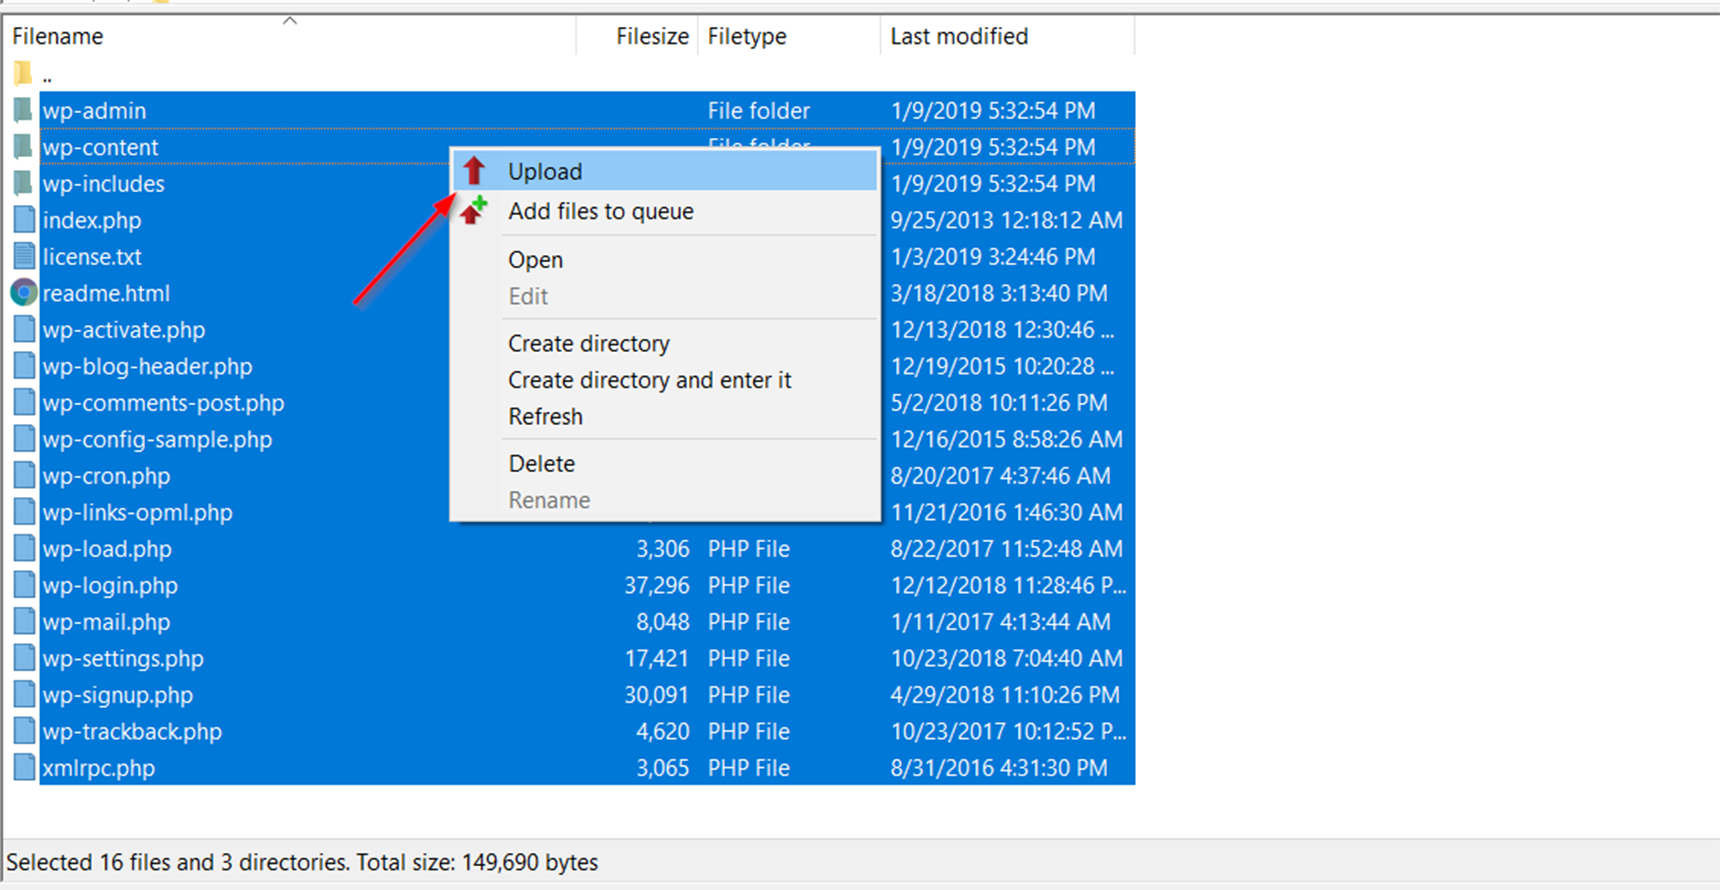
While this is what you want to happen when importing on a clean site or when you want to start fresh, it can cause problems when you do this on an existing website with existing content and everything gets removed. The best workaround to avoid content removal is to use a secondary website and import the template to it. Then, after making sure everything is alright, export the pages or the whole website and migrate it to the live website. However, sometimes it’s too late for this advice and your content might be lost before you notice.
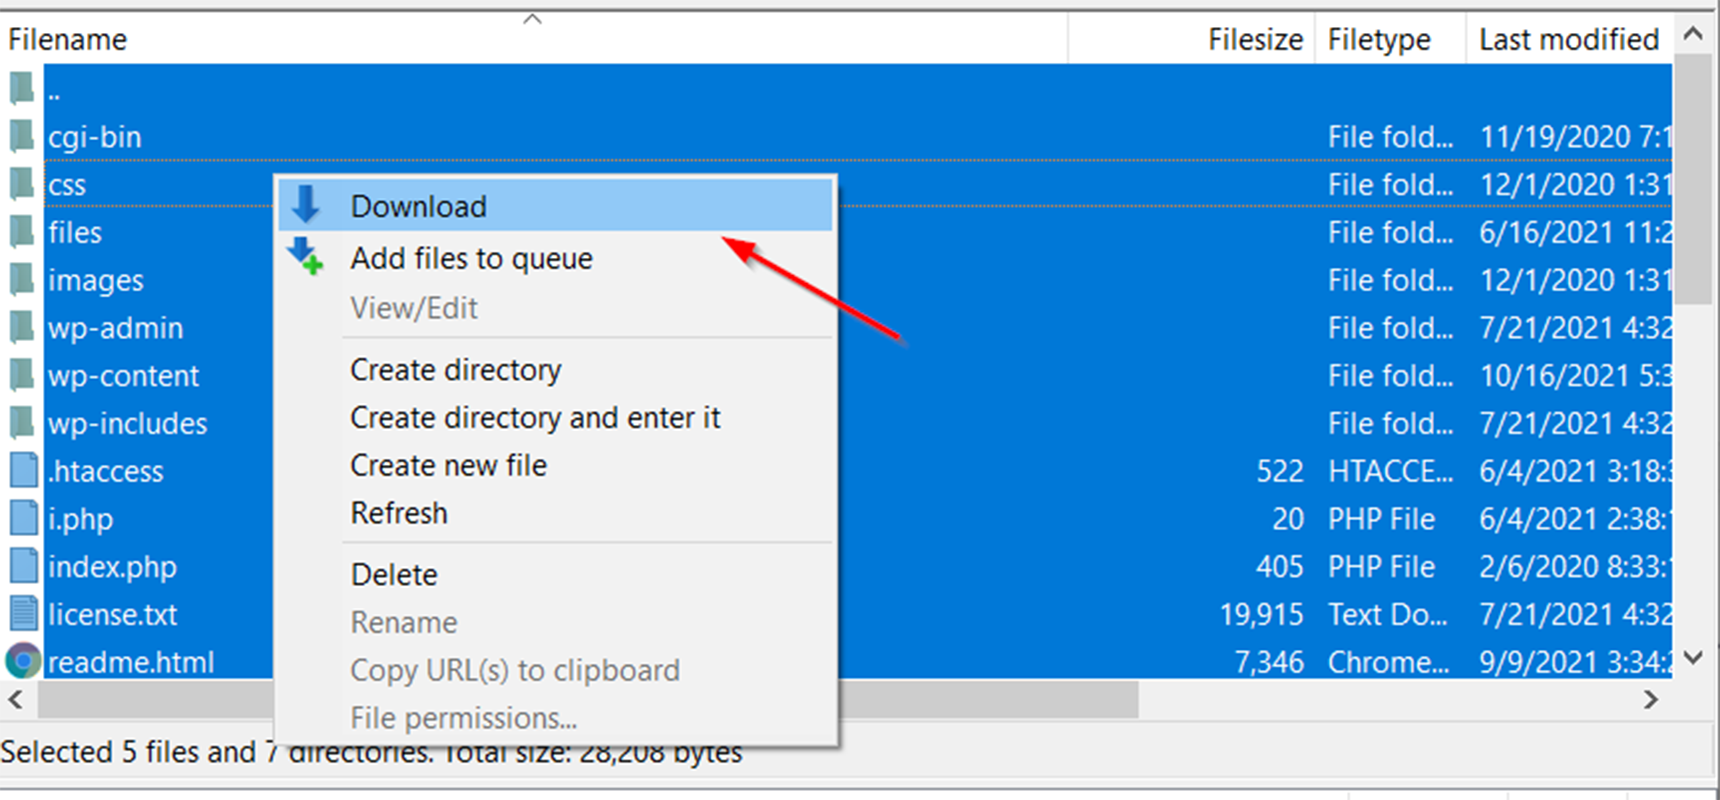
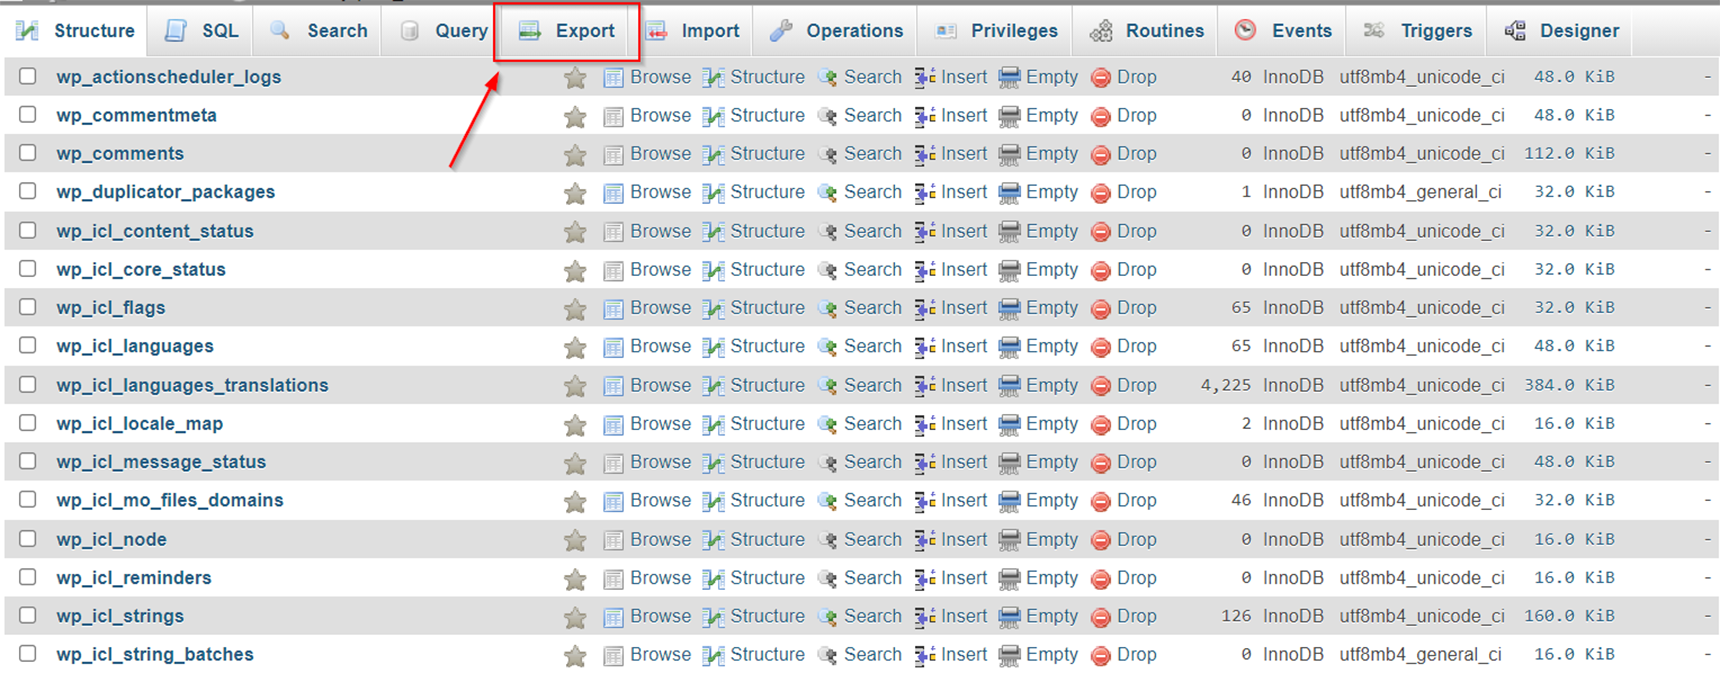
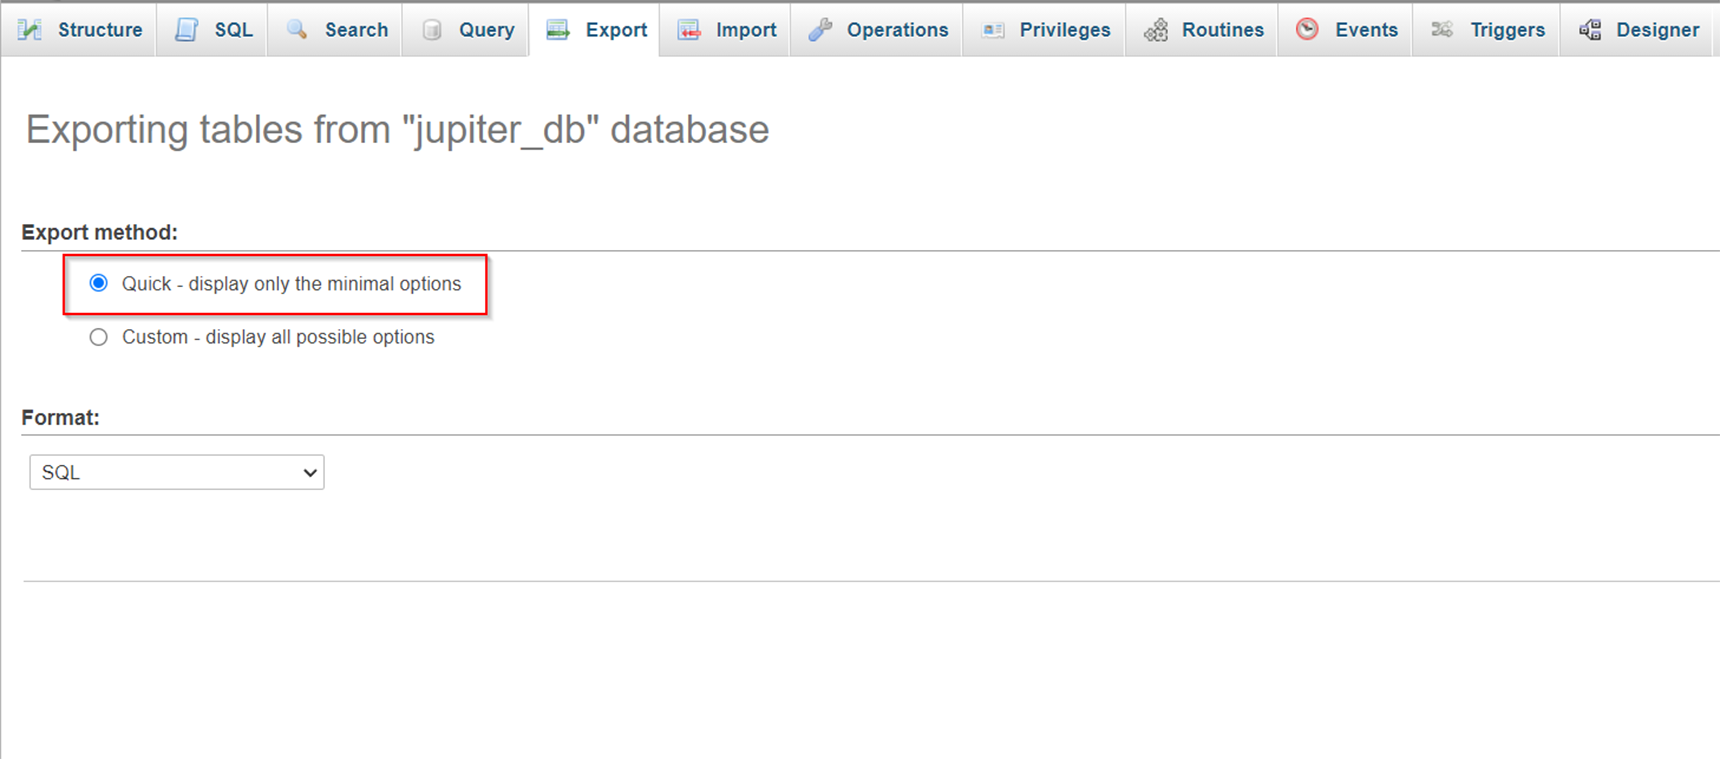
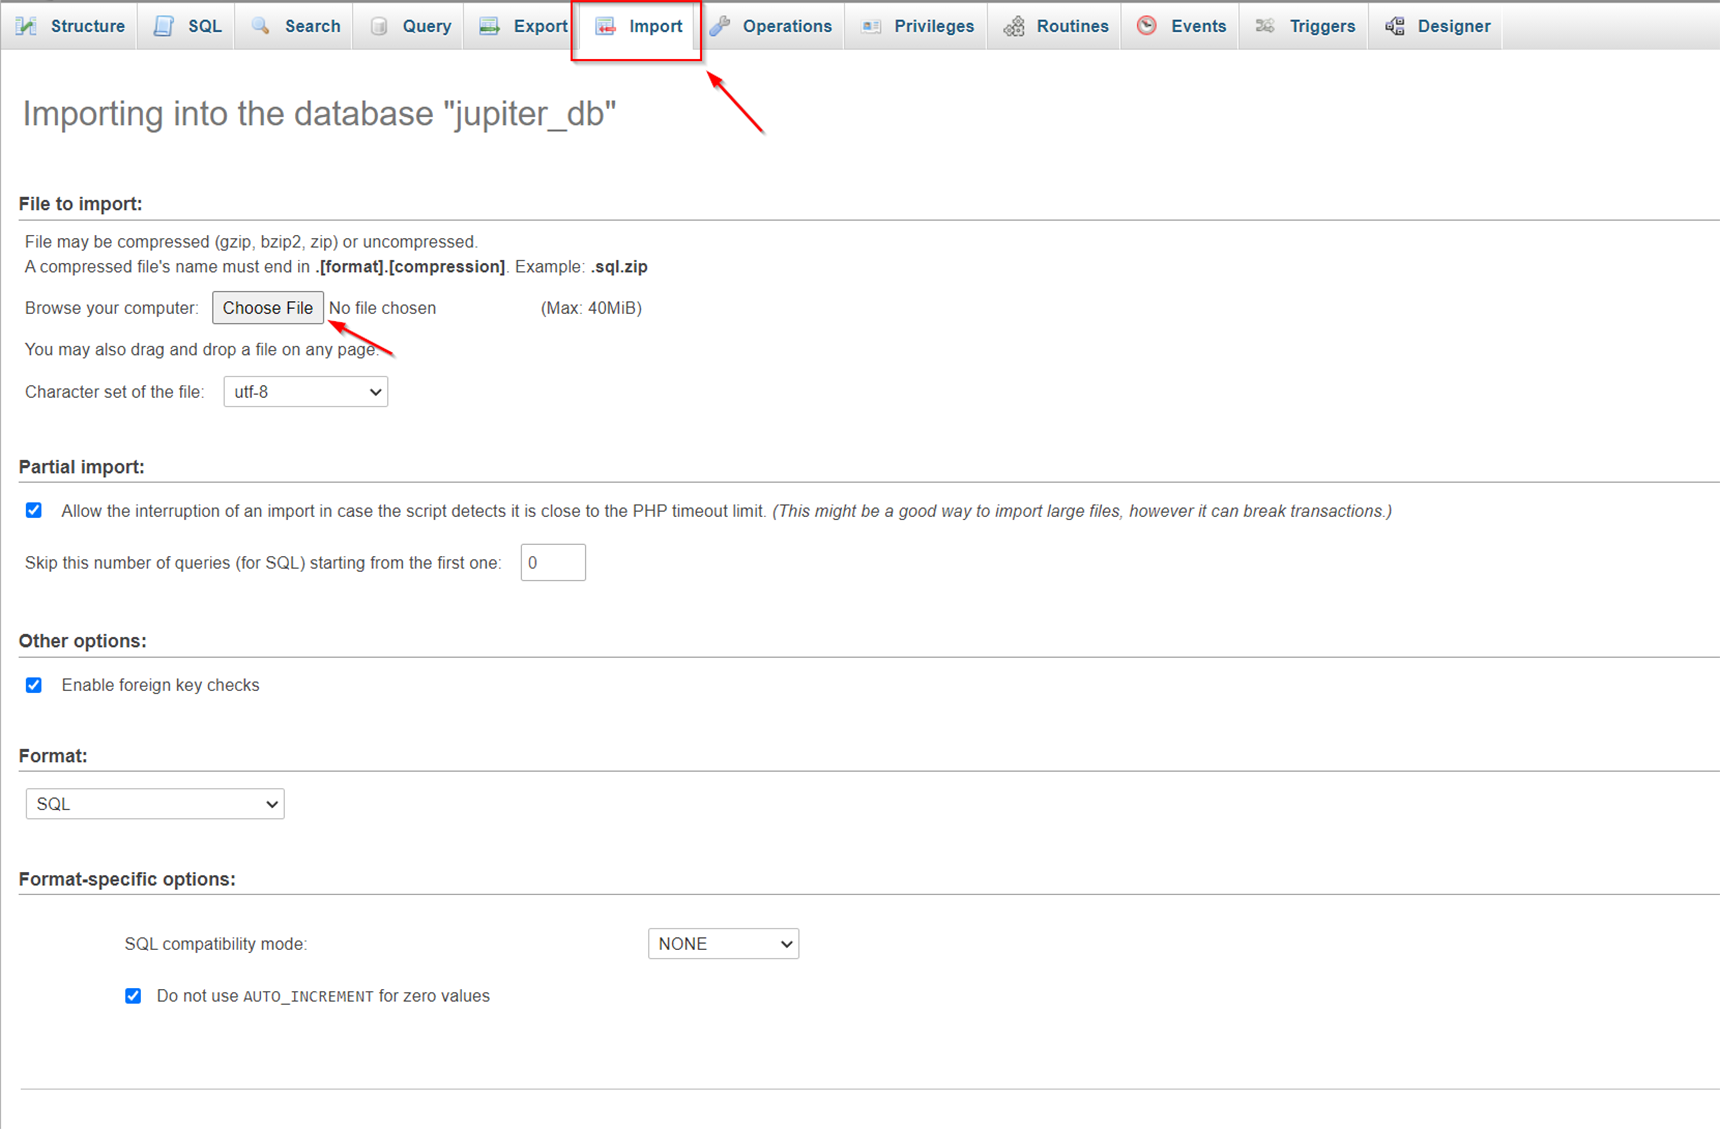
Fret not – we have got you covered. While installing a Jupiter X Ready-Made Template, on the very first step Jupiter X takes a backup of the database before it removes everything. This backup is in the form of an SQL dump file placed in this directory of your website wp-content/uploads/jupiterx_backups/
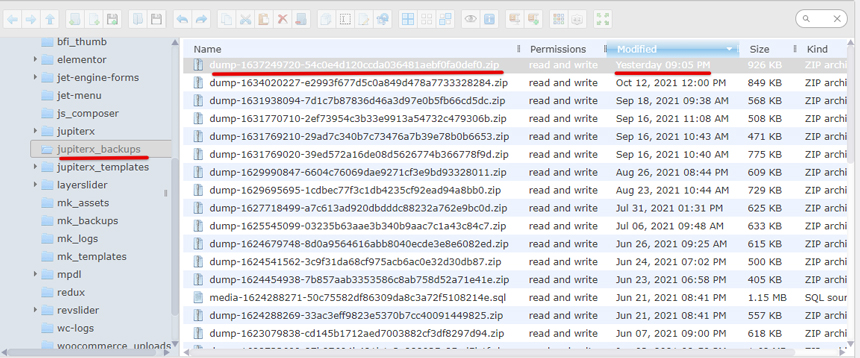
This is basically the backup that can be used to restore the contents of the website prior to the template installation. You can restore it with the help of a database expert and get back your content.
Elementor problems
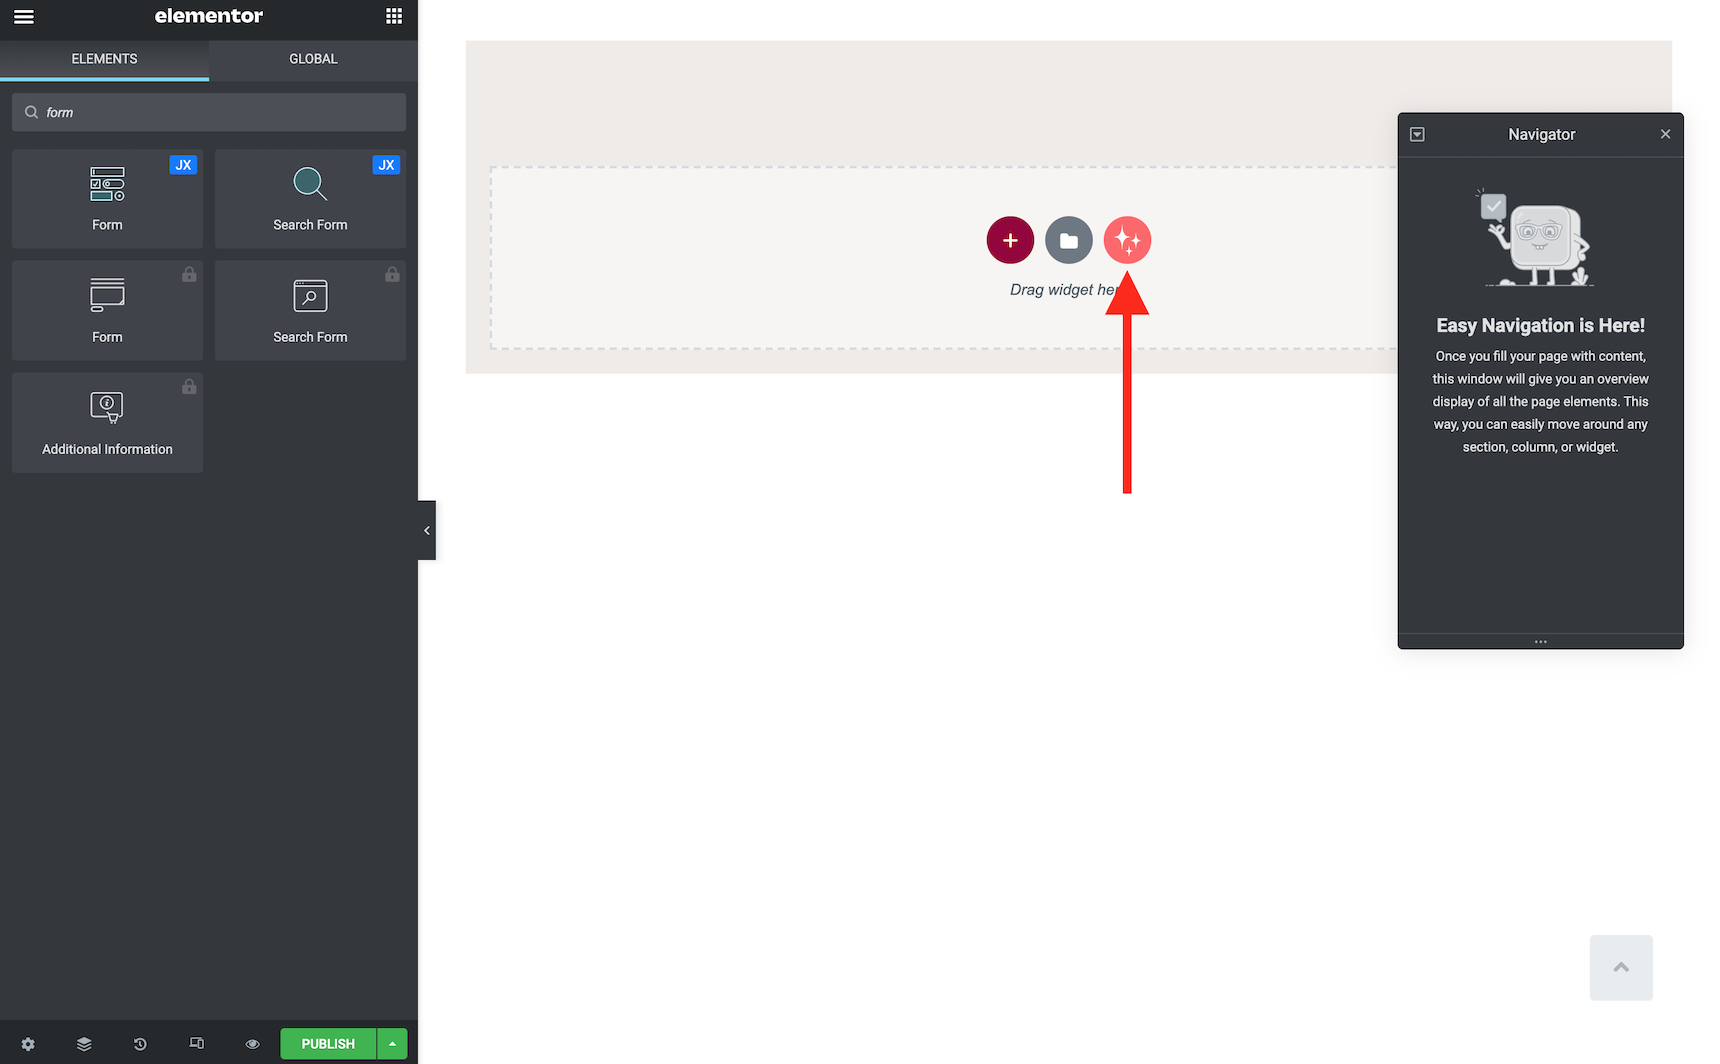
Elementor is the default page builder in Jupiter X. All of the theme’s demo templates are made via Elementor. This means that the theme is dependent on the Elementor page builder. Elementor is an open-source plugin with a large community and a lot of add-ons. Each add-on can add cool features to it, but at the same time, increase the risk of creating an issue.
While one of the most common issues with Elementor page builder is that the page loader is not loading, the reason for this might differ from case to case – don’t worry, I’ll go over some common causes. Please note that each time you encounter an Elementor issue, it may have a different cause, so actually covering all the reasons is not possible.
Check for plugin conflicts
Elementor says that these loading errors are caused due to plugin conflicts, so it’s best to start from here. If the Elementor loading issue is a new problem on your website, then check for plugins you’ve recently installed. Disable these plugins and check if the error is fixed.
If you are unable to find the culprit, then follow this plugin troubleshooting guide or enable only Elementor (and Elementor Pro if you have it) and check if it is loading properly. If it is, then start activating plugins one by one and check Elementor each time. If you face the loading issue again after activating a plugin, then you’ve found the culprit.
Check Your PHP version and WP Memory Limit
A server with limited WP memory can also prevent Elementor from loading. The Elementor page builder recommends using PHP 7.0 or higher to experience the best performance while using the editor. They also recommend a preferred memory limit of 256M or higher.
To check the PHP version and WP Memory limit, go to your WordPress dashboard and navigate to Elementor > System Info.
To update your PHP version, you can simply go to your web host admin panel and update PHP or you can contact your webmaster to do so.
If you’re on an updated version of PHP and still facing the issue, then you should check if the memory limit is 256M or not. To increase the memory limit you can perform one of the below actions.
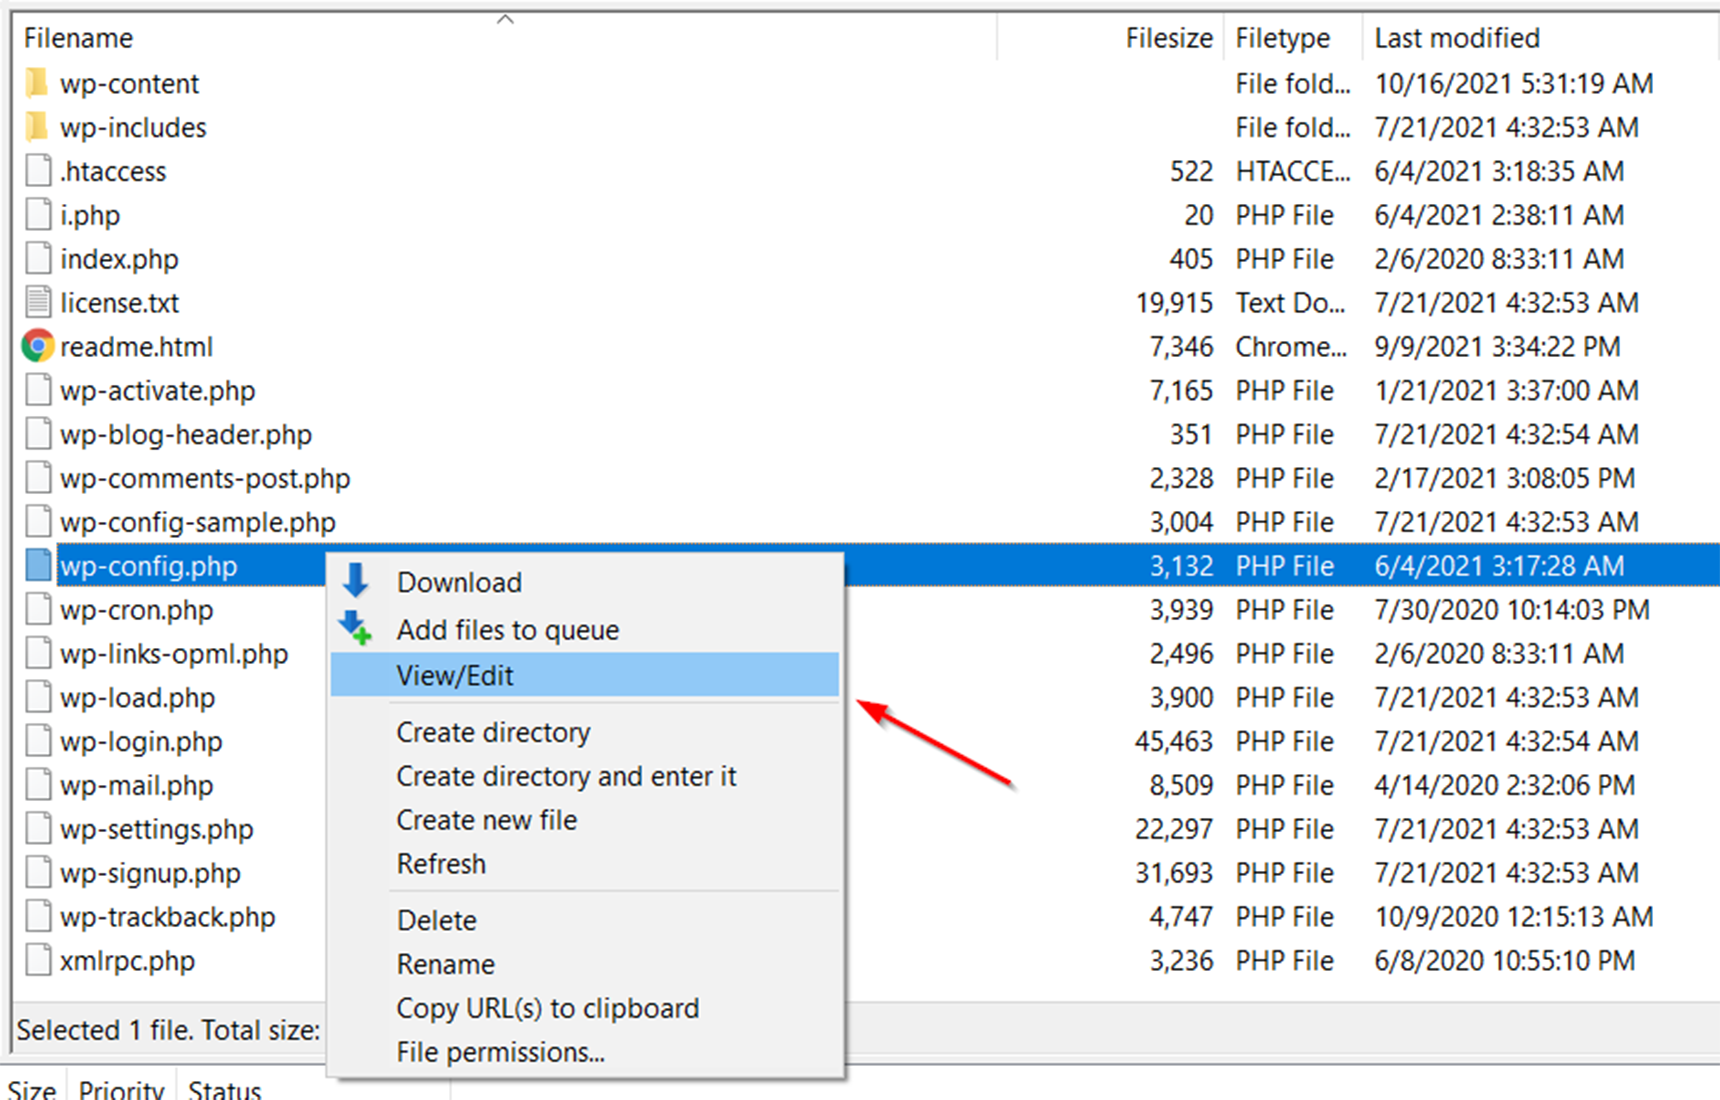
Edit your wp-config.php file
Add this to the top, before the line that says, “Happy Blogging”:
define('WP_MEMORY_LIMIT', '512M');
Note: WordPress memory can be different from the server – you need to set this regardless of server memory settings.
Edit your PHP.ini file
If you have access to your PHP.ini file, change the line in PHP.ini.
If your line shows 64M, try 256M:
memory_limit = 256M; Maximum amount of memory a script may consume (64MB)
Edit your .htaccess file
If you don’t have access to PHP.ini try adding this to the .htaccess file:
php_value memory_limit 256M
Sometimes the Elementor Widgets panel doesn’t work or load properly. If your Elementor Widget Panel does not load and has the continuously spinning “Loading” icon, as shown in the image below, this is generally due to a resource issue, a conflict with another plugin, or a setting on your server that needs to be adjusted.
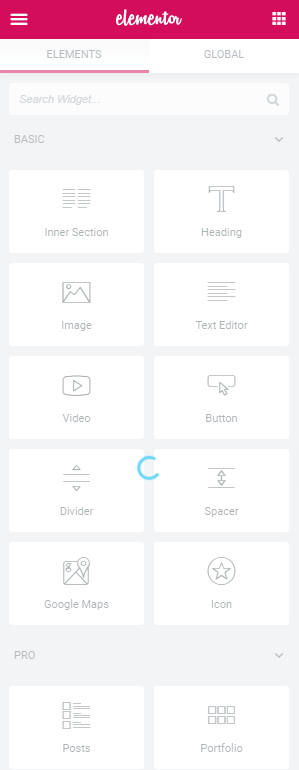
In this case, you may do as above (deactivating the third-party plugins, checking server requirements) and also do the following:
- Check the Elementor -> System Information -> Logs to see if there are any logs related to this issue
- Check the browser console and see if there are any console errors showing up. A lot of the time the Elementor loading spinner issue is related to javascript errors on the page.
- Use a plugin to clear your transients once. Sometimes a third-party plugin causes a wrong transient to store in your database and that transient belongs to a plugin that adds extra library resources to the Elementor library. Some Elementor add-ons have this feature and deactivating those plugins are not enough to troubleshoot the issue. You need to clear the transients once after the plugin deactivation to make sure it’s not a related issue.
Performance issues
Another set of questions often fielded by our support desk involve performance-related issues. After all, your website needs to perform well, right? Fortunately, Jupiter X is doing a good job here despite the fact that it’s a premium WordPress theme. We have covered this topic in multiple blog posts already so I’m going to make it short and refer you to these articles. Please check these articles to make sure you can get the best performance out of your website:
How to Speed Up your Website in Jupiter X
Wrapping up
The most common issues with Jupiter X reported to our support desk can be categorized as follows:
- License related issues
- Server errors
- Template installation issues
- Issues with the page builder or feature not working
- Performance issues
However, third-party-related issues and customization requests are a never-ending part of it as well. In this article, I tried to cover the top 5 most common issues with Jupiter X that we face every day in our support desk and provided troubleshooting guides to explain how to avoid them.