
The GDPR requires companies and site owners to be transparent about how they collect, use, and share personal data.
Continue readingThe GDPR requires companies and site owners to be transparent about how they collect, use, and share personal data.
Continue reading
What do you do when you face a problem using any of your tools? Some people stop using them entirely, while some try to fix it to avoid having to replace a perfectly good tool. But how do you fix something when you don’t know its mechanism? The answer is simple: Compare it with a fixed version of your tool and see which part is having the issue.
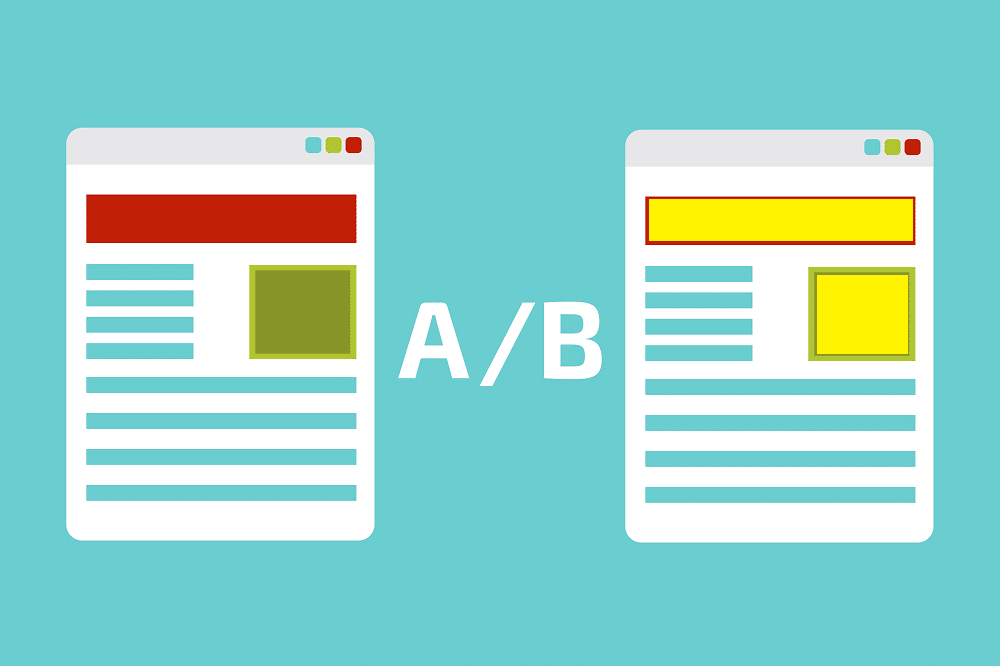
This is how the so-called A/B testing technique can be used to troubleshoot an issue. It doesn’t matter if your tool is a tangible object, virtual machine, or software You can use this method to troubleshoot and solve the problems you encounter. You probably did it before without knowing that your using the A/B testing strategy, but let me give you some examples so you understand it better:


The moment that you are in a clothing store and testing the clothes to see which one suits you better, you are doing an A/B Testing.

There are dozens of other examples of the concept. You basically used this method a lot in your daily life to troubleshoot an issue.
In digital marketing, A/B Testing is the perfect method to measure the impression you make on your users and increase your sales by collecting and analyzing the statistics of different marketing campaigns.
Let’s see how we can use it to troubleshoot an issue with your website. The principle and method are the same. You need to compare your website with a perfect version of it or with the design you provided (PSD) to be able to detect the issues.
Notice: Always do your testings over a staging website and keep a full backup before starting your tests.
The key point here is to have a perfect non-issue-ish version of your website. Whether it’s a PSD version or it’s a completed website, you need something to compare with your problematic website. Otherwise, detecting the issue will be hard. Keep the perfect look open on a different tab on your browser or in your Photoshop software. You will need it for the next steps.
If you had a website that was previously available but recently got issues and you don’t have a backup or screenshot from it, you may use Archive.org to see how your website looked like back then.
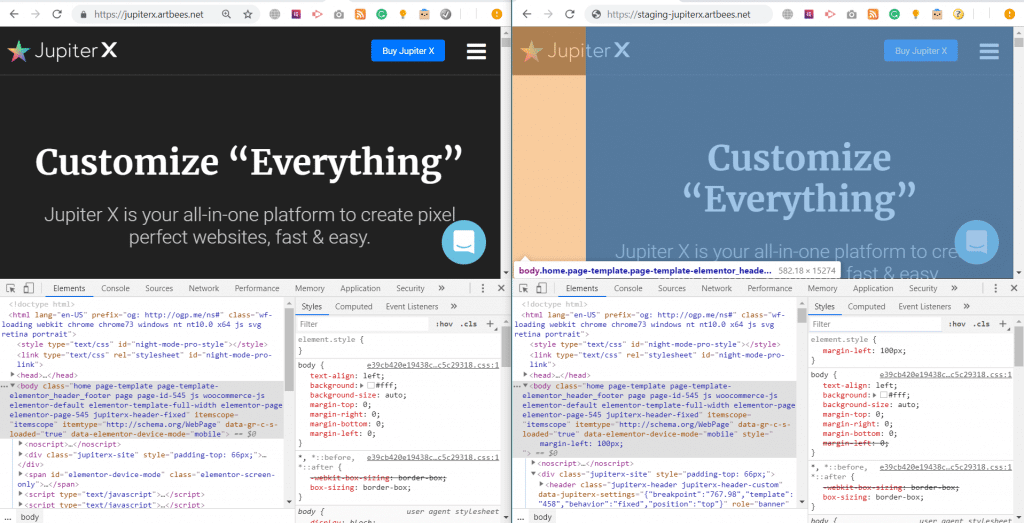
The first thing you should do is to use the browser Developer tools. Developer tools will help you detect the problems by providing debug tools and consoles. Hover the mouse on the different DOM elements in the Elements tab to see the size and details, and compare them with the other tab. It will help you detect the difference and then you will get one step closer to resolving the issue. Also, for the Javascript issues, you can compare the Browser Console tabs to see if you have any new errors in the problematic page or not.
This is a repeating task. You need to continuously compare the changes on your staging website and see if it helped or not. When I’m talking about the changes, I mean deactivating plugins one by one, switching the themes, updating WordPress (or other CMSes if you are using them), and even reconfigure your web host settings. Issues come from different places, so you need to perform the changes from different places to see if it’s related to your problem or not.
The thing is, the better you know the mechanism, the smarter you can troubleshoot an issue. For example, if a section background color is not working correctly, the reason cannot be from the webserver configuration (unless it’s a caching issue). Or when you have a server error on your page, it may not be related (or barely related) to the color configurations of your theme at all.
Sometimes, the issue goes further and comes from the Database or third-party API. So, you may need to reset your database and see if it helps or not. In a nutshell: You need to check everything that involves your website to be able to detect an issue.
Here is a list of things were common issues usually come from:
It’s better that you apply the changes you think may help, step by step, and see if they work.
While you are doing your A/B testing, you are also isolating the problem to the point that you find the reason for the issue and resolve it. When you find the problem, you did the job! The faster you isolate the problem, the sooner you get to the answer.
Here are some major testing tips which will help you get to the root of the issue faster:
If none of the above helped, you can isolate more by removing the content from your pages or deactivating headers, footers and block sections. These will help you identify issues with your content if you had any.
Although the best tools to troubleshoot an issue are your personal computer, a browser, and developer tools, each issue requires its own tool or service. Imagine that your SEO rank has dropped and you want to find the issue. What tools would you need? Probably, you will need your Google Search Console, or Alexa and Google Analytics.
Furthermore, each issue requires its own debugging tools. There are plenty of software and services, free and premium, which can help you troubleshoot an issue and also help you do automatic testing.
Here, I listed some of them:
As mentioned, A/B testing is a method that you are using a lot in your daily life. You can use it to troubleshoot your website issues, too. Every tool you are using to check your website and debug its issues can turn into an A/B testing tool. It’s just about the way you’re using your tools.

One of the important things in any person’s life is his or her job. A good career provides structure and gives one’s life direction. Therefore, finding the right job is essential. Nowadays, one way to find a job is by using a job board website.
A job board (a.k.a job site, job portal, employment site) is a website or webpage that deals particularly with employment, job seekers, and resumes. It enables employers to offer job positions to potential candidates. Applicants can search job boards to find open positions and career opportunities.
There are different types of job board websites over the internet:
Additionally, there are job search engines. The main difference between a job board website and a job search engine is that job seekers only see job offers on one site but on the job search engine, the applicants can access job offers from several job board websites or employers’ career websites.
In this article, we’re going to create a job board in WordPress using the Jupiter X theme and WP Job Manager plugin. In case you want to use a different plugin, the following list can help you.

WP Job Manager is a simple, lightweight and shortcode-based plugin that will help you create a job board in WordPress. It allows you to create jobs, job categories, frontend job submission forms and job dashboards for users.
The plugin comes with several shortcodes to show jobs and forms in various formats. You can learn more about the following shortcodes in this shortcode reference article.
Now that we have learned about the WP Job Manager plugin, let’s create a website using this plugin and your Jupiter X theme.
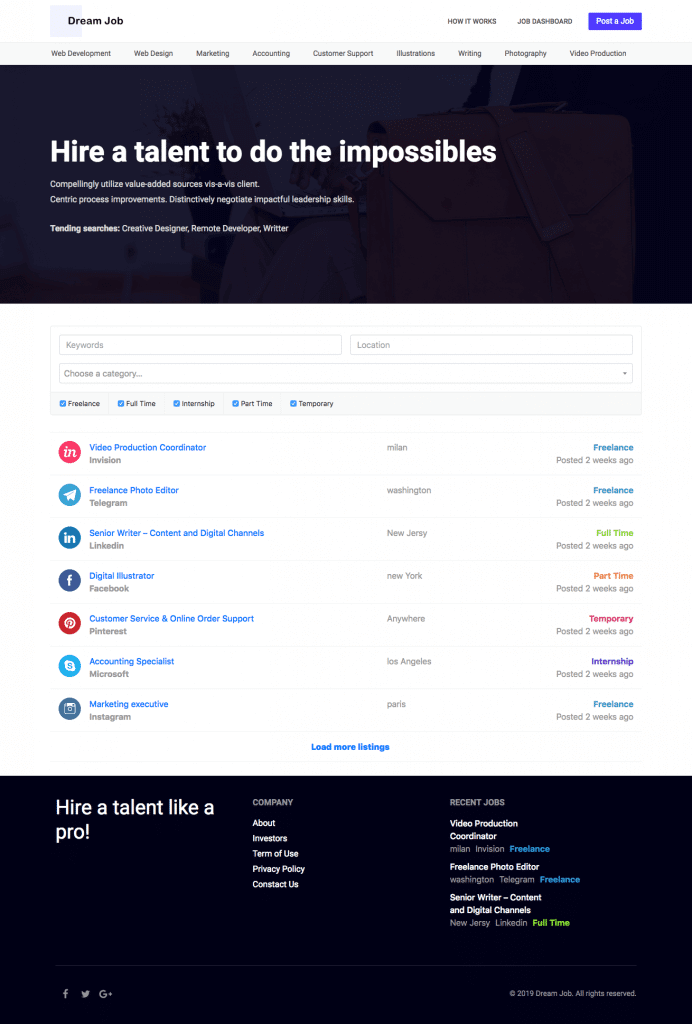
Categories provide a clear structure to websites. It helps visitors to easily find all jobs within a specific industry or field of expertise.
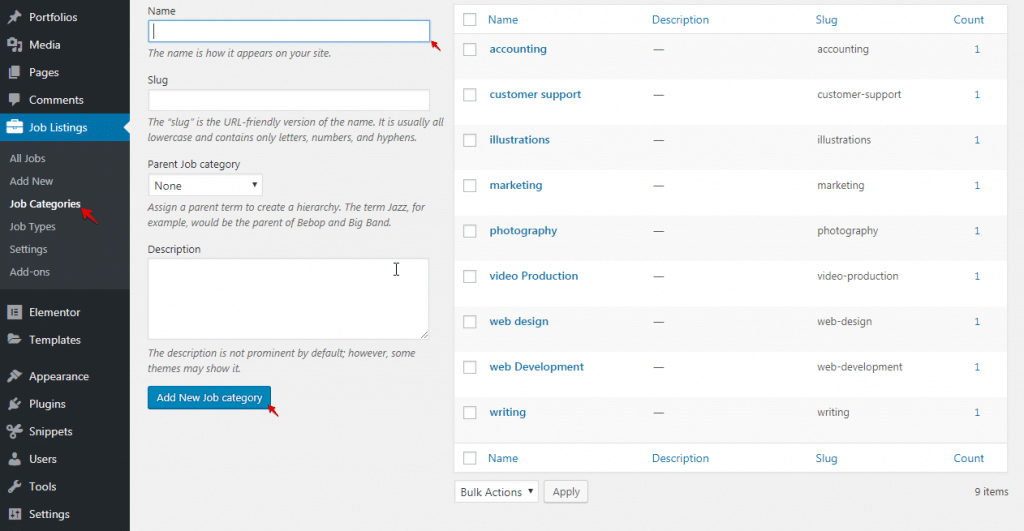
For creating categories, go to Job Listing > Add Categories, then create the following categories:
Web Development, Web Design, Marketing, Accounting, Customer Support, Illustrations, Writing, Photography, Video Production.
For the purpose of this article, let’s create some jobs so you can configure the plugin properly.
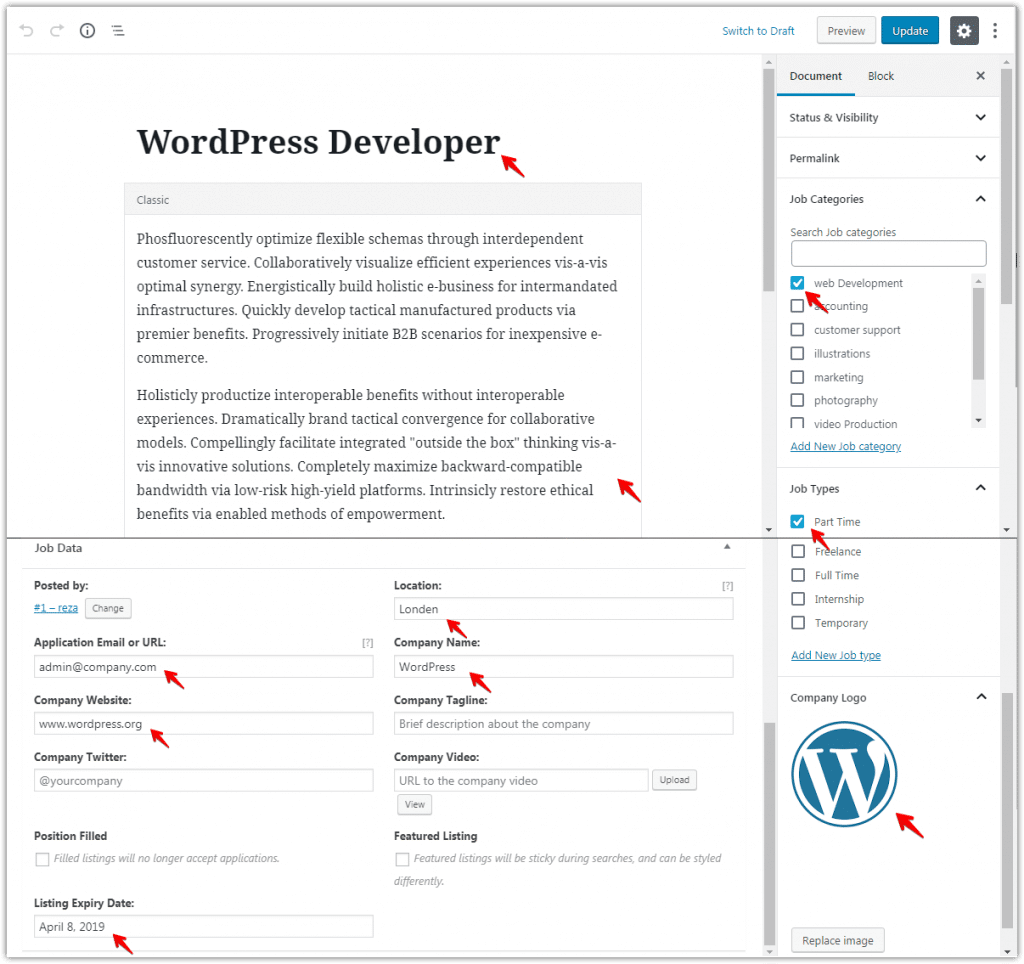
1. Go to Job Listing > Add New, then create some jobs and set proper values as shown below.
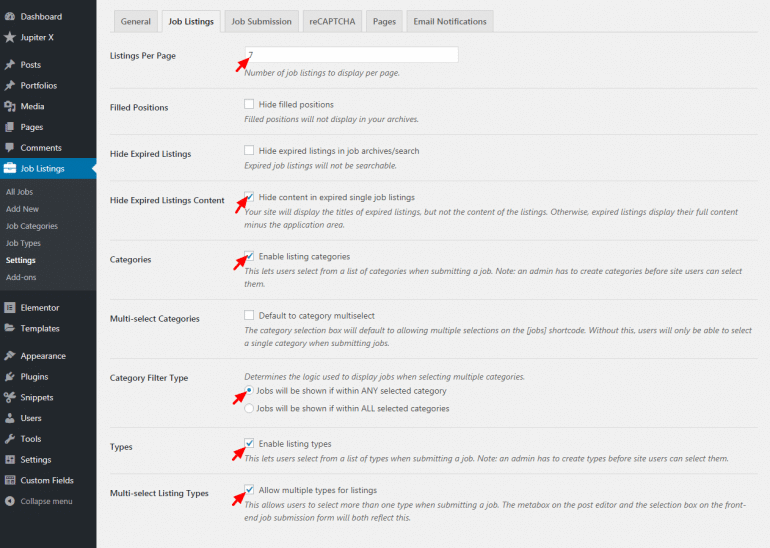
2. After creating the jobs, it’s time to configure the settings in Job Listing > Settings
3. In the Job Listing tab, set the following settings.
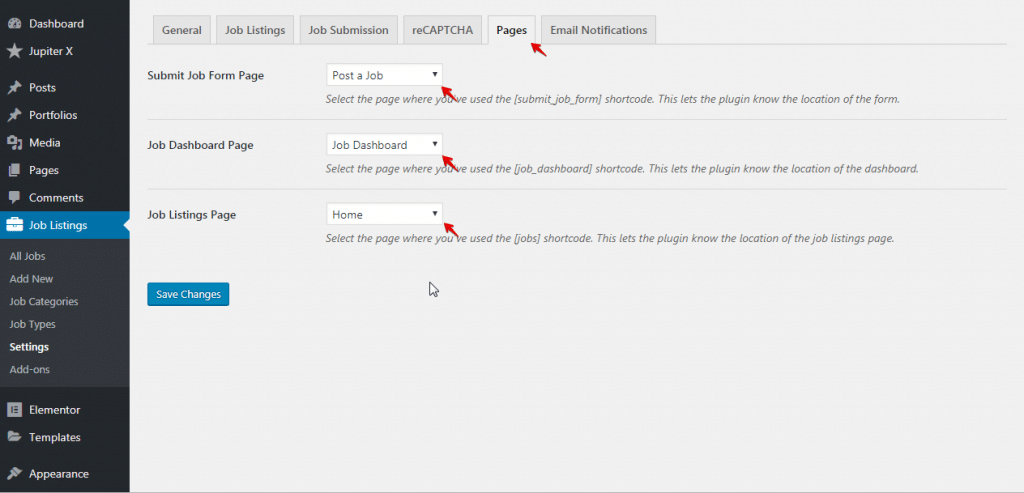
4. In the Pages tab, set the following settings:
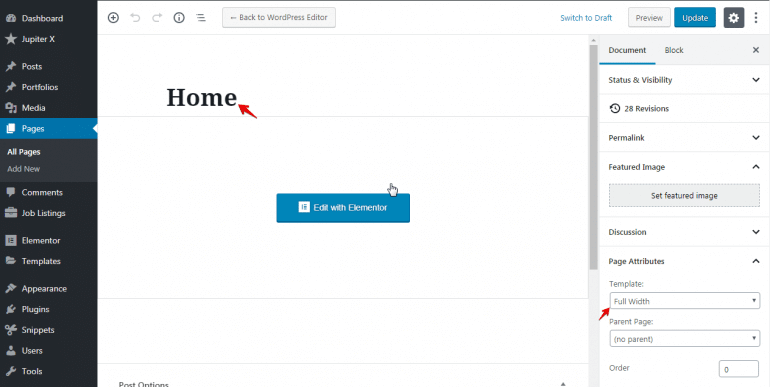
1. Create a new page from Pages > Add New. Set the following settings, then edit the page with Elementor.
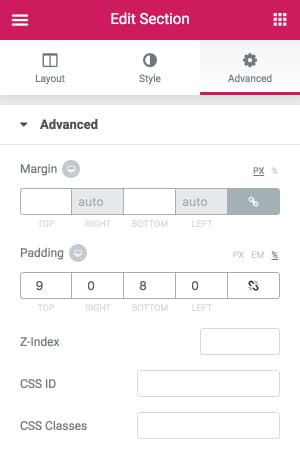
2. Add a new section. Set Padding as shown below:
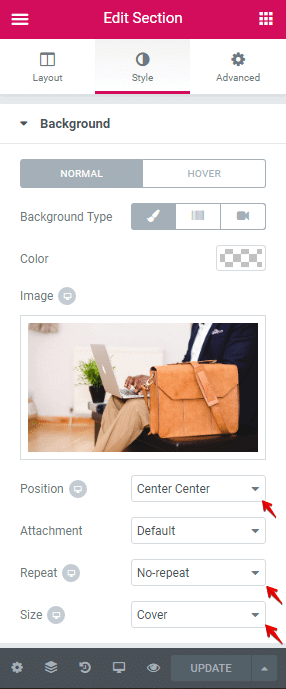
3. Set the Background settings as shown below. You can download the image from Unsplash for free.
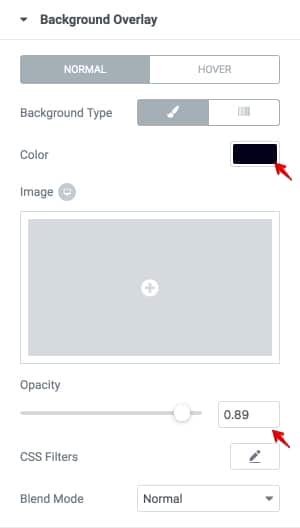
4. Set Background Overlay settings as shown below:
5. Add a Heading element then set the following settings:

6. Add a Text Editor element. Set line-Height to 0.8 and text to:
7. Add a Text Editor element. Set text to:
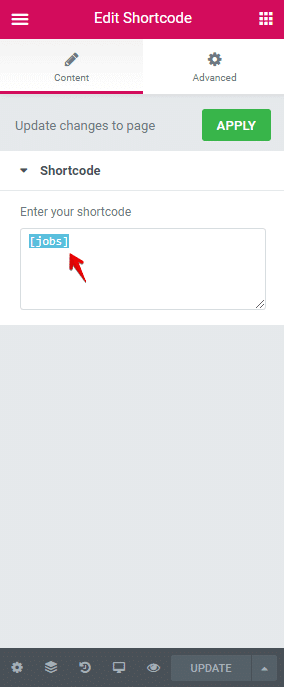
8. Add a Shortcode element then set it to [jobs].
9. In the end, go to Appearance > Customize > Homepage Settings

For each category, let’s create a specific page so users can find all jobs under that category in one page.
1. Create a new page. Set the Title to Accounting then add Shortcode block with [jobs categories=”accounting”] content.
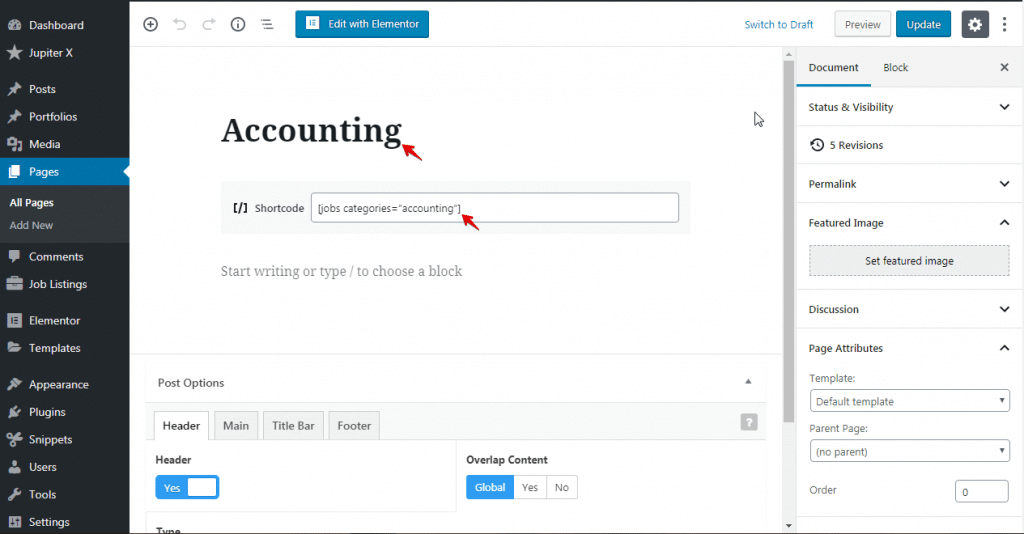
2. Create the following pages similar to the previous step with the following settings.
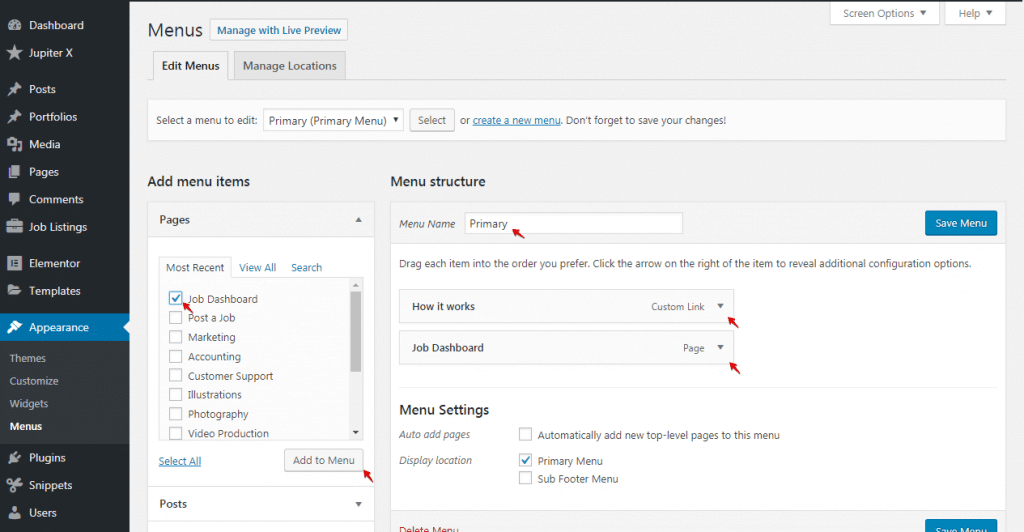
When you create a job board in WordPress, you also need to create two menus as explained below.
1. Go to Appearance > Menus
2. Create a new menu, then follow the below steps:
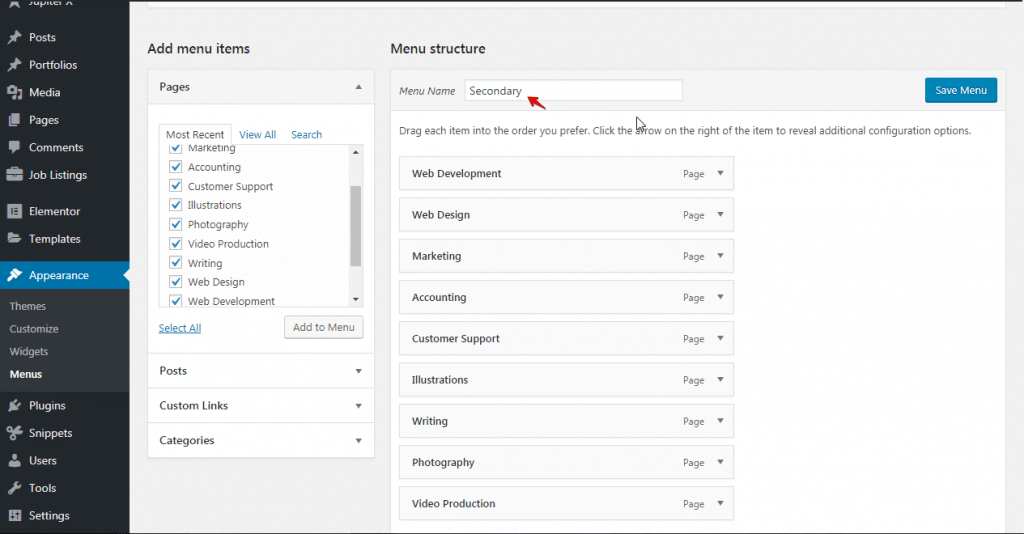
3. Create another new menu, then follow the below steps:
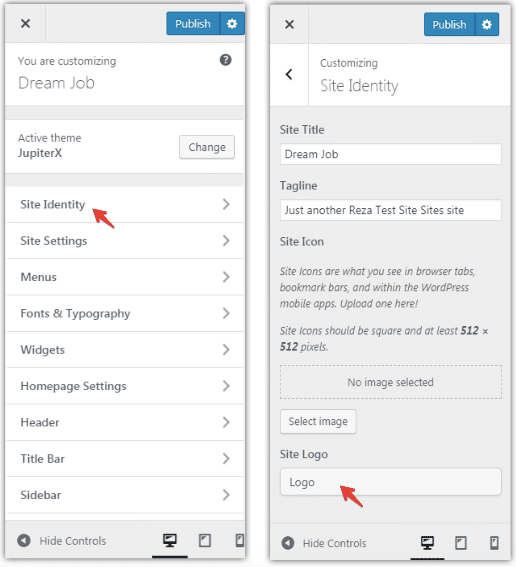
In job board websites, it’s very helpful to create a header with the necessary links like categories, submit a form, etc.
1. In the admin page, go to Appearance > Customize > Site Identity. Add your logo in Site Logo.

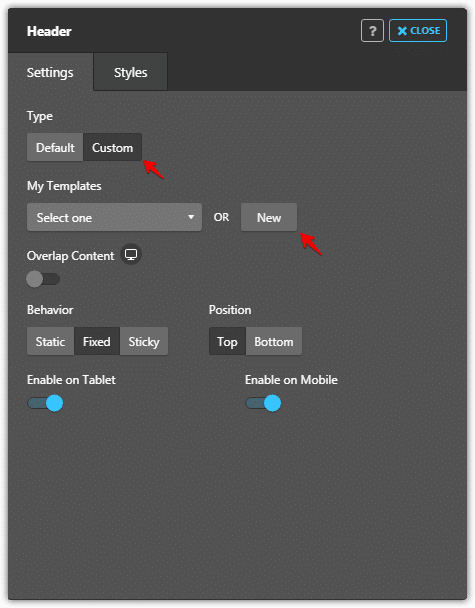
2. Go to Header. In the Settings tab, select the custom type and click on the New button.
3. In the popup, add a New Section.
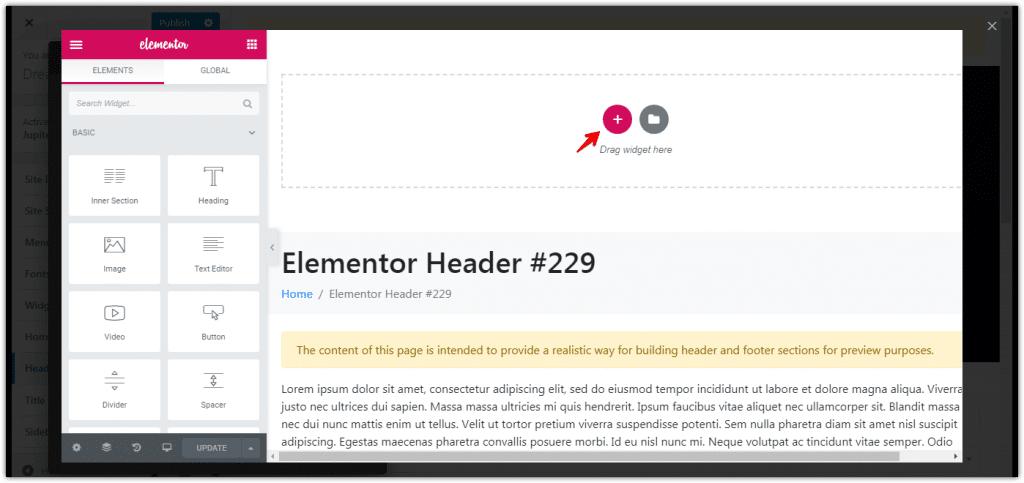
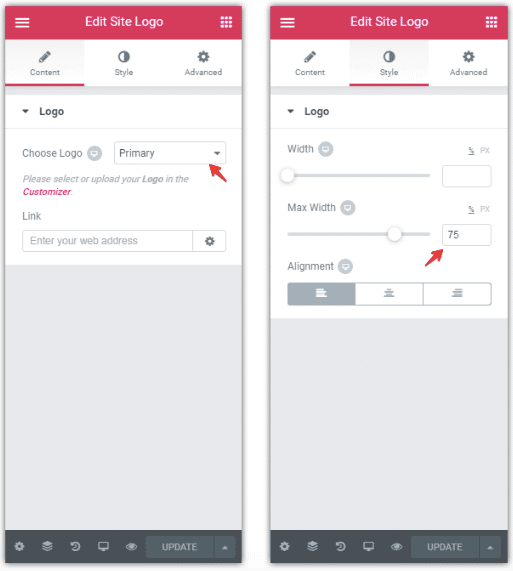
4. Add Site logo Element to section.
5. Add Flex Spacer element after Site Logo in the Section.
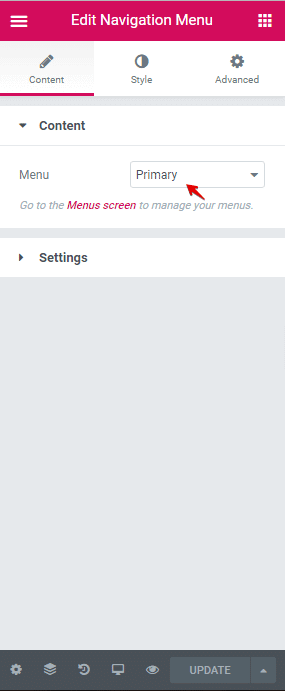
6. Add Navigation Menu element to the section. Set the menu option to Primary.
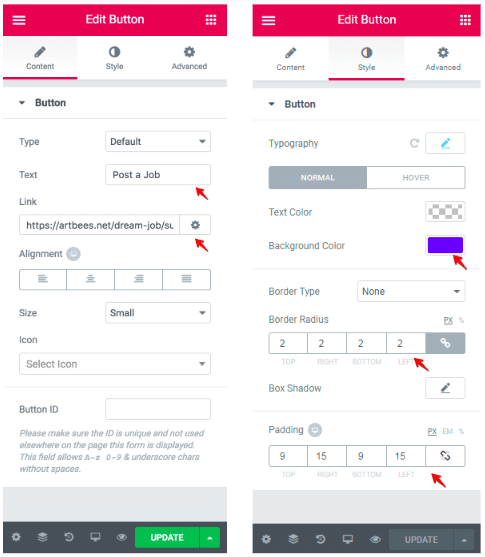
7. Add a Button element. In the Content tab:
In the Style tab:
8. Add a new Section. In the Style tab, set Background Color to #f8f9fa.
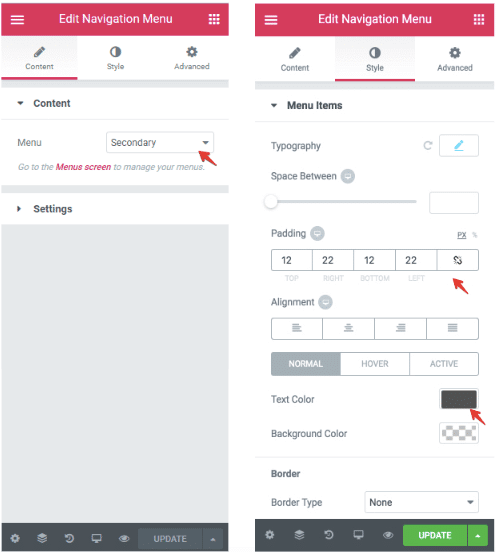
9. Add a Navigation Menu element in the section.
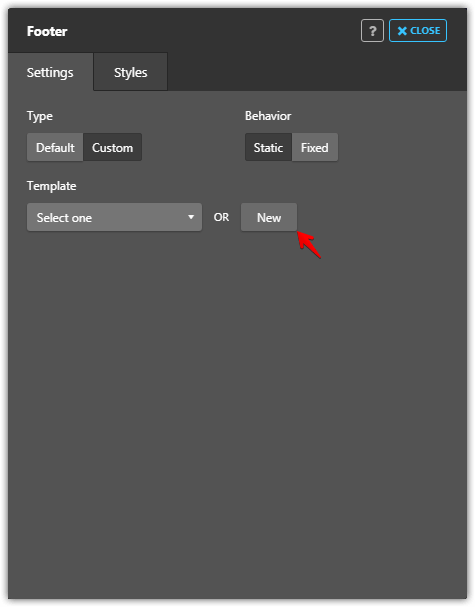
1. In the admin page, go to Appearance > Customize > Footer.
2. In the Settings tab, choose Custom type and click on the New button.
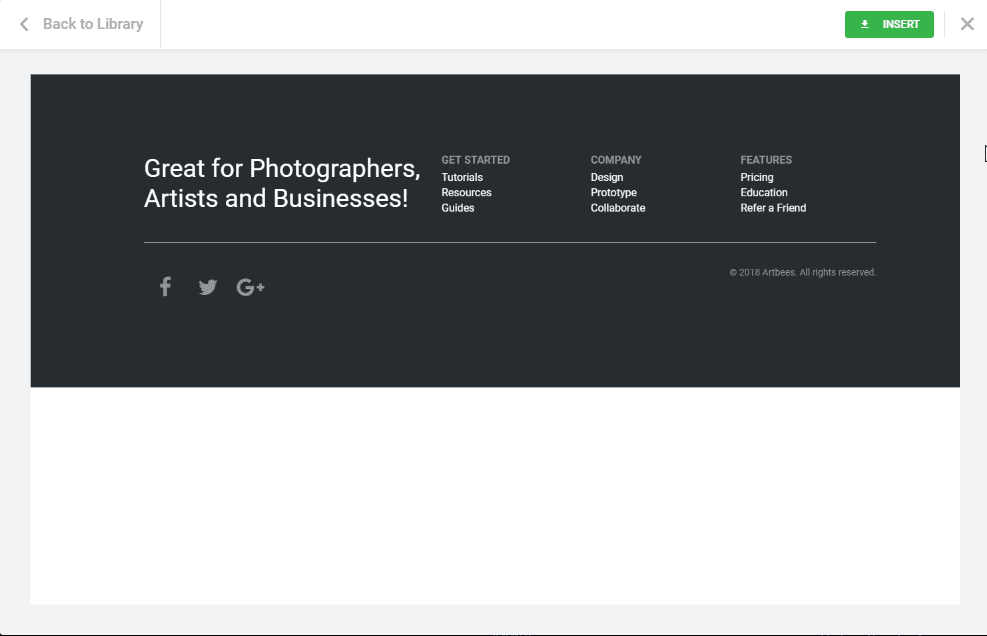
3. Click on the Add Template button.

4. Choose the following block from the list of ready-made templates, then click on the Insert button.
5. Edit the Section, set Background Color to #000116.
6. Change the Heading to Hire a talent like a pro!
7. Delete the Get Started and Features columns.
8. Replace Company column items with About, Investors, Terms of Use, Privacy Policy, Contact us.
9. Add a new column then add the Recent Jobs widget. On the content tab, set Number of listings to show up to 3 posts.
The WP Job Manager plugin has some basic styling to help you effectively create a job board in WordPress. You can improve the styling by adding the following CSS in Appearance > Customize > Additional CSS.
/* Job board filter */
.job_filters {
 margin: 2rem 0 2rem;
 border: 1px solid #e5e7e8;
 background-color: transparent;
border-radius: 4px;
overflow: hidden;
}

.job_filters input[type=text],
.job-manager-form input[type=text] {
 display: block;
 width: 100%;
 padding: .375rem .75rem;
 font-size: 1rem;
 line-height: 1.5;
 color: #495057;
 background-color: #fff;
 background-clip: padding-box;
 border: 1px solid #ced4da;
 border-radius: 4px;
}

.job_filters .select2-container--default .select2-selection--single {
 height: 38px;
border: 1px solid #ced4da;
}

.job_filters .select2-container--default .select2-selection--single .select2-selection__rendered {
 line-height: 36px;
}

.job_filters .select2-container--default .select2-selection--single .select2-selection__arrow {
 height: 36px;
right: 5px;
}

.job_filters .search_location {
 margin-bottom: .5rem;
}

.job_filters .job_types li {
padding: .7rem 1rem;
}

.job_filters .job_types li label {
margin-bottom: 0;
}

/* Job single */
.single-job_listing .jupiterx-post-author-box,
.single-job_listing .jupiterx-post-image{
display: none;
}

/* Job recent widget */
.jupiterx-widget ul.job_listings {
border-width: 0;
}

.jupiterx-widget ul.job_listings li.job_listing {
border-width: 0;
margin-bottom: 10px;
}

.jupiterx-widget ul.job_listings li.job_listing:hover a {
background-color: transparent;
}

.jupiterx-widget ul.job_listings li.job_listing a {
color: #fff;
padding: 0;
font-size: 1rem;
}

.jupiterx-widget ul.job_listings li.job_listing a div.position {
padding: 0;
float: none;
}

.jupiterx-widget ul.job_listings li.job_listing a ul.meta {
padding: 0;
float: none;
text-align: left;
display: flex;
width: 100%;
}

.jupiterx-widget ul.job_listings li.job_listing a ul.meta li {
margin-right: 10px;
}In this article, we showed you how to create a job board in WordPress with the WP Job Manager plugin and your Jupiter X theme.
There are some other plugins in the WordPress Community that you can try. Feel free to share your favorite one with us in the comments section below!

A couple of days ago Jupiter X v1.3 was released. Of course, just like any other theme updates, it comes with a long list of improvements and additions to make the theme even more powerful and capable. But looking at the features, you will notice that this update has particularly improved on one feature! Yes, that’s the form element.
Form builders are among those parts of WordPress themes that are basically the same without much difference in various themes and you don’t expect to see anything about them in theme updates. Well, Jupiter X surprises us again with this update!
Jupiter X form builder is already a powerful tool to visually create and order your online forms. It also allows you to customize its appearance to the deepest level. So, let’s see what can possibly be an improvement coming with the latest update, Jupiter X v1.3!
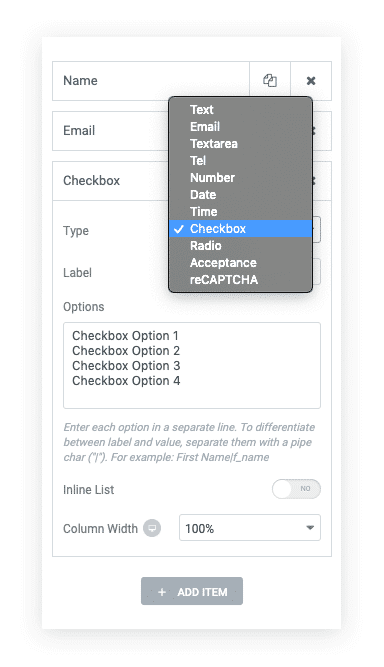
As the title also suggests, you will have more elements to use in your forms including checkbox, radio button, date selector and time selector. Date and time selector will open standard date and time selectors for your users to set a time or date.

For checkbox and radio buttons, add the choices one per line and see them listed down.
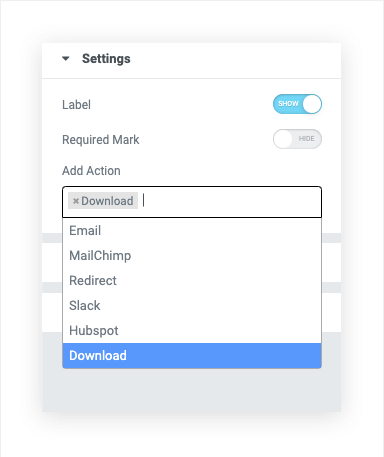
This action helps you upload a file to get downloaded when the submit button is clicked by the user; say, the PDF book you give away in return for new subscribers or a freebie design file in exchange for some valuable leads! There are 2 ways to link a “file” to “download” action:
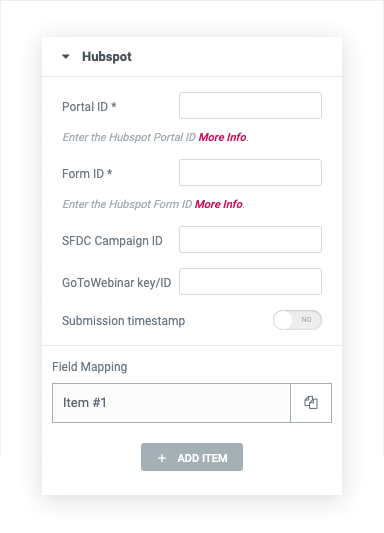
If you‘re using HubSpot to collect leads and you don’t want to use one of the forms from its built-in library, you can simply connect your Jupiter X form to Hubspot. You can enter your HubSpot account details such as Portal ID and Form ID, and the data your form collects will be sent in defined HubSpot table fields. You should do the field mapping here to choose what field will be connected to which HubSpot fields.
Jupiter has offered MailChimp integration from its very early versions, but with the latest Jupiter X v1.3 form builder updates, you will have tighter integration with MailChimp in your forms. Just by entering your MailChimp API key, you can connect your form to any specific audience list you have in Mailchimp and the emails you collect in your form will be added to that audience segment.
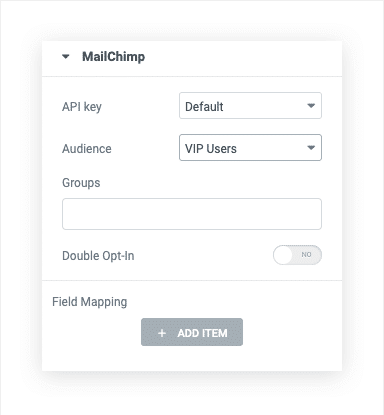
If your audience is segmented into groups, you can choose a group so the collected emails will be directly added to that group. Furthermore, you can activate the double opt-in feature for your entries directly from Jupiter X instead of doing it from MailChimp.
Just like the Hubspot integration, you can perform field mapping to indicate the exact MailChimp fields you want each of your form fields to be connected to.
How do you like the new additions to Jupiter X v1.3 form builder? Go ahead and build your next online form with it and let us know if there is anything you expect from a form builder that Jupiter X v1.3 form builder hasn’t yet provided. And stay tuned for more and more new features and additions coming your way very soon!

Spring is maybe the best season to run WordCamps. In fact, if you check WordCamp Central, you will notice that many WordCamps are scheduled for the spring season. Just to name a few, Paris, Vienna, Atlanta, London, Torino, Athens, Rotterdam, Madrid, Miami, Kolkata, and Prague have all held or scheduled WordCamps for March, April, and May.
Artbees started our WordCamp tours in 2019 with two important European WordCamps, WordCamp London 2019 and WordCamp Torino 2019. We participated in one as a speaker and in the other as a sponsor. Below I will share some of our takeaways from these two WordCamps. Let’s dig in.
Just a few months after our last WordCamp in Milano, we got to join another WordCamp with the great Italian WordPress community — WordCamp Torino 2019. The city of Torino is as beautiful as Milan but less expensive. It was, in fact, cheaper compared to many other EU cities.
Torino is one of the tech and industrial hubs of Italy. Communicating with people as a foreigner, of course, is challenging, but Italians are famous for their upbeat mood and hospitality. This all does not only make the city a great destination for tourists but also a great place for WordCamps.
Upon arrival, you can observe the high engagement of locals who are passionate about contributing to WordPress. WordCamp Torino 2019 was very well-organized and planned, too. Food was nothing less than what you could expect from a country like Italy —always savory and delicious!
Like every other WordCamp Artbees has attended, we had a member in WordCamp Torino 2019 as well. Rouzbeh from Artbees contributed to the Marketing team in WordCamp Torino (Contribution day in Italian WordCamps are not a placeholder!).
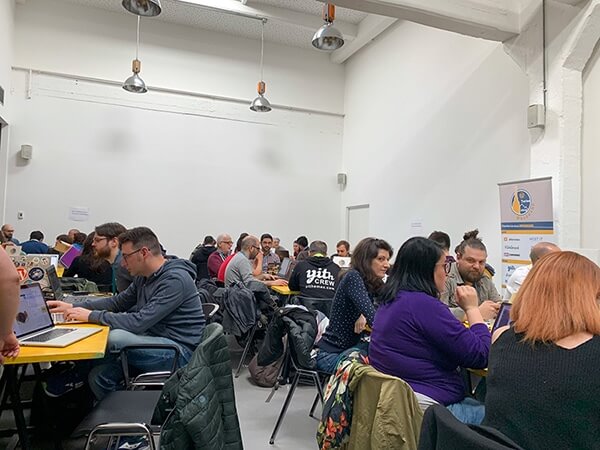
People seriously work and contribute during this segment and the progress is visible and even palpable. You can see heated discussions and meetings going on during the entire contribution day.
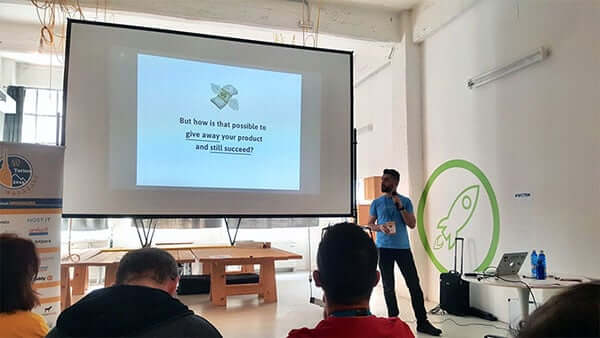
At WordCamp Torino, Rouzbeh, CEO at Artbees, discussed a very sensitive and nowadays popular matter: open-source. Within his talk entitled, “Going GPL: What happens when a theme with 100K users goes GPL!”, he shared the story of Jupiter X WordPress theme with 100K customers that decided to change its license to full GPL after 5 years.

As the CEO of Artbees, he explained how he had to be aware of the business implications and risks attached to such a decision. Before making this decision at Artbees, they were very much concerned about the impact this will have on sales, the Jupiter X brand image, and the future of the theme as a whole.
After a short introduction of GPL license and its meaning, he explained the results of this decision, the steps taken to execute the relicensing process, the market’s reaction to it, and finally, the state of the company and our theme after going GPL.
Rouzbeh’s presentation of the Artbees journey towards GPL was worth it for all the WordPress theme producers who are unsure about going GPL. It can also encourage many theme developers to follow the same path. The video of the talk will be available in wordpress.tv soon.
Francesca Marano of WordCamp Torino made a great point regarding Rouzbeh’s talk:
You can not encourage people to contribute to open source for free just as a good gesture or a positive deed. You should show them the real benefit they can get out of it or perhaps a potential opportunity from a business outlook.
Based on the extremely positive feedback regarding Rouzbeh’s talk, you can say that his topic was aligned with what Francesca said as it definitely was trying to explore the business potential of GPL.
Just about the same time that WordCamp Torino was taking place, there was another great WordCamp happening exactly 1240 KM away! WordCamp London 2019 was held on April 5-7 in London Metropolitan University, and Artbees was one of its sponsors. Fun fact: This was the first WordCamp that Artbees sponsored in 2019.
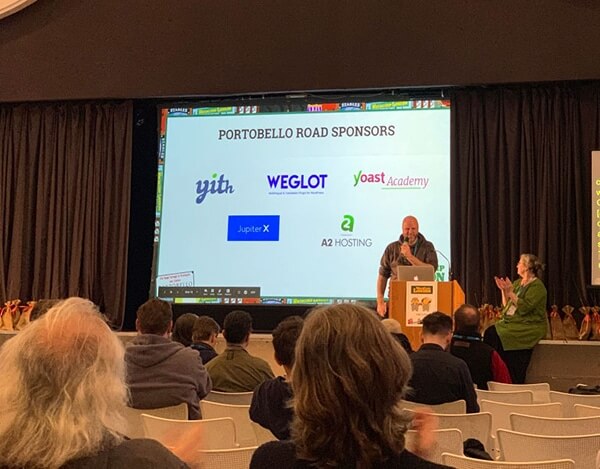
WordCamp London is one of the most important WordCamps in Europe. Some believe that’s the second most important WordCamp (after WordCamp Europe) in Europe and a great opportunity to obtain the pulse of the WordPress community in entire Europe, as there are attendees from every part of Europe, and not just the UK.
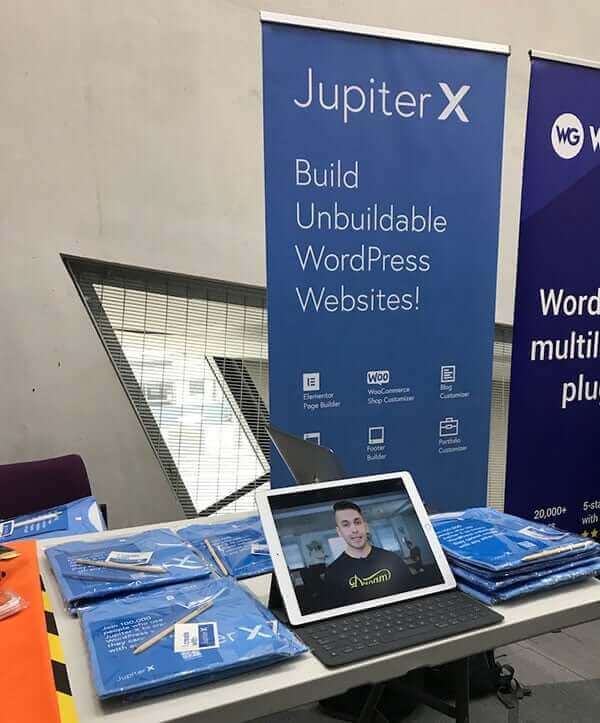
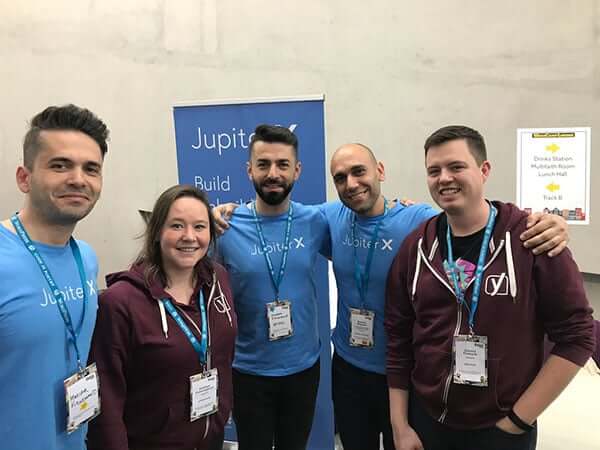
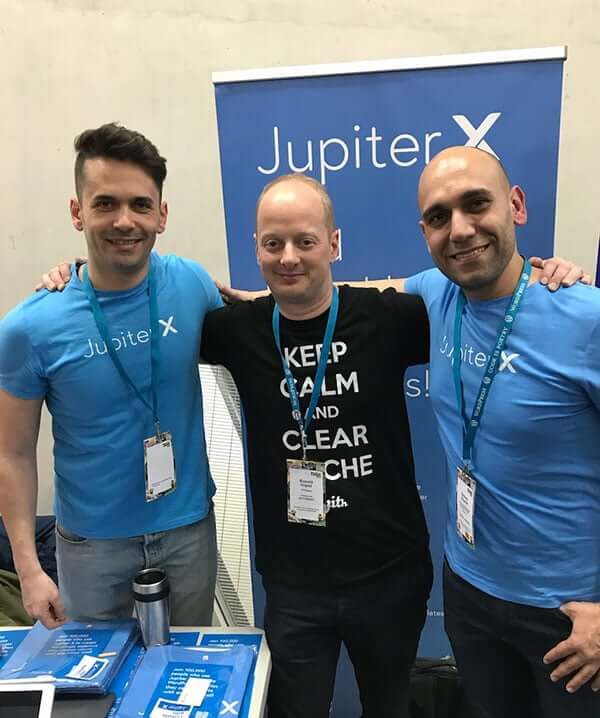
I, Maziar, and Babek were representing Artbees’ very own Jupiter X in its booth on April 6 and 7. Rouzbeh was only able to join us on April 7 Sunday after he held his talk in Torino!
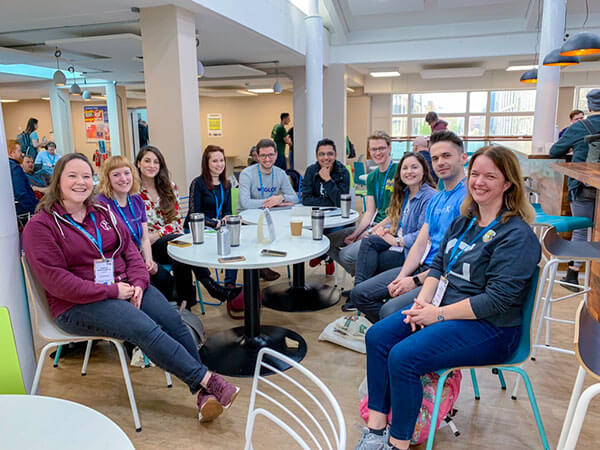
As you may know, Contributor Days are an integral part of WordCamps and truly symbolize the culture that WordPress promotes. Tens, sometimes dozens, and sometimes hundreds of passionate people gather in different teams in every WordCamp and contribute to WordPress however they can (I have co-authored a blog post about the culture of contribution in WordPress in WordPress.org Marketing blog and talked about this in extent).
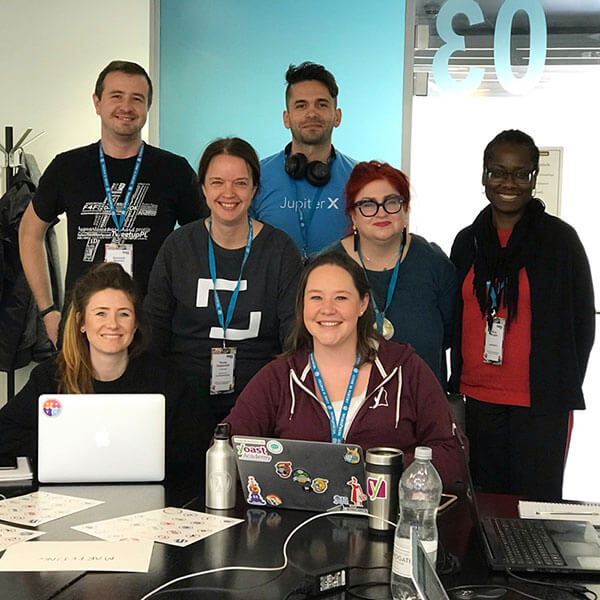
Artbees had a representative in WordCamp London 2019 Contributor Day as well! As part of the MakeWordPress Marketing team and along with other great members and reps such as Siobhan Cunningham and Yvette Sonneveld, we worked on different tasks related to the Marketing team. I personally wrote a WordPress success case study you will read soon on wordpress.org Marketing blog.
WordCamp London had a vibrant array of speakers talking about a wide variety of topics such as copywriting, business growth, content monetization, accessibility, content syndication, open-source, SEO, cognitive design, cookies, recruiting, e-commerce and technical topics such as HTTP/2, GraphQL, Laravel, Serverless, Redux, and more.
Below, I want to name a few very interesting talks you might have missed! In which case, do not forget to watch them once they are on wordpress.tv:
Sales Funnel = Sausage Maker?
Websites For Freelancers 101
JAMstack and WordPress: Friends or Foes?
Mindful Design: Designing with Presence for Purpose and Inclusion
5 Steps to a Faster Website and Higher Google Rankings
Are You Ready To Publish? – The Afterlife…
Accessibility Testing for Content Managers Workshop
Effective Copywriting Tips for Better UX
Using WordPress To DO_ACTION
Introduction to Web Components
Fireside Chat: Building a Culture of Safety
An Introduction to WP-CLI
5 eCommerce Trends to Implement Now
During the days of manning our booth as a sponsor of WordCamp London 2019 (April 6 & 7), we witnessed a very dynamic range of people stopping by to ask about Jupiter X. We received a lot of good insights and feedback about Jupiter X and a round of applause for our decision to go GPL! We also happened to meet some of the old Jupiter users in London who had been using Jupiter since 4 years ago.

As you can deduce, Jupiter X had a booth in WordCamp London 2019. So, I had a limited time attending talks or side events. However, I was lucky enough to manage my time to attend important events such as a very useful meetup regarding marketing that was held by MakeWordPress marketing team.
In this one-hour meeting, many ideas, trends, and practices regarding marketing were discussed and many questions were answered. I myself discussed the relevancy of testimonials in 2019 and received different ideas about that!
This was our first WordCamp London experience and for sure, not the last one. WordCamp London 2019 was organized by a veteran team (Led by Dan Maby) with many volunteers contributing to it in different sectors. WordCamp London gives everyone who does something with WordPress a unique chance to connect with the UK WordPress community and explore various opportunities.
WordCamp Torino 2019 and WordCamp London 2019 were a great kickstarter for Artbees’ WordCamp presence in 2019. The experience we collected in different parts of these great WordPress gatherings, from contributing to different teams to speaking with them to showcase Jupiter X is priceless and will definitely help us with the future of Artbees and Jupiter X.
However, that’s just the beginning for 2019! Stay tuned with us for great news with upcoming WordCamps such as WordCamp Athens 2019, WordCamp Plovdiv 2019, WordCamp Europe 2019, and more. 😀
Have you ever been to any WordCamp? Do share your experience with us and the Artbees community below!

Nowadays, any business needs a website for presenting and promoting its operation, production, expertise, and services. We live in a world where internet users have grown to more than 4 billion. That is a huge opportunity for businesses.
Continue reading
WordPress, the world’s most popular CMS is also quite beloved by developers. Among many of its possible customizations and flexibilities that can be pointed out is extending the admin side of WordPress. In this post, we will show you how to use WordPress custom admin pages to bring more options for the user.
The WordPress admin dashboard is the first page you’ll see after logging in. Using the side menu, you can navigate to other admin pages like Appearance, Plugins, Settings, Users, etc.
You may also see new menu items after activating a theme or a plugin that redirects you to a new admin page. It can be a settings page for the plugin, control panel of your theme, a page to show the status of your site or even a document page. The custom admin page is a very helpful feature which allows the developer to extend admin rights with new options.
In order to add a custom admin page in WordPress, we need 2 things:
In order to add a new admin menu item, we can use the following function:
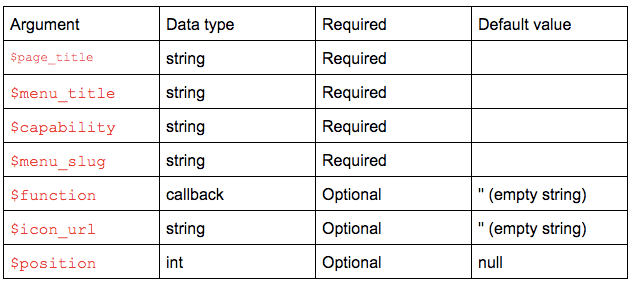
add_menu_page( string $page_title,
string $menu_title, string $capability,
string $menu_slug, callable $function = '',
string $icon_url = '', int $position = null )
Let’s dive into each item to learn what they are.
1. $page_title The text to be displayed in the title tags of the page when the menu is selected. Choose a meaningful page title. For example, if your custom admin page is an options page for the plugin, it could be “My plugin options”. Note that it should be translatable. So use _ function like the following example: _( ‘My Plugin Options’, ‘my-plugin-textdomain‘)
2. $menu_title The text to be used for the menu.
3. $capability The capability required for this menu to be displayed to the user. For example, if it contains some general options for the site, manage_option could be the best choice. Just set it carefully to avoid any possible security issue.
Check out the WordPress Roles and Capabilities page and see what the proper capability is for your custom admin page.
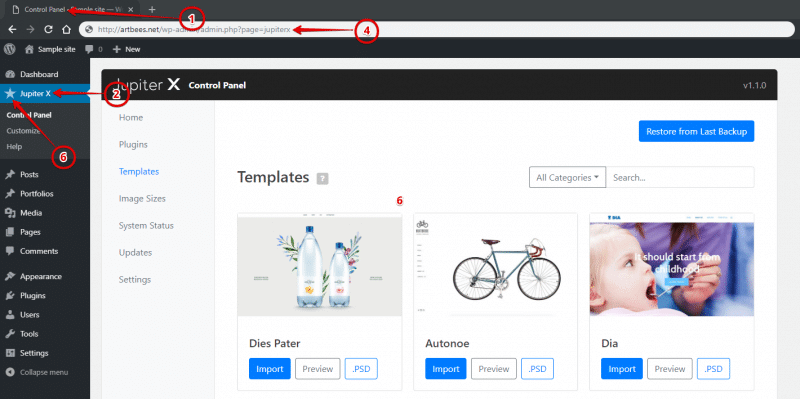
4. $menu_slug The slug name that refers to this menu. It should be unique for this menu page and only include lowercase alphanumeric, dashes, and underscores to be compatible with sanitize_key(). This will be used as a parameter in the URL of your custom admin page as it’s shown in the picture.
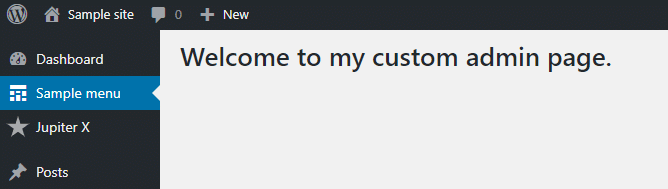
5. $function The function to be called to show the output content for this page. For a simple example, we can use the following code to show a header in the admin page:
function my_admin_page_contents() {
	?>
		<h1>
			<?php esc_html_e( 'Welcome to my custom admin page.', 'my-plugin-textdomain' );
		</h1>
	<?php
}
6. $icon_url The URL of the icon to be used for this menu. You can use an image, encoded SVG, or dash icons.
7. $position The position in the menu order should appear. Here is the list of numbers of default admin menus:
So, if you want to show your menu after Dashboard, you should use 3.
In the following table, you can see a piece of brief information about each item.
Add_menu_page arguments
Putting it all together, you’ll have:
function my_admin_menu() {
		add_menu_page(
			__( 'Sample page', 'my-textdomain' ),
			__( 'Sample menu', 'my-textdomain' ),
			'manage_options',
			'sample-page',
			'my_admin_page_contents',
			'dashicons-schedule',
			3
		);
	}

	add_action( 'admin_menu', 'my_admin_menu' );


	function my_admin_page_contents() {
		?>
			<h1>
				<?php esc_html_e( 'Welcome to my custom admin page.', 'my-plugin-textdomain' ); ?>
			</h1>
		<?php
	}
You should know that it is possible to add a submenu to existing menus or newly added menu using the following functions:
And all of them are a wrapper of add_submenu_page function, so we use them in the same way:
add_submenu_page( string $parent_slug, string $page_title,
string $menu_title, string $capability,
string $menu_slug, callable $function = '' );
And that’s it. We have a custom admin page. But, what about adding custom styles and scripts for its content?
Let’s see how we can put styles after adding page content:
function load_custom_wp_admin_style($hook) {
	// Load only on ?page=mypluginname
	if( $hook != 'toplevel_page_mypluginname' ) {
		 return;
	}
	wp_enqueue_style( 'custom_wp_admin_css',
plugins_url('admin-style.css', __FILE__) );
}
add_action( 'admin_enqueue_scripts', 'load_custom_wp_admin_style' );
The above code will load admin-styles.css file only in the mypluginname page. If you wonder why we should do this, the reason is that loading styles in all admin pages can cause unwanted changes in other admin pages. For example, you don’t want to change the size of texts in the dashboard.
If you’re unsure what your $hook name is, use this to determine your hook name. And then, change it to the code below.
function load_custom_wp_admin_style( $hook ) {
	wp_die( $hook );
}
add_action( 'admin_enqueue_scripts', 'load_custom_wp_admin_style' );
Note: Don’t use wp_die while you’re editing a file from the plugin editor. It can cause you to lose access to the admin page until you remove it.
You can also use default registered styles in WordPress, like this:
function load_custom_wp_admin_style( $hook ) {
	// Load only on ?page=mypluginname
	if( $hook != 'toplevel_page_mypluginname' ) {
		 return;
	}
	// Load color picker styles.
	wp_enqueue_style( 'wp-color-picker' );
}
add_action( 'admin_enqueue_scripts', 'load_custom_wp_admin_style' );
In the above code, we are not specifying any URL for the style file because it has already been registered once, and WordPress knows it. By registering a style file, you introduce it to WordPress without loading it. And then, you can load it by using a style handler name anywhere in the code. Have a look at the following code:
function register_my_plugin_styles() {

wp_register_style( 'my-plugin', plugins_url( 'my-plugin/css/plugin.css' ) );

}


// Register style sheet.

add_action( 'admin_enqueue_scripts', 'register_my_plugin_styles' );


function load_custom_wp_admin_style($hook) {

// Load only on ?page=mypluginname

if( $hook != 'toplevel_page_mypluginname' ) {

return;

}

// Load style

wp_enqueue_style( 'my-plugin' );

}


add_action( 'admin_enqueue_scripts', 'load_custom_wp_admin_style' );

Same as above, we can load custom scripts in admin pages:


function register_my_plugin_scripts() {

wp_register_script( 'my-plugin', get_stylesheet_directory_uri() . '/plugin-scripts.js', array( 'jquery' ) );

}


// Register style sheet.

add_action( 'admin_enqueue_scripts', 'register_my_plugin_scripts' );


function load_custom_wp_admin_scripts($hook) {

// Load only on ?page=mypluginname

if($hook != 'toplevel_page_mypluginname') {

return;

}

// Load style

wp_enqueue_script( 'my-plugin' );

}


add_action( 'admin_enqueue_scripts', 'load_custom_wp_admin_scripts' );
There are a lot of JavaScript libraries included in WordPress that you can use. There is also a list of default scripts included and registered by WordPress here.
In this section, we put all codes in a single file, which you can install as a plugin to add new WordPress custom admin pages.
<?php

/*

Plugin Name: My custom admin page

Description: Adds a custom admin pages with sample styles and scripts.

Version: 1.0.0

Author: Artbees

Author URI: http://artbees.net

Text Domain: my-custom-admin-page

*/


function my_admin_menu() {

add_menu_page(

__( 'Sample page', 'my-textdomain' ),

__( 'Sample menu', 'my-textdomain' ),

'manage_options',

'sample-page',

'my_admin_page_contents',

'dashicons-schedule',

3

);

}


add_action( 'admin_menu', 'my_admin_menu' );


function my_admin_page_contents() {

?>

<h1>

<?php esc_html_e( 'Welcome to my custom admin page.', 'my-plugin-textdomain' ); ?>

</h1>

<?php

}


function register_my_plugin_scripts() {

wp_register_style( 'my-plugin', plugins_url( 'ddd/css/plugin.css' ) );

wp_register_script( 'my-plugin', plugins_url( 'ddd/js/plugin.js' ) );

}


add_action( 'admin_enqueue_scripts', 'register_my_plugin_scripts' );


function load_my_plugin_scripts( $hook ) {

// Load only on ?page=sample-page

if( $hook != 'toplevel_page_sample-page' ) {

return;

}

// Load style & scripts.

wp_enqueue_style( 'my-plugin' );

wp_enqueue_script( 'my-plugin' );

}


add_action( 'admin_enqueue_scripts', 'load_my_plugin_scripts' );
And the final result will be like this:
In the next post, we will show you how to add custom settings to WordPress Custom Admin Pages, how to process forms, and how to make them secure.

WordPress plugins are great for website performance. They add extra layers of functionalities and features to your WordPress website and give you the capacity to achieve more. But there is a downside, not every WordPress plugin is safe for use.
Continue reading
With almost 75% of the Internet’s 4.1 billion users speaking a language other than English, WordPress language translation is a great way to expand your website’s reach and help you connect with your site’s visitors. But when it comes to creating a multilingual WordPress site, it can be difficult to know where to start.
To help, we’ve created this detailed WordPress language translation guide. First, we’ll take you through the benefits of going multilingual. Then, we’ll share a plugin to help you get the job done and show you step-by-step how to set everything up and translate your site.
There are two “directions” in which WordPress language translation can make your site better. There are benefits for:
Let’s cover the visitor benefits first.
As you’d expect, most people prefer to use their own native language when browsing the Internet. According to a Gallup survey commissioned by the European Commission, about 90% of those surveyed preferred to use their own language when visiting a site.
Perhaps more importantly, though, 45% of respondents in that same survey never use a language other than their own when browsing online. Now, you might be thinking this only matters if you target a global audience. But there are plenty of situations where you’ll have a multilingual audience even within the same geographic area.
For example, the US Census Bureau found that 21.6% of people ages 5 or older in the USA speak a language other than English when at home, with 40.5 million of those people speaking Spanish at home. So even if you only target the USA, a significant chunk of your visitors still might prefer a different language.
If you want to see how large that chunk is, you can get a good idea from the Languages report in the Audience area of Google Analytics:
WordPress language translation can also open up new opportunities for you to rank your content on Google. By translating all of your existing content, you’re essentially repurposing that same content, but for a whole new set of keywords (the same terms as before, but in a different language).
For example, if you’re using the Jupiter X Ananke template to create an eCommerce store for pet products, you might try ranking for the keyword “handmade dog toy” in Google search.
If you see that term gets 3,000 monthly searches in English, but the equivalent term in Spanish gets 1,000 monthly searches, you could increase your search visibility by 33% by creating a Spanish-language translation targeting that term.
To see how much potential SEO traffic you could gain, Google Market Finder gives you a high-level view, and most keyword research tools let you segment by language.
Now for the next question – how can you make your WordPress site multilingual to capture those benefits? Weglot is a WordPress language translation plugin that can help you go multilingual with minimal effort.
It starts by using machine translation to translate your WordPress site as soon as you activate the plugin. Then, you can go back and have a human review those translations using the Weglot cloud dashboard.
Any edits to your translations that you make in the Weglot cloud dashboard will automatically sync with your live WordPress site. The big benefit of Weglot is convenience. Within just a few minutes, you can have a working multilingual website that your visitors can start benefiting from.
Beyond that, Weglot implements all the WordPress language translation SEO best practices to ensure that your translated content is ready to rank in Google in different languages. And Weglot also lets you place your language switcher button in a few different places on your site to create a user-friendly experience for your visitors.
Now that you know the “why” of WordPress language translation, here’s a step-by-step guide for how to create a multilingual site with Weglot…
To get started, go to the Weglot registration page and create your Weglot account:
Once you register your account, Weglot will send you an activation email. After clicking the link in that email to activate your account, you’ll see a confirmation page that contains your API key (you can also go directly to your Weglot dashboard to find your API key):
Keep this API key handy because you’ll need it in the next step.
Go to Plugins → Add New in your WordPress dashboard and search for “Weglot”. Then, install and activate the Weglot plugin:
Once you’ve activated the Weglot WordPress language translation plugin, go to the new Weglot area in your WordPress dashboard and add your API key to the API Key box.
You should see a green checkmark appear, which means that your Jupiter X site is successfully connected to the Weglot service:
Below the API Key box, you should see two other settings for:
For example, if you wanted to translate your site from English to Turkish, you’d configure it like this:
Once you’ve made your choices, click Save Changes to start the WordPress language translation process. Almost immediately, Weglot will use machine translation to translate your content and give you a working multilingual WordPress site:
When you go multilingual, Weglot adds a language switcher button to the bottom-right corner of your site.
If you’d like to change that functionality, you’ll get a variety of new options in the Weglot area to do so. You can also add your language switcher as a menu item, widget, or shortcode:
At this point, you have a working multilingual WordPress site powered by machine translation. You’ll probably want to manually manage those translations, though, in which case you’ll use the Weglot cloud dashboard.
There, you can use two interfaces to manage your translations. Both interfaces let you manage 100% of your site, including:
First, you can use the Visual Editor to make changes on a live preview of your site. All you do is hover over the text that you want to translate and click on the green pencil icon.
For example, if you want to translate your Jupiter X theme menu, you’d hover over it and click this icon:
That will open a popup where you can make your changes.
Second, you can use the Translations List, which offers a non-visual side-by-side view of the original text and the translated version.
You can use the filters on the left sidebar to find specific content, and you can also outsource content to professional translators from this interface:
Any changes you make in either interface will automatically sync to your live WordPress site.
WordPress language translation is a great way to improve your WordPress site on two fronts:
To achieve those positives, the Weglot WordPress language translation plugin helps you translate your site in just a few minutes. Get started today!

Web designers who are into advanced customization know that one of the important parts of a WordPress theme is its ability to create and edit custom header and footer.
The powerful Jupiter X header and footer customizer already allow you to create and edit custom header and footer, but it involved a little back and forth navigation from the backend and frontend. We recently made the whole process a lot easier for you.
Before the new feature was added, you had to create a template first, open the customizer, chose the template for your header or footer, and then go back to Customizer to select and set that header or footer template as your global header or footer. Whew!
With the new feature, the entire process will be within the customizer itself, without the need to go to your WordPress dashboard!
1- Open Customizer WordPress Admin > Appearance > Customizer
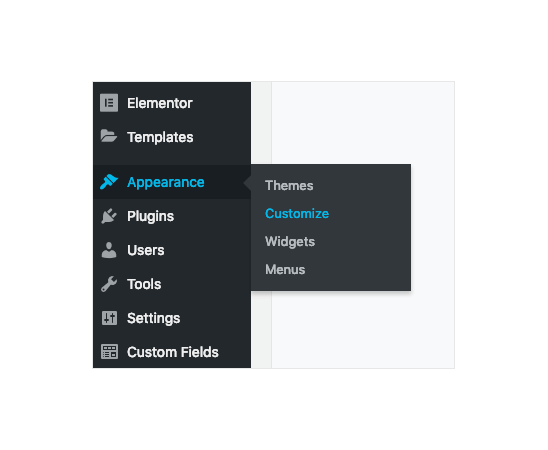
2- In Customizer, go to the Header section
There are now two new buttons next to the selected template: ‘Edit’ and ‘New’.
If you want to create a new header from the ground up, you can click on ‘New’ button and you will be quickly taken to the header/footer builder area where you can simply build a header or footer using Elementor, just like a regular page.
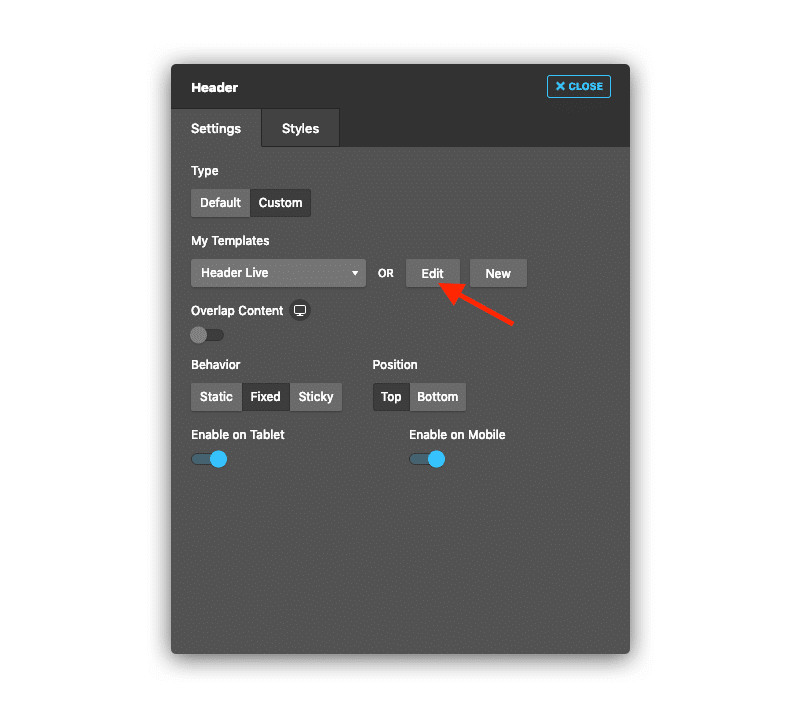
On the other hand, the ‘Edit’ button will let you use an existing template and edit the template that you currently selected. You can repeat the same process for your footer by going to the footer section of the Customizer.
Use this method only to create and edit global custom headers and footers. In order to create page-specific headers and footers, select a template from the page meta option > Header tab.
I hope this has eased up the header and footer customization for you! Stay tuned for more improvements and new features in our future updates.
Here’s a video with more info on how to create and edit custom header and footer.
Follow Jupiter X on Twitter to get the latest updates, news, and exclusives.