How to Add a Wishlist to WooCommerce with Artbees Wishlist
Meet Artbees Wishlist for WooCommerce. This hands-on guide covers setup, guest saving, product variations and mobile checks, with a clear look at what Free and Pro include.

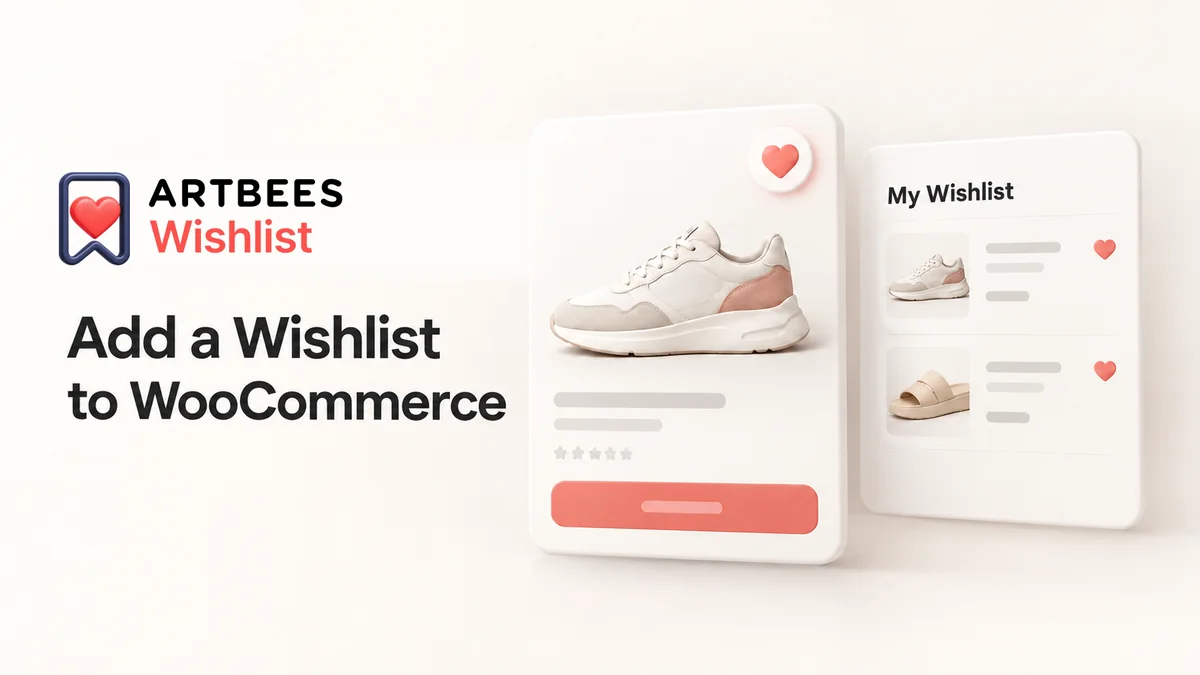
A wishlist lets shoppers save products they’re not ready to buy and return to them later. With the new Artbees Wishlist for WooCommerce plugin, you can add that experience to your store using the Free version.
Here’s how to set up the wishlist page, place save buttons, and help guests and signed-in shoppers move from saved products to the cart.
Tested with: Artbees Wishlist Free 1.0.1, WooCommerce 10.9.4 and Storefront 4.6.2 on a local demo store, with Pro inactive.
1. Install the Plugin and Open Its Settings
Before starting, make sure WooCommerce is active and you have a published product that shoppers can open. Use a staging or local copy for your initial checks, particularly if you already run a wishlist, product-template or quote extension.
- In WordPress, go to Plugins > Add Plugin and find Artbees Wishlist for WooCommerce. You can also obtain it from the WordPress.org listing.
- Install and activate the Free plugin.
- Open Artbees > Wishlist.
- Start on the Settings tab.
Check the installation and initial setup guide for current minimum requirements.
2. Assign a Wishlist Page
The save button is only the beginning. Shoppers also need a page where they can return to their saved products.
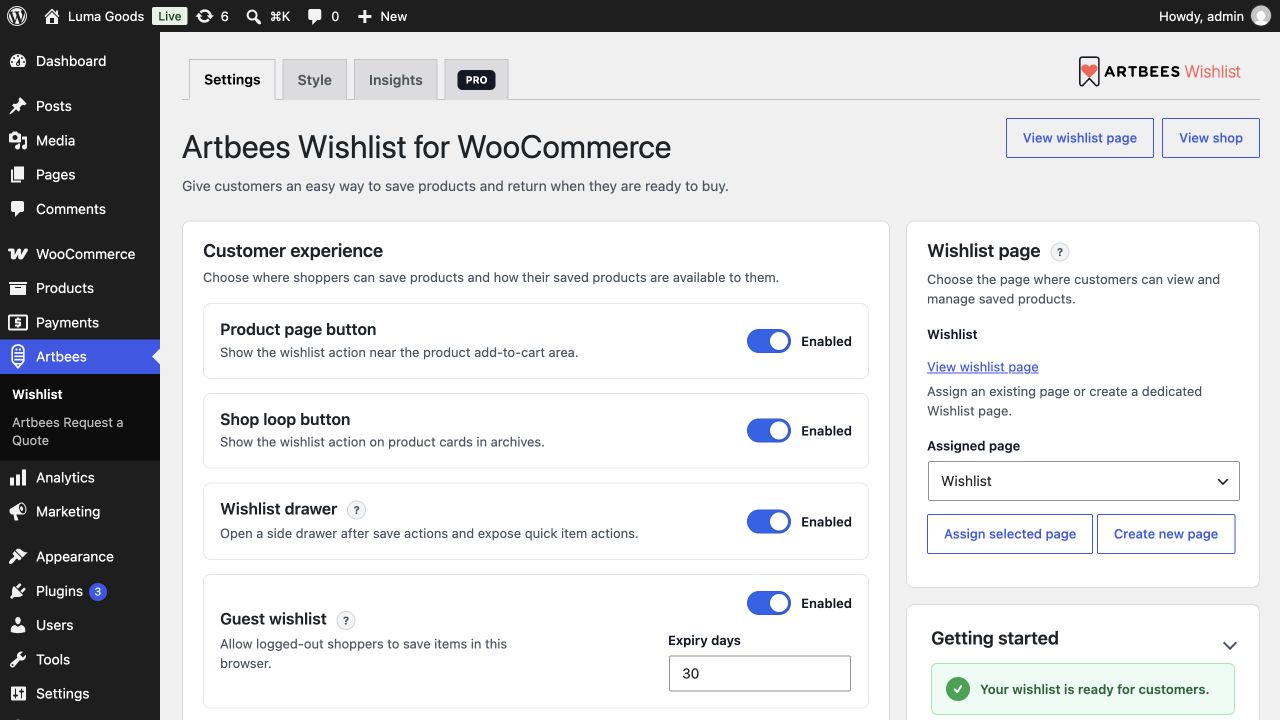
In Artbees > Wishlist > Settings, find the Wishlist page panel. Choose an existing page and click Assign selected page, or use Create new page. Then select View wishlist page and check that the wishlist interface appears.
You can use the Wishlist Page block or this shortcode:
[artbees_wishlist]Our demo store uses the shortcode. Choose either the block or the shortcode, not both, to avoid showing the wishlist twice.
Add a visible route to this page in your store navigation or account area. A customer should not need to save another product just to find the list again.
3. Enable the Shopper Controls You Need
The Customer experience section contains the main controls:
| Setting | What to check |
|---|---|
| Product page button | The save action appears beside the product’s shopping controls. |
| Shop loop button | Customers can find the save action on shop and category product cards. |
| Wishlist drawer | Saving opens a panel where shoppers can inspect saved items without leaving the current page. |
| Guest wishlist | Signed-out shoppers can save products using the current browser. |
| Expiry days | The retention period matches how you want temporary guest lists to work. |
Choose the behavior you want, then click Save customer settings. The example below uses all four switches and a 30-day guest expiry; adjust these to suit your store.
4. Match the Button to Your Store
Open Artbees > Wishlist > Style to review the button design and labels. The interface offers the plugin’s own style and a Match active theme option, plus controls for labels, layout, typography, borders and colors.
Keep the action understandable. A short label such as Save or Add to wishlist distinguishes it from buying. Make the saved state visibly different, and check the contrast against your product images and background.
For classic WooCommerce templates, the placement controls position the automatic wishlist action before or after Add to Cart. A custom builder template can replace those WooCommerce hooks, so a placement setting alone may not insert a button there.
For those templates, follow the blocks and shortcodes guide to place Wishlist Save Button, Wishlist Trigger and Wishlist Page blocks or Elementor widgets. Use the save control in the product context and the trigger where customers should reopen their lists.
Keep the purchase action clear as well. Our add-to-cart button guide offers useful design principles for making that next step easy to find.
5. Test a Product with Options
A wishlist test should include more than a simple product. If you sell sizes, colors or other variations, check that the saved item retains the customer’s actual choice.
In our test, the Nova Everyday Sneaker had color and size options:
- We tried saving before selecting a size. The plugin displayed Choose options first.
- We selected Cloud and size 9, then used the save button.
- As a signed-in shopper with existing lists, we chose Work Essentials and confirmed the save.
- The drawer displayed the sneaker with Color: Cloud and Size: 9.
- We used that item’s Add to cart action and checked the cart itself. It contained the Cloud / size 9 variation, not just an unspecified sneaker.
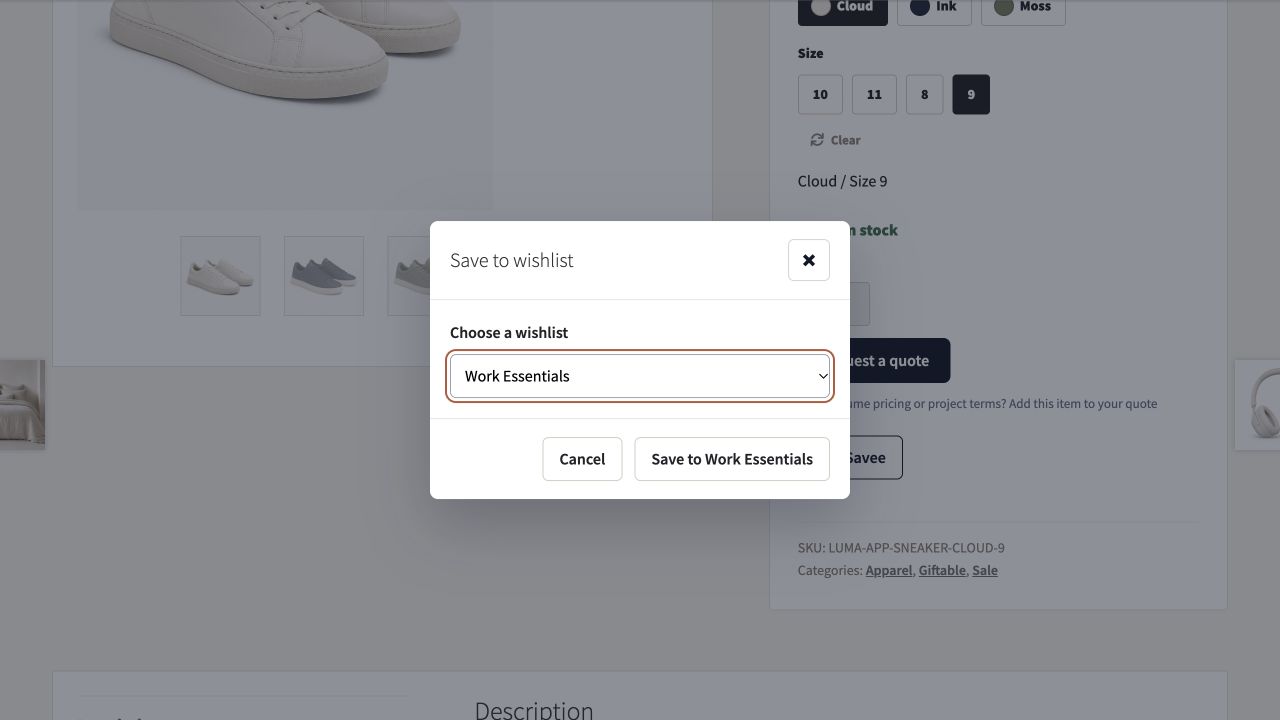
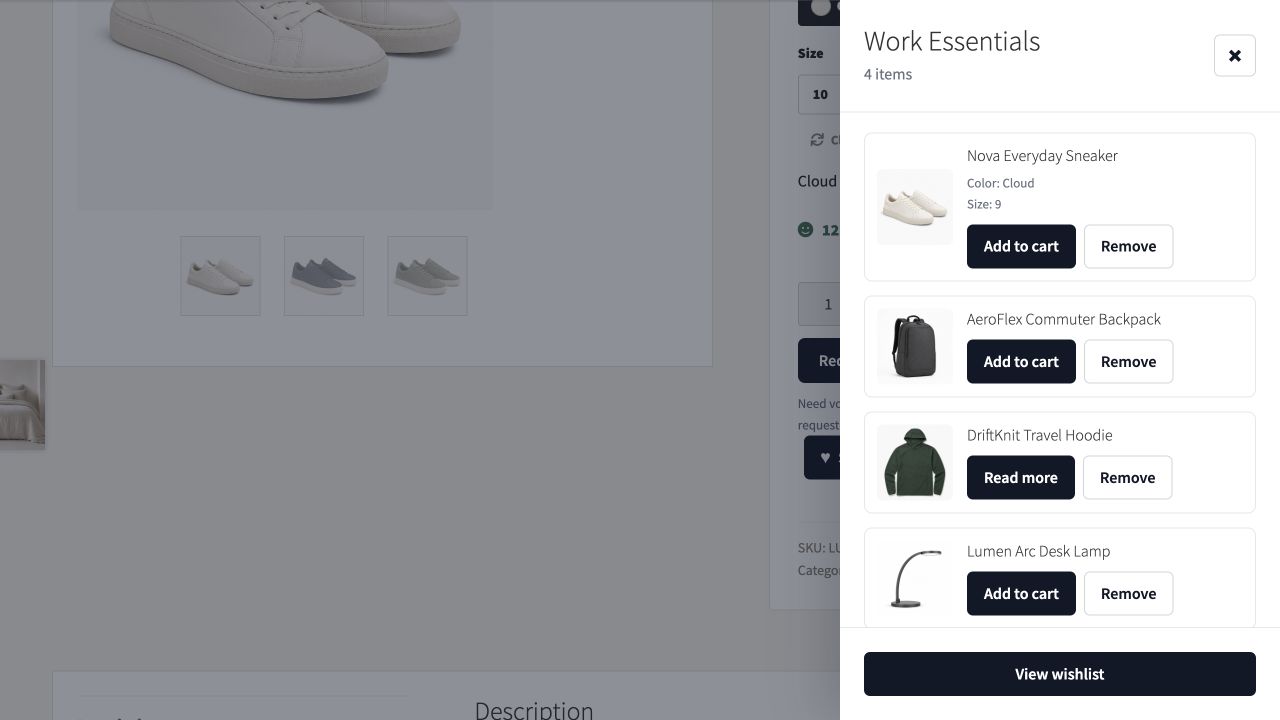
The demo store also uses a Request a Quote extension, so its product-page controls look different from a standard Add to Cart layout.
Repeat the variation check with your own products. Also inspect an unavailable item: saving a product should not be interpreted as reserving inventory or guaranteeing a future price.
6. Check the Guest and Mobile Experience
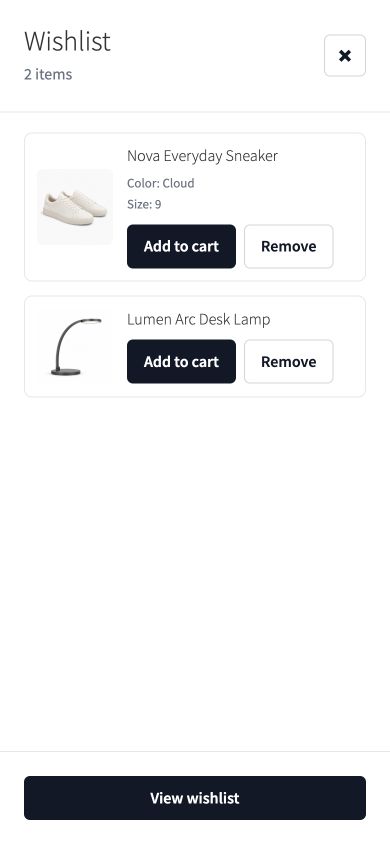
Guest wishlists let shoppers save before signing in. Saving from a shop card opens the drawer when that option is enabled, and shoppers can return to their saved items on the wishlist page. In our example, a guest saved a desk lamp and the Cloud / size 9 sneaker, then added the selected sneaker variation to the cart.
Guest lists are labeled Saved in this browser because a cookie connects the shopper to the list. Clearing cookies or switching devices can break that connection. The guest wishlists and login merge guide explains how this works.
The guide also explains how guest items merge into the account’s default wishlist after login, with duplicate items handled during the merge. Check that transition with a customer account on your staging store, especially if you customize login or registration.
On mobile, shoppers should be able to read product options, add items to the cart and remove them without sideways scrolling. The drawer below shows both saved products on a narrow screen. Check the experience on real phones and with a keyboard, including closing the drawer with Escape and returning focus to the save button.
7. Know What the Free Insights Show
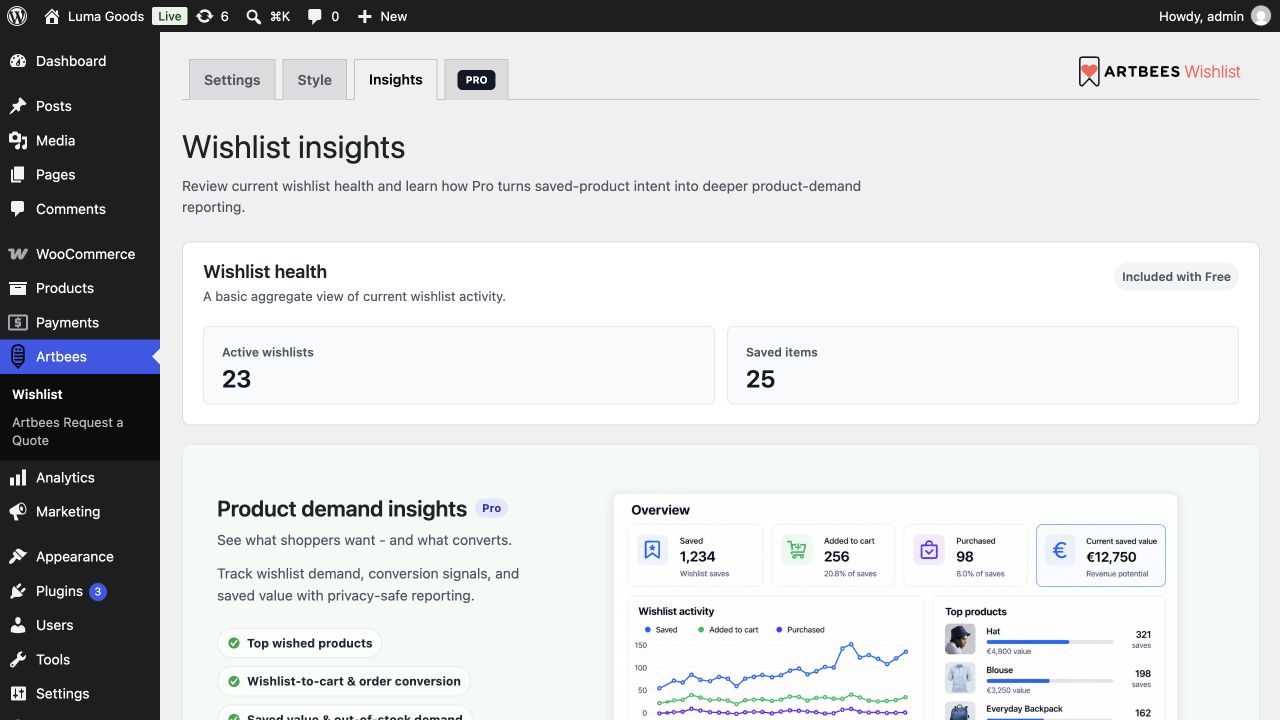
Open Artbees > Wishlist > Insights. Free includes a basic Wishlist Health view with Active wishlists and Saved items. Pro adds deeper Product Demand Insights, including Top wished products, wishlist-to-cart and order conversion, saved value and out-of-stock demand.
| Reporting need | Edition |
|---|---|
| Active wishlists and Saved items | Free Wishlist Health |
| Top wished products | Pro Product Demand Insights |
| Wishlist-to-cart and order conversion reporting | Pro |
| Saved value and out-of-stock demand | Pro |
Use wishlist activity as a signal of interest, not a sales guarantee. Saved items, cart additions and paid orders are different outcomes. A shopper saving a gift today may buy it later, choose another product, or never order.
Before You Make It Live
Run this short checklist on the store’s actual theme and templates:
- A simple product can be saved from its product page and shop card.
- A variable product keeps the selected options through saving and adding to cart.
- Signed-in customers can find their list again after leaving the product page.
- Guests can return in the same browser and keep their saved items when they sign in.
- The drawer, wishlist page and cart remain usable on a phone and with a keyboard.
- Out-of-stock products and quote-only items have appropriate next steps.
- Wishlist access is easy to find, and no duplicate save controls appear in custom templates.
If a button is missing, check its Settings switch first, then determine whether the template uses standard WooCommerce hooks or needs a manually placed block/widget. If a guest list disappears, review guest saving, expiry and browser-cookie behavior before assuming the save failed.
Start with the Free Artbees Wishlist plugin to set up the save-and-return experience. When you need more, explore Artbees Wishlist Pro for unlimited wishlists, deeper demand and conversion reporting, and price-drop and back-in-stock alerts that help shoppers return when a saved product’s price or availability changes. Compare Free and Pro to choose the features your store needs.